[ESP-ENG] Cómo hacer un alfiletero en forma de cupcake. || How to make a cupcake shaped pincushion. || TUTORIAL
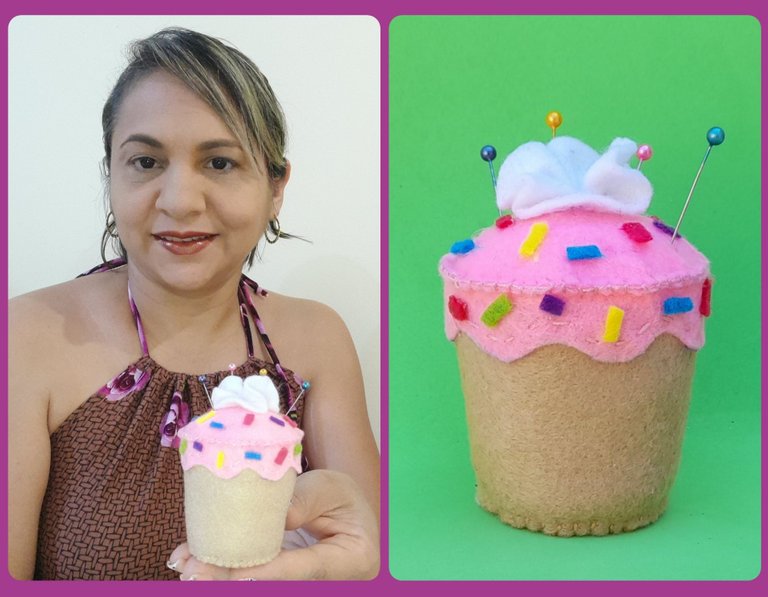
Saludos amigos de #hivediy. Feliz día. Espero que estén disfrutando juntos a sus familiares y amigos de un soleado sábado. Hoy es cinco de febrero y pronto se acerca el cumpleaños de una prima muy especial, es la repostera de la familia y combina su tiempo con el arte de la repostería y la costura, ya que también de vez en cuando nos deleita con una prenda única y con estilos muy particulares. Es por eso que mi proyecto de hoy consiste en un muy lindo y dulce alfiletero con diseño de cupcakes. Es un alfiletero porque siempre se le pierde los alfileres y este es un buen regalo, creo lo va a disfrutar y garantizar su seguridad. Así que aquí les dejo los paso para que elaboren este lindo detalle.
Greetings friends of #hivediy. Happy day. I hope you are enjoying a sunny Saturday with your family and friends. Today is February 5th and soon the birthday of a very special cousin is approaching, she is the family confectioner and combines her time with the art of confectionery and sewing, since from time to time she also delights us with a unique garment and with very particular styles. That's why my project today consists of a very cute and sweet cupcake pincushion. It is a pincushion because he always loses his pins and this is a good gift, I think he will enjoy it and guarantee his safety. So here I leave the steps to make this nice detail.
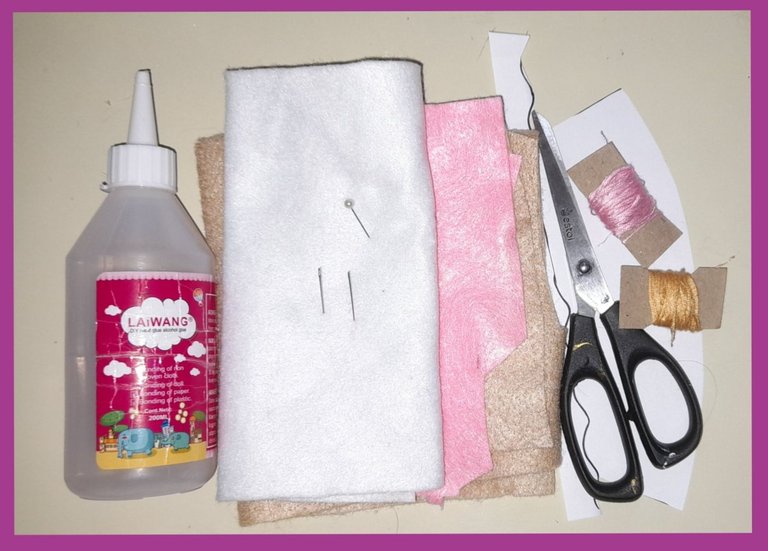
Materiales:
- Fieltro beige, rosado y blanco.
- Relleno.
- Agujas.
- Hilo blanco, rosado y beige.
- Patrones.
- Tijeras.
- Alfileres.
- Silicón frío.
Materials:
- Beige, pink and white felt.
- Filling.
- Needles.
- White, pink and beige thread.
- Patterns.
- Pair of scissors.
- Pins.
- Cold sylicon.
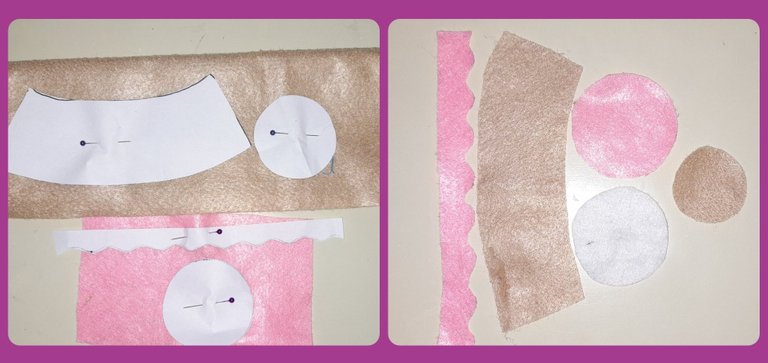
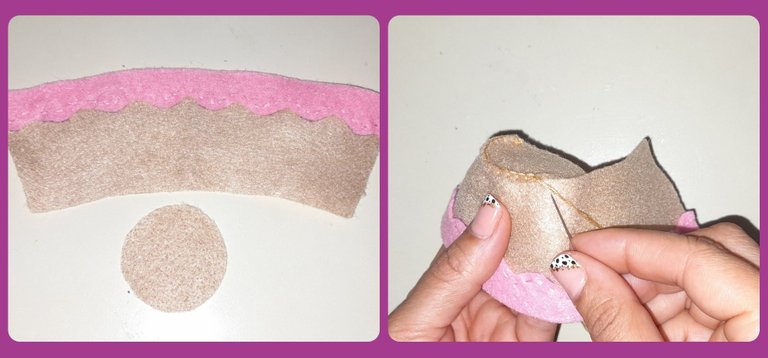
Fijamos los patrones en el fieltro luego de ubicarlos en el color que le corresponde. Luego lo recortamos, la base del alfiletero al sesjo para que pueda dar la forma del cupcakes.
We fix the patterns on the felt after placing them in the corresponding color. Then we cut it, the base of the pincushion to the sesjo so that it can give the shape of the cupcakes.
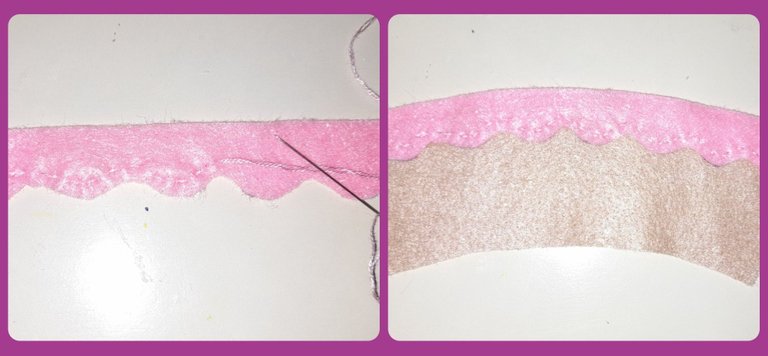
Por el faralao rosado pasamos una costura punto rectos y largos, luego pegamos a la base del alfiletero por toda la orilla.
Through the pink faralao we pass a straight and long stitch seam, then we glue to the base of the pincushion along the entire edge.
Para unir el fondo con la base, vamos pasando una costura punto de ojal por toda la orilla uniendo el círculo con la base del alfiletero, tal como lo indica la figura.
To join the bottom with the base, we sew a buttonhole stitch along the entire edge joining the circle with the base of the pincushion, as indicated in the figure.
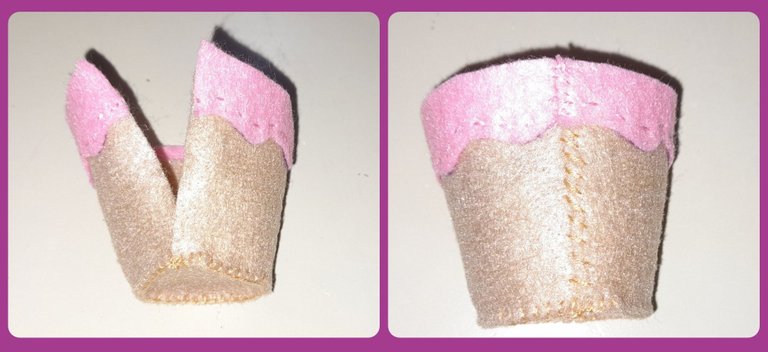
Para unir ambos extremos de la base pasamos una costura punto recto.
To join both ends of the base we pass a straight stitch seam.
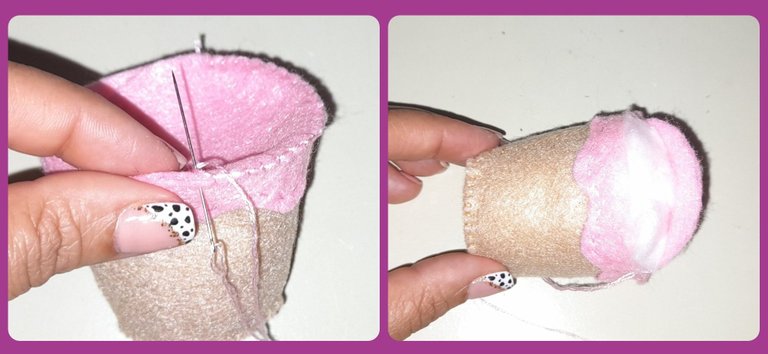
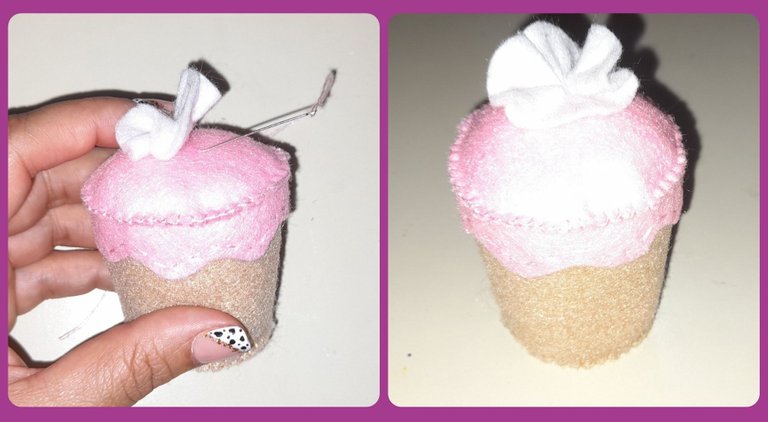
Para elaborar la parte superior tomamos el círculo de fieltro más grande y los vamos cosiendo con punto de ojal por toda la orilla de la base, luego colocamos el relleno y cerramos la costura.
To make the upper part, we take the largest circle of felt and we sew it with a buttonhole stitch along the edge of the base, then we place the filling and close the seam.
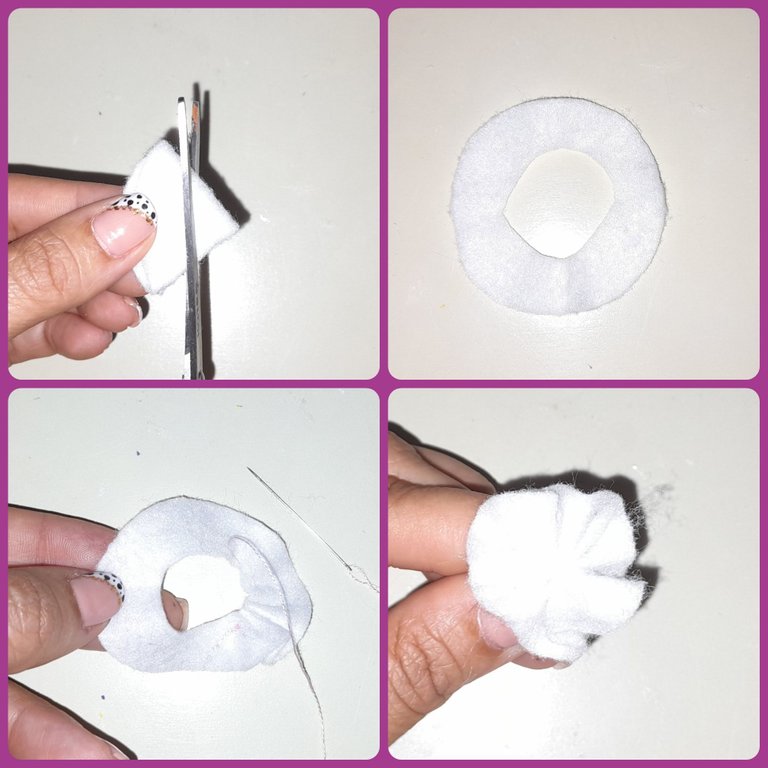
Para hacer la forma de merengue que va en la parte superior del cupcakes, cortamos un círculo de fieltro color blanco, cortamos el centro de manera que quede en forma de Aro, luego pasamos una costura por el centro del círculo y arruchamosy fijamos con unas puntadas.
To make the meringue shape that goes on the top of the cupcakes, we cut a circle of white felt, we cut the center so that it is in the shape of a ring, then we pass a seam through the center of the circle and we crumple and fix with some stitches .
Luego cosemos el arruchado blanco en la parte superior del cupcakes.
Then we sew the white scrunchy to the top of the cupcakes.
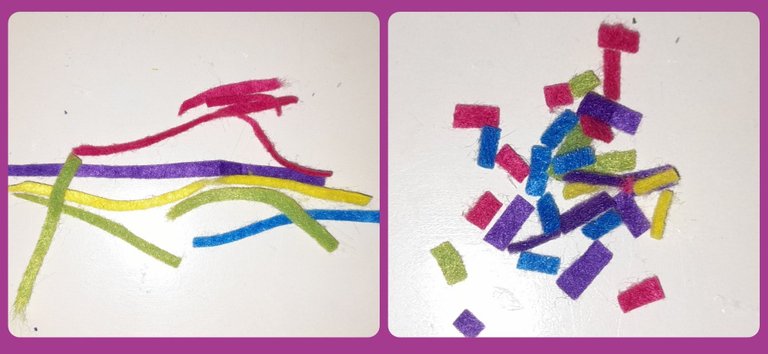
Para elaborar el confeti que pegaremos en el cupcakes, cortamos pequeñas tiras de fieltro.
To make the confetti that we will stick on the cupcakes, we cut small strips of felt.
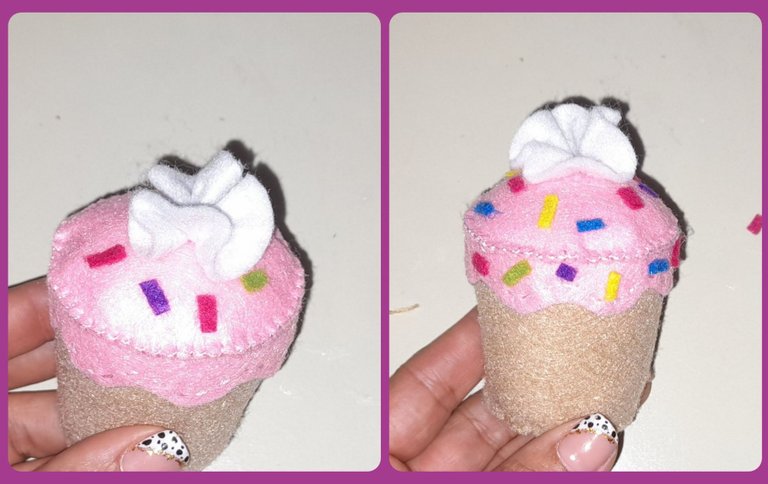
Por último pegamos con el silicón frío el confeti de fieltro en la parte superior del alfiletero con forma de cupcakes. Y de esta manera rápida, fácil y sencillo tenemos listo este lindo alfiletero.
Lastly, glue the felt confetti to the top of the cupcakes-shaped pincushion with the cold silicone. And in this quick, easy and simple way we have this cute pincushion ready.
-Las fotos son de mi propiedad, tomadas con un Samsung A21S,cámara de 48MP.
-Para la traduccion Google Traductor.
-The photos are my property, taken with a Samsung A21S, 48MP camera.
-For Google Translate translation.

Me encanto tu trabajo del día de hoy, se ve muy delicado. Felices sueños
Thank you for sharing this amazing post on HIVE!
Your content got selected by our fellow curator @rezoanulvibes & you just received a little thank you via an upvote from our non-profit curation initiative!
You will be featured in one of our recurring curation compilations and on our pinterest boards! Both are aiming to offer you a stage to widen your audience within and outside of the DIY scene of hive.
Join the official DIYHub community on HIVE and show us more of your amazing work and feel free to connect with us and other DIYers via our discord server: https://discord.gg/mY5uCfQ !
If you want to support our goal to motivate other DIY/art/music/homesteading/... creators just delegate to us and earn 100% of your curation rewards!
Stay creative & hive on!