Immersed in the Blue Forest
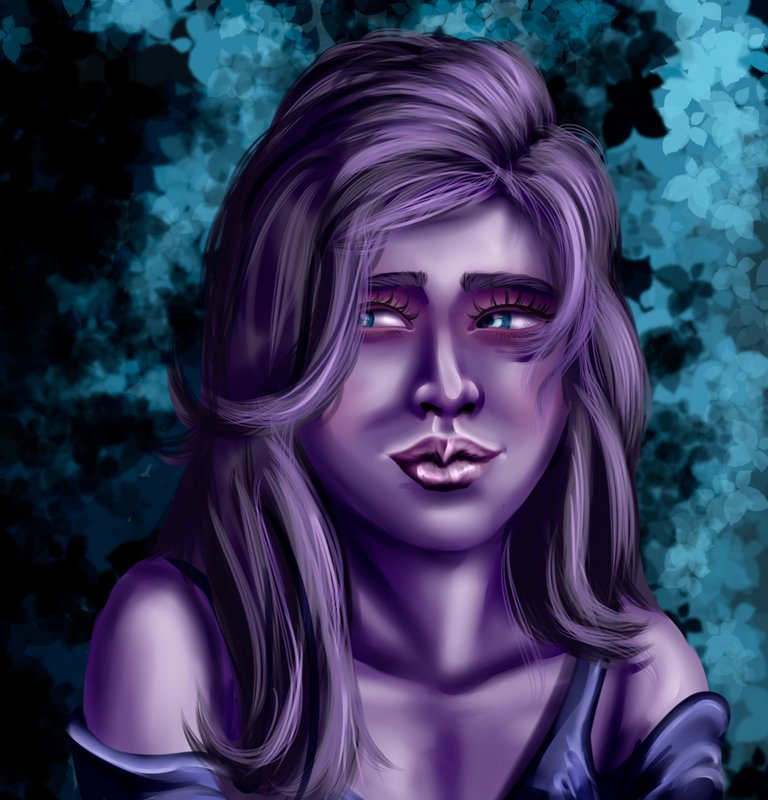
Very good evening my dearest community of artists and art lovers in general, I'm Manuel and I want to welcome you to a new drawing post, today I wanted to do something related to cold colors, I wanted to try a new mix of purple tones along with some blue and reddish tones to continue practicing a new mixing technique in which I have been working for the last 2 weeks; this time I dedicated myself to create the drawing of a pretty young teenager named Lucianna which would be immersed in a large forest filled with bushes and flowers of cold and striking shades, I hope you like it a lot and without further ado I leave you with the process of the work:
Muy buenas noches mi queridísima comunidad de artistas y amantes del arte en general, soy Manuel y quiero darles la bienvenida a un nuevo post de dibujo, el día de hoy quise hacer algo relacionado con los colores fríos, quería probar una nueva mezcla de tonos morados junto con algunos tonos azules y rojizos leves para seguir practicando una nueva técnica de mezclado en la cual he estado trabajando durante las ultimas 2 semanas; en esta ocasión me dedique a crear el dibujo de una linda joven adolescente llamada Lucianna la cual estaría inmersa dentro de un gran bosque copado por arbustos y flores de tonalidades frías y llamativas, espero les guste mucho y sin mas los dejo con el proceso de la obra:

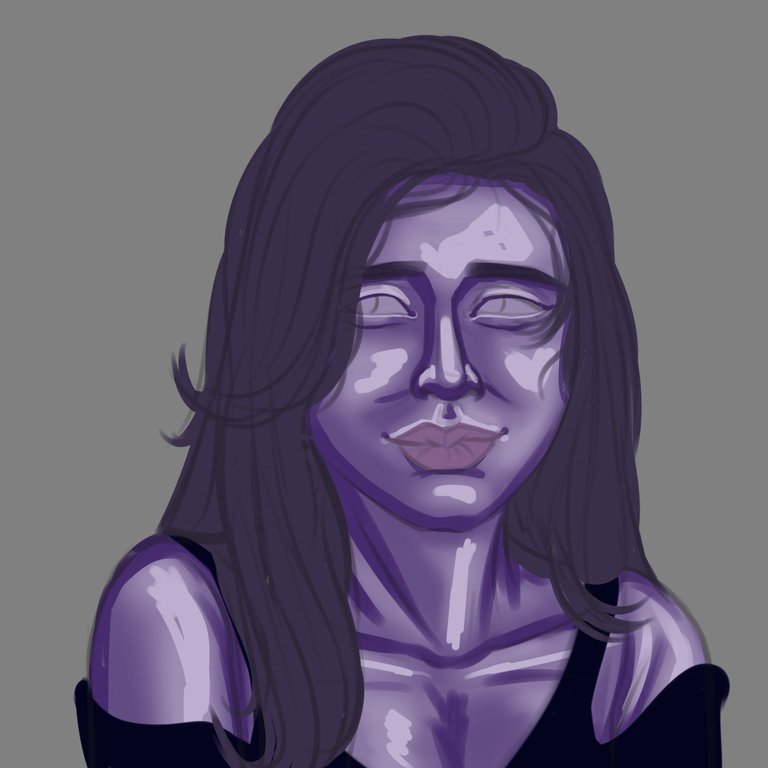
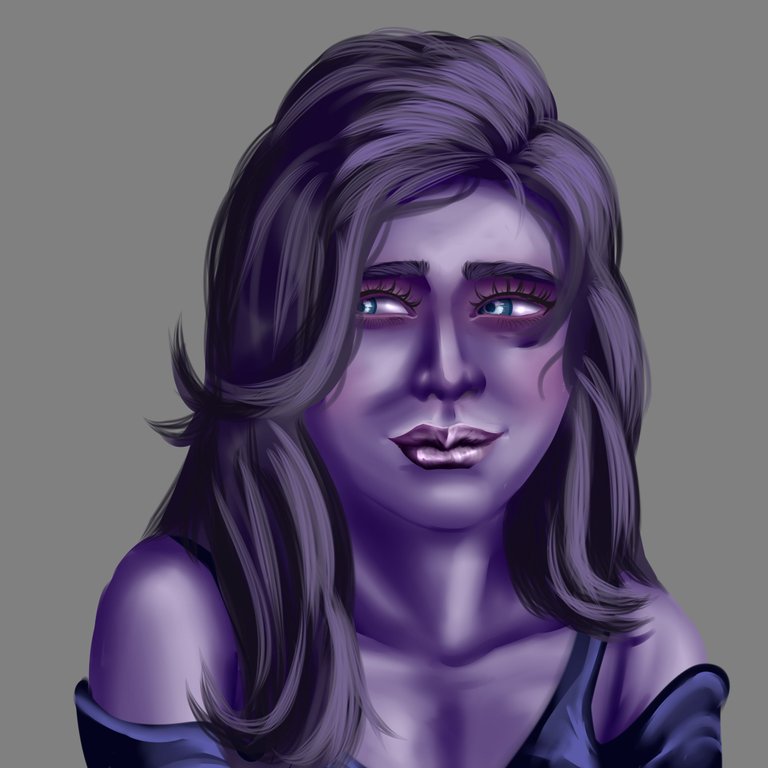
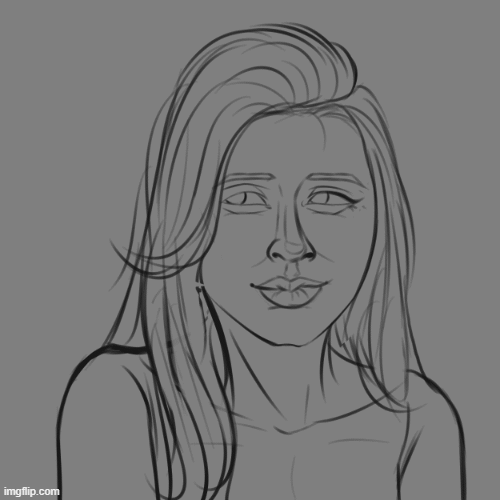
To start I spent a good half hour to create a sketch that looked pretty special, in this case I opted for something more portrait style as it seemed more appropriate to what I wanted to try and of course it would make it easier to focus on more specific details of the character; once I had finished with the sketch and then with the outline I could apply the cold colors that I wanted to try, for the skin for example I decided for a more intermediate lilac color and on that lilac I was drawing strokes with watercolor in darker tones to establish the shadows in the lower areas of the skin such as the chin, neck, arms and others. After having softened the strokes a little with the finger brush the next thing I did was to add some light high shines in the areas where the skin meets the light of the environment, the blush of the cheeks I worked with airbrush and also blurred it a little to match the skin; then for the painting of the eyes I opted for a very intense navy blue tone, and my idea was that both eyes were the contrast and the attribute that attracted the most attention.
Para iniciar me dedique una buena media hora a crear un boceto que se viera bastante especial, en este caso opte por algo más a estilo retrato ya que me pareció mas adecuado a lo que quería probar y por supuesto me facilitaría el centrarme en detalles más específicos del personaje; una vez había terminado con el boceto y luego con el delineado ya me pude dedicar a aplicar los colores fríos que tenia deseos de probar, para la piel por ejemplo me decidí por un color lila mas intermedio y sobre ese lila fui plasmando trazos con acuarela en tonalidad mas oscura para ir estableciendo las sombras en las zonas mas bajas de la piel como el mentón, cuello, brazos y demás. Luego de haber suavizado un poco los trazos con el pincel dedo lo siguiente que hice fue agregar unos leves brillos altos en las zonas donde la piel se topa con la luz del ambiente, el rubor de las mejillas lo trabaje con aerógrafo y también lo difumine un poco para acoplar a la piel; luego para el pintado de los ojos me decante por un tono azul marino muy intenso, y mi idea era la de que ambos ojos fueran el contraste y el atributo que más llamara la atención.

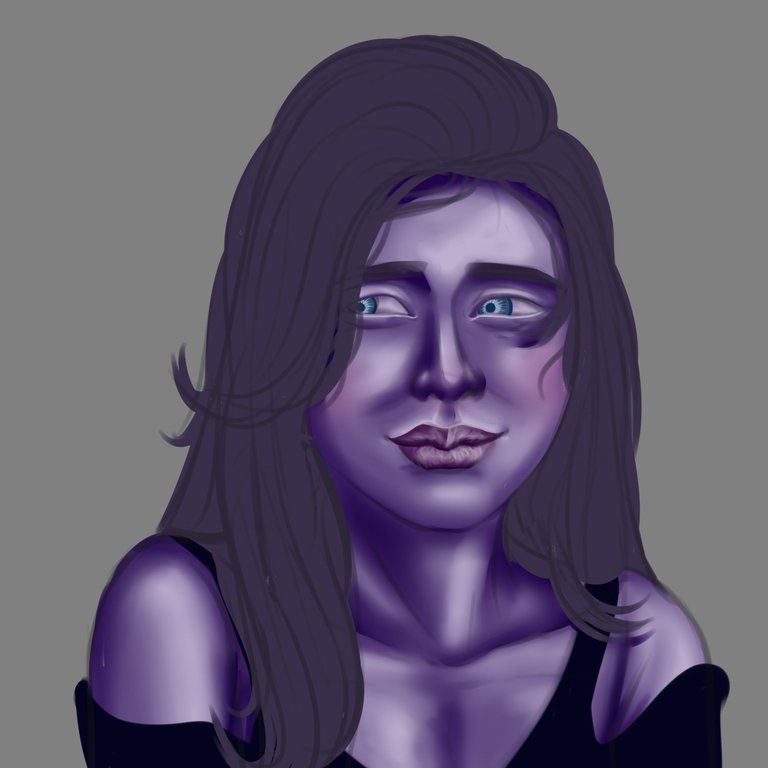
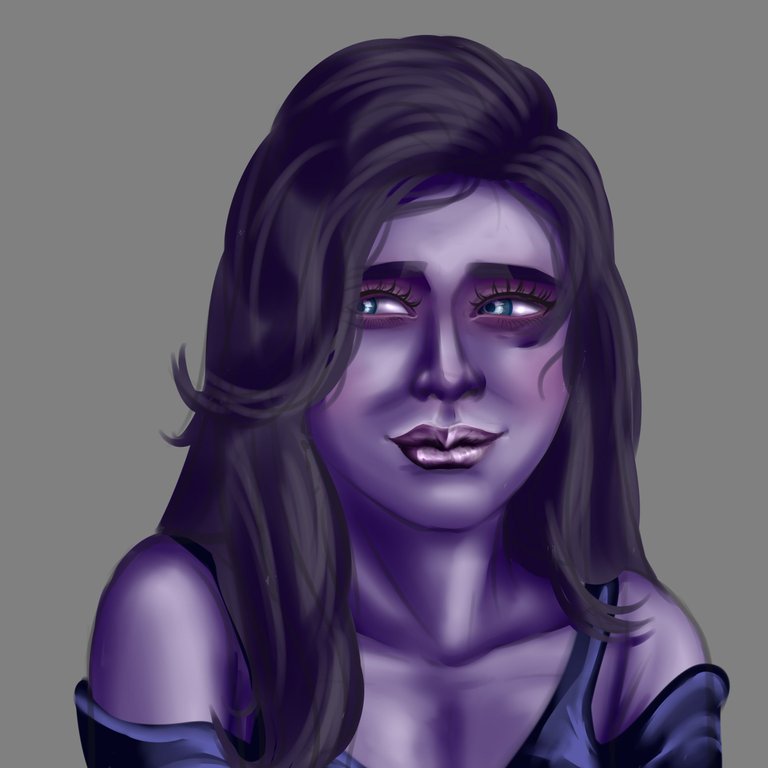
Something that I applied in the eyes and that is something new that I am using for some female characters is that slight dark shadow around the eye socket and eyelids, in this case I did them with purple using the airbrush in soft and subtle strokes; and after finishing with the eyes I moved on to the next section which was the clothing, here I was encouraged to create a kind of elegant dress starting from the darkest purple and ascending layer by layer to reach a light purple with a tendency to blue tones. Something I did to make the dress take the texture I wanted was to create a new layer and apply the overlay effect to add a little more elegant glitter to the edges of the shoulders, and once I finished with this I could concentrate on the next section which would be the hair; for the hair I was encouraged to create a fairly high volume, with quite fluffy locks, but at the same time smooth in bright violet tone.
Algo que aplique en los ojos y que es algo nuevo que estoy empleando para algunos personajes femeninos es esa leve sombra oscura alrededor de la cuenca de los ojos y parpados, en este caso los hice con color morado empleando el aerógrafo en brochazos suaves y sutiles; ya después de terminar con los ojos me pase al siguiente apartado que fue el de la vestimenta, aquí me anime a crear una especie de vestido medio elegante partiendo desde el morado mas oscuro y ascendiendo capa a capa hasta llegar a un morado claro con tendencia a los tonos azules. Algo que hice para que el vestido tomara la textura que yo deseaba fue crear una nueva capa y aplicar el efecto de superposición para añadir un poco mas de brillos elegantes a los bordes de los hombros, y ya una vez termine con esto pude concentrarme en el siguiente apartado que seria el del pelo; para el pelo me anime a crear un volumen bastante alto, con mechones bastante esponjados, pero a la vez lisos en tonalidad violeta brillante.

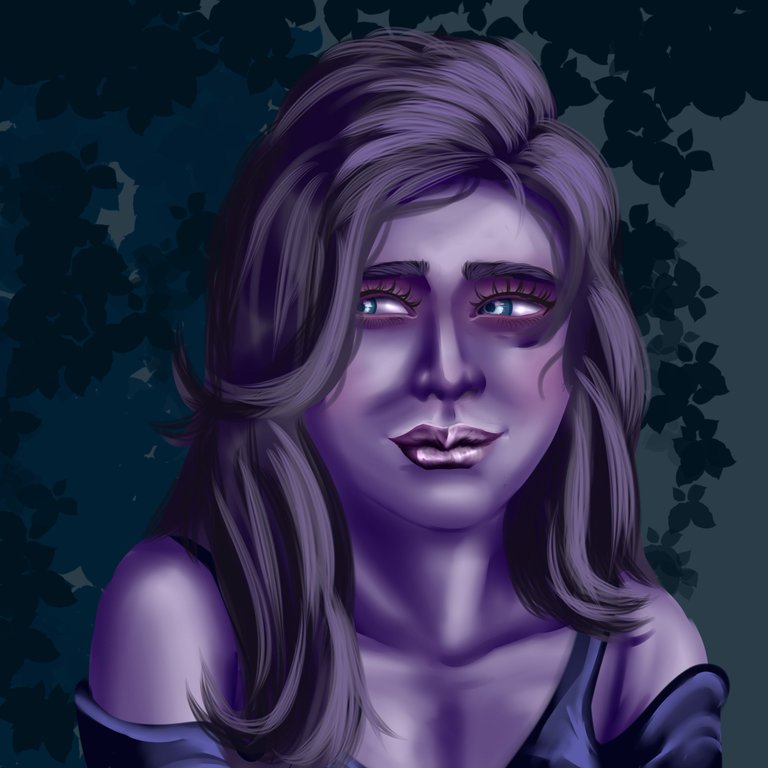
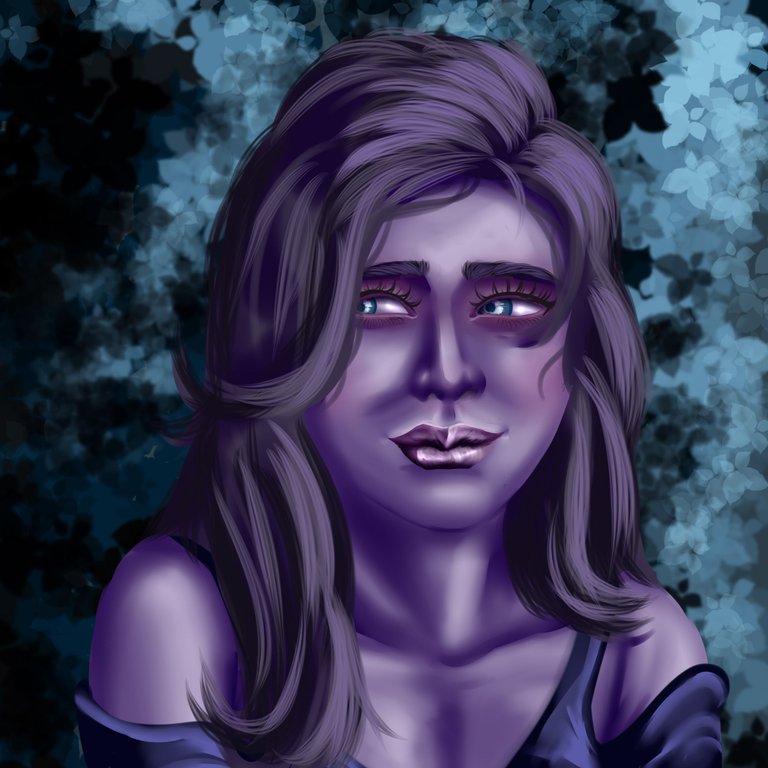
For the background or scenery of my drawing I proposed to create a kind of path of tall bushes with large flowers and leaves of vegetation, but in this case would be made of blue-green, first I established a little basic texture with many deep shadows on the bushes, then with a special Sai brush was creating and sculpting the bushes with varying shades of blue until they all fit together as best as possible. Finally I added some last loose shines with the help of the layer effect (Shine) and I adjusted a little the shades on the right side of the bushes to make them look a little bluer and give the sensation that the natural light of the environment and the moon are more intense on that side.
Para el background o escenario de mi dibujo me propuse crear una especie de sendero de arbustos altos con grandes flores y hojas de vegetación, pero en este caso estaría hechas de color azul verdoso, primero establecí un poco de textura básica con muchas sombras profundas en los arbustos; luego con un pincel especial de Sai fue creando y esculpiendo los arbustos con variación de tonos azulados hasta lograr que todos se acoplaran lo mejor posible entre sí. Ya por último añadí unos últimos brillos sueltos con ayuda del efecto de capa (Shine) y ajusté un poco los matices del lado derecho de los arbustos para hacerlos ver un poco mas azules y así dar la sensación de que la luz natural del ambiente y la luna son mas intensas por ese lado.
MATERIALS / MATERIALES
- Sai Paint Tool Program
- Huion inspiroy h610 v2 tablet
- Programa Paint Tool Sai
- Tableta Huion inspiroy h610 v2
Well girls and girls this has been all for my post today and for this week, thank you very much for having come this far and I hope you have enjoyed a lot with the process of my work and especially with the final result; without more to add, I send you a strong greeting, I wish you good night and happy weekend and we'll see you very soon with a next post...until the próxima✍🏽😎.
Bueno chicas y chicas esto ha sido todo por mi post de hoy y por esta semana, muchas gracias por haber llegado hasta aquí y espero hayan disfrutado mucho con el proceso de mi obra y sobre todo con el resultado final; sin mas que agregar, les mando un fuerte saludo, les deseo buena noche y feliz fin de semana y ya nos veremos muy pronto con un siguiente post…hasta la próxima✍🏽😎.