contest mothers day special or a gift for mom /// concurso un regalo para mama: realizando inicial de plata paso a paso ( ES/EN )
Estoy emocionado de participar en este concurso especial para mamá, en la comunidad de Jewelry, en este paso a paso realizaré un dije de inicial en plata ley, para ser específico la letra Y, que mi hija me pidió para su madre... De antemano pido disculpa por la calidad de las fotos, porque elabore la pieza denoche no tenía tanta facilidad para tomar buenas fotos, pero aún así pienso que cada imagen podrá ilustrar como hice la pieza.
Para elaborar este dije use lo siguiente:
🔹Lámina de plata de 0.6 mm de espesor.
🔹Argolla de plata. El hilo de aproximado de 1 mm de espesor.
🔹Lijas 3M número de grano 240, 360 y 400.
🔹Dremel con eje flexible, el dremel es necesario para abrir los huecos y en mi caso para lijar y pulir.
🔹Mecha o broca para abrir hueco, yo use de 0.75 mm.
🔹Mopa de algodón para pulir.
🔹Cera para pulir metales, yo use una verde que suele venir con el dremel.
🔹Arco de segueta para joyería.
🔹Pelos de segueta número 0/3.
🔹Dado de embutir
🔹Letra impresa, dibujada o calcada como yo hice. Puedes ver y escoger tipografías en páginas como
Dafont
🔹Pega en barra o pega blanca.
🔹Portalija
I am excited to participate in this special contest for mom, in the Jewelry community, in this step by step I will make a sterling silver initial charm, to be specific the letter Y, that my daughter asked me for her mother.... Beforehand I apologize for the quality of the pictures, because I made the piece at night and I didn't have so easy to take good pictures, but I still think that each picture will illustrate how I made the piece.
To make this pendant I used the following:
🔹Silver foil 0.6 mm thick.
🔹Silver ring. The thread of approximately 1 mm thick.
🔹3M sandpaper grit number 240, 360 and 400.
🔹Dremel with flexible shaft, the dremel is necessary to open the holes and in my case for sanding and polishing.
🔹Bit or drill bit to open hole, I used 0.75 mm.
🔹Cotton polishing mop.
🔹Metal polishing wax, I used a green one that usually comes with the dremel.
🔹 Jewelry saw arc.
🔹No. 0/3 number hacksaw hairs.
🔹Cutting die.
🔹Printed lettering, drawn or traced as I did. You can see and choose typefaces on pages like.
Dafont
🔹Stick on bar or white glue.
1
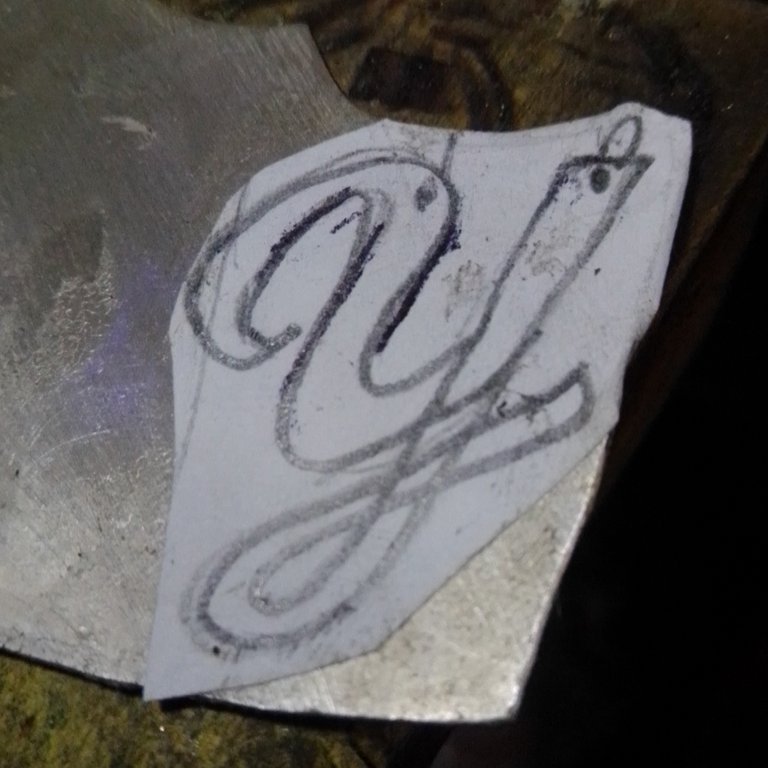
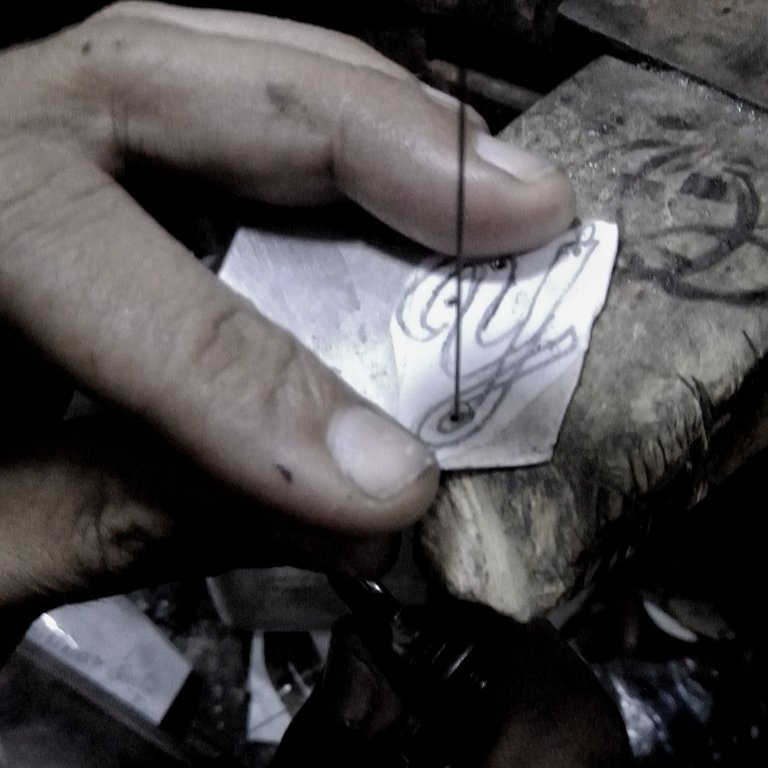
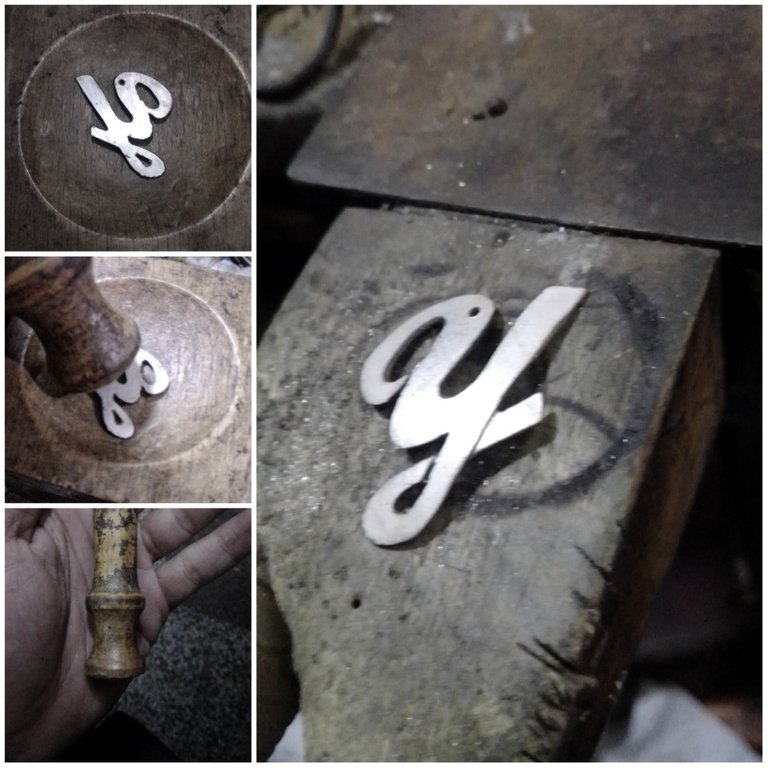
Se pega la letra que está impresa o dibujada en el papel a la lámina, yo use pega en barra. La letra la calque del monitor de la PC, porque la impresora no tenía tinta. La tipografía que escogí me gustó porque es elegante, tiene unas buenas curvas y no es la típica que todo el mundo usa.
The letter that is printed or drawn on the paper is glued to the sheet, I used glue stick. I traced the lettering from the PC monitor, because the printer had no ink. I liked the typeface I chose because it is elegant, has nice curves and is not the typical one that everyone uses.
2
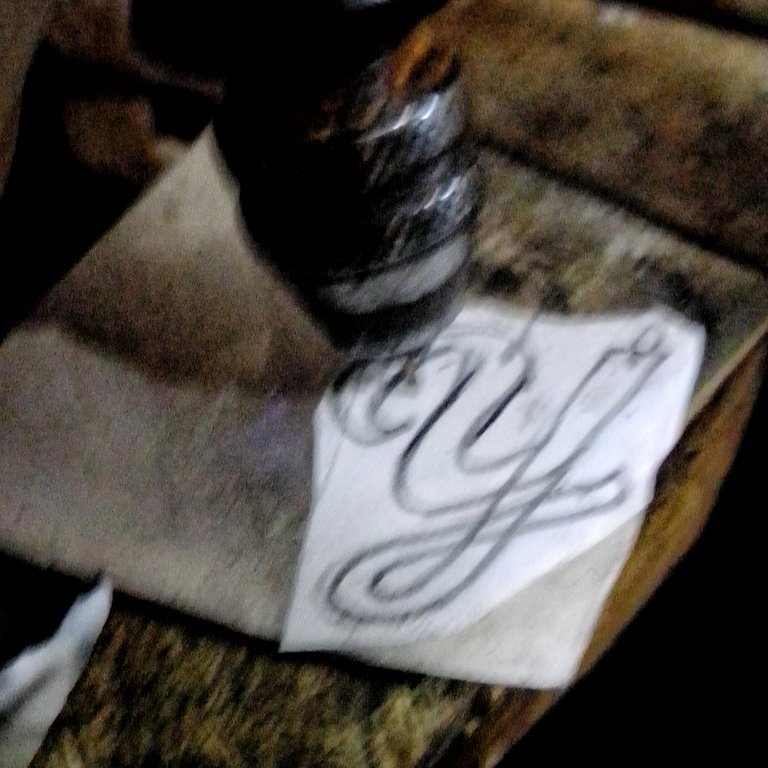
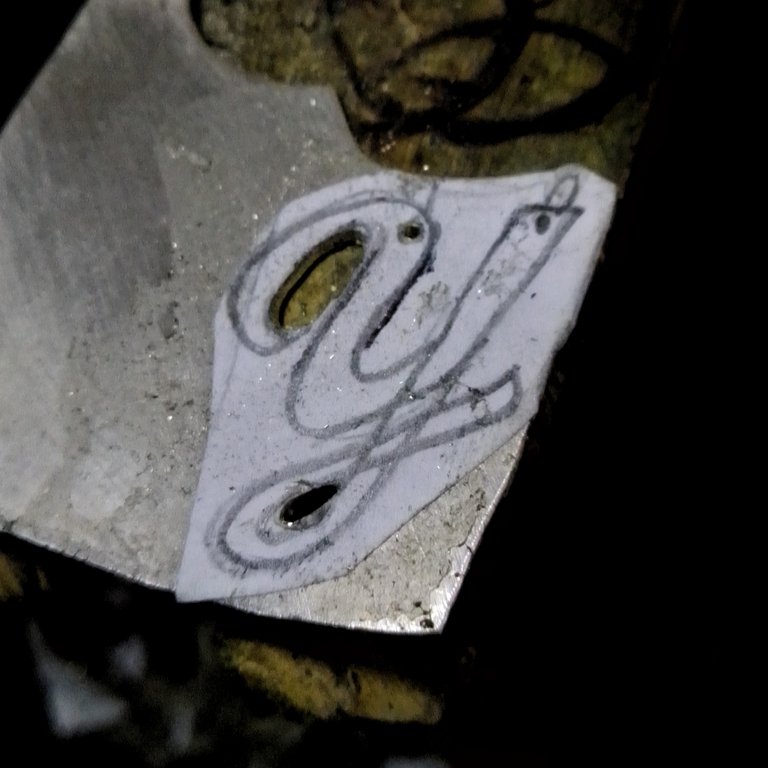
Con el dremel y la mecha de 0.75 mm abri los agujeros para hacer los cortes internos de la letra y también el correspondiente a dónde se va a meter la argolla.
With the dremel and the 0.75 mm bit I opened the holes to make the internal cuts of the letter and also the one corresponding to where the ring will be placed.
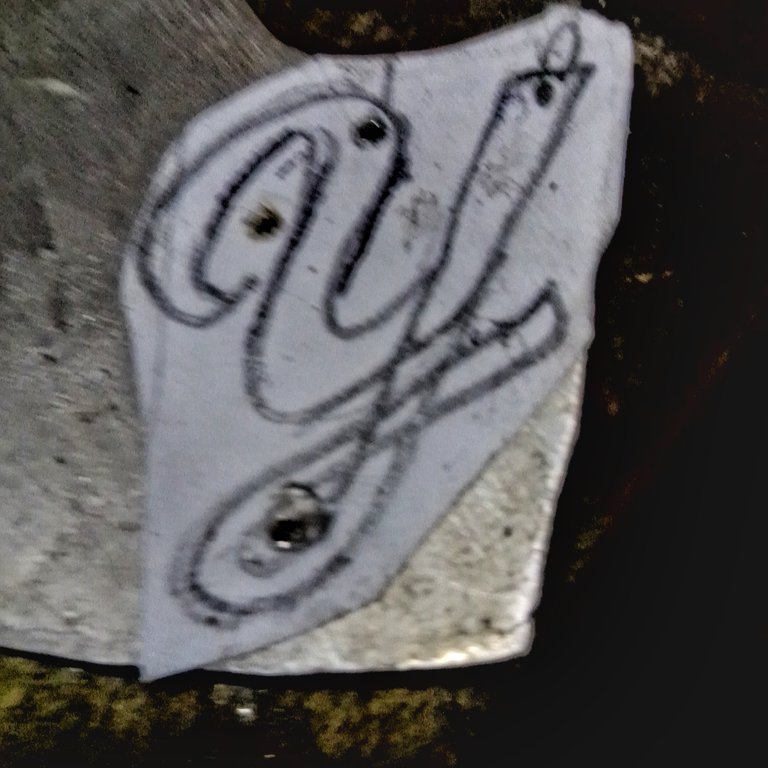
Queda algo así como en la foto de arriba.
It looks something like in the photo above.
3
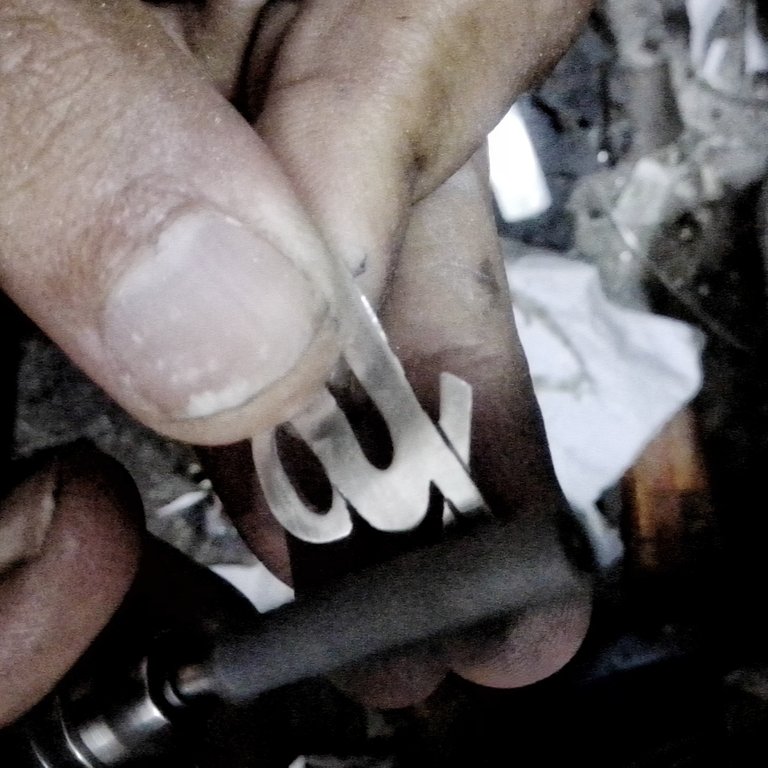
Con el arco de segueta, inserto la segueta en los huecos y empiezo a hacer los cortes, con mucho cuidado.
With the arc saw, I insert the saw into the holes and start making the cuts, very carefully.
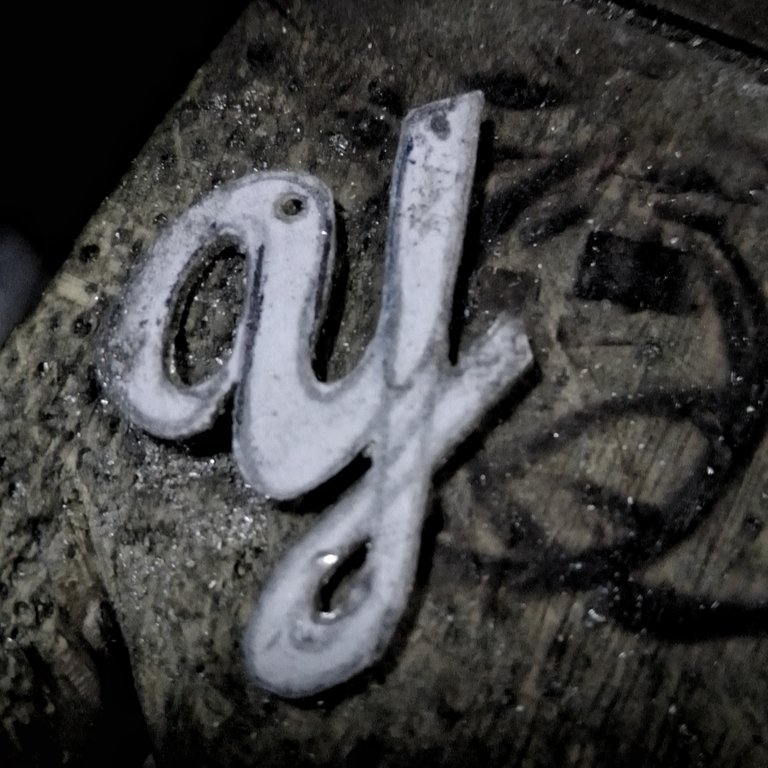
Así queda después de haber cortado los espacios internos, en el orificio donde va la argolla, con la segueta se debe ampliar lo suficiente para insertar la argolla de plata, también puedes usar una lima redonda de joyeria.
This is how it looks after having cut the internal spaces, in the hole where the ring goes, with the saw should be expanded enough to insert the silver ring, you can also use a round jewelry file.
4
Ahora se corta la silueta exterior con la segueta y queda así, a lo que después se remueve el papel pegado para ver qué imperfecciones tiene y así proceder corregir con la segueta.
Now the outer silhouette is cut with the cutter and it looks like this, then the glued paper is removed to see what imperfections it has and then proceed to correct it with the cutter.
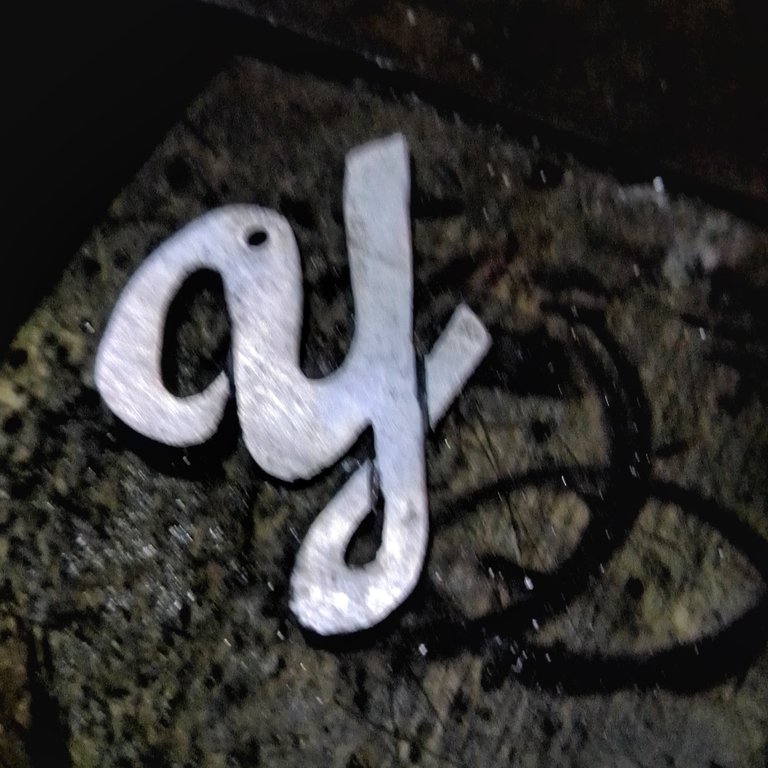
En el proceso de correción decidí hacer esas líneas con la misma segueta, para esto la incline lo más posible hacia adelante y con cuidado fui cortando para dibujar las líneas, si no tienes mucha práctica no es necesario hacerlo.
In the correction process I decided to make those lines with the same saw, for this I tilted it as much as possible forward and carefully I was cutting to draw the lines, if you do not have much practice it is not necessary to do it.
5
Con el embutidor de madera decidí darle volumen cóncavo golpeando un poco la pieza con ese masó de madera, la razón es para que el metal este más templado y que ese volumen hace que se vea más llamativa la pieza.
I decided to give it a concave volume with the wooden inlay by hitting the piece a little bit with the wooden dowel, the reason is so that the metal is more tempered and that volume makes the piece look more striking.
6
Con el dremel y el uso del Portalija, se repasa la pieza con las lijas de menor a mayor, empieza con el grano 220 o 240, pasa a 360 y en mi caso finalizo con la número 400, pero si deseas puedes llega a las lijas 500 o 600, este proceso lo puedes realizar sin el dremel, sencillamente pasa todas las lijas de forma manual, antes de pulir coloca la argolla de plata.
Para pulir la inicial, puedes usar una mopa de algodón como la que se ven en la imagen de abajo con el mismo dremel y la cera o pasta de pulir metal o joyería..... Si tienes los implementos completos de un taller de joyeria, usa el motor de banco y la Mopa correspondiente.
With the dremel and the use of the Portalija, go over the piece with the sandpaper from smallest to largest, start with grain 220 or 240, go to 360 and in my case I finish with the number 400, but if you want you can reach the sandpaper 500 or 600, this process can be done without the dremel, simply pass all the sandpaper manually, before polishing place the silver ring.
To polish the initial, you can use a cotton mop as shown in the image below with the same dremel and the wax or metal polishing paste or jewelry ..... If you have the complete tools of a jewelry workshop, use the bench motor and the corresponding mop.

7
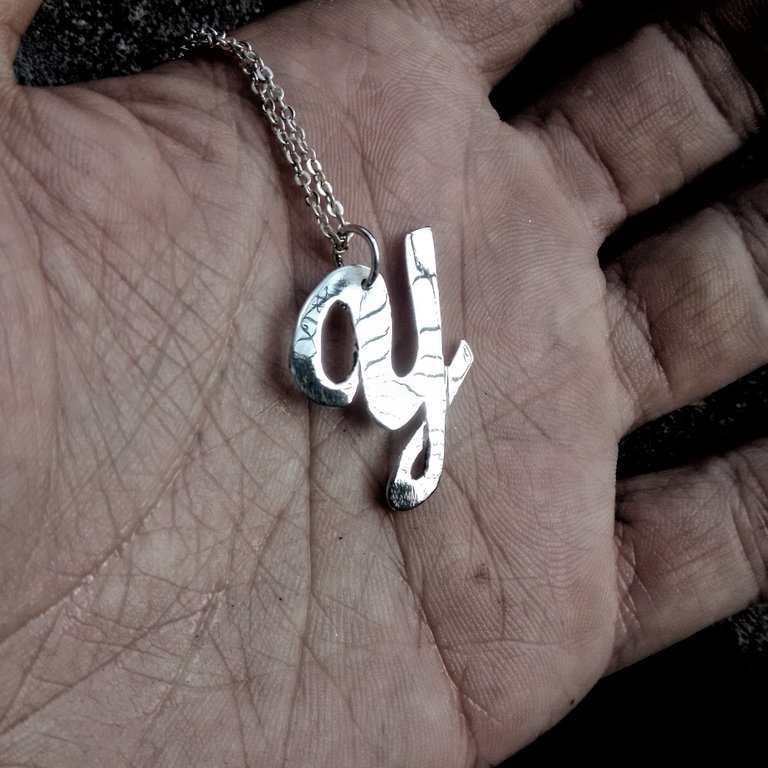
Este es el resultado final, después de pulir limpio con cepillo dental, agua caliente y jabón, para retirar todos los restos de cera, luego con agua retiras el jabón y con un paño seco de algodón seca con cuidado.... Ahora sencillamente mete en una cadena y ya está listo para regalar....
This is the final result, after polishing clean with toothbrush, hot water and soap, to remove all traces of wax, then with water remove the soap and with a dry cotton cloth dry carefully .... Now simply put it on a chain and it is ready to give as a gift....
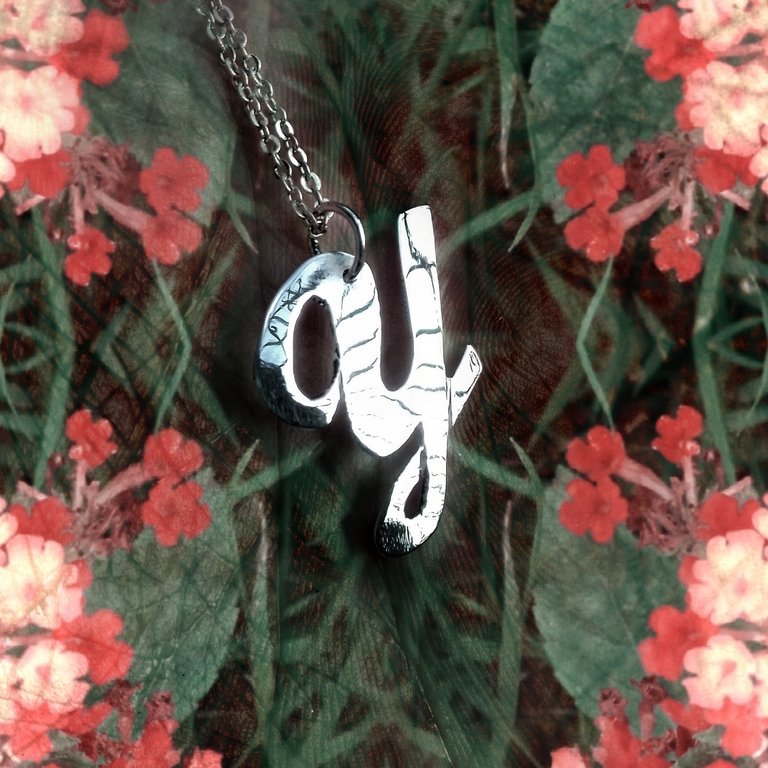
Foto editada con Picsart.
Espero les haya gustado el proceso...y gracias por el apoyo. Si quieren conocer más de mi trabajo me pueden visitar en mi instagram:
Instagram.com/m16ueljoyas
I hope you liked the process...and thanks for the support. If you want to know more about my work you can visit me on my instagram:
Instagram.com/m16ueljoyas
Translation made with
deepl
Sin duda alguna nos has traído un proceso muy hermoso de la orfebrería, gracias por ese paso a paso tan maravilloso que nos has mostrado, un dije muy especial, será un regalo maravilloso que seguro encantará.
Gracias por tu participación en el concurso, te deseo mucho éxito 🙌
Gracias... Si el dije quedó fabuloso, a ver qué me reseña de su entrega
https://twitter.com/yolimarag/status/1523408481956790272
The rewards earned on this comment will go directly to the person sharing the post on Twitter as long as they are registered with @poshtoken. Sign up at https://hiveposh.com.
Me gusta mucho el dije que has realizado, se que ese 🎁 le gustará, muy bella tu técnica. Saludos
Gracias .... Estás inicies son un tiro al piso a todo el mundo le gusta..
Te quedó preciosa esta pieza. Seguro le encantó.
Gracias por compartir ☺️☺️😊🤗☺️😉
🌈💮🌱🏵️🌻🌺🍁💋♥️🍄💜💐🎊🌸💖🌼🌷🌹🎉🥀💙
Gracias, quedó muy linda anoche se la lleve a mi hija pero no me quedé a ver la reacción de su mama.... Ya me contaran
Lindo, lindo @m16uellop
Me gusta como se ve. A la mamá de tu hija le encantará. Como siempre, tu trabajo quedó genial. Saludos y mucha suerte.
Gracias... Si era para ella, pero la niña en vez de recibir la pieza en la mañana espero a las 9pm jajaja, no vi la reacción pero si seguro le encanto