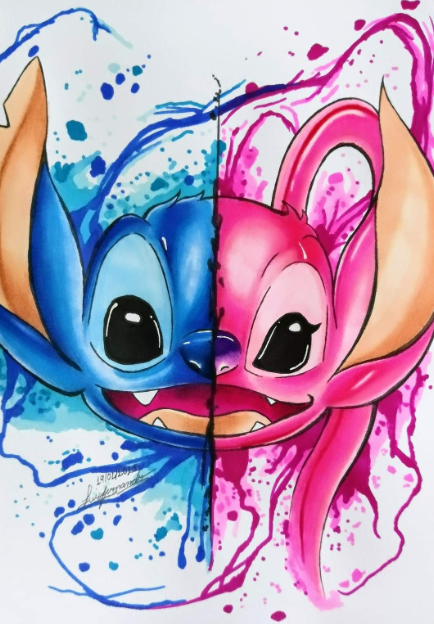
Drawing Stitch and Angela | Dibujando a Stitch y Angela | Disney.
(Edited)
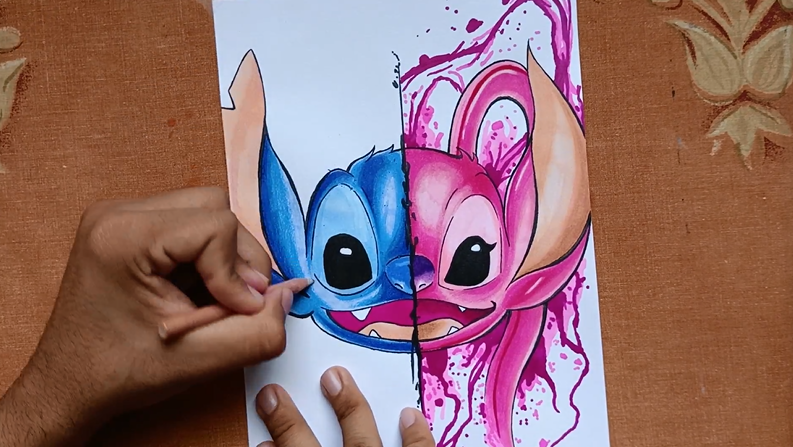
¡Hola a todos! Hoy les quiero compartir un dibujito que realicé de Stitch y de Agela el cual me tomo hacerlo unas 4 horas ya que combine los marcadores a base de alcohol y los colores prismacolor dando un resultado realmente sensacional espero les guste mucho lo compartan y me digan en los comentarios que personajes quieren que dibuje a este estilo.
Hello everyone! Today I want to share a little drawing that I made of Stitch and Agela which took me about 4 hours to do since I combined the alcohol-based markers and the prismacolor colors giving a really sensational result I hope you like it a lot, share it and tell me in the comments which characters want me to draw in this style.
Materiales:
Cartulina Bristol
Borrador
Borrador moldeable
Lápices de colores prismacolor
Portaminas 0.5
Marcadores a base de alcohol
bristol cardboard
Draft
moldable eraser
prismacolor colored pencils
mechanical pencil 0.5
alcohol-based markers
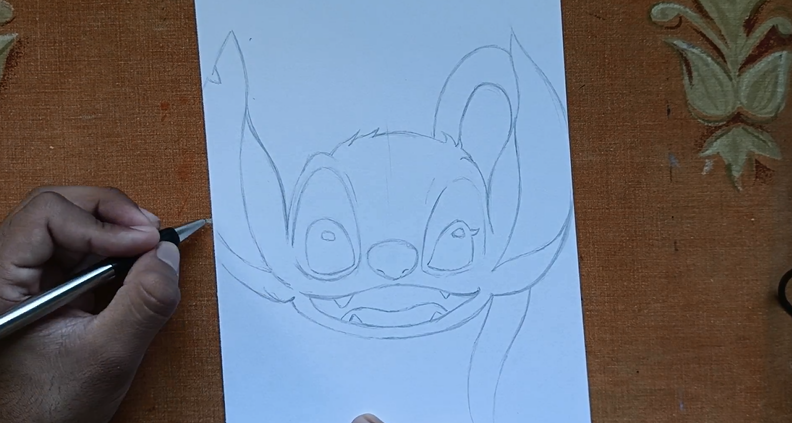
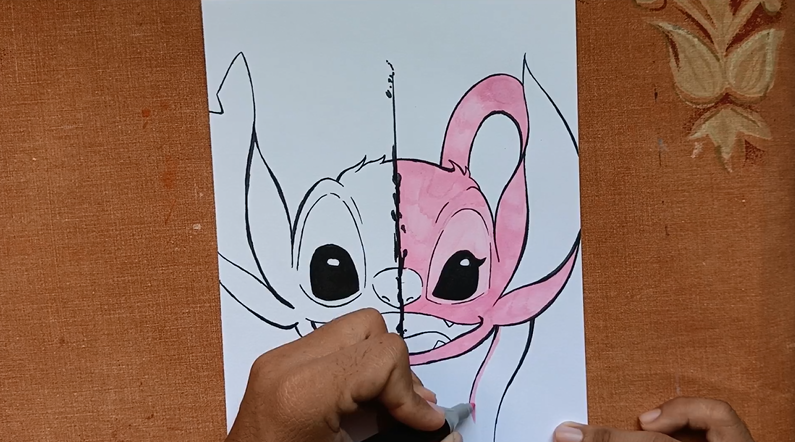
Para comenzar este dibujo tuve una pequeña dificulta ya que el rostro de estos personajes son totalmente diferentes a nivel anatómico Stitsh es mas redondo y Angela mas ovalada, pero partiendo de eso pude ir encajando el dibujo y hacer que el espacio fuera el adecuado.
To start this drawing I had a little difficulty since the faces of these characters are totally different at the anatomical level Stitsh is rounder and Angela more oval, but starting from that I was able to fit the drawing and make the space adequate.
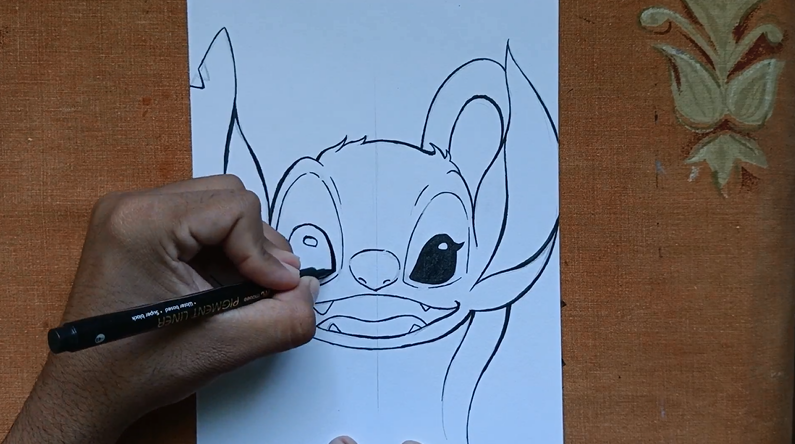
Luego de hacer el boceto pase a la parte del delineado el cual hice con un delineador 0.5 y un BR punta pincel para hacer los detalles de líneas más gruesas para darle un toque más personal, mientras más detalles le daba al delineado más me gustaba y emocionaba ya que visualizaba como sería el resultado final.
After making the sketch, I went to the part of the eyeliner, which I did with a 0.5 eyeliner and a brush tip BR to make the details of thicker lines to give it a more personal touch, the more details I gave to the eyeliner, the more I liked and excited since I visualized what the final result would be like.
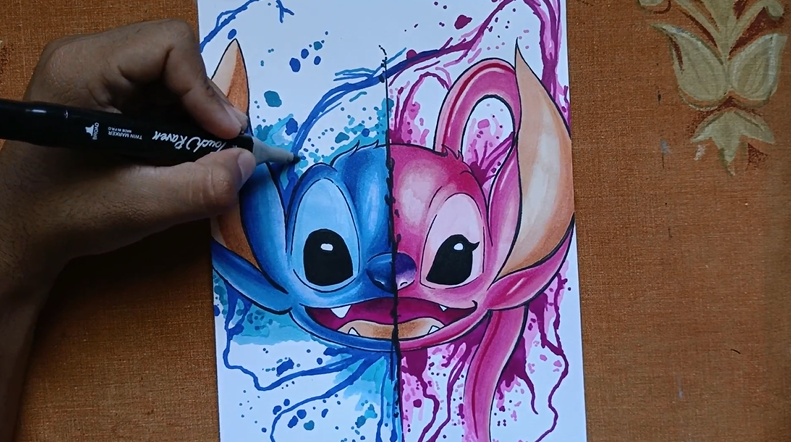
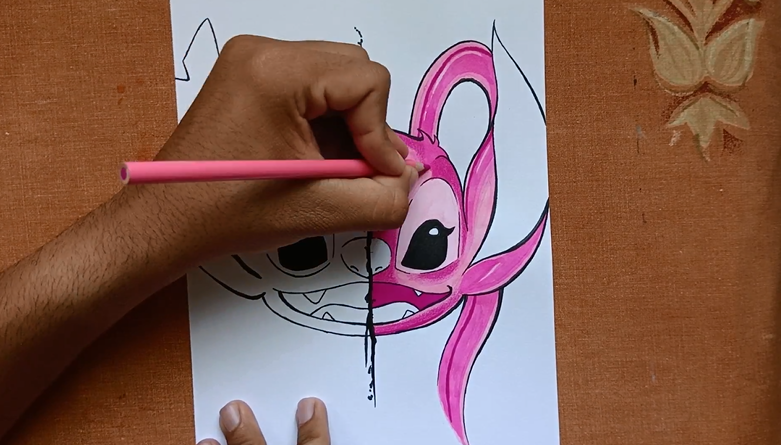
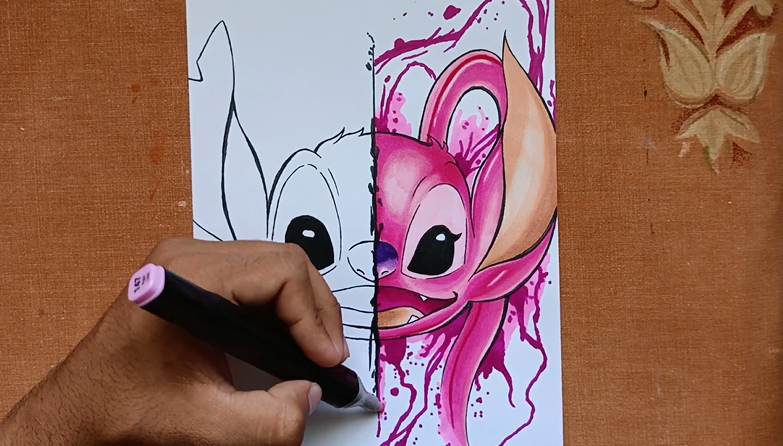
El coloreador fue un reto y la parte más larga del proceso ya que cuando coloreaba con los marcadores debía esperar a que la cartulina secara para luego con los colores ir cubriendo aun mas y darle profundidad a parte para que el color no se viera tan montado sobre el marcador con un lápiz BLENDER unifique todo para darle ese realce de pulidez como si fuera un difuminado.
The coloring was a challenge and the longest part of the process since when I colored with the markers I had to wait for the cardboard to dry and then with the colors to cover even more and give depth to part so that the color did not look so mounted on the marker with a BLENDER pencil unifies everything to give it that highlight of polish as if it were a blend.
Les agradezco mucho el tiempo que se tomaron en leer esta publicación y el apoyo que me han brindado todo este tiempo, no olviden apoyarme en mis redes sociales las cuales tienen presente en esta última imagen; me despido enviándoles un fuerte abrazo y recuerden que no necesitan ser un experto para ser un gran artista.
I thank you very much for the time you took to read this publication and the support you have given me all this time, do not forget to support me on my social networks which are present in this last image; I say goodbye sending you a big hug and remember that you don't need to be an expert to be a great artist.

▶️ 3Speak
0
0
0.000
0 comments