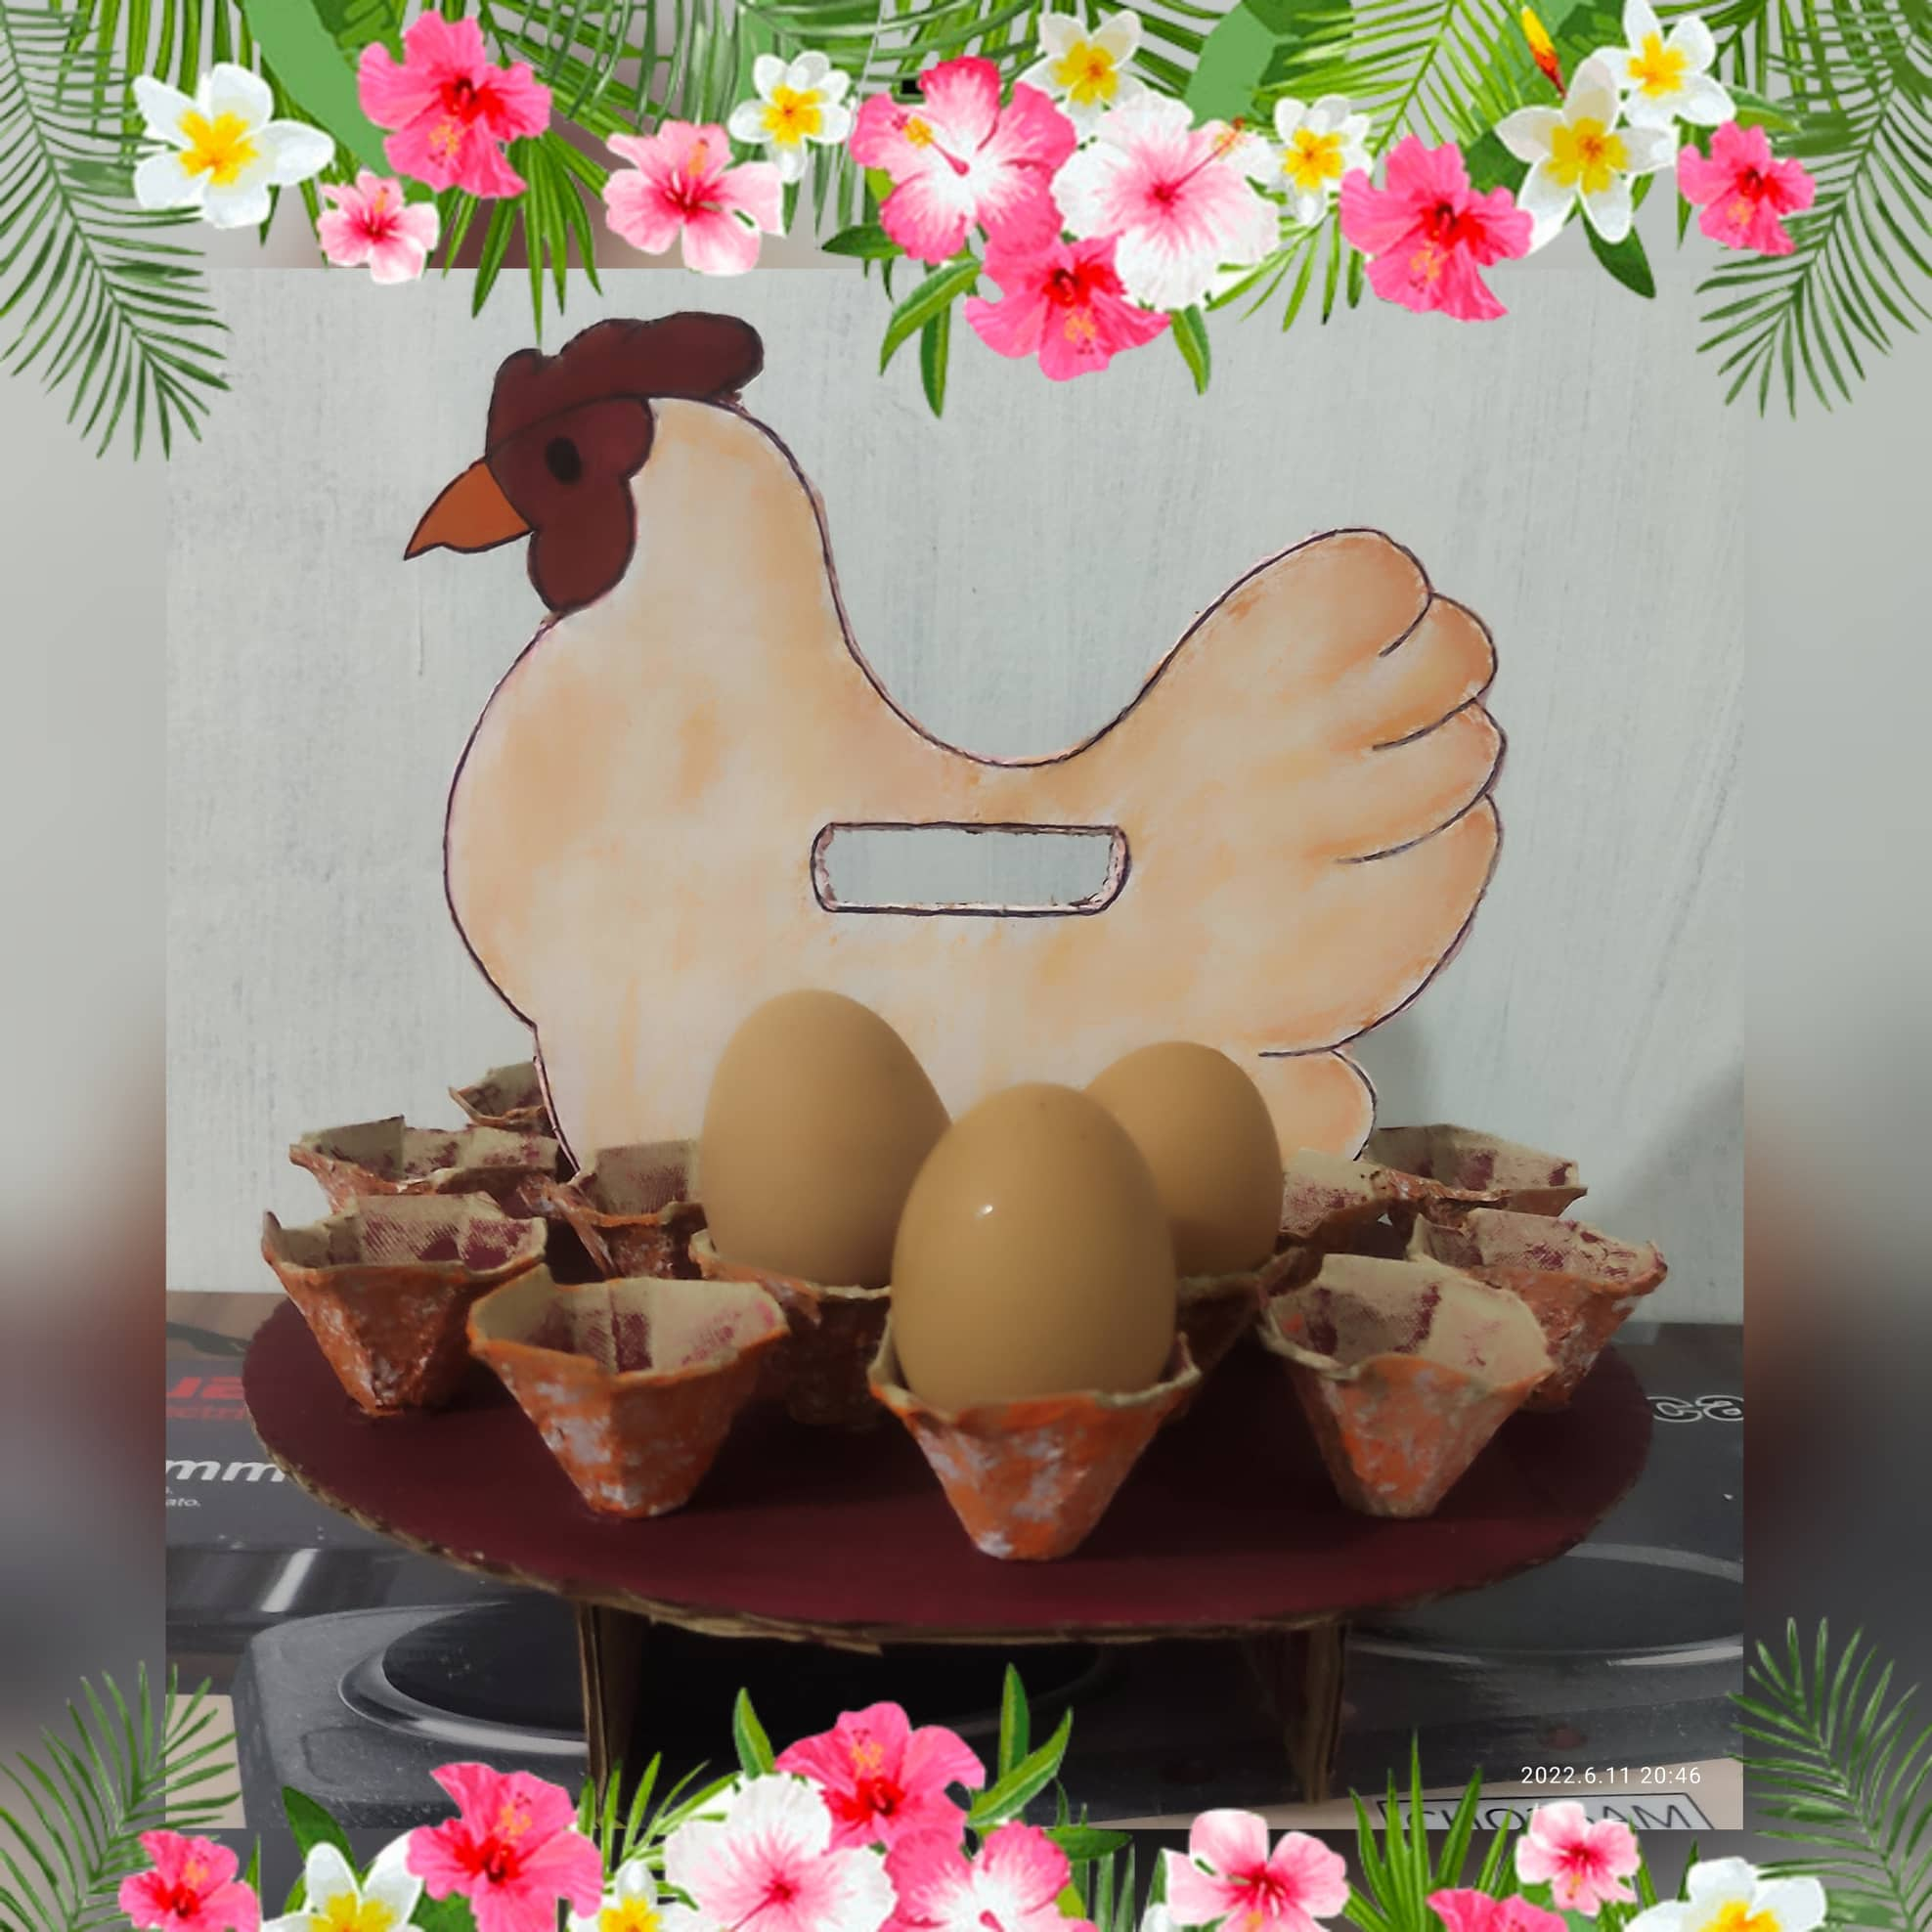
[ESP-ENG] Hermosa huevera o porta-huevos hecho desde casa con material reciclable @lorimusic // Beautiful egg cup or egg holder made from home with recyclable material @lorimusic
Hola que tal, se encuentra mis apreciados amig@s de #hive? espero que se encuentren muy bien! El día de hoy les traigo una Super y Divertida manualidad, les voy a enseñar a elaborar paso a paso esta Linda huevera o porta-huevos, es muy sencilla, la misma te servirá de mucho para que decores tu hogar y ademas tengas un lugar seguro para que guardes tus posturas de gallinas también llamada huevos. Espero que les guste y que también lo pongan en practica.
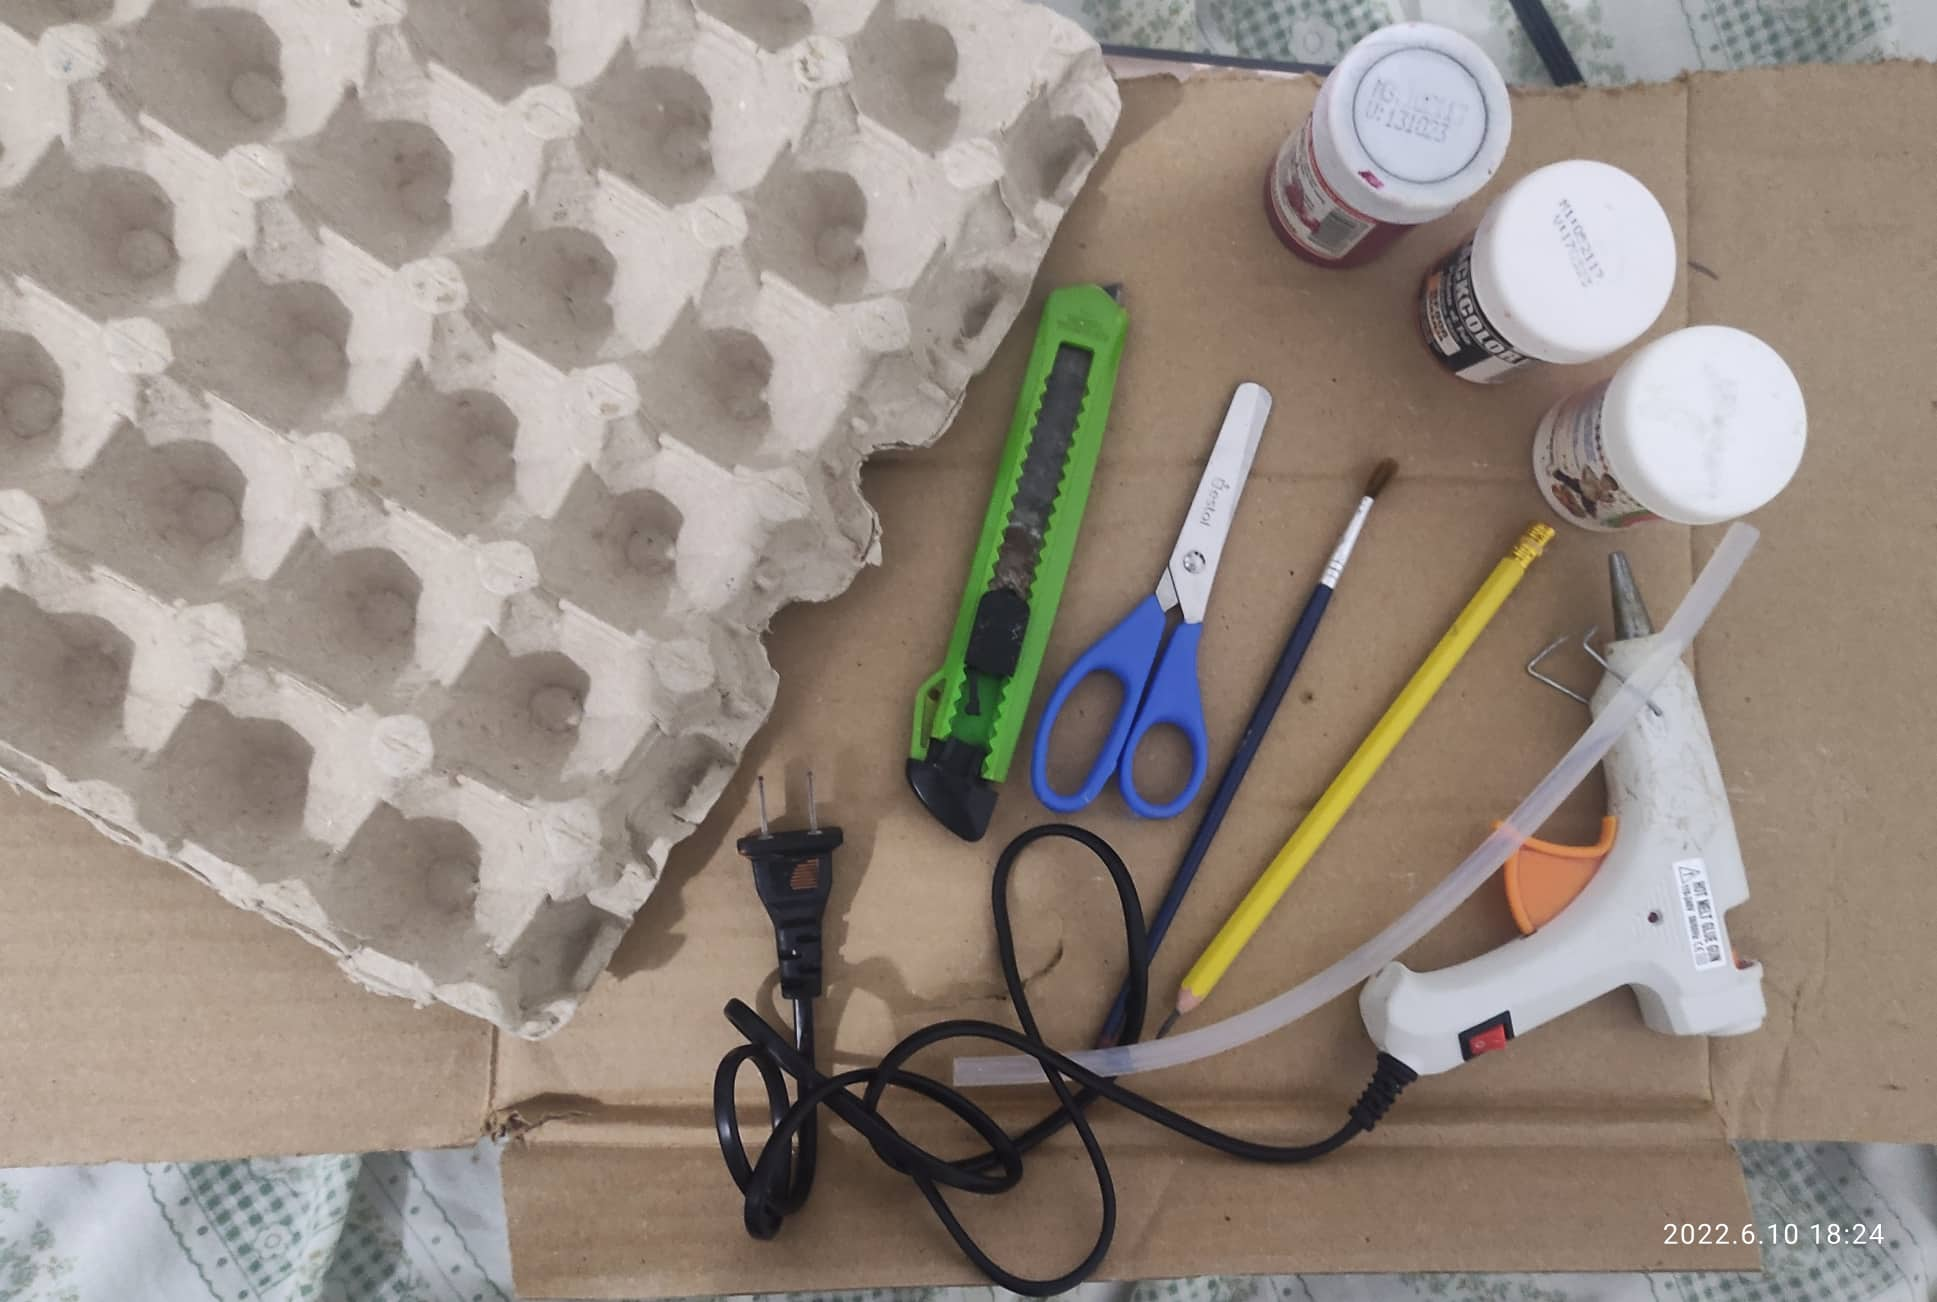
Materiales necesarios:
- Cartón de huevos
- Cutter o cuchilla
- Silicon en barra
- Pinturas
- Cartón
- Pincel
- Tijera
- Lápiz.
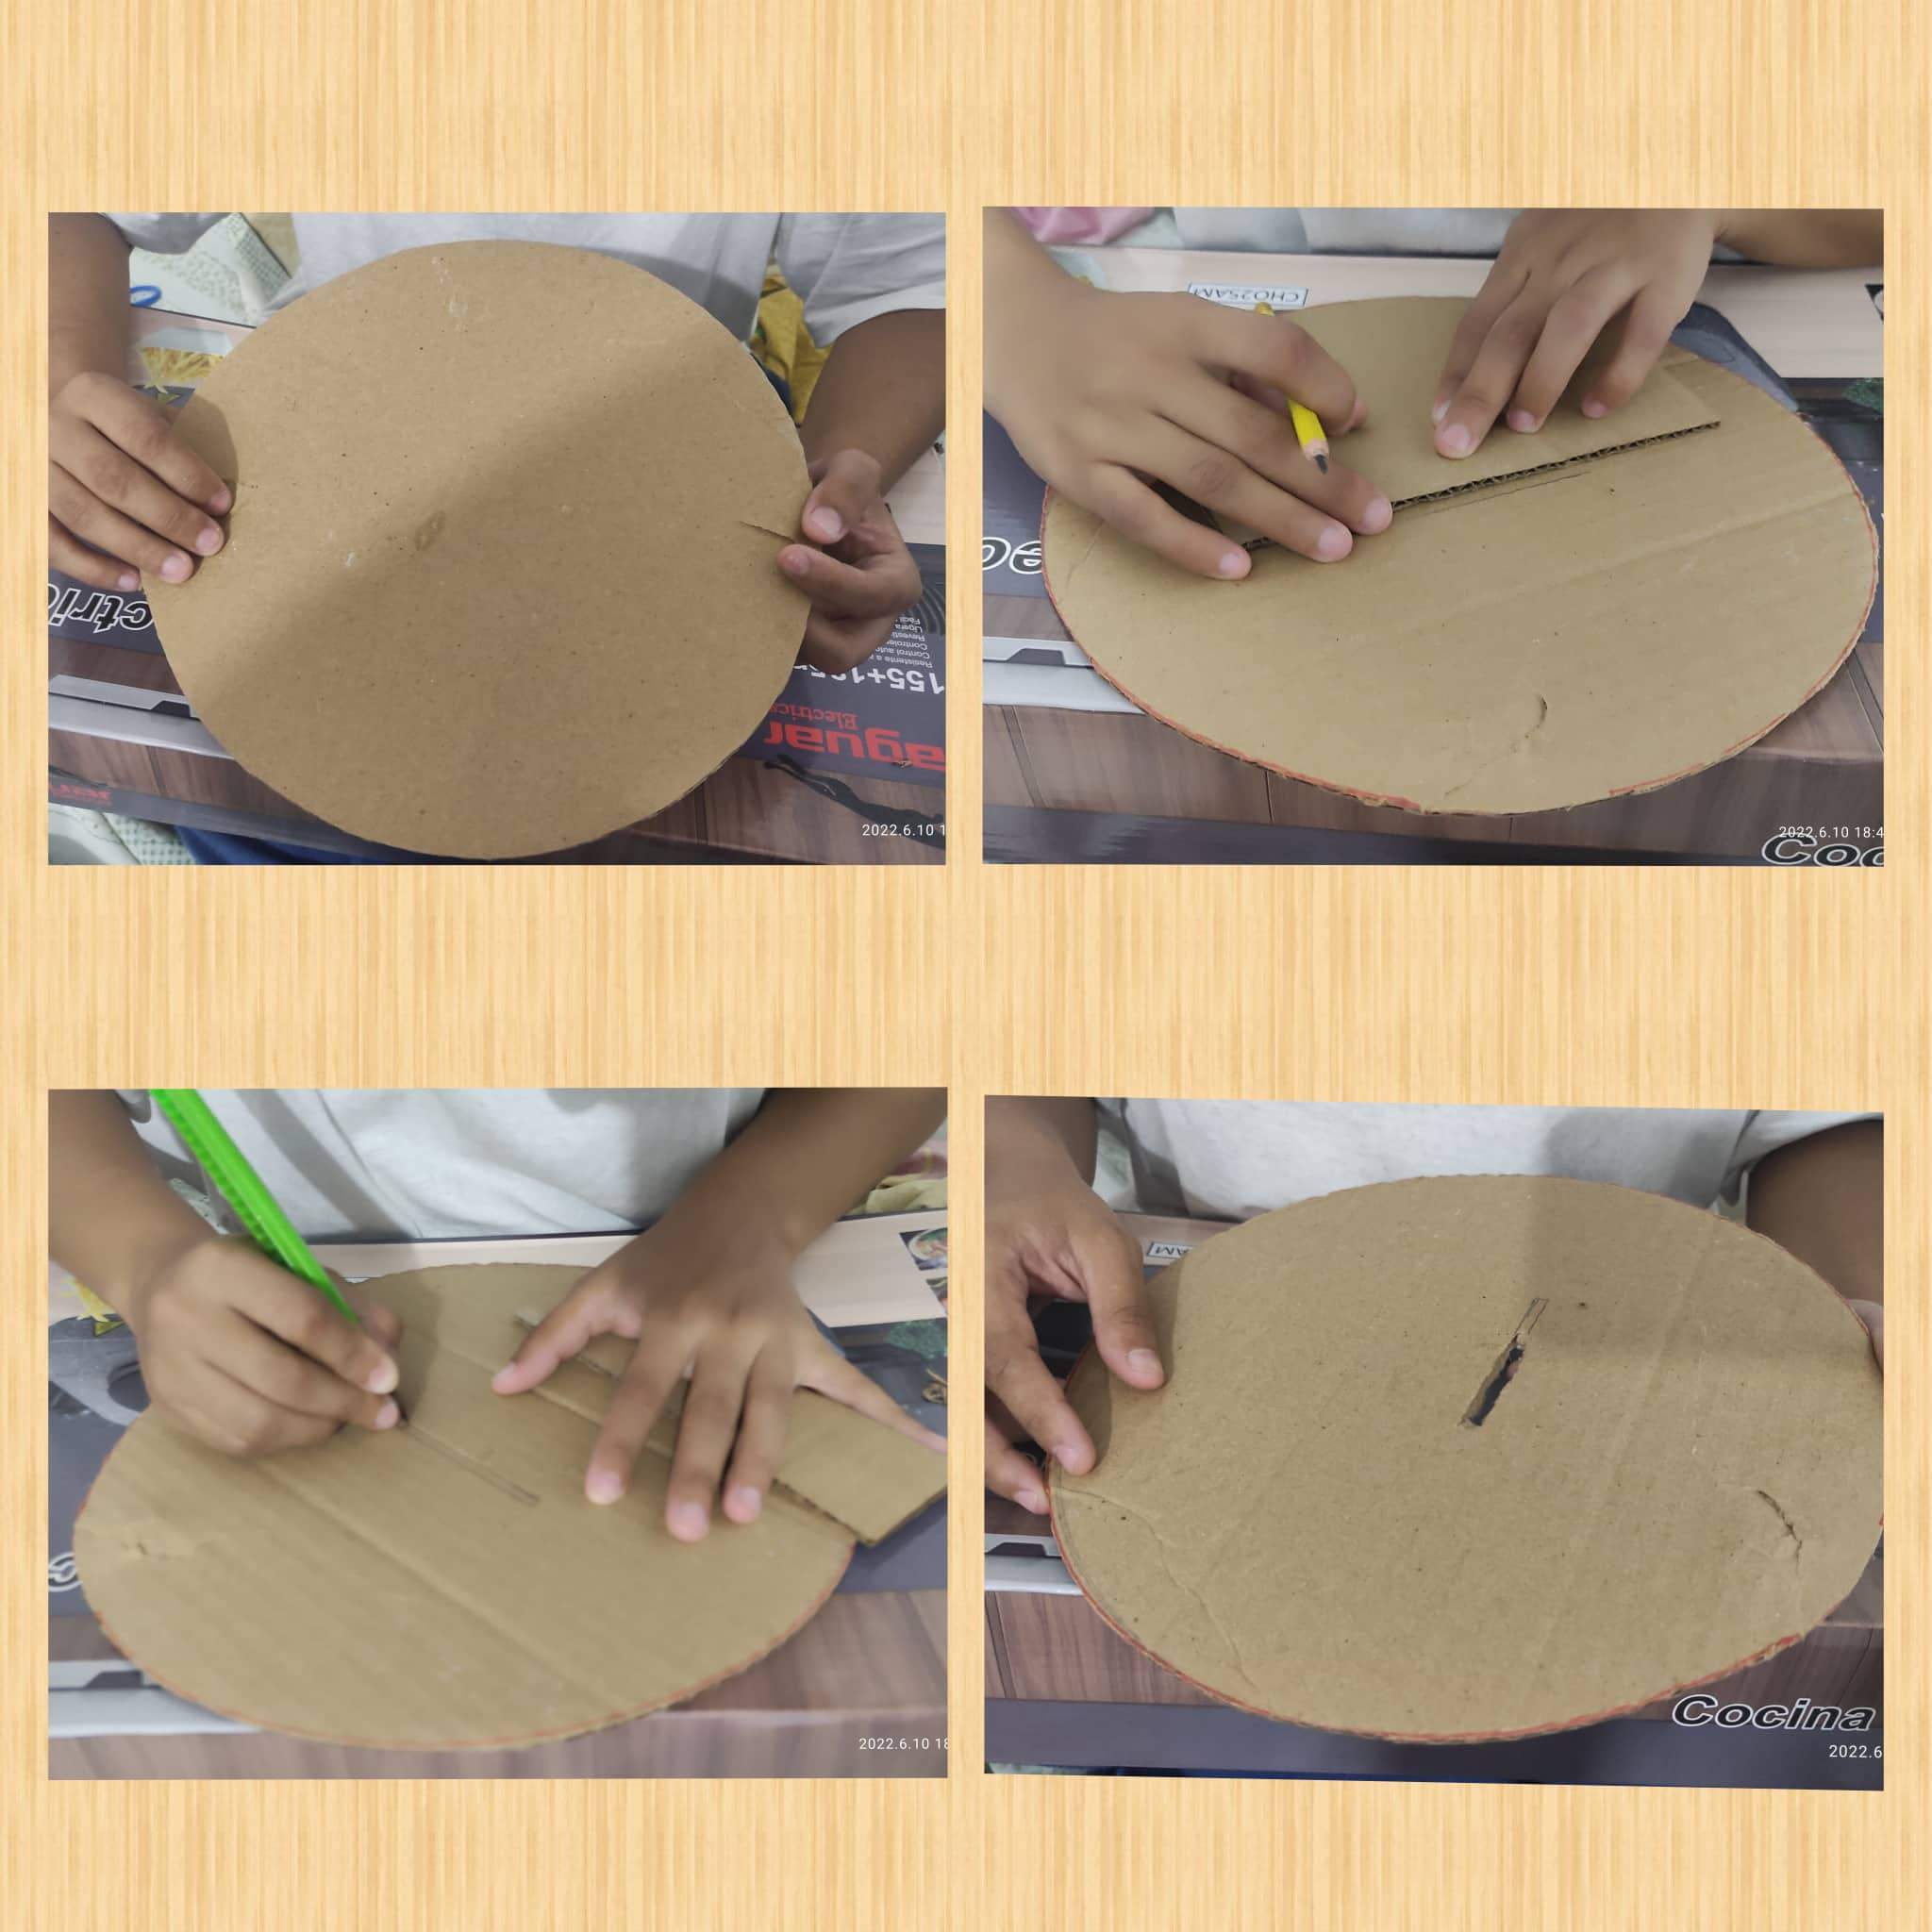
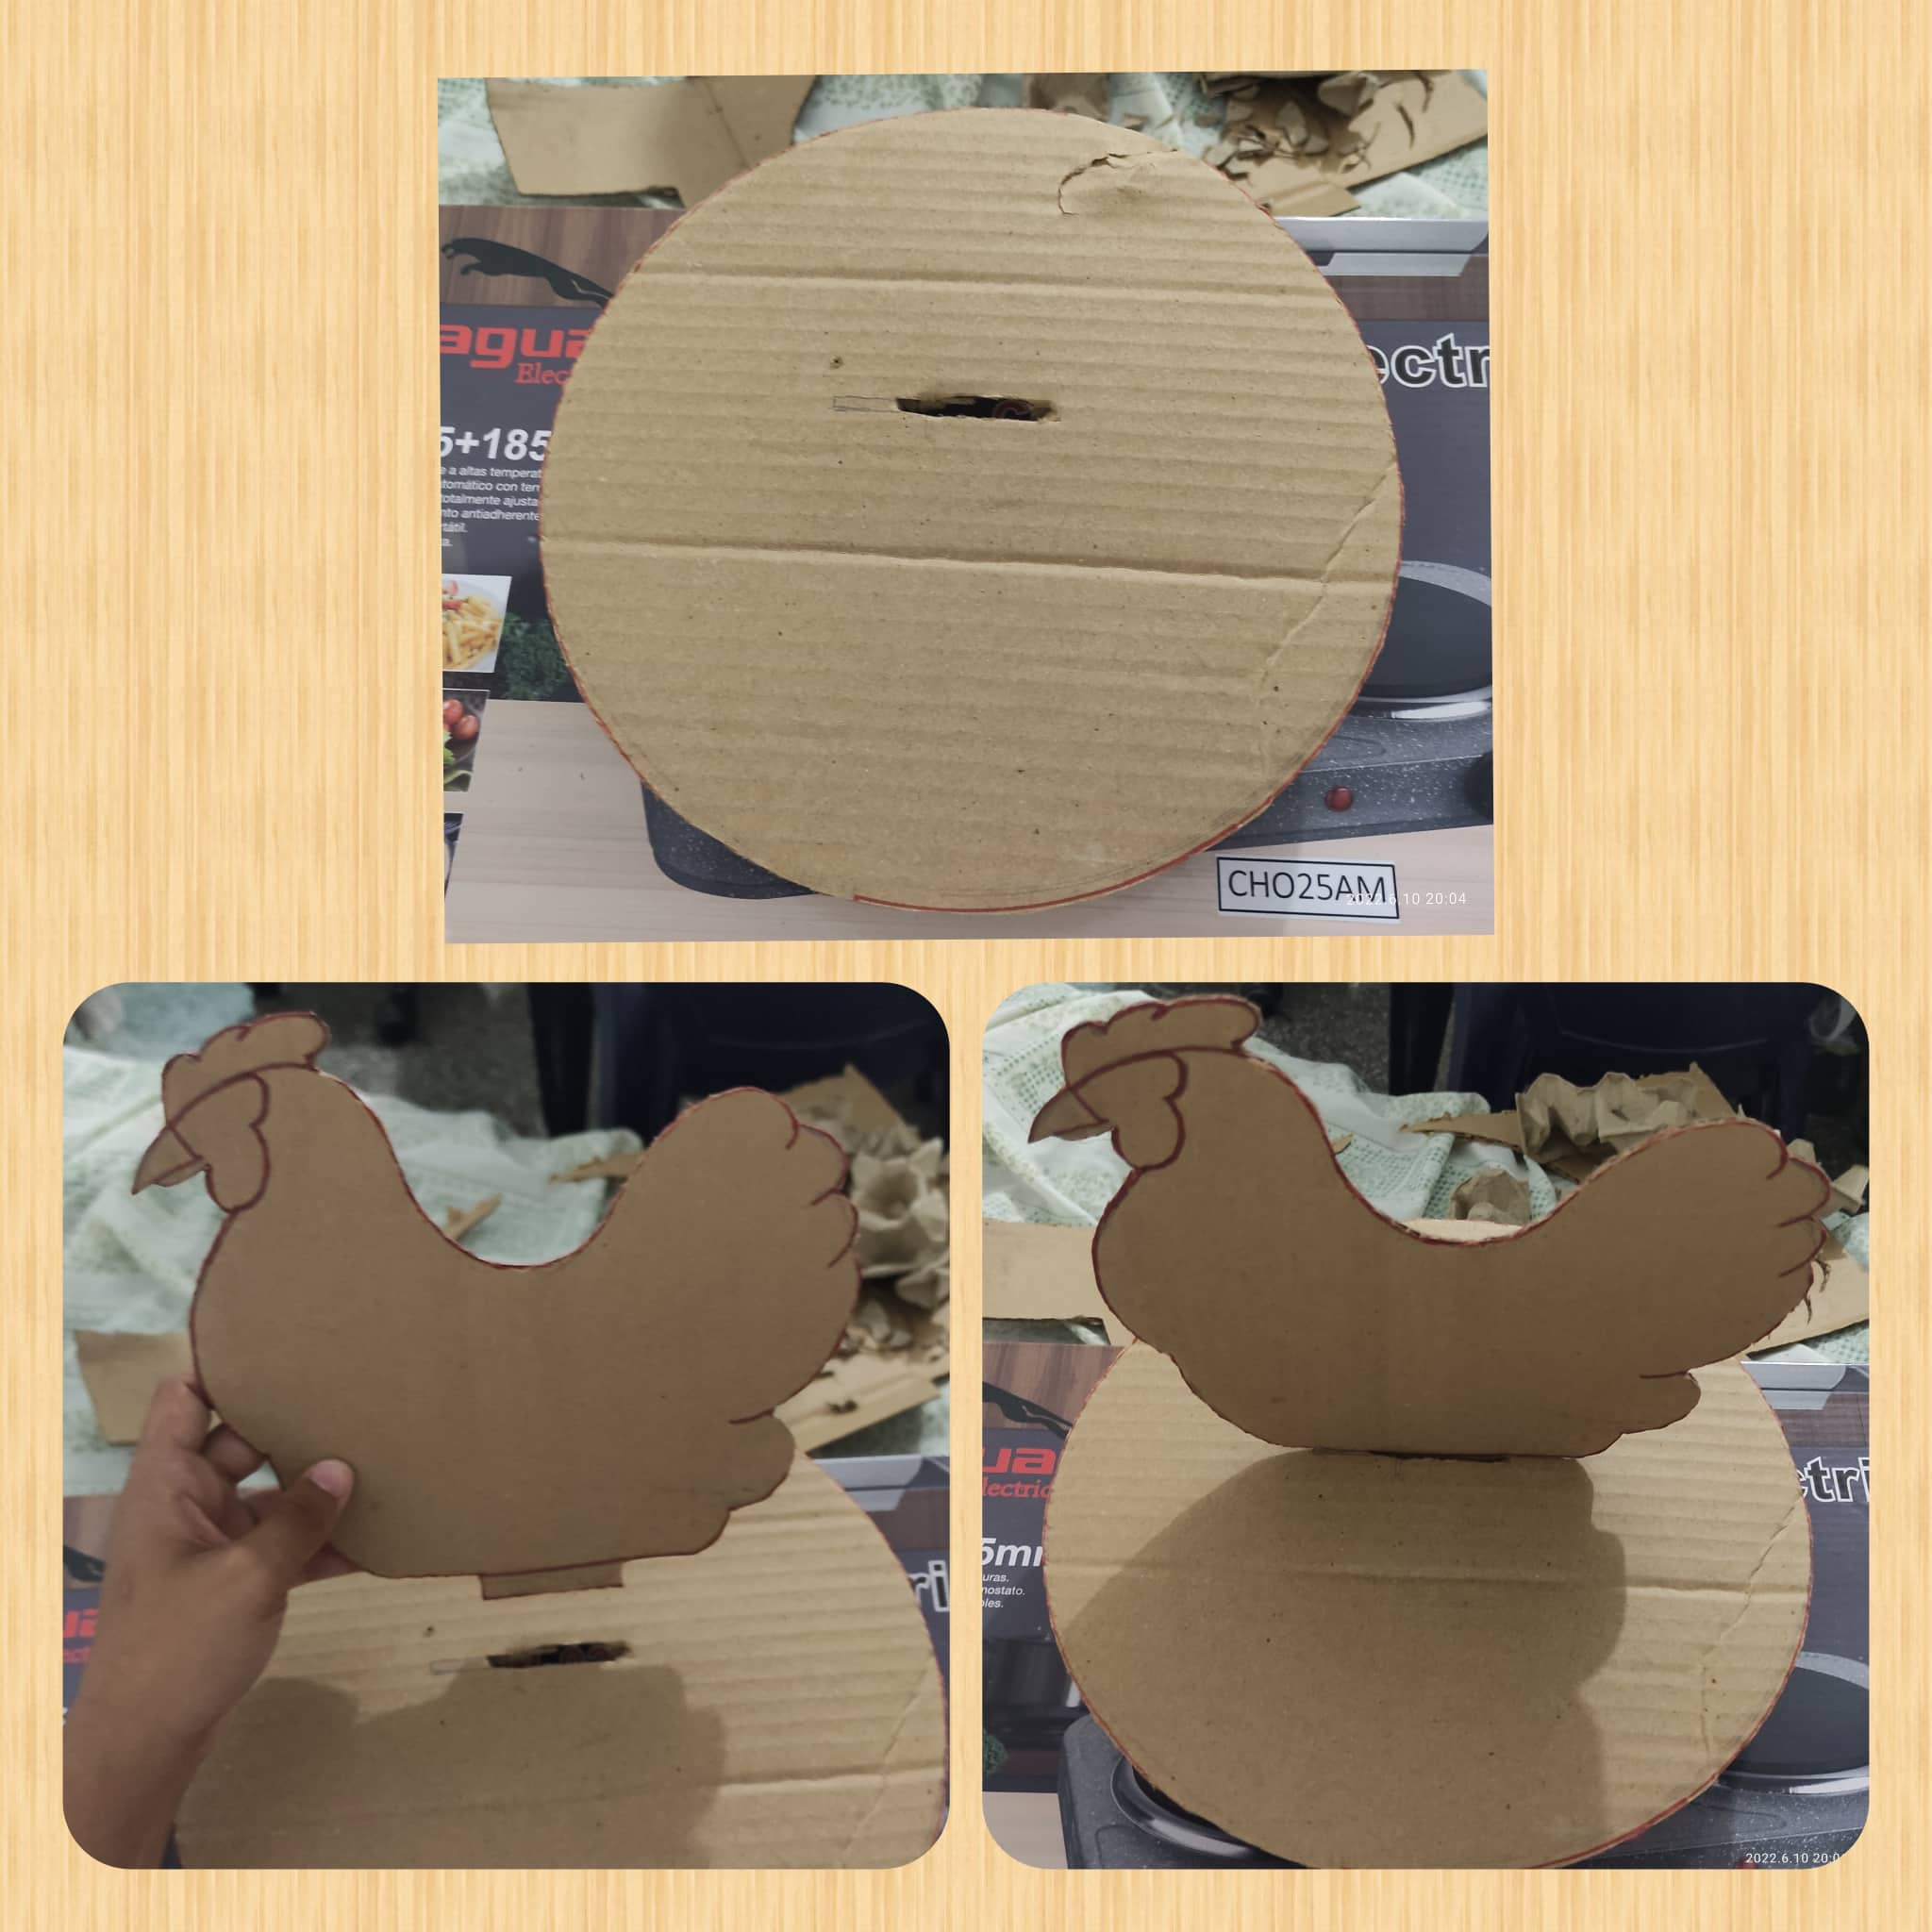
Paso 1
Comenzaremos, cortando nuestro cartón en forma de circulo. Luego en la parte del centro del circulo hacemos una ranura y cortamos, debe quedar de esta manera.
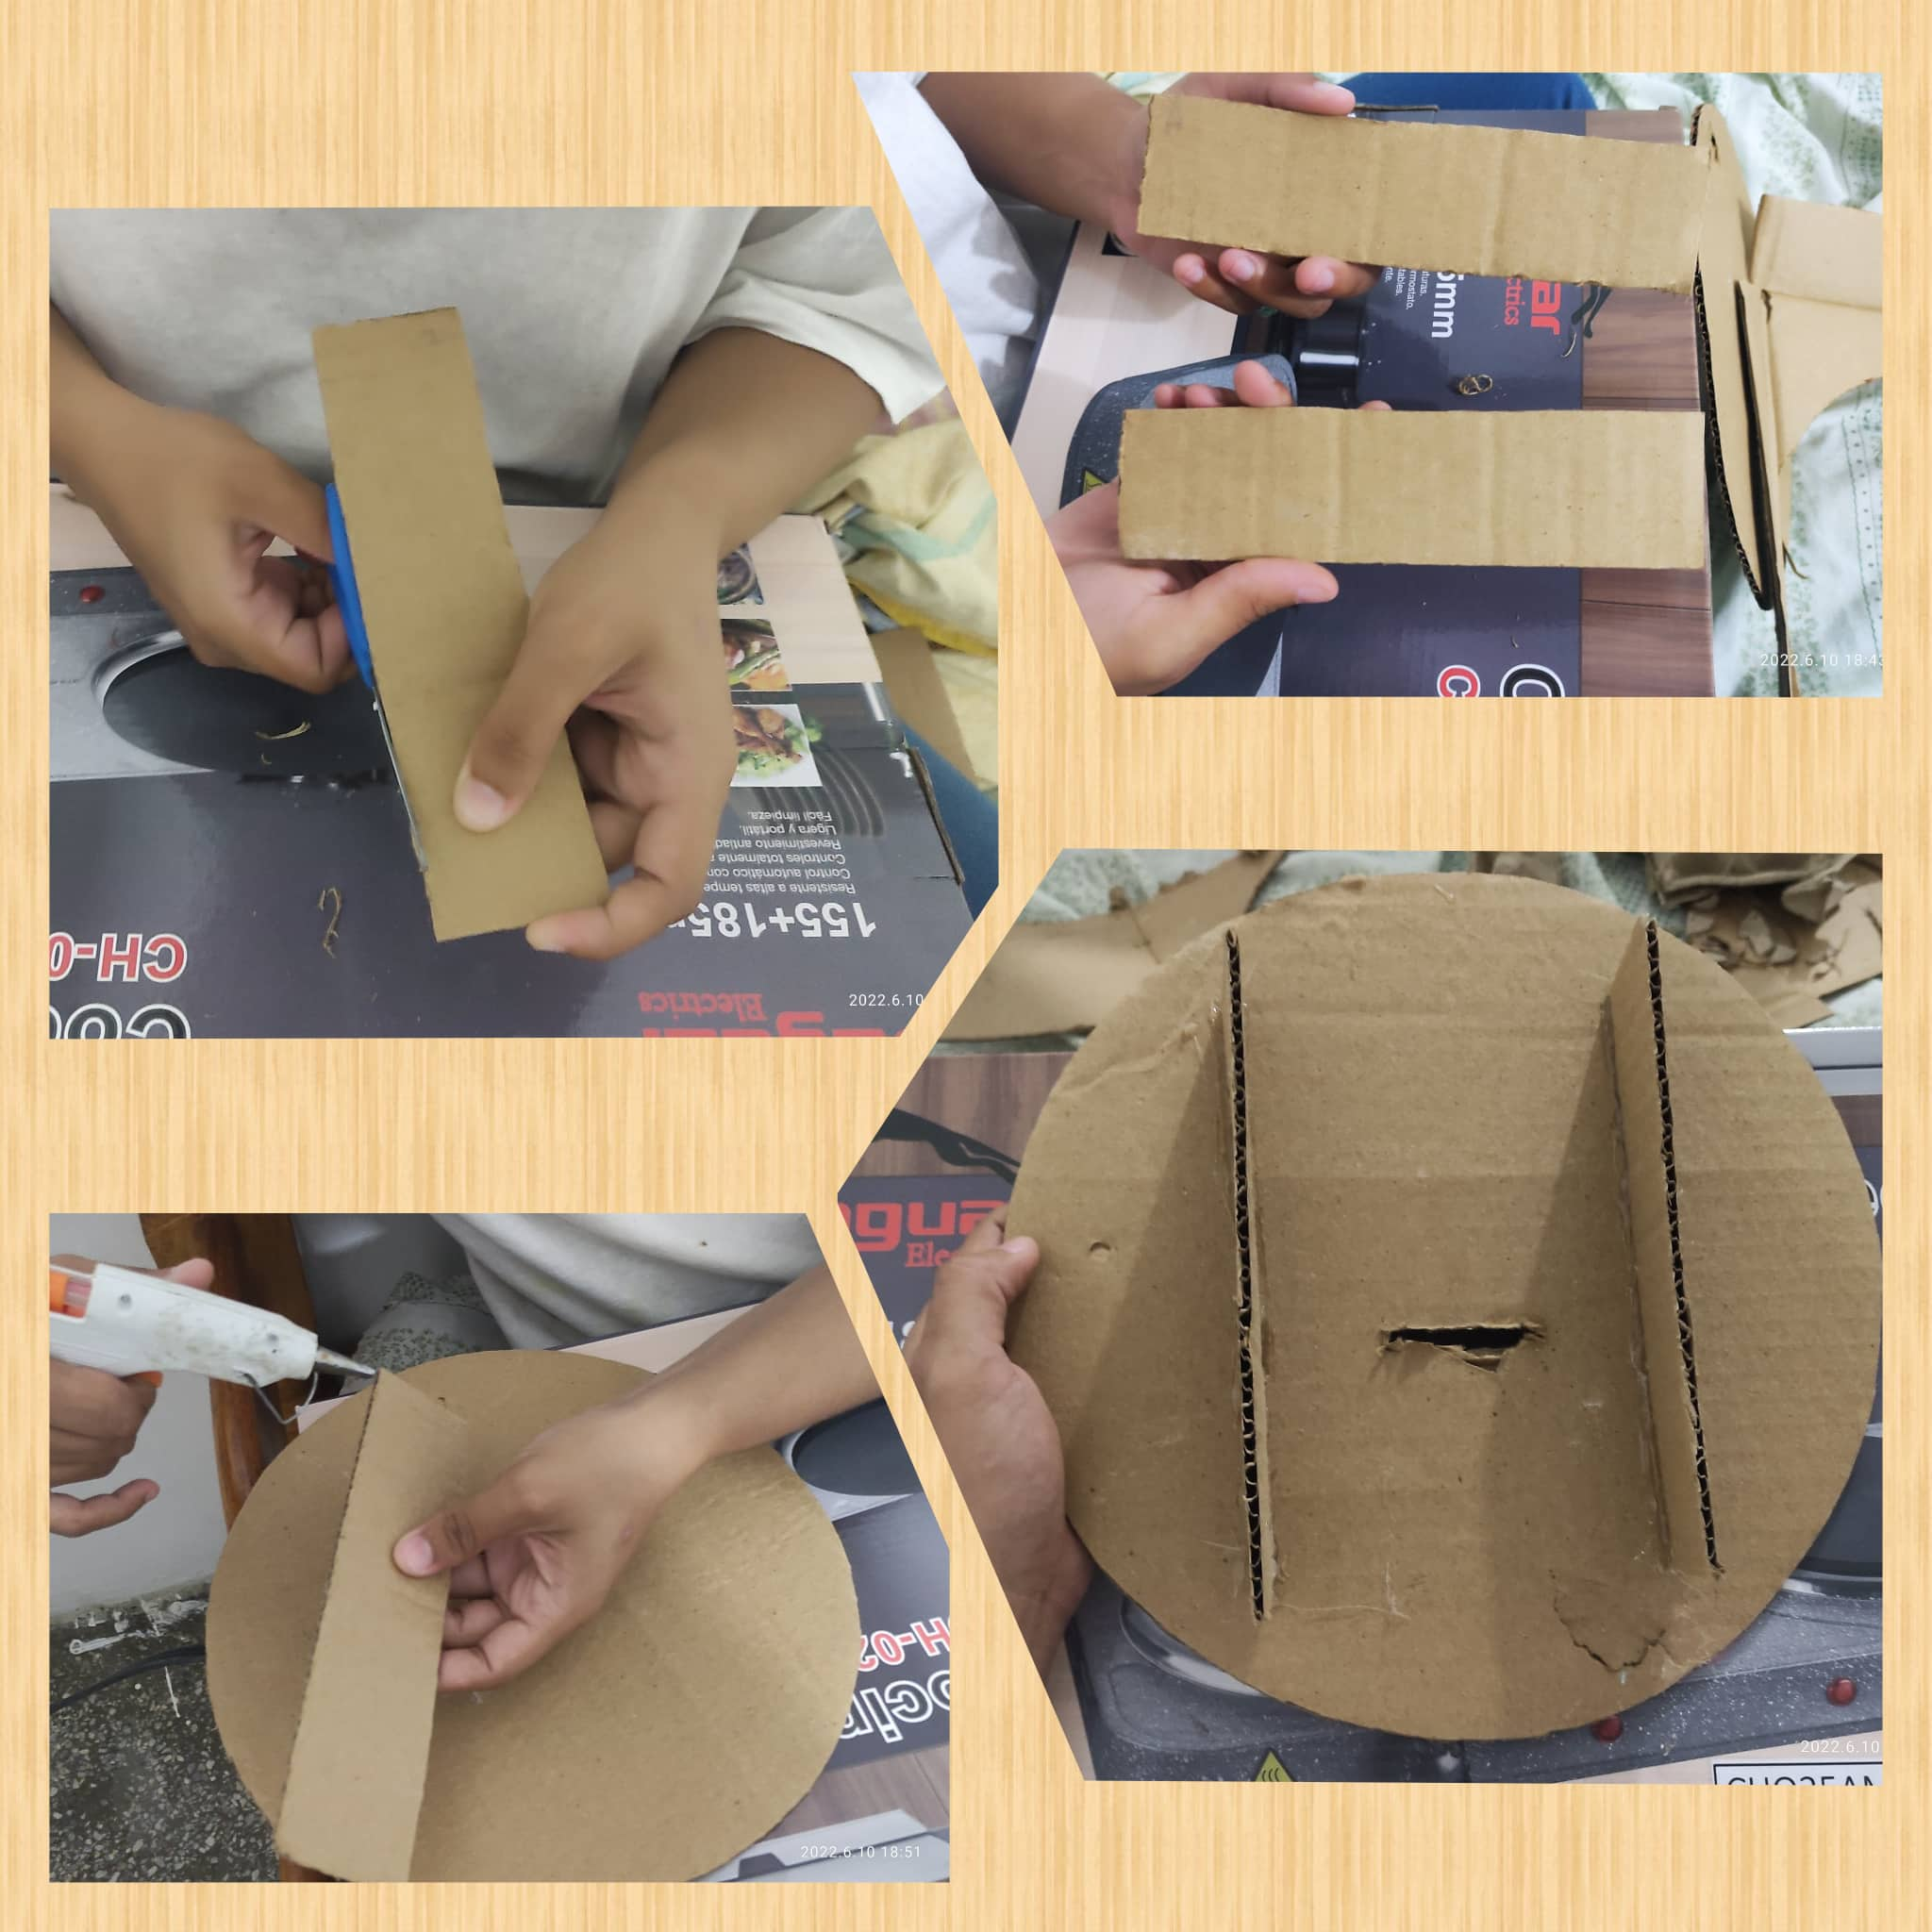
Paso 2
Nuevamente, cortaremos en otro pedazo de cartón dos rectángulo, esto nos ayudara de soporte para nuestra huevera y luego lo pegaremos así.
Paso 3
En este paso, hacemos el dibujo de una gallina ya que se semeja muchísimo lo que vamos hacer. En las fotos se muestra que en la parte inferior de nuestro dibujo hay un mini-rectángulo, es importante tomar en cuenta este detalle para poder cortar,
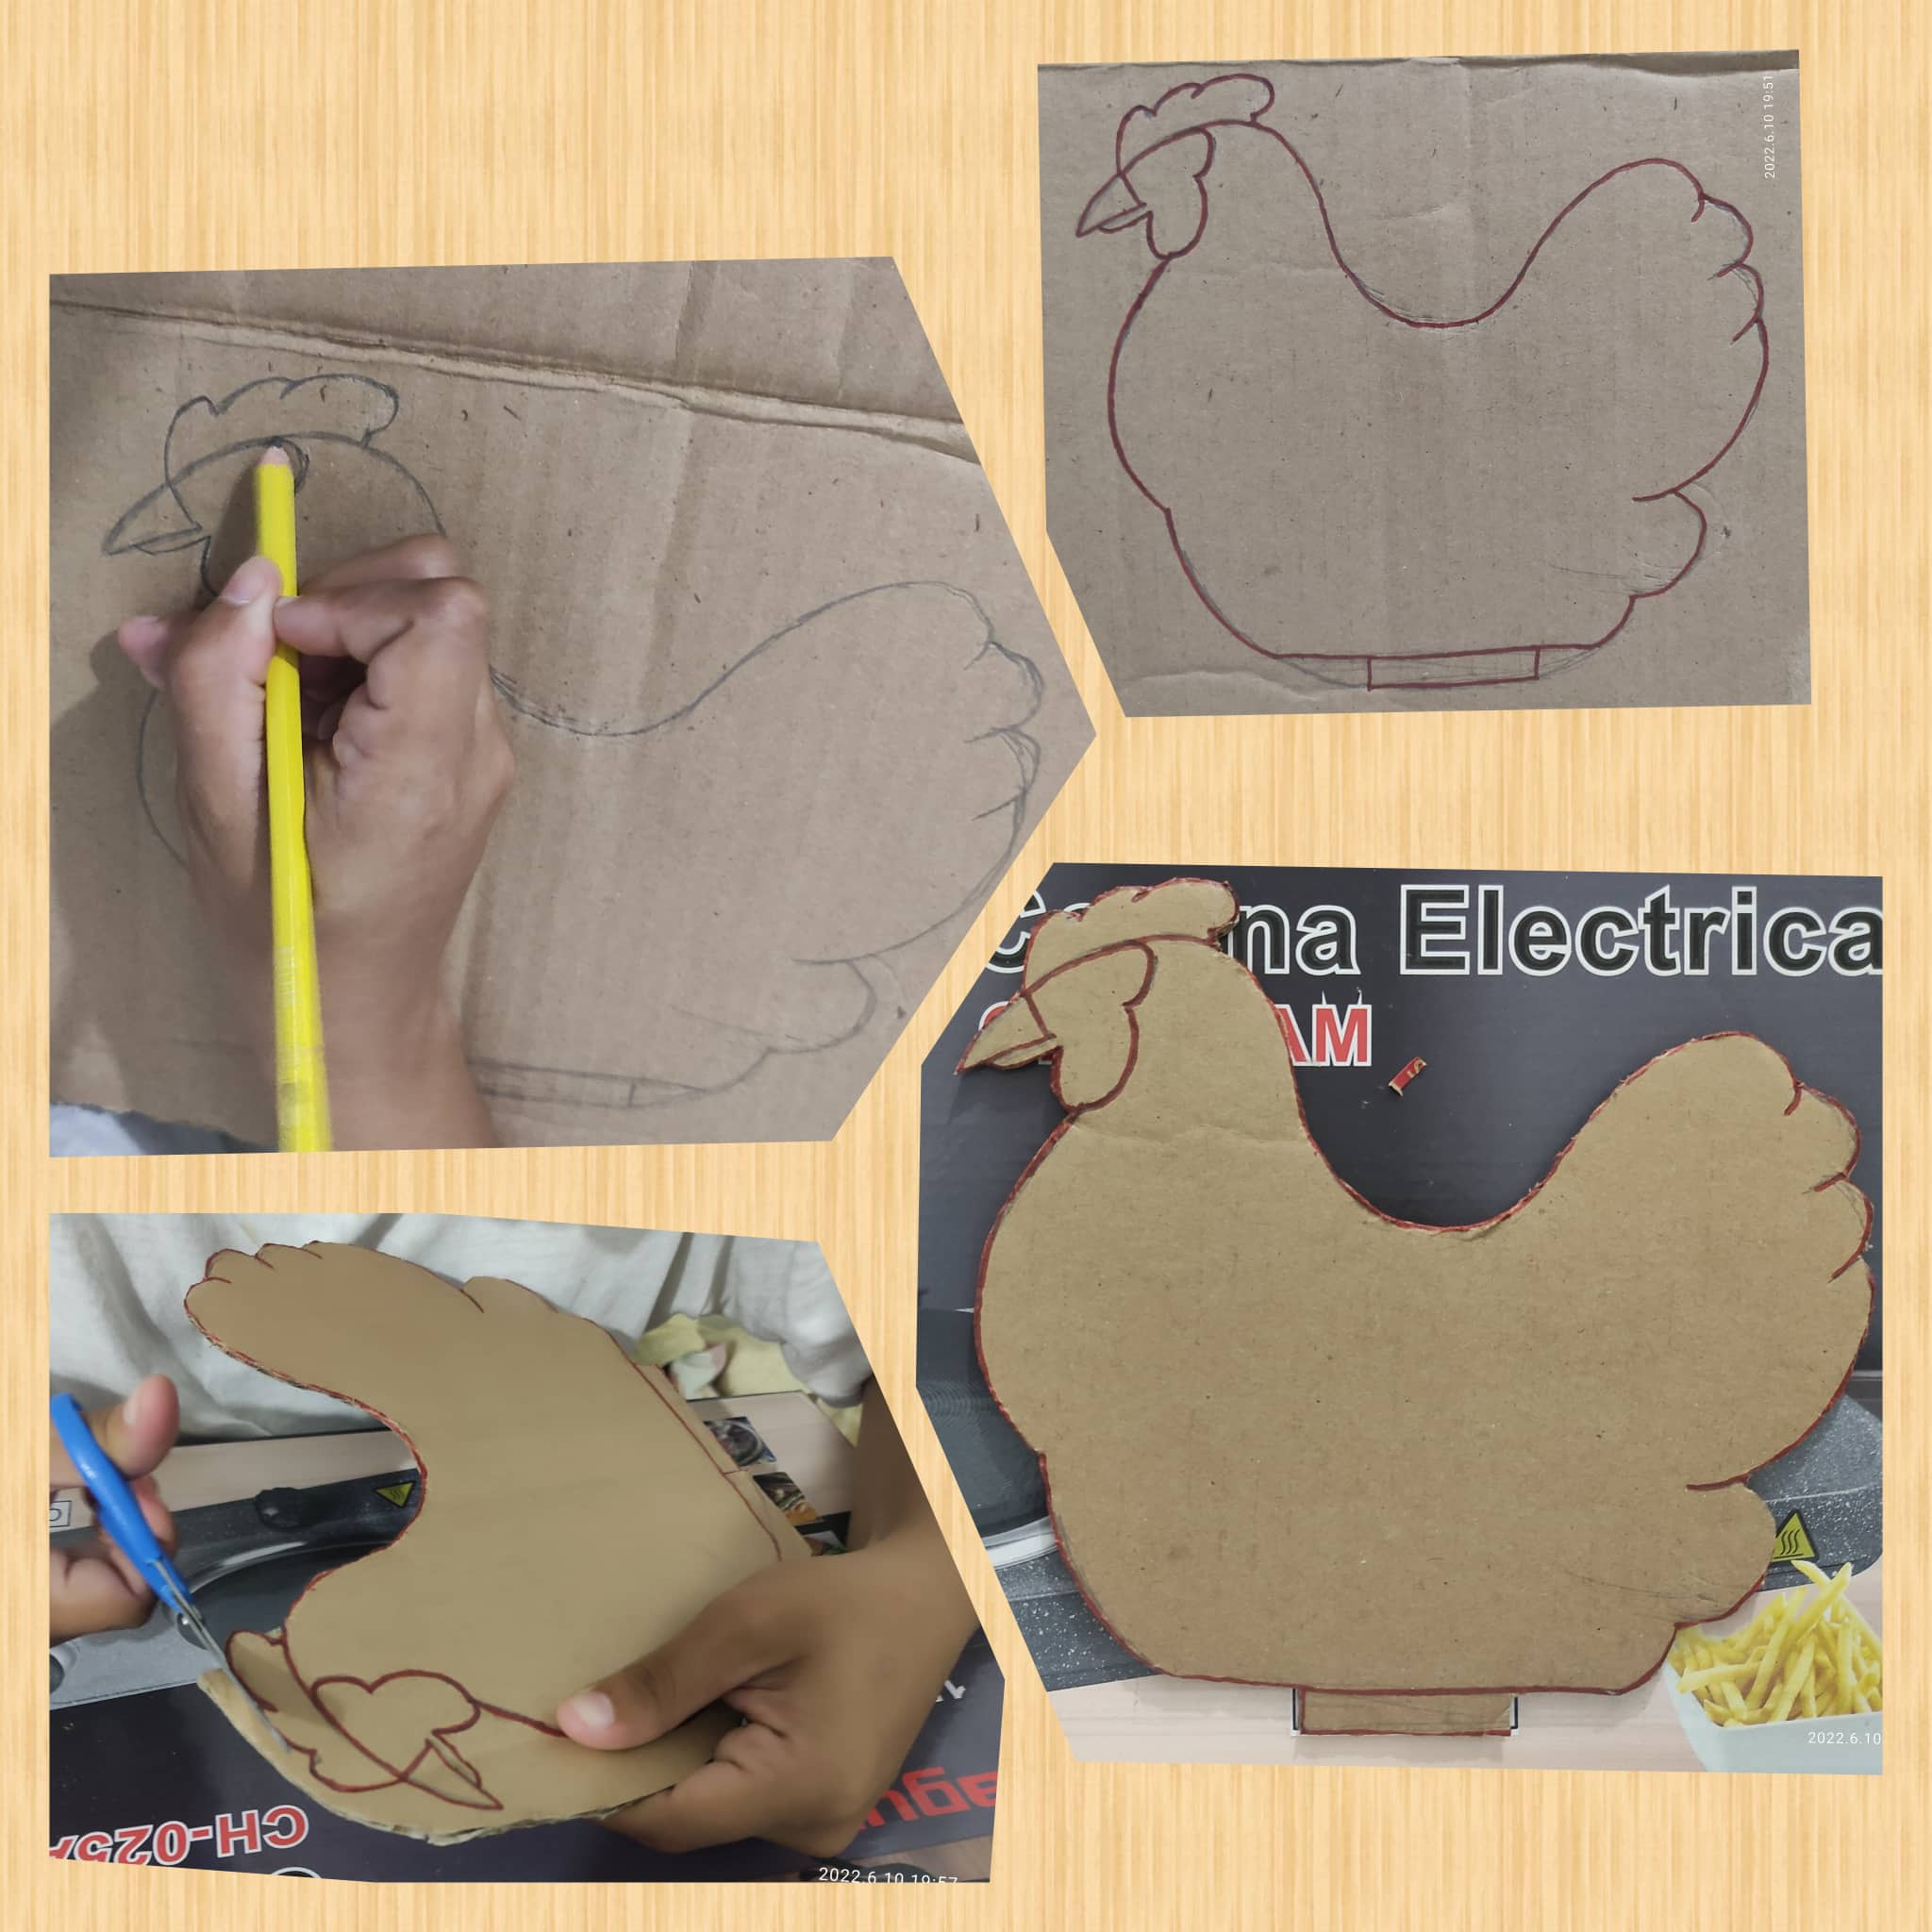
Paso 4
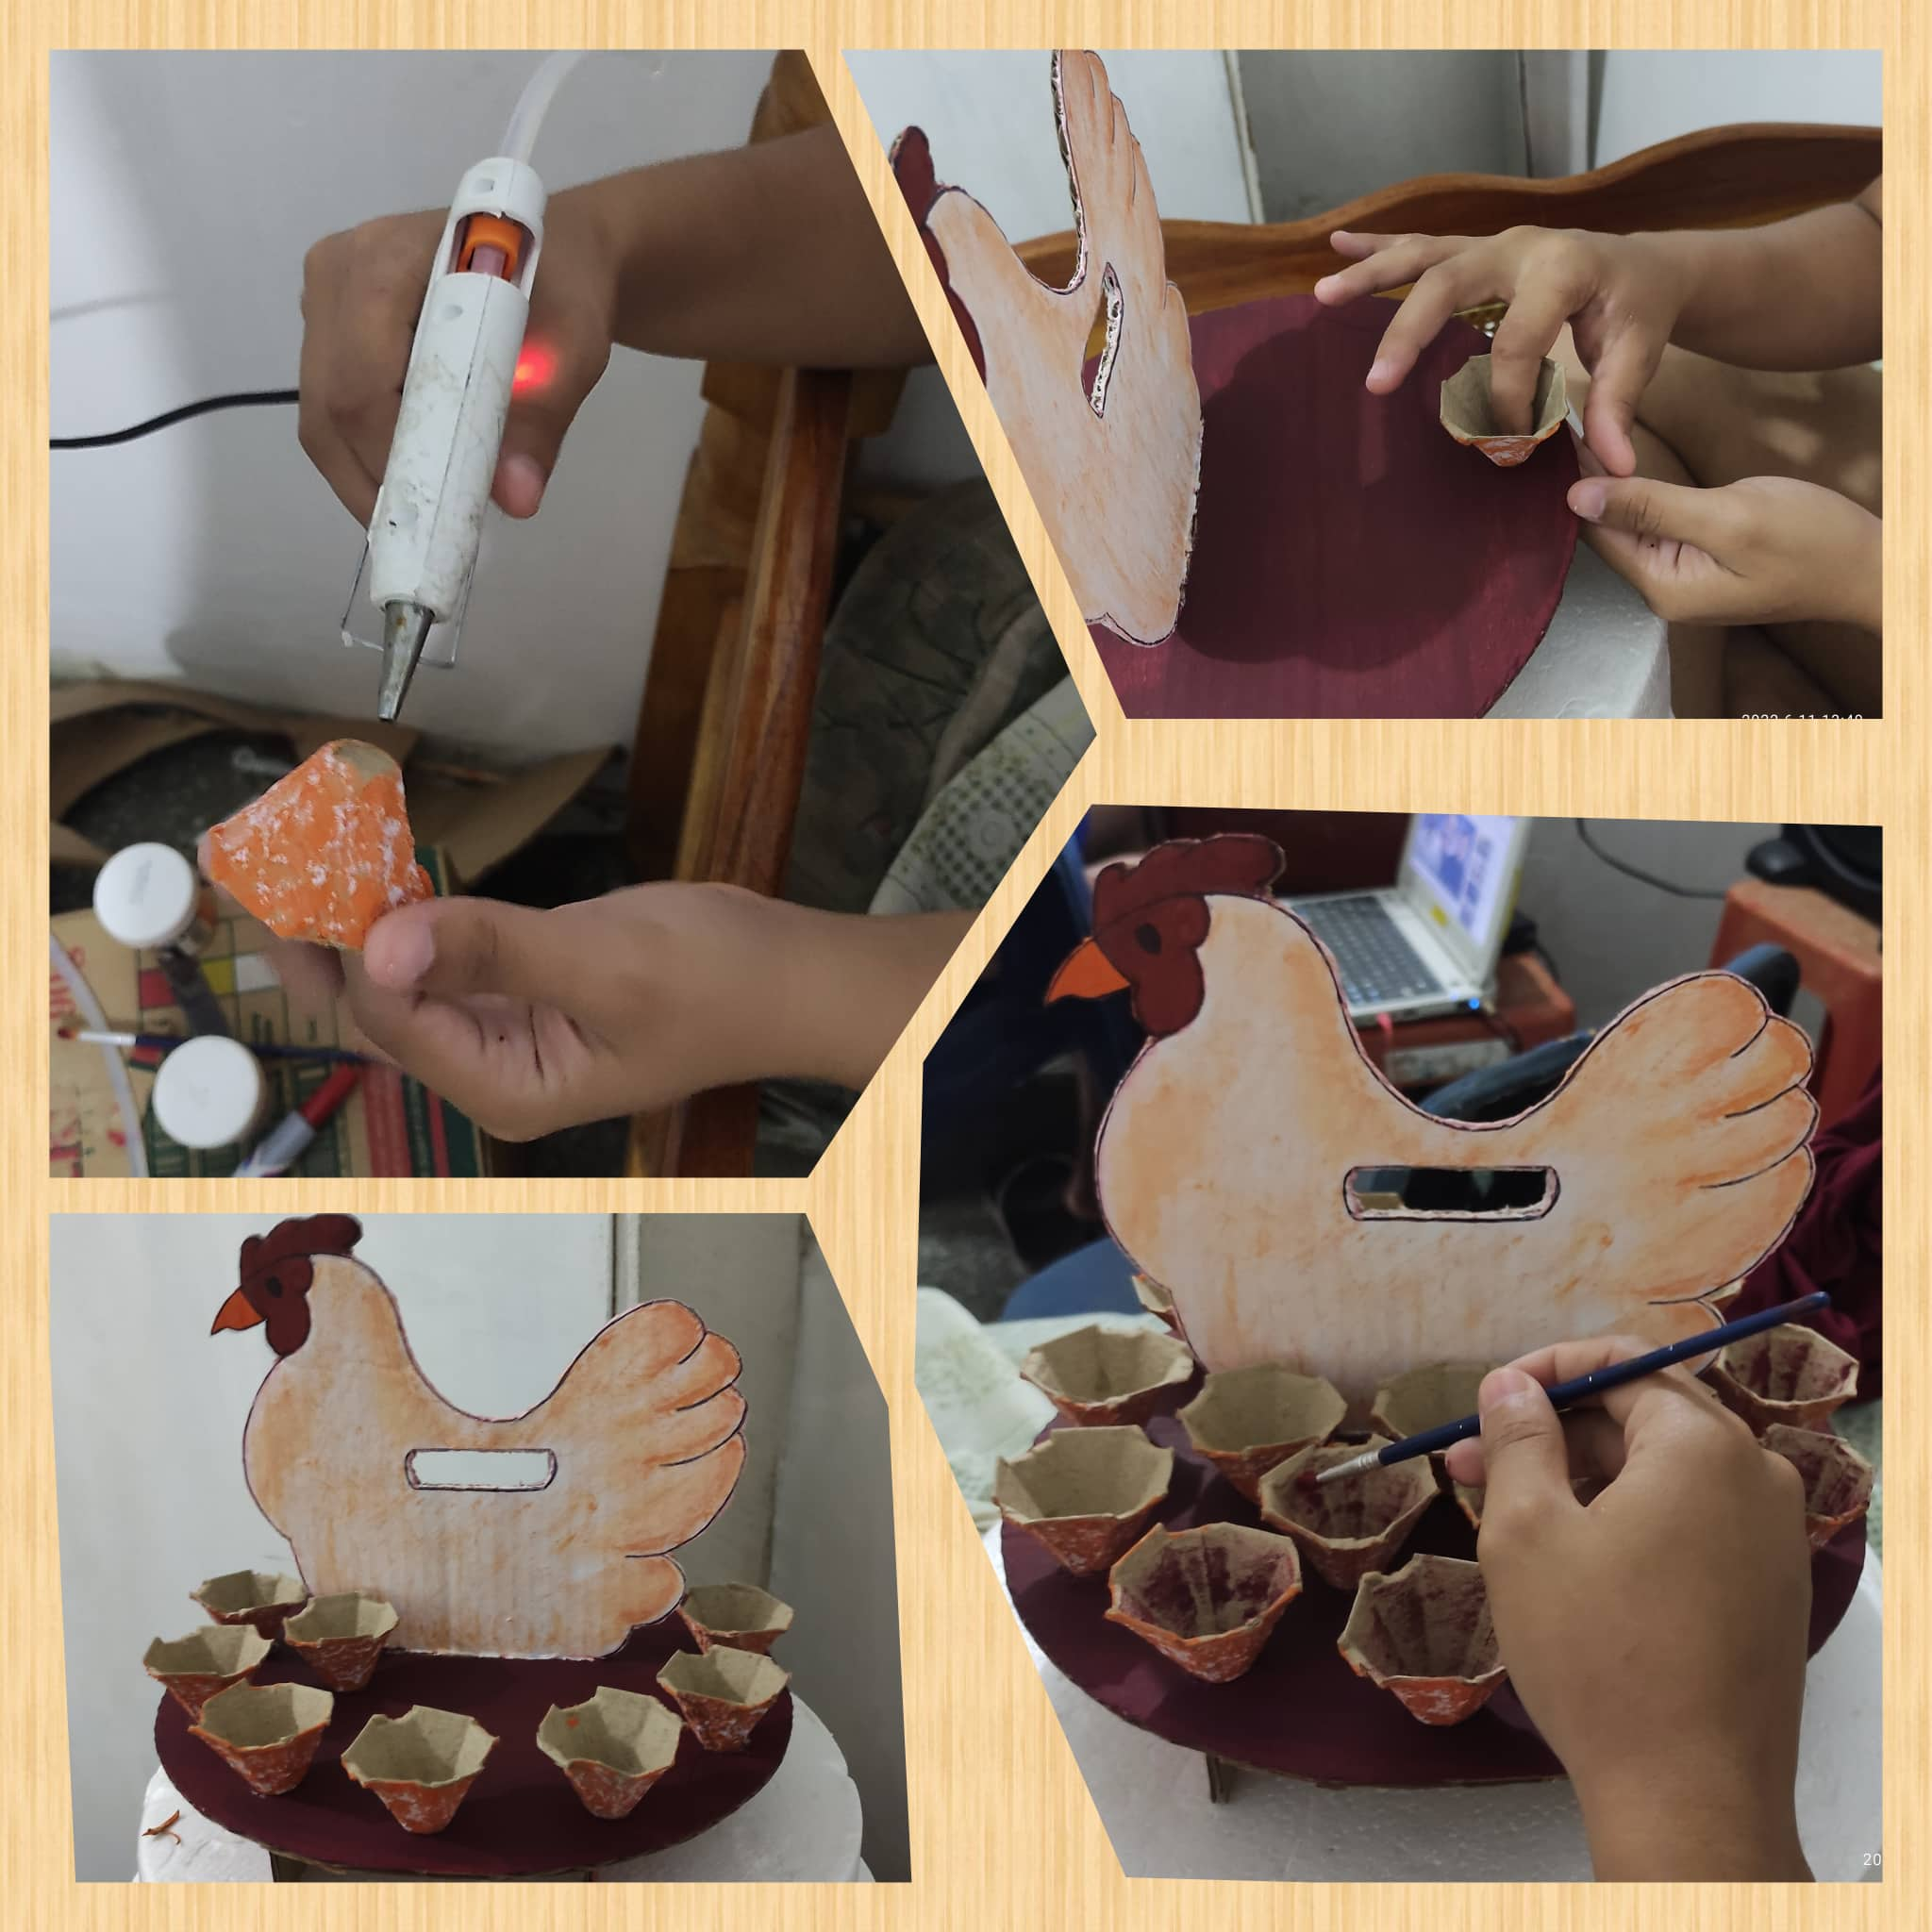
Ya realizador los pasos anteriores, procedemos a pegar nuestra gallina, uniendo el mini-rectangulo del dibujo con la ranura de la base ya elaborada.
Paso 5
Aquí pintaremos la base de nuestra huevera, dejando un ovalado en la paste superior de la gallina, esto para sujetarla cuando este ya lista.
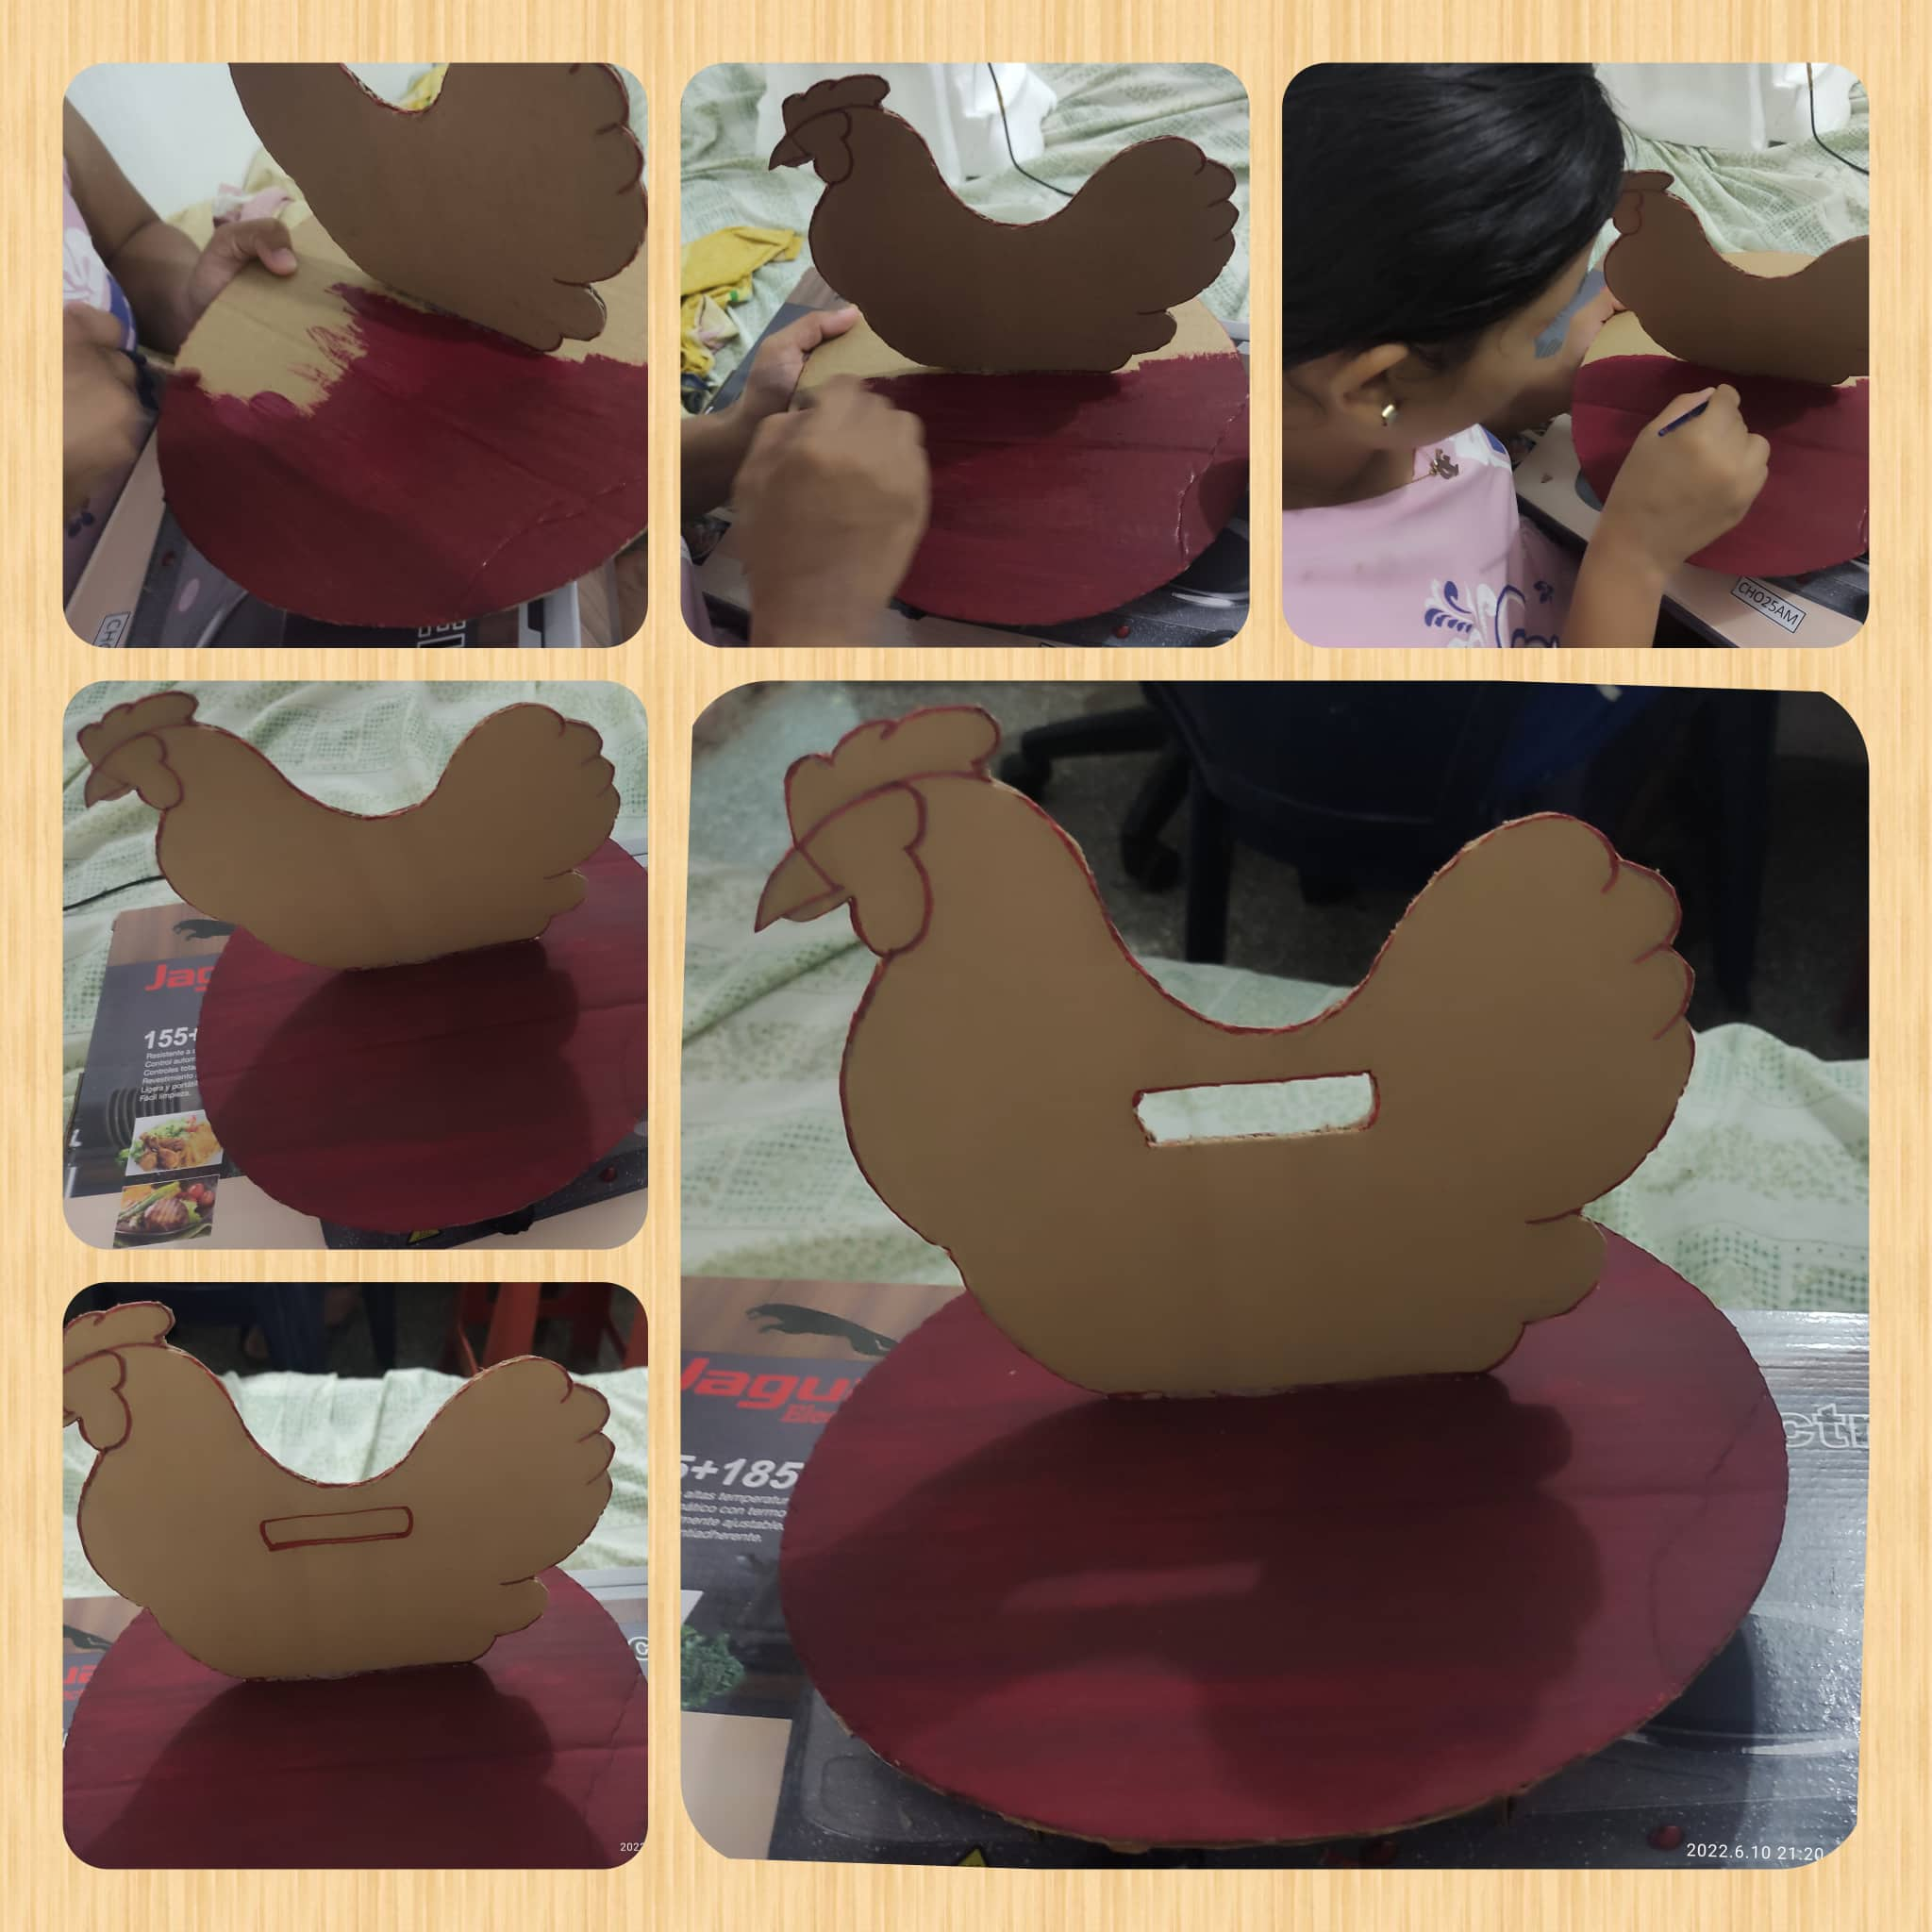
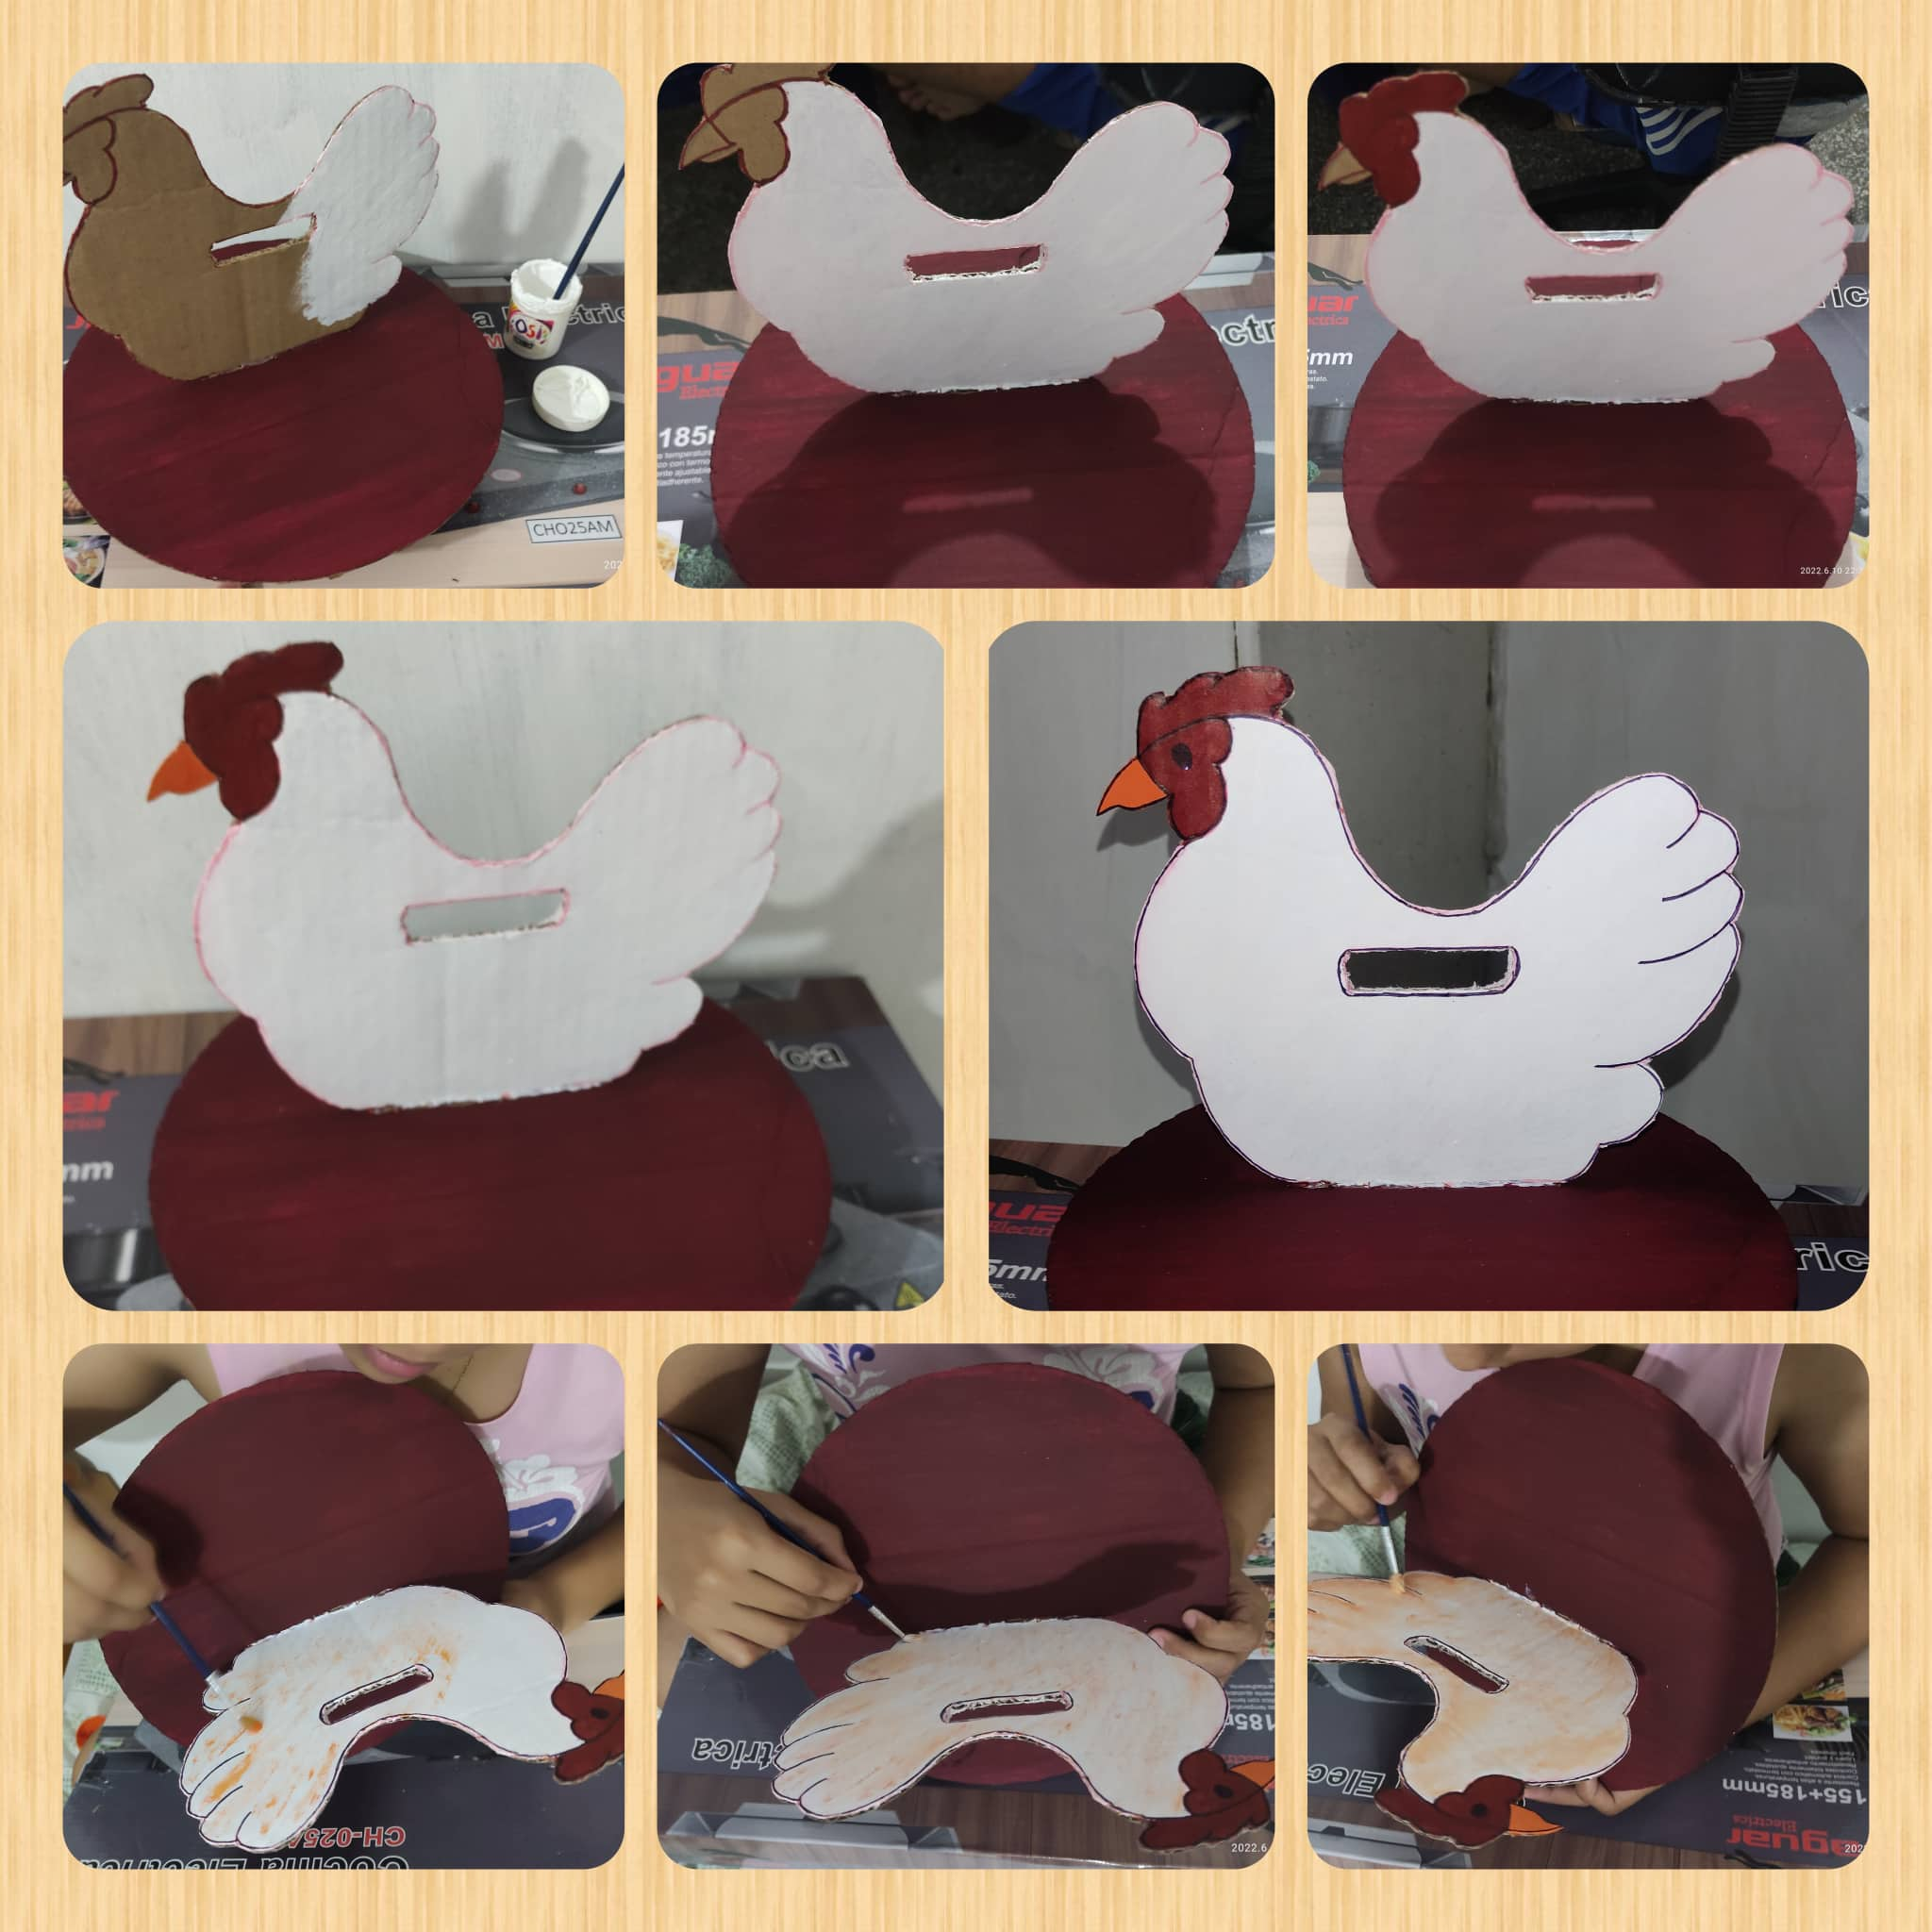
Paso 6
Seguimos pintando y en esta oportunidad sera la gallina.
Paso 7
En este paso, cortaremos todos los cubitos que tiene el cartón de huevo y también los pintamos.
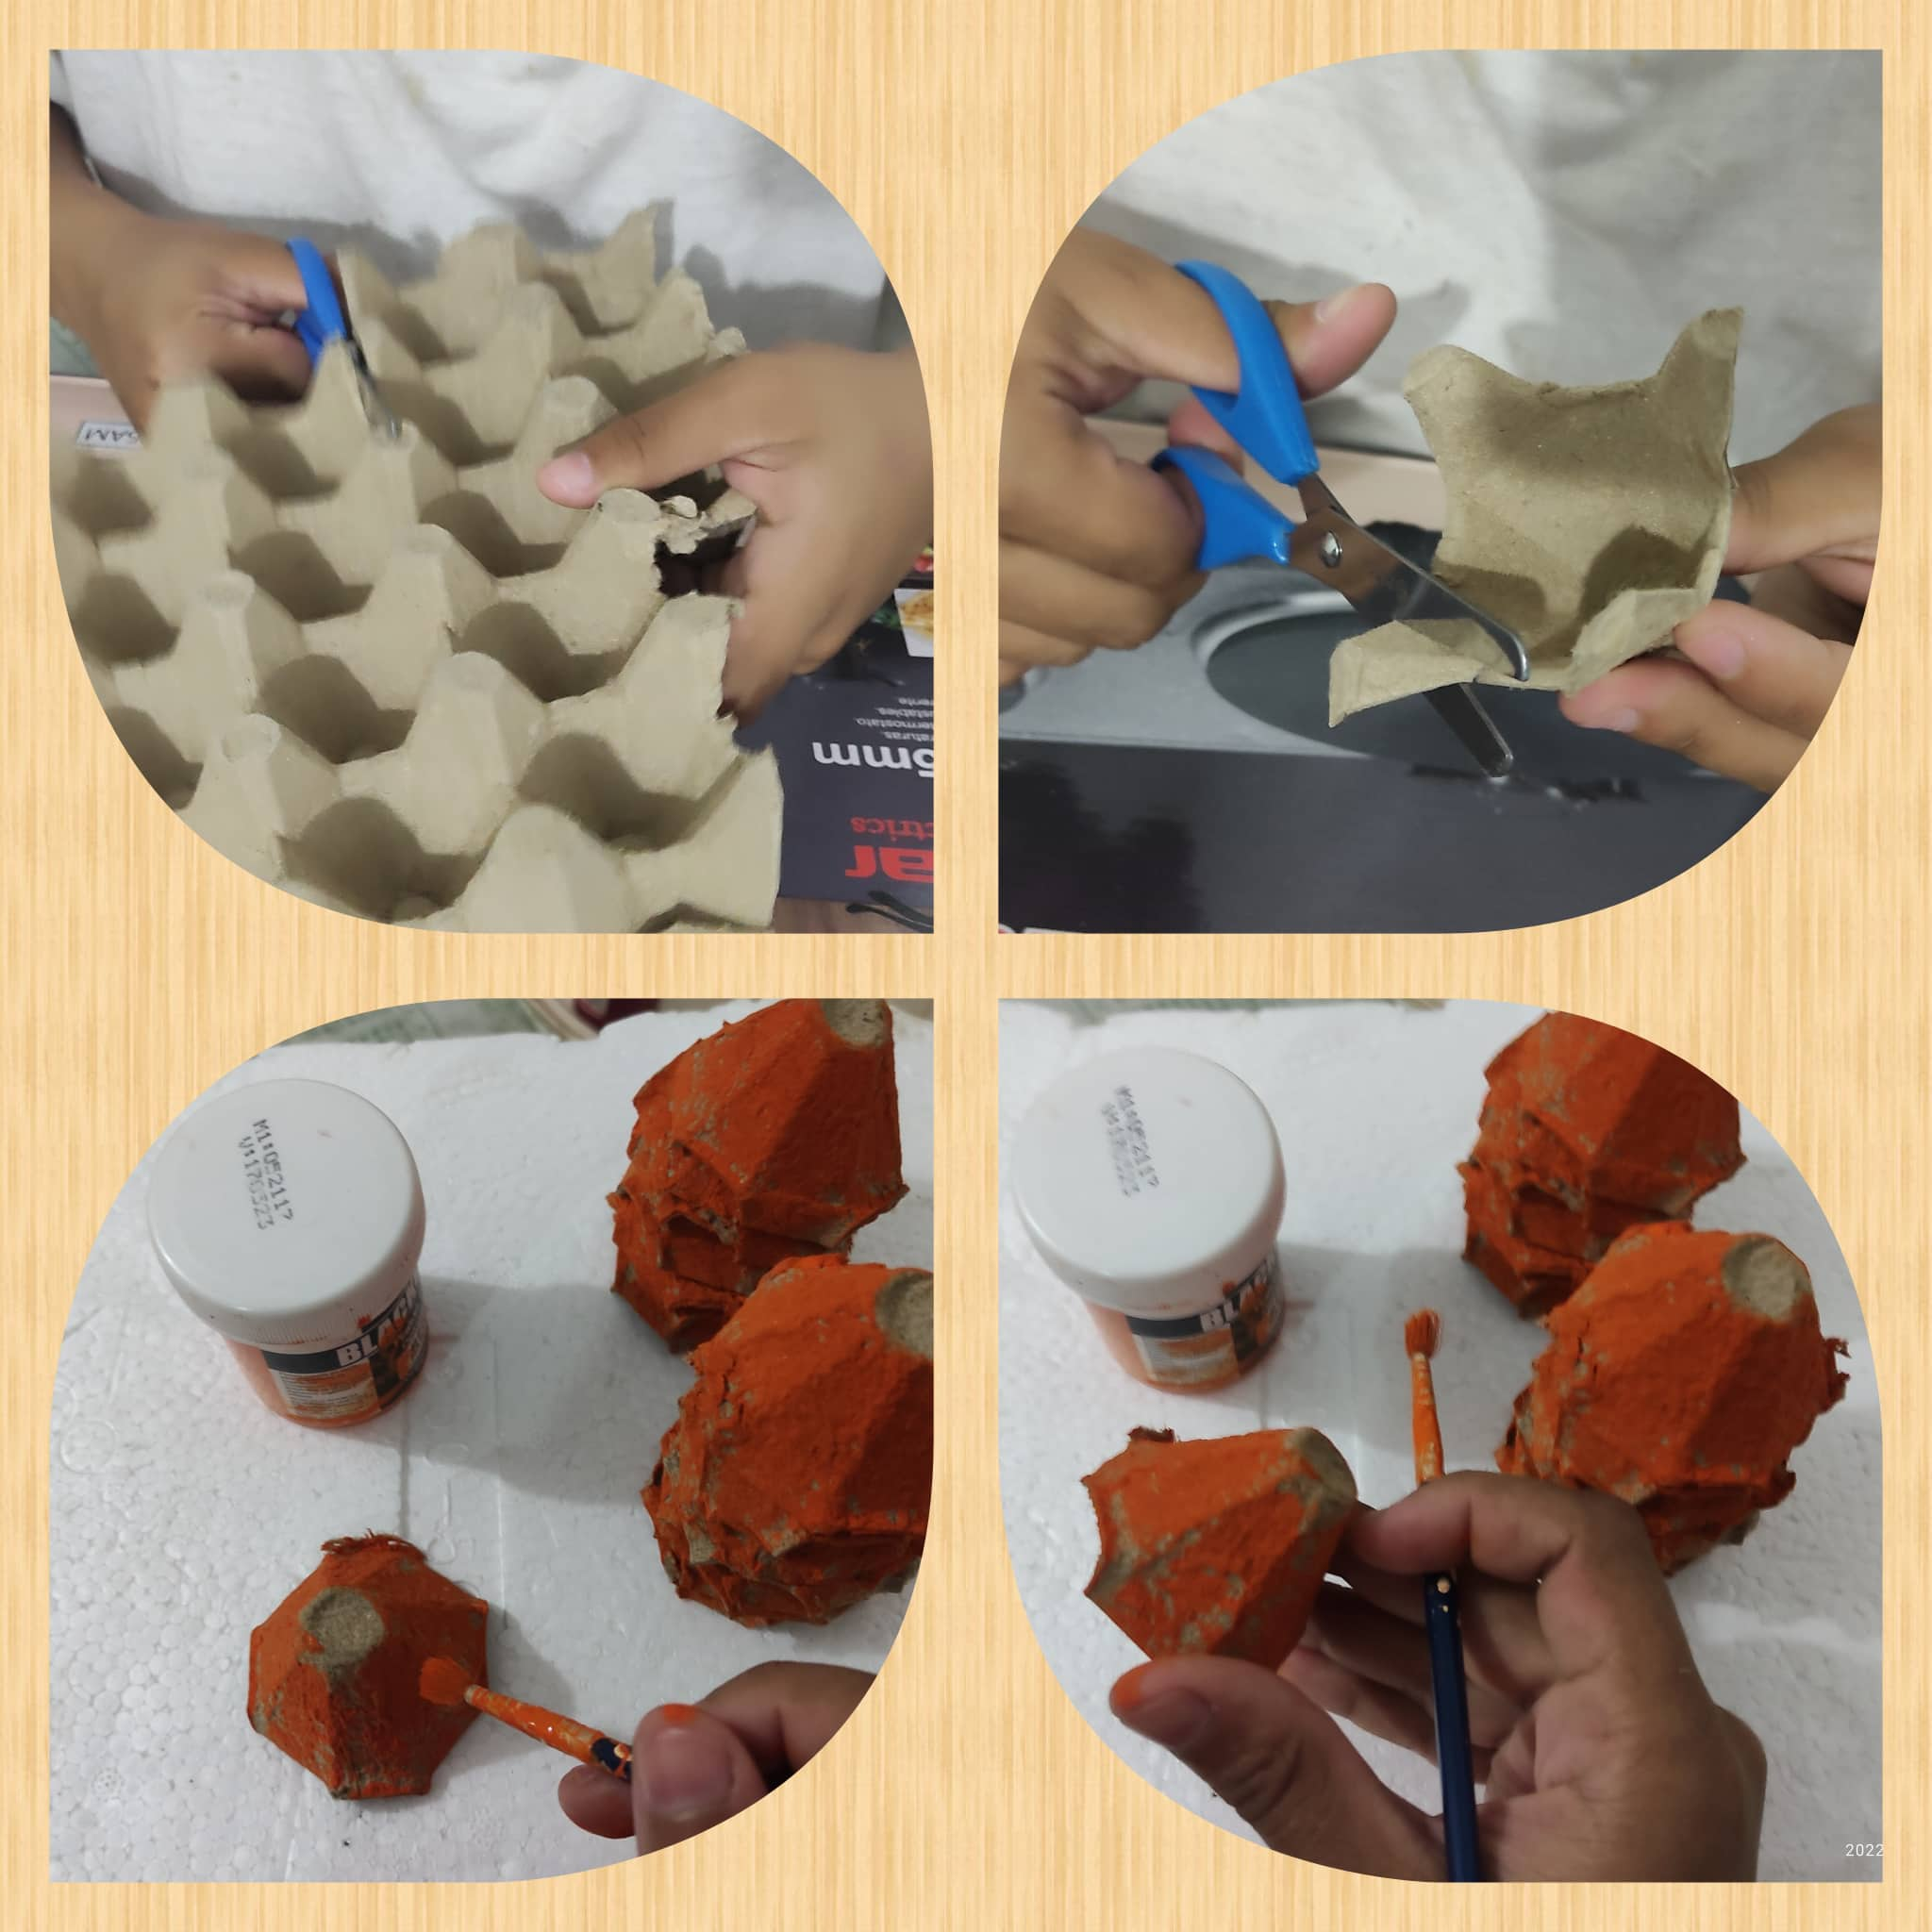
Paso 8
De esta manera, comenzaremos a pegar los cubito ya pintados en nuestra huevera, hasta cubrir completamente la base.
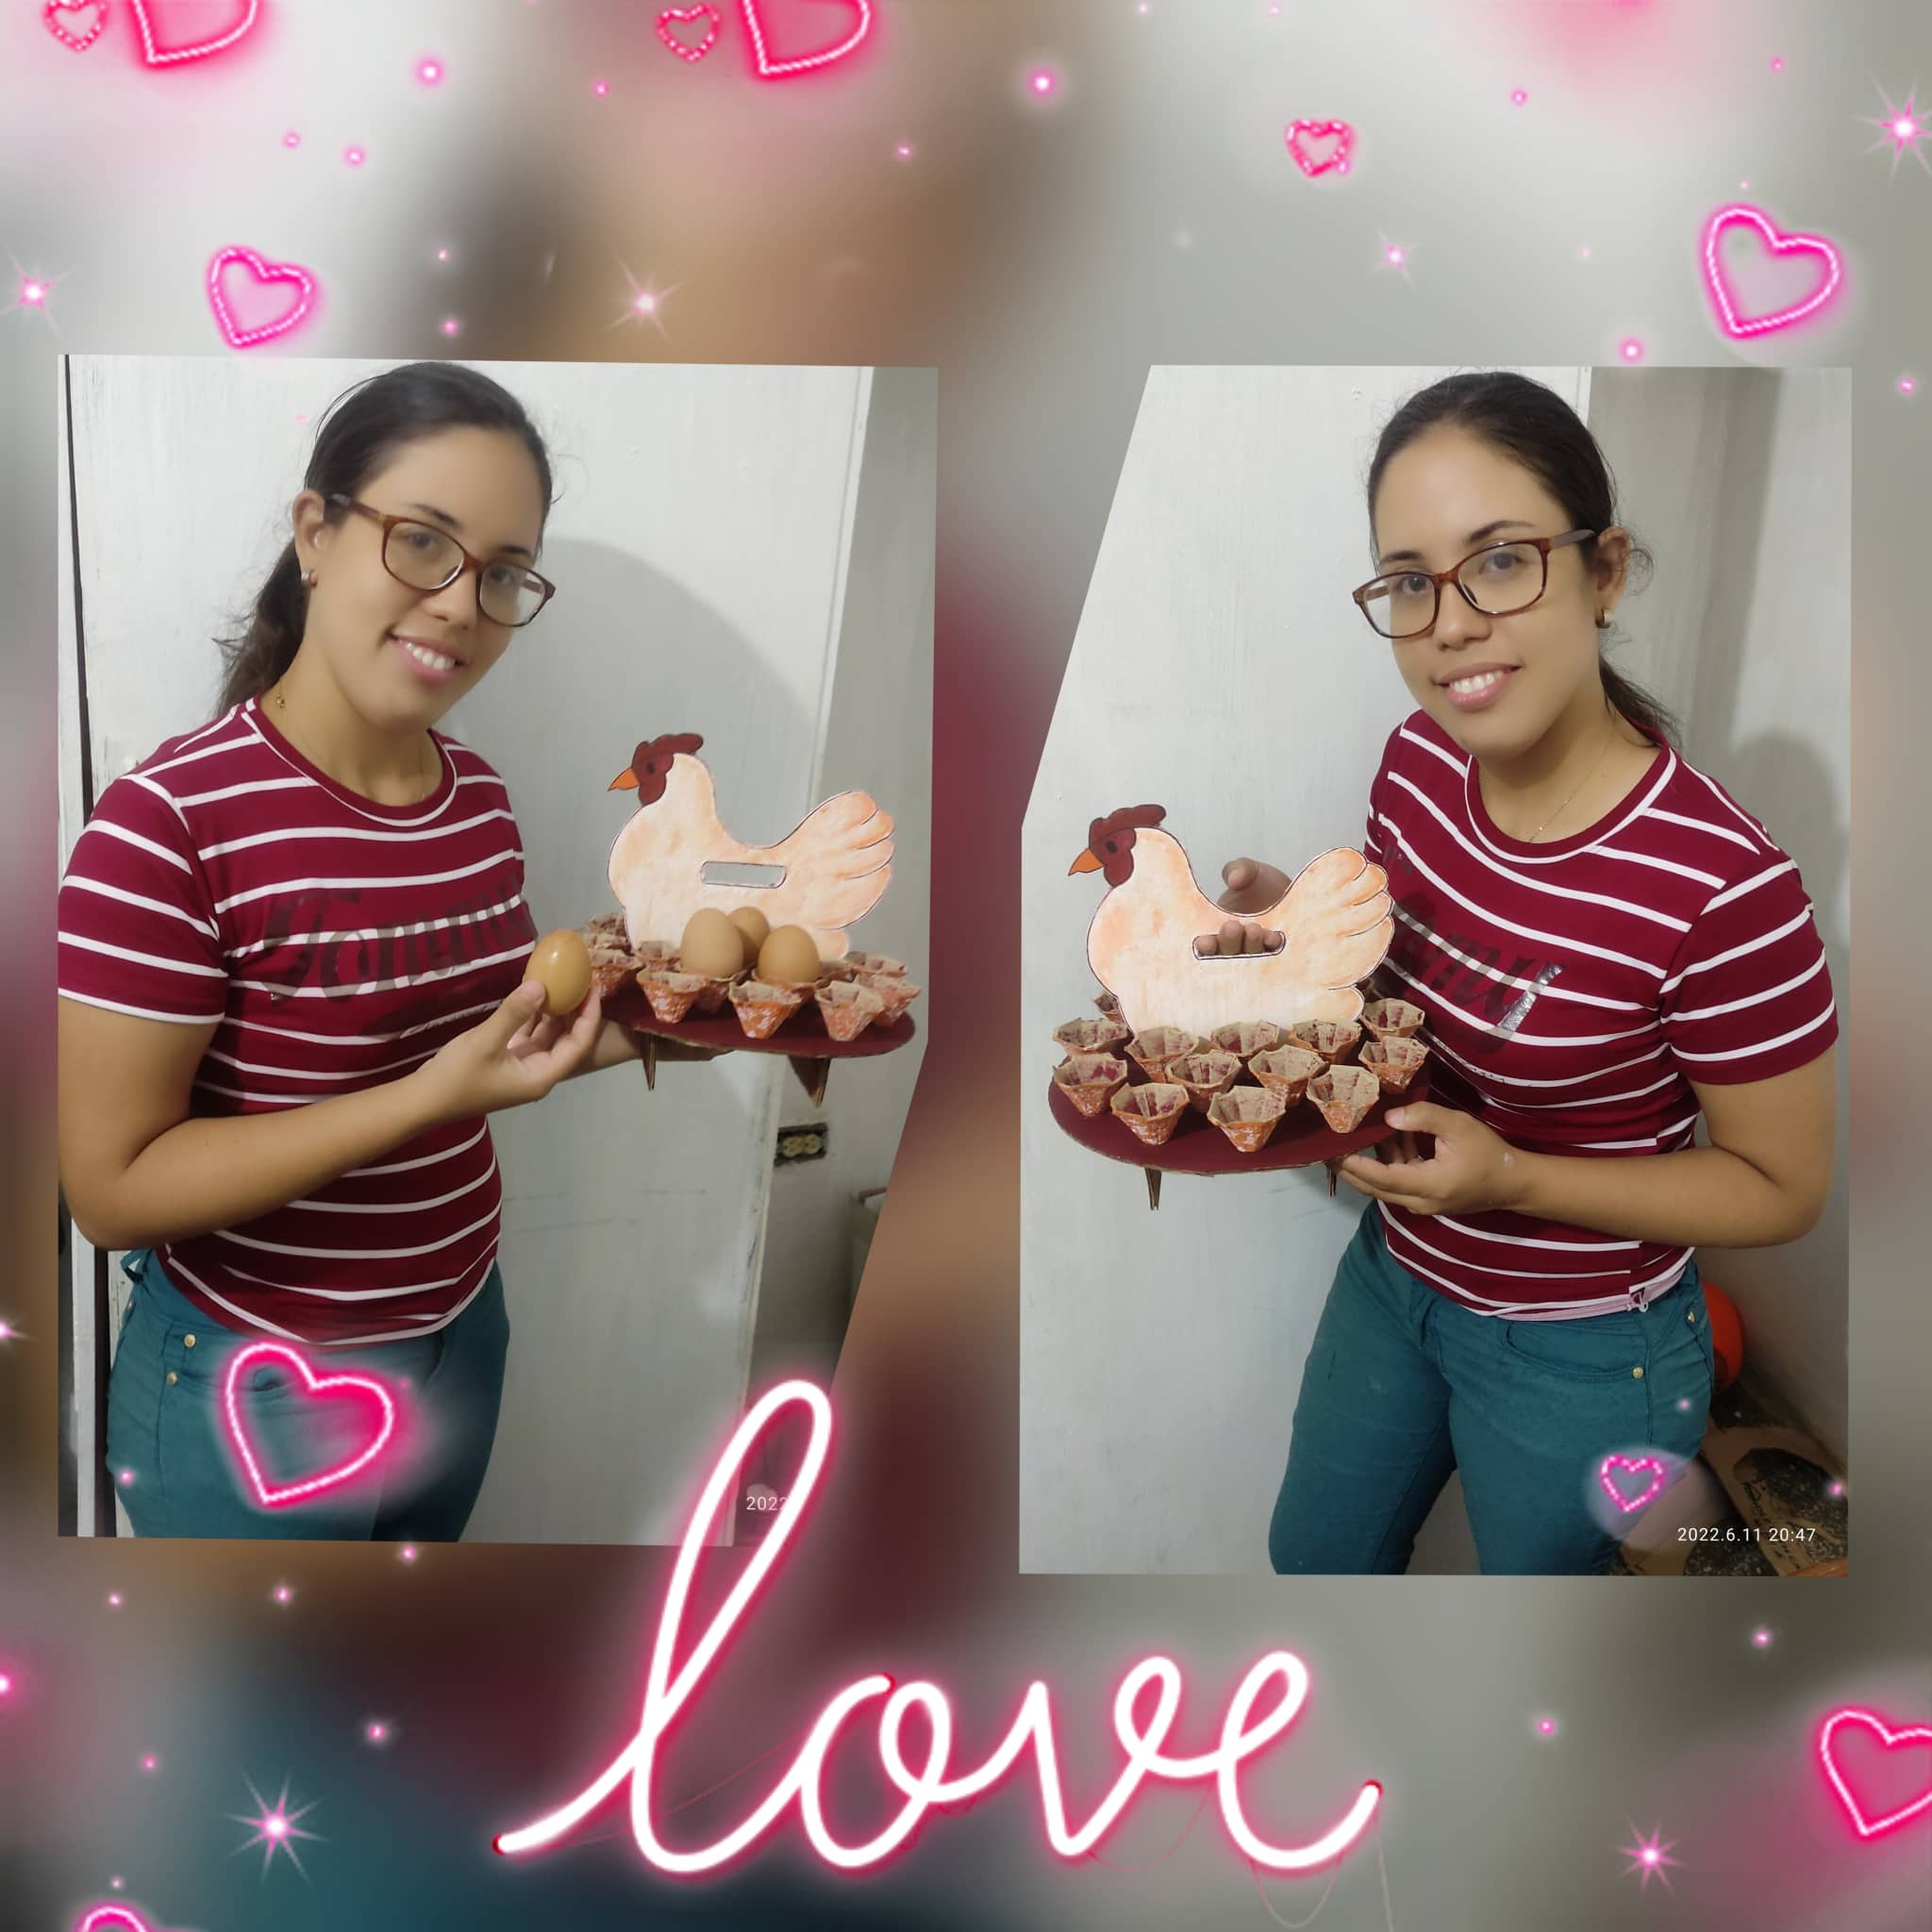
Ya finalizado estos pasos, este será el resultado de mi presentación. Las fotos son de mí autoria y fueron tomadas del teléfono de un amigo marca Poco x3.
Espero le haya gustado post, Gracias por pasar y recuerda no dudes en dejar tu comentario.
Hello, how are you, are you my dear friends from #hive? I hope you are good! Today I bring you a Super and Fun craft, I am going to teach you how to make this cute egg cup or egg holder step by step, it is very simple, it will help you a lot to decorate your home and also have a safe place for you to save your chicken postures also called eggs. I hope you like it and that you also put it into practice.
Necessary materials:
- Egg carton
- Cutter or blade
- Silicon in bar
- Paintings
- Paperboard
- Brush
- Scissors.
Paso 1
We will start by cutting our cardboard in the shape of a circle. Then in the center of the circle we make a slot and cut, it should be this way.
Paso 2
Again, we will cut two rectangles in another piece of cardboard, this will help us as a support for our egg cup and then we will glue it like this.
Paso 3
In this step, we make a drawing of a hen since it is very similar to what we are going to do. The photos show that at the bottom of our drawing there is a mini-rectangle, it is important to take this detail into account in order to cut.
Paso 4
Once the previous steps have been carried out, we proceed to glue our hen, joining the mini-rectangle of the drawing with the groove of the already elaborated base.
Paso 5
Here we will paint the base of our egg cup, leaving an oval in the upper paste of the hen, this to hold it when it is ready.
Paso 6
We continue painting and this time it will be the chicken.
Paso 7
In this step, we will cut all the cubes that the egg carton has and we will also paint them.
Paso 8
In this way, we will begin to paste the cubes already painted in our egg cup, until the base is completely covered.
Once these steps are finished, this will be the result of my presentation. The photos are my own and were taken from a friend's phone brand Poco x3.

Dear @lorimusic, we need your help!
The Hivebuzz proposal already got important support from the community. However, it lost its funding a few days ago when the HBD stabilizer proposal rose above it.
May we ask you to support it so our team can continue its work?
You can do it on Peakd, Ecency, Hive.blog or using HiveSigner.
https://peakd.com/me/proposals/199
All votes are helpful and yours will be much appreciated.
Thank you!