[Esp | Eng] Set of miyukli and macrame style bracelets
Buenas noches amigos de jewelry, tenia dias sin publicar en su comunidad no tenia algo que sintiera que realmente fuera bonito de presentar, pero esta vez hice un pequeño par de pulseras que me han gustado y quiero compartir con ustedes.
Good evening jewelry friends, I had days without posting in your community I didn't have something that I felt was really nice to present, but this time I made a small pair of bracelets that I liked and I want to share with you.
Materiales para pulsera # 1 | Materials for bracelet # 1
- 40 cm de hilo piel de serpiente
- 60 cm de hilo nylon
- Mostacillas rojas tornasoladas
- Swarovskis transparentes
- 40 cm of snakeskin thread
- 60 cm of nylon thread
- Iridescent red beads
- Transparent Swarovskis
Materiales para pulsera # 2 | Materials for bracelet # 2
- 60 cm de hilo piel de serpiente
- 60 cm de hilo nylon
- Mostacillas rojas tornasoladas
- 60 cms de hilo cola de raton
- 60 cm of snakeskin thread
- 60 cm of nylon thread
- Red iridescent beads
- 60 cm of mouse tail thread
Procedimiento | Procedure
Pulsera # 1 | Bracelet # 1
Paso 1 | Step 1
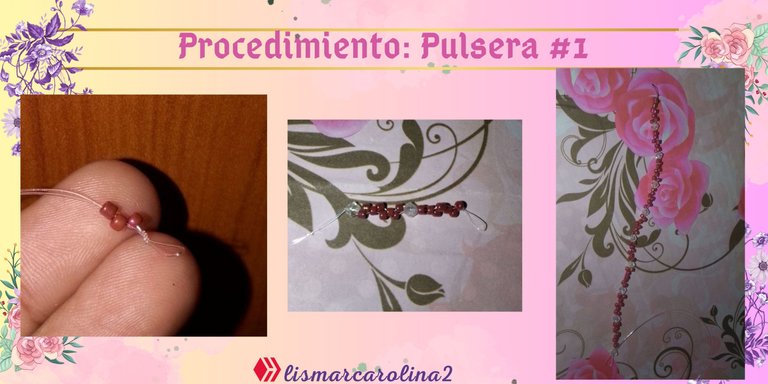
Tomamos el hilo nylon y hacemos un nudo a la mitad, dejando un pequeño ojal. Entonces nos quedará dos hilos, primero colocamos una mostacilla en cada hilo, y luego la tercera mostacilla l pasamos por los hilos nylon. Luego hacemos un nudo justo a ras, luego pasamos el cristal de sarovski y remetimos el proceso hasta llegar al largo deseado. Luego hacemos otro nudo para terminar y dejamos un ojal.
We take the nylon thread and tie a knot in the middle, leaving a small buttonhole. Then we will be left with two threads, first we place a bead on each thread, and then the third bead we pass through the nylon threads. Then we tie a knot just flush, then we pass the sarovski crystal and tuck the process until we reach the desired length. Then we tie another knot to finish and leave a buttonhole.
Paso 2 | Step 2
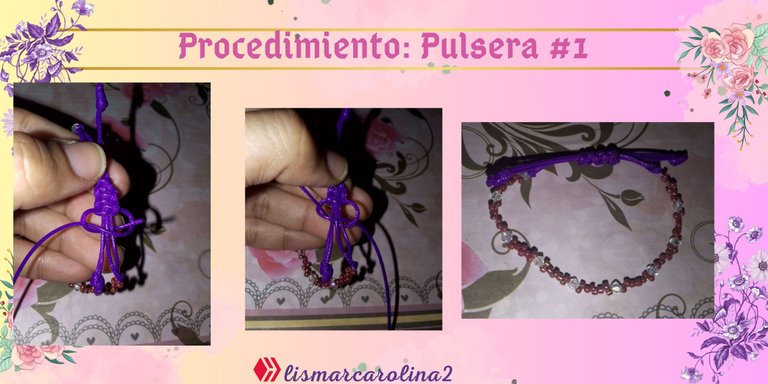
Cortamos el hilo de piel de serpiente por la mitad,hacemos un peuqeño nudo de cada lado, y hacemos un nudo al final de cada extremo de la pulsera. Y luego para cerrar hacemos un nudo plano.
Cut the snakeskin thread in half, tie a small knot on each side, and tie a knot at the end of each end of the bracelet. And then to close the bracelet we tie a flat knot.

Pulsera # 2 | Bracelet # 2
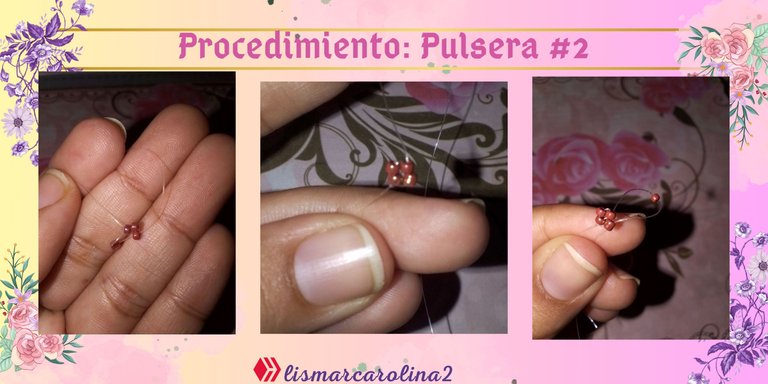
Paso 1 | Step 1
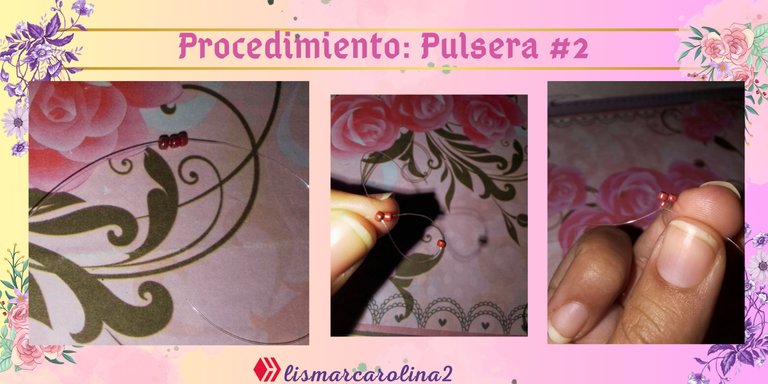
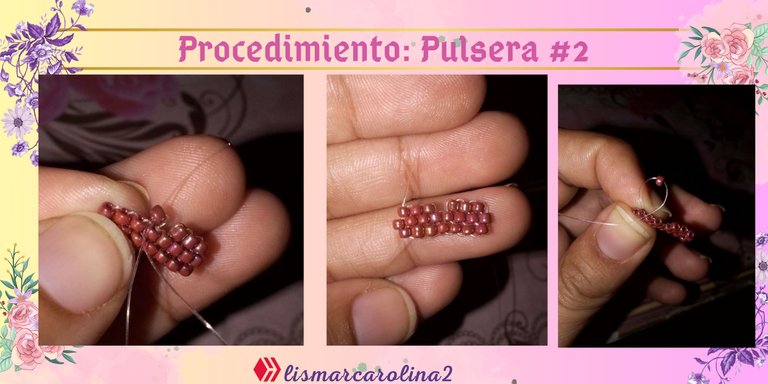
Colocamos tres mostacillas, luego pasamos el hilo desde la priemra mostacilla hasta la ultima. Luego ubicamos la mostacilla de manera que quede un tringulo invertido.
We place three beads, then we pass the thread from the first bead to the last one. Then we place the bead so that it is an inverted tringulum.
Paso 2 | Step 2
Luego, colocamos una mostacilla y pasamos el hilo por dentro de la mostacilla que ya va colocada, esta tecnica se conoce como tecnica ladrillo, precisamente por esta razon, estamos empezamos con las dos lineas mas largas del corazón.
This technique is known as brick technique, precisely for this reason, we are starting with the two longest lines of the heart.
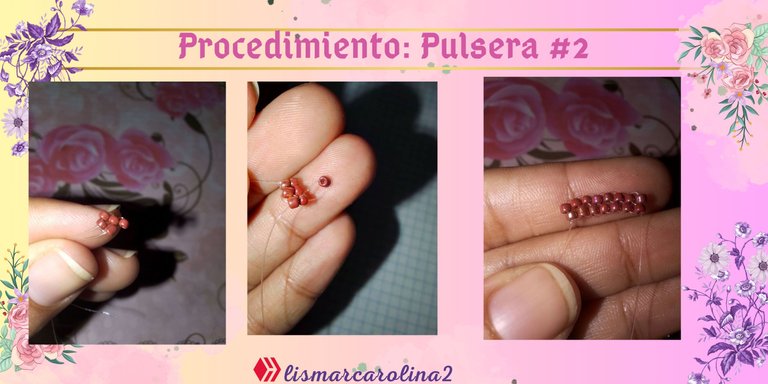
Paso 3 | Step 3
Como podemos ver en este paso, hay 8 mostacillas y mas bajo 7 mostacillas, pasamos el hilo nylon hacia arriba como se ve en la imagen. Y lo sacamos por dentro de la ultima mostacilla, colocamos una mostacilla y luego pasamos el hilo nylon a travez del tejido, no através de la mostacilla y luego pasamos el hilo por dentro de la mostacilla que acabamos de agregar.
As we can see in this step, there are 8 beads and under 7 beads, we pass the nylon thread upwards as shown in the picture. And we pull it through the inside of the last bead, we place a bead and then we pass the nylon thread through the weave, not through the bead and then we pass the thread through the bead we just added.
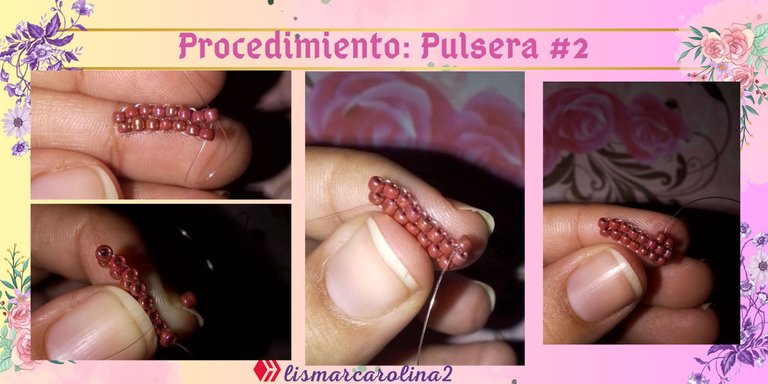
Paso 4 | Step 4
Luego colocamos tres mostacillas de la misma manera que en el paso anterior, bajamos el hilo como se ve en la imagen, formando una v pasamos el hilo por dentro de esas mostacillas y luego dejamos un espacio l¿ibre para sacarlo por la cuarta mostacilla de la linea mas larga, entonces volvemos a pasar 3 mostacillas con el mismo procedimiento que en el paso anterior.
Then we place three beads in the same way as in the previous step, we lower the thread as shown in the image, forming a v, we pass the thread inside these beads and then we leave a free space to take it out through the fourth bead of the longest line, then we pass 3 beads again with the same procedure as in the previous step.
Paso 5 | Step 5
Ahora el hilo nos esta quedando hacia arriba, asi que pasamos dos mostacillas como en el paso 3 . y volvemos a bajar el hilo nylon por dentro de las mostacillas formando una v hasta llegar al otro extremo del corazón. Y volvemos a colocar dos mostacillas como en el paso 3.
Now the thread is facing upwards, so we pass two beads as in step 3 and we go back down the nylon thread inside the beads forming a v until we reach the other end of the heart. And we return to place two beads as in step 3.
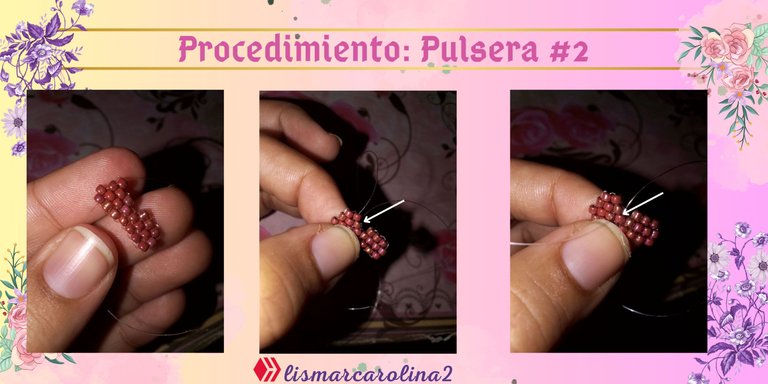

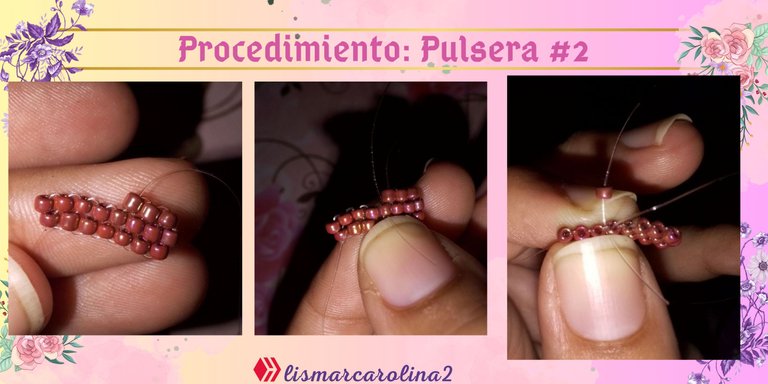
Paso 6 | Step 6
Ya en este paso podemos ver que la parte de arriba del corazón ya está formada, ya fila de abajo tiene 7 mostacillas, entonces la fila siguiente de mas abajo tendrá 6 mostacillas y asi irá reduciendose una mostacilla por fila sucesivamente.
Already in this step we can see that the top part of the coraxon is already formed. The bottom row already has 7 beads, then the next lower row will have 6 beads and so on, reducing one bead per row successively.

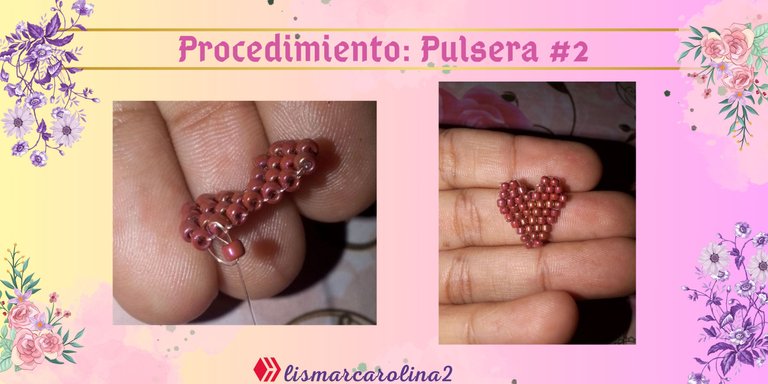
Paso 7 | Step 7
Aqui es donde podemos ver a mas detalle como es que se pasa el hilo, primero colcoamos la mostacilla, luego pasamos el hilo a través del tejido y luego sacamos el hilo por dentro de la mostacilla que acabamos de colocar. Ya lo que sigue es colocar unos pequeños aros en la mostacilla que este al extremo de la fila mas larga del corazón , cortar la cola de ratón por la mitad pasarla por los aros y quemar la cola de ratón de manera que los extremos queden pegados.
Here is where we can see in more detail how the thread is passed, first we place the bead, then we pass the thread through the fabric and then we pull the thread through the inside of the bead we just placed. The next step is to place some small rings on the beads at the end of the longest row of the heart, cut the mouse tail in half, pass it through the rings and burn the mouse tail so that the ends are glued together.
Paso 8 | Step 8
Lo siguiente es hacer un nudo con la piel de serpiente y pasarla a traves de la cola de ratón. Hacemos nudos al final y para el cierre hacemos un nudo plano.
The next thing is to make a knot with the snakeskin and pass it through the mouse tail. We make knots at the end and for the closure we make a flat knot.
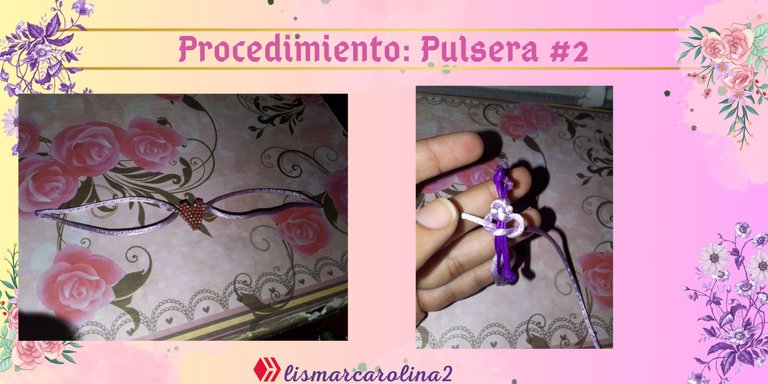
Resultado | Result
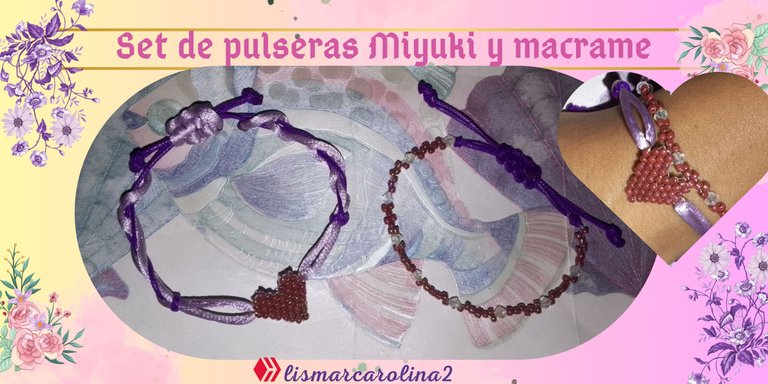
Asi es como quedan estas preciosas pulseras, me encantaron el color, espero les haya gustado.
This is how these beautiful bracelets look like, I loved the color, I hope you liked it.


Y como siempre gracias por leer mi posts
And as always thanks for reading my posts
No te detengas, no dejes de creer en ti y de buscar ideas y opciones para salir adelante.
Don't stop, don't stop believing in yourself and looking for ideas and options to get ahead.
Créditos | Credits
Utilicé Canva para editar imágenes y personalicé un poco una plantilla de Canva.
I used Canva to edit images and customize a Canva template a bit.
Utilicé https://www.deepl.com/es/translator para la traducción
I used https://www.deepl.com/es/translator to traduction.
Las imagenes son propias.
The images are my own.
https://inleo.io/threads/lismarcarolina2/re-leothreads-29pvjmxji
The rewards earned on this comment will go directly to the people ( lismarcarolina2 ) sharing the post on LeoThreads,LikeTu,dBuzz.
Te quedó realmente bonito. El corazón es el foco del set, aún así, todo el conjunto luce muy lindo.
Gracias por tu comentario❤️
Me gusto mucho como te quedo el corazón.. Felicidades..💗
Gracias amiga
¡Enhorabuena!
✅ Has hecho un buen trabajo, por lo cual tu publicación ha sido valorada y ha recibido el apoyo de parte de CHESS BROTHERS ♔ 💪
♟ Te invitamos a usar nuestra etiqueta #chessbrothers y a que aprendas más sobre nosotros.
♟♟ También puedes contactarnos en nuestro servidor de Discord y promocionar allí tus publicaciones.
♟♟♟ Considera unirte a nuestro trail de curación para que trabajemos en equipo y recibas recompensas automáticamente.
♞♟ Echa un vistazo a nuestra cuenta @chessbrotherspro para que te informes sobre el proceso de curación llevado a diario por nuestro equipo.
🥇 Si quieres obtener ganancias con tu delegacion de HP y apoyar a nuestro proyecto, te invitamos a unirte al plan Master Investor. Aquí puedes aprender cómo hacerlo.
Cordialmente
El equipo de CHESS BROTHERS
Te ha quedado muy bonita la pulsera
Gracias