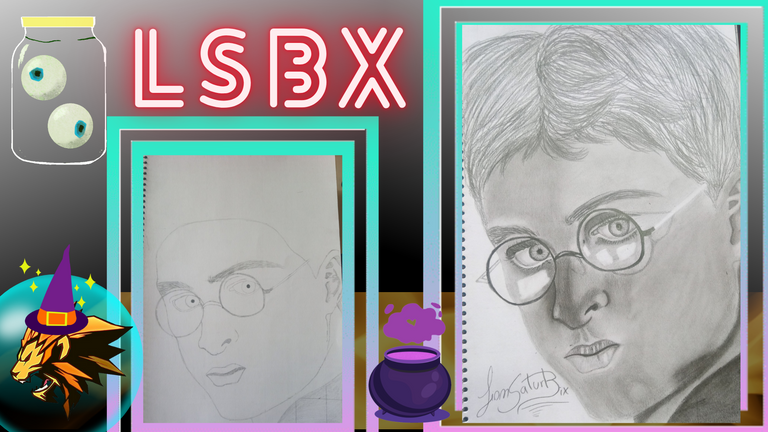
What would harry potter female version look like? / (ENG/ESP)

Bienvenidos mis queridos amigos amantes del arte y artista.
El día de hoy les vengo a compartir un dibujo que he creado con lápices de grafito 2B y 6B, esta vez no le traigo algo común como en la mayoría de mis dibujos, sino que estoy practicando para pasar una imagen de un hombre a la de una mujer o viceversa, por lo que he querido experimentar primero con uno de mis actores favoritos de la película Harry Potter (Daniel Radcliffe).
La verdad el resultado fue un poco extraño, aunque me divertí mucho en el proceso, espero que les guste.
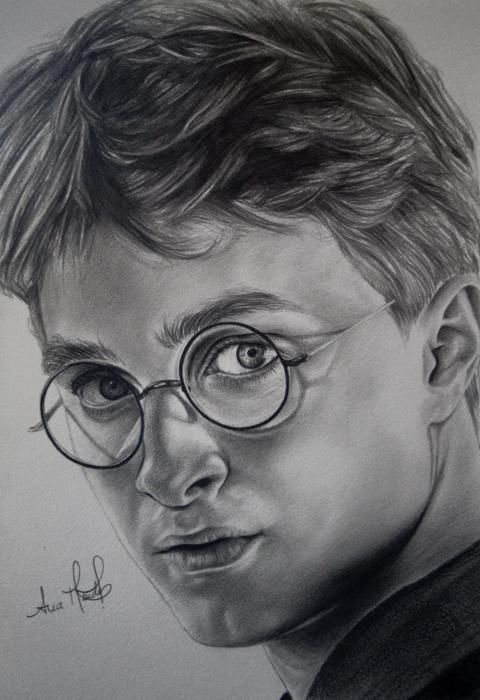
Al igual que en la mayoría de mis dibujos, las imágenes que utilizo en referencia son sacados de una gran página de ideas y diseños llamada Pinterest.
Welcome my dear art lovers and artist friends.
Today I come to share with you a drawing that I created with 2B and 6B graphite pencils, this time I'm not bringing you something common as in most of my drawings, but I'm practicing to pass an image of a man to a woman or vice versa, so I wanted to experiment first with one of my favorite actors from the movie Harry Potter (Daniel Radcliffe).
Truth be told the result was a bit strange, although I had a lot of fun in the process, I hope you like it.
As in most of my drawings, the images I use in reference are taken from a great page of ideas and designs called Pinterest.
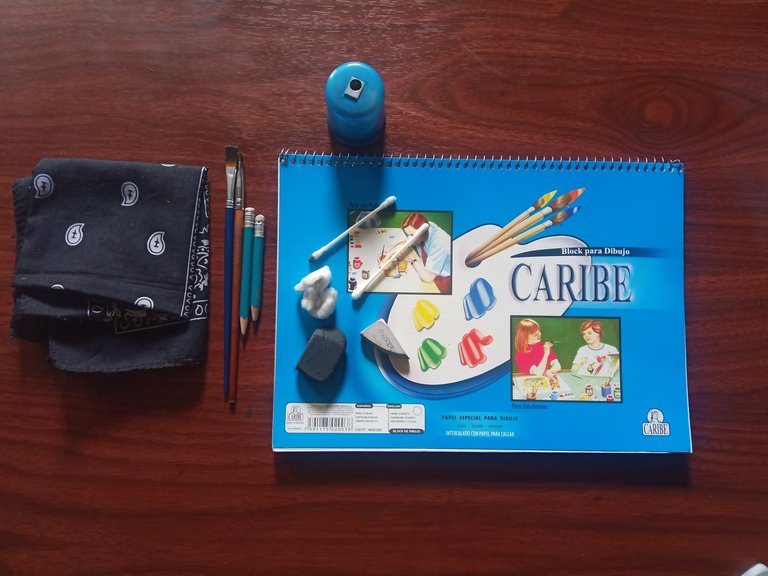
Los materiales que vamos a necesitar para elaborar nuestro dibujo son los siguientes:
*Un bloc de dibujo marca Caribe.
*Lápiz de grafito 2B y 6B
*Sacapuntas con depósito.
*Borrador.
*Pañuelo.
*Regla.
*Algodón.
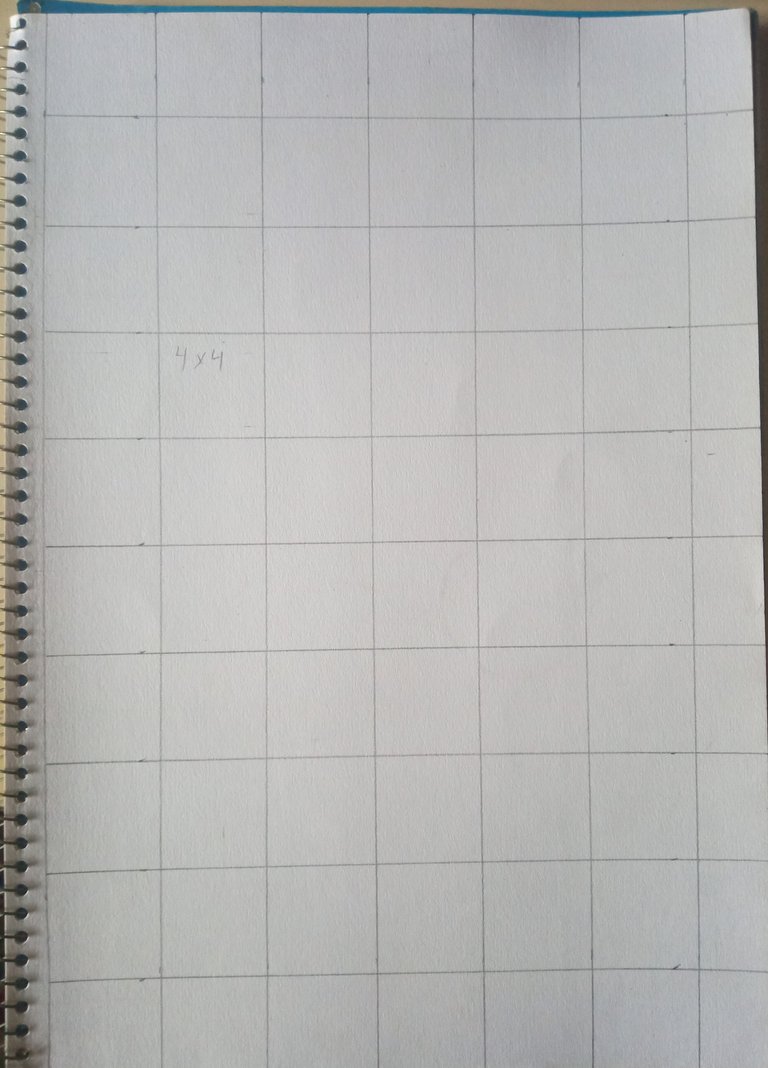
Para comenzar a trabajar en mi dibujo, primero comencé a crear una serie de líneas guías llamadas cuadrícula, en la que tienen un tamaño de 4 centímetros por 4, estas líneas me ayudaran a que todo mi dibujo no quede desproporcionado, es muy útil a la hora de dibujar rostros grandes como en este caso.
The materials that we are going to need to elaborate our drawing are the following:
*A Caribe sketch pad.
*2B and 6B graphite pencils.
*Pencil sharpener with reservoir.
*Pencil eraser.
*Handkerchief.
*Ruler.
*Cotton.
To start working on my drawing, first I began to create a series of guide lines called grid, which have a size of 4 centimeters by 4, these lines will help me that all my drawing is not disproportionate, it is very useful when drawing large faces as in this case.
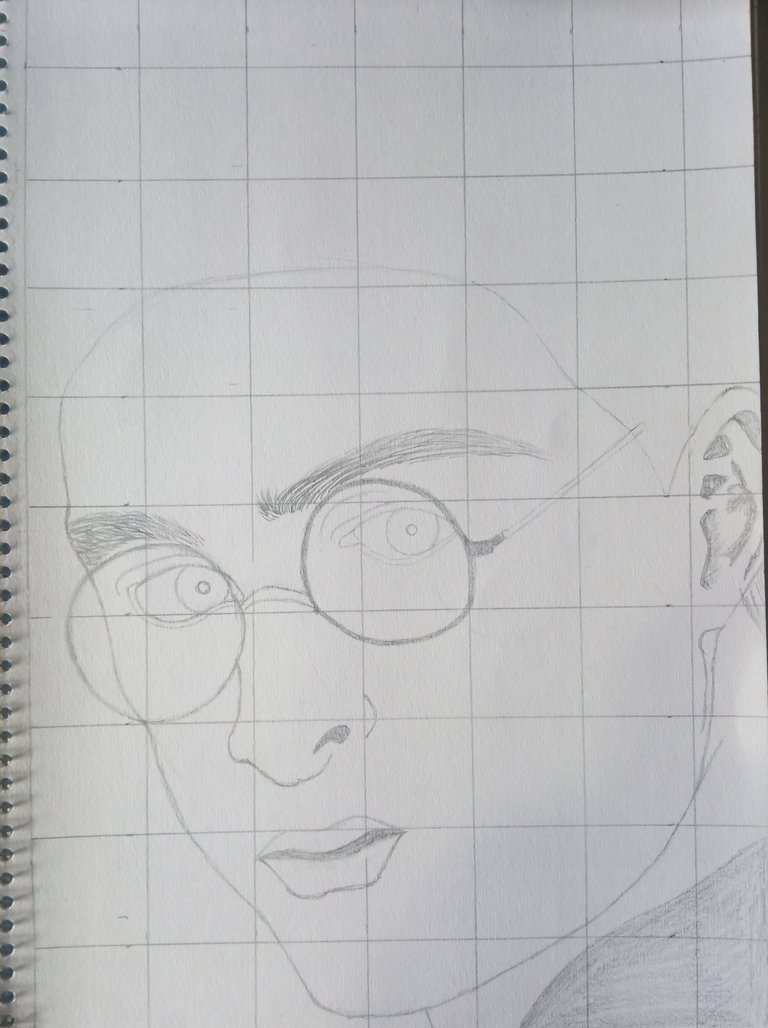
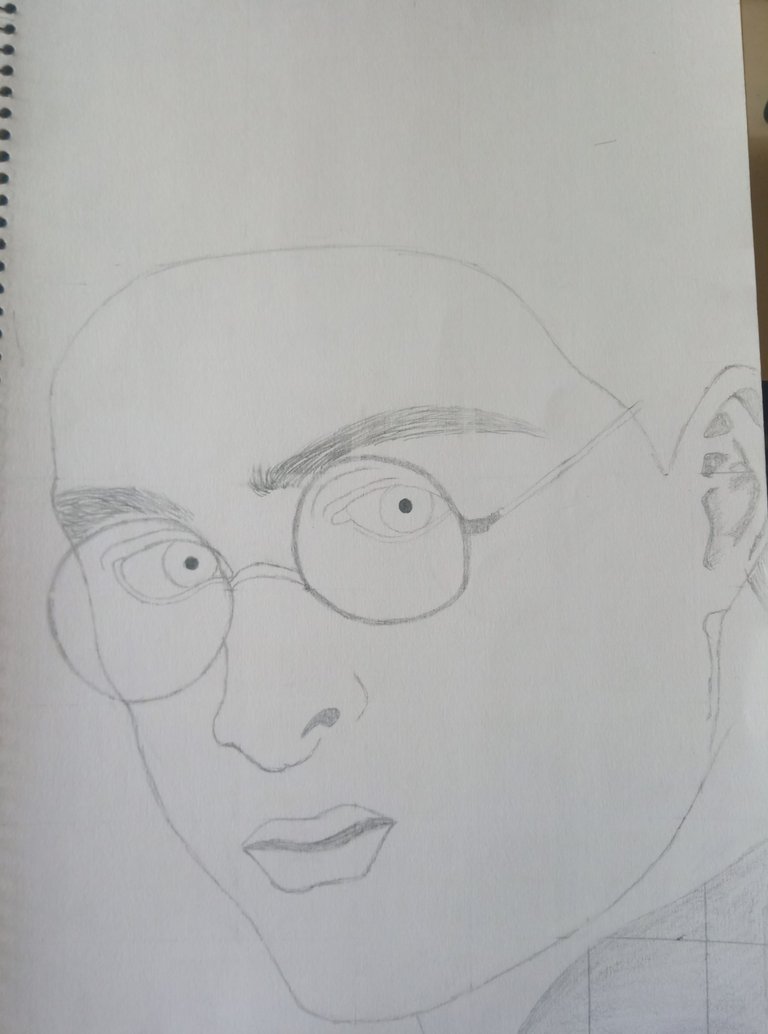
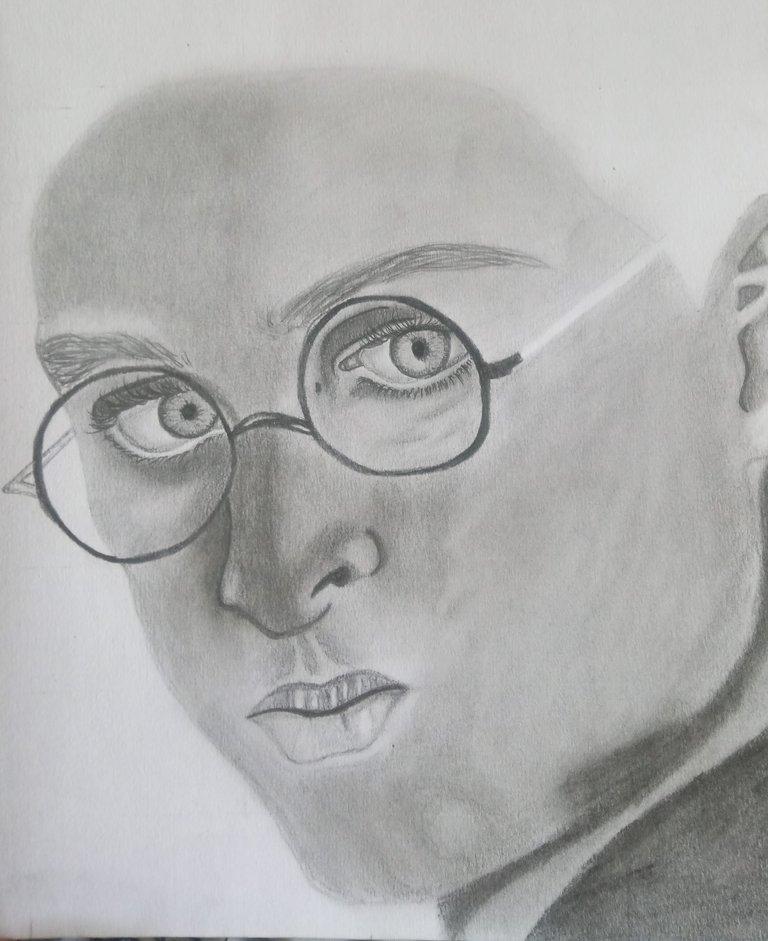
Posteriormente, comencé a agregar el rostro de nuestro personaje, podemos notar codo queda en perfecta posición, la única parte que me costó un poco hacerla es la de los lentes, como el rostro está en una posición ¾, tenía que darle el efecto a los lentes para que quedara con un poco de inclinación.
Luego comencé a borrar todas las líneas que usé como guía para crear el rostro, en necesario eliminarlas, ya que de lo contrario cuando comencemos a valorizar nuestro dibujo, se notaran y arruinara nuestro dibujo, esto se los menciono por experiencia propia amigos, una vez hice esto y vaya que me arruino todo el dibujo, por lo que tuve que volverlo hacer una vez más.
Later, I started to add the face of our character, we can notice the elbow is in perfect position, the only part that cost me a little to do it is the glasses, as the face is in a ¾ position, I had to give the effect to the glasses so that it was with a little inclination.
Then I started to erase all the lines that I used as a guide to create the face, it is necessary to eliminate them, otherwise when we start to value our drawing, they will be noticed and ruin our drawing, I mention this from my own experience friends, once I did this and it ruined the whole drawing, so I had to do it once again.
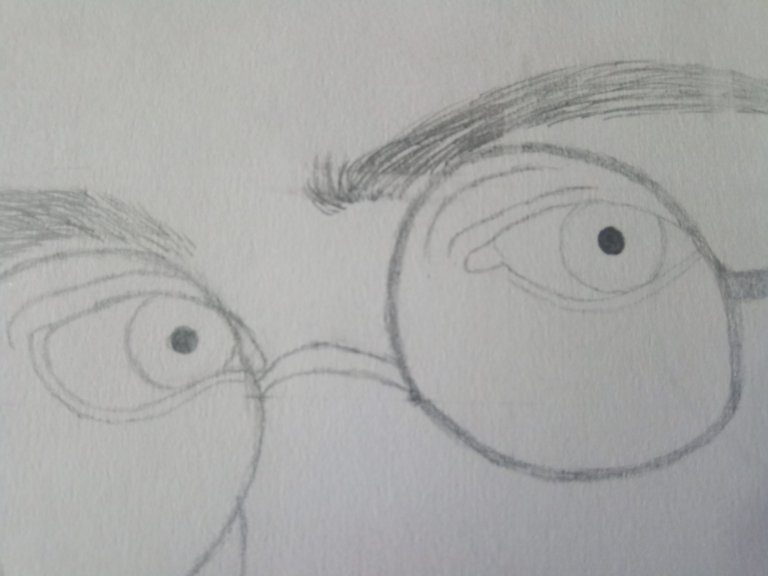
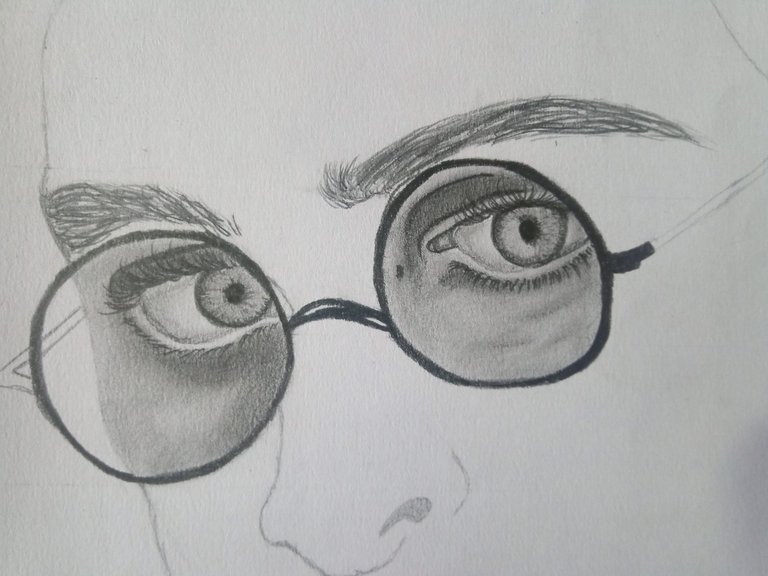
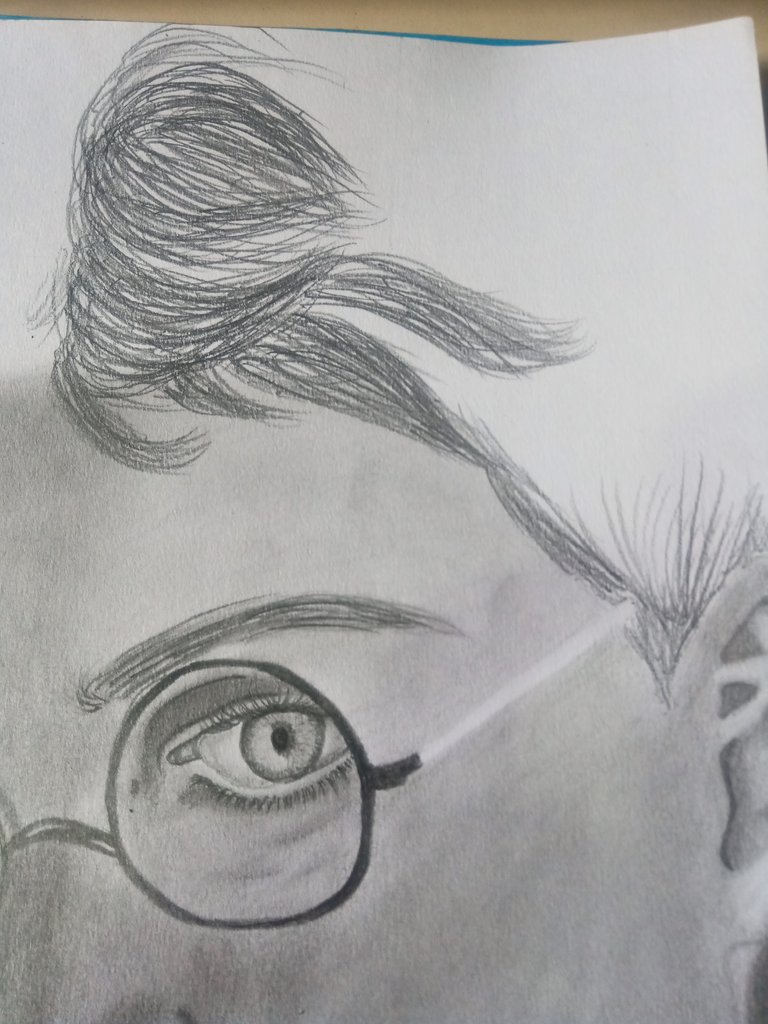
Luego de haber eliminado las líneas guías, ahora mi siguiente paso es valorizar, por lo que primero comencé con los ojos.
Primero le agregué una primera capa de valorizado a las zonas donde se encuentran ambos ojos, también remarque un poco los lentes con la ayuda de un lápiz 6B, también le agregue la otra parte que sostiene los lentes, ya que anteriormente no se lo había agregado.
También remarque con el mismo lápiz las partes donde están las rugosidades de los ojos, luego los difumine con la ayuda de un pincel, dicho pincel debe tener la punta lo suficientemente fuerte para poder lograr este difuminado, no quería usar un algodón porque de usarlo me mancharía el resto del dibujo, cosa que no quería que sucediera, la mirada tiene que ser como la de una mujer, por lo que trate en lo posible de lograr este efecto.
After having eliminated the guide lines, now my next step is to valorize, so first I started with the eyes.
First I added a first layer of valorized to the areas where both eyes are, I also remarked a little bit the lenses with the help of a 6B pencil, I also added the other part that holds the lenses, since previously I had not added it.
I also remarked with the same pencil the parts where are the roughness of the eyes, then I blurred them with the help of a brush, this brush must have the tip strong enough to achieve this blurring, I did not want to use a cotton because if I used it I would stain the rest of the drawing, which I did not want to happen, the look has to be like that of a woman, so try as much as possible to achieve this effect.
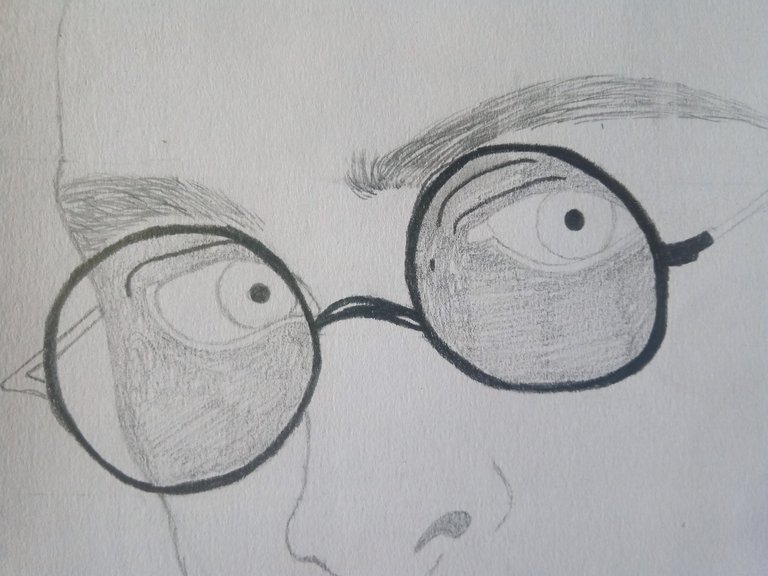
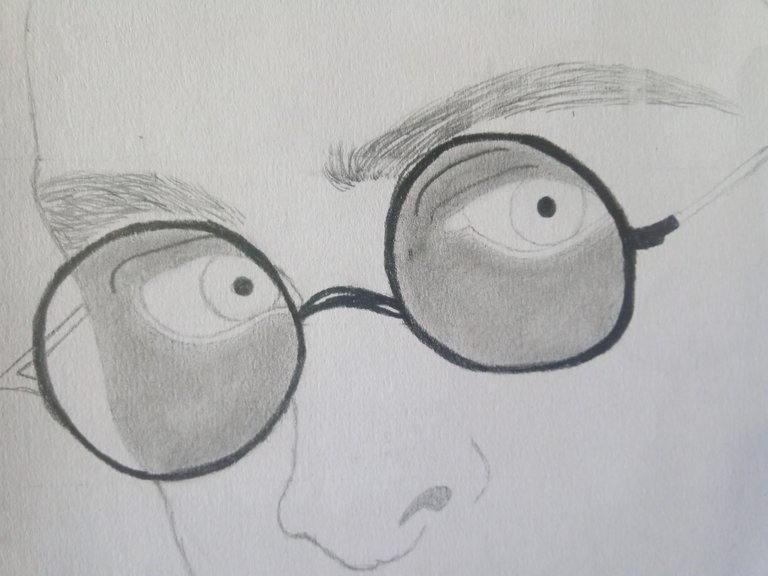
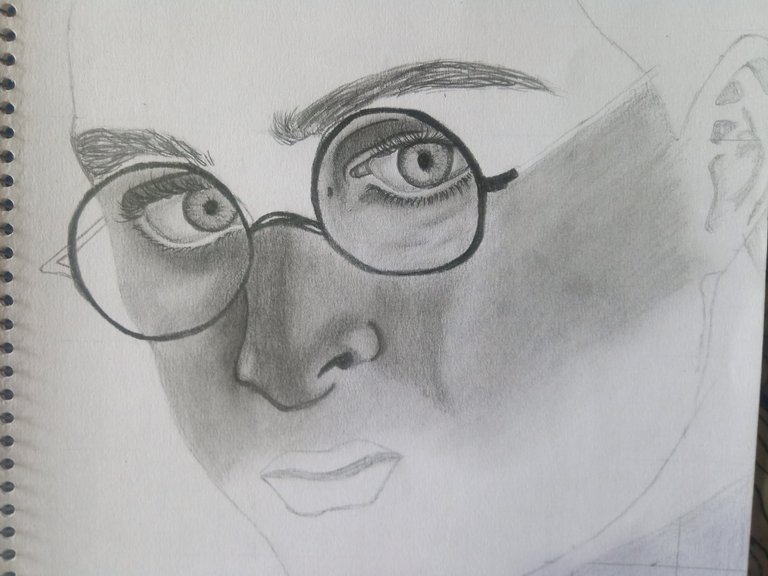
Posteriormente, comencé a darle más profundidad a las rugosidades de los ojos para hacerla lo más realista posible, por la parte donde están las pestañas inferiores de los ojos tenemos que dejar un pequeño espacio para poder crear esa separación, porque las pestañas no están del todo cerca de los ojos.
Luego comencé a valorizar la parte donde se encuentra la nariz y un poco las mejillas, primero comencé dándole una primera capa con la ayuda de mi lápiz 2B, luego lo difumine con la ayuda de un pincel, luego de este use el algodón para terminar de rellenar los poros de la hoja, después use el lápiz 6B para oscurecer las partes donde se encuentra la sombra de la nariz y de la inclinación del rostro.
Afterwards, I started to give more depth to the roughness of the eyes to make it as realistic as possible, in the part where the lower lashes of the eyes are we have to leave a little space to create that separation, because the lashes are not quite close to the eyes.
Then I started to enhance the part where the nose is and a little bit the cheeks, first I started giving it a first layer with the help of my 2B pencil, then I blurred it with the help of a brush, after this I used the cotton to finish filling the pores of the sheet, then I used the 6B pencil to darken the parts where the shadow of the nose and the inclination of the face are.
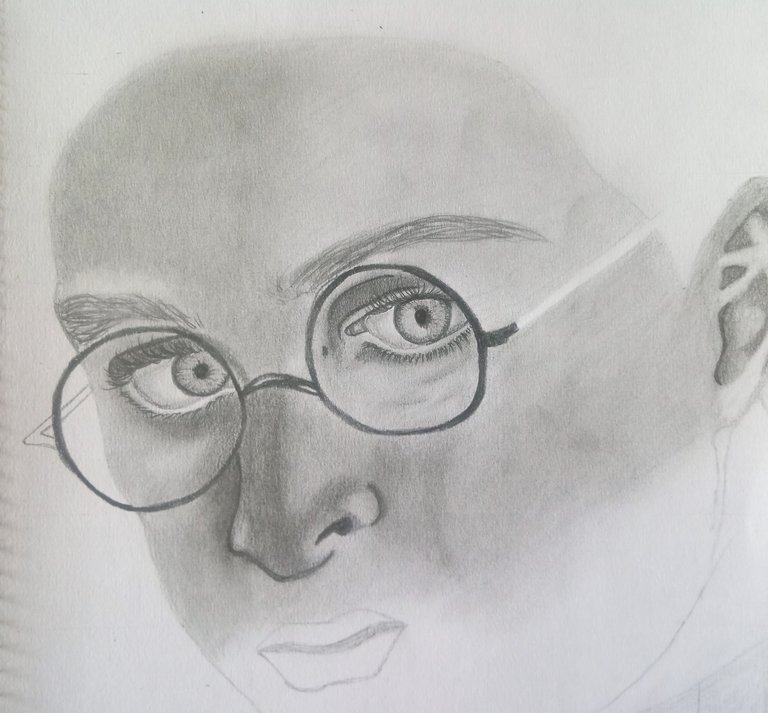
Posteriormente, comencé a trabajar en la parte superior del rostro, aplique la misma técnica de antes, con el lapiz 2B valorice la frente creando una primera capa, luego lo difumine con él pincel y el algodón.
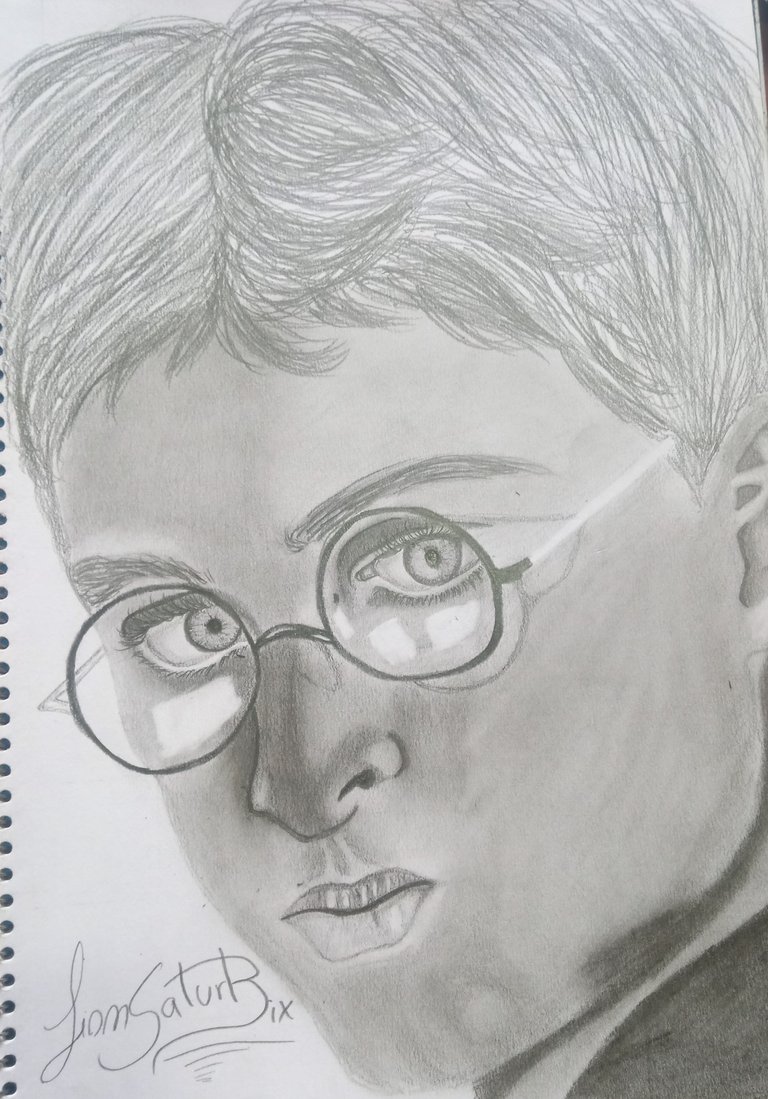
Luego comencé a trabajar con al parte inferior del rostro aplicando la misma técnica, honestamente he tenido muchos problemas con el valorizado de los labios, porque no me gusto para nada como me quedo en el dibujo, lo hace lucir como un poco odioso, pero tengo fe en que en algún momento podre dominar el valorizado de los labios.
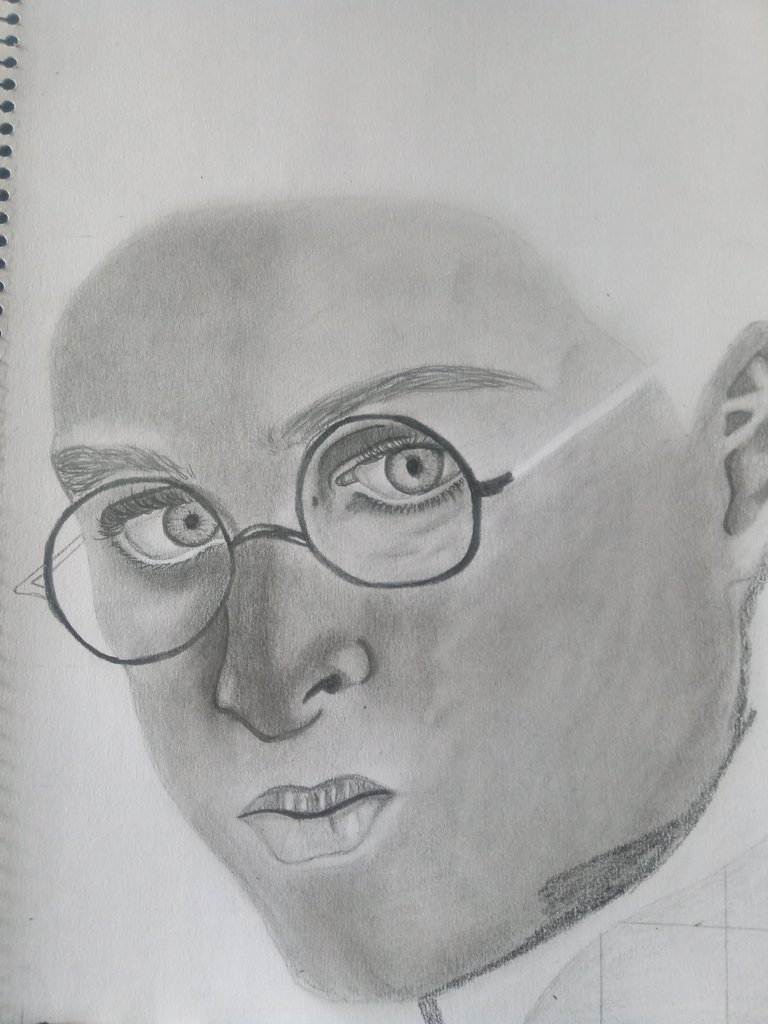
Más adelante trabaje con la parte del cuello, y por último en el cabello, para poder hacer este cabello tuve que usar mi lápiz 6B para crear trazos de diferentes formas y tamaños para lograr un cabello un poco sencillo, pero por mucho que lo aparente, hacer este cabello tampoco es fácil, también estoy probando otros estilo de cabello para así mejorar más en mi técnica.
La verdad me dio un poco de riza el resultado final, ya que mi experimento en pasar un rostro masculino a uno femenino fue muy interesante, creo que lo logre, aunque tengo que practicar un poco más, de verdad que disfrute mucho haciendo este dibujo.
Este personaje me quedo un poco odioso, tengo que admitirlo, jajaja
Recuerden esta frase, no es necesario ser un gran maestro para lograr ser un gran artista, palabras sabias de un buen amigo que quizás muchos conozcamos.
Las fotos fueron tomadas con la ayuda de mi teléfono Bison X Designed By Umidigi.
La imagen de referencia se encuentra en la parte inferior de este texto, debajo de ella podrán encontrar la fuente de la misma, el cual los llevara a la página que utilizo para encontrar las imágenes en referencia que uso para dibujar.
Y Así finaliza la publicación de hoy amigos, espero les sea de su agrado y que hayan aprendido algo nuevo el día de hoy con mi publicación, hasta la próxima.
Then I started to work on the upper part of the face, I applied the same technique as before, with the 2B pencil I highlighted the forehead creating a first layer, then I blurred it with the brush and the cotton.
Then I started to work with the lower part of the face applying the same technique, honestly I have had a lot of problems with the lip enhancement, because I don't like at all how it looks in the drawing, it makes it look a little bit hateful, but I have faith that at some point I will be able to master the lip enhancement.
Later I worked with the neck part, and finally on the hair, to make this hair I had to use my 6B pencil to create strokes of different shapes and sizes to achieve a hair a little simple, but as much as it seems, making this hair is not easy either, I am also trying other hair styles to improve more in my technique.
The truth is that the final result gave me a little bit of curl, since my experiment in changing a male face to a female one was very interesting, I think I did it, although I have to practice a little more, I really enjoyed doing this drawing.
This character was a little bit hateful, I have to admit it, hahaha.
Remember this phrase, it is not necessary to be a great teacher to be a great artist, wise words of a good friend that maybe many of us know.
The pictures were taken with the help of my Bison X Designed By Umidigi phone.
The reference image is at the bottom of this text, below it you can find the source of it, which will take you to the page I use to find the reference images I use to draw.
And so ends today's publication friends, I hope you like it and that you have learned something new today with my publication, until next time.

Source / Fuente Castle of Castlevania
Source / Fuente Terra Blade of Terraria
Los separadores son de mi autoría, la imagen de referencia tiene su fuente, las ediciones del GIF son creados por mí.
The separators are of my authorship, the reference image has its source, the GIF edits are created by me.
Programas que utilicé para crear mi diseño es este:
This is the program I used to create my design:
Gif y portada cortesía de Canva
Gif and cover courtesy of Canva
Traducido por Deepl


Estás mejorando en la técnica del rostro, necesitas más práctica con el cabello, se que lo lograrás.
Gracias, siempre trato de dar lo mejor de mi en cada publicación.
¡Felicidades! Esta publicación obtuvo upvote y fue compartido por @la-colmena, un proyecto de Curación Manual para la comunidad hispana de Hive que cuenta con el respaldo de @curie.
Si te gusta el trabajo que hacemos, te invitamos a darle tu voto a este comentario y a votar como testigo por Curie.
Si quieres saber más sobre nuestro proyecto, acompáñanos en Discord: La Colmena.
Your content has been voted as a part of Encouragement program. Keep up the good work!
Use Ecency daily to boost your growth on platform!
Support Ecency
Vote for new Proposal
Delegate HP and earn more
Congratulations @lionsaturbix! You have completed the following achievement on the Hive blockchain and have been rewarded with new badge(s):
Your next target is to reach 70000 upvotes.
You can view your badges on your board and compare yourself to others in the Ranking
If you no longer want to receive notifications, reply to this comment with the word
STOPCheck out the last post from @hivebuzz:
Support the HiveBuzz project. Vote for our proposal!
El súper Harry te quedo calidad.
gracias amigo
Beautiful drawing
thanks dude