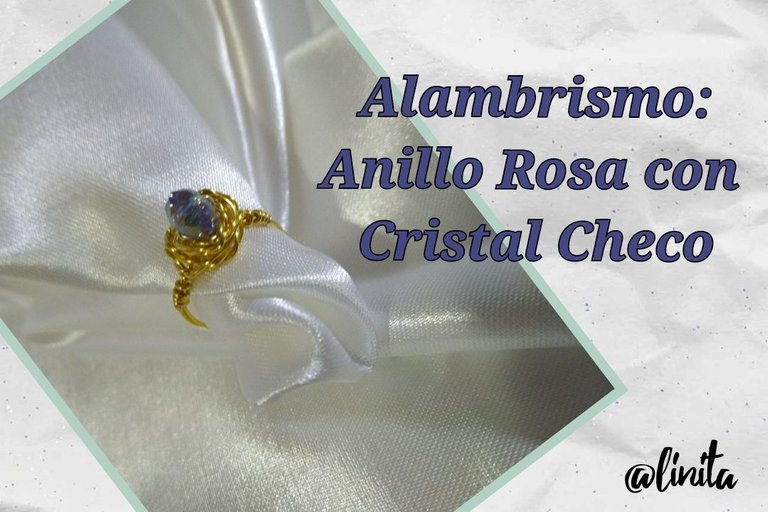
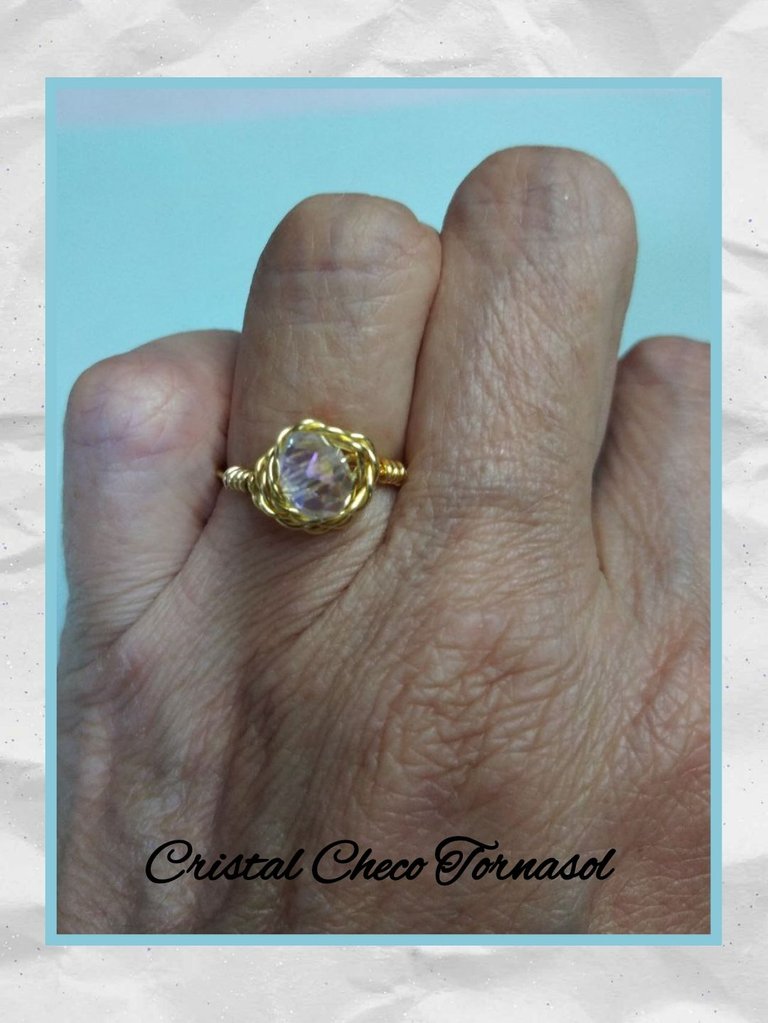
[ENG-ESP] ALAMBRISMO: ROSE RING WITH CZECH CRYSTAL // ALAMBRISMO: ANILLO DE ROSA CON CRISTAL CHECO
WELCOME TO MY BLOG
Since I was introduced to this wonderful art of creating jewelry pieces, I have not wanted to stop the desire to learn. Every day I am excited by a new piece and technique. I'm really hooked on wire rope, starting a new project and shaping it is really exciting and when you reach the goal, you want to quickly start doing another one. I am going to confess that I have never been one to wear so many clothes, firstly because I am allergic to certain materials that are used to make earrings such as nickel, copper and others and when I have used some it has been for very short periods, like For example, go to a meeting for no more than 4 hours and come back quickly removing them. My everyday clothes were gold, mainly earrings because they didn't make my ears sick, but due to the high crime rate I stopped wearing them. Then I started using silver, until it was also considered a temptation for the underworld, so trying and trying I managed to use steel without any novelty. But what I do tell you is that my mom is very cool and uses everything and although she has a lot of it, she wants more. So I will learn with the sole objective of making and giving them the ones they like.
The ring that I bring you today is very simple to make. Once we get the hang of using the chuck and the measurements for each finger, the rest is a piece of cake. I have seen how much more elaborate rings are made but as you know, I am still in the apprentice stage and we have to start with the simplest and we also minimize material waste. Now let's start with the making of this ring.
BIENVENIDOS A MI BLOG
Desde que me introduje en este maravilloso arte de crear piezas de bisutería no he querido parar las ganas de aprender. Cada día me entusiasma una pieza y una técnica nueva. Estoy realmente enganchada con el alambrismo, comenzar un nuevo proyecto e ir dándole forma es realmente emocionante y cuando ya alcanzas el objetivo, quieres comenzar rápidamente a realizar otra más. Les voy a confesar que nunca he sido de llevar tantas prendas encima, primero porque soy alérgica a ciertos materiales que se utilizan para la elaboración de zarcillos como el niquel, el cobre y otros y cuando he usado algunos ha sido por períodos muy cortos, como por ejemplo ir a una reunión no más de 4 horas y regresar quitándolas rápidamente. Mis prendas de uso diario eran de oro, principalmente aretes porque no me enfermaban las orejas, pero debido al alto índice delictivo dejé de usarlas. Luego comencé a usar plata, hasta que también se consideró una tentación para el hampa, así que probando y probando conseguí usar acero sin ninguna novedad. Pero lo que si les cuento es que mi mamá es muy pava y usa de todo y aunque tiene muchas, ella quiere más. Así que aprenderé con el único objetivo de hacerle y obsequiarle las que les guste.
El anillo que les traigo hoy es muy sencillo de hacer. Una vez que le agarramos la vuelta al uso del mandril y las medidas para cada dedo, lo demás es pan comido. He visto cómo se realizan anillos mucho más elaborados pero como saben, aún estoy en la etapa de aprendiz y hay que comenzar por lo más sencillo y minimizamos también el desecho de material. Ahora comencemos con la elaboración de este anillo.

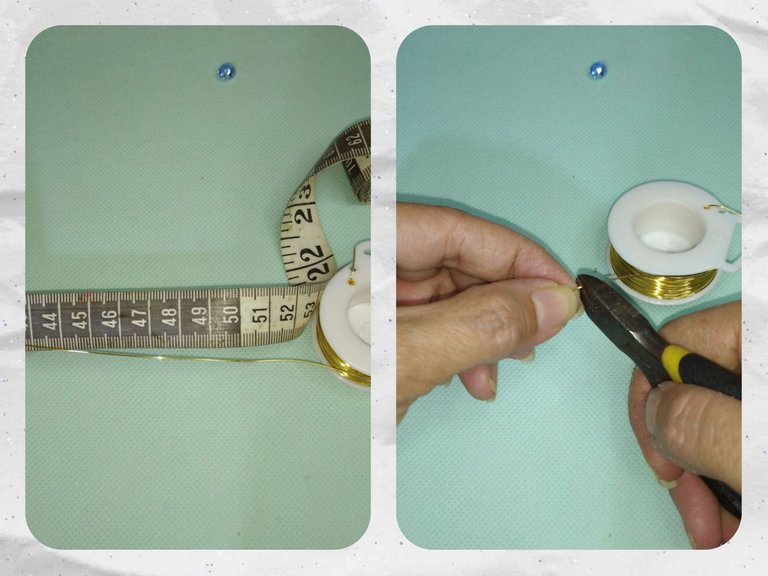
MATERIALS
- 50 cm of wire No. 22
- 01 Czech crystal Nº6 oval
- Round mandrel
- Measuring tape
- Cutting pliers
- flat curved clamp
MATERIALES
- 50 cm de alambre Nº 22
- 01 cristal checo Nº6 oval
- Mandril redondo
- Cinta métrica
- Pinza de corte
- Pinza curva plana
STEP BY STEP
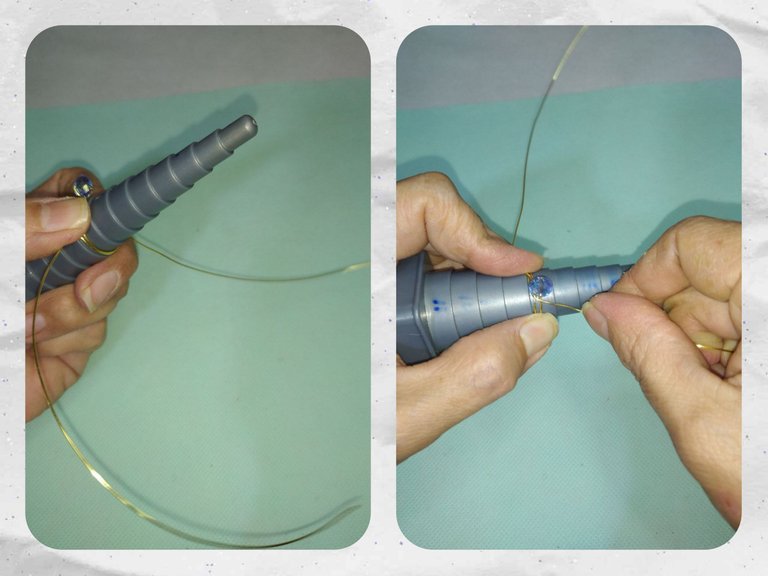
To make this ring we need 50 cm of wire. If we want a more striking and voluminous ring, what we must do is calculate a little more wire.
PASO A PASO
Para realizar este anillo necesitamos 50 cm de alambre. Si queremos un anillo más llamativo y voluminoso lo que debemos hacer es calcular un poco más de alambre.
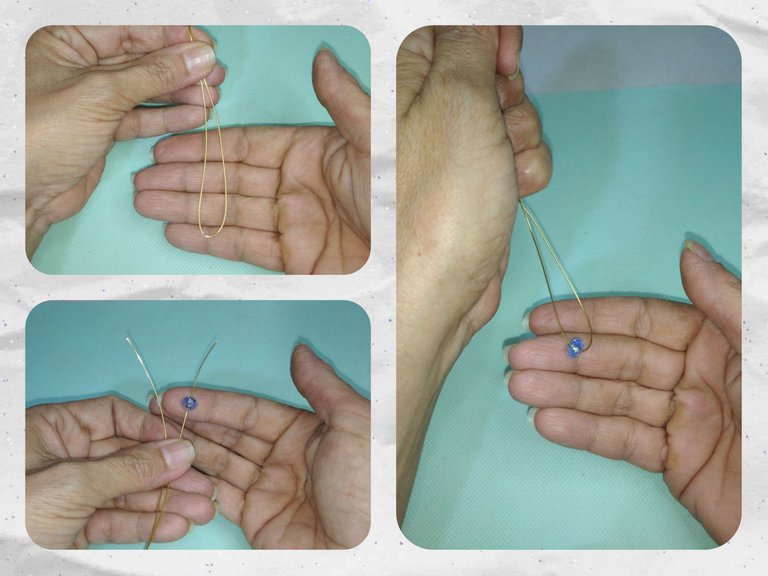
We join the two ends and stretch the wire without putting pressure on the union curve so that it does not bend. We introduce the crystal and bring to the center of the bent wire.
Unimos las dos puntas y realizamos un estiramiento del alambre sin hacer presión en la curva de unión para que no se doble. Introducimos el cristal y llevamos al centro del alambre doblado.
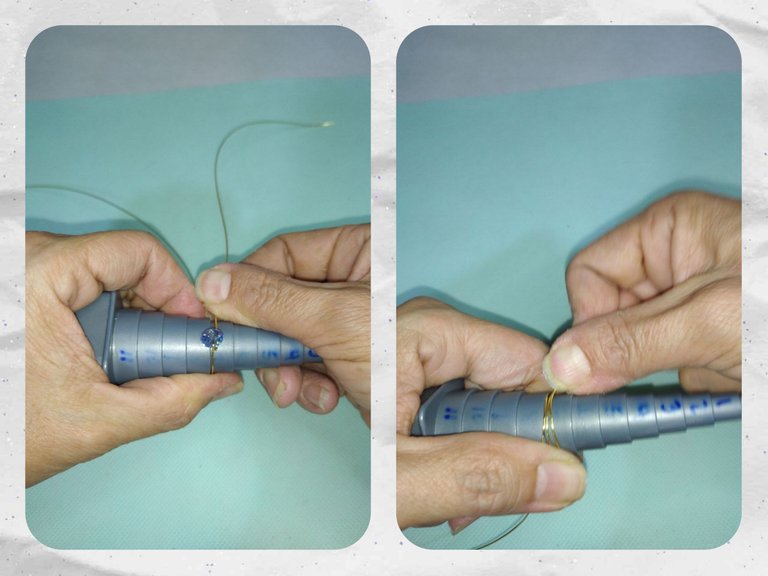
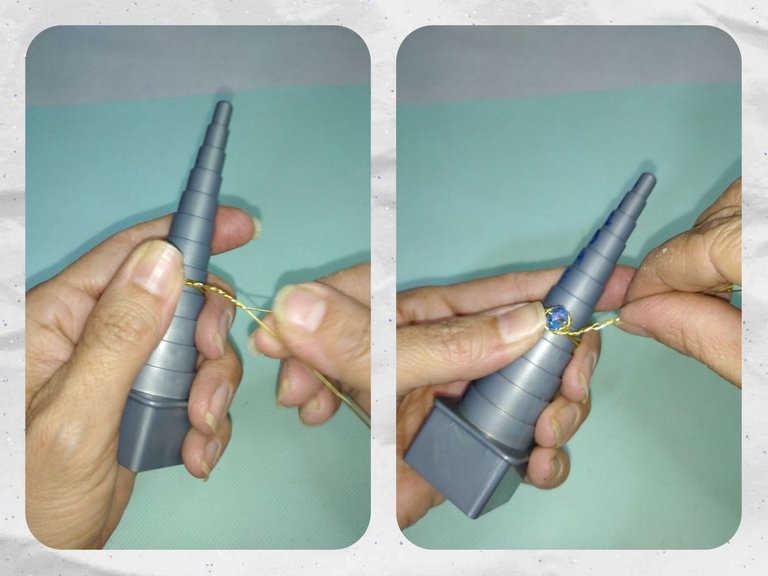
We take the mandrel and place the glass with the wires at each end to make the rings to form the ring, making a complete turn with each end. The measurement will depend on the finger that will use it. In this case I did Nº7.
Tomamos el mandril y colocamos el cristal con los alambres en cada extremos para realizar los aros para formar el anillo, realizando un giro completo con cada extremo. La medida dependerá del dedo que lo usará. En este caso lo realicé Nº7.
Then we pass the wire on the right side around the glass and press until snug. In the same way we do with the one on the left side and we make another half turn to join both wires.
Luego pasamos el alambre del lado derecho alrededor del cristal y presionamos hasta ajustar. De igual manera hacemos con el del lado izquierdo y realizamos media vuelta más para unir ambos alambres.
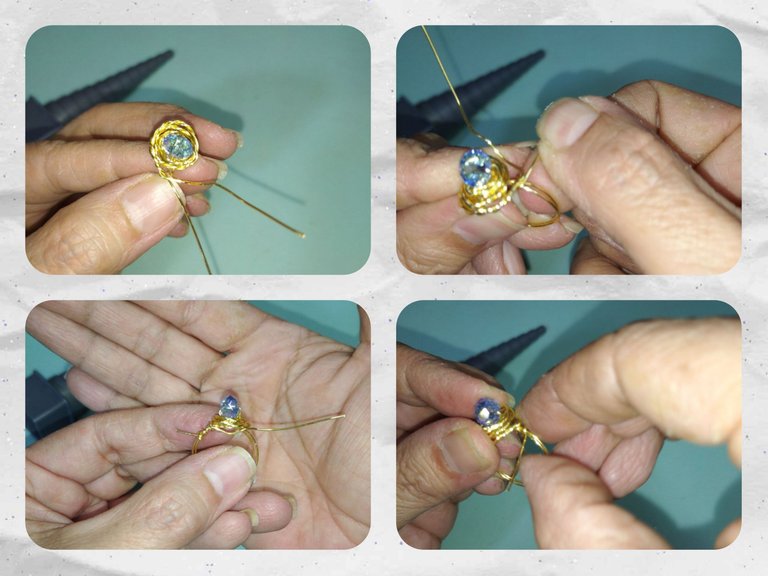
Secured the glass, we proceed to wind the wires forming a not very closed chain, this is to begin to form the rose around the glass. We make the first lap glued to the glass.
Asegurado el cristal procedemos a enrollar los alambres formando una cadena no muy cerrada, ésto es para comenzar a formar la rosa alrededor del cristal. Realizamos la primera vuelta pegada al cristal.
Then we remove from the mandrel and continue turning along the contour of the previous turn until reaching the desired thickness or until we have approximately 3 cm of wire left.
On the last turn we separate a hair from the wire and wrap it around the ring to secure the weave. And the other one we pass under it and we wrap it at the other end of the ring, giving the necessary turns and well glued so that it looks nice.
Seguidamente sacamos del mandril y continuamos girando por el contorno de la vuelta anterior hasta alcanzar el grosor deseado o hasta que nos quede aproximadamente 3 cm de alambre.
En la última vuelta separamos un pelo del alambre y lo enrollamos al anillo para asegurar el tejido. Y el otro lo pasamos por debajo y lo enrollamos en el otro extremo del anillo, dando la vueltas necesarias y bien pegadas para que se vea bonito.
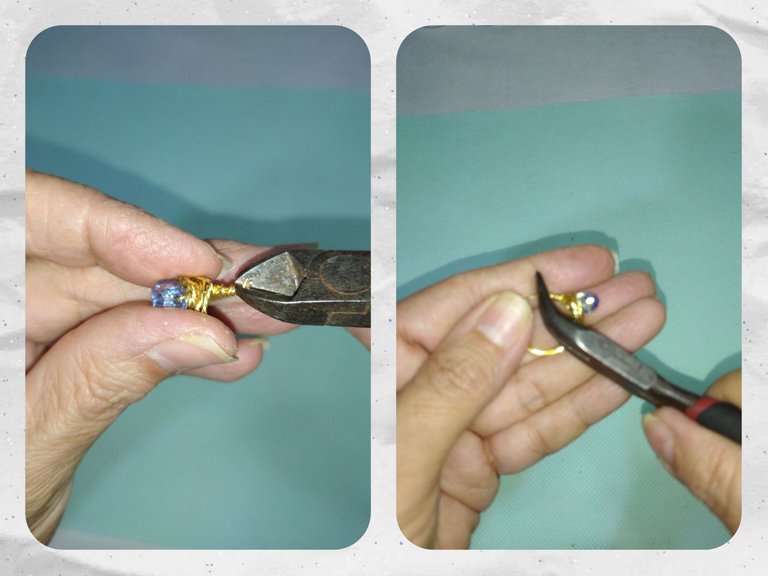
We cut the excess wire and with the square clamp we crush the tip to prevent it from mistreating the skin. We do this on both sides of the ring.
Cortamos el alambre sobrante y con la pinza plaza aplastamos la punta para evitar que maltrate la piel. Esto lo hacemos en ambos lados del anillo.
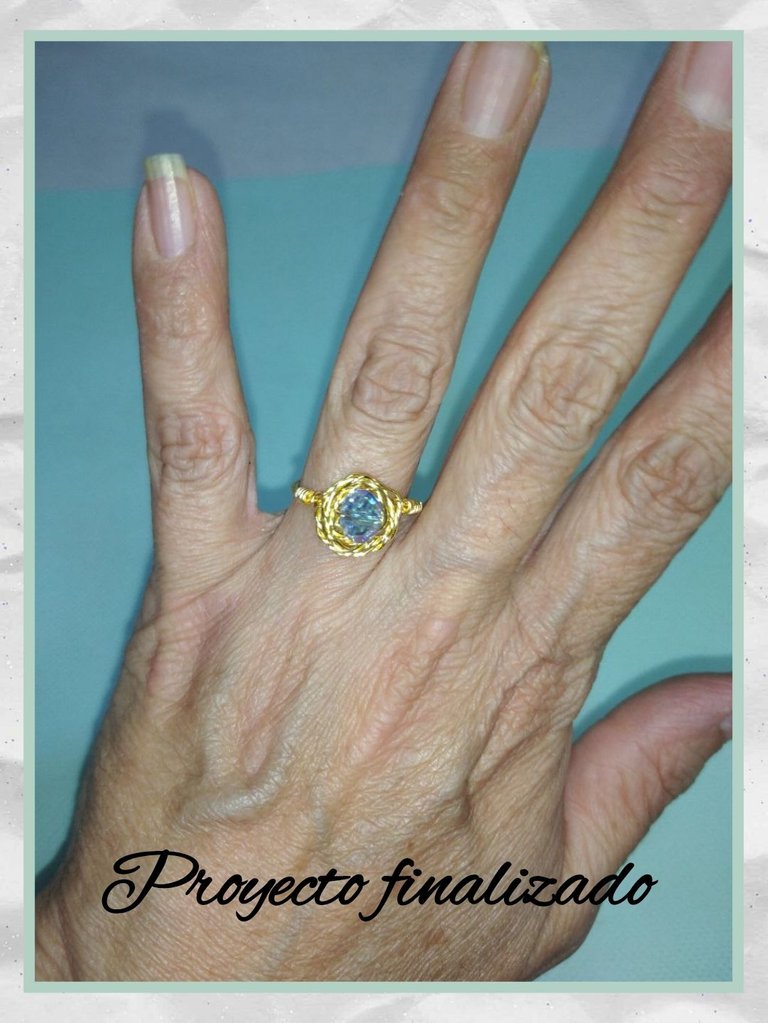
Finished project
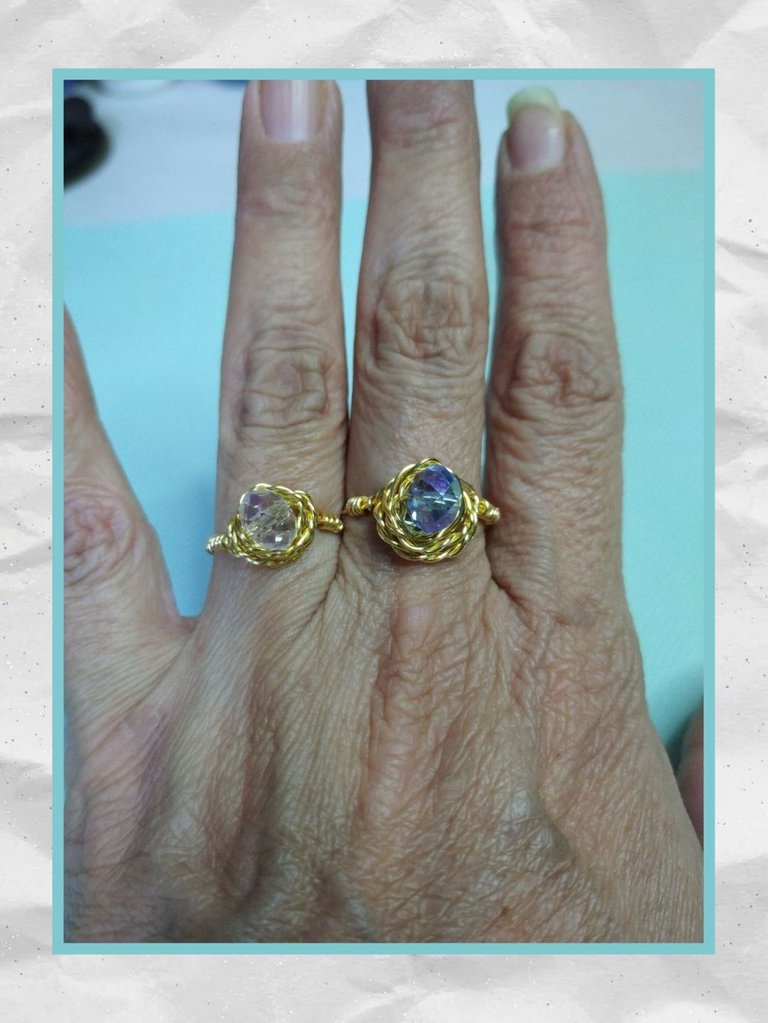
When we see these types of garments in jewelry stores, we think they are super difficult and the truth is that if we put effort, dedication and care we can get them and make them to our liking and measure. I made two models, one for myself and the other to give to my mother. I hope you like it and that it also serves as a guide for you to make your own. See you in the next installment.
Proyecto Finalizado
Cuando vemos en las tiendas de bisutería este tipo de prendas creemos que son super difíciles y la verdad es que si le ponemos empeño, dedicación y cariño podemos conseguirlas y hacerlas a nuestro gusto y medida. Yo realicé dos modelos, uno para mi y el otro para regalárselo a mi madre. Espero le guste y que a ustedes también les sirva de guía para realizar los suyos. Nos vemos en la próxima entrega.
https://twitter.com/98702291/status/1581407482685296640
The rewards earned on this comment will go directly to the people sharing the post on Twitter as long as they are registered with @poshtoken. Sign up at https://hiveposh.com.
De lujo. Se ven muy bonitos los anillos. La flor que sujeta la perla te quedó muy bien definida. Te felicito. Para ser aprendiz lo estás haciendo de maravilla.
Gracias por el entusiasmo que le has puesto a la elaboración de estos accesorios. Tu mamá estará feliz porque va a estrenar 😁
Si, es muy emocionante ver el resultado final. Poco a poco voy poniendo en práctica lo aprendido. Este es un arte bien extenso así que seguirán viéndome por aquí.
Seguro que sí. Me consta. 😁 Estaremos viéndonos.
Thank you for sharing this post on HIVE!
Your content got selected by our fellow curator rezoanulvibes & you received a little thank you upvote from our non-profit curation initiative. Your post will be featured in one of our recurring curation compilations which is aiming to offer you a stage to widen your audience within the DIY scene of Hive.
Next time make sure to post / cross-post your creation within the DIYHub community on HIVE and you will receive a higher upvote!
Stay creative & hive on!
Hey! ¡Que belleza de anillo! 😍 Me encantó como quedó 👏 ¡Espectacular!
Sin duda amiga @linita el alambrismo atrapa jeje y cuando uno hace algo, luego quiere ir por más, es bueno verte tan entusiasmada y aprendiendo más y más, este anillo es hermoso, un tutorial muy bonito y se puede seguir, gran trabajo.
Dear @linita,
May I ask you to review and support the new proposal (https://peakd.com/me/proposals/240) so I can continue to improve and maintain this service?
You can support the new proposal (#240) on Peakd, Ecency, Hive.blog or using HiveSigner.
Thank you!