Linda cajita en forma de casa navideña — Cute little Christmas house box [ESP|ENG]
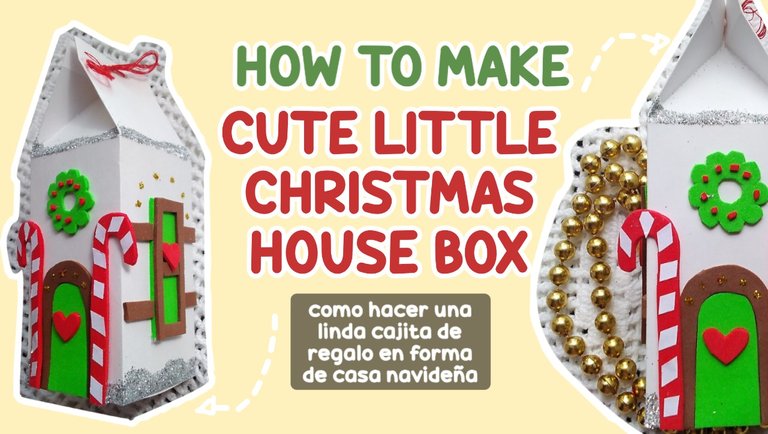
¡Hola, hola, comunidad creativa! Ya estamos cada vez más cerca de la fecha en que acostumbramos a recibir y dar regalos, pasar tiempo en familia y disfrutar. Por eso hoy he venido con esta linda idea de una caja de regalo dónde puedes meter dulces o lo que desees, en forma de una casita dulce y navideña que va bien con el tema.
Hello hello creative community!
We are getting closer and closer to the date when we get used to receiving and giving gifts, spending time with the family, and enjoying ourselves. That is why today I have come up with this nice idea of a gift box where you can put sweets or whatever you want, in the form of a sweet and Christmas house that goes well with the theme.
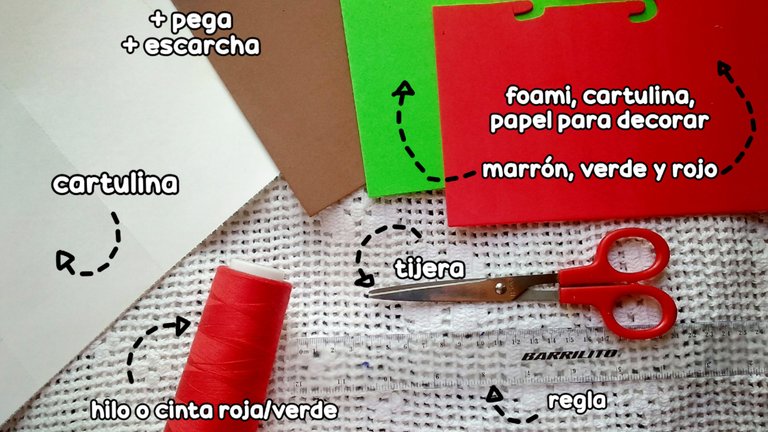
Para empezar, necesitaremos:
• Cartulina blanca o de cualquier color
• Foami, cartulina o papel para decorar marrón, verde y rojo
• Cinta o hilo de color
• Tijera, pega, regla
• ¡Escarcha!
To get started, we will need:
• White or any color card
• Foam, cardboard or paper to decorate brown, green and red
• Colored ribbon or thread
• Scissors, glue, ruler
• Brilliantine!
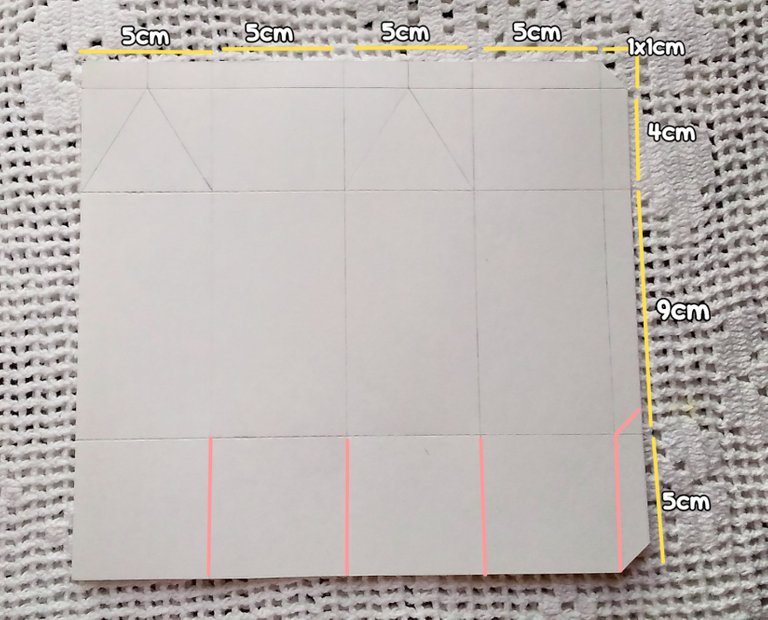
Primero empezaremos haciendo el molde de esta caja. Con las siguientes medidas es como yo lo haré. En las rayas rojas se debe cortar y el resto se debe doblar para poder armarlo.
Estás medidas pueden ser cambiadas a su preferencia, siempre y cuando manteniendo las zonas necesarias para que mantenga su forma.
First we will start by making the mold of this box. With the following measures is how I will do it. In the red stripes it must be cut and the rest must be folded to be able to assemble it.
These measurements can be changed to your preference, as long as you keep the necessary areas to keep your shape.
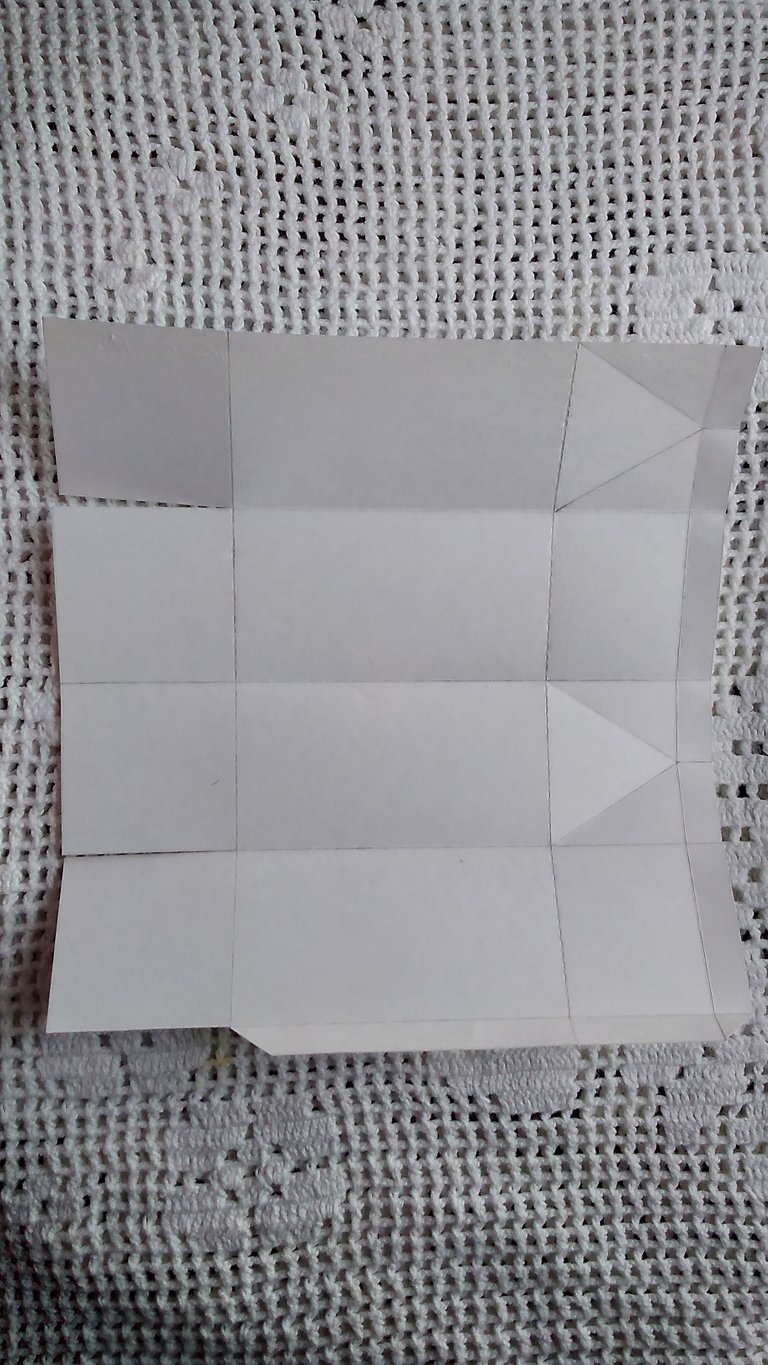
Luego haremos cada doblez y cortaremos dónde indiqué. Quedando así.
Then we will make each fold and cut where I indicated. Being that way.
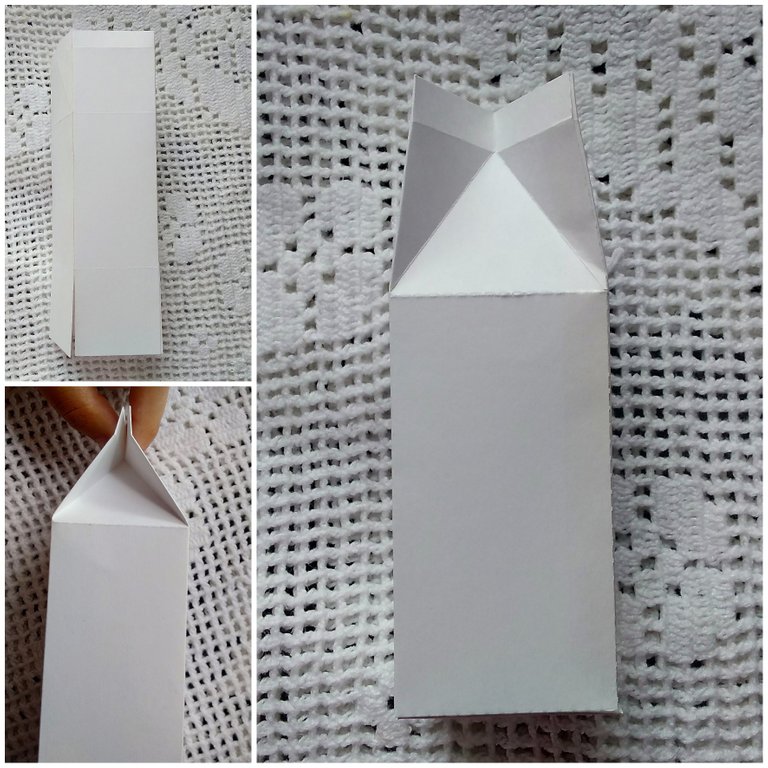
Procedemos a armar muestra caja, cerrando primero la solapa larga para que tenga la forma de caja. Ya luego haciendo la forma como de cajita de leche con los dobleces que habían sido indicados y luego pegar las solapas restantes entre sí para la base. Y listo, tenemos nuestra cajita lista para decorar.
We proceed to assemble the sample box, first closing the long flap so that it has the shape of a box. Then making the shape like a milk box with the folds that had been indicated and then gluing the remaining flaps together for the base. And voila, we have our box ready to decorate.
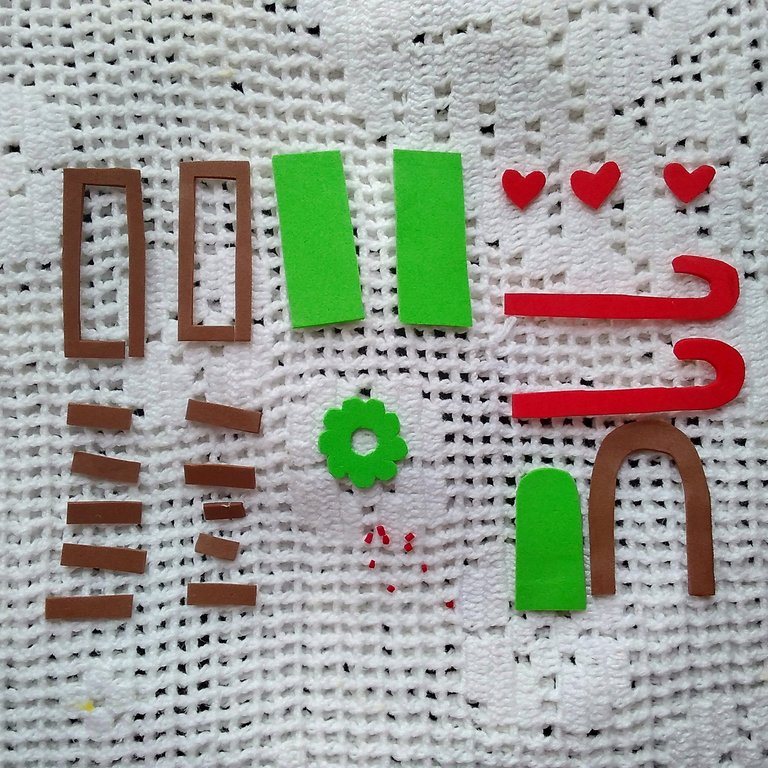
Para comenzar a decorar haremos estás formas con cada foami. Dos rectángulos huecos marrones, dos verdes, diez rectangulos marrones pequeños, un aro verde, nueve (o la cantidad que quieras) de bolitas rojas, tres corazones, dos bastones y un arco verde y otro marrón.
To start decorating we will make these shapes with each foami. Two brown hollow rectangles, two green ones, ten small brown rectangles, one green ring, nine (or whatever number you want) of red marbles, three hearts, two sticks, and one green and one brown bow.
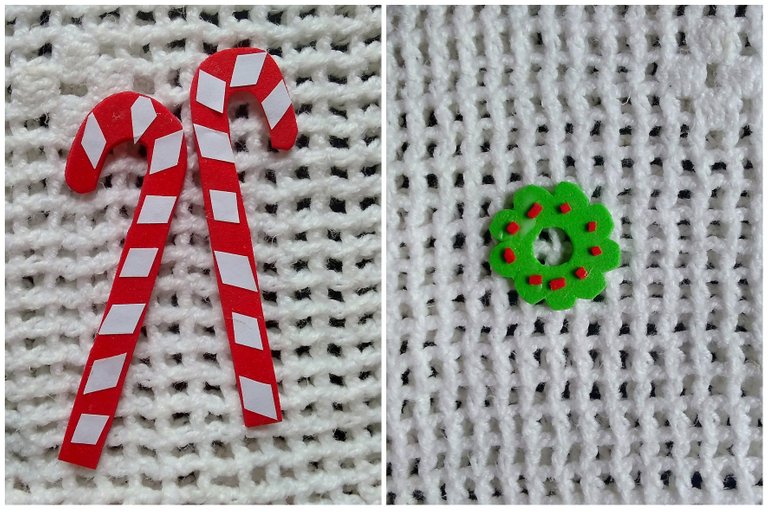
Al los bastones les vamos a pegar pequeños rombos blancos para que sean lo más parecidos a estos dulces. Mientras que al aro verde le pegaremos las bolitas rojas, siendo nuestra guirnalda decorativa.
We are going to glue small white diamonds to the canes so that they are the most similar to these sweets. While we will glue the red balls to the green ring, being our decorative garland.

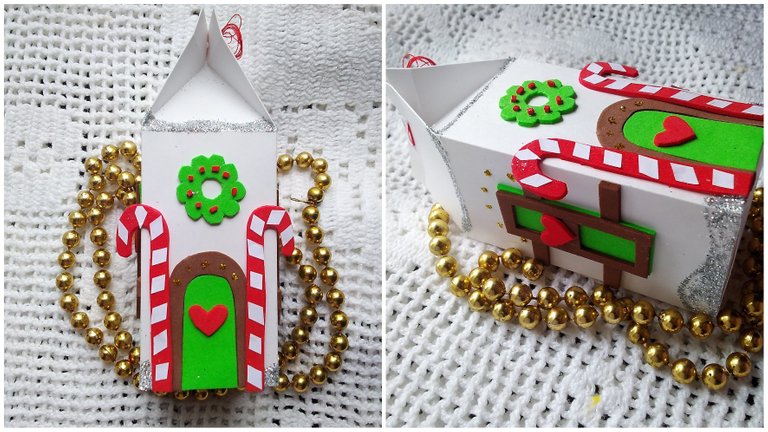
Primero haremos la parte del frente. Dónde se pegaran los arcos, lo cual es la puerta, los bastones y la guirnalda. También un lindo corazón que le da un toque bonito ¡Lindo!
We will do the front part first. Where the bows are glued, which is the door, the sticks and the garland. Also a cute heart that gives it a nice touch. Cute!
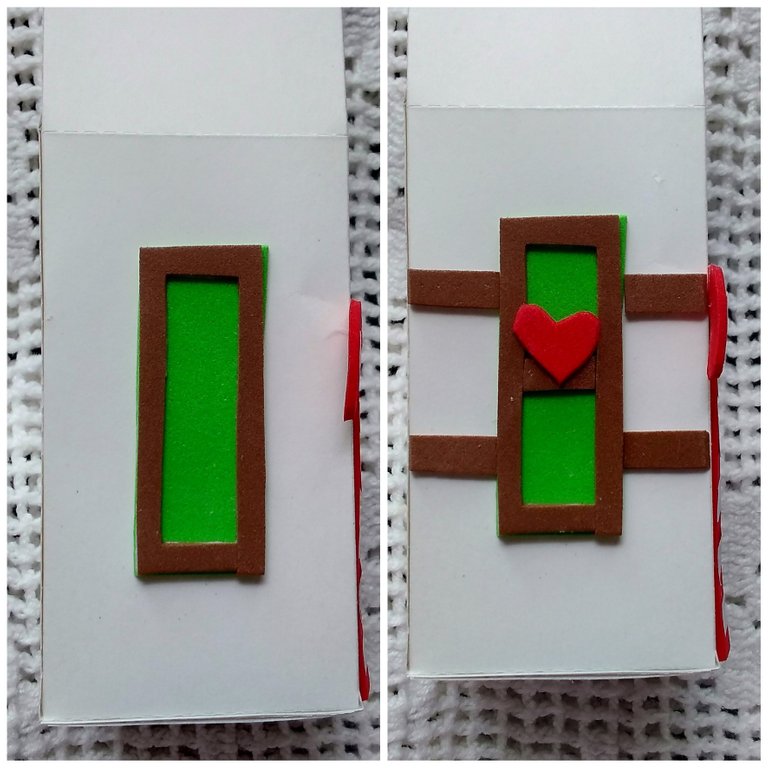
A los lados haremos las ventanas con los rectángulos verde y marrón, luego añadiendo las tiras marrones para darle mayor forma. ¡Y otro corazón! Se hará lo mismo a cada lado. ¡Y listo! Tenemos parte de la decoración lista!
On the sides we will make the windows with the green and brown rectangles, then adding the brown strips to give it more shape. And another heart! The same will be done on each side. And ready! We have part of the decoration ready!
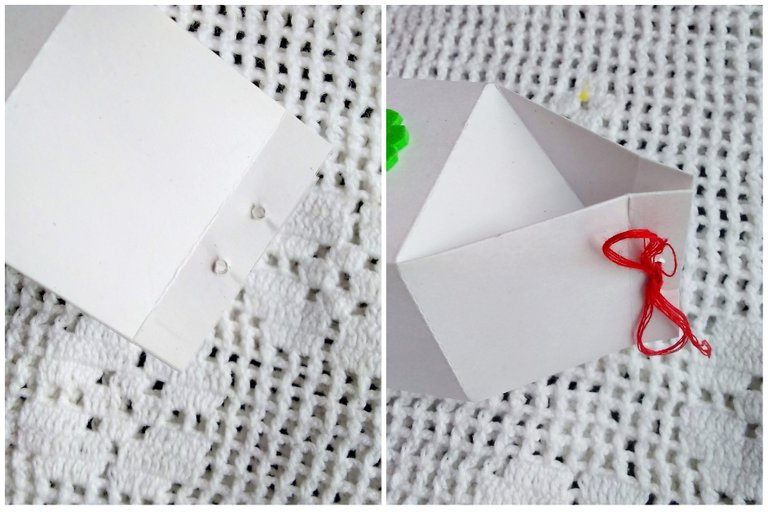
Ya todo pegado, procedemos a hacerle un par de huecos a la tira que sobra en la cajita, esto será para poderlo cerrar y abrir a nuestro gusto. Con el hilo rojo hice un pequeño lacito y yap.
Once everything is glued, we proceed to make a couple of holes in the excess strip in the box, this will be to be able to close and open it to our liking. With the red thread I made a small bow and yep.
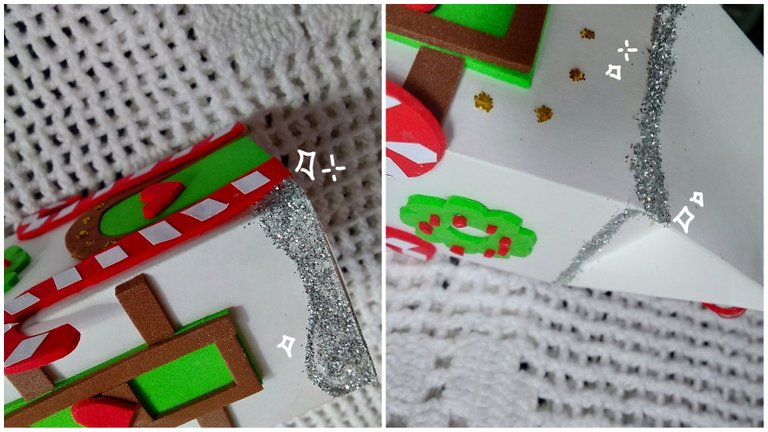
Después quise agregarle más brillo a este regalo. Así que coloqué pequeños puntos de escarcha dorada en la puerta y ventana. ¡Y plateada en la base! Da la ilusión de que es nieve.
Then I wanted to add more sparkle to this gift. So I put little dots of golden frost on the door and window. And silver at the base! It gives the illusion that it is snow.
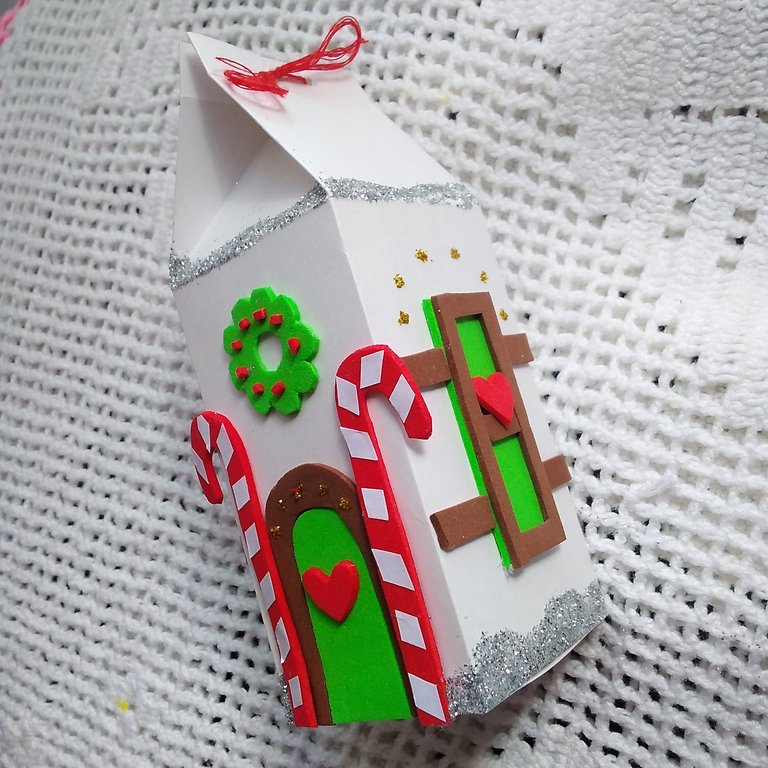
Y ya está. Es rápido y simple. Nuestra caja de regalo navideña está lista para regalar (o decorar) Es brillante y colorida. Espero que lo intenten hacer si no tienen ideas para regalar y les guste a quien se lo den, o incluso a ustedes mismos.
And that's it. It is fast and simple. Our holiday gift box is ready to gift (or decorate) It's bright and colorful. I hope you will give it a try if you don't have any gift ideas and like whoever you give it to, or even yourselves.
Espero que les haya gustado. ¡Gracias por leerme y pasar por aquí!
I hope you liked it. Thanks for reading and stopping by!
Muy bonita tu caja casita navideña, Felicitaciones. Una recomendación es colocar el tipo de cámara que utilizaste y los programas de edición, siempre es bueno colocar los recursos usados. Exitos.
¡Muchas gracias! Tomaré en cuenta la recomendación a partir de ahora.