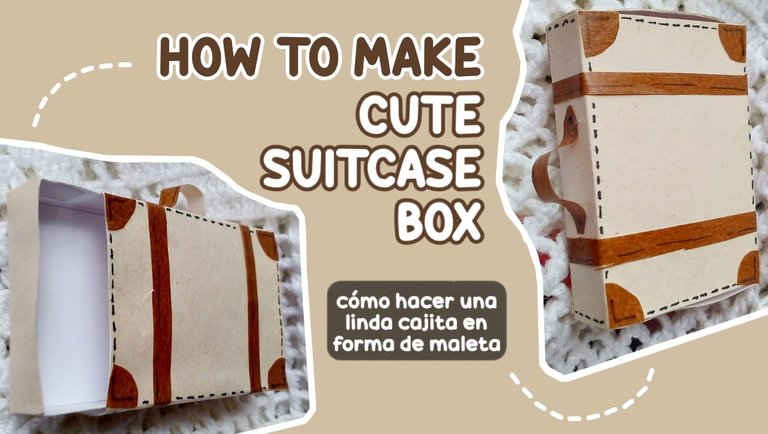
Linda cajita en forma de maleta — Cute suitcase box [ESP|ENG]
¡Hola, hola, comunidad creativa!
Hace mucho tiempo que no hago alguna manualidad, pero me he animado a hacer una pequeña cajita que encontré y me gustó mucho. Es muy simple y fácil, así que les mostraré el proceso por si desean hacerlo.
Hello hello creative community!
I haven't done any crafts for a long time, but I have encouraged myself to make a little box that I found and I really liked. It is very simple and easy, so I will show you the process in case you want to do it.
Es nada más y nada menos que una cajita en forma de maleta, la utilizaré para meter pequeños papelitos con deseos, la mayoría relacionadas al viaje porque pues... es una maleta.
It is nothing more and nothing less than a box in the shape of a suitcase, I will use it to put small pieces of paper with wishes, most of them related to the trip because well ... it is a suitcase.
También estaría lindo usarlo para alguien que se va de viaje, así tiene una pequeña maleta consigo con pequeños detalles dentro que lo hacen especial.
It would also be nice to use it for someone who is going on a trip, so they have a small suitcase with them with small details inside that make it special.
Primero empezaremos con los materiales.
We will start with the materials first.
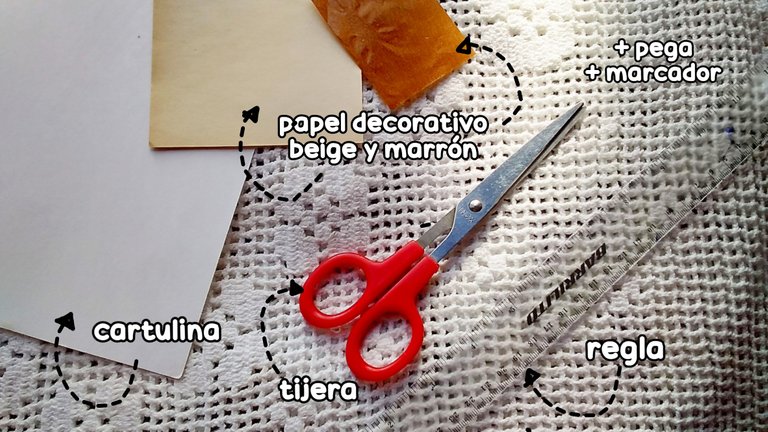
Solo necesitaremos:
• Cartulina
• Papel para decorar beige y marrón
(o se puede utilizar una cartulina beige)
• Tijeras
• Regla
• Pega
• Marcadores si se desea
We will only need:
• Cardboard
• Beige and brown decorating paper
(or you can use a beige card stock)
• Pair of scissors
• Rule
• Job
• Bookmarks

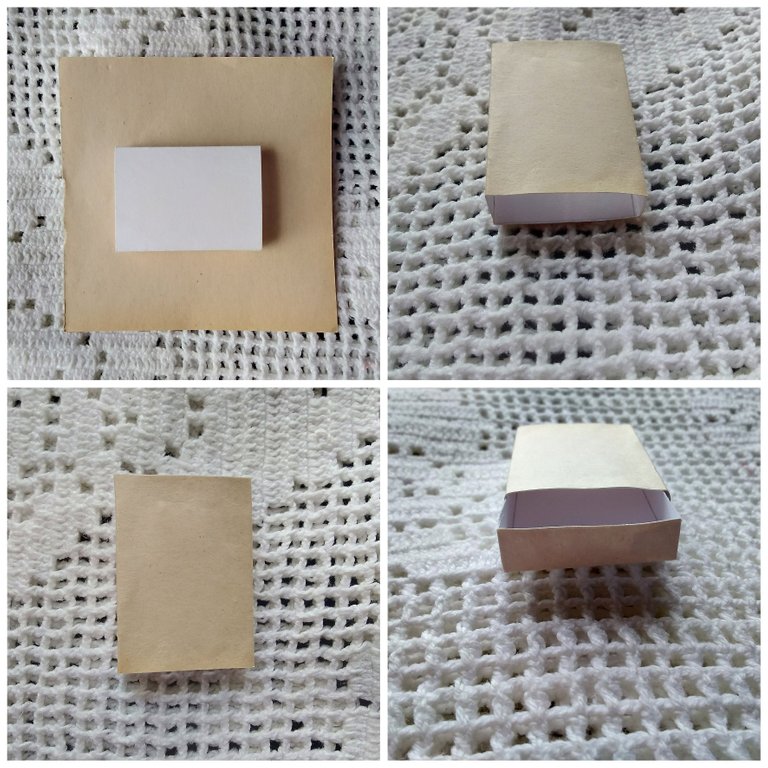
El primer paso será recortar la cartulina inicial con las siguientes medidas, dobleces y cortes. Tal y como se muestra. Son dos piezas, la cajita como tal, y lo que lo cubrirá. La primera debe caber dentro de la otra, para esto, la segunda pieza debe de tener unos pocos milímetros extras.
The first step will be to cut out the initial cardboard with the following measurements, folds and cuts. As shown. They are two pieces, the box as such, and what will cover it. The first must fit inside the other, for this, the second piece must have a few extra millimeters.
Estas medidas pueden ser cambiadas para hacer una cajita más grande.
These measurements can be changed to make a larger box.

Luego lo armaremos y quedará así.
Then we will put it together and it will be like this.
Después tomaremos la segunda pieza y lo vamos a envolver con el papel decorativo beige. Este paso puede saltarse si se utiliza una cartulina de este color al principio.
También vamos a colocar este papel en las esquinas de la cajita para que todo quede parejo por fuera.
Then we will take the second piece and we will wrap it with the beige decorative paper. This step can be skipped if you use card stock of this color at first.
We are also going to place this paper in the corners of the box so that everything is even on the outside.
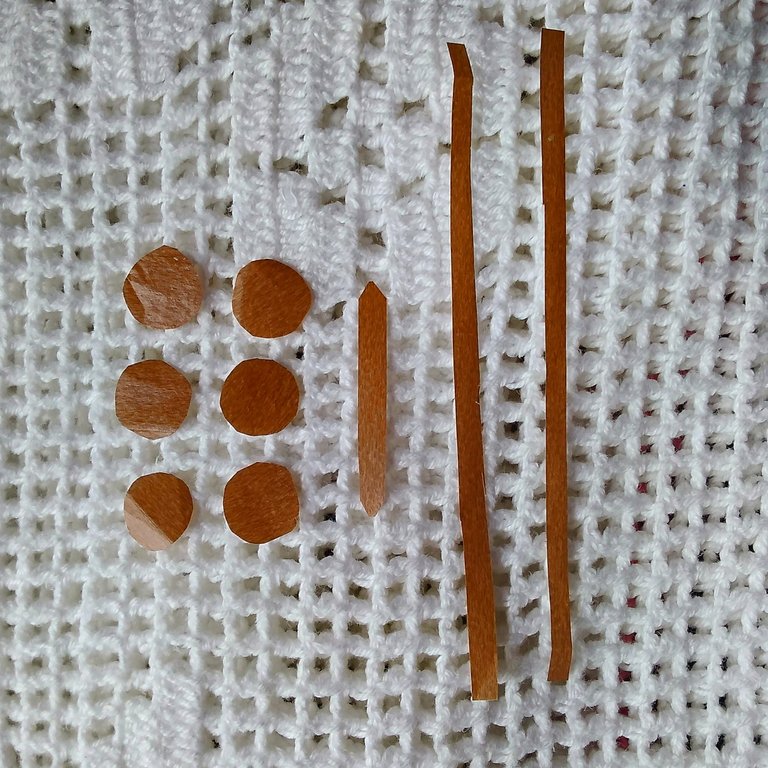
Después con el papel decorativo marrón, vamos a hacer algunos circulitos, dos tiras y una tira mucho más pequeña.
Then with the brown decorative paper, we are going to make some little circles, two strips and a much smaller strip.
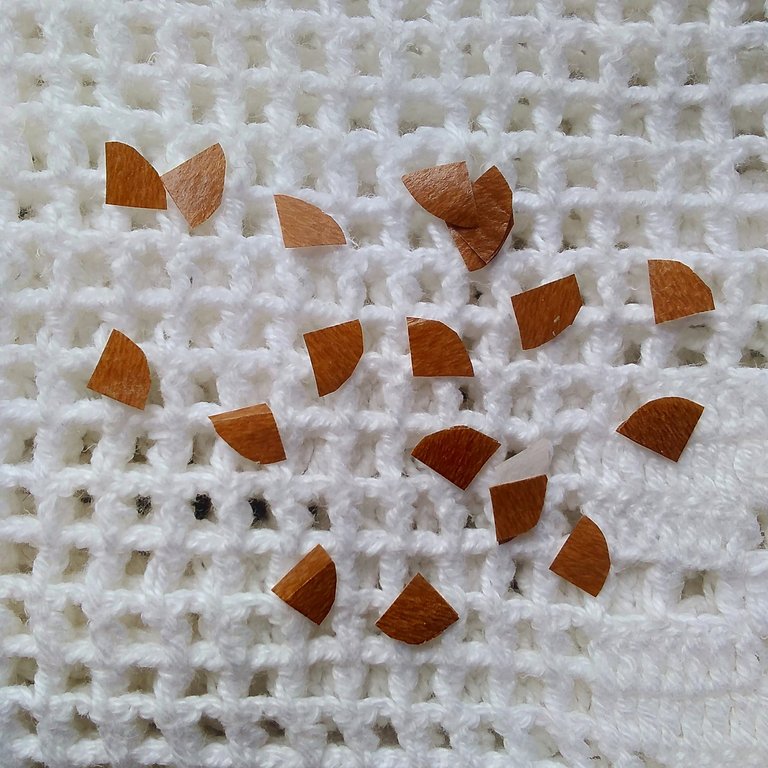
Los círculos que hicimos los vamos a recortar en cuatro partes, para que queden unos conos pequeños.
We are going to cut the circles that we made into four parts, so that there are small cones.
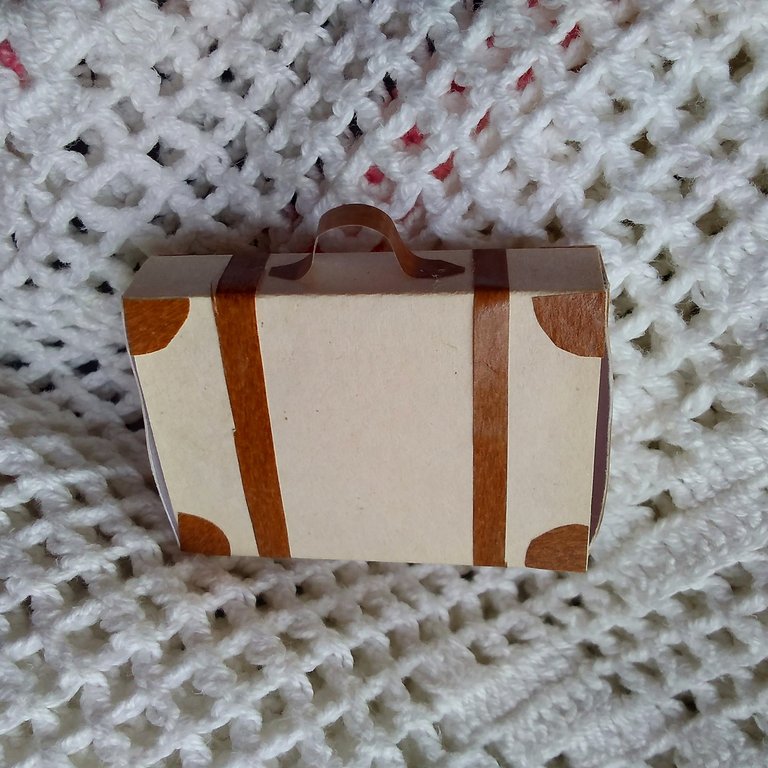
Ya luego podemos pegar cada pieza en el exterior de la cajita, los triángulos en las esquinas y las tiras rodeando la caja. Además, la tira más pequeña se colocará a un lado algo doblada para que tenga forma de que es el agarradero de la maleta.
Then we can glue each piece to the outside of the box, the triangles in the corners and the strips surrounding the box. In addition, the smaller strip will be placed to one side somewhat bent so that it is shaped like the handle of the suitcase.
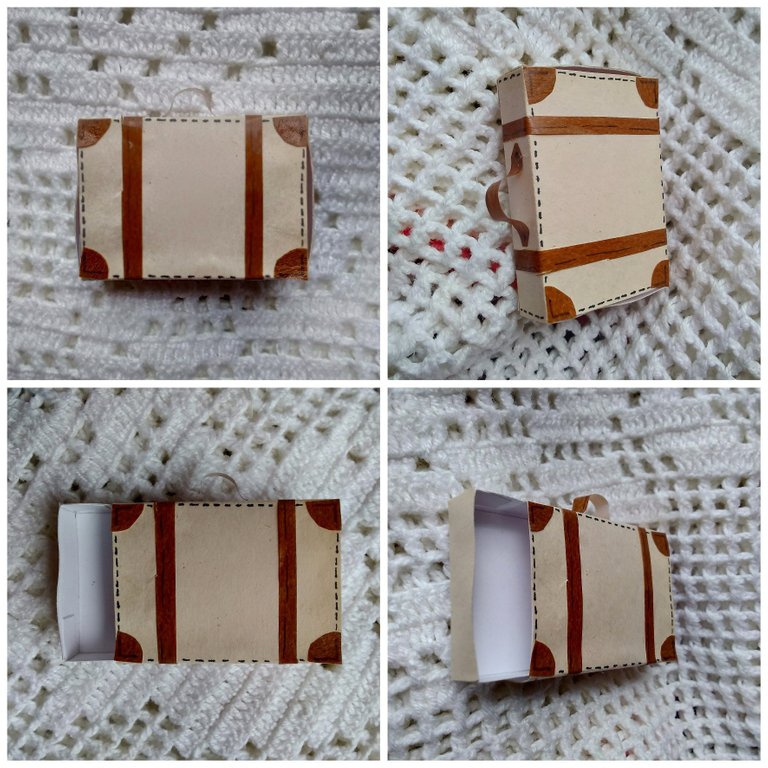
¡Y listo! Podemos añadirle detalles pequeños con un marcador negro o marrón, pequeñas rayitas o puntos para hacerlo ver mucho mejor.
And ready! We can add small details with a black or brown marker, small lines or dots to make it look much better.
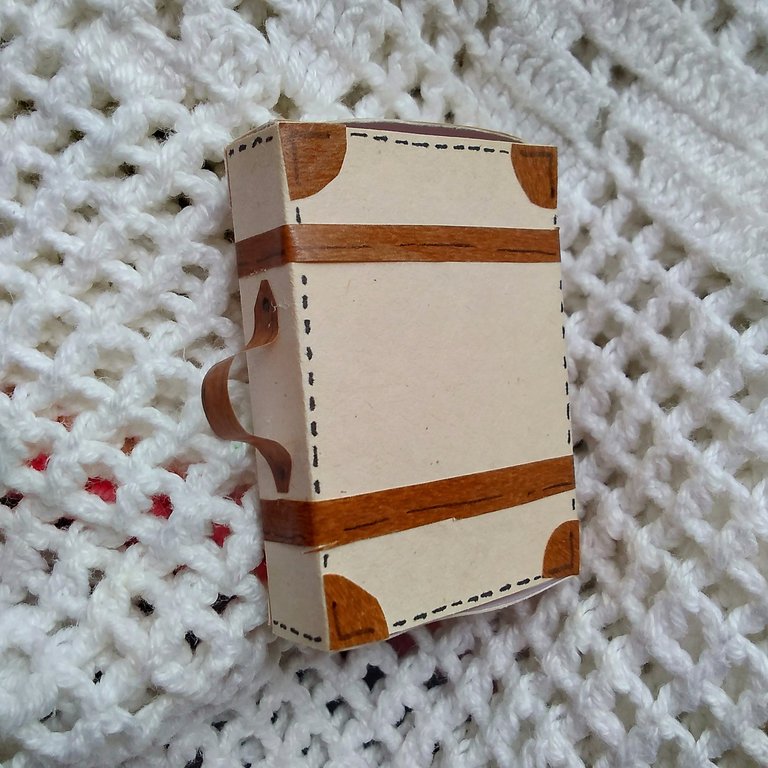
Ya tenemos nuestra cajita desplazable dónde se pueden almacenar pequeñas notitas.
We already have our drop-down box where little notes can be stored.
¡Eso es todo! Espero que les haya gustado y que se animen a hacerlo para algún regalito. ¡Gracias por leer!
That's it! I hope you liked it and that you are encouraged to do it for a little gift. Thanks for reading!