Linda cadenita para la mascarilla — Cute mask chain [ESP|ENG]
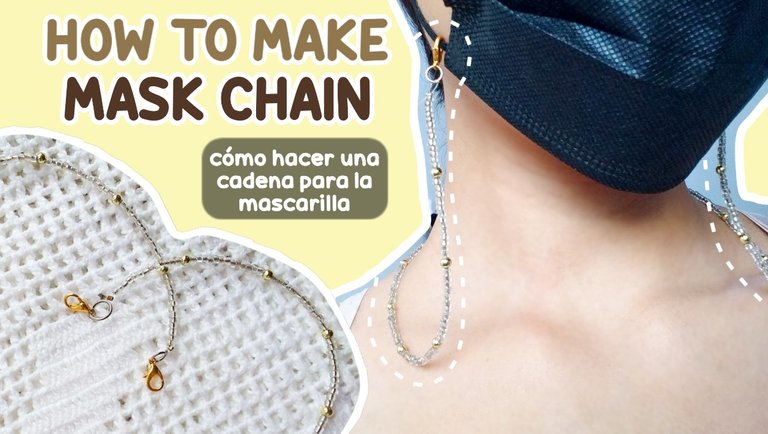
¡Hola, hola creativa comunidad! Hoy me he animado a hacer algo que quería desde hace mucho tiempo ya y quería aprovechar para enseñarles el proceso por si alguien también quiere hacerlo.
Hello hello creative community! Today I have encouraged myself to do something that I have wanted for a long time and wanted to take the opportunity to teach you the process in case someone also wants to do it.
Hice una pequeña y linda cadenita que va sostenida en el tapabocas, probablemente lo hayan visto ya y sepan qué es, es para darle un lindo toque a lo que últimamente usamos en el día a día. Además, ¡también puede usarse en lentes!
I made a cute little chain that is held in the mask, you have probably seen it already and know what it is, it is to give a nice touch to what we use lately on a day-to-day basis. Plus, it can also be used on lenses!
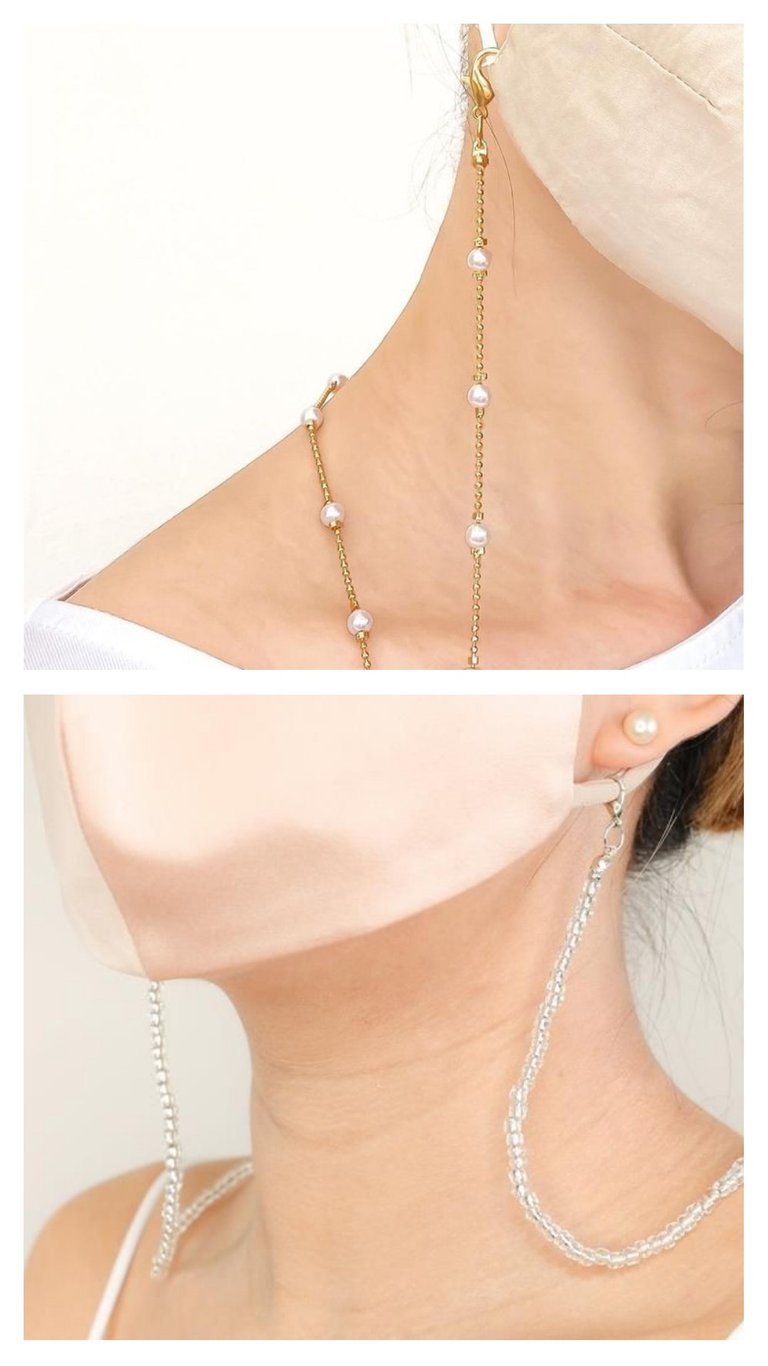
↓ Si aún no saben de lo que hablo les mostraré unas inspiraciones que conseguí ↓
↓ If you still don't know what I'm talking about, I'll show you some inspirations that I got ↓
Ahora sí, podemos comenzar.
Lo primero son los materiales, la verdad no son nada del otro mundo, si alguna vez te has interesado por el mundo de la bisutería, es posible que tengas estas cosas en casa. También daré algunas alternativas. Igualmente no son muy difíciles de conseguir.
Now we can start.
The first thing is the materials, the truth is nothing to write home about, if you have ever been interested in the world of costume jewelery, you may have these things at home. I will also give some alternatives. They are also not very difficult to obtain.
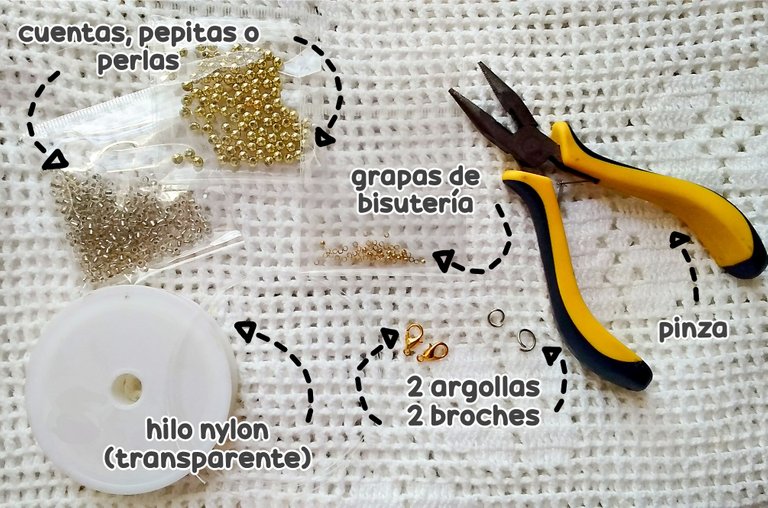
• Cuentas, perlas o mostacilla: como quieran llamarle. Puede ser del color tamaño o el tipo que quieras, yo estaré utilizando un tipo transparente y perlitas doradas para intercalar.
•Hilo nylon (transparente): En mi caso este es el hilo que tengo, pero pueden utilizar cualquier otro que crean que es resistente (y que pueda pasar entre las cuentas) Asegúrate de que sea lo suficientemente largo. Yo utilicé una medida de 70-80cm.
•2 argollas y 2 broches: Esto es esencial, pues será lo que sostendrá nuestra cadena a la mascarilla. Hubo un tiempo en el que hacía las argollas con un alambre chiquito y le ponía forma de aro, ¡así que no te preocupes!
•Grapas de bisutería: Esto es opcional, dependiendo del tipo de hilo que utilices, puedes necesitar estos pequeños aritos que se aprietan para sellar alguna zona del hilo. Pero puedes hacer un simple nudo.
•Pinzas: ¡Son solo para apretar esas grapas!
• Beads, pearls: whatever you want to call it. It can be the color, size or the type you want, I will be using a transparent type and golden pearls to insert.
• Nylon thread (transparent): In my case this is the thread I have, but you can use any other that you think is resistant (and that it can pass between the beads) Make sure it is long enough. I used a 70-80cm measurement.
• 2 rings and 2 clasps: This is essential, as it will be what will hold our chain to the mask. There was a time when I made the rings with a small wire and put it in the shape of a hoop, so don't worry!
• Jewelry staples: This is optional, depending on the type of thread you use, you may need these small rings that are tightened to seal some area of the thread. But you can tie a simple knot.
• Tweezers: They're just for tightening those staples!
Ahora que tenemos nuestros materiales listos, podemos comenzar con el proceso.
Now that we have our materials ready, we can begin the process.
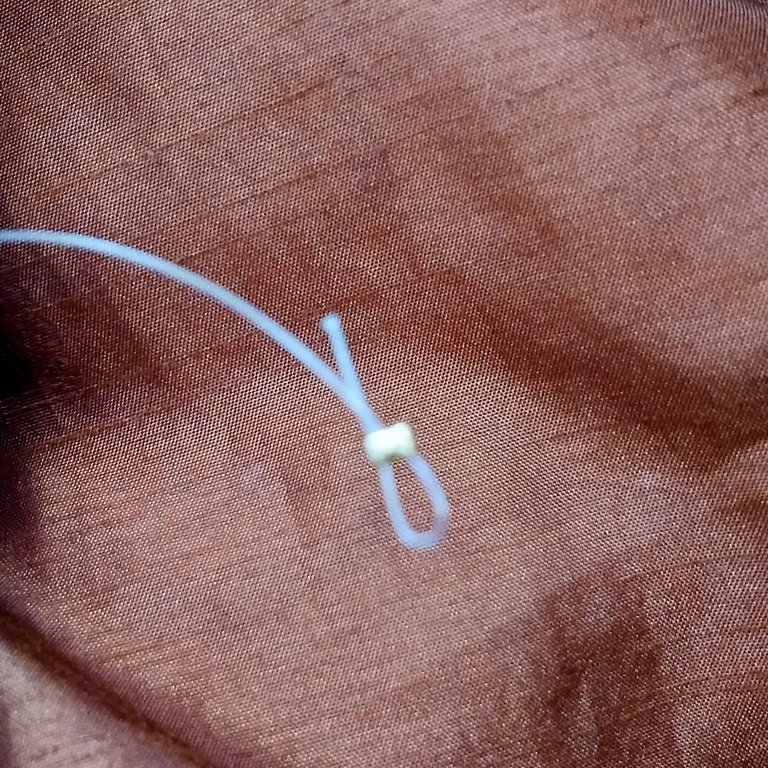
Lo primero que haremos será grapar uno de los extremos del hilo, también puedes hacer un simple nudo. Pero asegúrate de que las cuentas que se van a colocar no se salgan y que haya un espacio para poder colocar la argolla, como se ve en la foto.
The first thing we will do is staple one end of the thread, you can also make a simple knot. But make sure that the beads to be placed do not come off and that there is a space to place the ring, as seen in the photo.
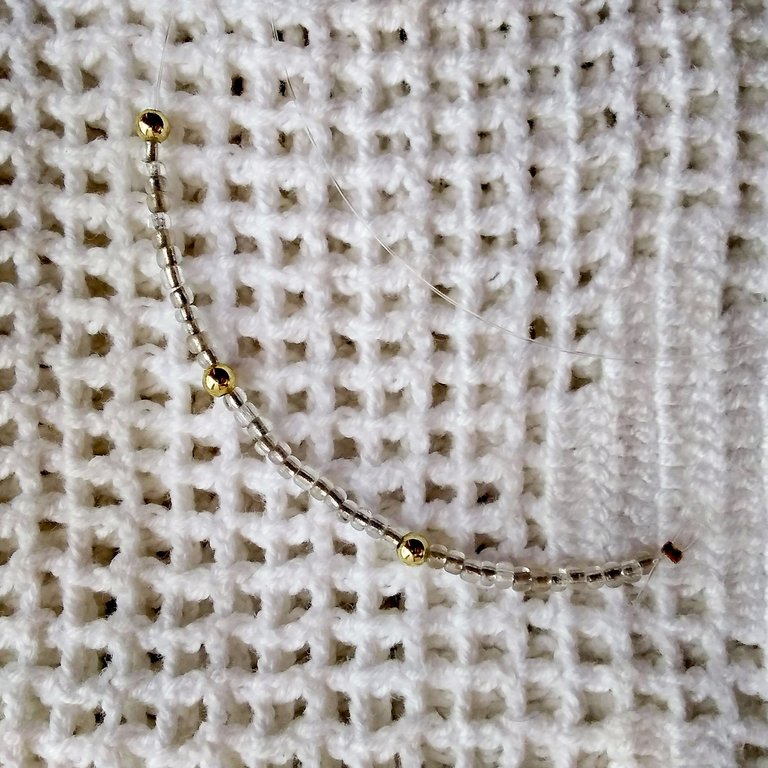
Luego podemos proceder a hacer el diseño de nuestra cadena. Yo intercale 13 cuentas transparentes con 1 perlita y así sucesivamente.
Then we can proceed to make the design of our chain. I interspersed 13 transparent beads with 1 pearlite and so on.
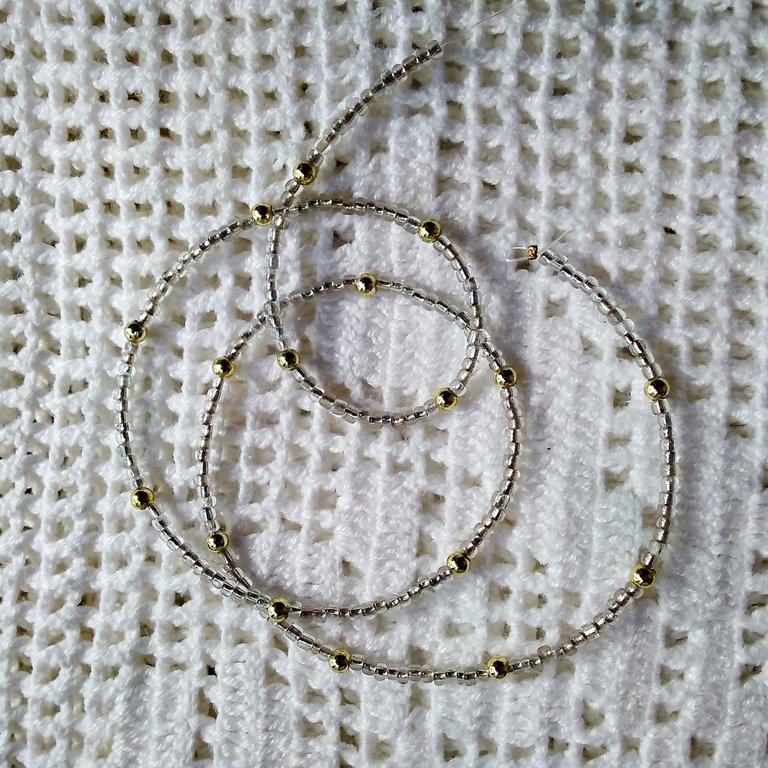
Hasta terminar y obtener el largo que se desee, yo lo dejé en unos 50 a 60cm.
So until I finish and get the desired length, I left it at about 50 to 60cm.
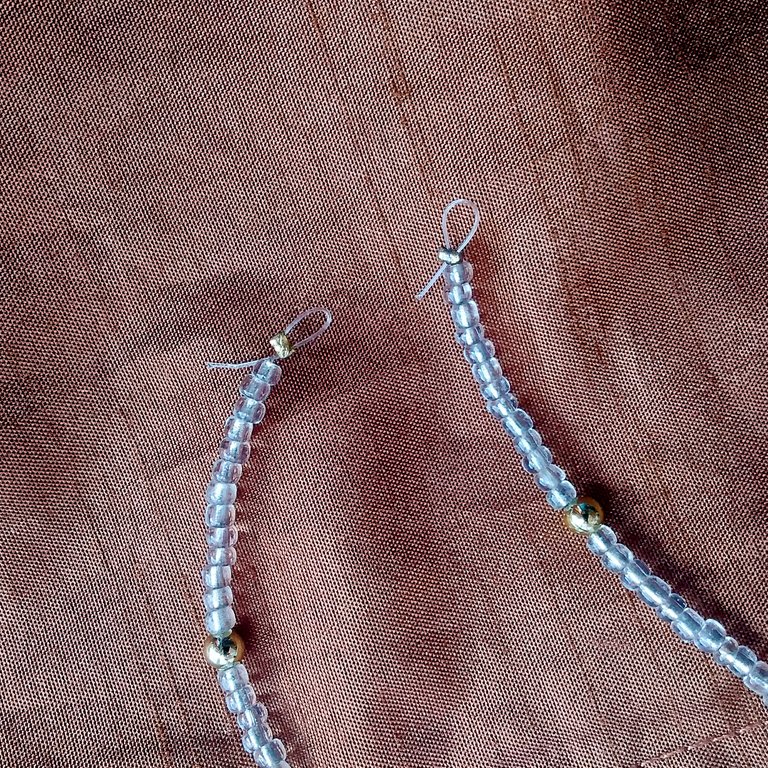
Luego procedemos a hacer otro nudo de la misma manera que al inicio, en mi caso utilicé de estas grapas ya que es mucho más fácil y corté el sobrante.
Then we proceed to make another knot in the same way as at the beginning, in my case I used these staples since it is much easier and I cut the excess.
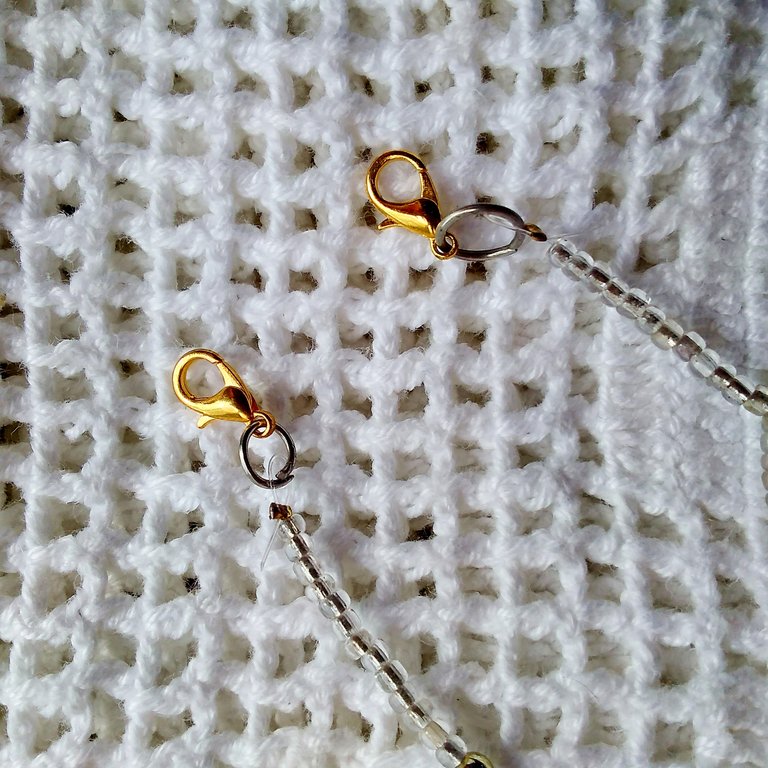
Ya nuestra cadena asegurada, podemos colocar las argollas y los broches en cada extremo de la cadena, justo como se puede apreciar.
Once our chain is secured, we can place the rings and clasps at each end of the chain, just as you can see.
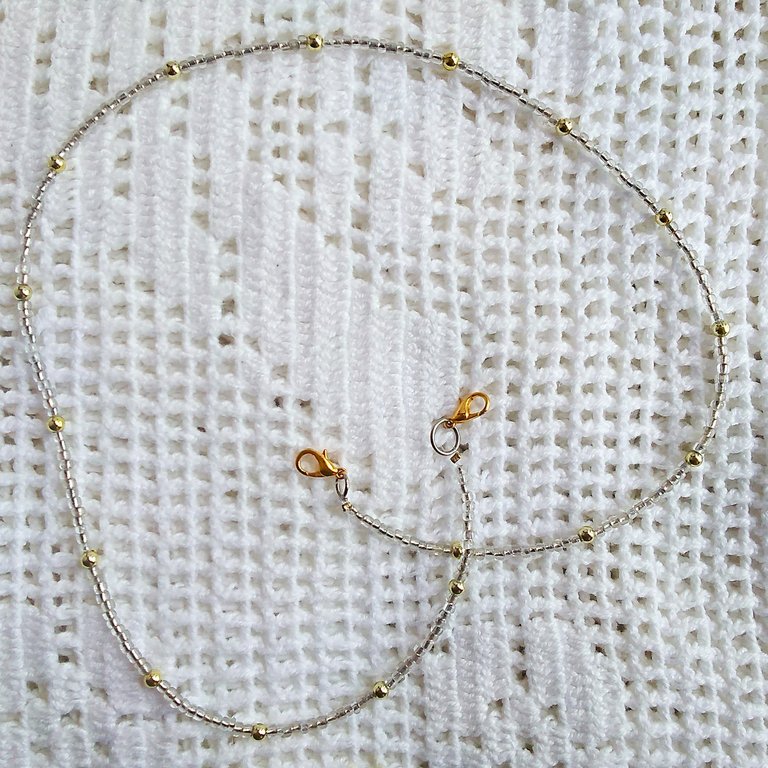
¡Y ya está!
Tenemos nuestra cadenita lista para poder lucir nuestra mascarilla. Es muy fácil y rápido.
And that's it!
We have our chain ready to wear our mask. It is very easy and fast.
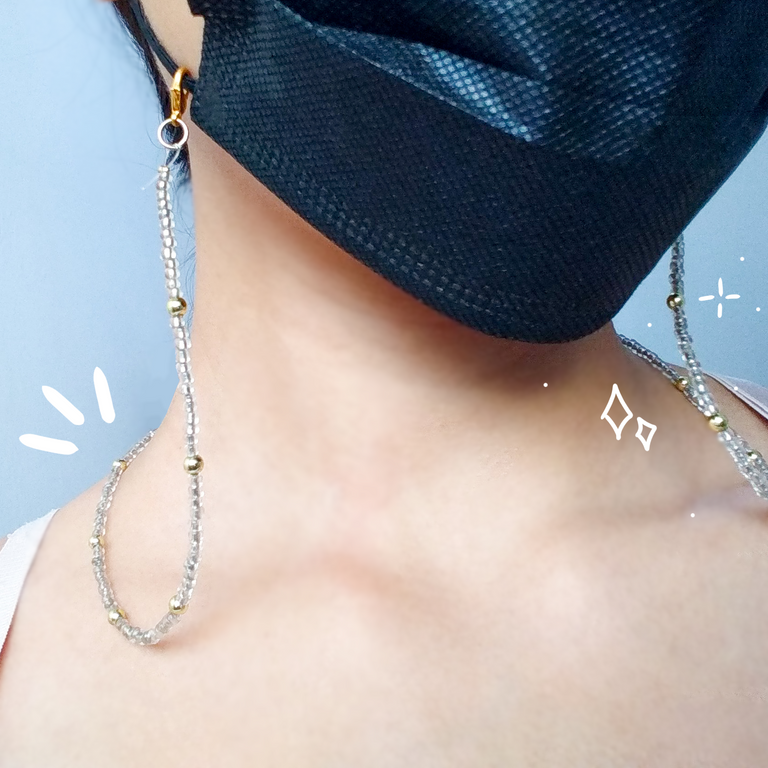
Aquí pueden ver mucho mejor como queda puesta, como dije al inicio puedes utilizarla en los lentes también. Me gustó el largo que utilicé, pero puedes hacerlo como prefieras, es totalmente personalizable. Si deseas utilizar cuentas de colores y hacer una cadenita arcoiris, puedes.
Here you can see much better how it is on, as I said at the beginning you can use it in the lenses too. I liked the length I used, but you can do it however you prefer, it is fully customizable. If you want to use colored beads and make a rainbow chain, you can.
Espero que les haya gustado y se animen a hacerlo. ¡Gracias por visitarme y leer!
I hope you liked it and are encouraged to do it. Thanks for visiting me here and reading.

Congratulations @lilycmd! You have completed the following achievement on the Hive blockchain and have been rewarded with new badge(s):
Your next target is to reach 50 replies.
You can view your badges on your board and compare yourself to others in the Ranking
If you no longer want to receive notifications, reply to this comment with the word
STOPCheck out the last post from @hivebuzz:
Buen trabajo, te ha quedado delicado y es muy útil, creo que me inspiraré en tu proyecto para hace runo para sujetar mis lentes. Gracia por compartir con nosotros.