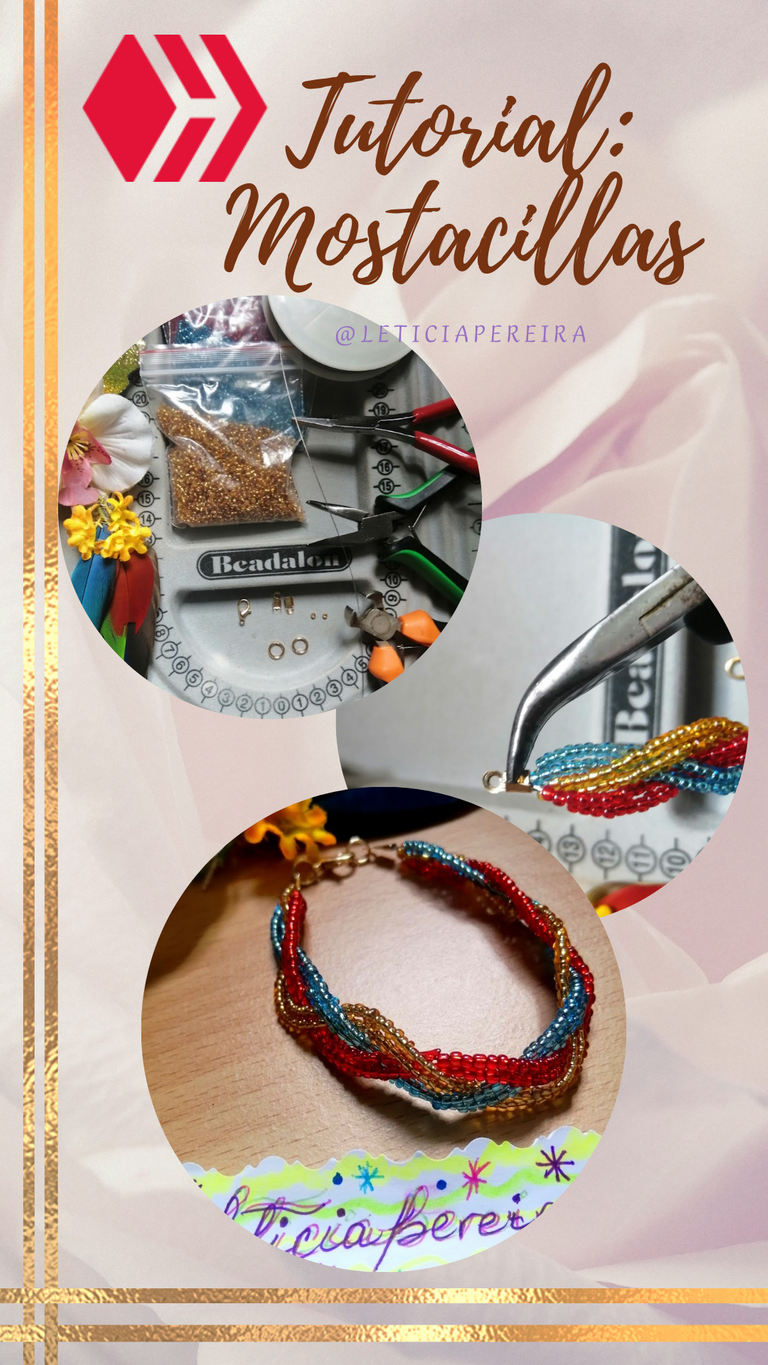
ESP/ENG Brazalete de mostacillas | How to make a mostacilla bracelet | Tutorial | @leticiapereira
Las primeras manifestaciones artísticas de la mostacilla o chaquiras, datan de tiempos remotos: en África exactamente en el Cabo de Buena Esperanza, se encontraron fragmentos de dibujos con incrustaciones de pequeños filamentos de conchas de nácar pintadas en ocre rojo.
Posteriormente, las primeras chaquiras de vidrio, se realizaron en Venecia hacia el siglo XVI y con el pasar del tiempo es la Republica Checa (llamada Bohemia en esa época), quienes se especializan y mejoran las técnicas de elaboración de estas diminutas piezas, logrando un alto nivel de exportación a todo el mundo.
Artesanos indígenas de países de América latina como Perú, México, Venezuela, entre otros, crearon sus propios abalorios, que permitieron crear prendas únicas y con materiales propios al alcance de sus recursos.

The first artistic manifestations of glass beads date back to ancient times: in Africa, exactly at the "Cabo Buena Esperanza", fragments of drawings with incrustations of small filaments of mother-of-pearl shells painted in red ochre were found.
Later, the first glass beads were made in Venice around the 16th century and with the passing of time it was the Czech Republic (called Bohemia at that time) who specialised and improved the techniques of making these tiny pieces, achieving a high level of exportation all over the world.
Indigenous artisans from Latin American countries such as Peru, Mexico, Venezuela, among others, created their own beads, which allowed them to create unique garments with their own materials within the reach of their resources.

Es un placer volver a presentarles un tutorial que permita ampliar la gama de técnicas que puedes utilizar en tu emprendimiento o idea de negocio. Para hoy les presento una hermosa pulsera de seis (06) hilos de mostacillas, muy sencilla de hacer y con muy pocos materiales, acompáñenme!
It is a pleasure to present again a tutorial that allows you to expand the range of techniques that you can use in your venture or business idea. For today I present a beautiful bracelet of six (06) strands of beads, very simple to make and with very few materials, join me!
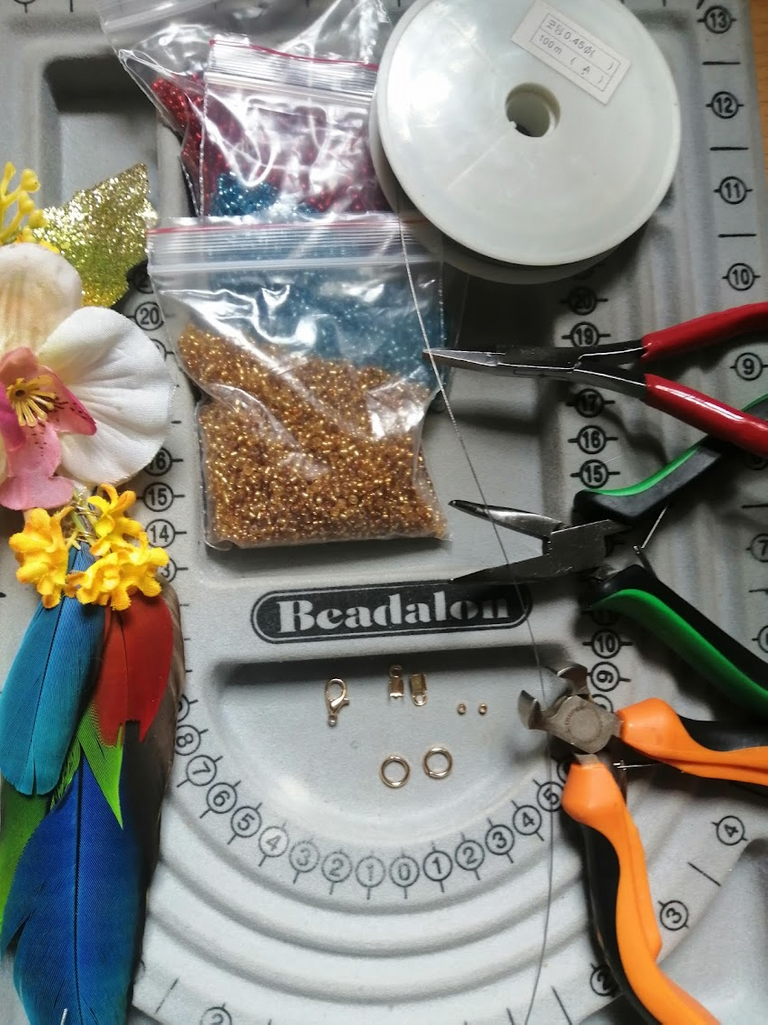
Materiales a utilizar:
- Hilo encerado de 0.45mm
- Mostacillas a tu gusto
- Dos (02) Grapas o escalachín
- Dos (02) Tapa nudos planos
- 1 Broche de cierre
- Dos (02) Aros rígidos de 4mm
- Pinzas de bisutería (planas)
- Tijera
- Tabla de diseño, en su defecto una regla de 30cm
- 0.45mm waxed thread
- Beads of your choice
- Two (02) staples or scallops
- Two (02) Flat knot covers
- 1 clasp for closing
- Two (02) 4mm rigid rings
- Fashion jewellery tweezers (flat)
- Scissors
- Design board, or failing that a 30cm ruler
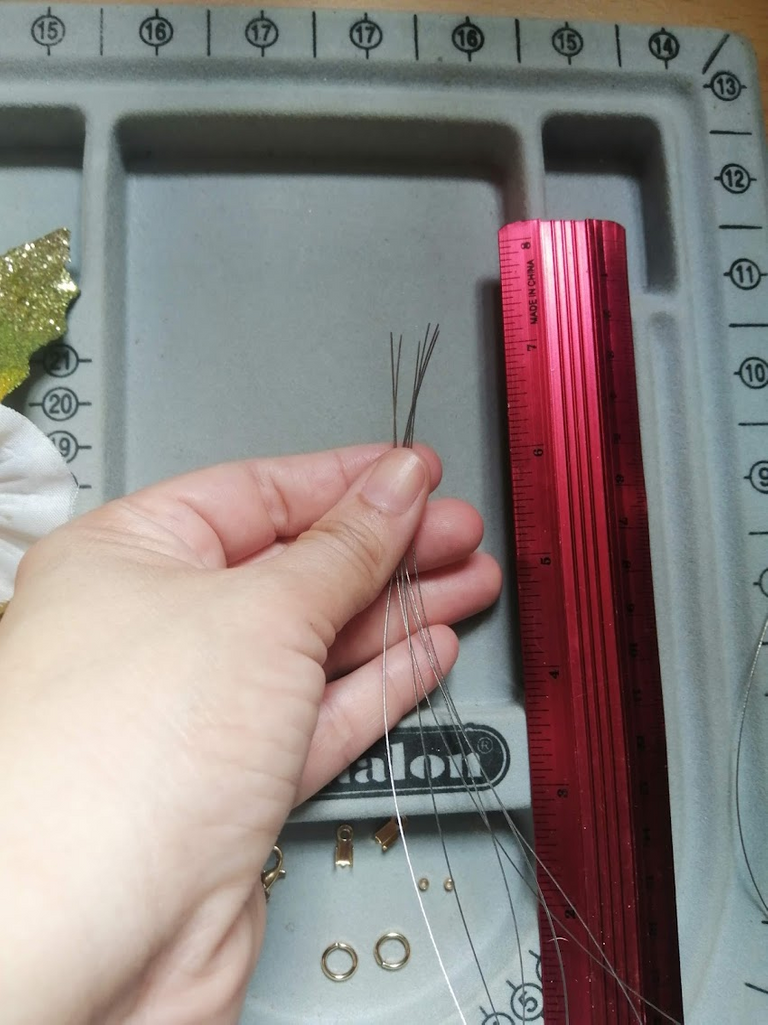
Procedimiento a seguir:
Cortamos seis (06) hilos de 30 cm cada uno
Procedure to follow:
Cut six (06) threads of 30 cm each.
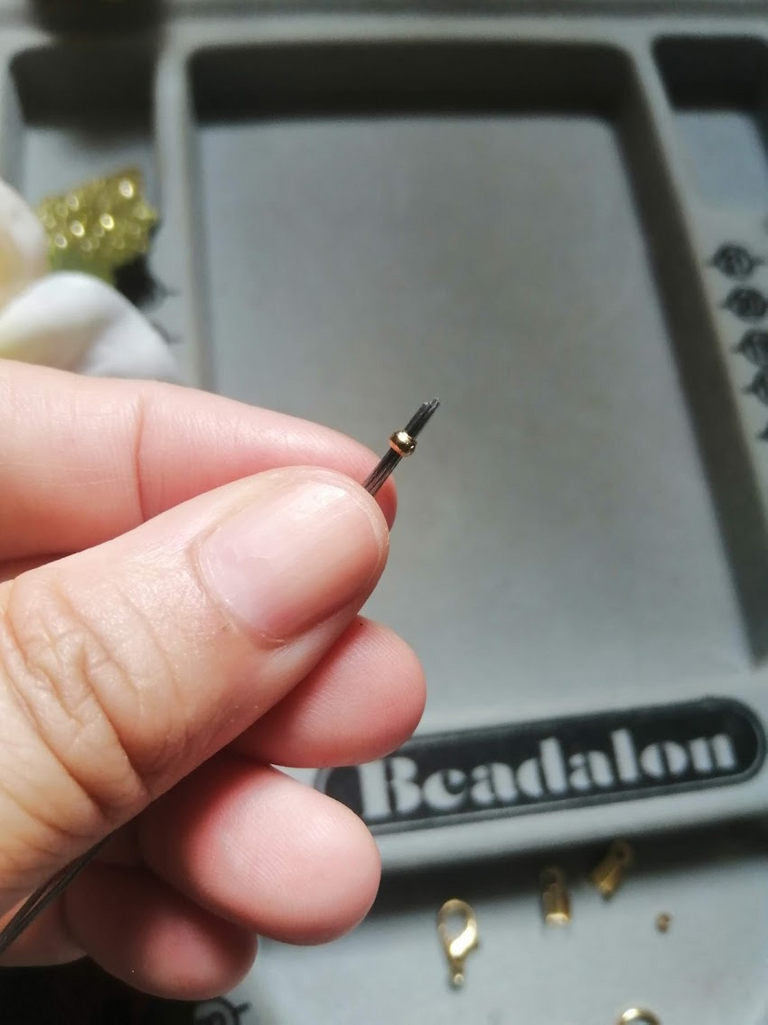
Colocamos una grapa o escalachín al principio de los hilos
We place a staple at the beginning of the threads.
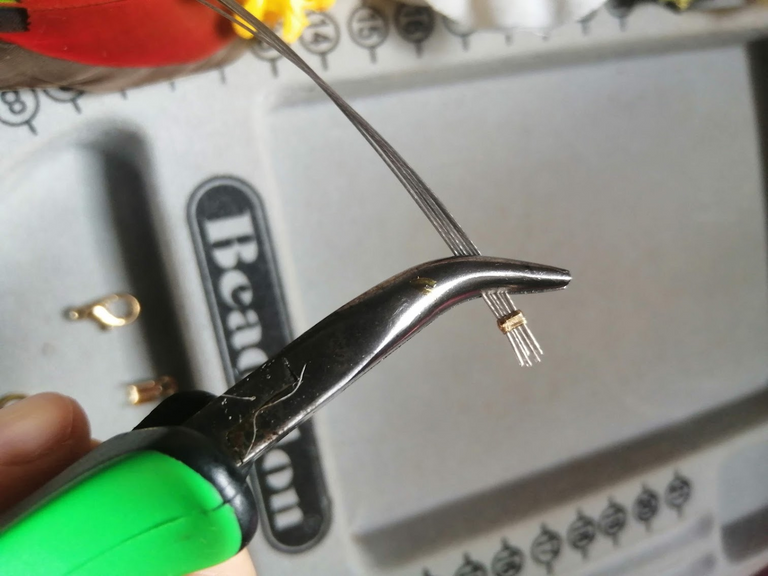
Con ayuda de la pinza plana, ajustamos muy bien nuestra grapa.
With the help of the flat clamp, we tighten our clamp very well.
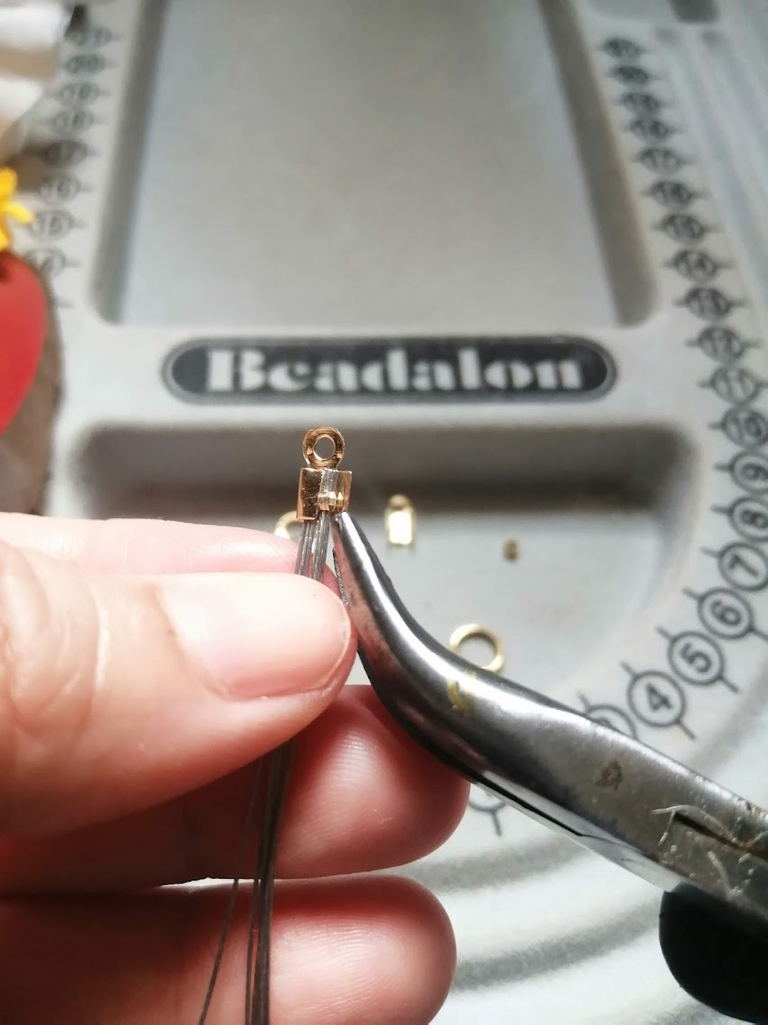
Ahora, procedemos cubrir la terminación mediante el uso de un tapa nudos, con sumo cuidado colocamos nuestros hilos en la guía del terminal y cerramos.
Now, we proceed to cover the termination by using a knot cover, carefully place our threads in the guide of the terminal and close it.
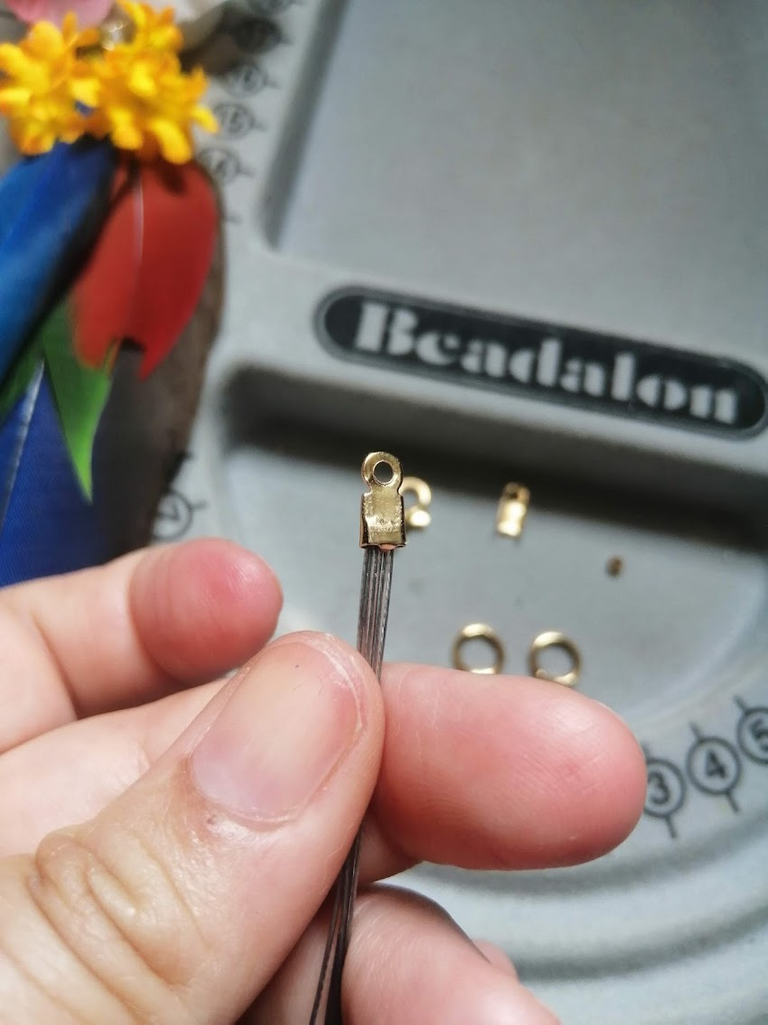
De esta manera queda nuestro primer extremo.
That leaves our first end.
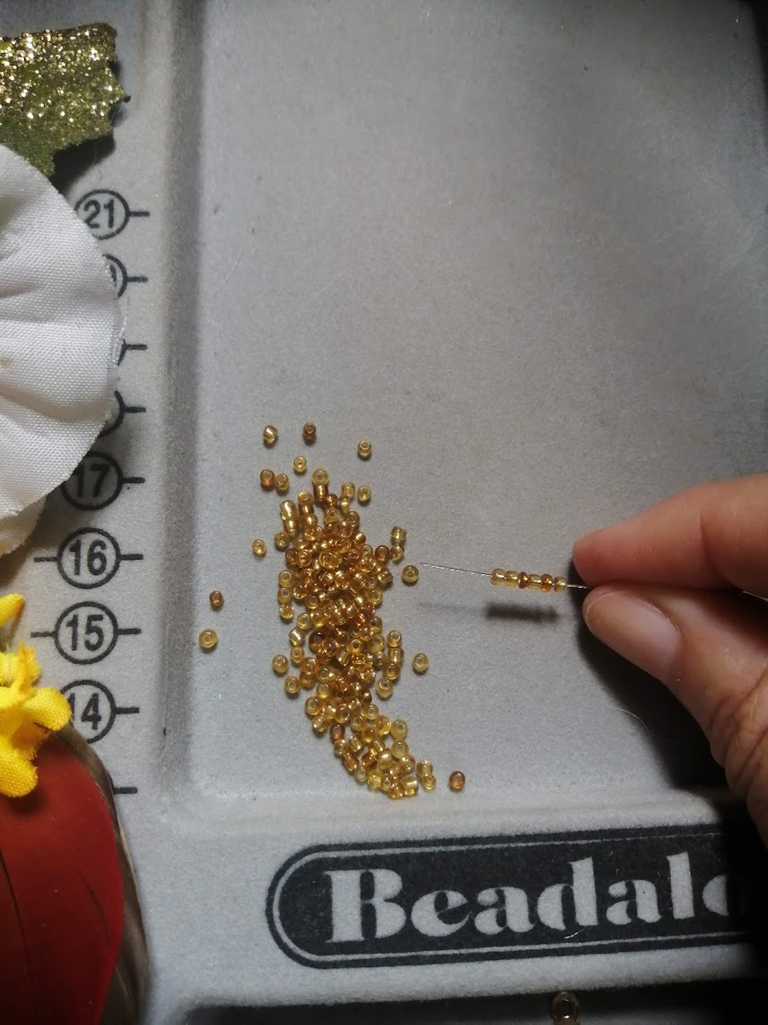
Ahora vamos a ir llenando nuestros hilos con las mostacillas: primer turno a las amarillas.
Now we are going to fill our threads with the beads: first turn to the yellow ones.
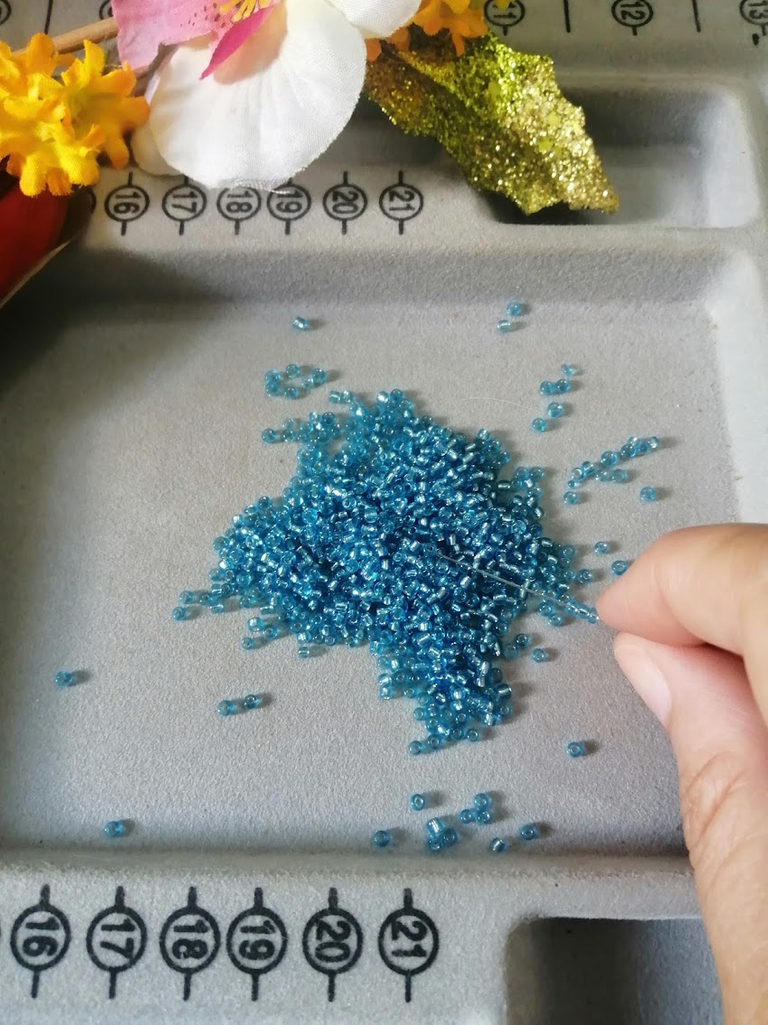
Luego le toca el turno a las azules
Then it's the turn of the blues
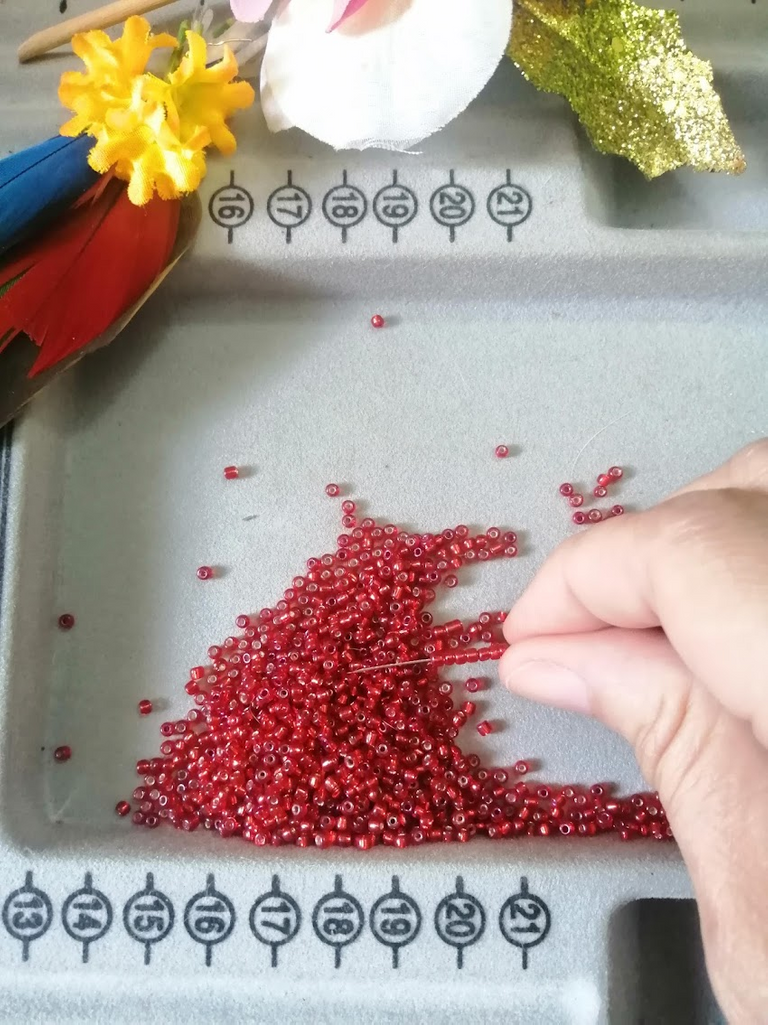
Ahora las dos ultimas hileras rojas.
Now the last two red rows.
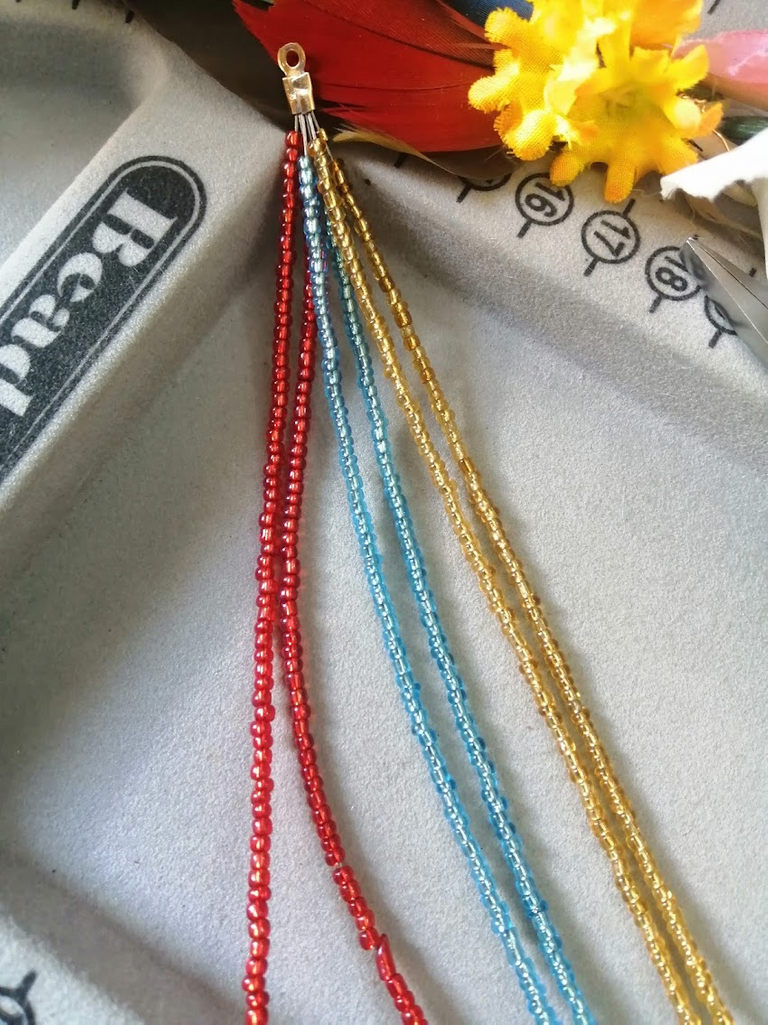
Así deben quedar los hilos de mostacillas, se ven lindos, cierto?
This is how the beads should look, they look nice, don't they?

Ajustamos nuestra pulsera en una carpeta con gancho y empezamos a tejer una clineja, tal como se observa en la gráfica.
We fit our bracelet on a hook binder and start weaving a stitch, as shown in the illustration.

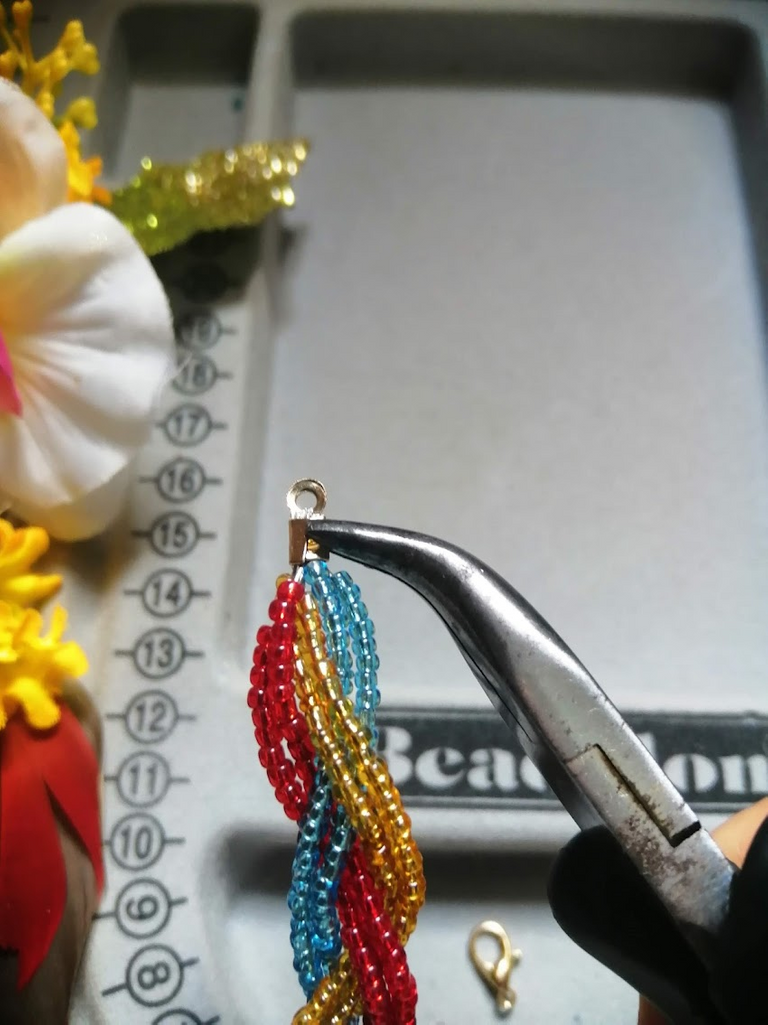
Sean cuidadosos cuando vayan acercándose al final. Deben medir 14cm, marquen con sumo cuidado y saquen las mostacillas que sobren, introduzcan la grapa con mucho cuidado para que la trenza no se suelte.
Be careful as you approach the end. They should be 14cm long, mark very carefully and remove the excess beads, insert the clip very carefully so that the braid does not come loose.
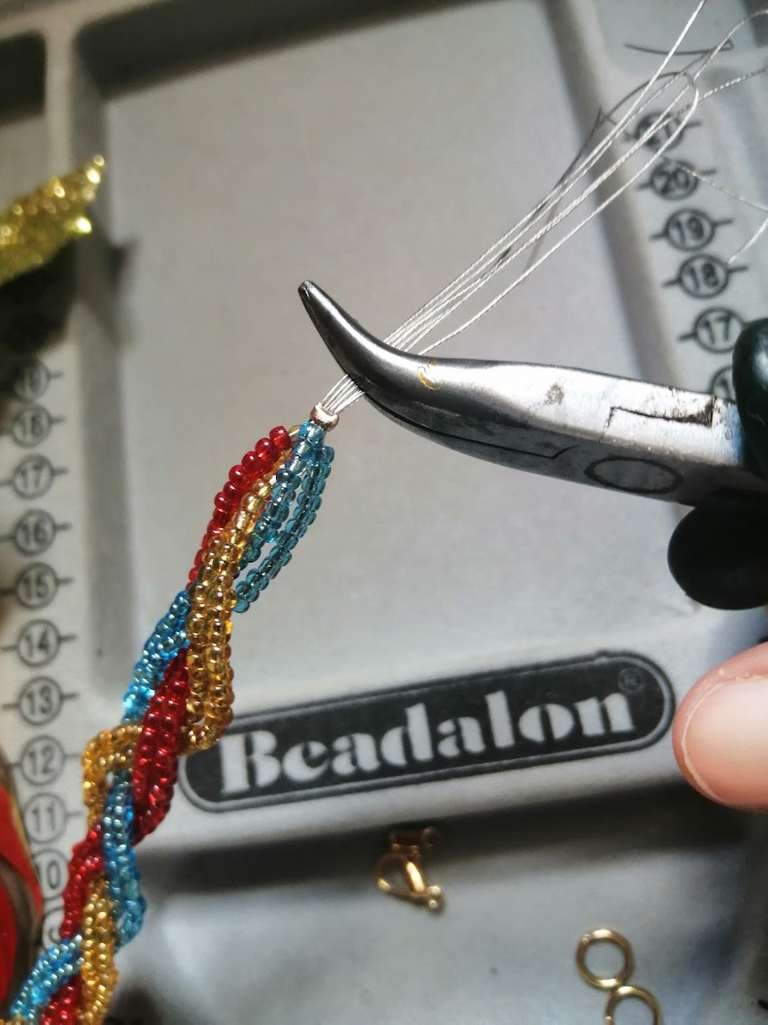
Mantengan la firmeza y el control de la pieza en todo momento, una vez que hayan realizado el ajuste correspondiente, procedan al ajuste de la grapa y corten el excedente del hilo.
Maintain firmness and control of the workpiece at all times. Once you have made the appropriate adjustment, proceed to tighten the clamp and cut off the excess thread.
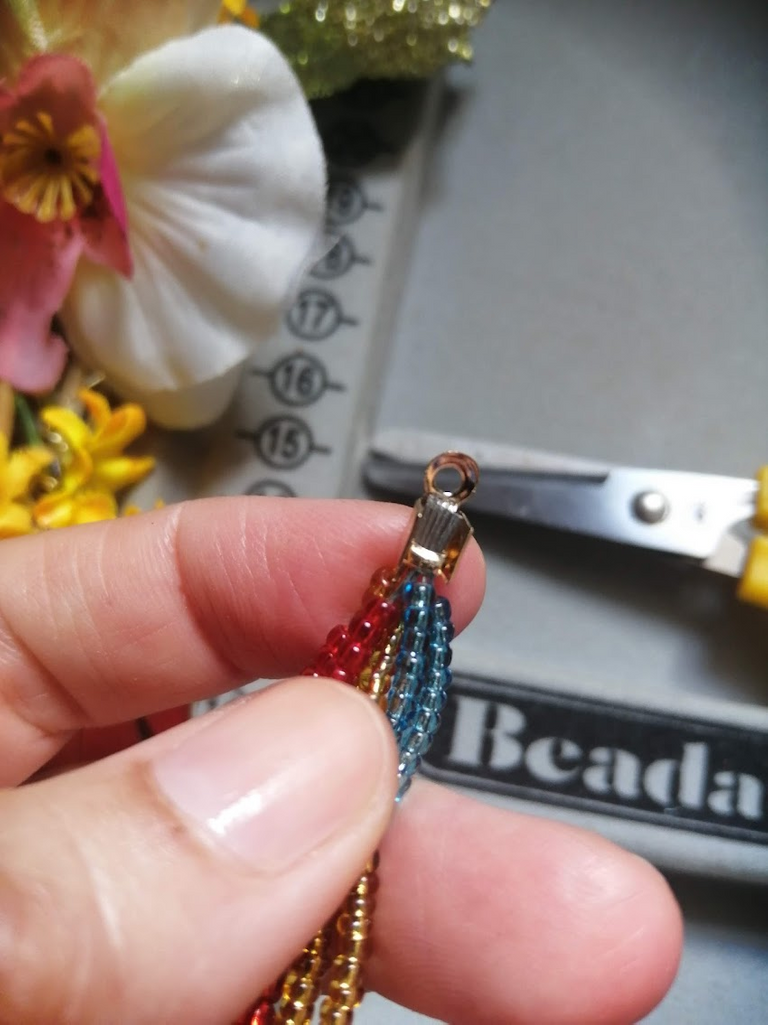
Coloquen el tapa nudos
Put on the knot cover
Ajusten firmemente, pero con cuidado de no dejar marcas que maltraten la piel.
Fit securely, but be careful not to leave marks that will damage the skin.
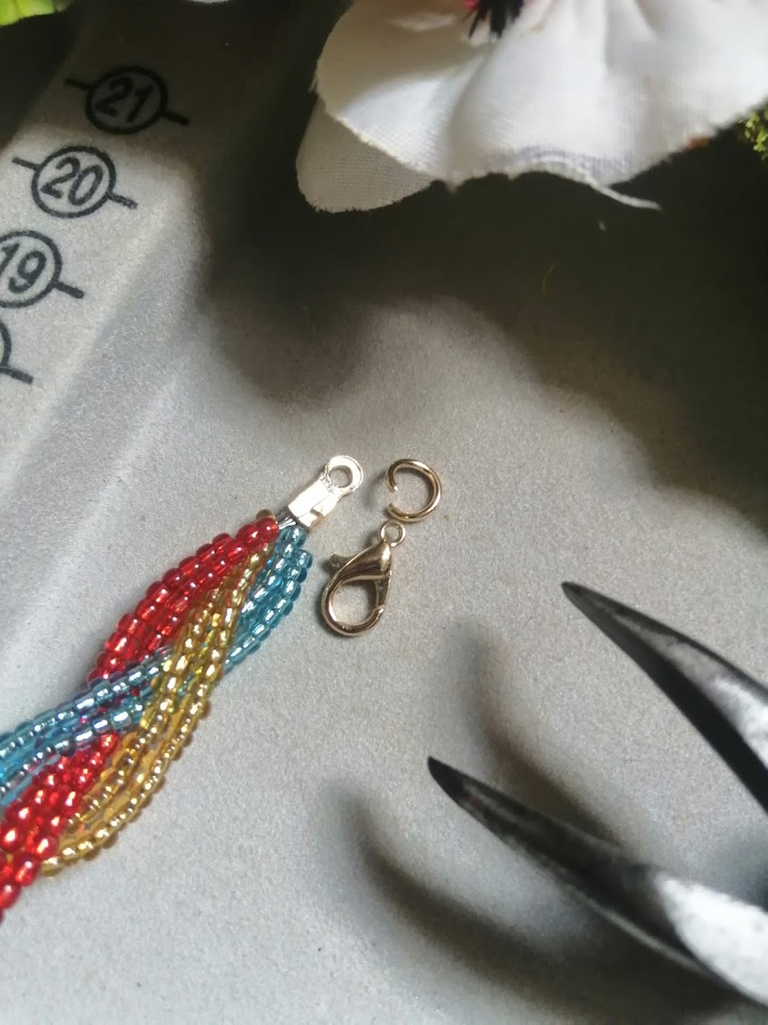
Coloquen los aros y el broche en el extremo que corresponda:
Place the clips on the end of the earrings and the brooch:
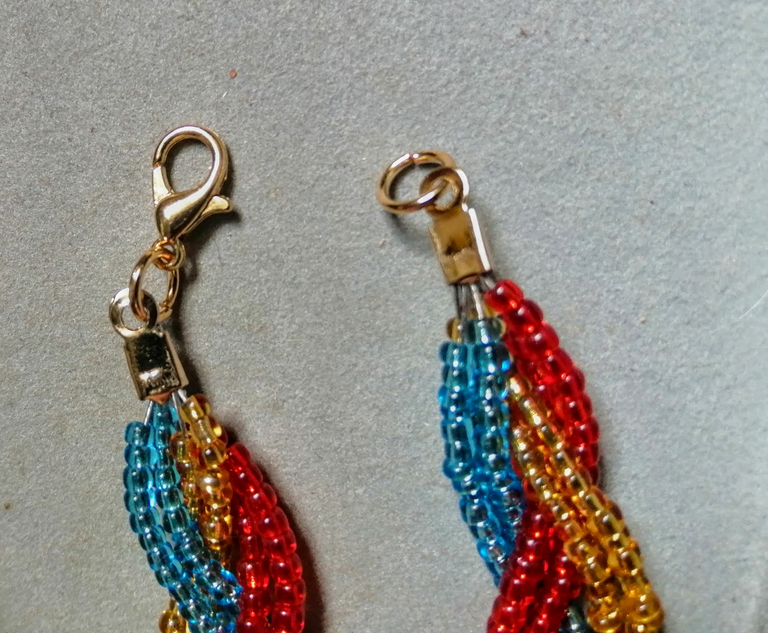
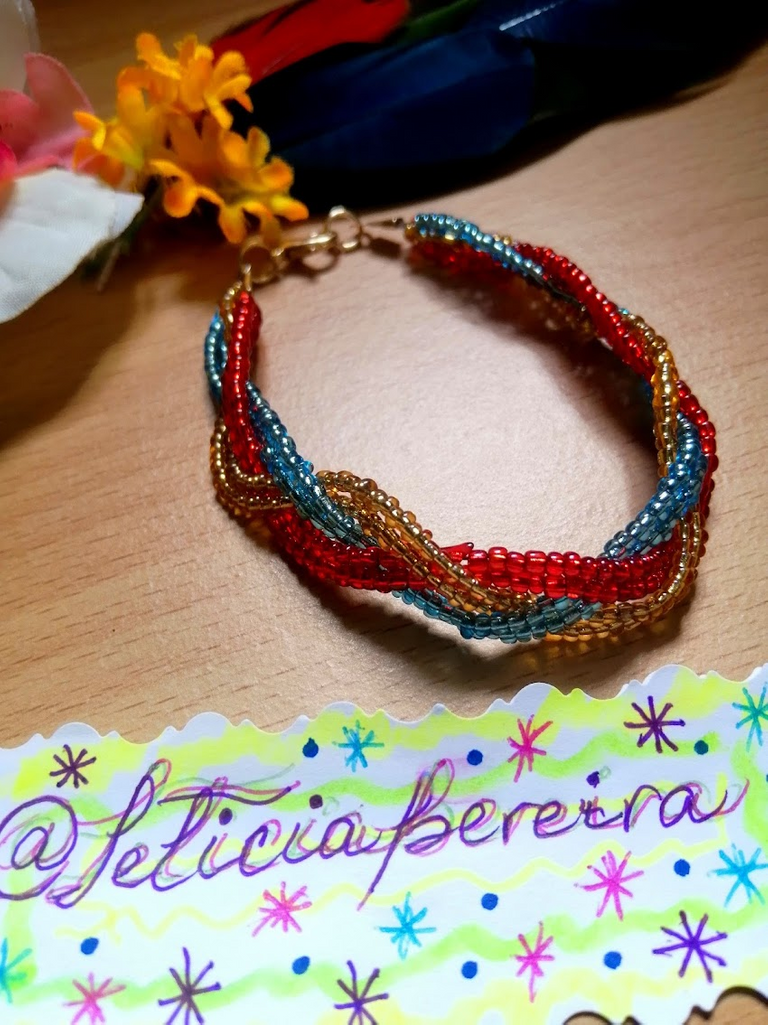
De esta manera queda nuestra linda pulsera de chaquiras, un material fácil y económico que no te dejará pasar desapercibida.
This is how our pretty bead bracelet turns out, an easy and inexpensive material that will make you look beautiful.
Espero que te haya gustado este paso a paso, disculpa si ha quedado muy extenso, pero quise mostrar todos los detalles. Si tienes dudas, házmelo saber en los comentarios, espero verles pronto de nuevo..!!
Por favor cuídense mucho, manténganse a salvo ustedes, así sus seres amados también estarán sanos.!! Hasta nuestro próximo tutorial..!!, Se les quiere..!!
I hope you liked this step by step, sorry if it was too long, but I wanted to show all the details. If you have any questions, let me know in the comments, I hope to see you again soon!
Please take care of yourselves, keep yourselves safe, so your loved ones will be healthy too!!!! Until our next tutorial!!!, You are loved!!!!!

Autor: @leticiapereira
Camera: HuaweiY9/2019
Central picture performed by CANVAS
Miranda, Venezuela
Translated with www.DeepL.com/Translator (free version)
Qué preciosos, me encantaron los tejidos. Gracias por compartir con nosotros.
Muchas Gracias @equipodelta, por el apoyo que me han brindado..!! Me comprometen a crear más y mejor contenido..!! Gracias..!!
Thank you for sharing this amazing post on HIVE!
Your content got selected by our fellow curator @rezoanulvibes & you just received a little thank you via an upvote from our non-profit curation initiative!
You will be featured in one of our recurring curation compilations and on our pinterest boards! Both are aiming to offer you a stage to widen your audience within and outside of the DIY scene of hive.
Join the official DIYHub community on HIVE and show us more of your amazing work and feel free to connect with us and other DIYers via our discord server: https://discord.gg/mY5uCfQ !
If you want to support our goal to motivate other DIY/art/music/homesteading/... creators just delegate to us and earn 100% of your curation rewards!
Stay creative & hive on!
Con el apoyo de la familia.
Trail de TopFiveFamily
Con el apoyo de la familia.
Trail de TopFiveFamily
Que lindo, me gusta mucho estas cosas de buena energía, gracias por compartir
Muchas gracias @karbea...!! Me alegra mucho tu cometario..!!
Te quedó muy bonita @leticiapereira y se ve bastante fácil de hacer.
Muchas gracias @josegilberto..!! Muy agradecida por el apoyo..!!