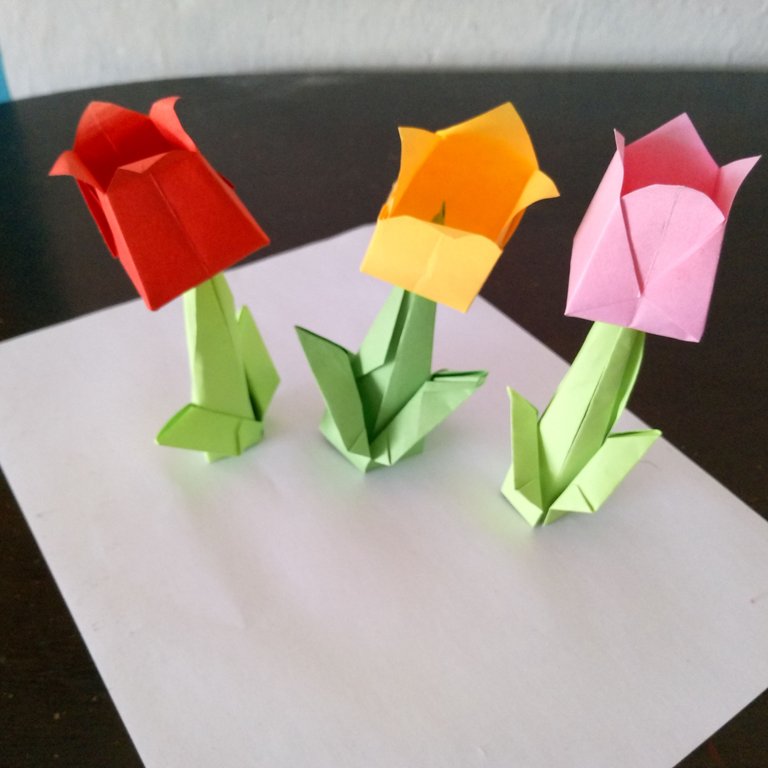
Creation of tulips with the origami technique / (ENG/ESP)


Saludos para todos apreciados amigos, hoy les presentó una hermosa manualidad que realice con pocos materiales y un resultado fantástico.
Me siento muy emocionada porque emprendí mi nuevo proyecto de origami y me ha ido muy bien debido a que es propicio para calmar la ansiedad y mantener la concentración
Tengo tiempo observando hermosas publicaciones donde usan las técnicas del origami para crear fascinantes manualidades, así que tengo la meta de aprender mucho para poder presentarles grandes cosas en este estilo de manualidad.
Los invito a seguir el paso a paso de este arte tan hermoso.
Las fotografías que verán a continuación, fueron tomadas con mi teléfono modelo TECNO SPARK GO 2023.

Greetings to all dear friends, today I present you a beautiful craft that I made with few materials and a fantastic result.
I feel very excited because I started my new origami project and it has been going very well because it is conducive to calm anxiety and keep my concentration.
I have been observing beautiful publications where they use origami techniques to create fascinating crafts, so I have the goal of learning a lot to be able to present you great things in this style of craft.
I invite you to follow the step by step of this beautiful art.
The pictures you will see below were taken with my phone model TECNO SPARK GO 2023.

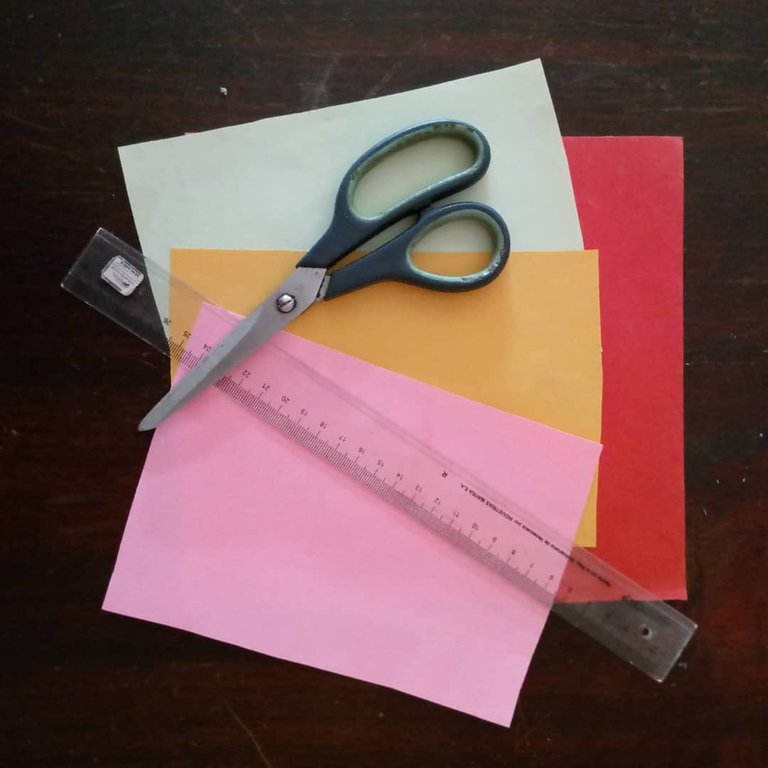
Materiales:
Papel de colores como rojo, amarillo, verde y rosado.
Tijera
Regla
Pega blanca
Materials:
Colored paper such as red, yellow, green and pink.
Scissors
Ruler
White glue
 1 1 | 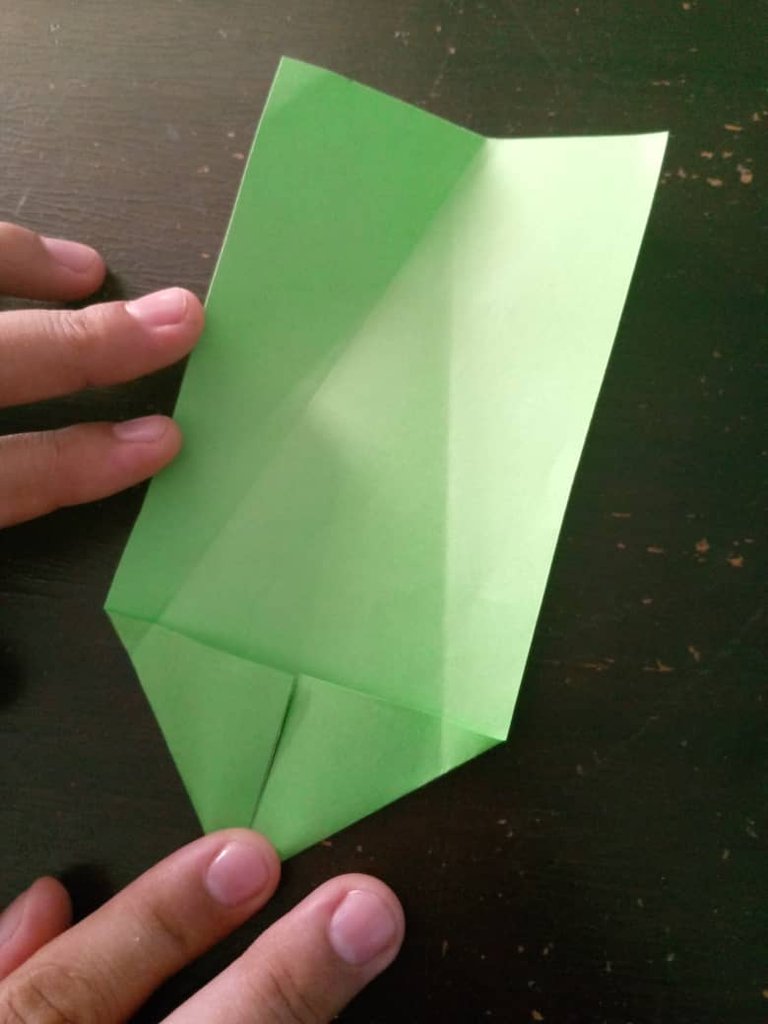 2 2 | 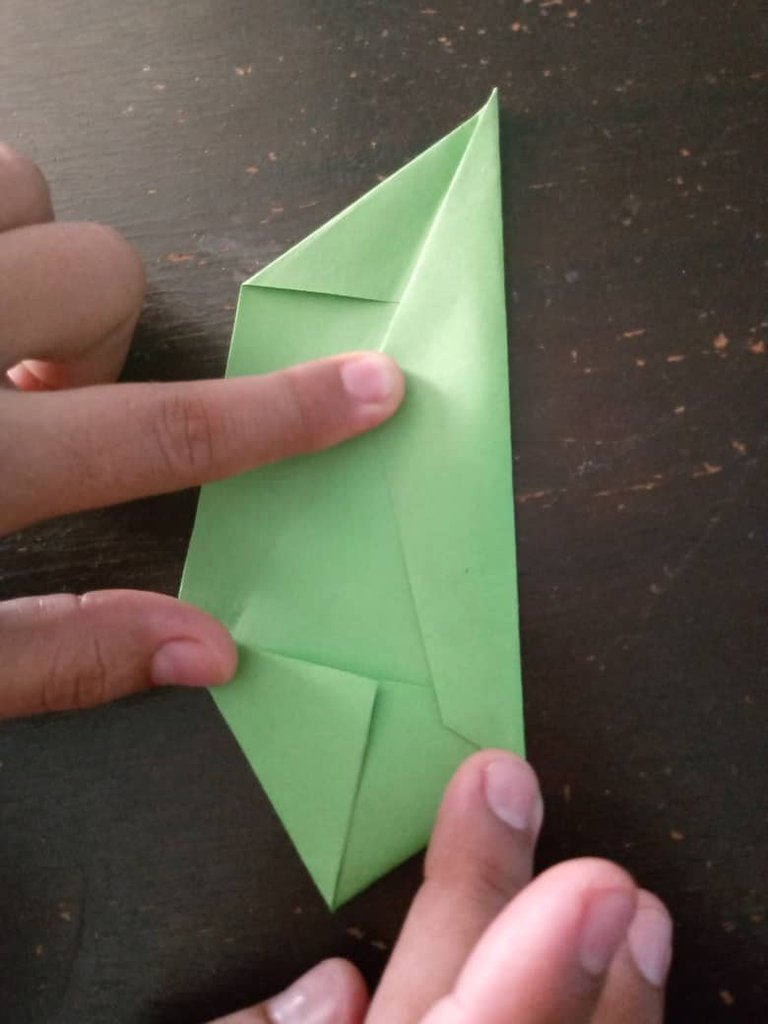 3 3 |
|---|
 4 4 | 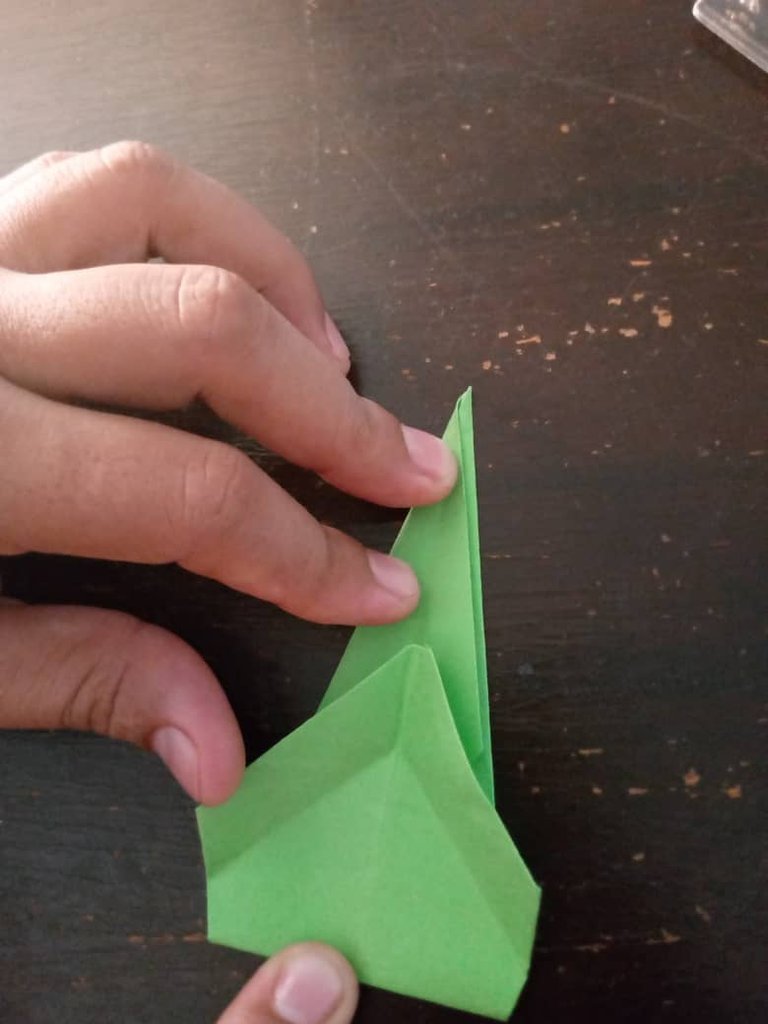 5 5 | 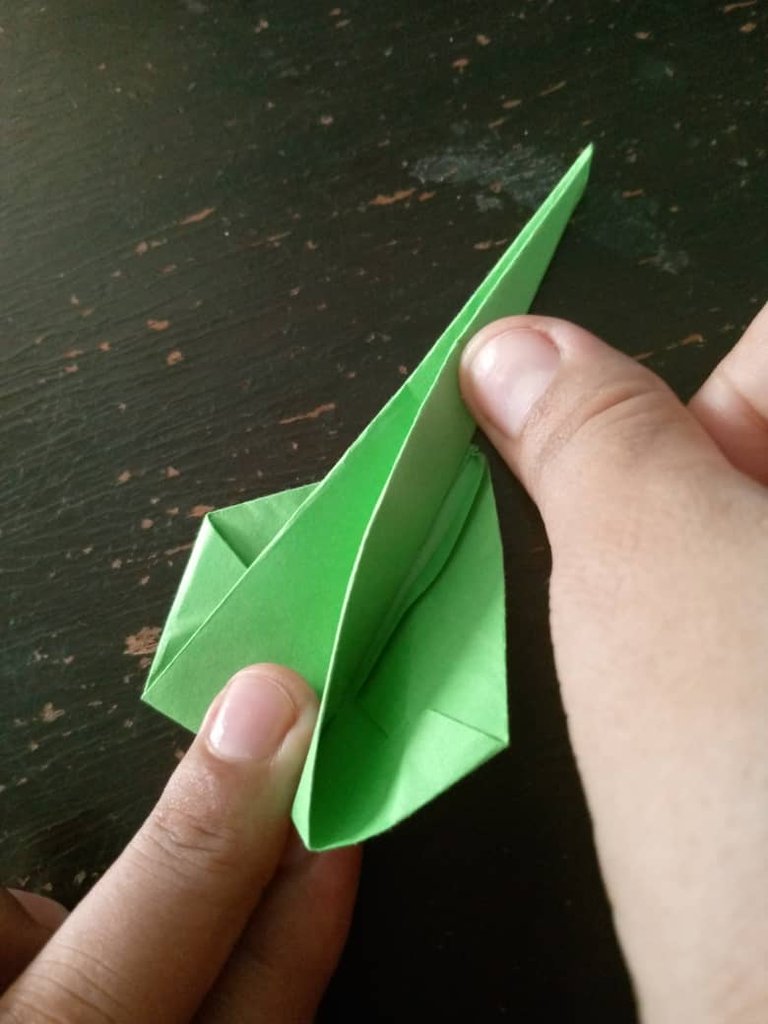 6 6 |
|---|
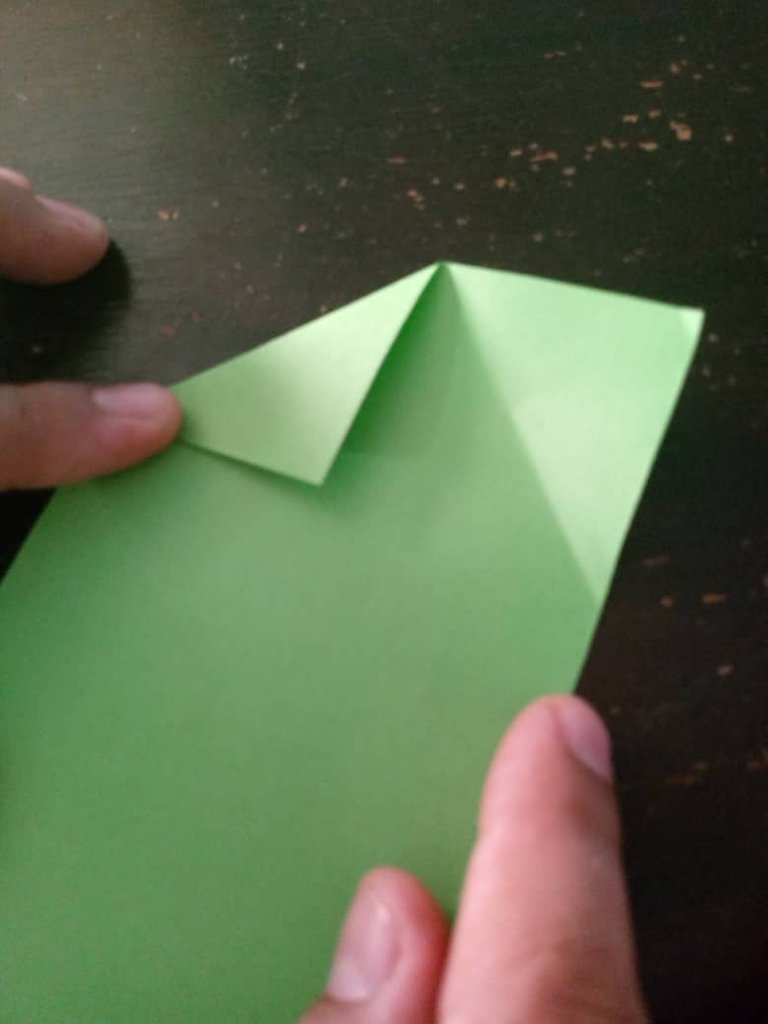
Comenzaremos con el tallo de estos hermosos tulipanes.
Lo primero que aremos es recortar un cuadro de la hoja de papel de color verde para el tallo a 12 centímetros de largo por 9.5 de ancho.
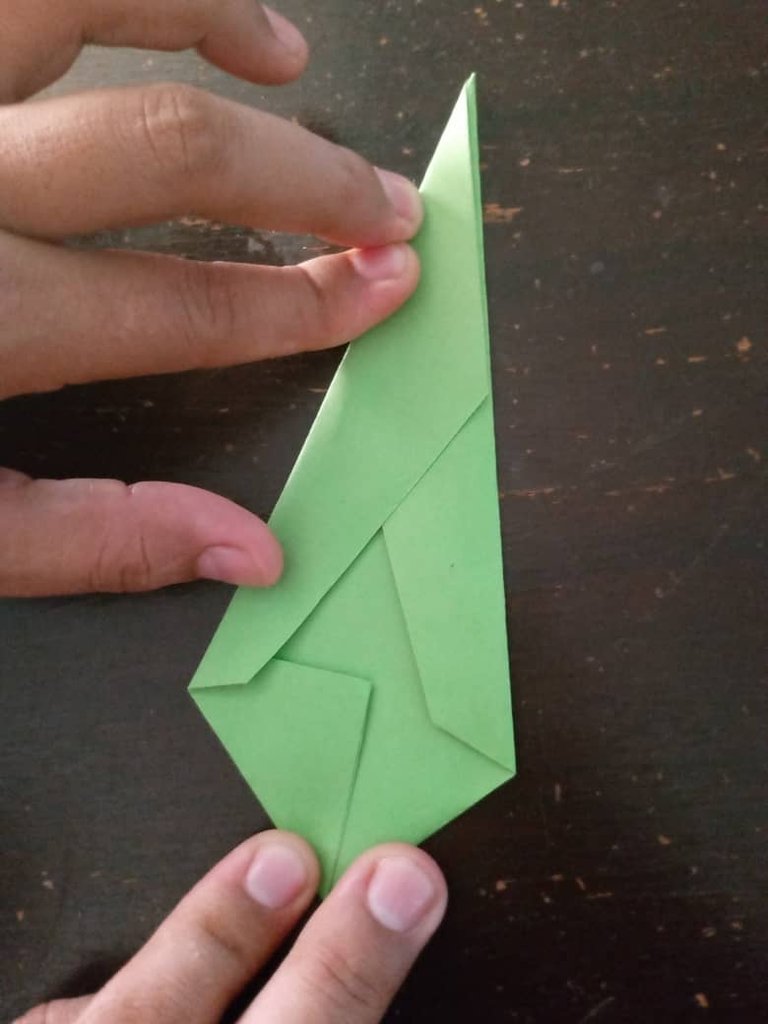
1- Luego doblaremos 2 veces en uno de los lados, el tipo de doble debe ser mas corto como lo muestran las fotos 1 y 2.
2- Del otro extremo doblamos para darle la forma de una punta de flecha, podemos notar como tenemos nuestra marca en la hoja para facilitar nuestro trabajo más adelante.
3- Después doblaremos el otro extremo como el que hicimos en el paso 1 para volverlo a doblar como lo hicimos en el paso 2.
4- Hacemos lo mismo en el otro extremo de la hoja a así tener una punta de flecha.
5- De la parte inferior del paso 1, lo doblaremos hacia arriba
como para darle forma de una casa y las puntas del mismo los doblaremos hacia adelante, el mismo tendrá la forma del techo de una casa.
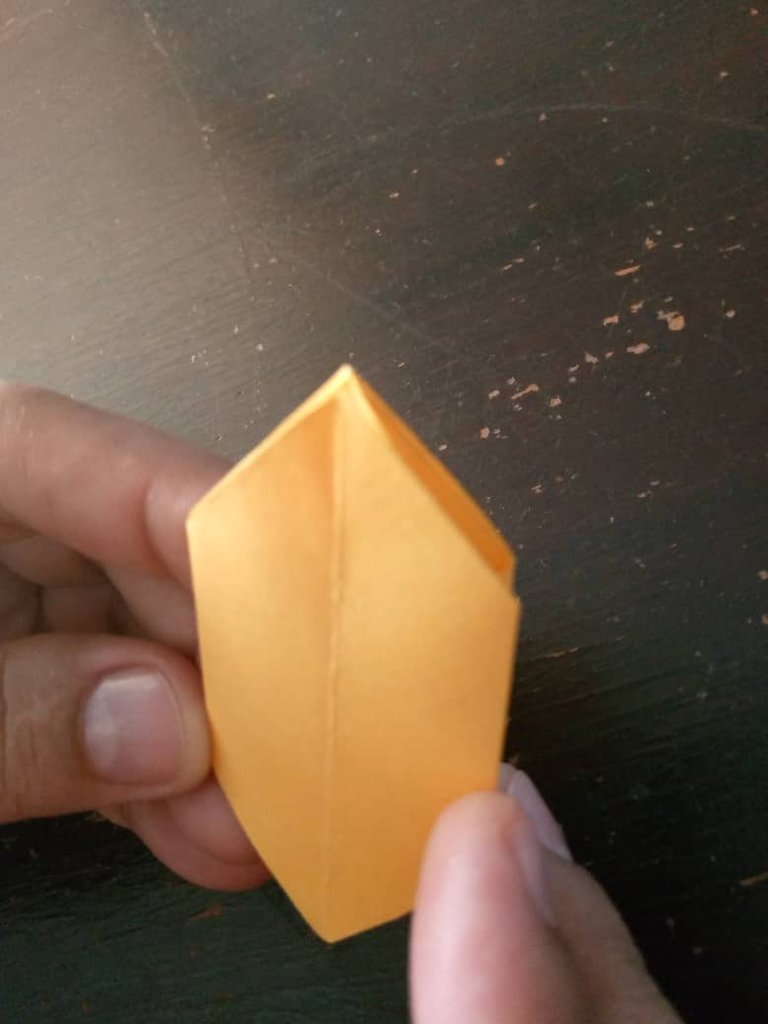
6- Luego en la parte de atrás lo doblaremos por la mitad apoyando nuestro dedo pulgar sobre la hoja para asi darle la forma a nuestro tallo.
We will start with the stem of these beautiful tulips.
The first thing we will do is to cut out a square from the green colored paper sheet for the stem at 12 centimeters long by 9.5 centimeters wide.
1- Then we will fold 2 times on one of the sides, the type of fold should be shorter as shown in photos 1 and 2.
2- On the other end we fold to give it the shape of an arrowhead, we can notice how we have our mark on the sheet to facilitate our work later.
3- Then we will fold the other end as we did in step 1 to fold it again as we did in step 2.
4- We do the same on the other end of the sheet so we have an arrowhead.
5- From the lower part of step 1, we will fold it upwards as to give it the shape of a house.
and the ends of it we will fold it forward, it will have the shape of the roof of a house.
6- Then in the back part we will fold it in half supporting our thumb on the leaf to give it the shape of our stem.
 1 1 | 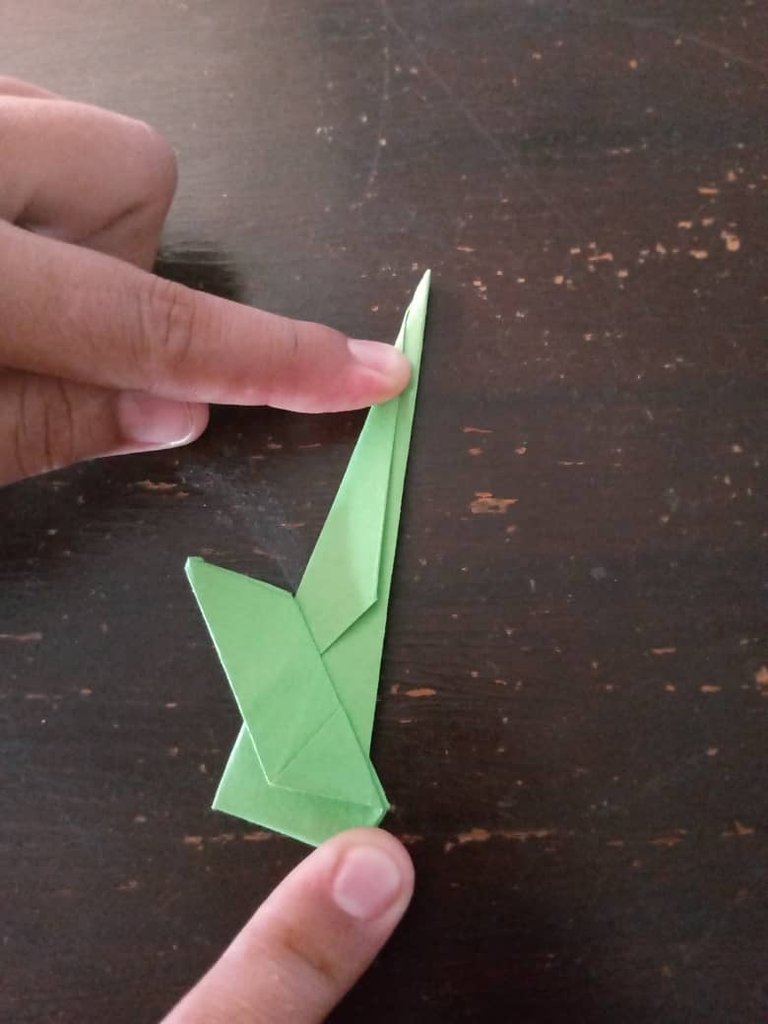 2 2 | 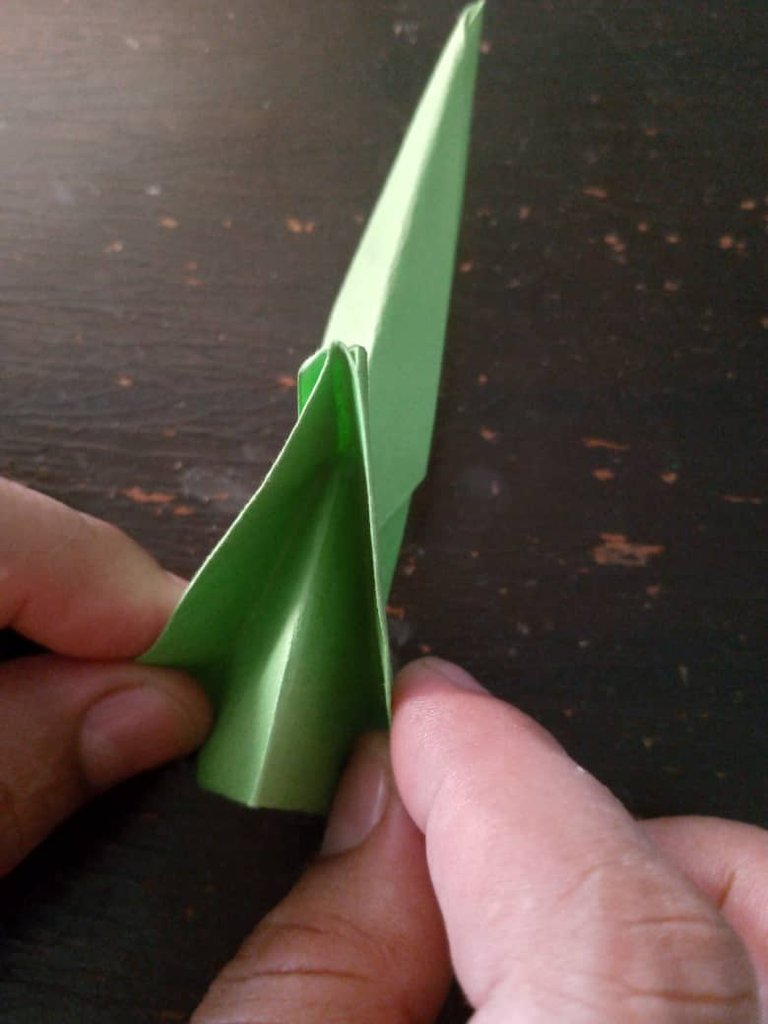 3 3 |
|---|
Seguido, desde la parte que será nuestra hoja, doblamos hacia atrás para finalizar con lo que sería el tallo y la hoja de nuestro hermoso tulipán.
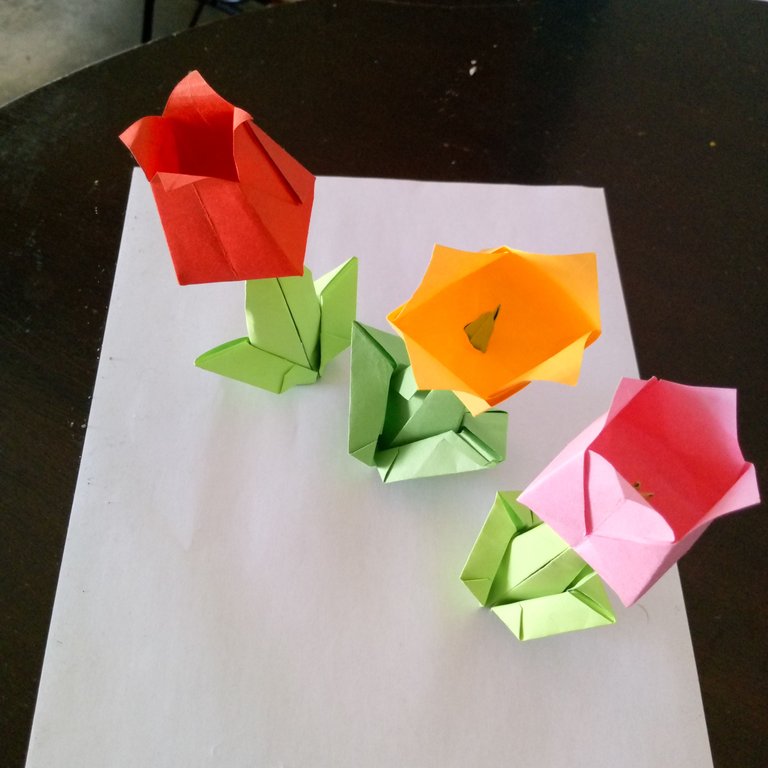
Aquí pueden observar como se hace 1 lado de la base de la flor, de este haremos 2 iguales, los mismos se colocaran frente con frente para que queden 2 hojas de cada lado y se note un mejor efecto.
Así nuestro tulipán puede colocarse en cualquier lugar que queramos colocarlo, también puede hacerse con 1 solo lado y quedaría como resultado 1 tallo con una sola hoja, cualquiera de las 2 que elijan es una linda opción.
Then, from the part that will be our leaf, we fold backwards to finish with what would be the stem and the leaf of our beautiful tulip.
Here you can see how 1 side of the base of the flower is made, from this we will make 2 equal ones, the same ones will be placed facing each other so that there are 2 leaves on each side and a better effect is noticed.
Thus our tulip can be placed anywhere we want to place it, it can also be done with only 1 side and the result would be 1 stem with a single leaf, any of the 2 you choose is a nice option.
 |  |  |
|---|
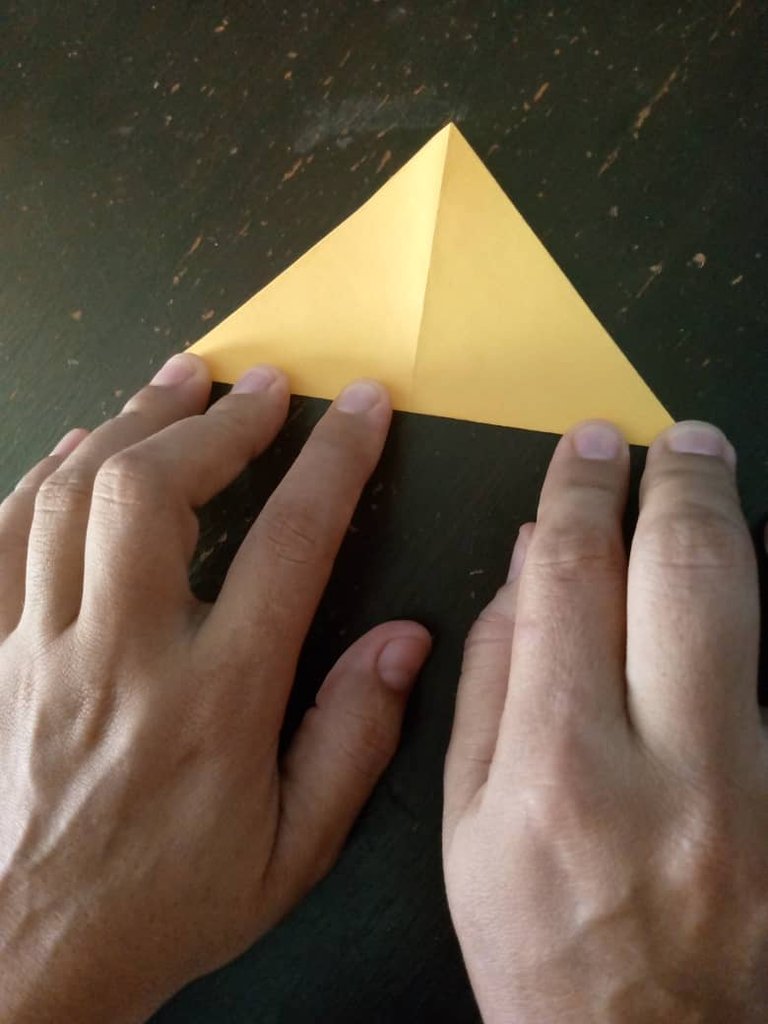
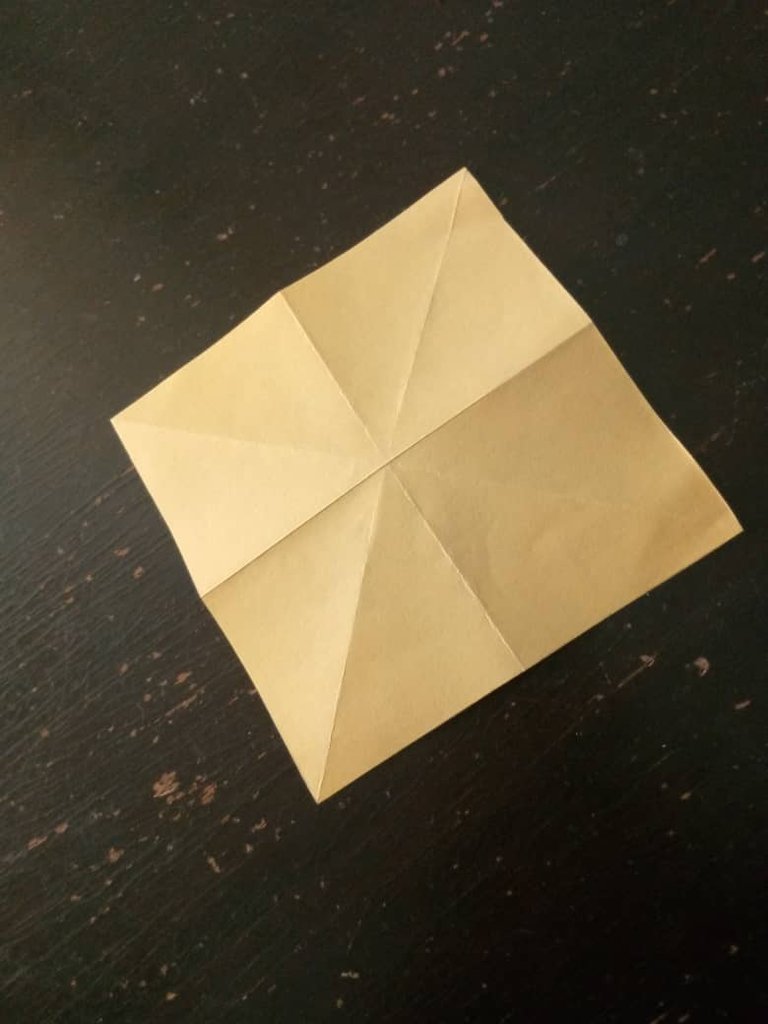
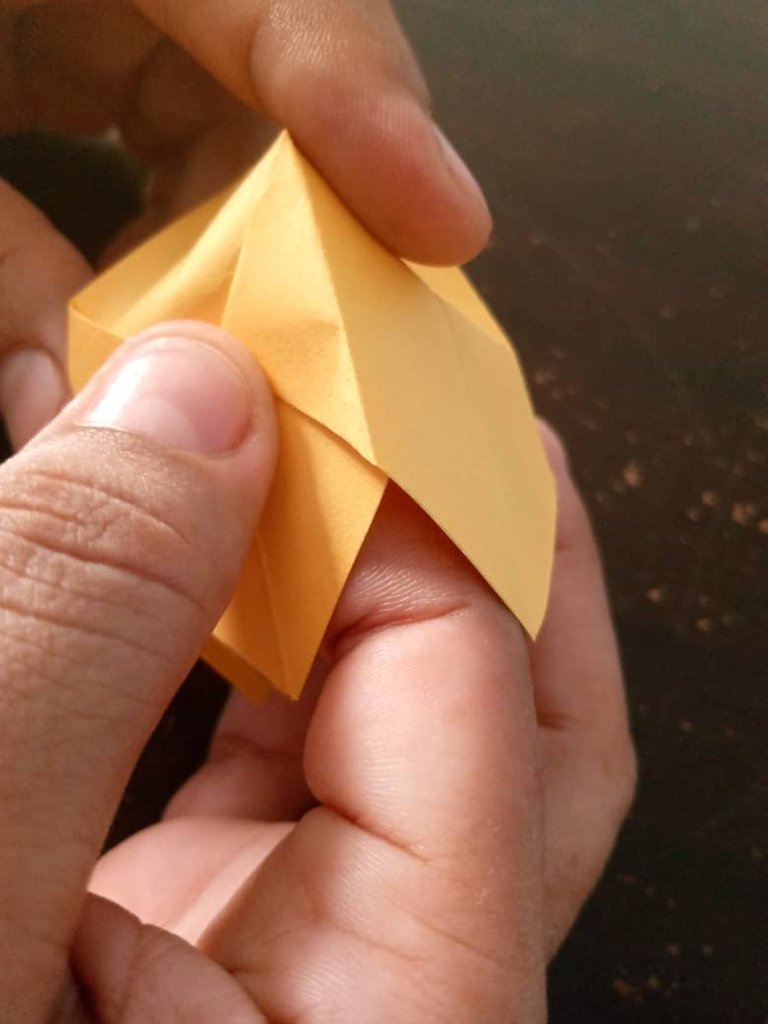
Al culminar con nuestro tallo, ahora seguimos con la flor, el mismo tiene una medida de 11 centímetros de largo por 11 centímetros de ancho.
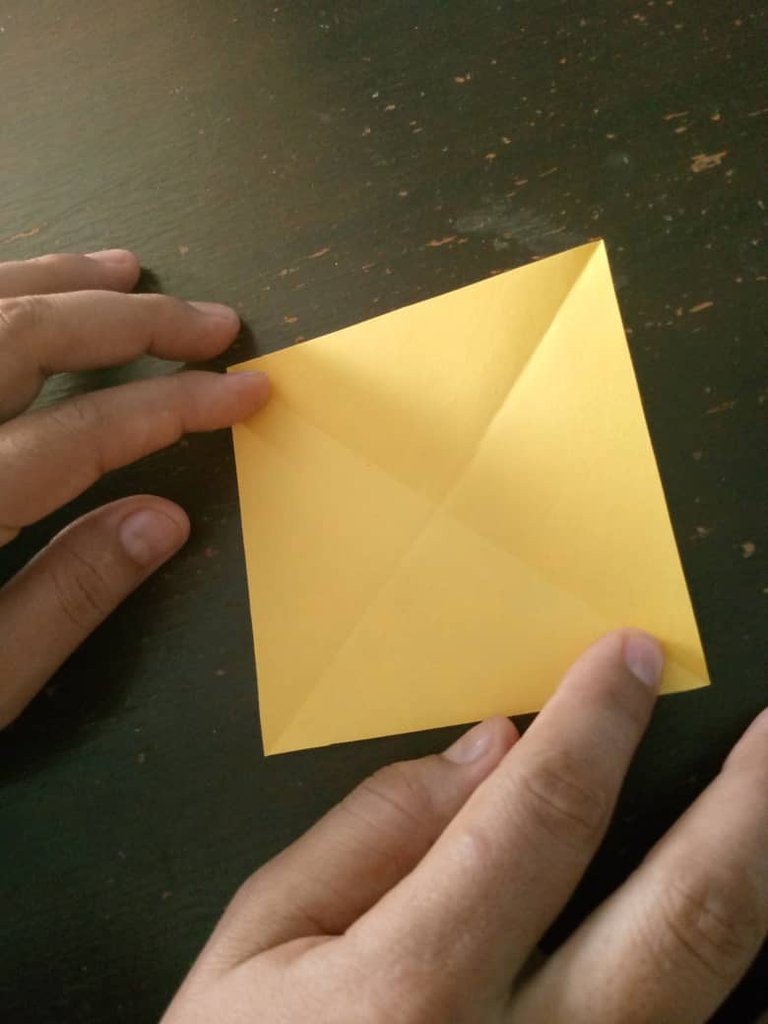
Primero comenzamos a doblar nuestra hoja de manera triangular, por un lado de la hoja y por el otro, para dividir con marcas nuestra hoja en 4 triángulos.
Después doblamos por la mitad para dividirlas todas.
When we finish with our stem, now we continue with the flower, which is 11 centimeters long and 11 centimeters wide.
First we begin to fold our leaf in a triangular way, on one side of the leaf and on the other, to divide with marks our leaf in 4 triangles.
Then we fold in half to divide them all.
 1 1 | 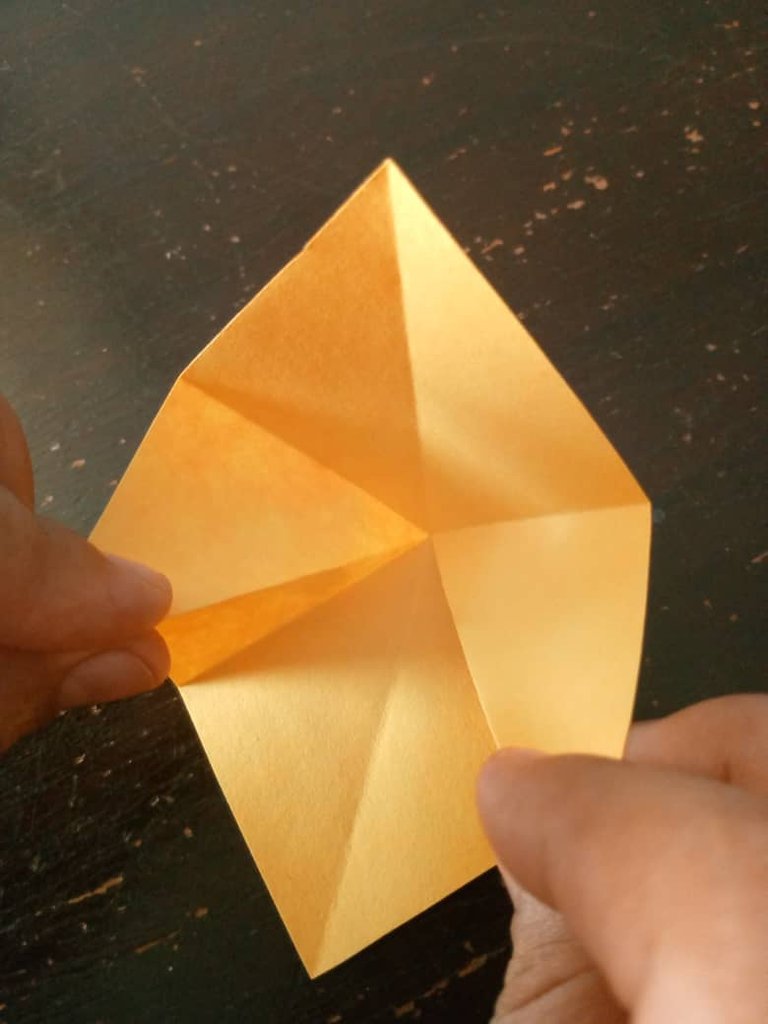 2 2 | 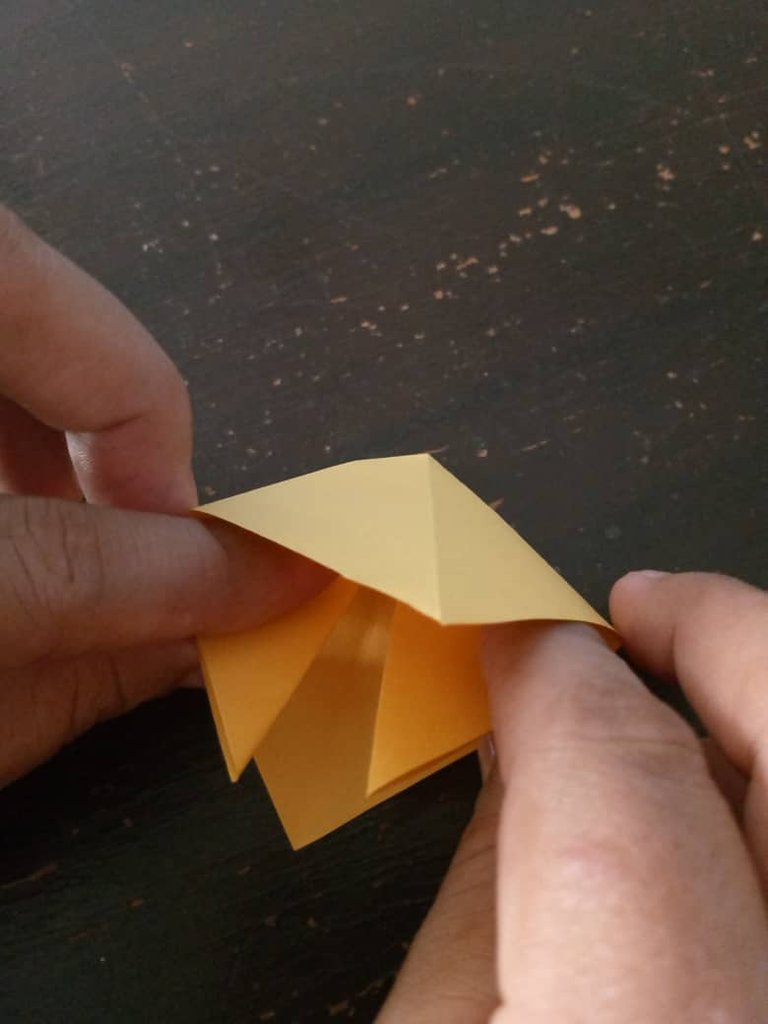 3 3 |
|---|
 4 4 | 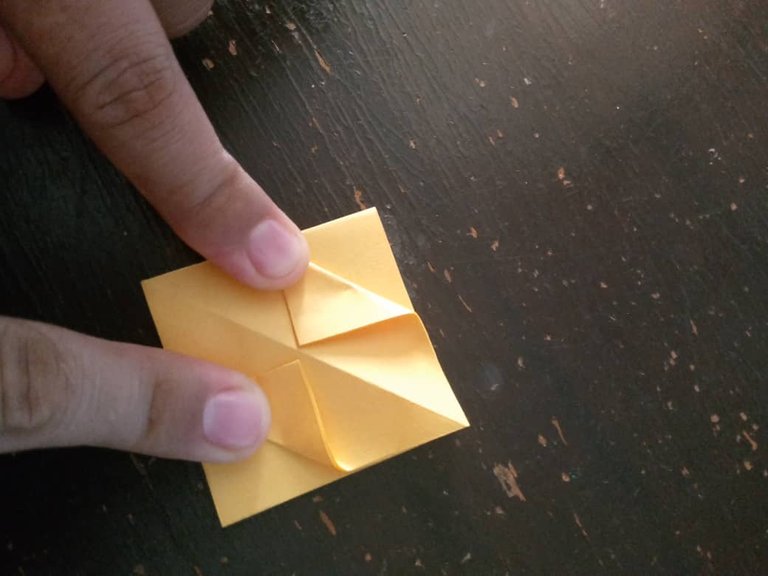 5 5 | 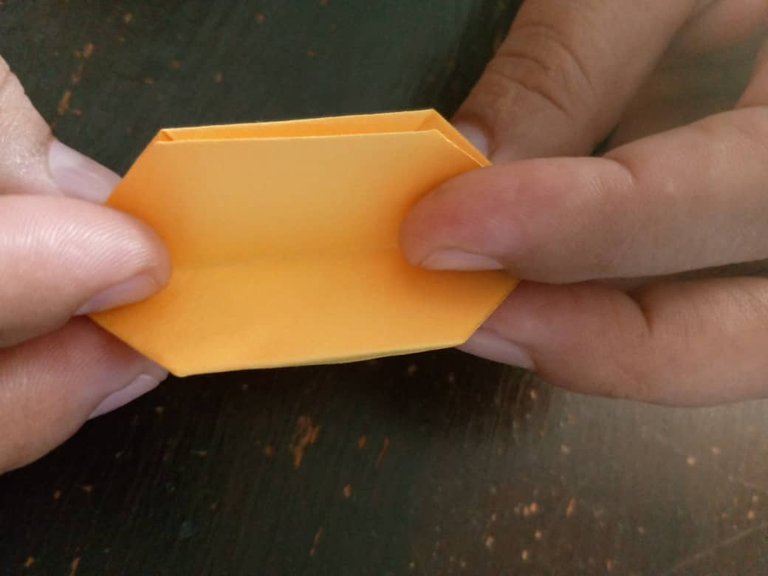 6 6 |
|---|
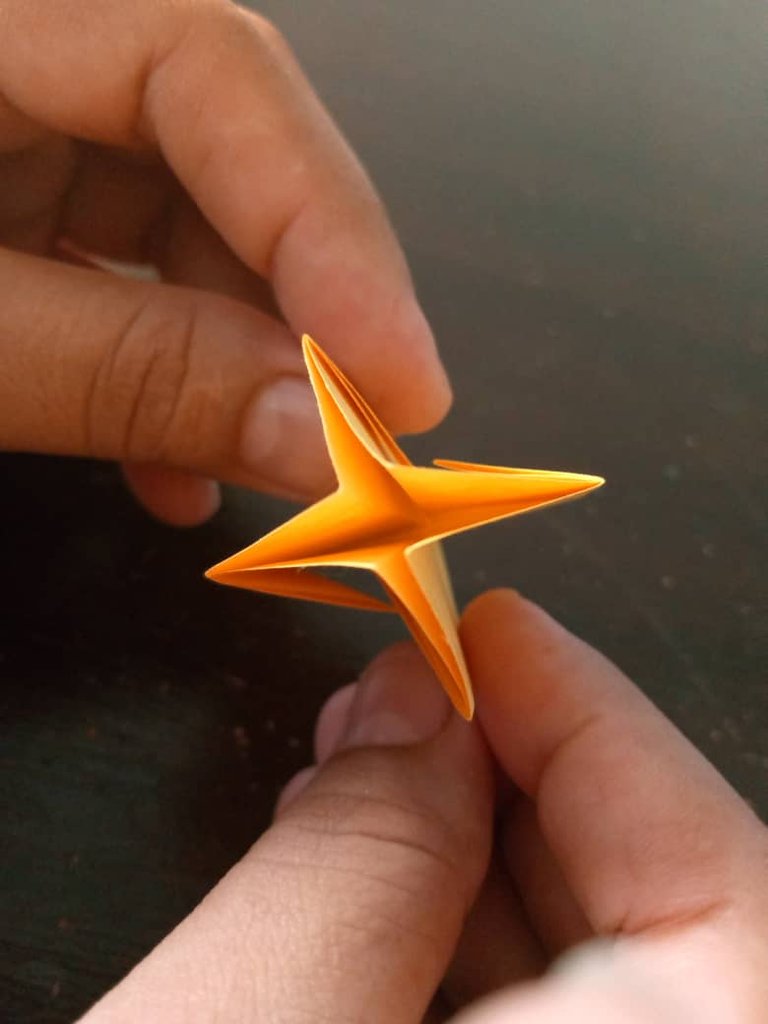
1- Al tener lista las marcas de nuestras hojas, comenzaremos a darle la forma a nuestra hermosa flor.
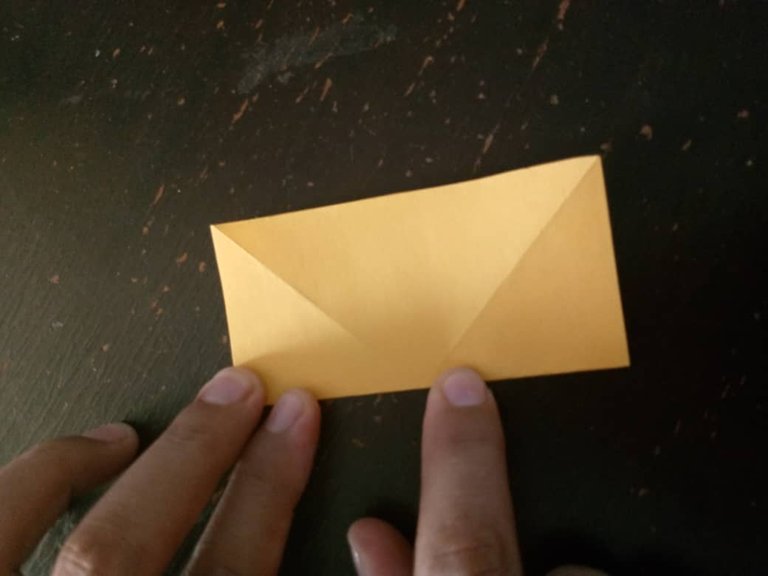
2- Con la ayuda de nuestro dedo índice y pulgar, tomaremos 2 extremos y con sumo cuidado lo doblaremos hacia dentro.
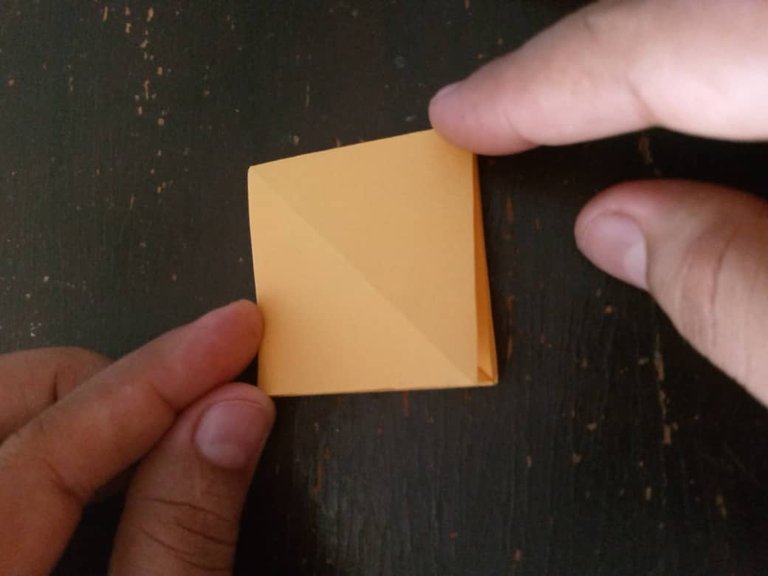
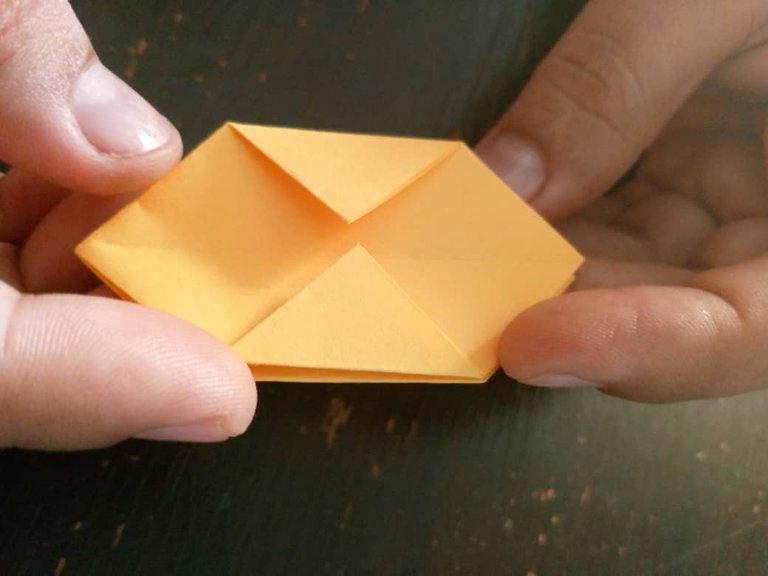
3 y 4- Después comenzamos a doblar las puntas que nos quedaron hacia adentro nuevamente hasta que nuestra flor tome forma de un cuadrado.
5- Del mismo cuadrado antes realizado, tomaremos las puntas y las doblaremos hacia el centro.
6- Al hacerlo veremos que nuestra hoja tomo forma de una punta de flecha de ambos lados.
1- Once we have the marks of our leaves ready, we will begin to shape our beautiful flower.
2- With the help of our index finger and thumb, we will take 2 ends and carefully fold them inwards.
3 and 4- Then we begin to fold the ends that we have left inwards again until our flower takes the shape of a square.
5- From the same square we made before, we will take the ends and fold them towards the center.
6- When we do this we will see that our leaf takes the shape of an arrowhead on both sides.
 |  |  |
|---|
 |  |
|---|
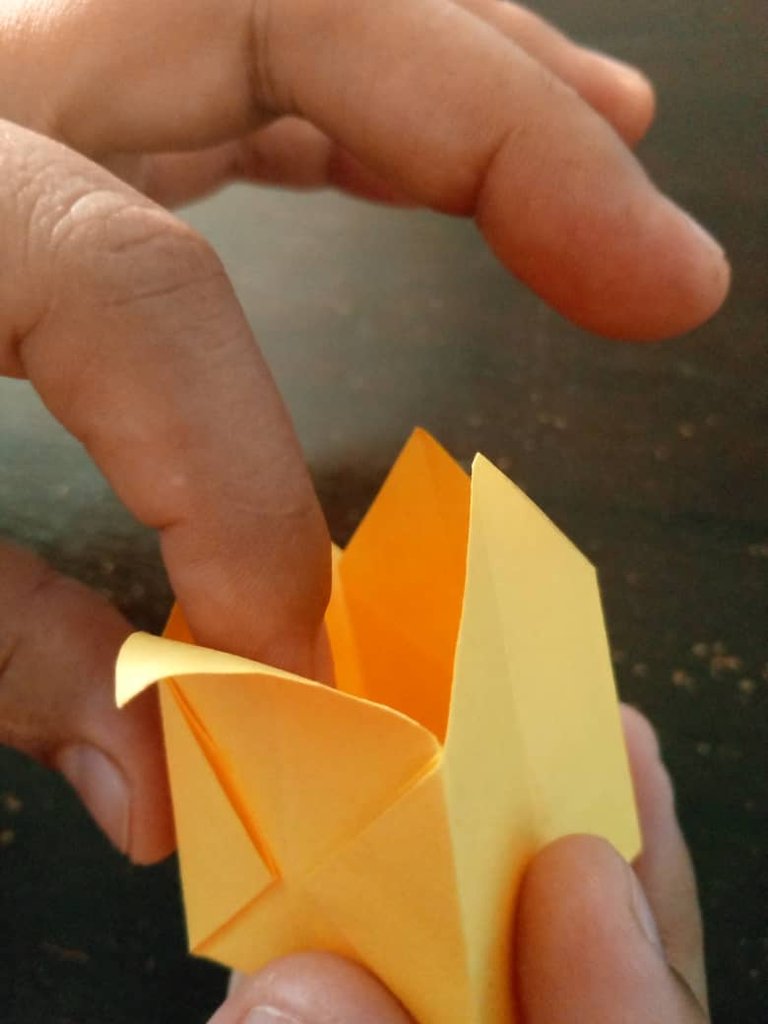
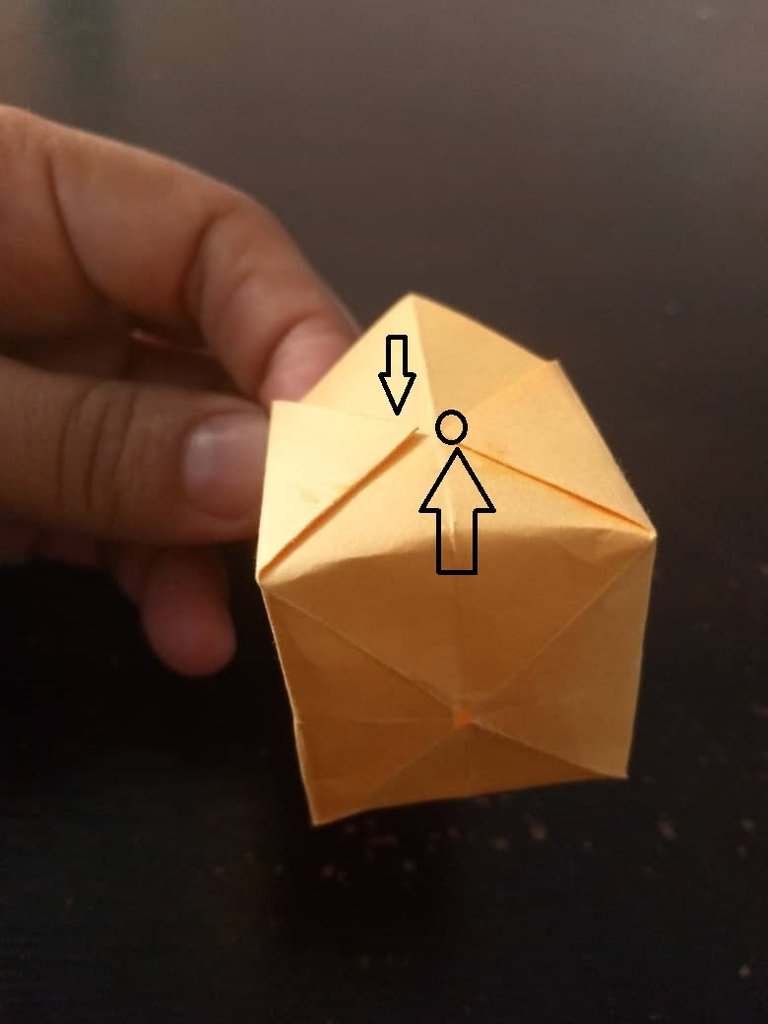
Terminado con los dobles de los pétalos que deben quedar en la línea centrar sin sobrepasarse, sino que deben posarse en la línea central de cada punta, estos quedarían solamente por dos lados de dos caras de los pétalos de la flor.
Los otros 2 pétalos se observan que no tienen estos dobles sobre ellos, sino que se nota como si estuviesen sosteniendo los pétalos que no tienen el doble, para abrirlo colocaremos nuestro dedo pulgar, sosteniendo estos doble y nuestro dedo índice dentro de la flor.
En este momento iremos dándole la forma cuadrada siguiendo las líneas guías inferiores que están al final de cada pétalo.
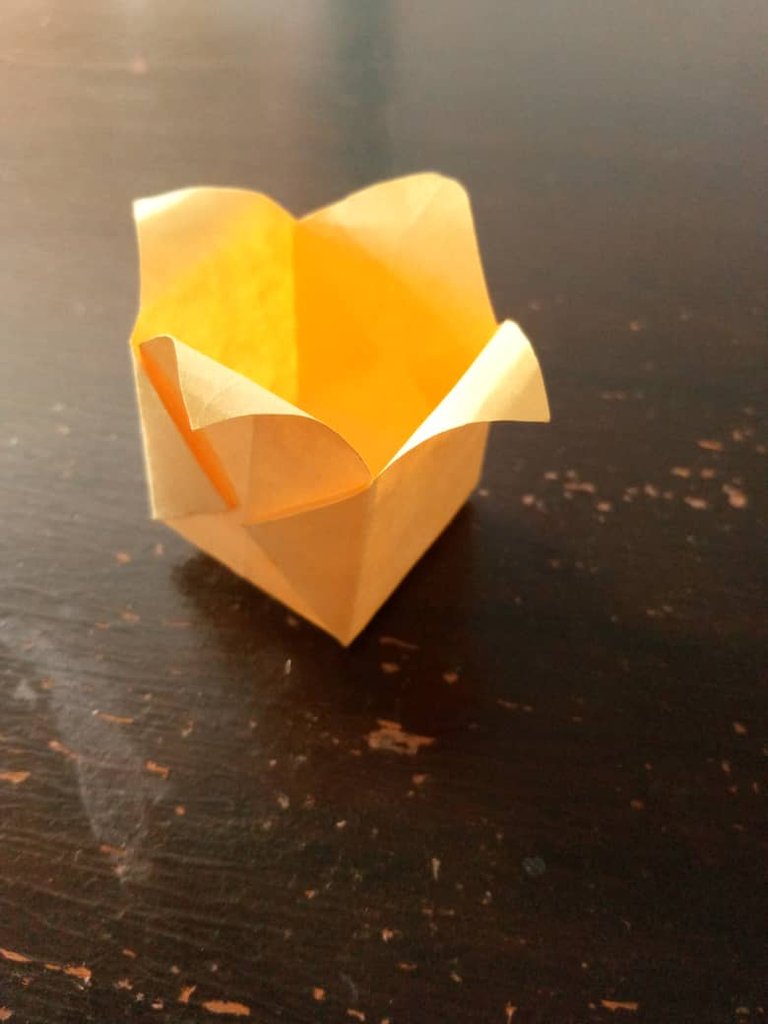
Al terminar de darle la forma cuadrada de nuestro tulipán, comenzaremos a hacer unos doble en la punta de los pétalos hacia atrás con sumo cuidado para no desformar esta frágil flor y así solamente nos faltaría realizar un orificio en el centro de la flor para colocar nuestro tallo y poder estabilizar la flor.
Si deseamos que nuestra flor de tulipán en origami se mantenga sin perder su forma, podemos colocarle 1 punto de pega blanco en cada uno de los extremos de los dobles para evitar que se suelten y así podemos disfrutar de una flor de tulipán sin que pierda su forma.
Por otra parte, el orificio que se hace para introducir el tallo debe ser muy reducido para que nuestro tallo fije perfectamente y no se tambalee, este orificio lo podemos hacer con un objeto de punta afilada sin perforar tanto.
Finished with the doubles of the petals that should be in the center line without overlapping, but should rest on the center line of each tip, these would be only on two sides of two faces of the petals of the flower.
The other 2 petals are observed that do not have these doubles on them, but it is noted as if they were holding the petals that do not have the double, to open it we will place our thumb, holding these double and our index finger inside the flower.
At this moment we will give it the square shape following the lower guide lines that are at the end of each petal.
When we finish giving the square shape of our tulip, we will begin to make some folds at the tip of the petals backwards with great care to avoid deforming this fragile flower and so we only need to make a hole in the center of the flower to place our stem and to stabilize the flower.
If we want our origami tulip flower to remain without losing its shape, we can place 1 point of white glue at each of the ends of the doubles to prevent them from coming loose and so we can enjoy a tulip flower without losing its shape.
On the other hand, the hole that is made to introduce the stem must be very small so that our stem fixes perfectly and does not wobble, this hole can be made with a sharp-pointed object without drilling so much.
 |  |
|---|
Gracias por visitar mi publicación, espero que todos se encuentren muy bien y disfruten de este hermoso y creativo arte, nos seguiremos viendo en otra de mis publicaciones.
Thank you for visiting my publication, I hope you are all very well and enjoy this beautiful and creative art, we will continue to see each other in another of my publications.
social networks / redes sociales
![]()
![]()
Traductor Deepl
Translated Deepl
Ediciones Canva
Editions Canva

This post has been manually curated by @bhattg from Indiaunited community. Join us on our Discord Server.
Do you know that you can earn a passive income by delegating to @indiaunited. We share more than 100 % of the curation rewards with the delegators in the form of IUC tokens. HP delegators and IUC token holders also get upto 20% additional vote weight.
Here are some handy links for delegations: 100HP, 250HP, 500HP, 1000HP.
100% of the rewards from this comment goes to the curator for their manual curation efforts. Please encourage the curator @bhattg by upvoting this comment and support the community by voting the posts made by @indiaunited.
Wow great art work you are amazing. Thanks for sharing.
!giphy wow
@sagarkothari88 vote 20%
!PIZZA
Via Tenor
| Hive Curators Community | Join Discord | Support Witness | Follow Curation Trail |
Keep Up the good work on Hive ♦️
I really appreciate your appreciation and support, thank you!!! I am happy with the result.🤗💐
What a beautiful origami friend, it made me remember my mother, this looks great as part of a gift decoration, mother's day, love and friendship day, birthdays, special events and decoration. I liked it very much thanks for sharing with us.
@sagarkothari88 vote 15%
Hey @equipodelta! Error: You have reached the maximum votes with 20% in last 24 hours.!
@sagarkothari88 vote 15%
Hey @equipodelta! Error: Comment has to be just below the post.!
Greetings friend!!! good that you liked it and brought you those nice memories of your mother, now I'm getting into this practice because I find it super cute and interesting to combine in any event applies perfect, I am very pleased with your appreciation a big hug.
I will definitely follow this tutorial to decorate my table, I already imagine it great with these little flowers.
@sagarkothari88 vote 15%
Hey @equipodelta! Error: Unfortuntely, we won't be able to curate for this content. 1.5 Please connect in discord for more information!
Thanks friend 😊 I also imagine how that decoration could look like for you, I hope to see it. ❣️
¡Qué maravilloso que hayas iniciado este nuevo proyecto en el mundo del origami! Siempre es bueno aprender cosas nuevas, y en el caso del origami, como bien has mencionado, ayuda a relajar la mente.
Muy cierto es maravilloso, y ver el resultado es sorprendente, estoy súper animada con este proyecto. Gracias por visitar mu publicación 🤗🌹
te quedaron muy bonitos
Gracias!!! 💯 😃😃😃 🤗
A mi me gustan las manualidades pero nunca le he tenido paciencia al origami 😅 Te quedaron muy lindos esos tulipanes ❤️
Hola amiga!!! Que bueno que haya gustado.
Te cuento que me pasaba igual cada vez que intentaba hacer algo, pero un día me di cuenta que podía lograrlo y bueno ahí voy, me siento animada así que te invito a intentarlo porque luego te sentirás bastante relajada cultivando el don de la paciencia.☺️🤗💐❤️
Oye, acabo de aterrizar aquí desde un post sobre el mismo tema, pero tu explicación es más sencilla y el resultado mucho más hermoso!
https://twitter.com/hivediy47901/status/1756167332450210201
Vota por HIVEDIY como Witness en el siguiente Link:
https://vote.hive.uno/@hivediy
¡¡¡Buen trabajo!!! Gracias por publicar tu excelente contenido en Hive Diy.
Tu comunidad artesana ahora es testigo
