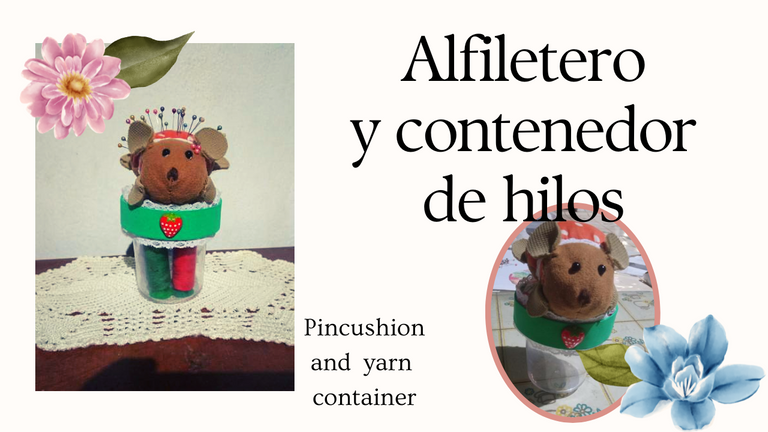
Creando un alfiletero y contenedor de hilos / creating Pincushion and yarn container

Saludos amigos y reciban todos una grata bienvenida a mi publicación.
Hoy te vengo a compartir una hermosa manualidad que nos ayudara a tener más comodidad a la hora de realizar nuestras costuras, aparte que sirve como decoración, lo podemos usar para colocar nuestros alfileres o agujas de costura, por lo que es una idea que te daré para hacer el tuyo a tu gusto, por lo que en este caso, él envase sirve para almacenar nuestros hilos de costura o botones, tiene la forma de un hermoso animal he interesante llamado cuerpo espín.
¿Por qué elegí la forma de un puercoespín?
Antes de hacer esta manualidad, tenía pensado hacerlo con la forma de una tortuga, pero ¿se imaginan clavarle las agujas a una tortuga?.
Es por eso que elegí el puercoespín, ya que este hermoso animal tiene agujas en su cuerpo para defenderse de los depredadores.
Como esta manualidad es para colocar nuestros alfileres y agujas que solemos utilizar en la costura, lo hice de este hermoso y misterioso animal, sin más preámbulos, comencemos con la publicación.
Las fotografías que verán a continuación, fueron tomadas con mi teléfono modelo Alcatel_5044R.

Greetings friends and receive a warm welcome to my publication.
Today I come to share a beautiful craft that will help us to have more comfort when performing our sewing, besides serving as decoration, we can use it to place our pins or sewing needles, so it is an idea that I will give you to make yours to your liking, so in this case, the container serves to store our sewing threads or buttons, has the shape of a beautiful animal that I have interesting called porcupine body.
Why did I choose the shape of a porcupine?
Before making this craft, I had thought of making it in the shape of a turtle, but can you imagine sticking needles into a turtle?
That's why I chose the porcupine, since this beautiful animal has needles in its body to defend itself from predators.
Since this craft is to place our pins and needles that we usually use in sewing, I made it from this beautiful and mysterious animal, without further ado, let's start with the publication.
The photos you will see below, were taken with my phone model Alcatel_5044R.

Paso 1
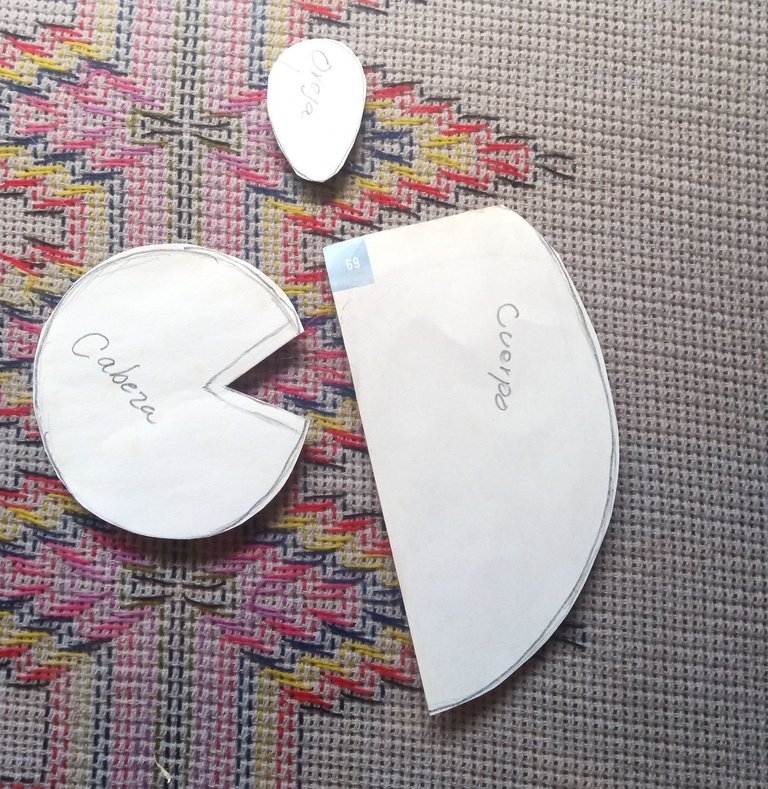
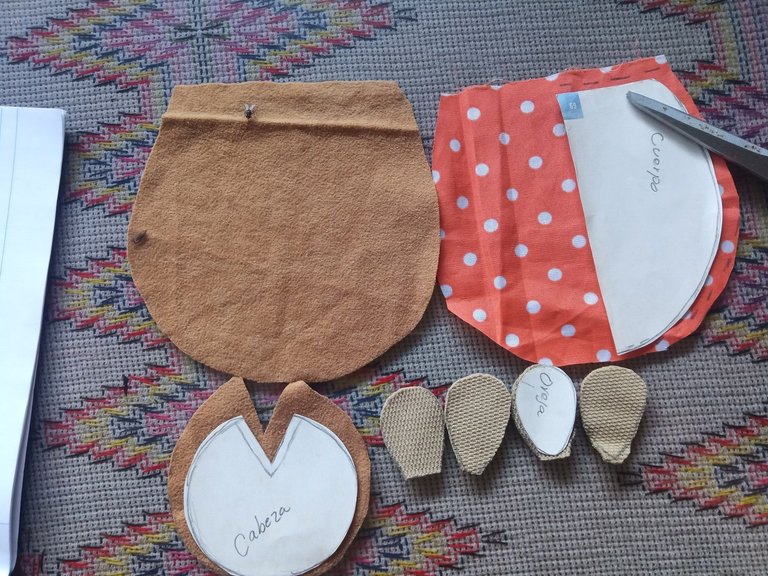
Primero comencé dibujando unos patrones, para hacer la cabeza, dibuje un círculo con una abertura centrada con un corte triangular. El cuerpo lo dibujé con semi círculo y, para las orejas, hice un óvalo.
Seguidamente, comencé a usar el primero de los moldes, como en este caso la cabeza de este cuerpo espín, lo coloqué sobre una tela llamada camuza, las mismas que sueles utilizarse para crear algunos peluches.
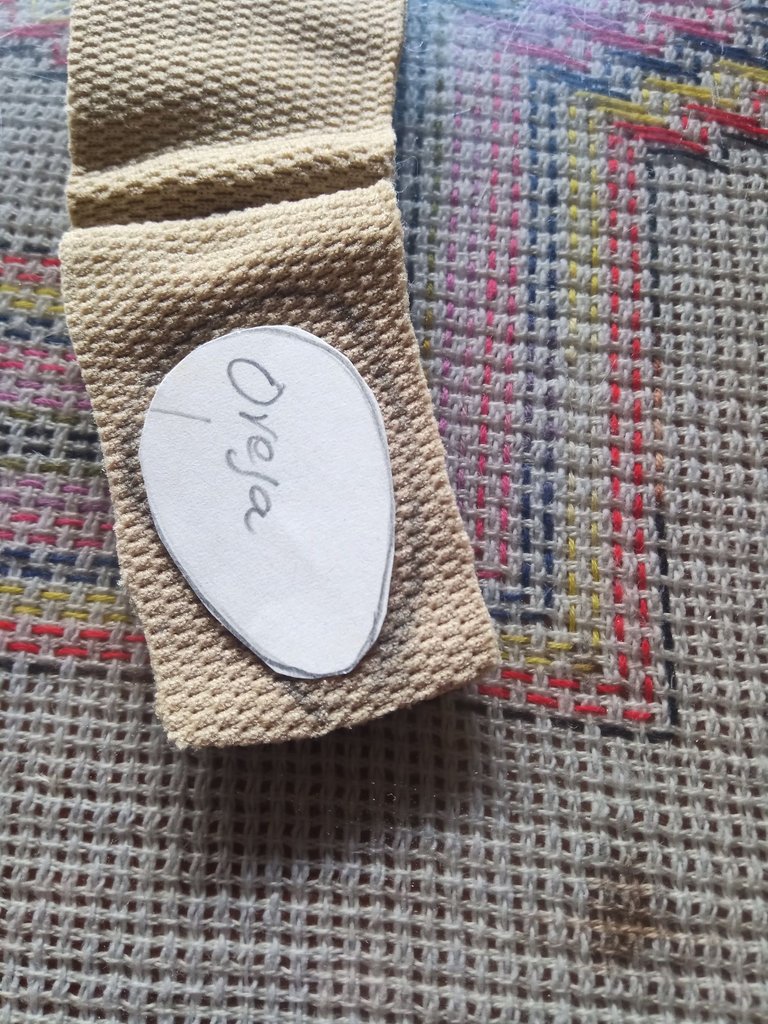
Para las orejas, use el molde con forma de óvalo, seguidamente lo coloque sobre una tela tejida, este tipo de tela suelen utilizarse para algunas carteras de tela o bien para prendas que puedan dar calor.
Step 1
First I started by drawing some patterns, to make the head, I drew a circle with an opening centered with a triangular cut. The body I drew with a half circle and, for the ears, I made an oval.
Next, I started using the first of the molds, as in this case the head of this spiny body, I placed it on a fabric called camuza, the same ones that are usually used to create some stuffed animals.
For the ears, I used the oval-shaped mold, then I placed it on a woven fabric, this type of fabric is usually used for some fabric bags or for garments that can give warmth.

 |  |  |
|---|
PASO 2
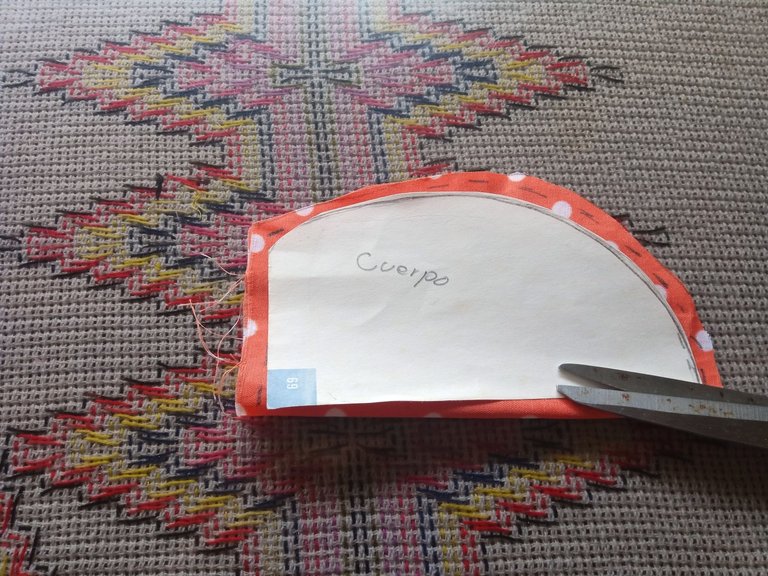
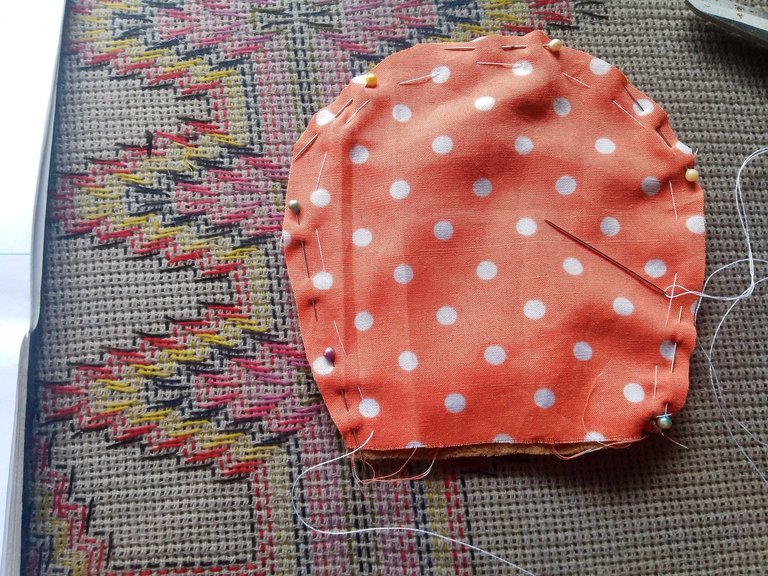
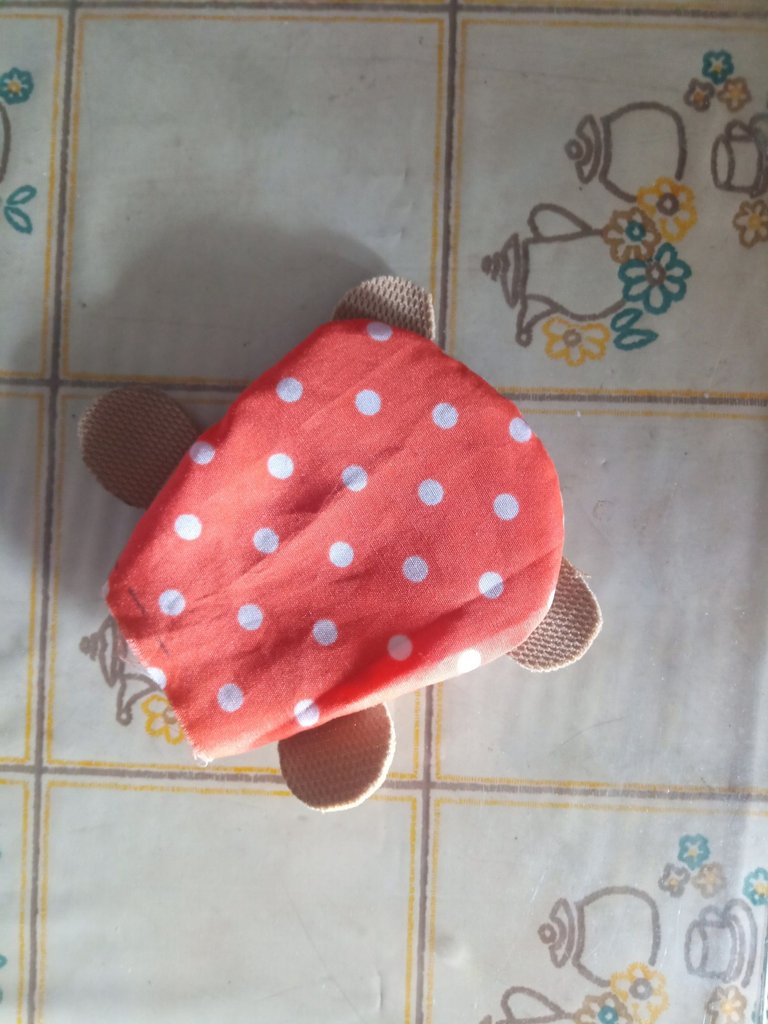
Por último, comencé a usar el molde del cuerpo, el mismo lo coloqué sobre una tela de color anaranjado con estampado de lunares de color blanco y, con la ayuda de una tijera, comencé a recortar cada una de las partes donde remarque con los moldes, para marcar use la ayuda de un lápiz.
Pueden notar que también use la tela camuza para el cuerpo (ignoren a la mosca en la fotografía jajaja), teniendo ya todas las partes recortadas, se procede a cocer cada una de dichas partes.
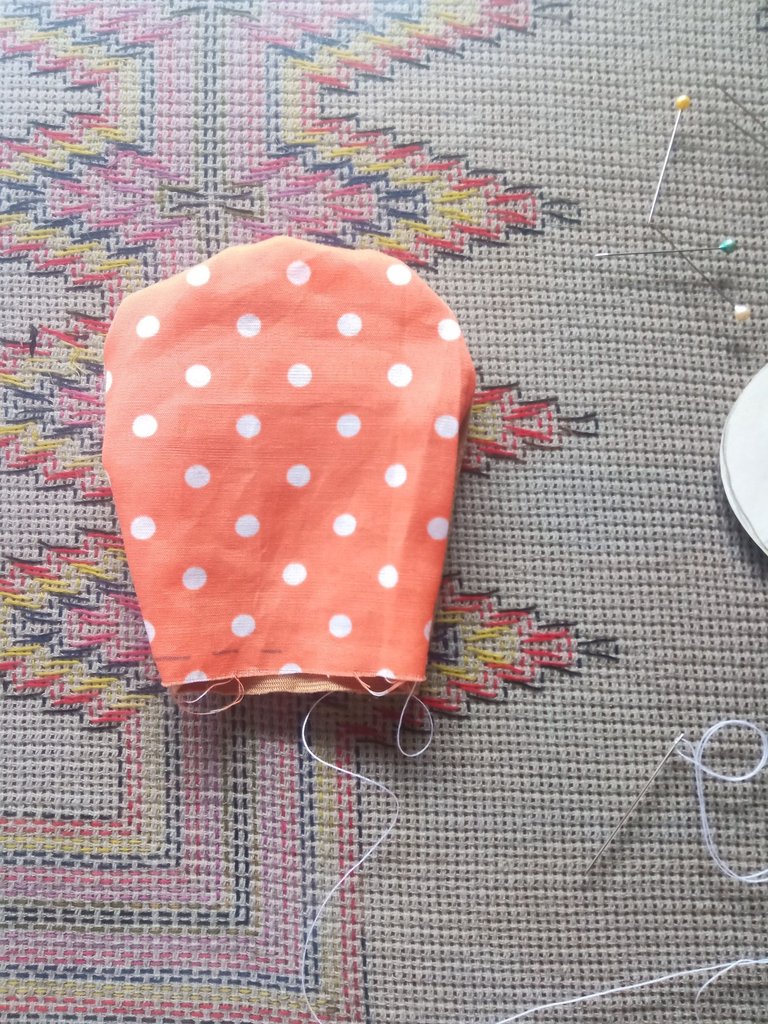
Con la ayuda de algunos alfileres, sostuve ambas telas del cuerpo, tanto la estampada de lunares como la camuza, continuando con la costura con la ayuda de una aguja y un hilo de color blanco, quedando como en la foto que está abajo, también deje un espacio sin cocer para agregarle relleno más adelante.
Un dato extra que voy a agregar, es que si poseemos un dedal, lo podemos usar para no pincharnos los dedos mientras cocemos.
STEP 2
Finally, I began to use the mold of the body, I placed it on an orange fabric with white polka dot pattern and, with the help of a scissors, I began to cut out each of the parts where I marked with the molds, to mark I used the help of a pencil.
You can notice that I also used the camouflage fabric for the body (ignore the fly in the picture hahaha), having all the parts already cut out, I proceeded to bake each of these parts.
With the help of some pins, I held both fabrics of the body, both the polka dot print and the camuza, continuing with the sewing with the help of a needle and a white thread, looking like in the picture below, I also left a space unbaked to add stuffing later.
An extra tip that I will add is that if you have a thimble, you can use it to avoid pricking your fingers while baking.
 |  |  |
|---|
PASO 3
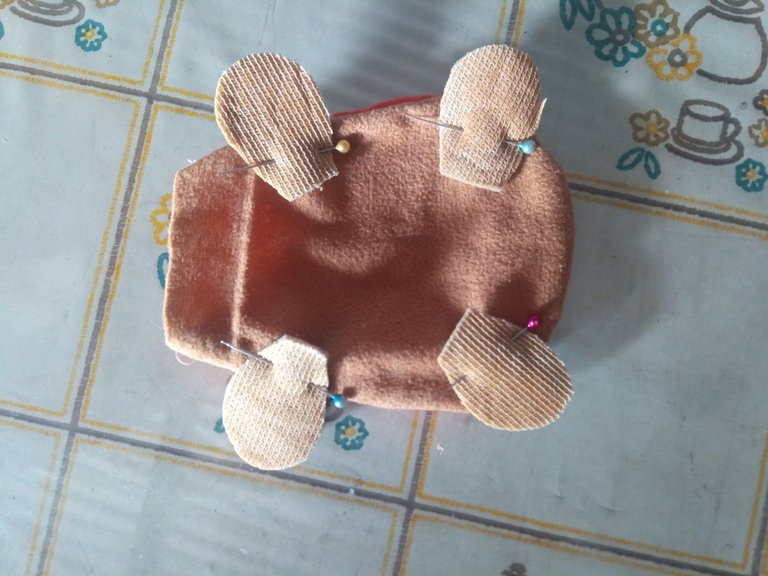
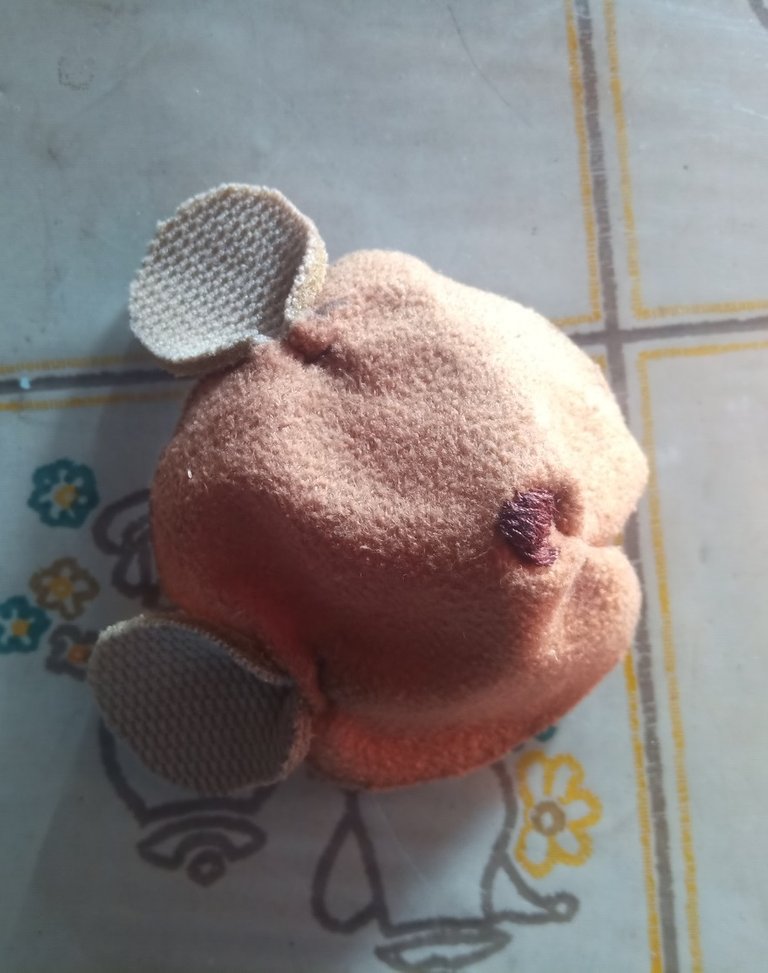
Luego de tener parte del cuerpo adherido con hilo blanco, mi siguiente paso fue pegar lo que vendría siendo las patas, las mismas las sujete con alfileres y procedí a cocer con el mismo hilo blanco.
Podemos notar como nos está quedando nuestro hermoso y tierno puercoespín, ahora voy a comenzar a trabajar en la cabeza.
Para las orejas utilicé la misma tela tejida y cocí una orilla de la misma para crear profundidad de la oreja, para la cara solamente cocí un extremo para cuando la voltee pueda darme la forma de la cara de este hermoso animal, seguidamente adherí las orejas con hilo de color marrón.
Después comencé a darle relleno a este cuerpo espín, dicho relleno está hecho con esponja, estas son las que sostendrán las agujas y alfileres que vayamos a colocar en ella.
Podemos notar como quedo gordito nuestro puercoespín. Con la ayuda de algunos alfileres sostuve la parte del cuello para que no se saliera el relleno.
STEP 3
After having part of the body attached with white thread, my next step was to glue what would become the legs, I attached them with pins and proceeded to bake with the same white thread.
We can see how we are getting our beautiful and tender porcupine, now I am going to start working on the head.
For the ears I used the same woven fabric and baked one edge of it to create depth of the ear, for the face I only baked one end so that when I turn it over it can give me the shape of the face of this beautiful animal, then I attached the ears with brown thread.
Then I began to give stuffing to this spine body, this stuffing is made with sponge, these are the ones that will hold the needles and pins that we are going to place in it.
We can see how chubby our porcupine got. With the help of some pins I held the neck part so that the stuffing would not come out.

 |  |  |
|---|
PASO 4
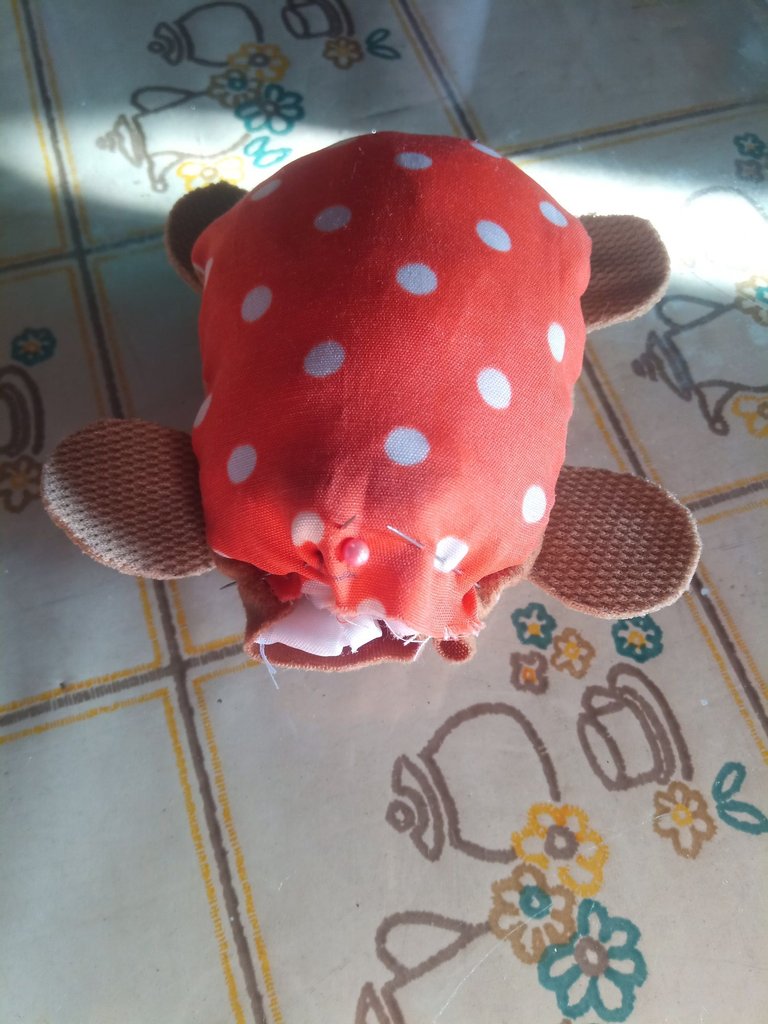
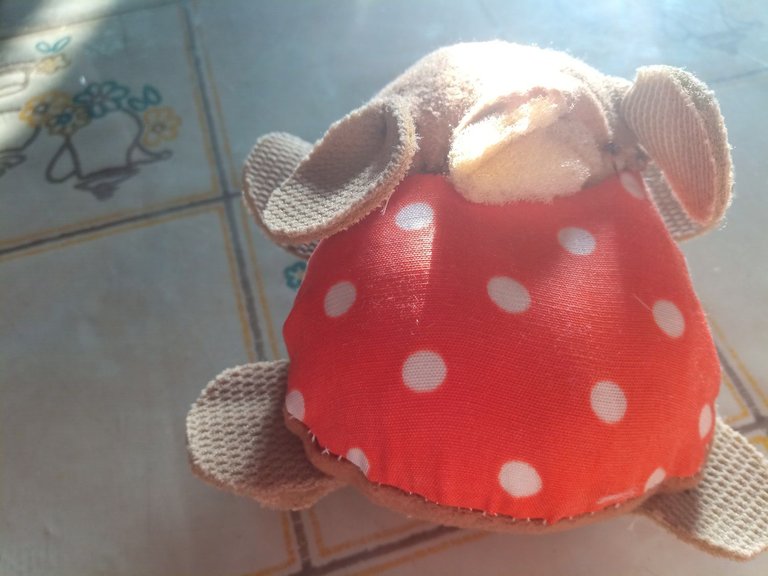
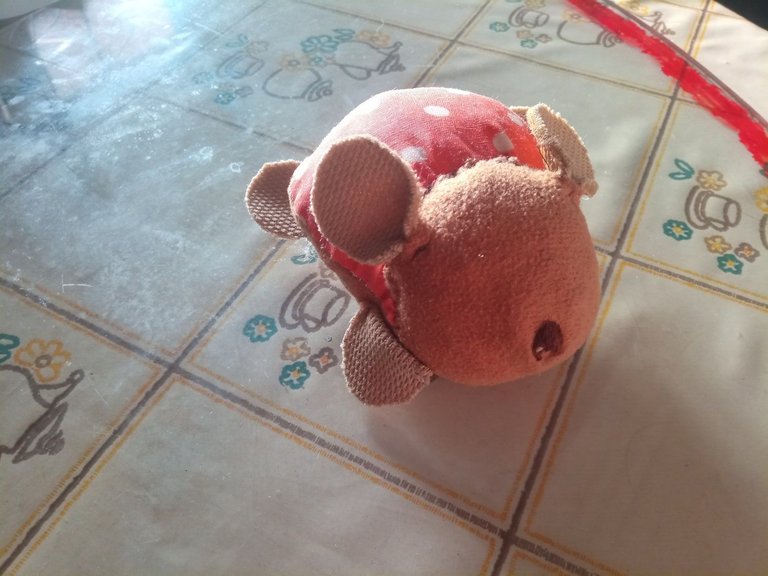
Luego de agregar todo el relleno necesario, procedí a cocer el cuello para que quedara prensado dicho relleno para luego comenzar a adherir la cabeza del puercoespín en ella, Poco a poco fui cociendo cada una de las orillas con el cuerpo para poderle dar esta forma.
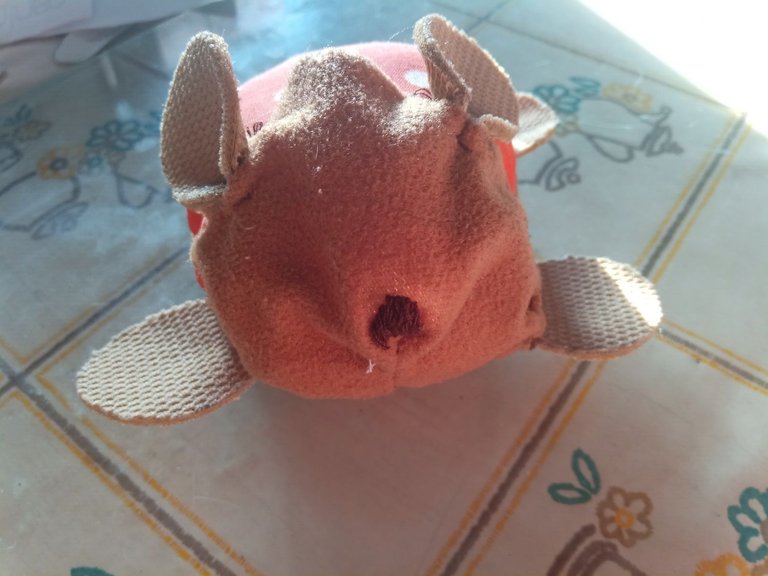
Deje un pequeño espacio para también agregarle relleno a la cara con esponjas para que la cara tuviera forma, aparentemente parece un ratón, pero eso cambiara cuando le agreguemos los alfileres.
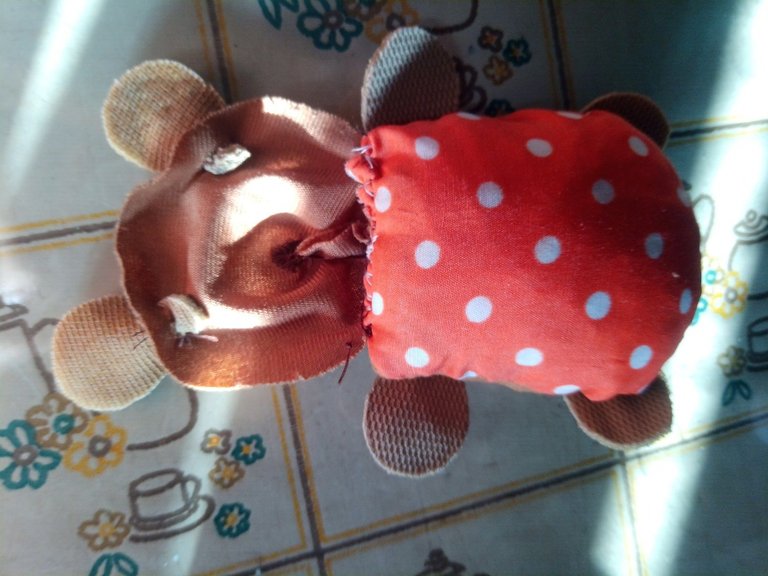
Por último comencé a agregarle los ojos con algunas pelotas de plástico, para estas costuras, de modo que no se noten las costuras, cocí por la parte baja hacia arriba sujetando los ojos. Ya este cuerpo espín está listo para colocarle sus espinas con los alfileres de costura.
STEP 4
After adding all the necessary stuffing, I proceeded to bake the neck so that the stuffing would be pressed and then begin to attach the porcupine's head to it. Little by little I baked each of the edges with the body to give it this shape.
I left a little space to also add stuffing to the face with sponges so that the face would have a shape, apparently it looks like a mouse, but that will change when we add the pins.
Finally I started to add the eyes with some plastic balls, for these seams, so that the seams are not noticeable, I baked from the bottom upwards holding the eyes. Now this spiny body is ready to attach its spines with the sewing pins.
|  |  |
|---|
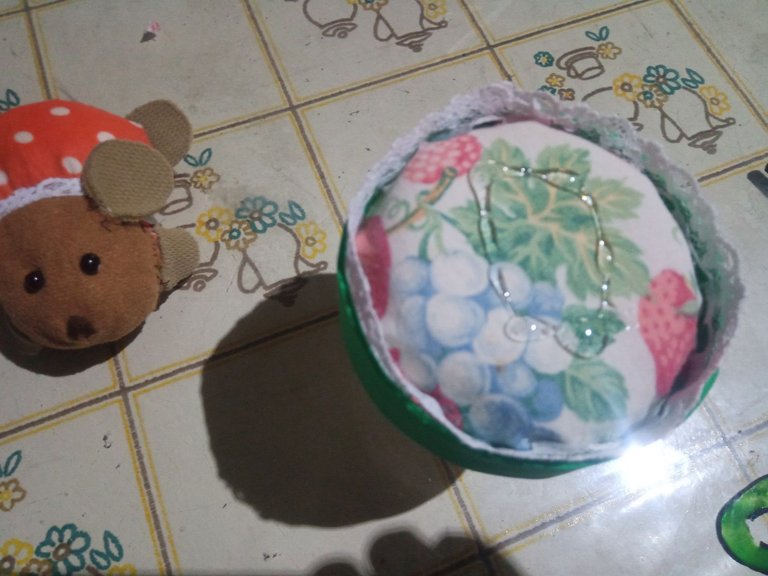
PASO 5
Una vez terminado con el hermoso cuerpo espín, lo reservé para utilizarlo más adelante, por lo que ahora comenzaré a decorar la base donde este va a ir colocado.
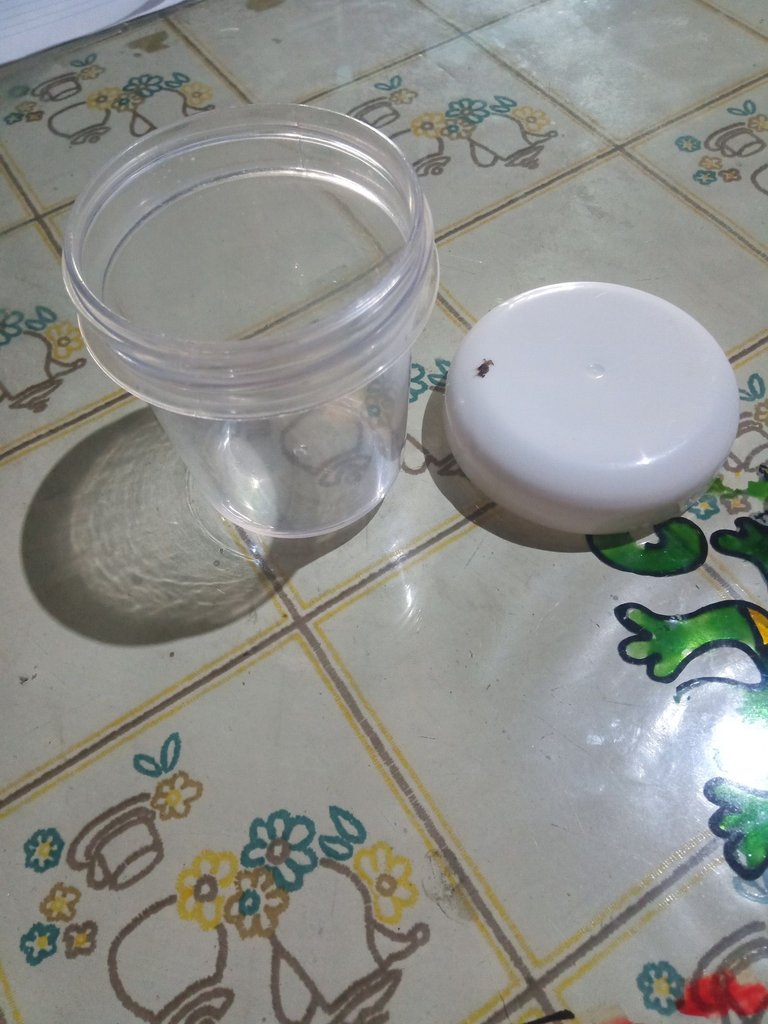
Esta base es un embace de plástico transparente con una tapa un poco más grande, de modo que sea fácil de quitar y colocar de nuevo las veces que sea necesario.
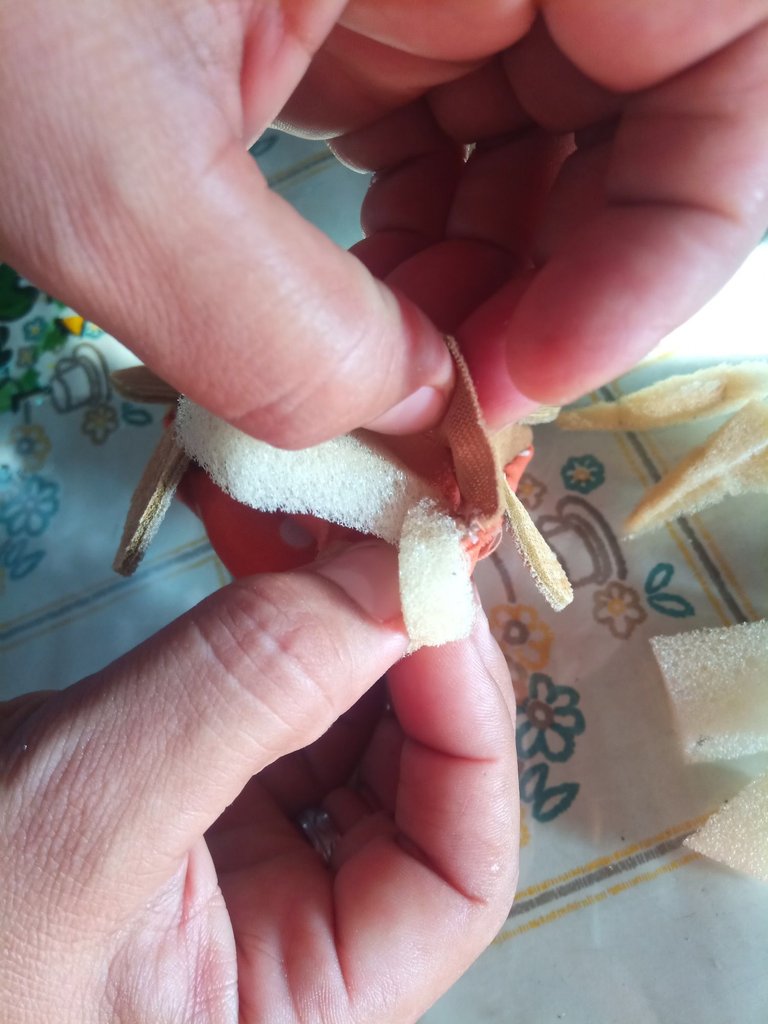
Con la ayuda de la tapa de este embace, lo coloque sobre una tela estampada de flores y remarcar el área con la ayuda de un lápiz para luego recortarla, también podemos usar un pedazo de esponja un poco más pequeño, más adelante verán en donde lo vamos a utilizar.
Con la ayuda de una regla comencé a remarcar sobre un foami de color verde, luego procedemos a picarlo para decorar él envase más adelante.
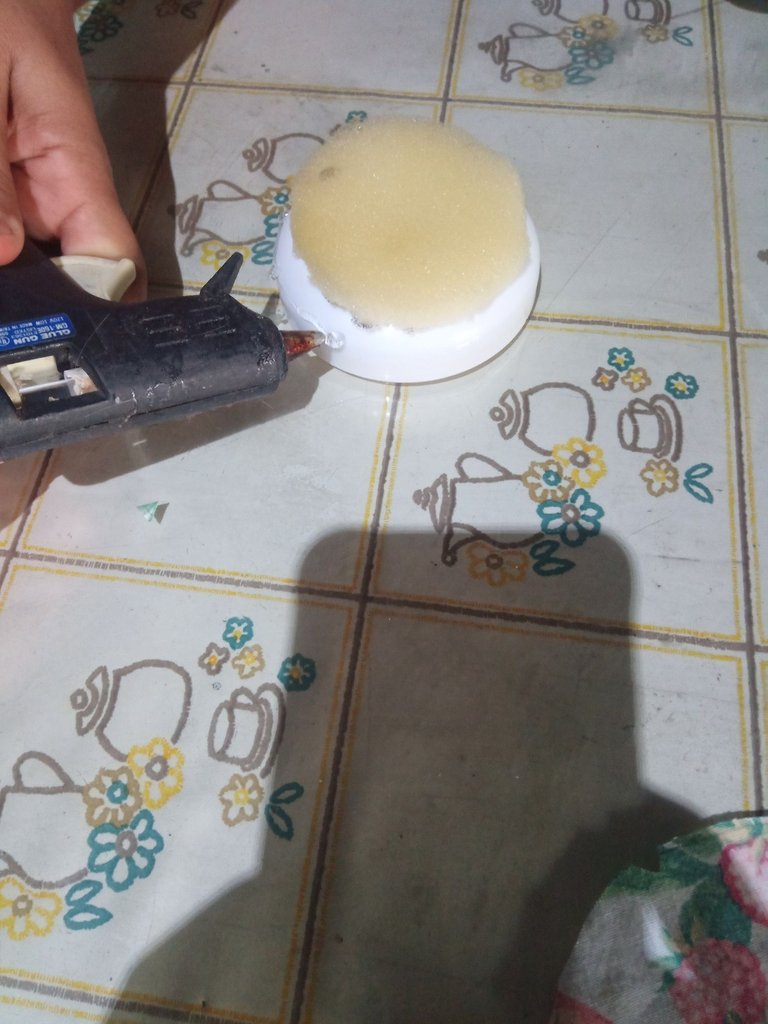
Ahora comenzaremos a pegar cada una de estas partes con la ayuda de una barra de silicona y una pistola de silicona. En la parte superior de la tapa comenzamos a agregar silicona para pegar la esponja que anteriormente habíamos recortado.
STEP 5
Once finished with the beautiful spine body, I reserved it for later use, so now I will begin to decorate the base where it will be placed.
This base is a clear plastic embace with a slightly larger lid, so that it is easy to remove and replace as many times as necessary.
With the help of the lid of this embace, place it on a flower patterned fabric and mark the area with the help of a pencil and then cut it out, we can also use a piece of sponge a little smaller, later you will see where we are going to use it.
With the help of a ruler I began to mark on a green foam, then we proceed to chop it to decorate the container later.
Now we will begin to glue each of these parts with the help of a silicone stick and a silicone gun. At the top of the lid we start adding silicone to glue the sponge that we had previously cut out.
 |  |  |
|---|
 |  |  |
|---|
 |  |  |
|---|
 |  |  |
|---|
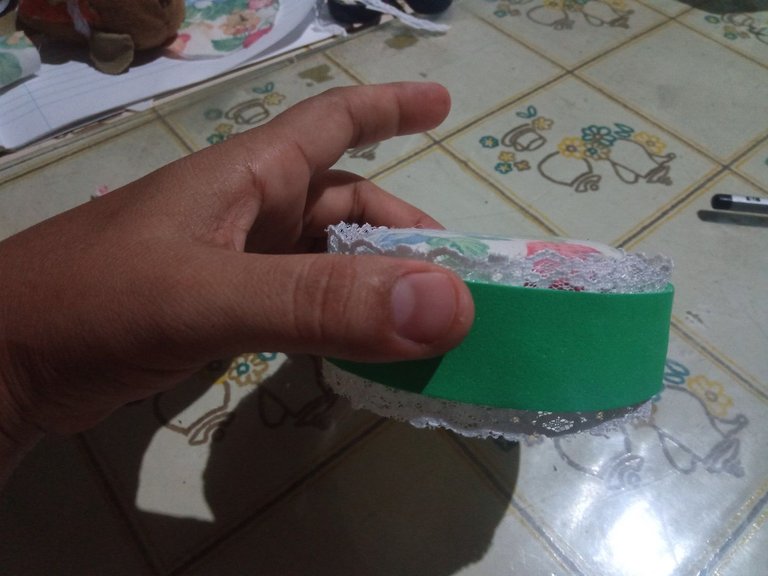
PASO 6
Después por los lados de la tapa, comencé a agregar más silicona para adherir la tela estampada sobre ella sin que traspasa la altura de la tapa, luego volví a agregar silicona para adherir el foami con la tela de formas de color blanco.
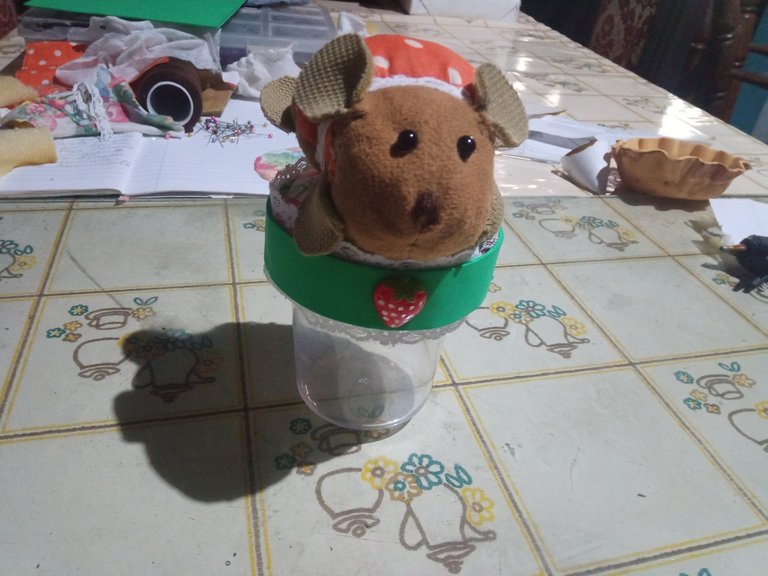
Por último, comencé a colocar la tapa sobre él embace de plástico y, sobre este, el hermoso puercoespín.
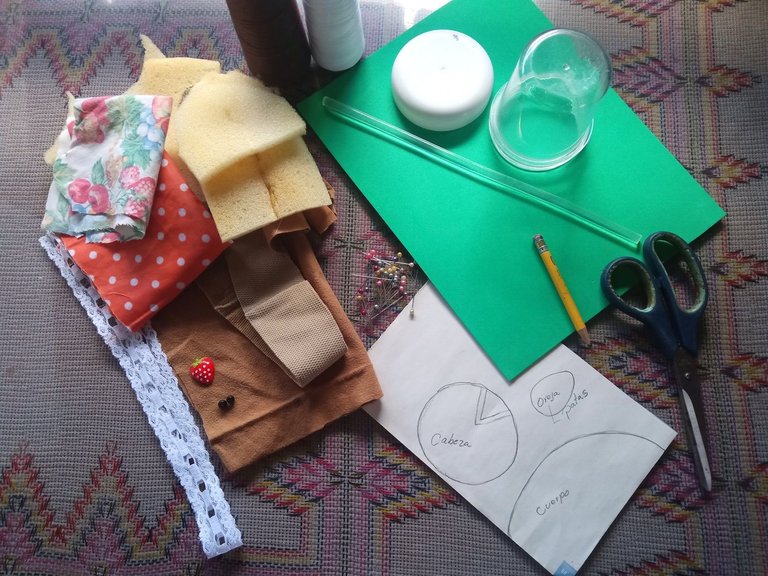
Los materiales que utilice para mi Títere son los siguientes.
Materiales:
Tela camuza.
Tela estampada de flores.
Tela estampada de lunares.
Esponjas.
Tijera.
Tela trenzada.
Botones.
Fresa de plástico.
Pepas de plástico.
Barra de silicona.
Pistola de silicona.
Lápiz.
Foami de color verde manzana.
Hilo de color blanco y marrón.
Alfileres.
Agujas.
Hoja blanca para los moldes.
Regla.
De esta manera concluyo la publicación de hoy amigos, espero que te haya gustado esta manualidad.
Nos veremos en otra publicación basada en el hermoso mundo del arte, manualidades y maquillaje.
STEP 6
Then on the sides of the lid, I began to add more silicone to adhere the printed fabric on it without going beyond the height of the lid, then I added silicone again to adhere the foam with the white fabric shapes.
Finally, I began to place the lid on the plastic bag and, on top of it, the beautiful porcupine.
The materials I used for my Puppet are as follows.
Materials:
Camouflage fabric.
Printed fabric with flowers.
Printed fabric with polka dots.
Sponges.
Scissors.
Braided fabric.
Buttons.
Plastic cutter.
Plastic nuggets.
Silicone bar.
Silicone gun.
Pencil.
Foam of green apple color.
White and brown thread.
Pins.
Needles.
White sheet for the molds.
Ruler.
This way I conclude today's publication friends, I hope you liked this craft.
See you in another publication based on the beautiful world of art, crafts and makeup.

social networks / redes sociales
![]()
![]()
Traductor Deepl
Translated Deepl
Ediciones Canva
Editions Canva


Esto quedó muy cuchi, me encantó la idea. Gracias por la inspiración
Me alegro que te haya servido como inspiración amiga, no solamente puedes hacer un puercoespín, hay miles de formas, saludos.
Ay Dios! pero esa cosita si está cute, me encantó además que hiciste un contenedor de hilos, tenemos todo a la mano!
Gracias amiga, es muy practico y divertido el proceso, saludos.
¡Felicidades! Esta publicación obtuvo upvote y fue compartido por @la-colmena, un proyecto de Curación Manual para la comunidad hispana de Hive que cuenta con el respaldo de @curie.
Si te gusta el trabajo que hacemos, te invitamos a darle tu voto a este comentario y a votar como testigo por Curie.
Si quieres saber más sobre nuestro proyecto, acompáñanos en Discord: La Colmena.
Thank you for sharing this amazing post on HIVE!
Your content got selected by our fellow curator @rezoanulvibes & you just received a little thank you via an upvote from our non-profit curation initiative!
You will be featured in one of our recurring curation compilations and on our pinterest boards! Both are aiming to offer you a stage to widen your audience within and outside of the DIY scene of hive.
Join the official DIYHub community on HIVE and show us more of your amazing work and feel free to connect with us and other DIYers via our discord server: https://discord.gg/mY5uCfQ !
If you want to support our goal to motivate other DIY/art/music/homesteading/... creators just delegate to us and earn 100% of your curation rewards!
Stay creative & hive on!
Es hermoso, que adorable peluche lograste, me gusta la textura que tiene la tela.
He querido comprar éste material para mis peluches, porque hace que se vea más realista. Me encanta éste contenedor, te quedó muy bonito
Gracias amiga, me alegro de que te haya gustado, tiene razón en cuanto a la tela, hace que las manualidades que hagamos con ella se vean realistas, yo la conozco como camuza.
Amazing
thanks