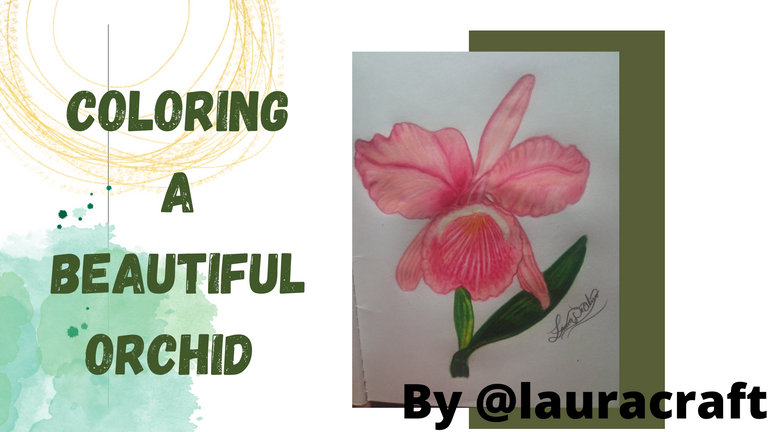
Coloring a beautiful orchid / Drawing / (ENG/ESP)

Hola amigos saludos a todos, reciban la bienvenida a mi publicación.
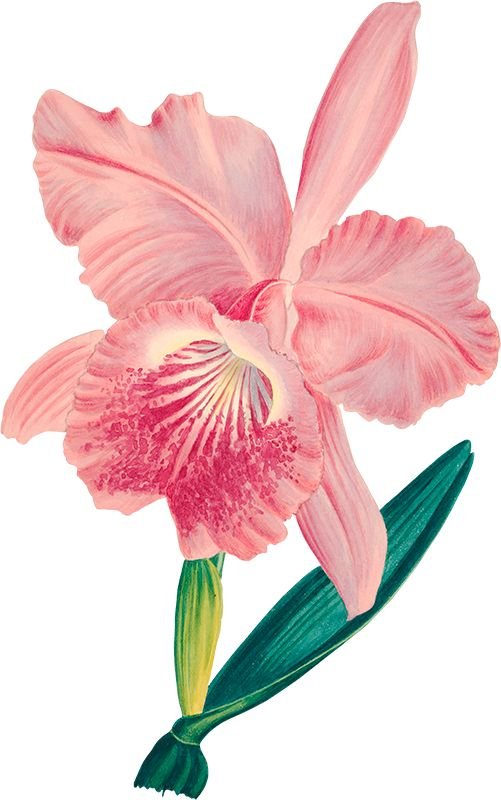
El día de hoy les vengo a presentar otra de mis prácticas en dibujos a color, en esta ocasión les traigo una flor llamada orquídea, en este post les mostraré el paso a paso de cómo conseguir la combinación de colores que tuve que implementar para conseguir la semejanza al tono del color de la imagen de referencia.
En este tipo de dibujo no se utiliza el tipo de difuminado que utilizamos con los dibujos blanco y negro, como por ejemplo el uso del algodón, aquí utilizaremos solo los colores, desde los más oscuros a los más claros.
Es muy importante el uso del pañuelo para colocar nuestra mano al momento de pintar y evitar manchar nuestro dibujo, también es útil para limpiar los residuos de colores de una manera muy cuidadosa.
Las fotografías que verán a continuación, fueron tomadas con mi teléfono modelo Alcatel_5044R.
A continuación, les presentaré el proceso de elaboración que implemente para realizar este dibujo.

Hello friends greetings to all, welcome to my publication.
Today I come to present another of my practices in color drawings, this time I bring you a flower called orchid, in this post I will show you step by step how to get the combination of colors that I had to implement to get the resemblance to the color tone of the reference image.
In this type of drawing we do not use the type of blurring that we use with the black and white drawings, such as the use of cotton, here we will use only the colors, from the darkest to the lightest.
It is very important to use the handkerchief to place our hand at the moment of painting and avoid staining our drawing, it is also useful to clean the color residues in a very careful way.
The pictures you will see below were taken with my Alcatel_5044R model phone.
Next, I will show you the elaboration process that I implemented to make this drawing.

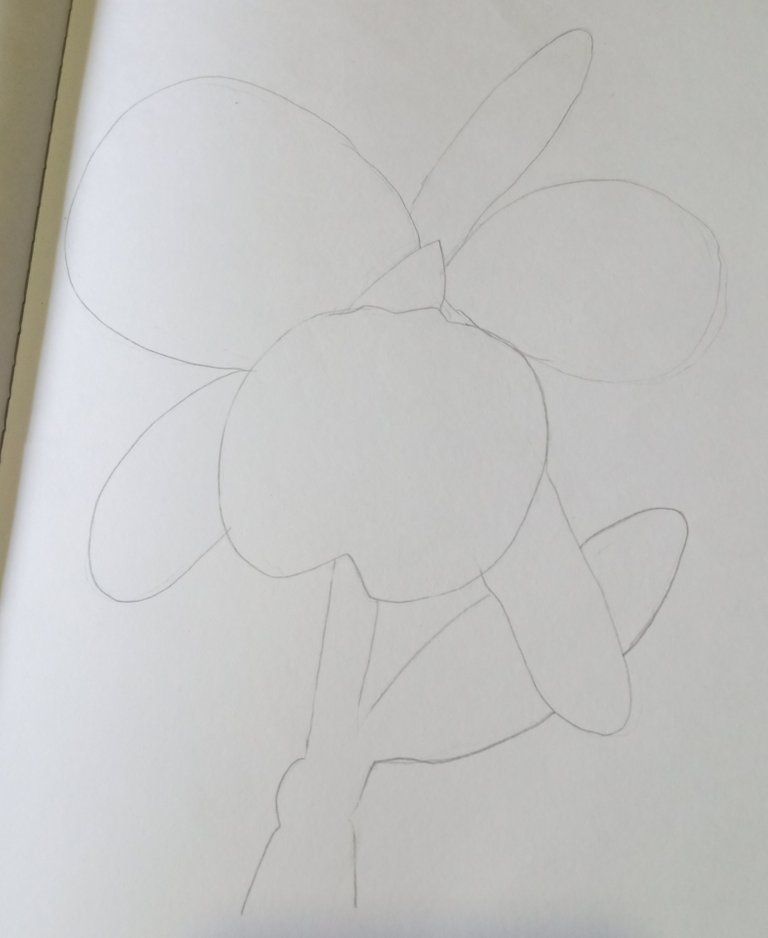
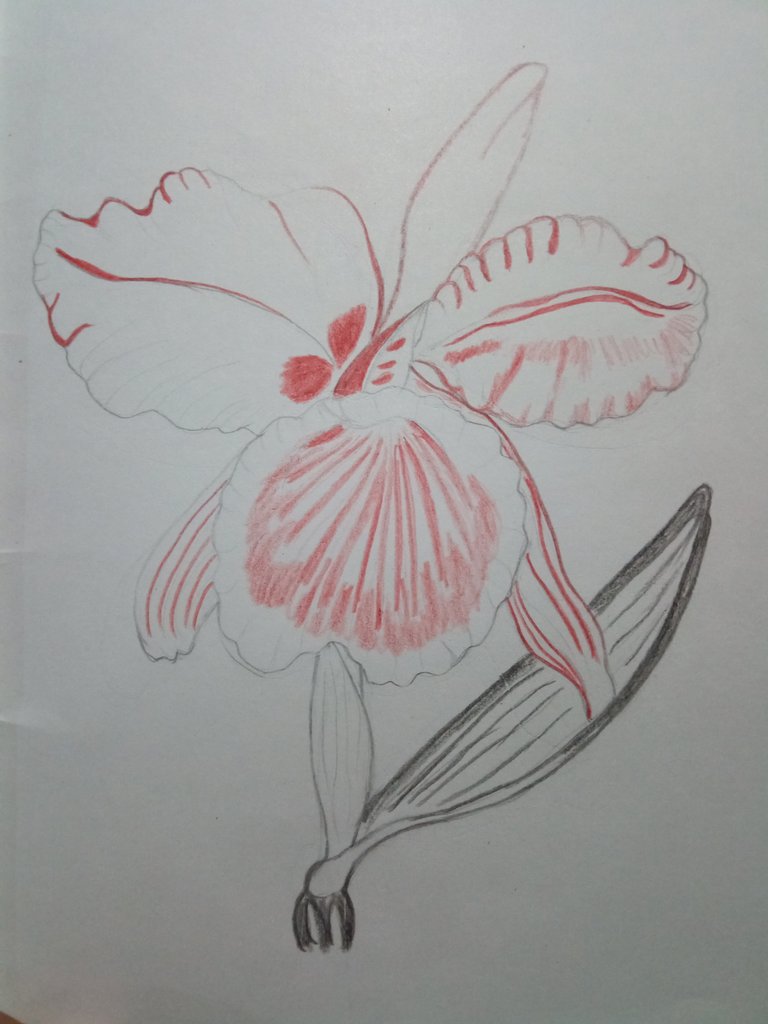
Paso 1
BOCETO
Para iniciar este dibujo primero vamos a realizar una figura similar al dibujo para que nos sirva de guía, dentro de esta figura iremos creando cada una de las partes de la flor.
Podemos realizar esta flor de manera directa, pero en mi caso usé un boceto que me ayuda mucho en las formas que debo darle a mi dibujo.
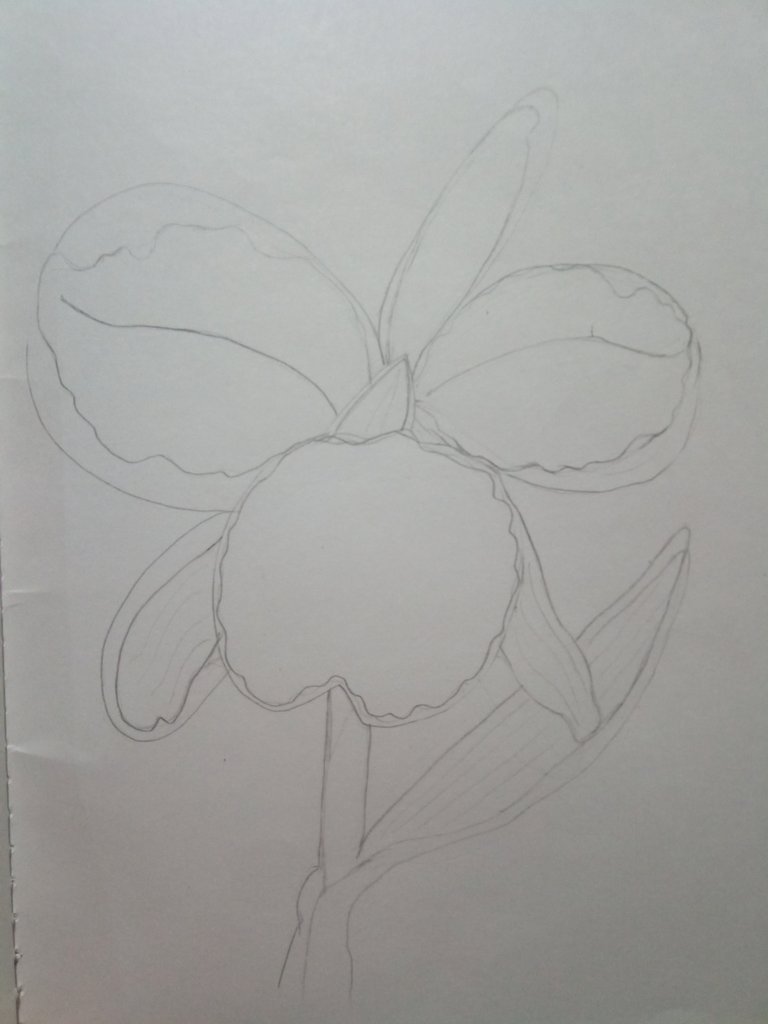
PASO 2
LA FORMA DE LA FLOR
En este segundo paso pueden notar como fui elaborado esta flor que anteriormente les había mostrado, aquí podemos mejorar algunos detalles principales para seguidamente iniciar con el eliminado de las líneas guías del boceto.
Step 1.
SKETCH.
To start this drawing first we are going to make a figure similar to the drawing to serve as a guide, inside this figure we will create each of the parts of the flower.
We can make this flower directly, but in my case I used a sketch that helps me a lot in the shapes I have to give to my drawing.
STEP 2
THE SHAPE OF THE FLOWER.
In this second step you can notice how I made this flower that I had previously shown you, here we can improve some main details and then start with the elimination of the guide lines of the sketch.
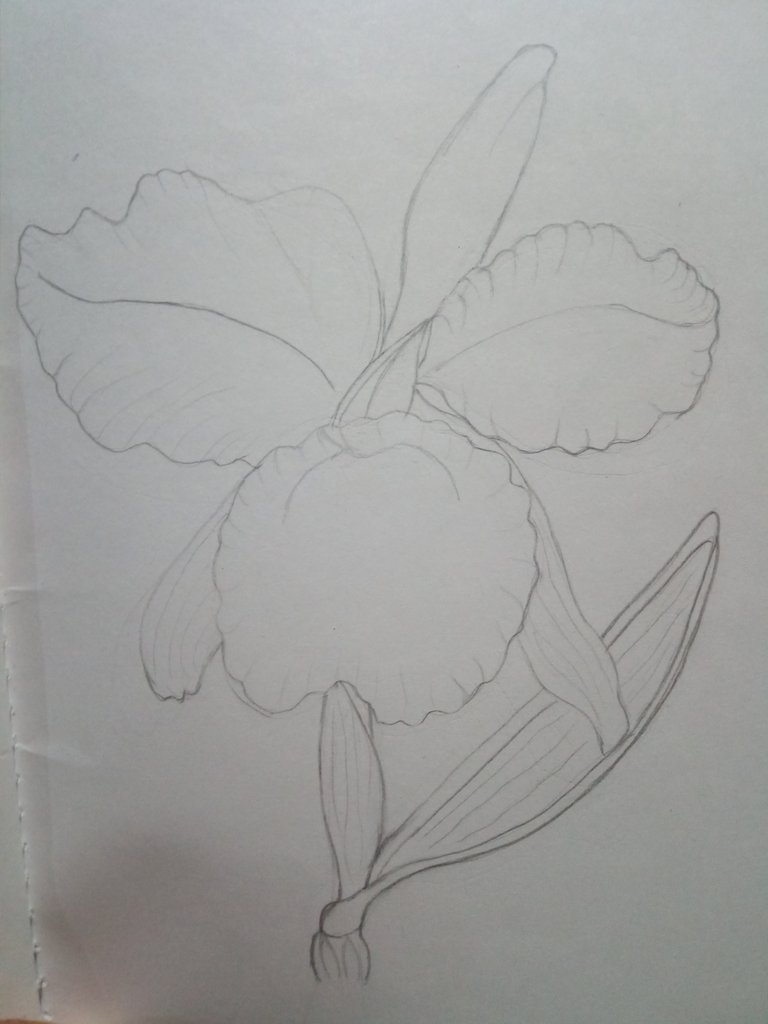
PASO 3
LÍNEAS
En este paso vamos a agregar las líneas que nos van a hacer útil para crear los efectos de dobladuras, volumen y profundidad con la ayuda de nuestro lápiz de dibujo, iremos realizando líneas en los pétalos de la siguiente manera.
Trazaremos líneas de afuera hacia adentro con una pequeña curvatura, en las hojas aremos líneas inclinadas y verticales, para el centro de la flor realizaremos un semi círculo dentro de la parte central de la flor.
PASO 4
PRIMERAS CAPAS DE COLOR
Antes de realizar las capas de colores, realice un subrayado de todas las líneas del dibujo con el color marrón, también agregue algunos puntos que me van a permitir crear las profundidades en esta hermosa flor, también con el uso del color negro, subraye la hoja y el tallo.
STEP 3
LINES.
In this step we are going to add the lines that will be useful to create the effects of folds, volume and depth with the help of our drawing pencil, we will make lines on the petals as follows.
We will draw lines from the outside to the inside with a small curvature, in the leaves we will make inclined and vertical lines, for the center of the flower we will make a semi-circle inside the central part of the flower.
STEP 4.
FIRST LAYERS OF COLOR.
Before making the color layers, underline all the lines of the drawing with brown color, also add some dots that will allow me to create the depths in this beautiful flower, also with the use of black color, underline the leaf and the stem.

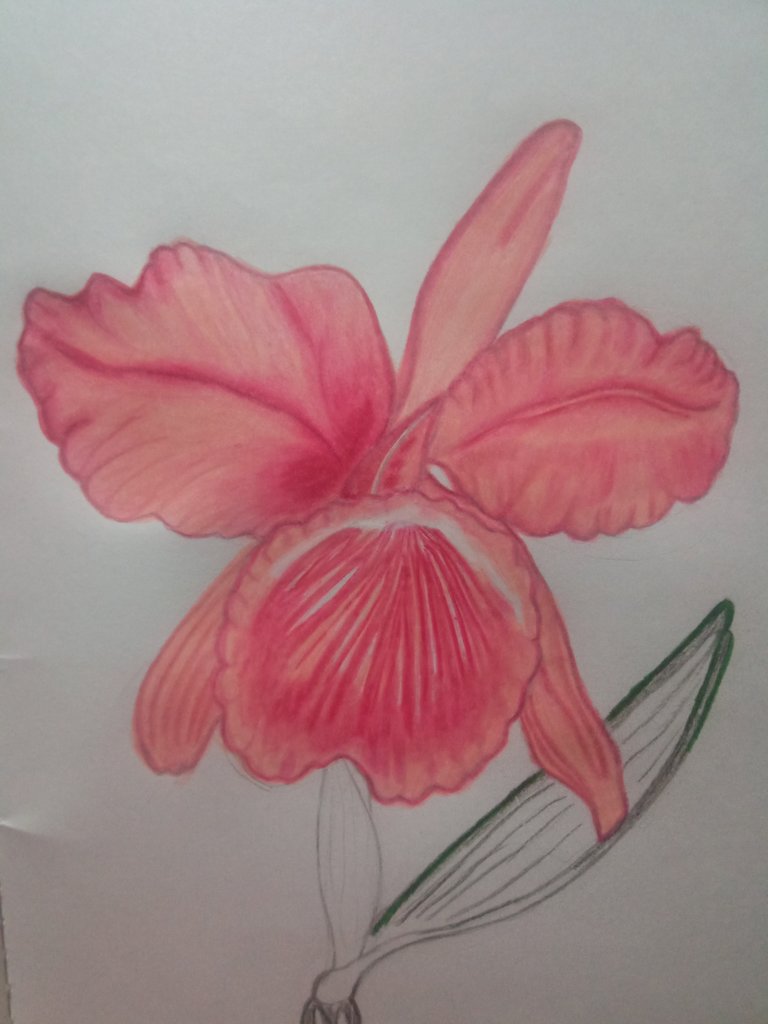
PASO 5
OTRAS CAPAS DE COLOR
En este paso agregaremos sobre el color marrón que anteriormente habíamos aplicado en nuestro dibujo, una capa fina de color rosado, afincando un poco más sobre las líneas más oscuras del color marrón y más claro en el resto de la flor.
Este es el resultado de las dos primeras capas del color, recuerden primero, fue el color marrón y sobre él agregamos el color rosado oscuro.
STEP 5.
OTHER LAYERS OF COLOR.
In this step we will add over the brown color that we had previously applied in our drawing, a thin layer of pink color, a little more on the darker lines of the brown color and lighter in the rest of the flower.
This is the result of the first two layers of the color, remember first, it was the brown color and over it we add the dark pink color.


PASO 6
TERCERA CAPA DEL COLOR
Sobre las dos capas de color agregaremos el color carne muchas veces hasta lograr un tono muy similar a la imagen de referencia, para esto debemos afincar muy bien nuestro crayón por todas las áreas de la flor, excepto la parte del centro de la flor.
PASO 7
EL CENTRO DE LA FLOR
En la parte del centro, aremos líneas con el crayón rosado oscuro, dejando algunos espacios en blanco desde la parte superior hacia la parte inferior, luego vamos a aclarar las líneas rosadas oscuras aplicando sobre ellas el color carne.
STEP 6.
THIRD LAYER OF THE COLOR.
Over the two layers of color we will add the flesh color many times until we get a tone very similar to the reference image, for this we must sharpen our crayon very well in all the areas of the flower, except the center part of the flower.
STEP 7
THE CENTER OF THE FLOWER.
In the center part, we will make lines with the dark pink crayon, leaving some blank spaces from the top to the bottom, then we will lighten the dark pink lines by applying the flesh color on them.
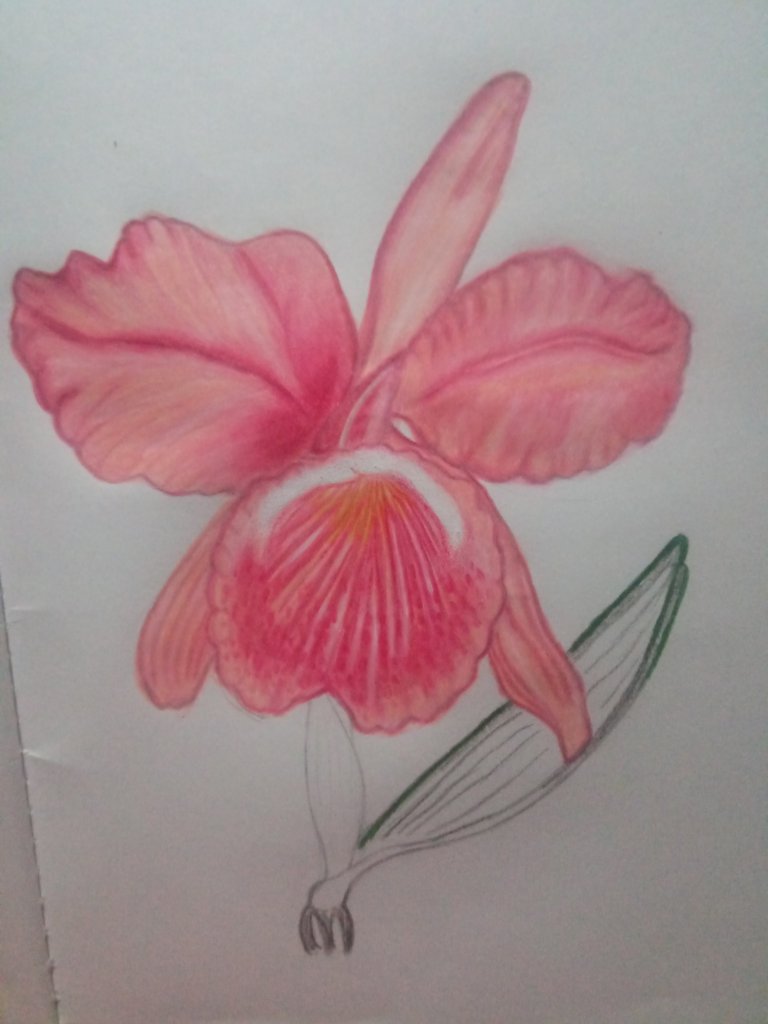
PASO 8
ILUMINACIÓN
Después de culminar con las capas de color antes mencionadas, sobre todo el área de la flor, necesitaremos darle esos efectos de luz, el cual podemos conseguir con la ayuda del crayón blanco que agregaremos pasando muchas veces sobre los pétalos de la flor, no en su totalidad, pero si en las áreas donde notamos en nuestra imagen de referencia esas iluminaciones.
También en el centro de esta flor pueden notar una línea blanca semi circular que nos permite darle profundidad al centro de la flor, esta la podemos realizar con un borrador del lápiz de dibujo que utilice para realizar el boceto.
Luego de ese detalle agregue unos puntos en la parte inferior con la ayuda del color rosado oscuro, para así conseguir una mayor profundidad en el centro de la flor, también agregue en la parte superior interna un toque de color amarillo.
STEP 8
LIGHTING
After finishing with the layers of color mentioned before, over the whole area of the flower, we will need to give it those light effects, which we can achieve with the help of the white crayon that we will add passing many times over the petals of the flower, not in its totality, but in the areas where we notice in our reference image those illuminations.
Also in the center of this flower you can notice a white semi-circular line that allows us to give depth to the center of the flower, this can be done with an eraser of the drawing pencil used to make the sketch.
After that detail add some dots in the lower part with the help of the dark pink color, to get a greater depth in the center of the flower, also add in the upper inner part a touch of yellow color.
PASO 9
HOJAS
Al culminar la flor en su totalidad, empecé a pintar las hojas, la hoja que estaba subrayada con el color negro, aplique sobre este un color verde oscuro muy afincado, y luego la iluminé con el color blanco.
Para la hoja del centro trace unas líneas de un verde más oscuro y sobre ellas pinte con un color verde manzana iluminándolo con el color amarillo, para darle esas tonalidades similares a la de nuestro dibujo de referencia.
STEP 9
LEAVES.
When I finished the flower in its totality, I began to paint the leaves, the leaf that was underlined with the black color, I applied on it a dark green color, and then I illuminated it with the white color.
For the center leaf I drew some lines of a darker green and on them I painted with an apple green color illuminating it with yellow color, to give it those tonalities similar to the one of our reference drawing.
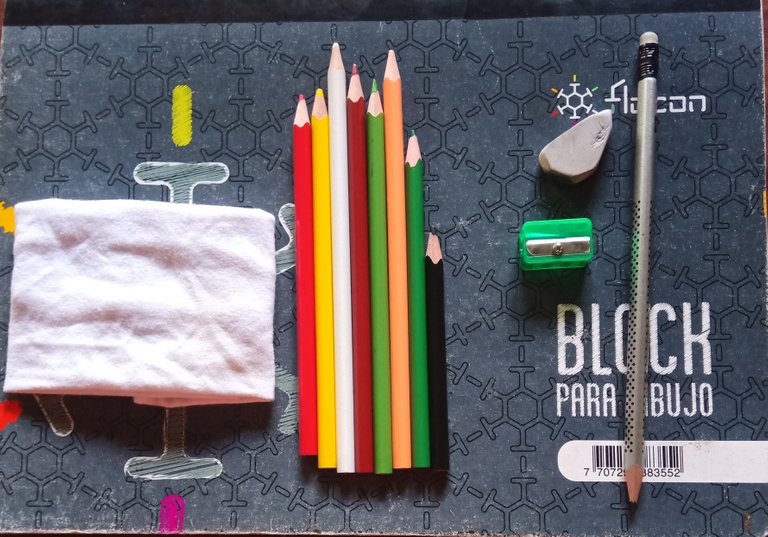
MATERIALES
BLOC DE DIBUJO.
BORRADOR.
SACAPUNTAS.
LÁPIZ DE DIBUJO.
PAÑUELO.
COLORES:
NEGRO.
VERDE PINO.
VERDE MANZANA.
ROSADO OSCURO.
CARNE.
BLANCO.
AMARILLO.
MARRÓN.
La imagen que utilice en referencia posee su fuente, puesto que es una imagen sacada de Pinterest, de donde estoy sacando todas las imágenes que uso para realizar mis dibujos.
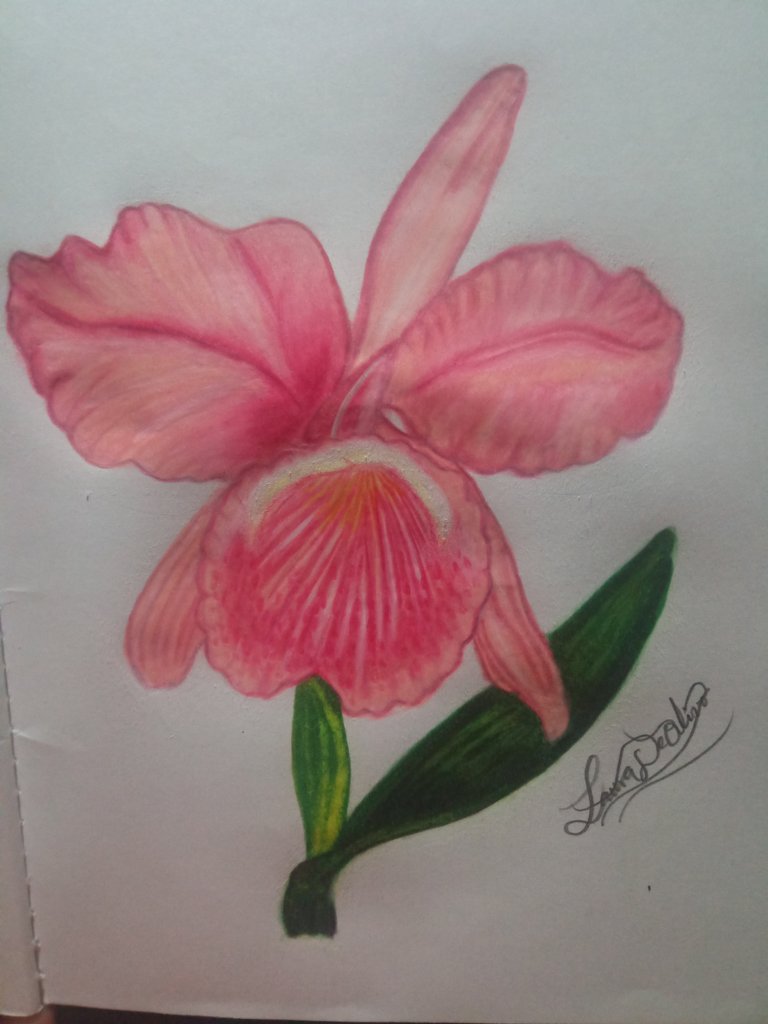
Y así concluye la publicación de hoy amigos, espero sea de tu agrado y que hayas aprendido algo nuevo el día de hoy con esta publicación de dibujo, nos veremos en otra publicación basada en el hermoso mundo del arte del dibujo.
MATERIALS.
SRAWING PAD.
DRAWING BOARD.
SONG PENCIL.
DRAWING PENCIL.
SCARF.
COLORS:
BLACK.
PINE GREEN.
APPLE GREEN.
DARK PINK.
FLESH.
WHITE.
YELLOW.
BROWN.
The image I used in reference has its source, since it is an image taken from Pinterest, where I am getting all the images I use to make my drawings.
And so concludes today's publication friends, I hope you like it and that you have learned something new today with this publication of drawing, see you in another publication based on the beautiful world of the art of drawing.
social networks / redes sociales
![]()
![]()
Traductor Deepl
Translated Deepl
Ediciones Canva
Editions Canva


Beautiful drawing
thanks my friend
¡Felicitaciones!
1. Invierte en el PROYECTO ENTROPÍA y recibe ganancias semanalmente. Entra aquí para más información.
3. Suscríbete a nuestra COMUNIDAD, apoya al trail de @Entropia y así podrás ganar recompensas de curación de forma automática. Entra aquí para más información sobre nuestro trail.
4. Creación de cuentas nuevas de Hive aquí.
5. Visita nuestro canal de Youtube.
Atentamente
El equipo de curación del PROYECTO ENTROPÍA