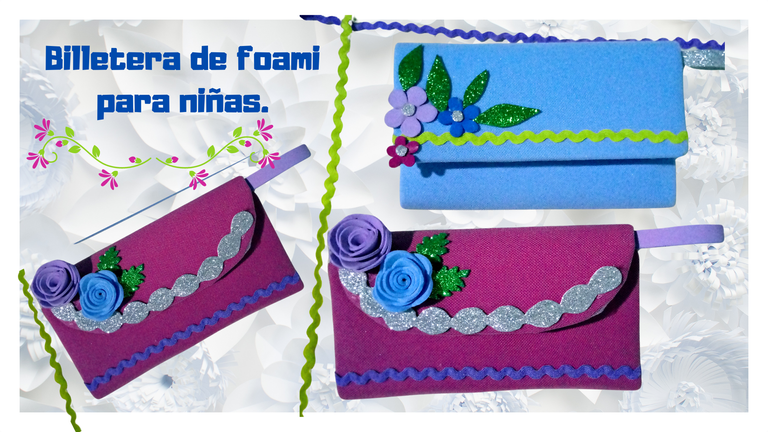
Billetera de foami para niñas/(ESP/ENG)
Feliz jueves querida comunidad artesana HiveDiy espero que estén pasando una semana productiva, me complace estar nuevamente por aquí compartiendo mis trabajos manuales con todos, siempre me ha gustado crear, es mi mejor forma de salirme de las rutinas diarias, es una de las artes que me entretienen mucho la mente.
El día de hoy les vengo a compartir un tutorial de como hacer una billetera para niñas con foami y material de provecho, en esta oportunidad estoy utilizando los cartones donde viene la leche líquida, me gusto mucho trabajar este material porque es resistente, ideal para crear mil ideas.
Sin más que acotar les muestro los materiales y el proceso del paso a paso.
Happy Thursday dear HiveDiy craft community, I hope you are having a productive week, I am pleased to be here again sharing my crafts with everyone, I have always liked to create, it is my best way to get out of the daily routines, it is one of the arts that entertains my mind a lot.
Today I come to share with you a tutorial on how to make a wallet for girls with foami and useful material, this time I am using the cartons where the liquid milk comes, I really like to work with this material because it is resistant, ideal for creating a thousand ideas.
Without further ado I show you the materials and the step by step process.
The pictures you will see below were taken with my TECNO SPARK GO 2024.

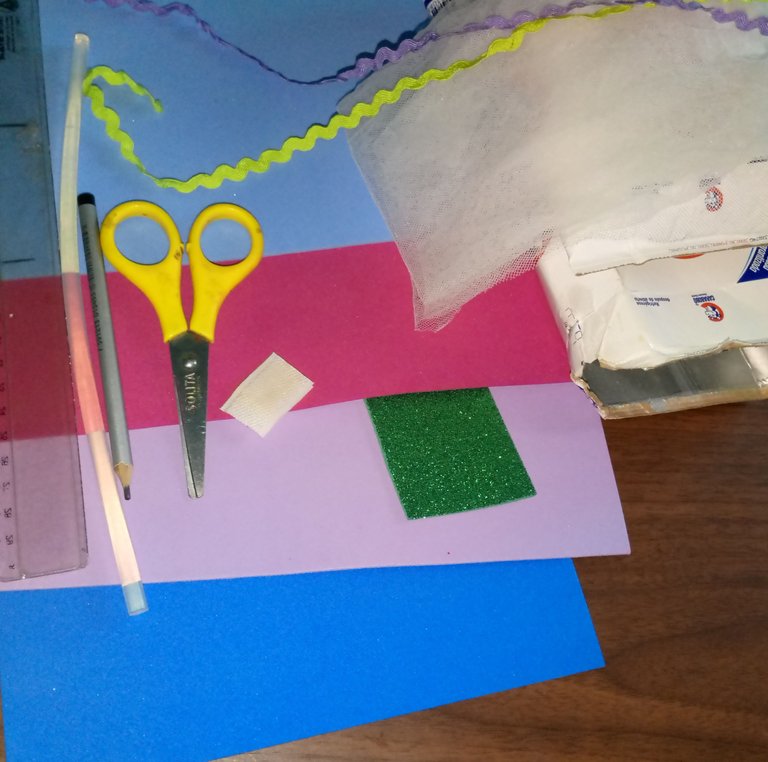
Materiales:
Foami de diferentes colores.
Cajas recicladas de leche líquida.
Tela de tul blanco
Cinta en zigzag
Tijera
Lápiz
Regla
Silicona en barra para pistola
Materials:
Foami of different colors.
Recycled liquid milk cartons.
White tulle fabric
Zigzag ribbon
Scissors
Pencil
Ruler
Silicone gun stick
 |  |
|---|
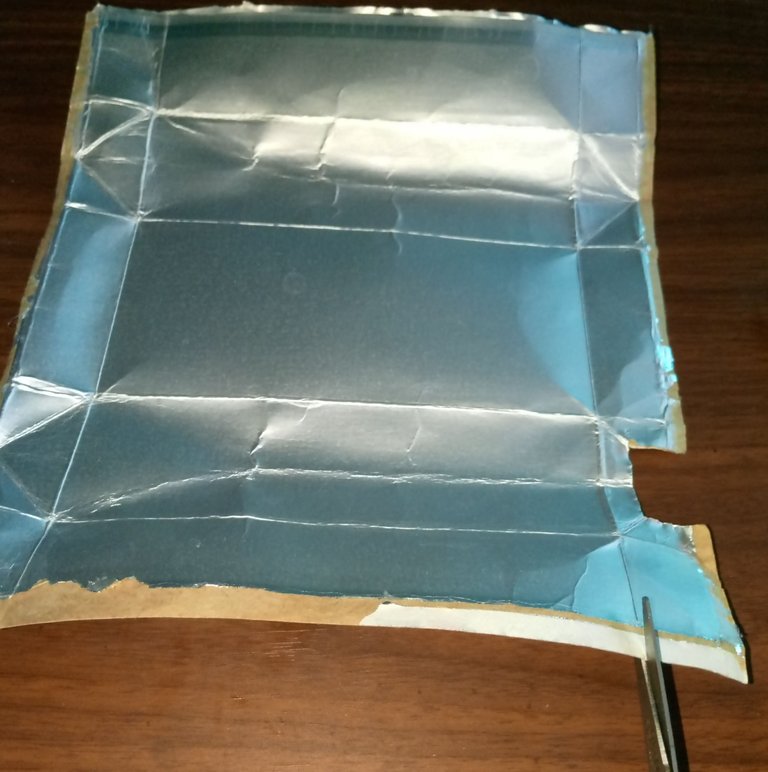
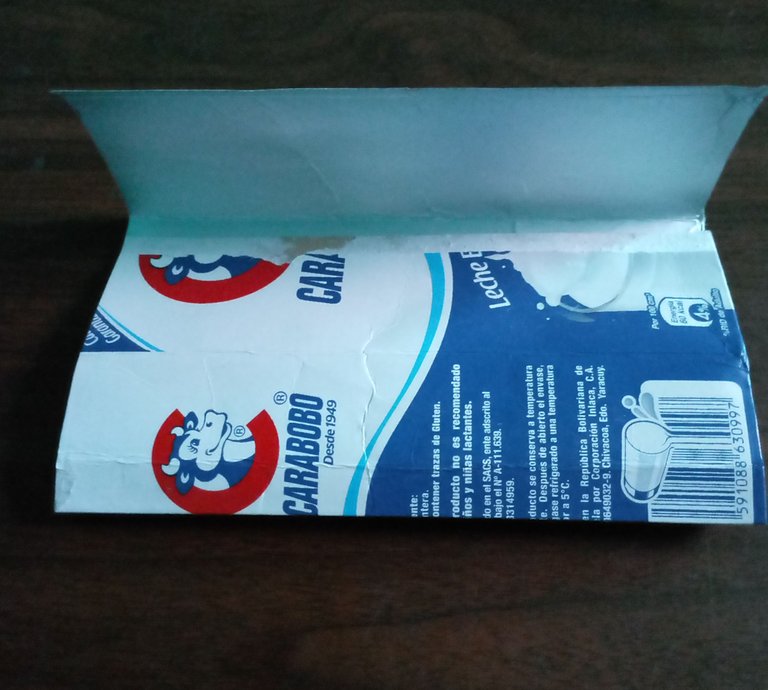
Después de haber limpiado y secado nuestras cajas, lo primero que vamos a hacer es abrir la caja por donde tiene la línea de cierre en la parte de atrás, por allí vamos a despegar.
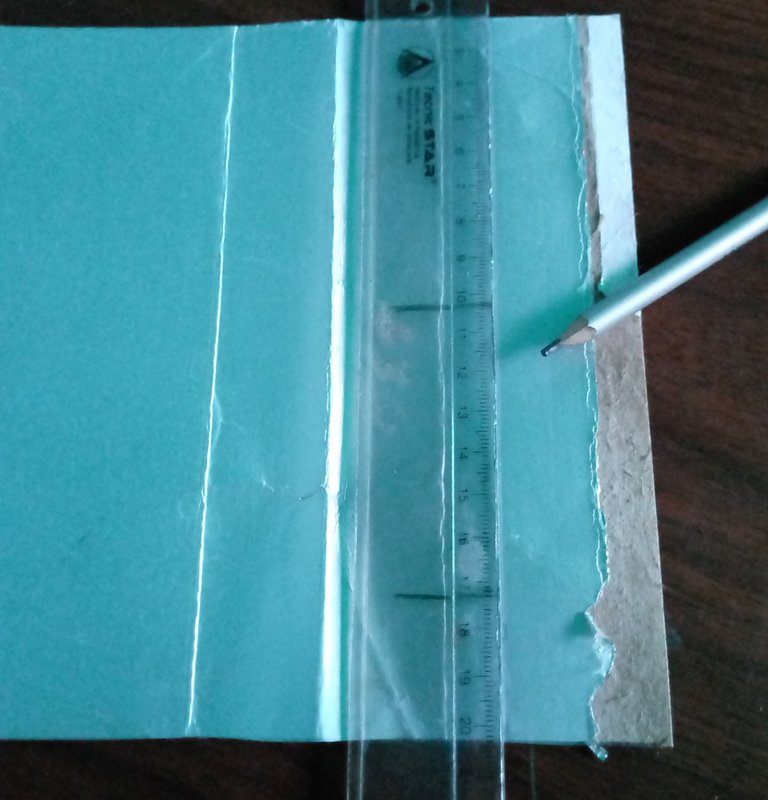
Después de abrir vamos a recortar los laterales por donde tiene la línea del doblado superior e inferior.
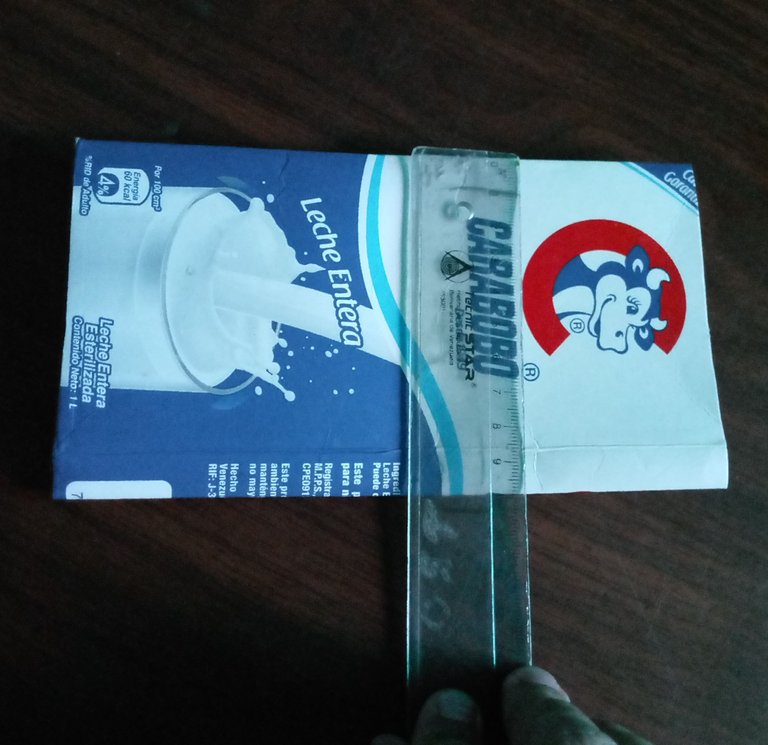
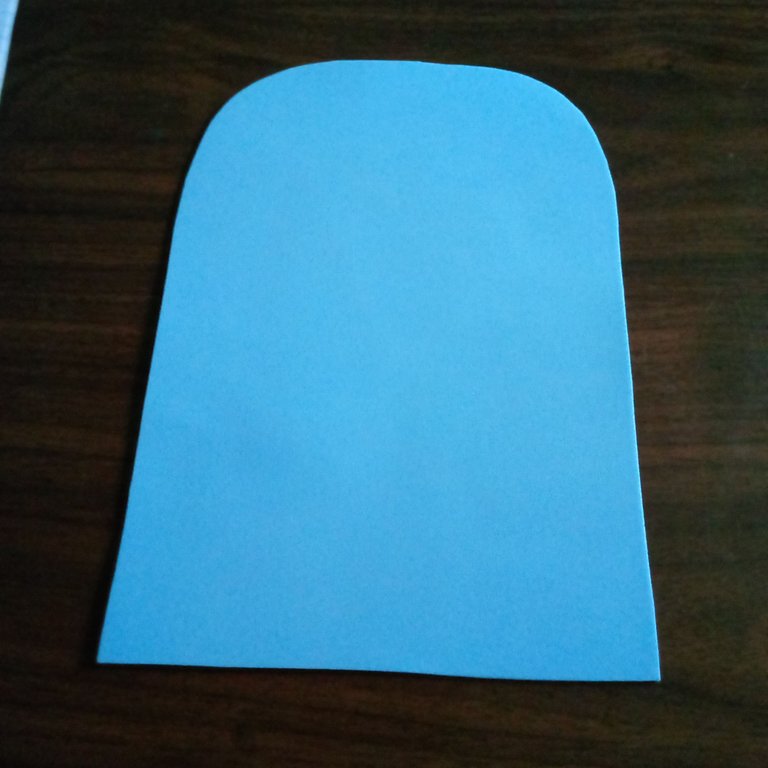
Una vez cortados los lados vamos a hacer unas medidas con la regla del tamaño que va a quedar la billetera.
Recortaremos un rectángulo de 18 cm de ancho y 25.5 cm de largo
Doblamos 3 lados, un lado superior que sería la tapa de 6.5 cm de alto, el bolsillo es de 9 cm de alto y el lado de atrás en 10 cm, más 1 cm de separación para doblar entre la tapa y el bolsillo.
After having cleaned and dried our boxes, the first thing we are going to do is to open the box where it has the closing line on the back, from there we are going to peel off.
After opening we are going to cut the sides where it has the line of the upper and lower folding.
Once the sides are cut, we are going to measure the size of the wallet with the ruler.
We will cut a rectangle 18 cm wide and 25.5 cm long.
We fold 3 sides, a top side that would be the cover of 6.5 cm high, the pocket is 9 cm high and the back side is 10 cm, plus 1 cm of separation to fold between the cover and the pocket.
 |  |
|---|
En este paso notaremos como la billetera va tomando forma.
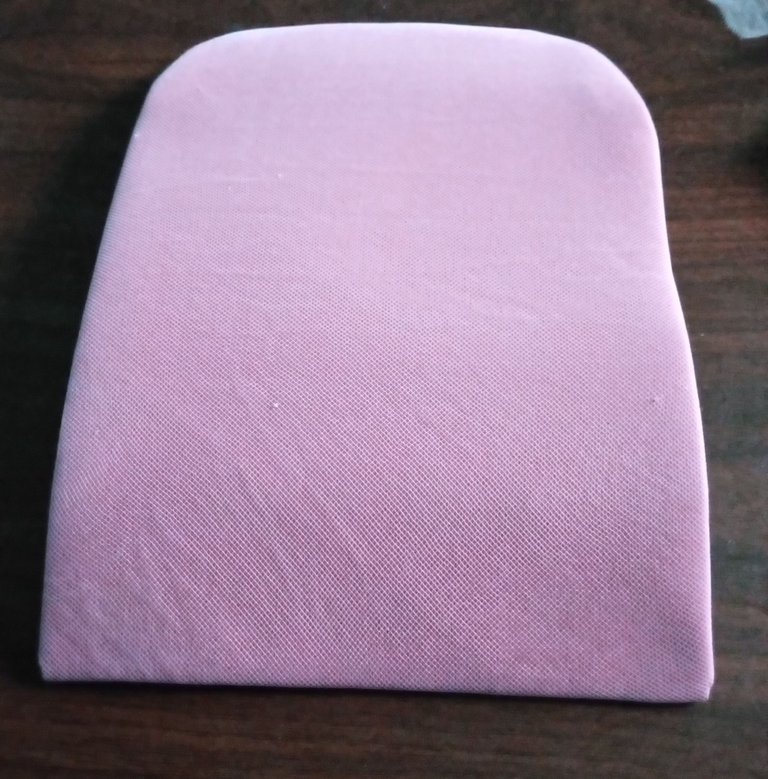
Lo siguiente que vamos a hacer es recortar las puntas superiores para darle forma redondeada.
Después colocaremos esta pieza de cartón sobre la tela de tul y el foami fucsia que ya hemos recortado con la forma, luego pegaremos doblando las orillas hacia dentro.
In this step we will notice how the wallet is taking shape.
The next thing we are going to do is to cut the upper ends to give it a rounded shape.
Then we will place this piece of cardboard on the tulle fabric and the fuchsia foami that we have already cut out with the shape, then we will glue by folding the edges inwards.
 |  |
|---|
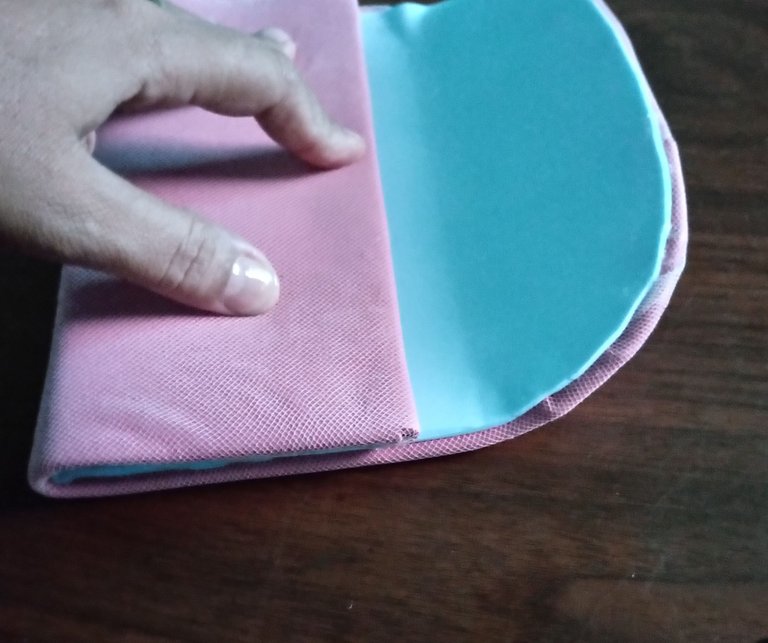
Después de haber pegado las piezas exteriores, pegaremos la capa interior de la cartera, haciendo presión para que todo quede bien pegado.
After we have glued the external pieces, we will glue the internal layer of the wallet, applying pressure so that everything is well glued.
 |  |
|---|
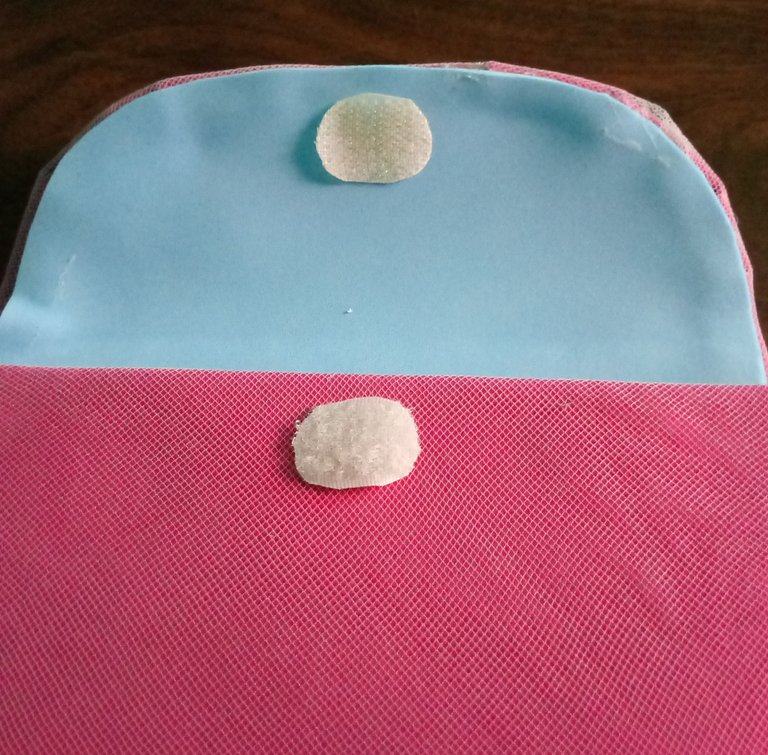
Seguimos doblando el bolsillo con las medidas que habíamos tomado anteriormente para darle la forma final, primero pegaremos el bolsillo en los laterales y después pegaremos el cierre mágico.
We continue folding the pocket with the measurements we had previously taken to give it the final shape, first we will glue the pocket on the sides and then we will glue the magic clasp.
 |  |
|---|
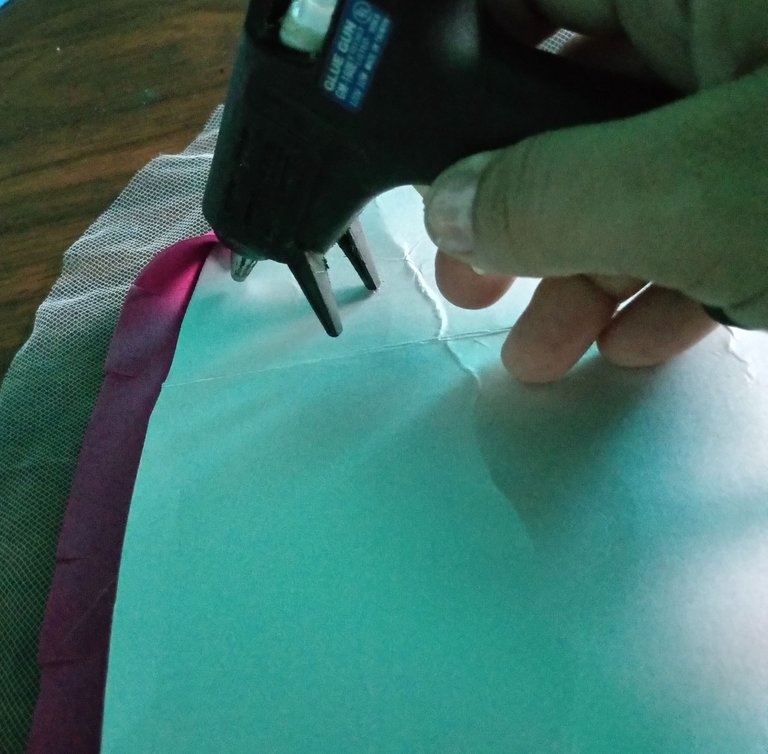
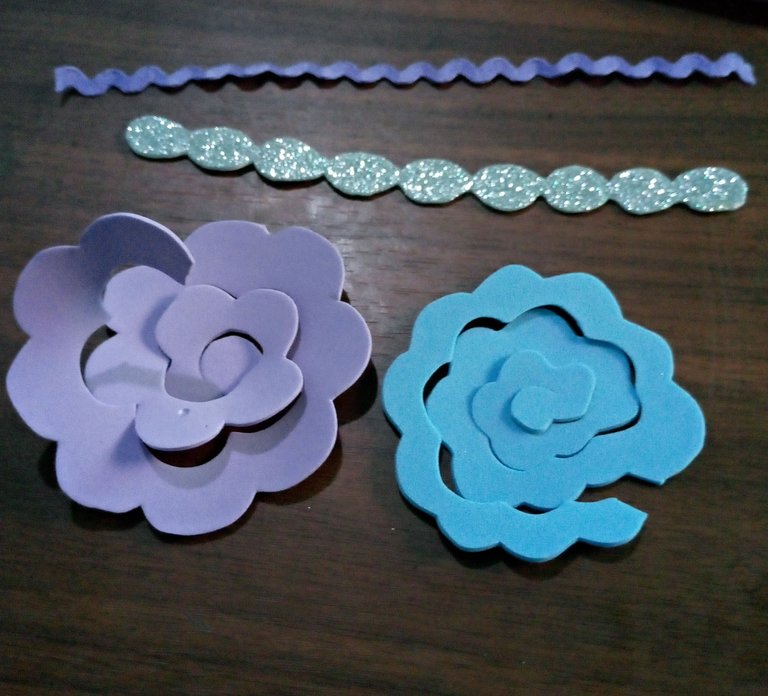
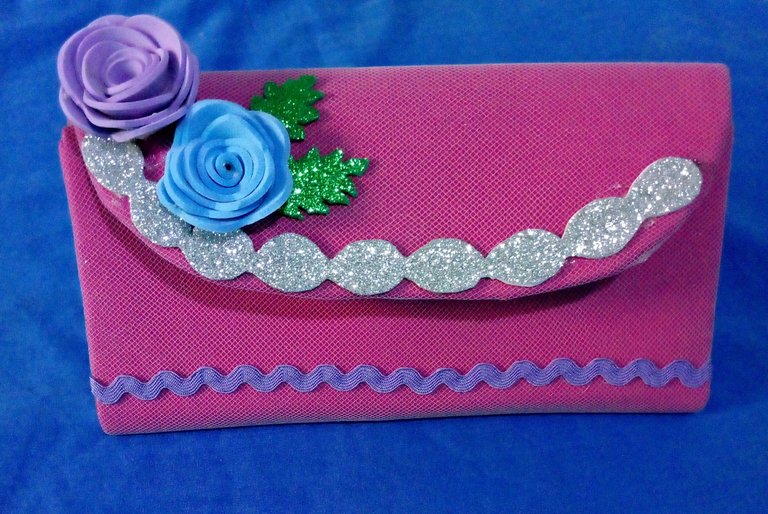
Cerramos la billetera, y comenzaremos hacer las rosas y demás detalles decorativos a nuestro gusto, en este caso son rosas que se hacen con un círculo.
Para hacer las rosas recortaremos el círculo de foami en forma de caracol a 1 cm para que sea más fácil con vueltas hasta el centro del círculo, para después comenzar a pegar desde la punta externa hasta llegar al centro, luego recortaremos él, excedente que sobre en la base de las rosas para que queden planas.
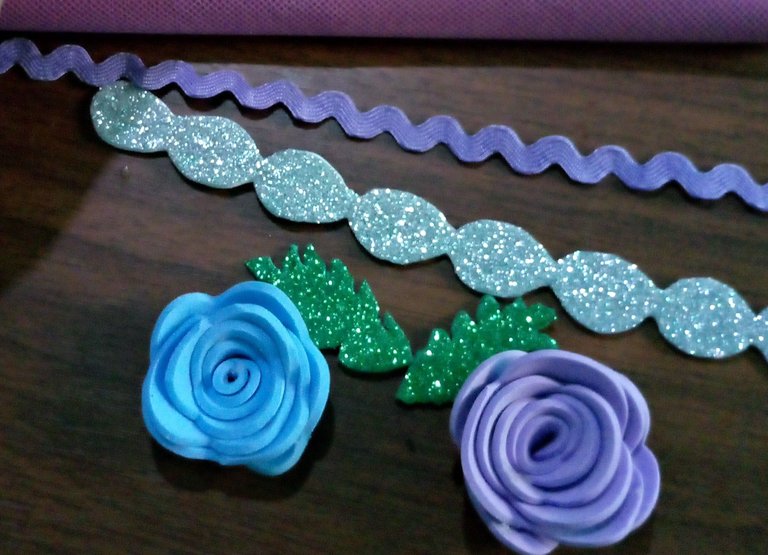
Comenzaremos a pegar la cinta en zigzag y la cinta de foami escarchado, así como las rosas y hojas.
Close the wallet, and start making the roses and other decorative details to our liking, in this case they are roses that are made with a circle.
To make the roses we will cut the circle of foami in the shape of a snail to 1 cm to make it easier with laps to the center of the circle, and then start gluing from the outer tip to reach the center, then we will cut it, surplus at the base of the roses to be flat.
We will start gluing the zigzag ribbon and the frosted foami ribbon, as well as the roses and leaves.
 |  |
|---|
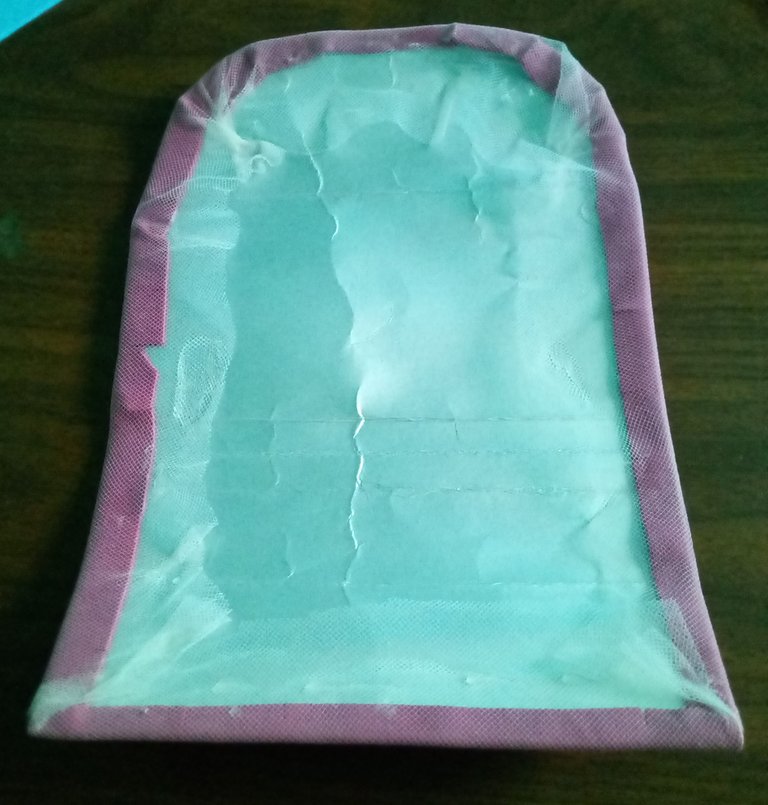
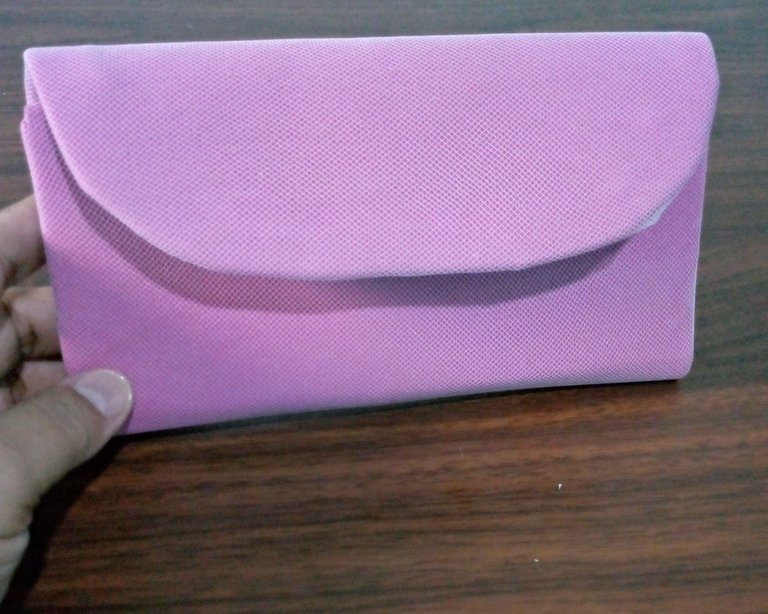
Con estos detalles decorativos hemos concluido nuestra billetera para niñas.
Espero que les haya gustado y se animen hacerlas para sus niñas, también para regalar en fiestas y otras ocasiones, les aseguro que sería un buen detalle para esas coquetas de la casa, ahora estoy haciendo varias para mis sobrinas que les encanta lucirse.
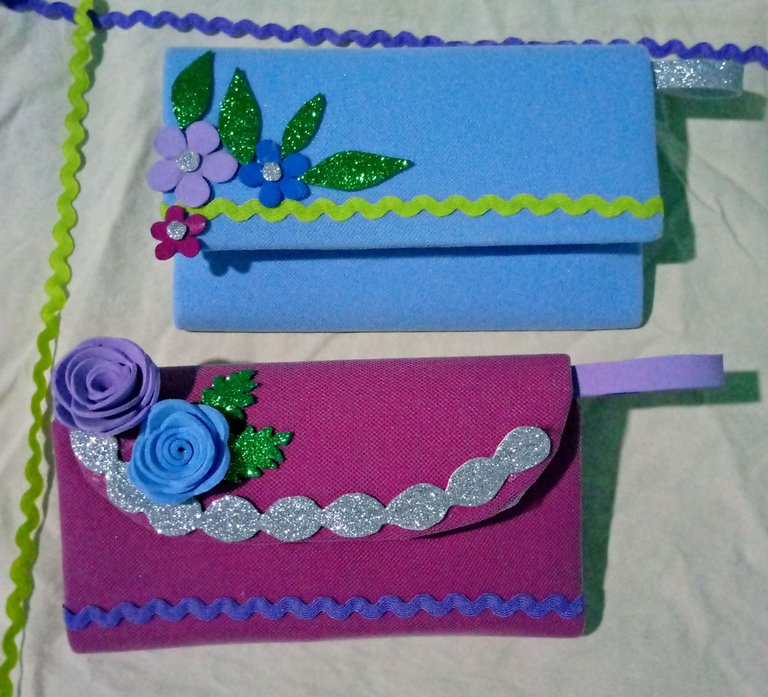
También pueden ver la versión en azul muy bonita para los diferentes gustos de color.
Gracias por acompañarme en este tutorial, espero vernos pronto en otra de mis publicaciones.
With these decorative details we have concluded our wallet for girls.
I hope you liked it and I encourage you to make them for your girls, also to give away at parties and other occasions, I assure you that it would be a nice detail for those coquettes of the house, now I'm making several for my nieces who love to show off.
You can also see the blue version very nice for different color tastes.
Thanks for joining me in this tutorial, I hope to see you soon in another of my publications.
social networks / redes sociales
![]()
![]()
Traductor Deepl
Translated Deepl
Ediciones Canva
Editions Canva


This post has been manually curated by @bhattg from Indiaunited community. Join us on our Discord Server.
Do you know that you can earn a passive income by delegating to @indiaunited. We share more than 100 % of the curation rewards with the delegators in the form of IUC tokens. HP delegators and IUC token holders also get upto 20% additional vote weight.
Here are some handy links for delegations: 100HP, 250HP, 500HP, 1000HP.
100% of the rewards from this comment goes to the curator for their manual curation efforts. Please encourage the curator @bhattg by upvoting this comment and support the community by voting the posts made by @indiaunited.
Me gustan mucho las iniciativas para reciclar...de hecho en una de mis publicaciones comparti un mural de tapas plasticas, apoyando el reciclaje. Muy buena tu contribucion.
¡Hola amigas!!! Gracias que bueno que ames reciclar, creo que vi este mural fue de la universidad si no mal recuerdo.
Gracias por pasar, me alegra que compartas esta buena práctica. Seguiremos reciclando para crear. Un abrazo 🤗😃
Solamente te voy a decir que eres una genio!, tremenda y hermosa habilidad que tienes para las manualidades, me ha gustado como te han quedado las rosas, parecen verdaderas.
¡Qué honor, gracias!!! Me alegra que te haya gustado querido, gracias por pasarte por mi publicación.😃🙂
Me encantoooo 🥰🥰🥰
Sabes que no soy muy hábil en cuanto a manualidades se refiere, pero una vez quise trabajar con mis estudiantes algo diferente, encontre como hacer carteras de fiesta con cartón, este post me recordo ese trabajo.
Está muy bonita la billetera.
Gracias amiga, si eres buena solo necesitas enfocarte, necesitas un poco de tiempo y practica, veras que si puedes.😘
Omg esta preciosaaa, así bien tierna y glamourosa a la vez. Me encantaron las rositas. <3
Gracias amiga, es muy fácil de hacer, y como dices también es tierna y glamourosa 😁 las rositas le dan ese toque de ternura, me alegra que te haya gustado.❤️
Es increíble como de materiales reciclados haces maravillas muy hermosas, felicidades.
Hola corazón gracias!!! la verdad me encanta hacer manualidades es mi pasión y reciclo para transformar es gratificante.🙂
Me sorprendió mucho el resultado, se ve genial para haber sido hecho con esos materiales. Además, está muy detallado el paso a paso. Saludos.
Hola @miguelmederico gracias por comentar, me alegra que te haya gustado, los materiales se pueden reutilizar incluso para emprender.
https://twitter.com/hivediy47901/status/1781206395246854277
Saludos @lauracraft, te quedaron hermosas las billeteras, la de color rosa es mi favorita, me encantó la combinación con morado se ve espectacular, es increíble lo que se puede realizar reciclando cartón, gracias por compartir.
Feliz fin de semana!
Hola @belkyscabrera espero que estés bien, gracias por tu apreciado comentario, me alegra que te haya gustado, trabajar con cartón es impresionante, se pueden crear grandes ideas.🤗
Que optimo este nuevo método de reciclaje, al menos para mí es nuevo y creo que es una oportunidad genial para que los pequeños también aprecien la importancia de reciclar. Creo que sería una actividad bonita por el a los pequeños a confeccionar sus carteristas, está genial la idea y el tutorial.
Si es una gran idea para los niños, esto los motiva, y los ayuda a mantener mayor concentración y atención, además de cuidar y crear con los reciclajes y así contribuir con el medio ambiente y cuidar el planeta.
Cualquier pregunta estaré atenta por si te motivas hacer unas manualidades reciclando.🤗
Hola querida excelente obra , están muy bonitas las billeteras me encanta la del color azul.
Hola querido gracias, excelente ya tienes tu elección, que bien me parece genial, veo que te gusta el color azul como a mi hija.😃
Gracias por pasar y dejar tu importante comentario 🤗
Me encanta esta cartuchera amiga muchas gracias por compartir tu creatividad amiga
Amigaaa @rosselena querida, gracias a ti por visitar mi blog, que bueno que sea de tu agrado, espero vernos pronto con más ideas creativas.😃🤗
wow very creative!!
Wow que talento tan bonito tienes 😍 @lauracraft de verdad que te votas con tus creaciones me encantó todo y la explicación detallada de tu trabajo realizado. Gracias por compartirlo con nosotros. 🤗🥰❤️❤️ Bendiciones 😇
¡Mil gracias!!!, me alegra recibir tu apreciado comentario. 😀🤗