make a simple but attractive shoe rack (furnitur design)
We need objects to remind us of the commitments we've made. That carpet from Morocco reminds us of the impulsive, freedom-loving side of ourselves we're in danger of losing touch with. Beautiful furniture gives us something to live up to. All designed objects are propaganda for a way of life.
Hi all architectural design lovers!!!! How are you guys today??? I hope you are always healthy and full of laughter in happiness and also I hope you are always enthusiastic in living your daily routine and also you always enjoy it even though in the journey of life that sometimes doesn't go as desired.
Back again with me @lancang a wood craftsman from a village far from urban areas, today I'm back to making a post about furniture and in this post I'm showing a result of my work two days ago to all of you I hope you will like it.

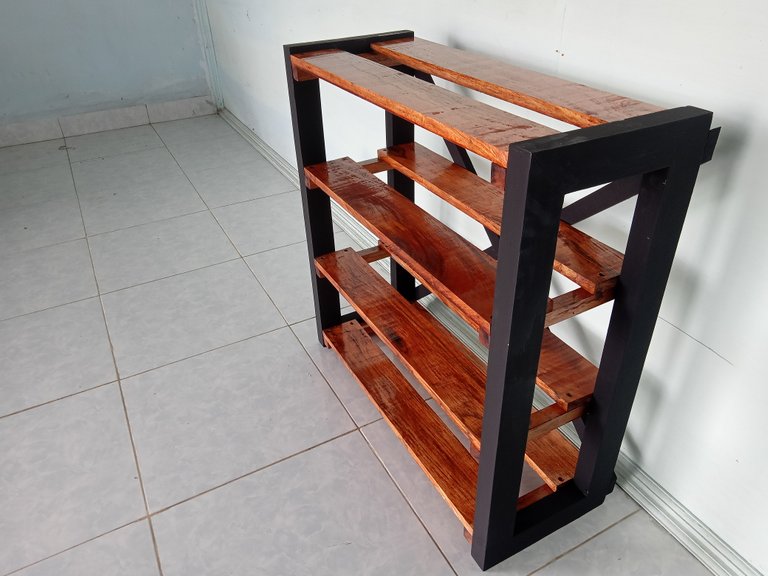


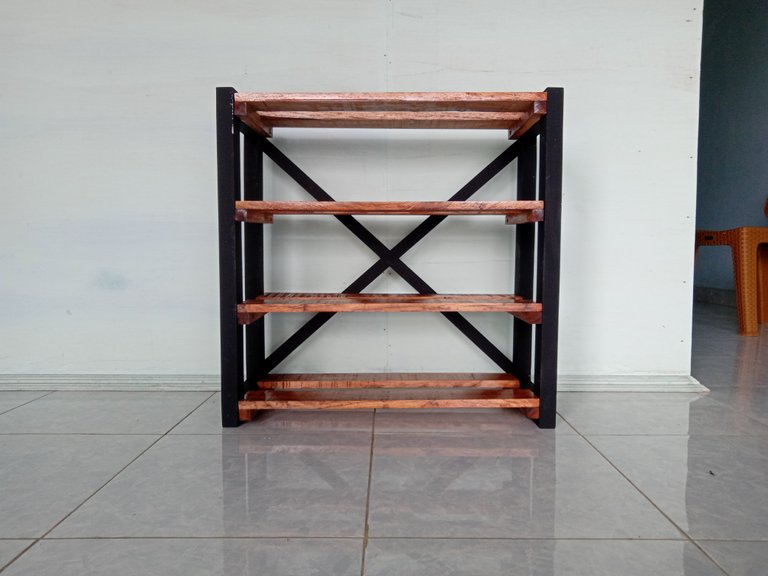

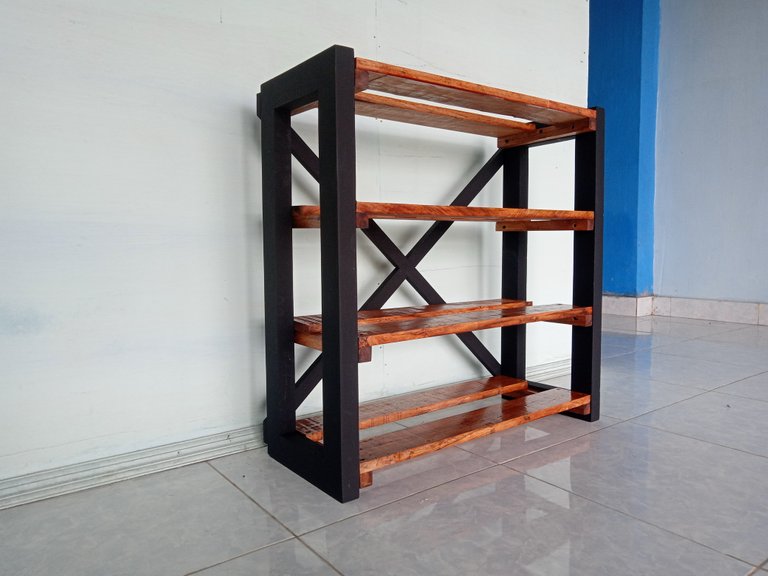
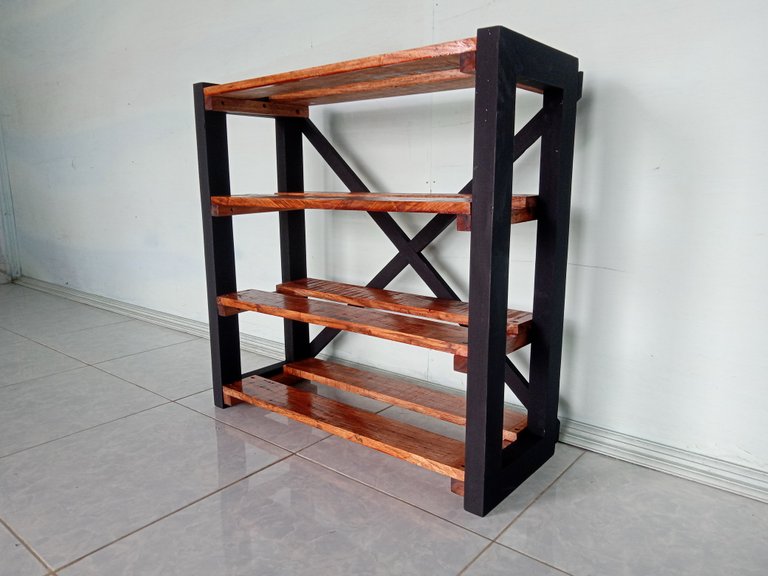

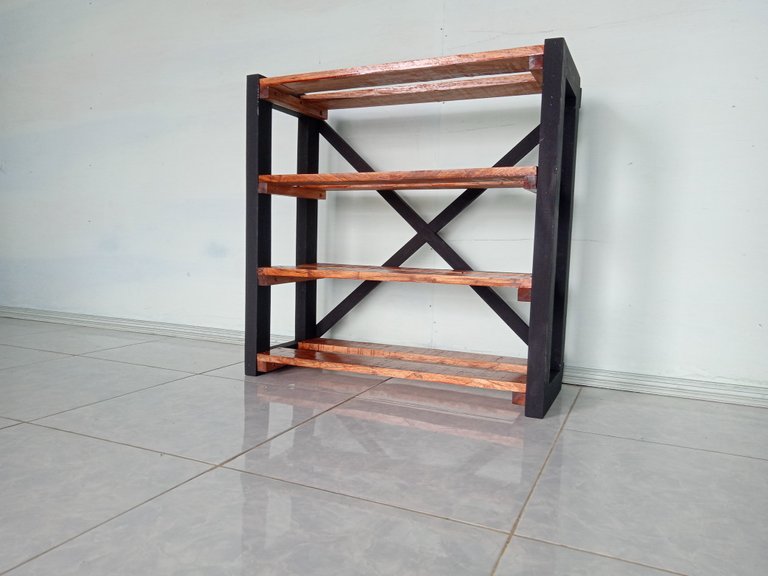
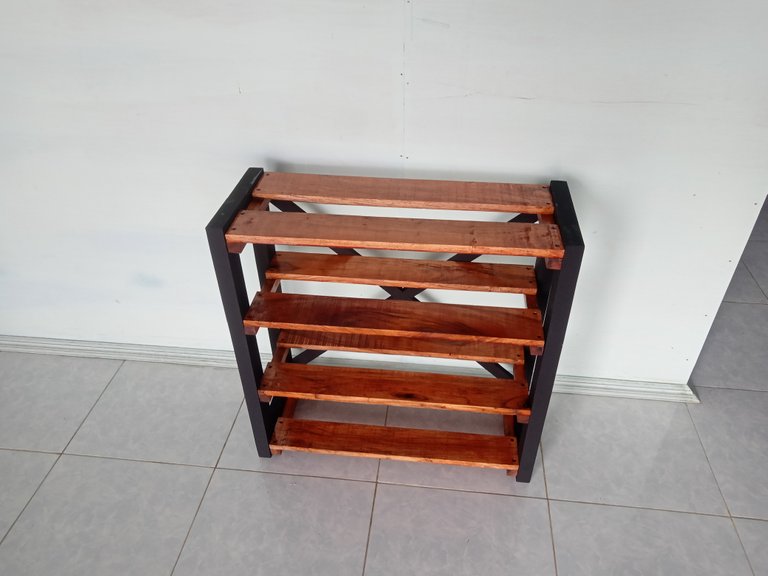
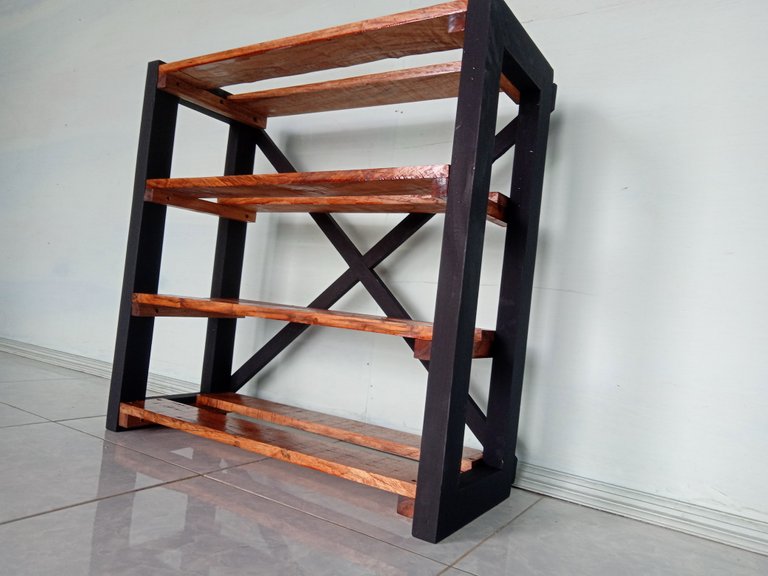
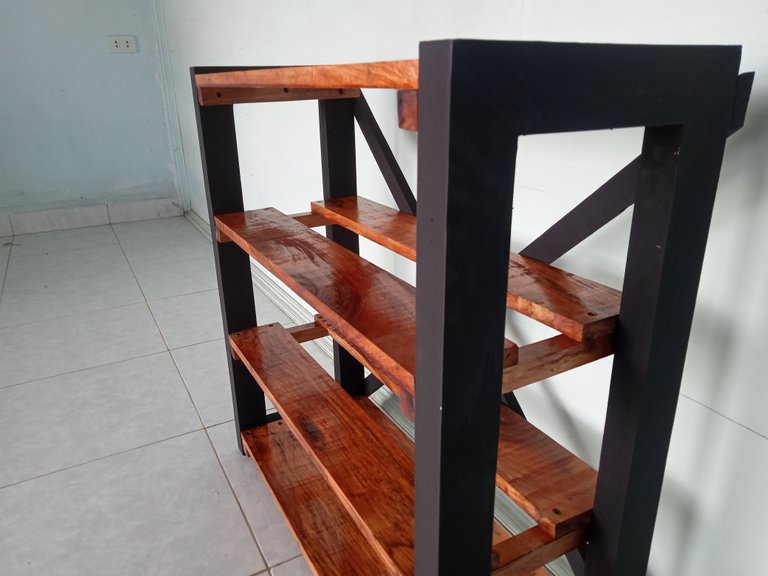
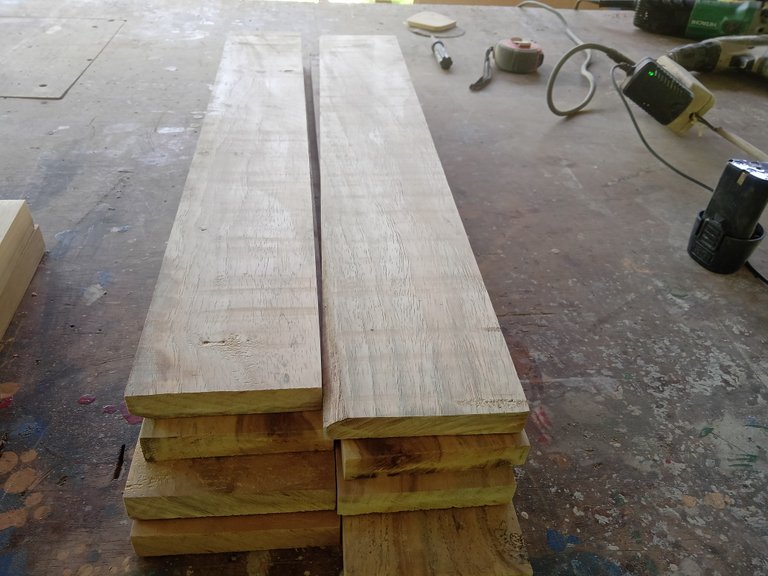
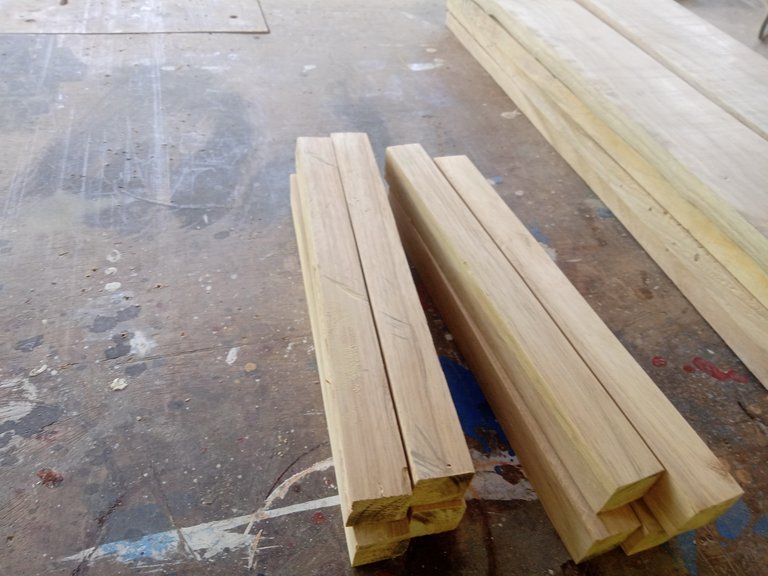
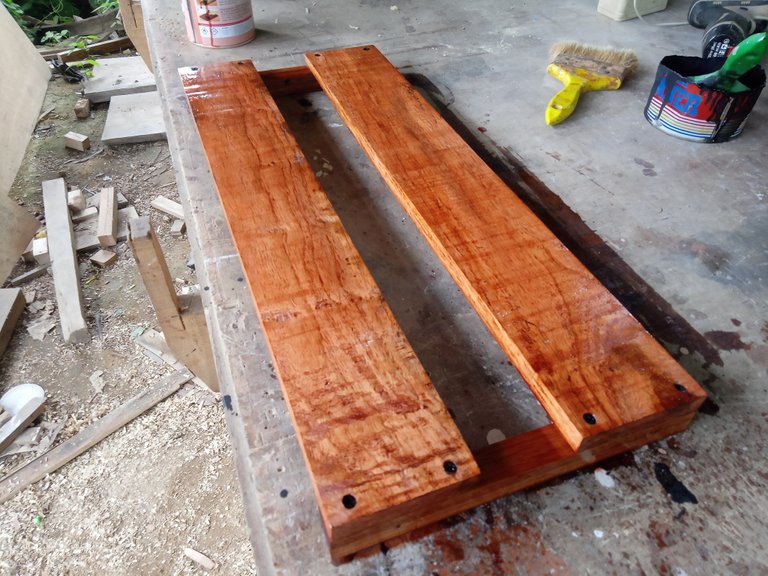
The result of my work this time is a shoe rack that I made from "asan" wood, this wood belongs to the hard wood group and also this wood has good colors and fibers, at first glance this wood is very similar to teak wood but this wood is more hard from teak.
Shoe racks have an important role in a home design because with its usefulness it will be able to make the house look neater because the shoes will be placed there and not scattered, for the placement of the shoe rack it depends on the owner of the house who puts it on the balcony of the house right next to the front door and there are also those who put it in the house, it all depends on how the house picker wants it to make the house look neater and nicer.
As usual, before I explain to the manufacturing process I want to mention the tools or machines that I use and also their functions;
1, table saw ; this machine
I use it to split
board of the same size
I want.
2, hand drill; this machine i
use to screw
board and also assemble parts
the shelf.
3, hand planners; this machine i
use for leveling
wood surface up to
the result is even and neat.
4, grinding; I use this machine
to sand the surface
smooth wood.
5, is a manual tool
as a supporter and also
some as the main tool
in project work
this is like
saw, hammer, elbow, meter, and
also a pen for making lines.
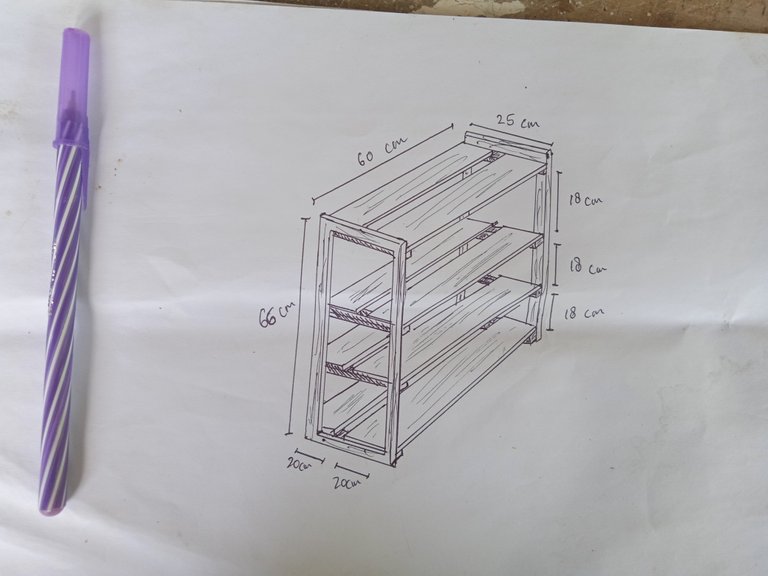
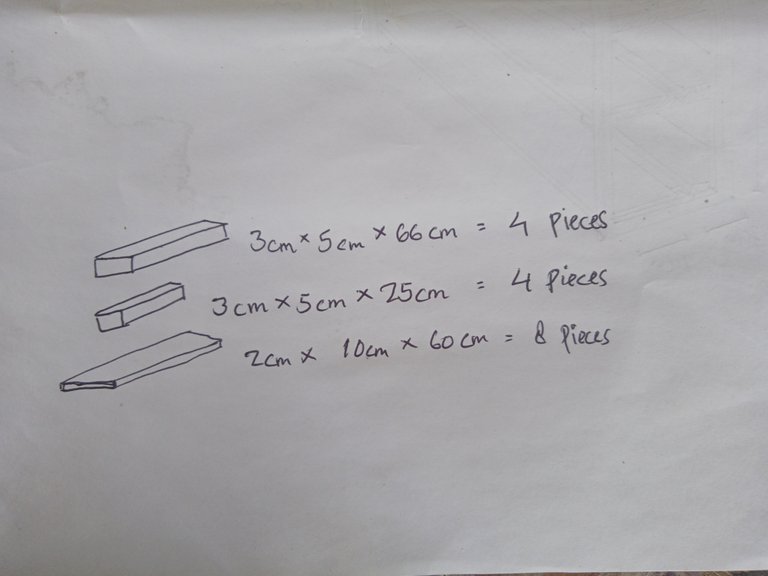
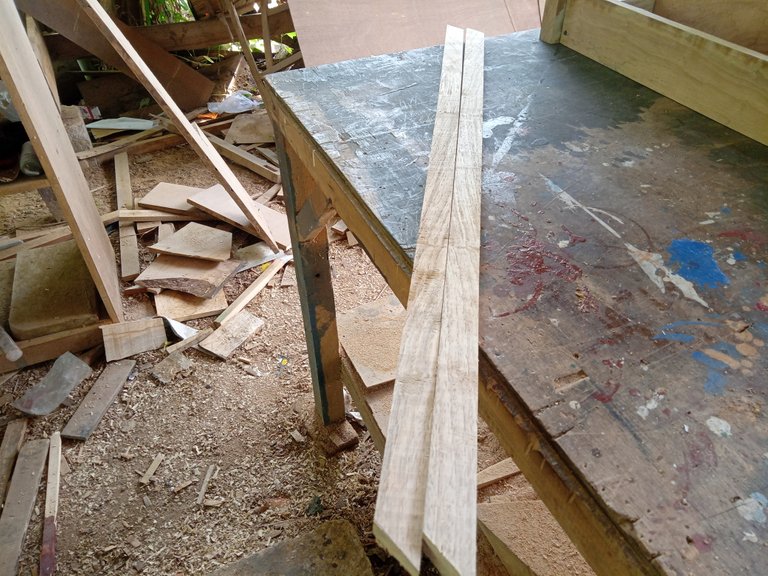
Some of my previous posts about furniture, I often explain about the size of my project but this time it's a little different because maybe many of you are a little confused about the size, so in this post I make pictures of the projects I'm working on and also the materials so that it's easier for you understand it.

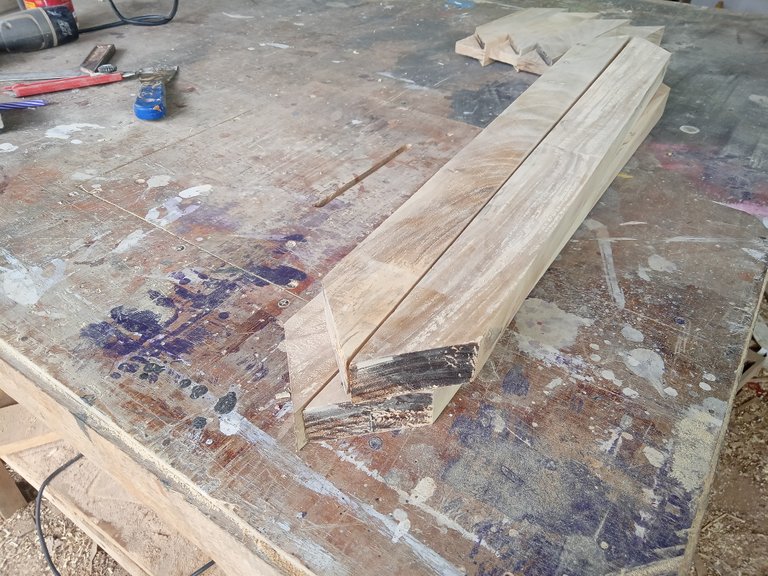
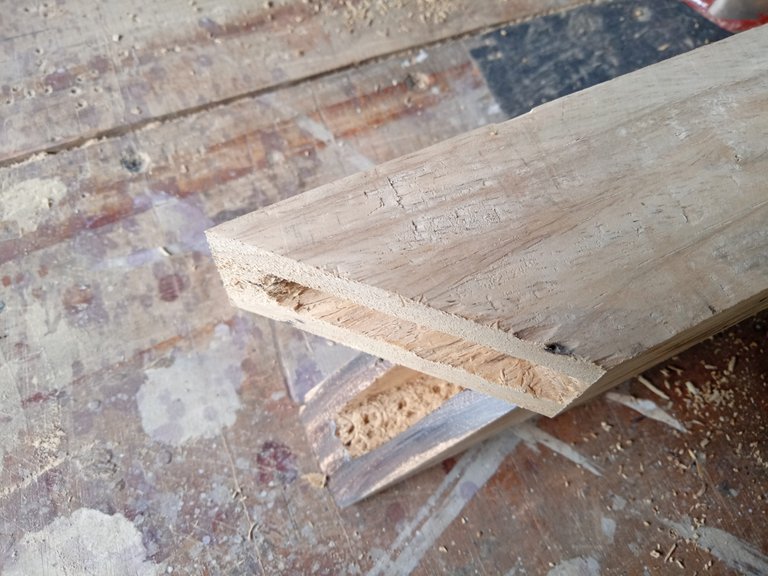
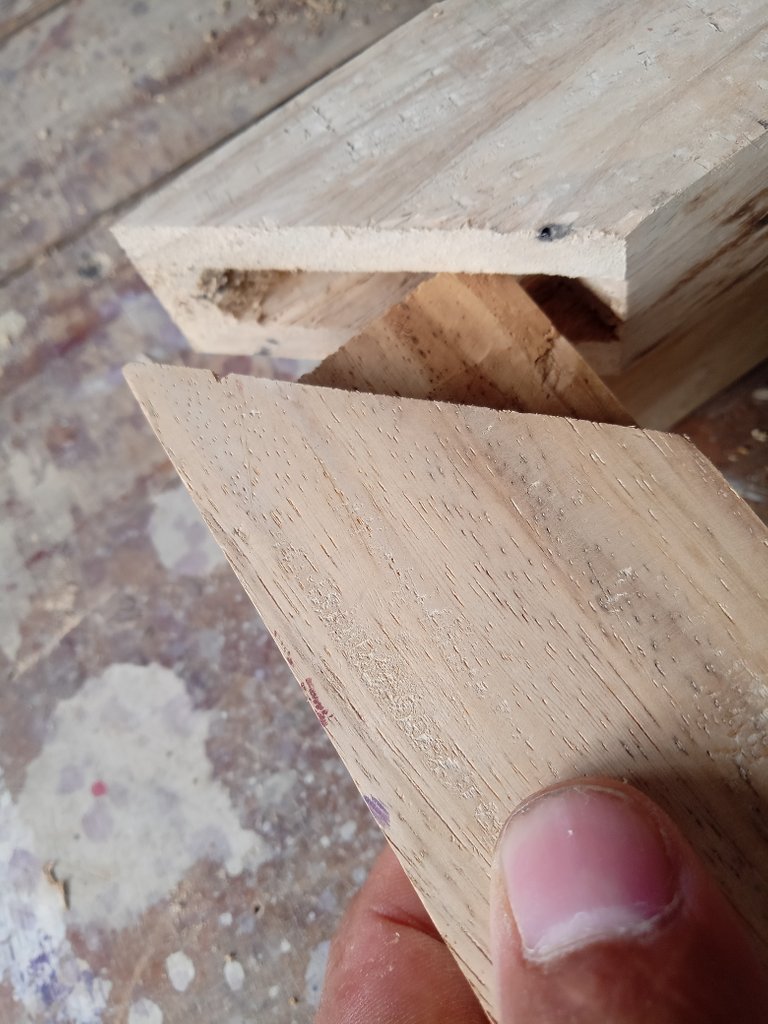
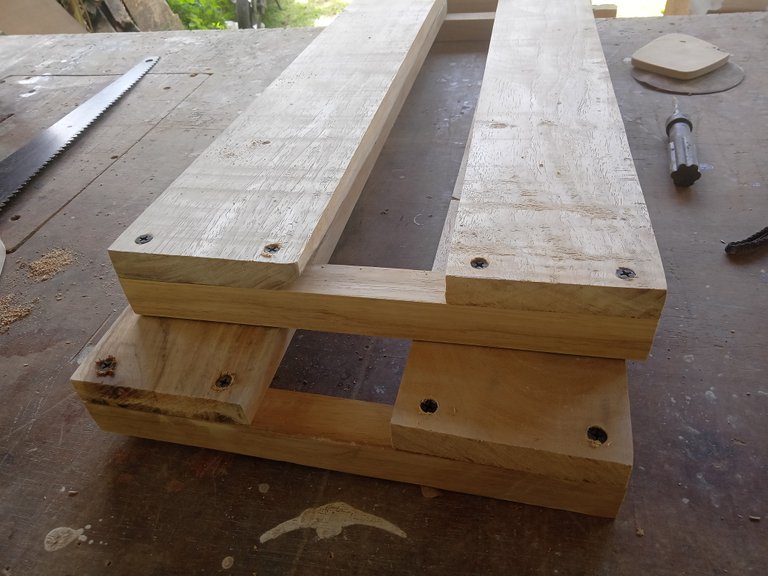
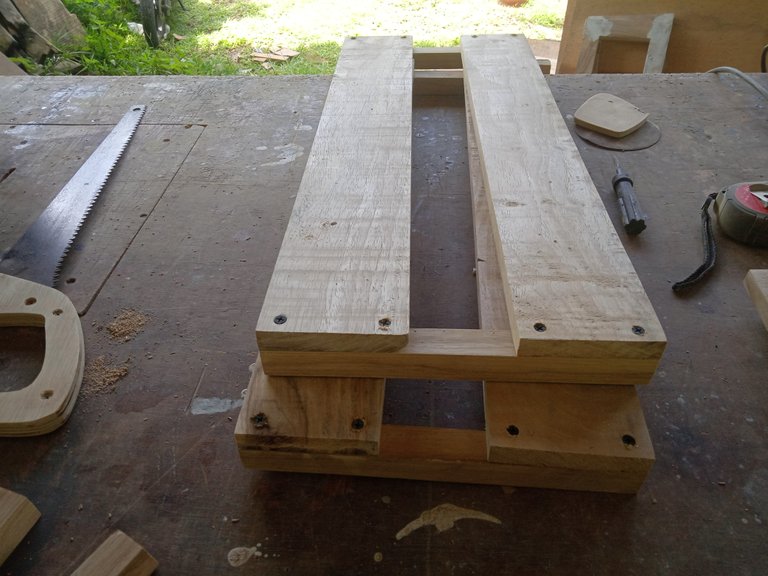
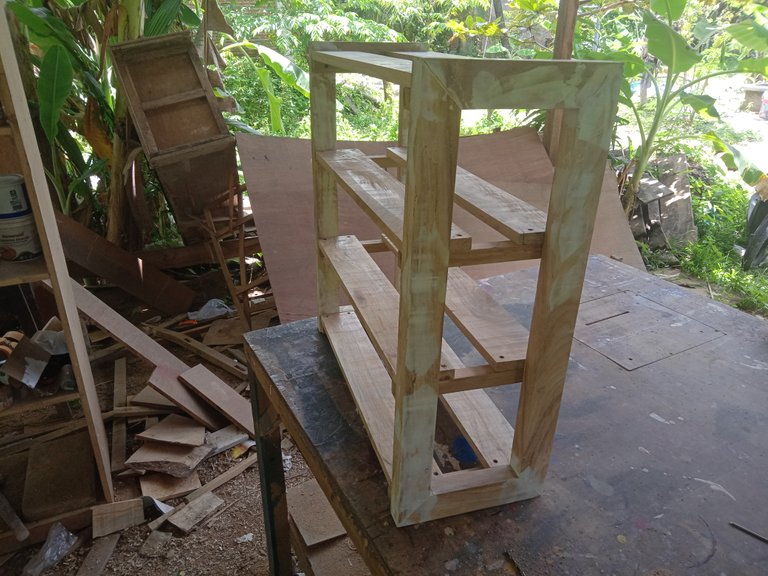
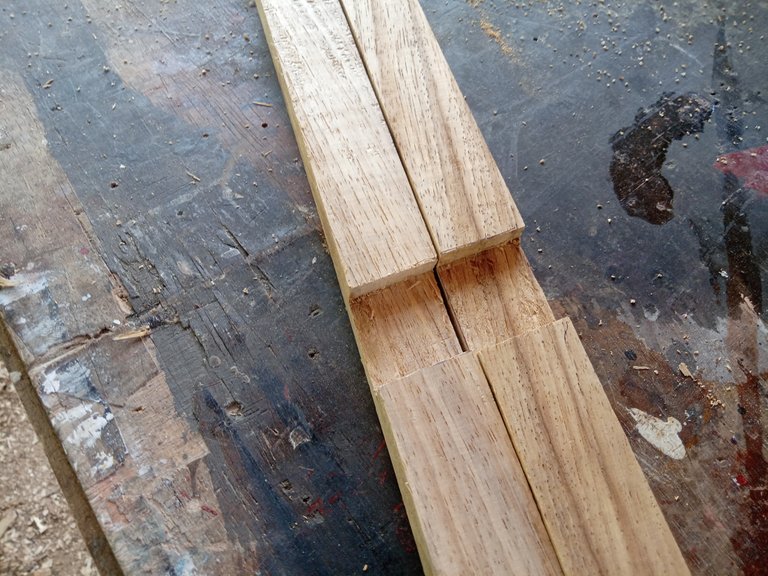
After all the materials as in the picture are ready, I start the process of making the foot connection of the rack, I made this shoe rack in the shape of a rectangle and to unite it I made the connection process first, and the connection process this time is a combination of "miter joint" and "tenon & mortise joint" in my opinion this is the best joint for this project,
"miter joint" is a connection where the two parts to be connected are cut with a 45° slope, this process will be very precise if it is done using a miter saw machine but I do it using a hand saw but I try to make the results precise.
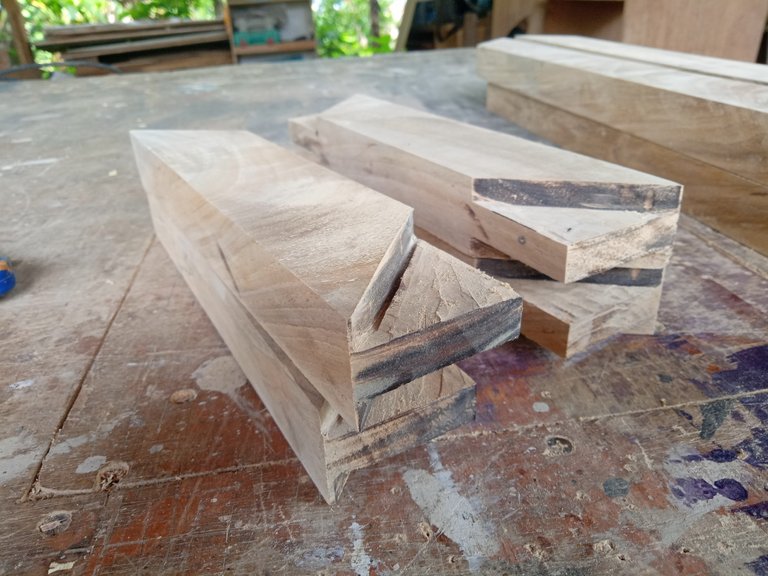
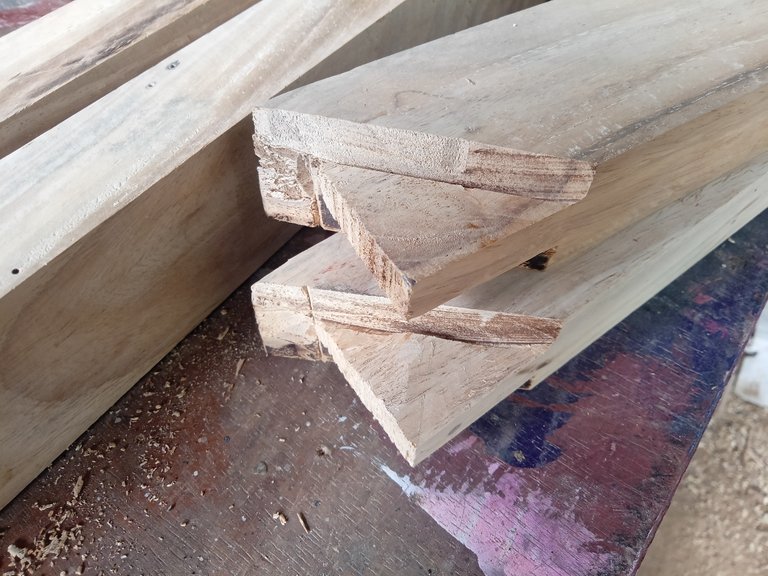
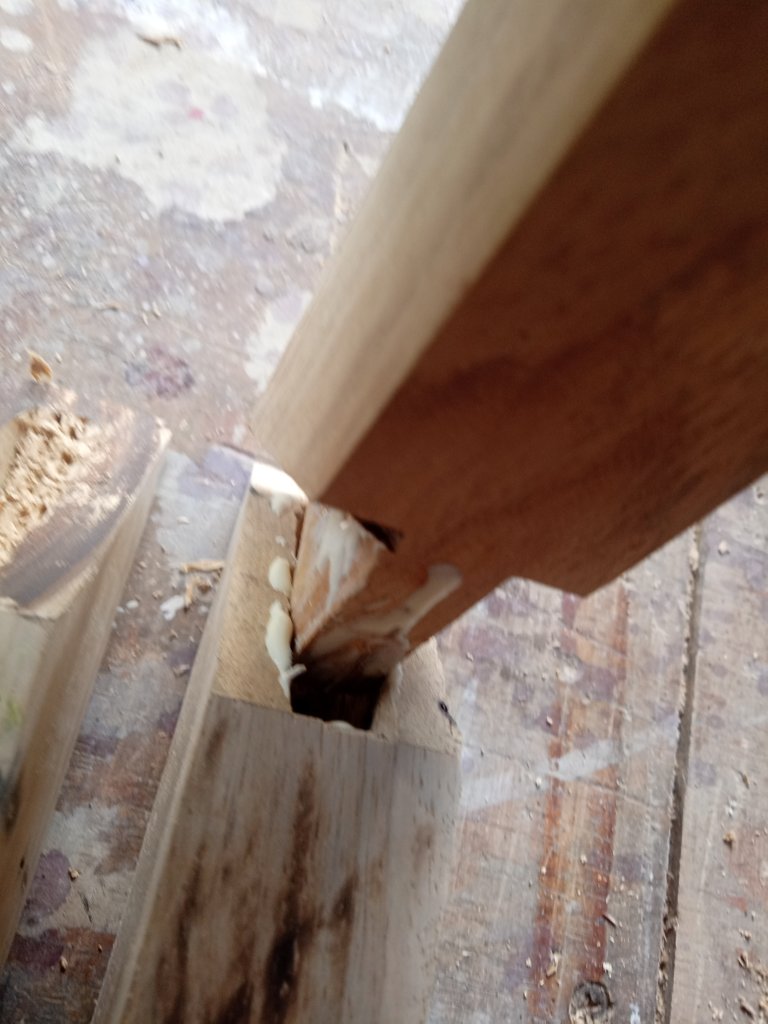
And "tenon & mortise joint" is a connection between two woods, one of which is made a panel called "tenon" and the other wood is made a hole called "mortise",
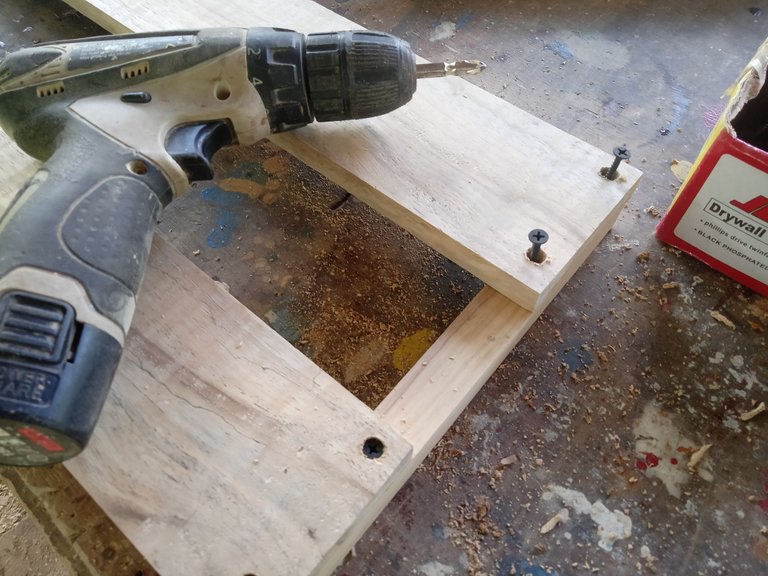
In this connection process I use glue on both parts and also I screw it so that the connection is strong and you can combine the joints that I made below.


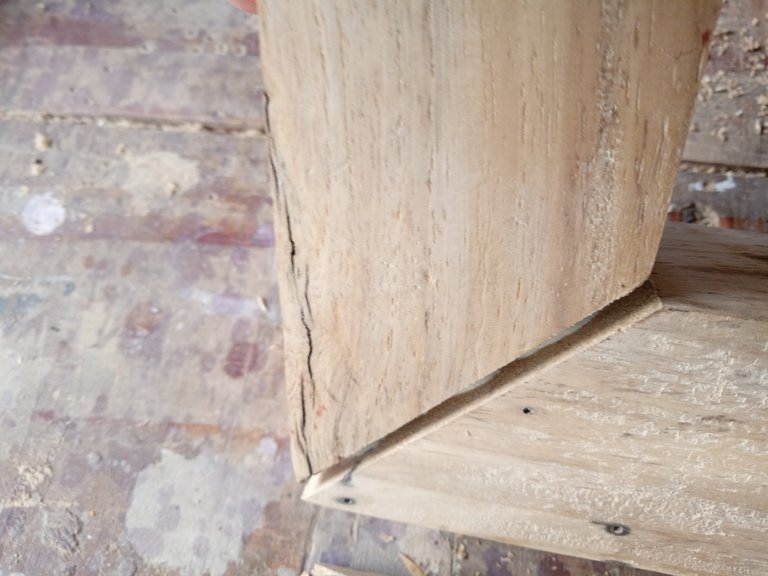
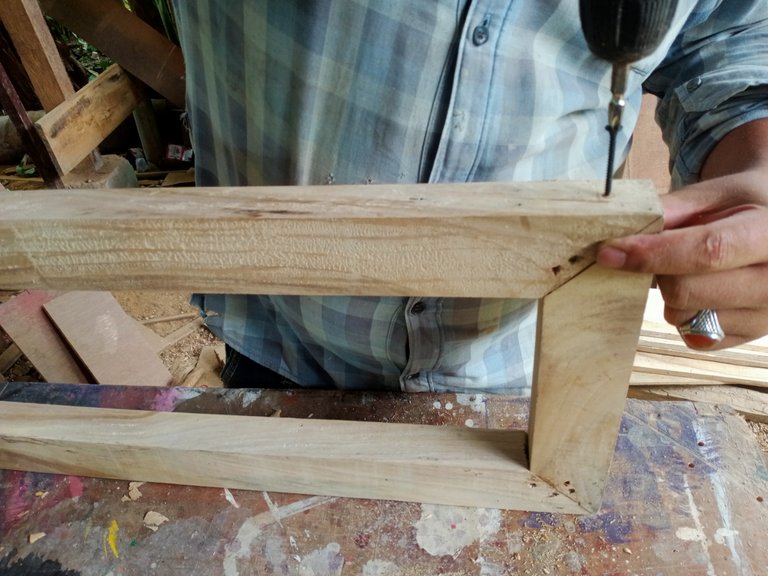
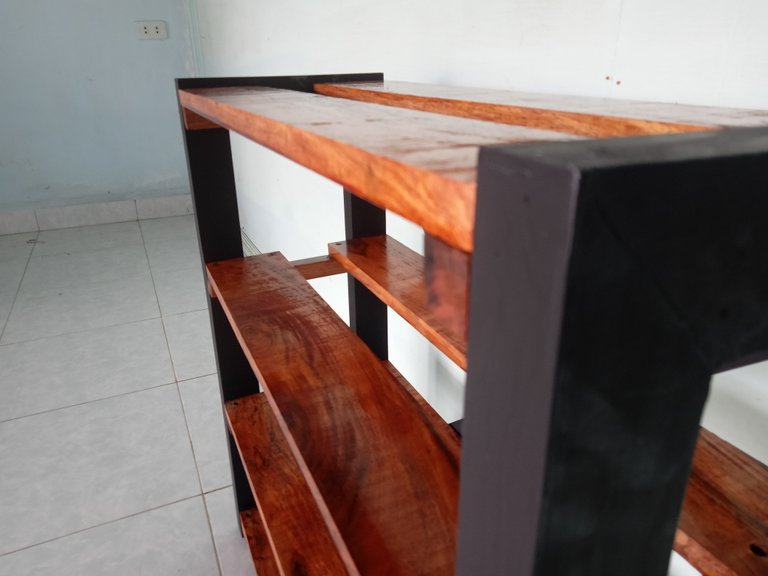
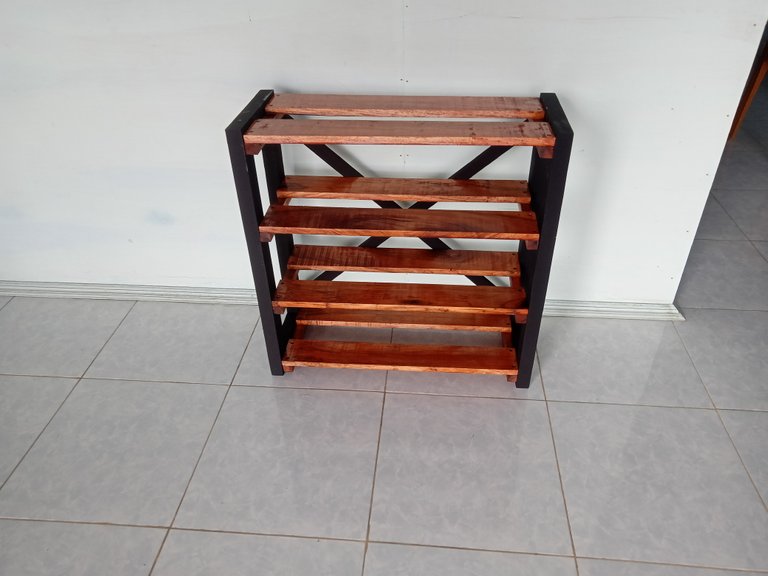
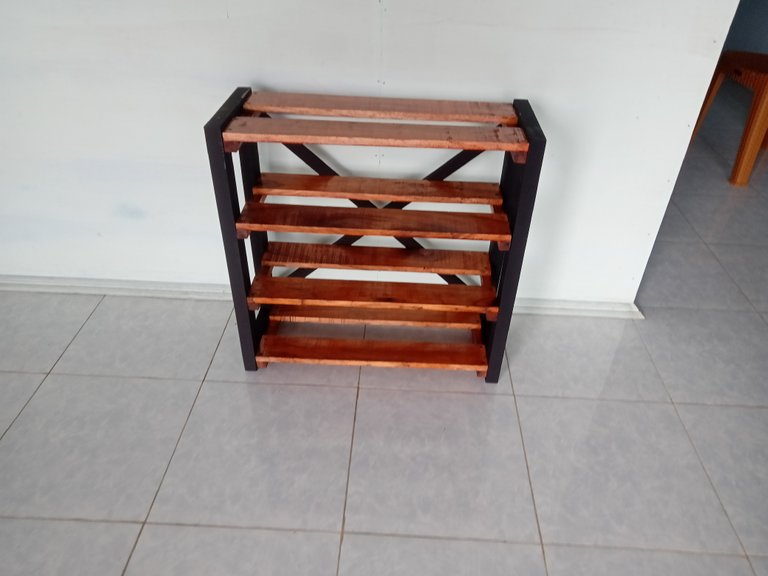
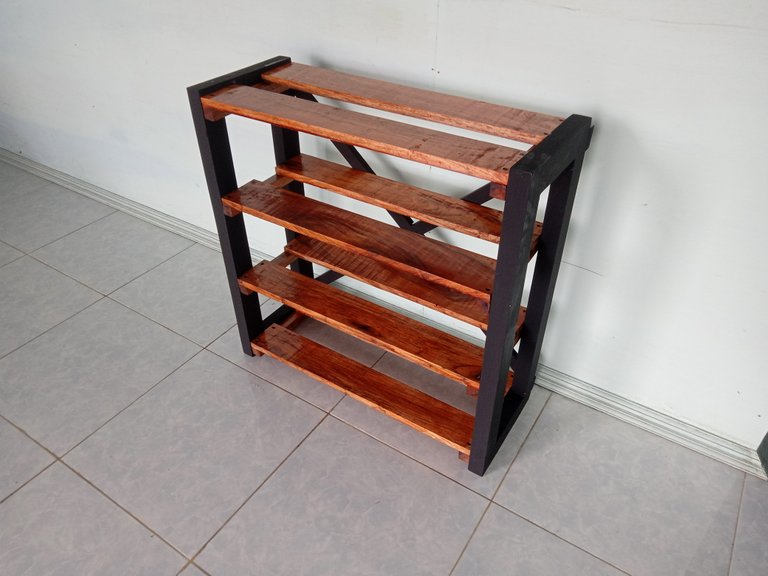
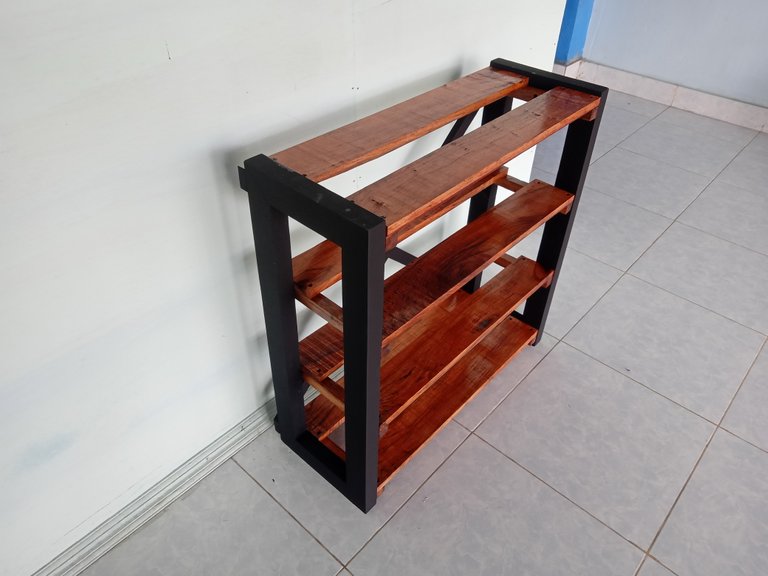
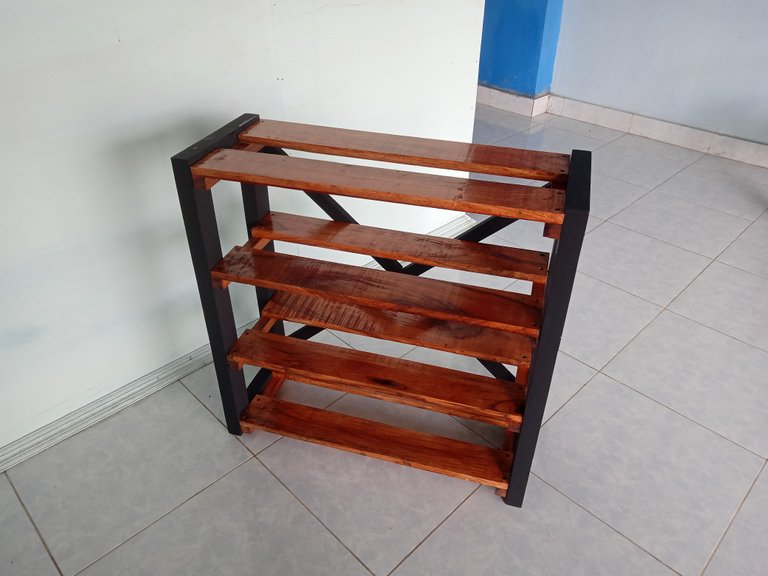
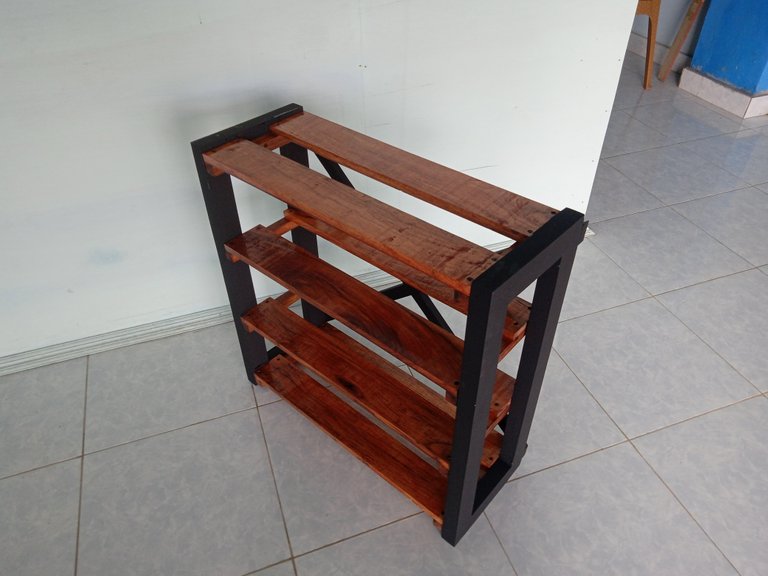
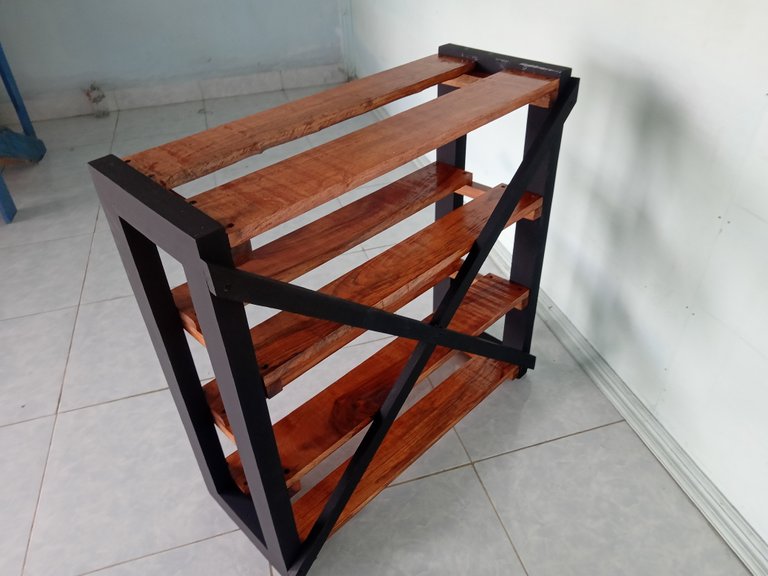
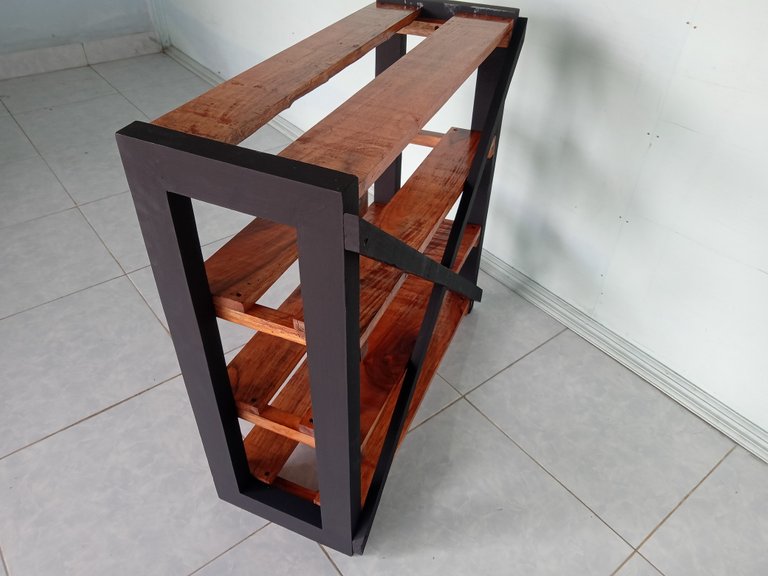
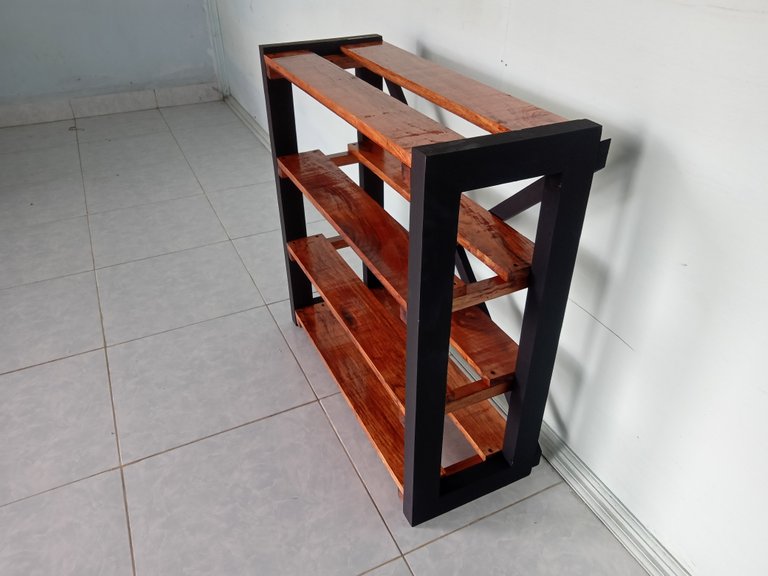
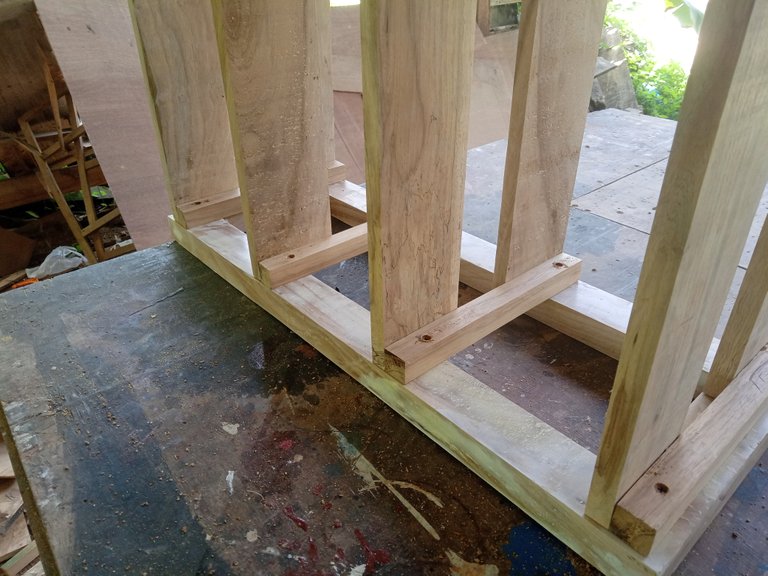
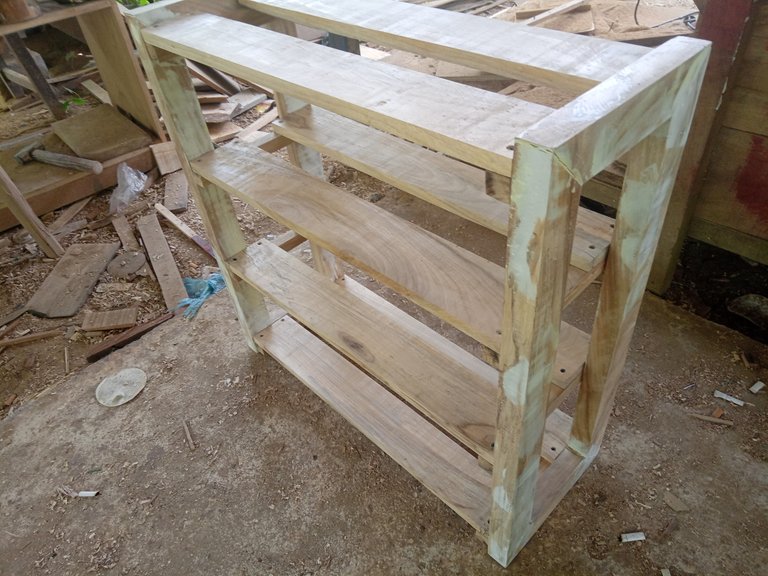
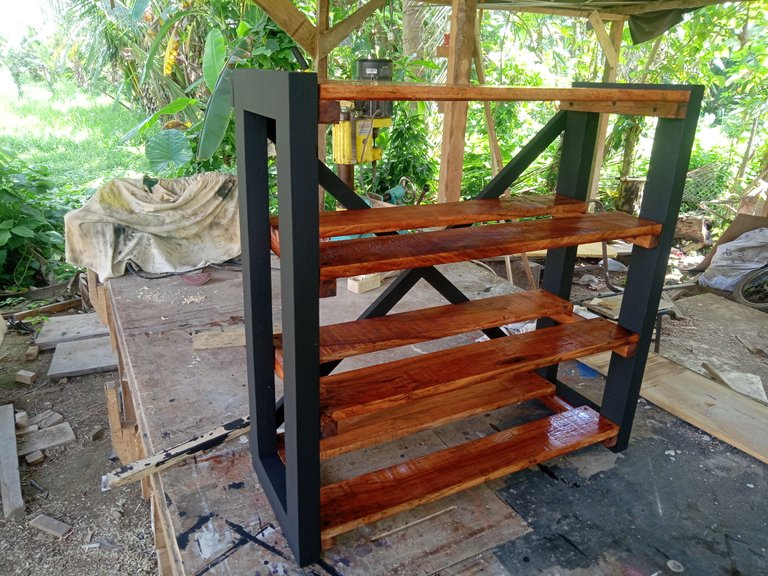
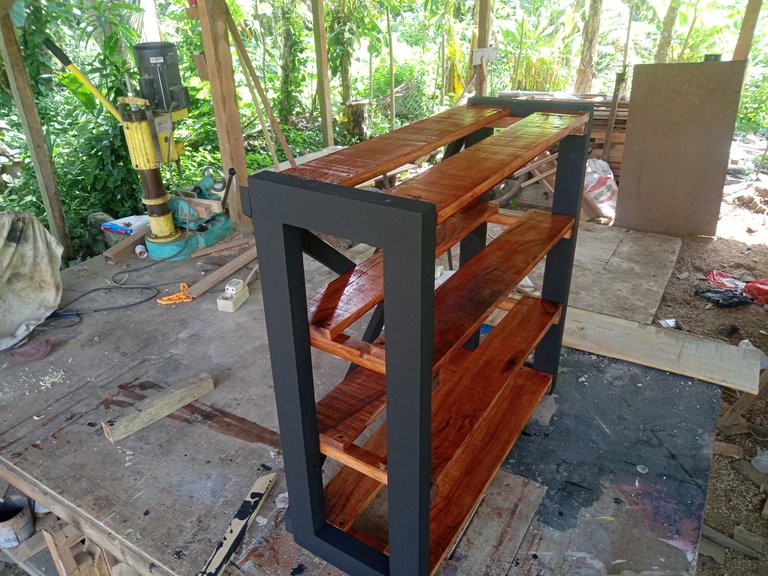
After the process of connecting the legs is complete, then I do the assembly process of the rack arrangement, there are 4 arrangements in each arrangement there are 2 boards measuring 10 cm and the width of the arrangement is 25 cm, so between one board and another has a distance of 5 cm, I paste the two boards to the support wood and later the support wood will be attached to the foot of the shoe rack, to attach the boards to the support wood I use glue and also screw it and I do the process until the four shelves are complete.
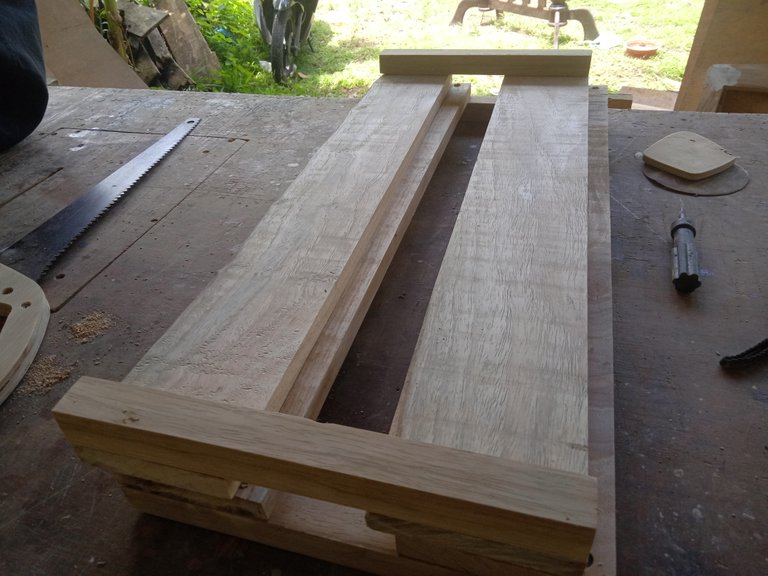
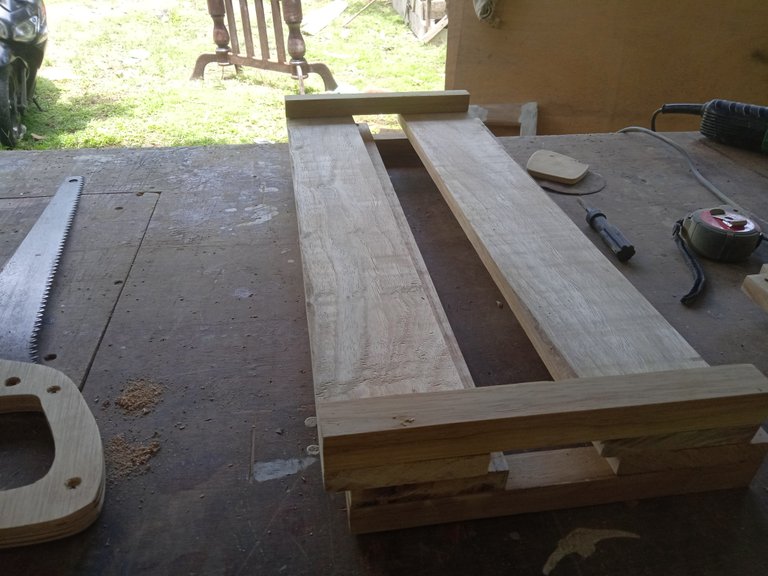
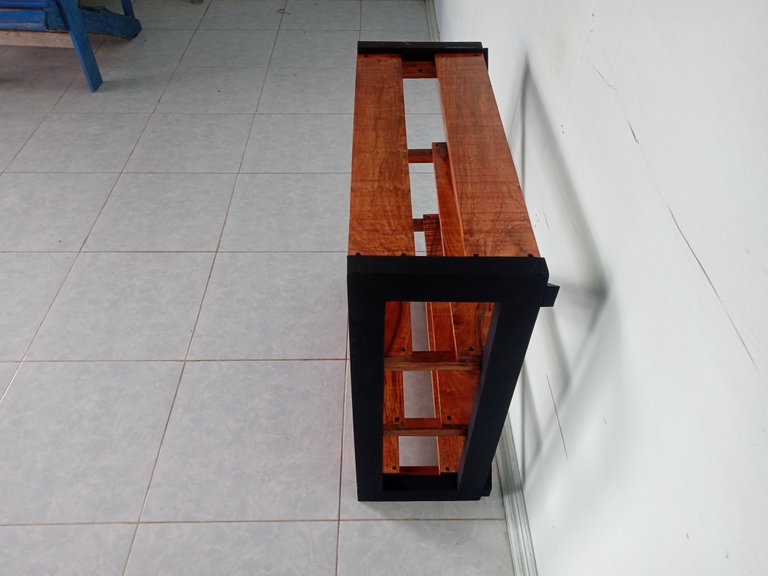
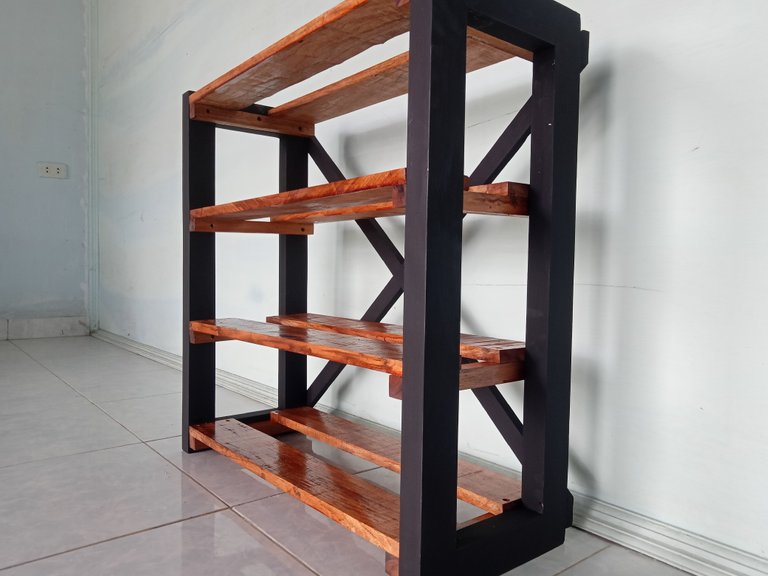
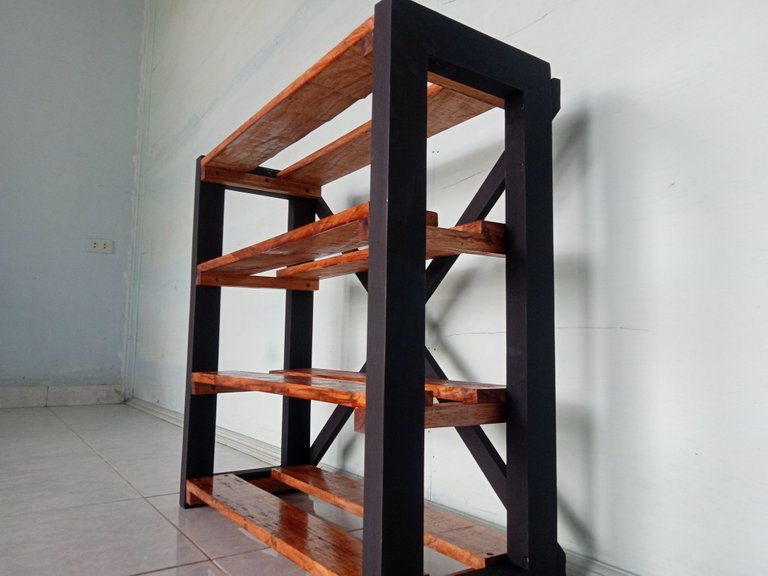
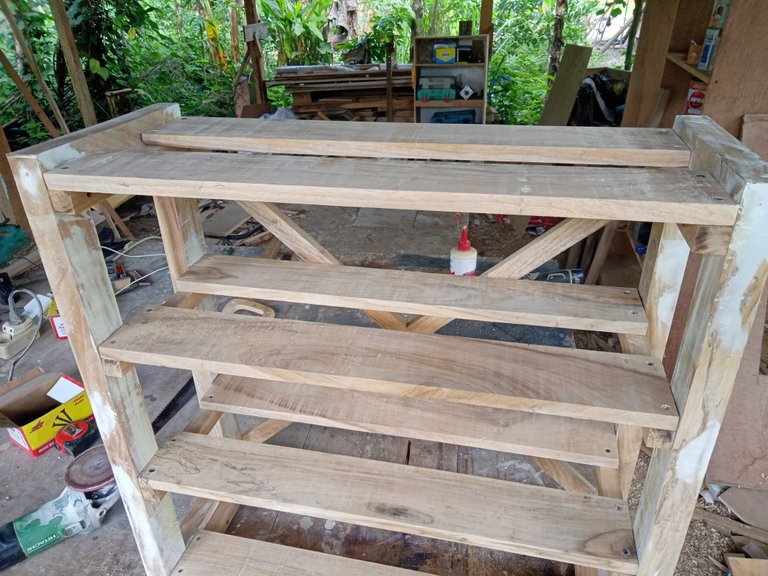
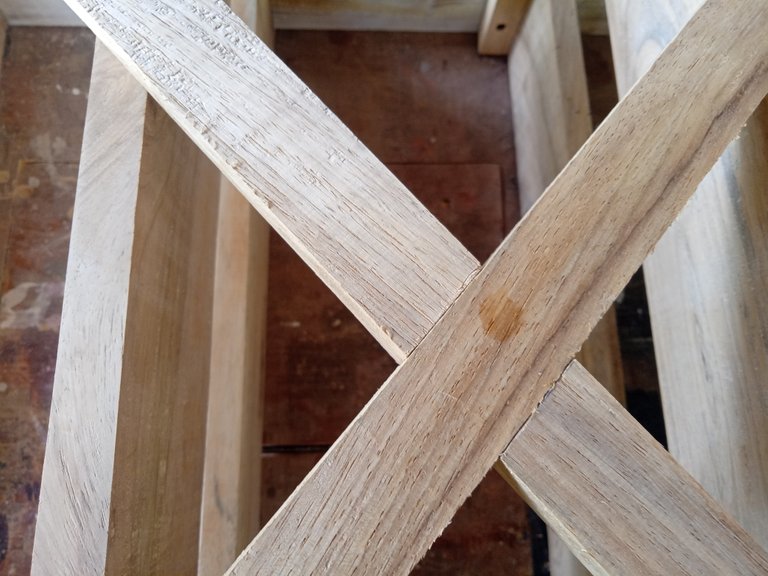
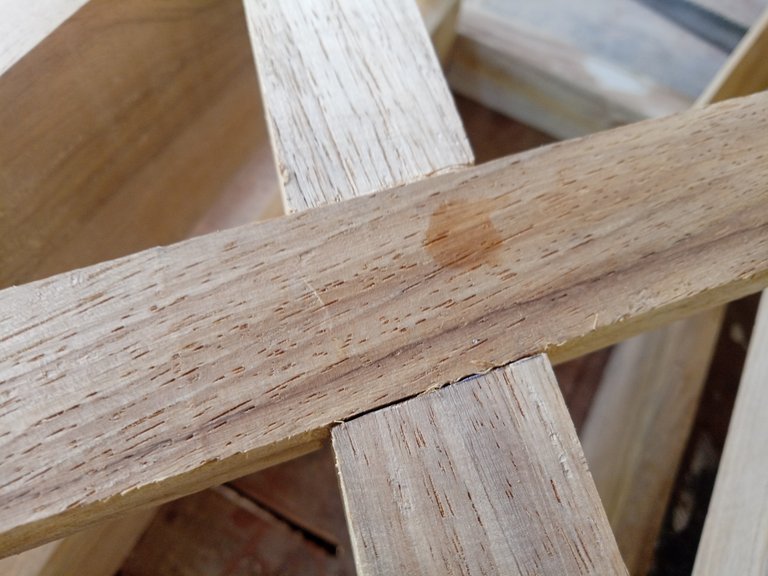
After all the arrangement of the shoe rack I finished then I tried to assemble it with the foot of the rack by screwing it alone, after that I attached 2 wood as reinforcement on the back of the shoe rack crosswise, this will prevent the shoe rack from shaking and will make it more sturdy and strong In making the reinforcing wood, I carved both of them at the meeting of the two crossed woods so that they didn't look harmonious, it's a bit difficult for me to explain but you can see it in the picture below.
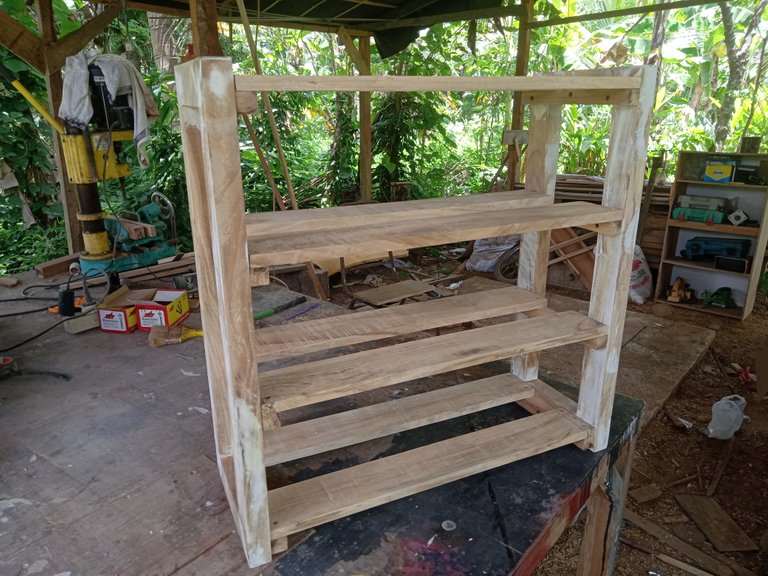
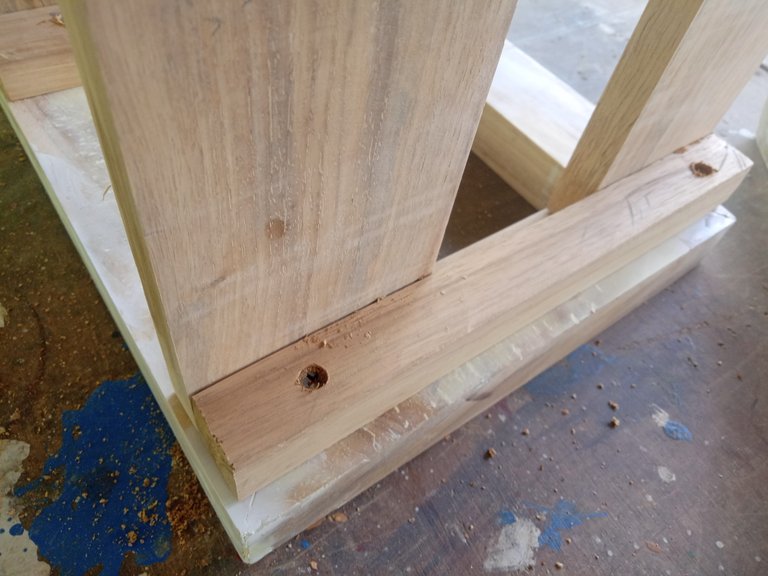
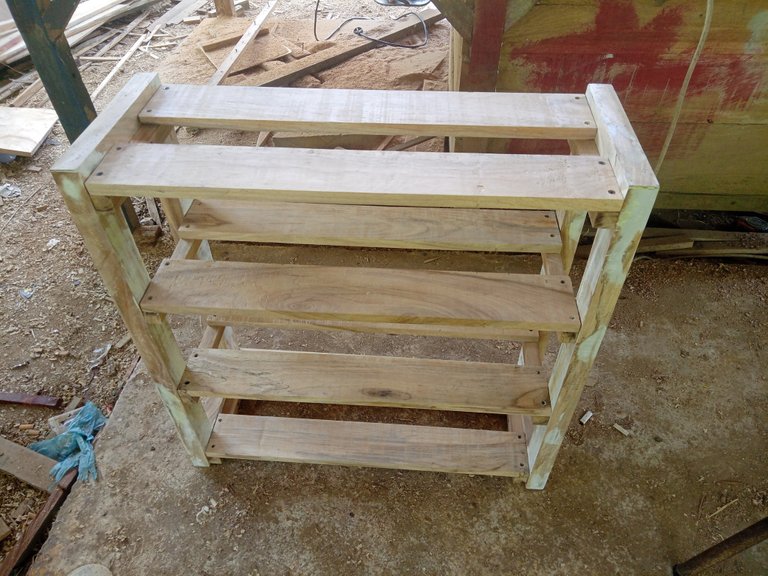
After everything was finished I assembled and made sure it was strong and sturdy then I disassembled everything separately one by one, then I caulked the legs of all of them but I didn't putty on the wood so that the bolts look, I think it's better for this project,
After the putty started to dry I started sanding it so that everything was smooth and tidy, then I painted it.
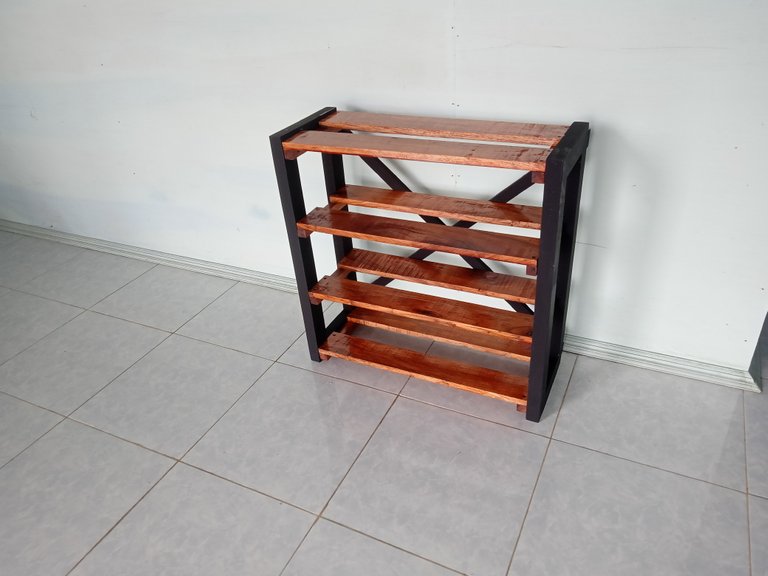
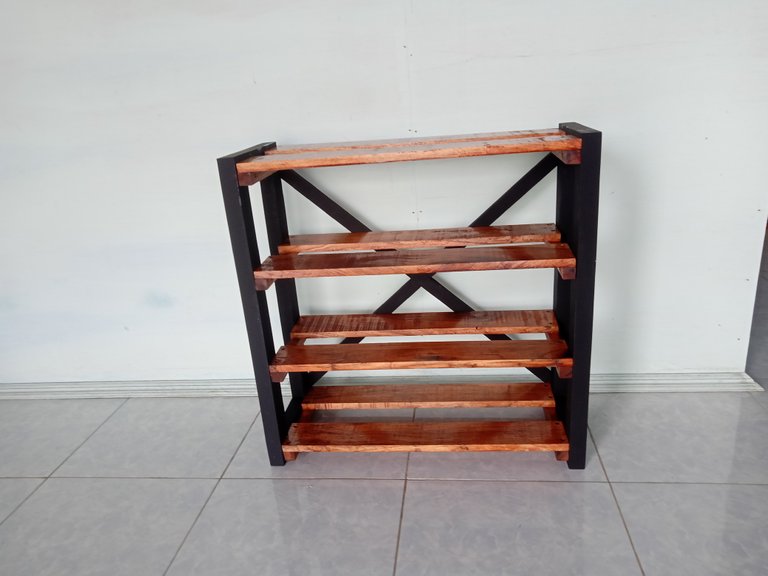
To paint this shoe rack I used two types of paint with different colors, I did this to make this project look more aesthetic, in combining it I used dove black paint for the legs of the shoe rack and for the arrangement I used "reddis clay" varnish paint and according to I think this is the perfect combination, if we look at the feet of this shoe rack like they are made of iron holo but if we look closely we will know that the legs of this shoe rack are made of wood and that is my goal in this project design.
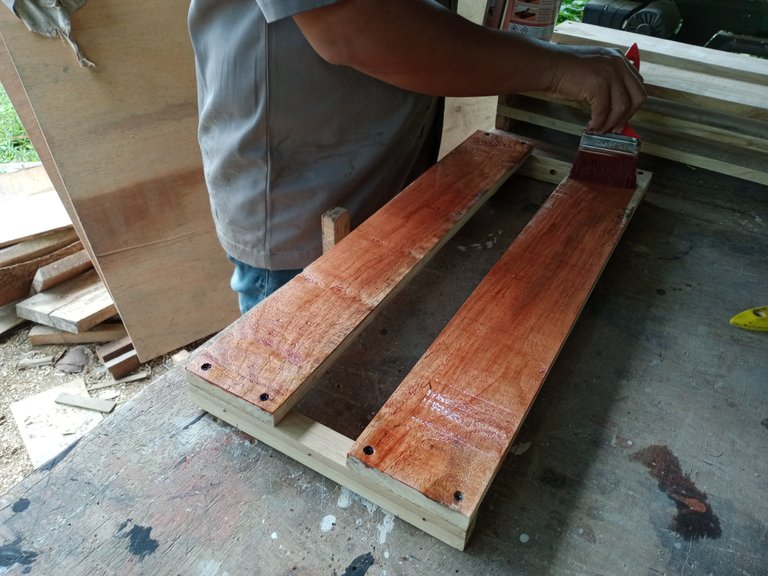

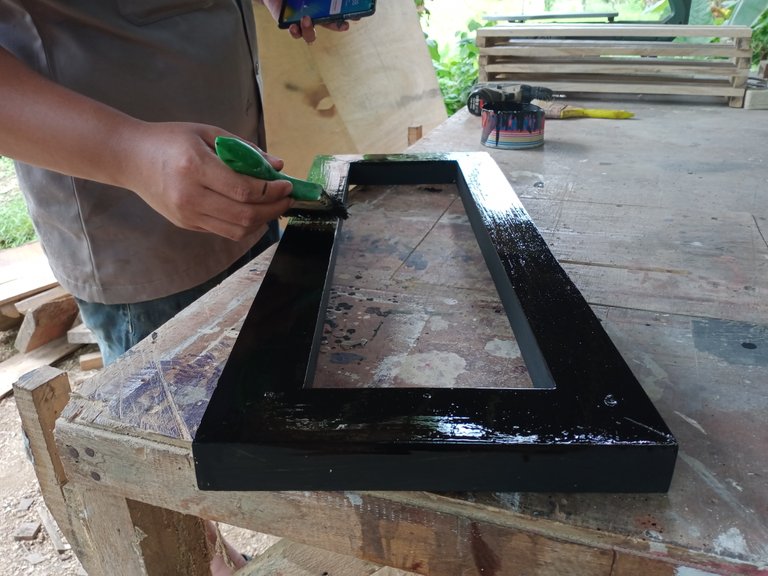

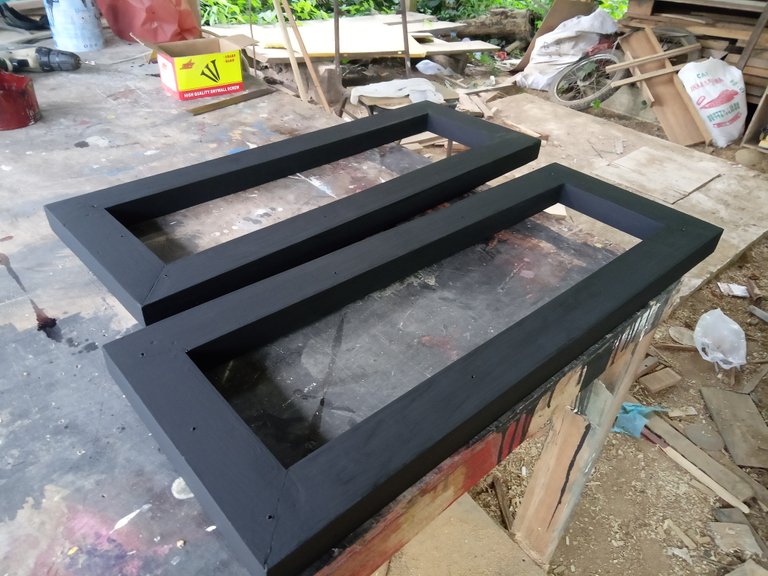
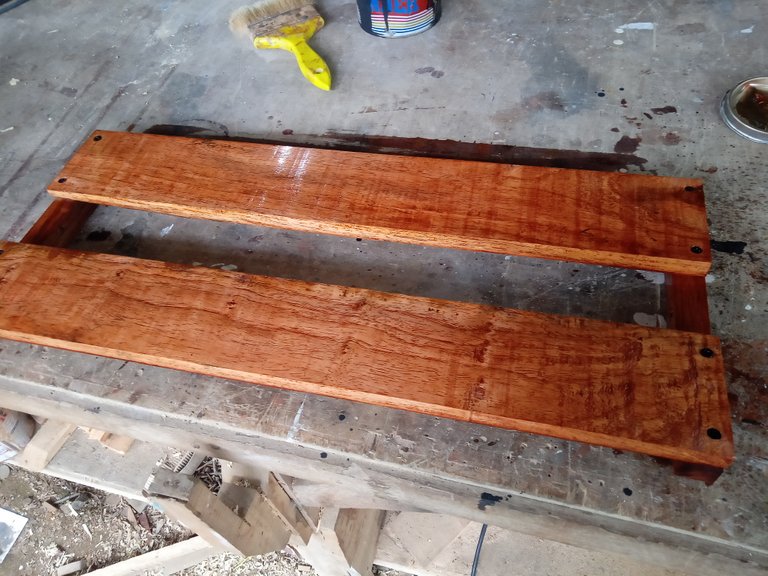

All this painting process I do using a brush and everything I do with 3 layers of painting so that the results are satisfactory,
After waiting for about 3 hours, the paint was completely dry, I started assembling it again and screwing all the components of this shoe rack until it became a very satisfying result.
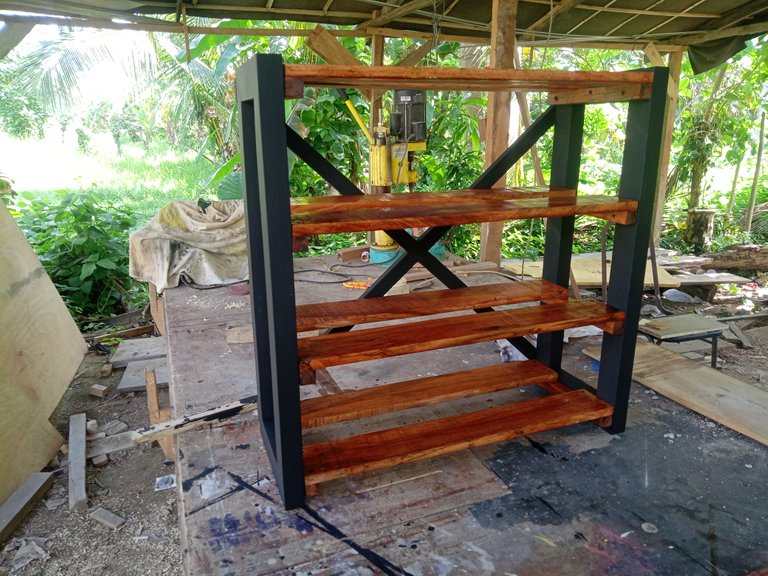

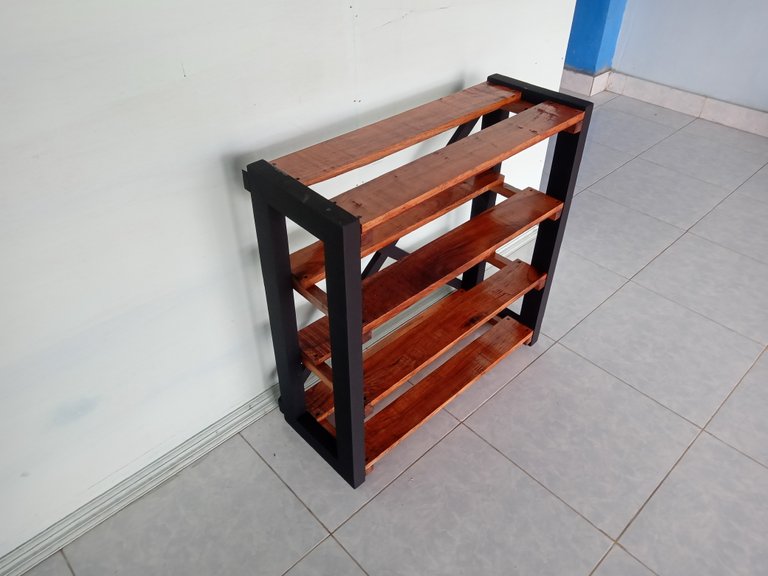
And this is the result of my project work this time, I hope this post can entertain your boredom and also I hope this post is useful, and I hope you can comment below about the process or other things so that we can discuss about the woodworking world, and see you at next post.
Wow!!! This is an amazing work! Congratulations on your skills
Thanks so much...
Thank you for sharing this amazing post on HIVE!
Your content got selected by our fellow curator @hafizullah & you just received a little thank you via an upvote from our non-profit curation initiative!
You will be featured in one of our recurring curation compilations and on our pinterest boards! Both are aiming to offer you a stage to widen your audience within and outside of the DIY scene of hive.
Join the official DIYHub community on HIVE and show us more of your amazing work and feel free to connect with us and other DIYers via our discord server: https://discord.gg/mY5uCfQ !
If you want to support our goal to motivate other DIY/art/music/homesteading/... creators just delegate to us and earn 100% of your curation rewards!
Stay creative & hive on!
Thanks for the support...
amazing, you make it very nice and neat, asan wood is also a very good choice because it has very good wood grain.
Yeah,you are right the asan wood is best choice...
That's quite a nice shoe rack dear @lancang! 😊
In your furniture shop, do you manually use a hammer and chisel when creating wood joints for your projects? Or do you have other electric power tools that assist during the process?
Of course I have a hammer and chisel that I use to make wood joints, I use them to tidy up wood joints and I also have other power tools that help me do the connection process...
Thanks so much for support, i appreciate that...
Okay I see. It's great to know that the combination of manual and powered tools always produce the best results in furniture production. Plus it requires the carpenter's specific skills to master the art of wooden joinery. 😊
Yeah,,,thank you..
Congratulations @lancang! We're delighted to specially curate your awesome publication and award it RUNNER-UP in Architecture Brew #85. More power!
Thank you for subscribing to Architecture+Design, an OCD incubated community on the Hive Blockchain.
Thanks so much...
With huge pleasure dear @lancang. Cheers! 😀