create and design a minimalist dining table for furniture design
Hi all good morning,,
How are you guys today? I hope you are always healthy and happy, and continue to work hard without giving up to achieve unattainable dreams and continue to be passionate about living a life full of twists and turns.
Architecture and design are two things that cannot be separated, because every architecture certainly has a certain design and is certainly interesting, such as a house building before starting its construction of course the plans and building designs will be prepared first, of course this includes the design in it and this is what name architecture.
And also in a house architecture, of course it has furniture and other interiors to make the building perfect, these two things are also inseparable from the design, every room in the house will be designed in such a way to make it look beautiful and added with other furniture and interiors so that make the house attractive.
One of the rooms that must be designed as good as possible is the kitchen because this room is used very often, even several times a day, this room must be attractive, and the interior must also be good, such as a dining table, for example, this is a family gathering place when having breakfast together. must also be designed as good as possible even though it is simple but don't be boring when you see it.
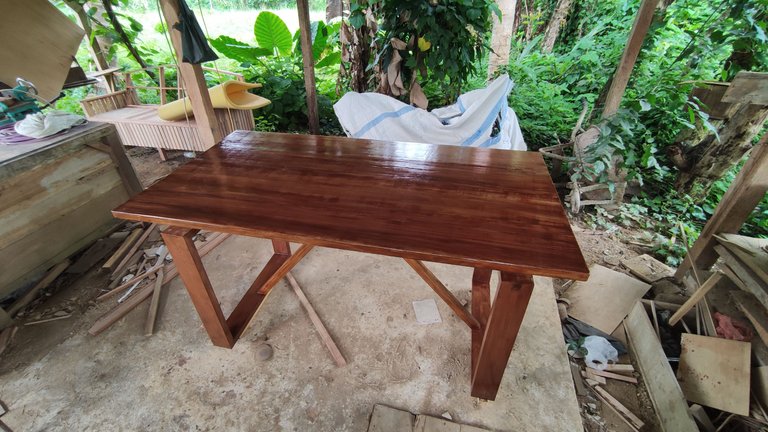
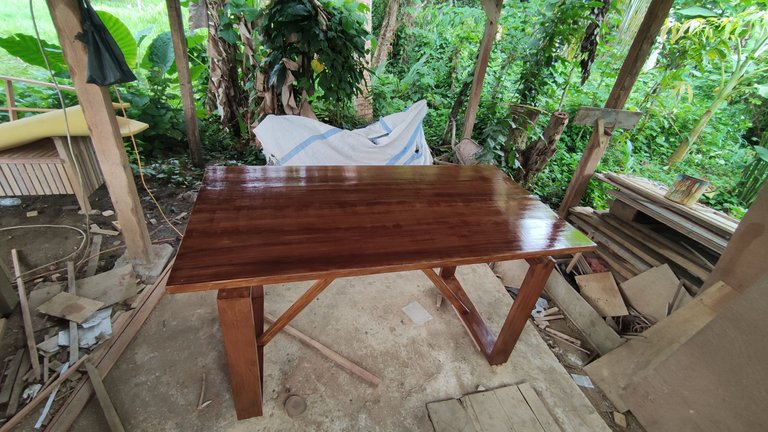
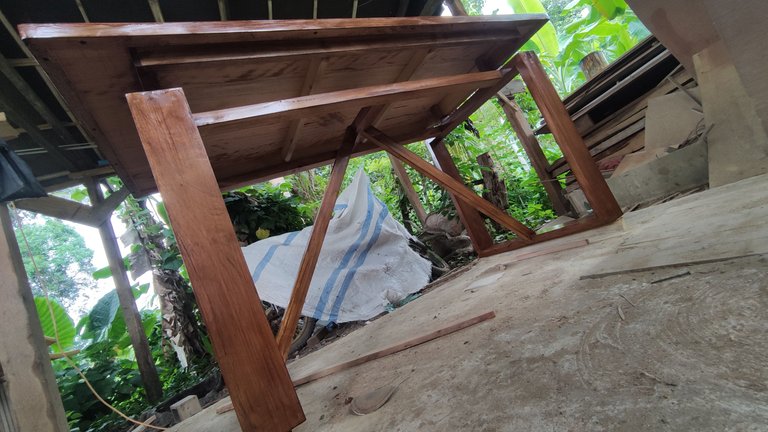
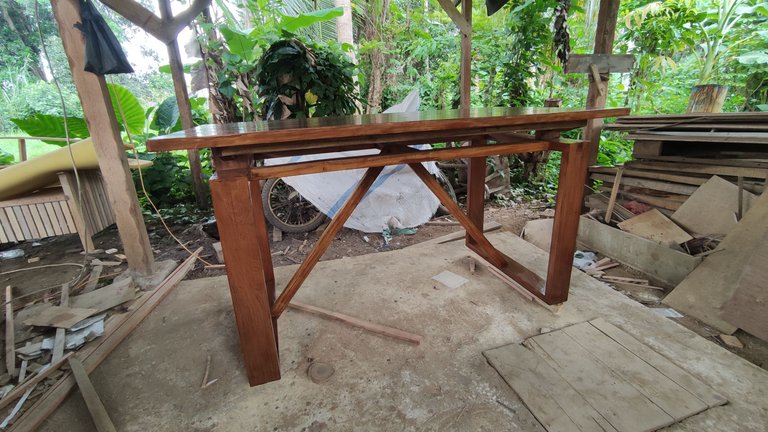
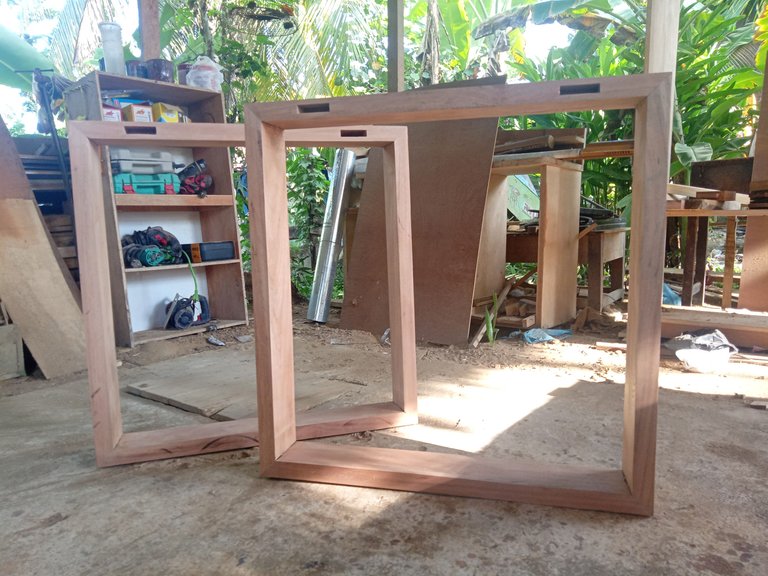
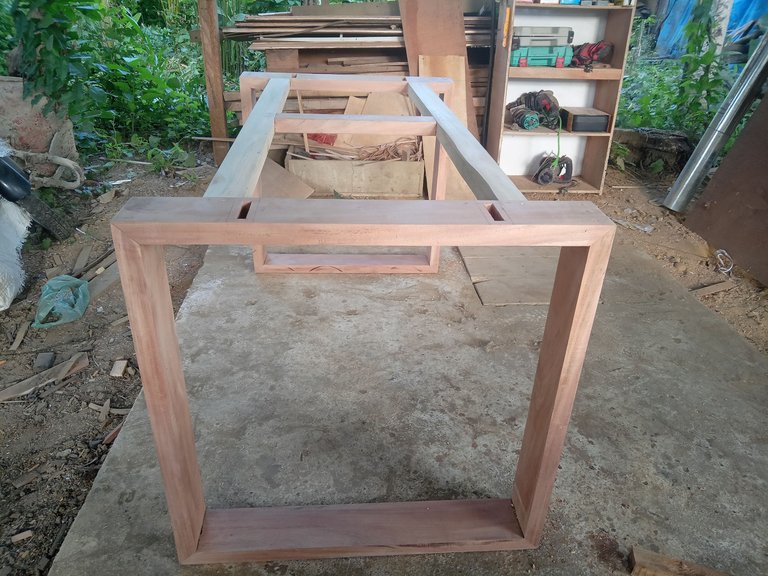
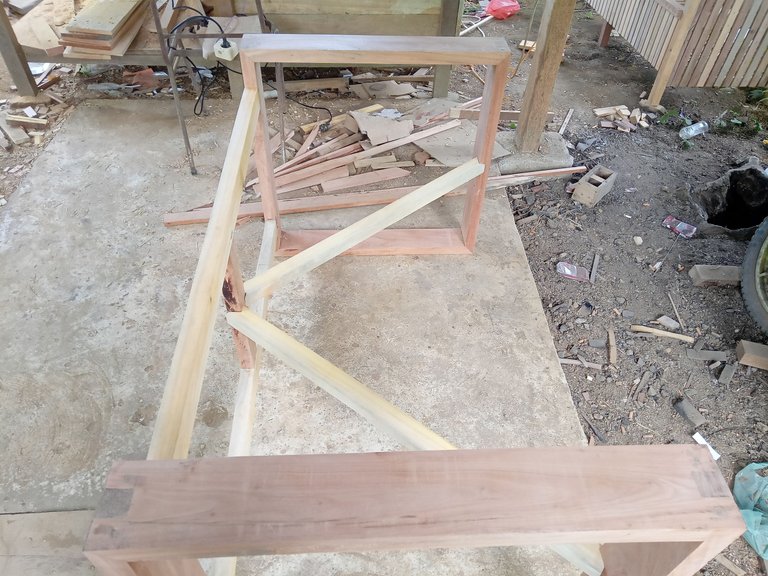
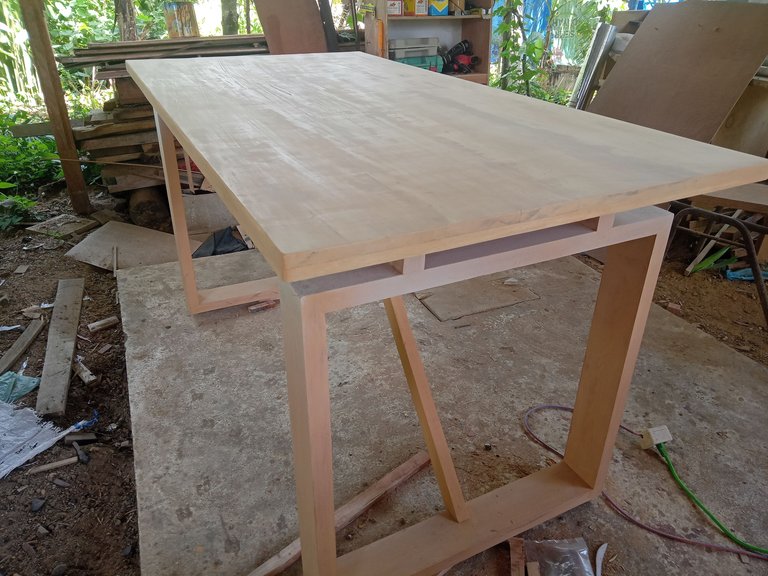
Below are some photos of a minimalist dining table that I designed and made myself, this was an order from my customer a few days ago but he didn't ask for a chair because he already had it, this table as an addition to the interior of his house.
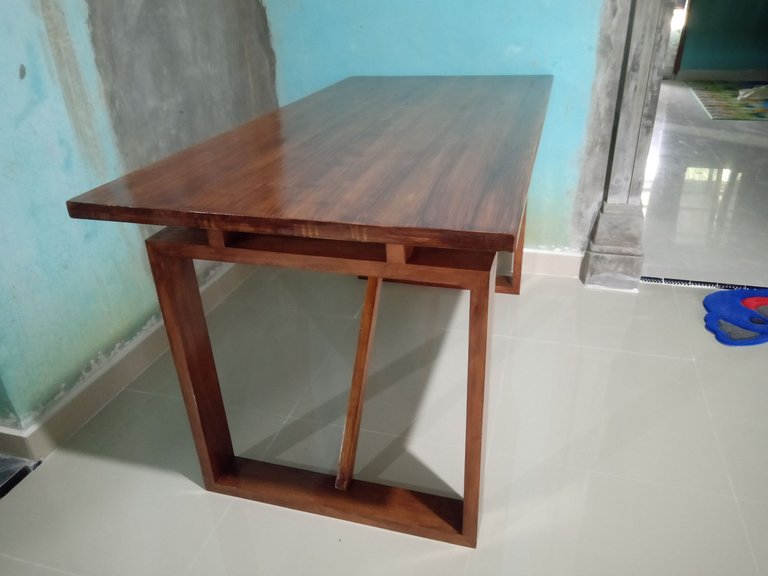
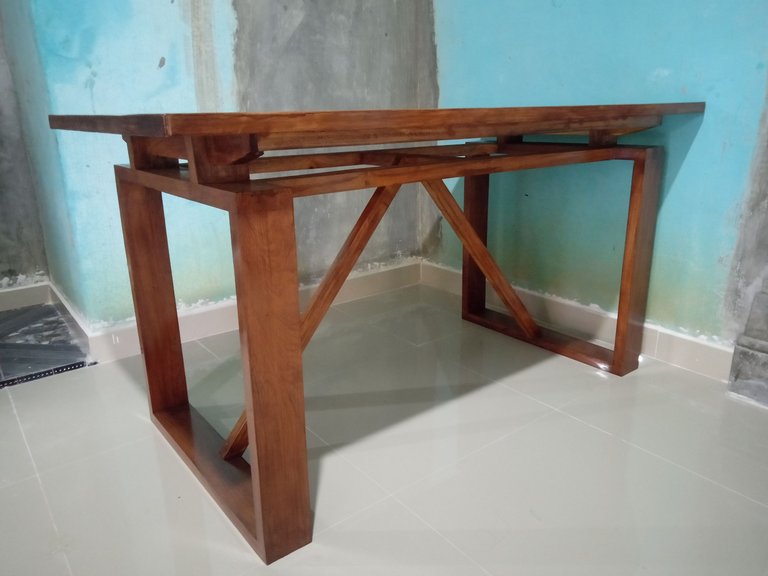
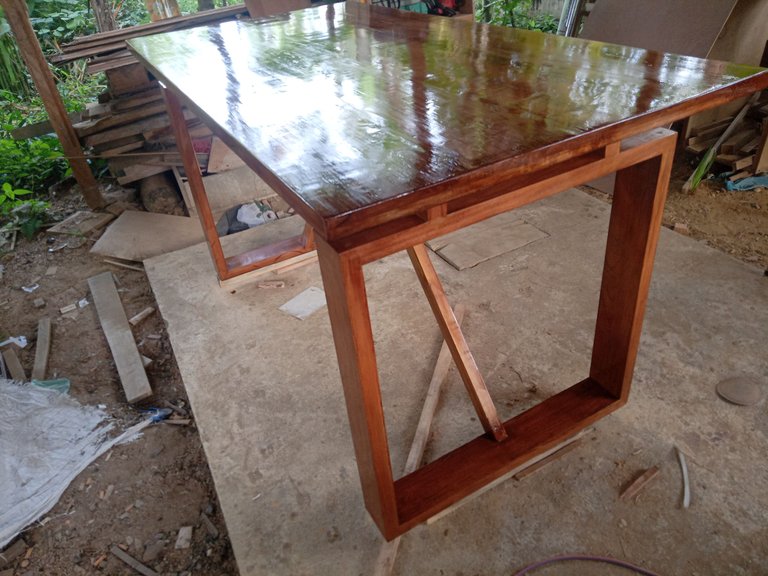
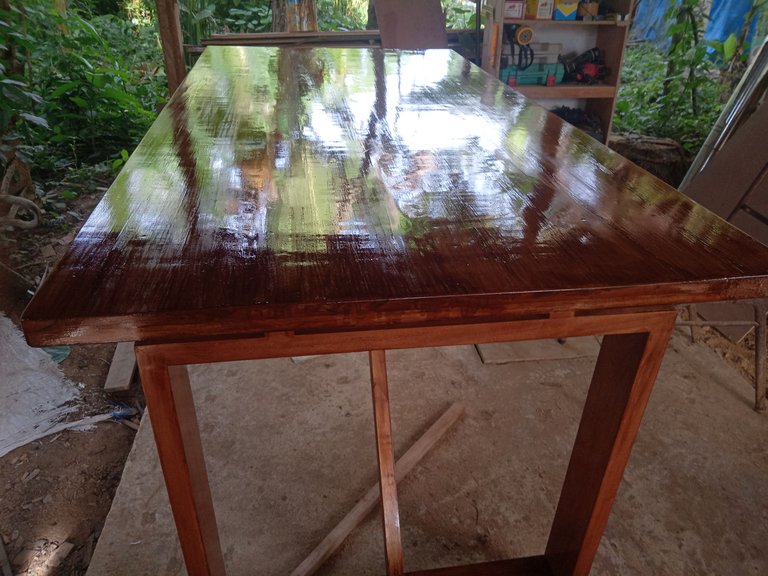
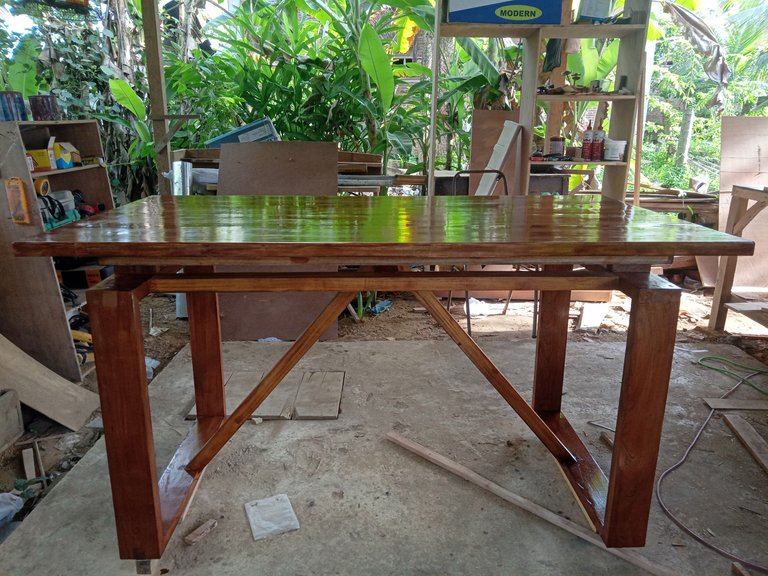
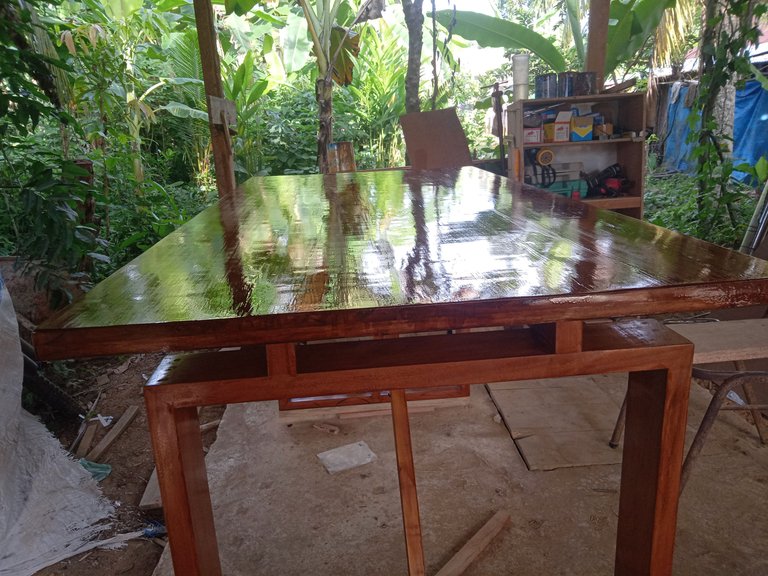
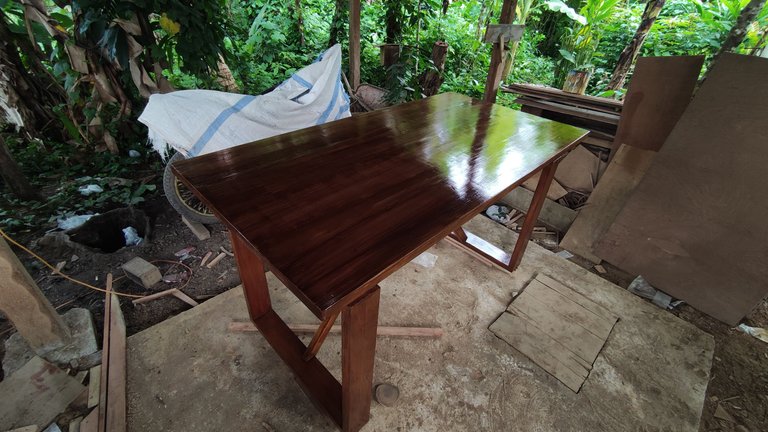
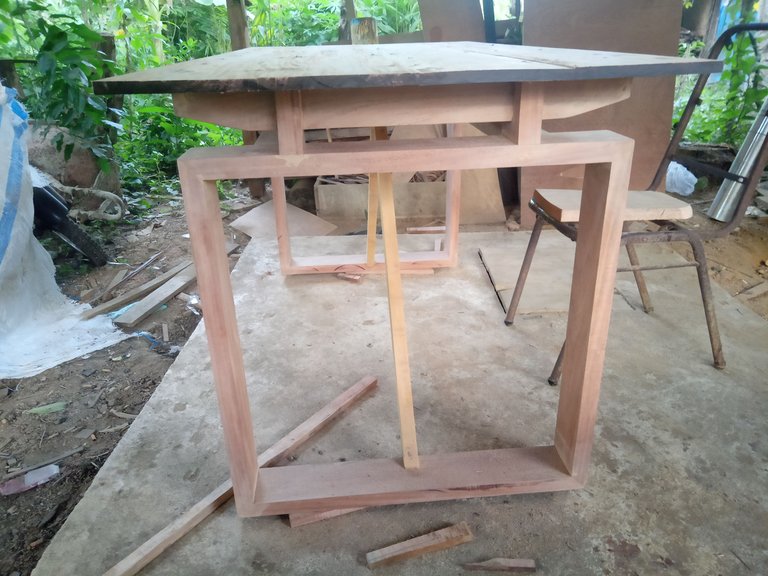
I designed this table with a simple model with a table size of 80 cm x 160 cm and a height of 75 cm. This size was his own request because this table will only be used by four people because he only has two children.
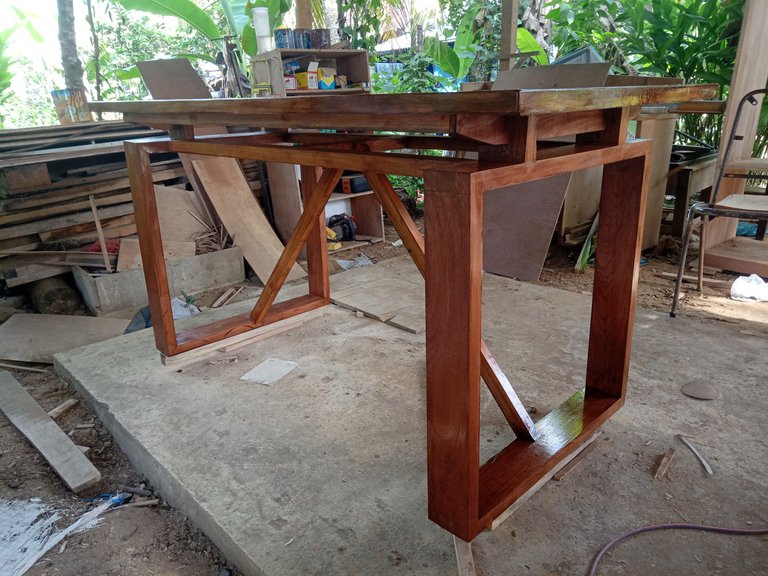
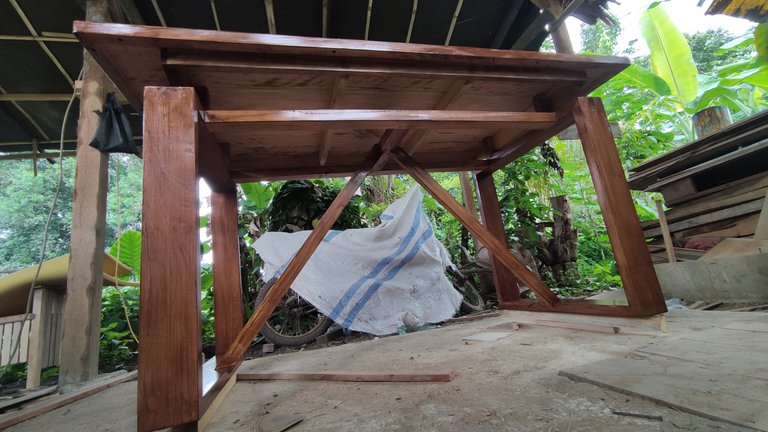
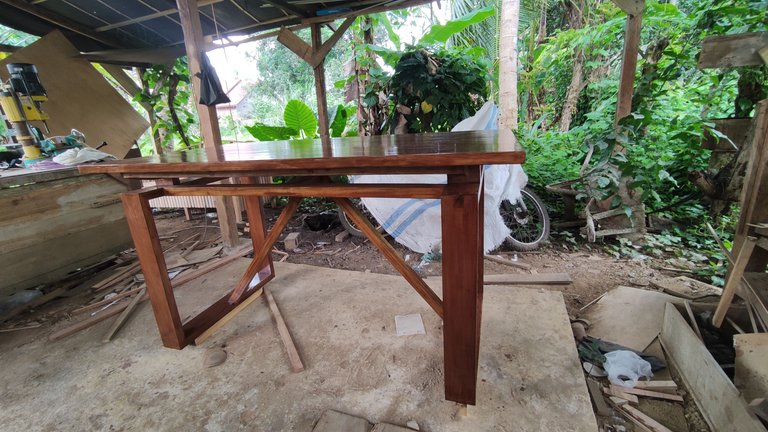
I designed the legs of this table in the form of a left and right square and this is my first time making a table like this model because previously my customers brought their own designs and there was no one like this, and for this table the customer asked me to design it because That's why I made a design like this and also I think this model is interesting and also a challenge for me to try new things.

Then how do I do it?
So I will explain how the process is done and I will try to explain in as much detail as possible so that you can understand it and can also be additional knowledge for you.
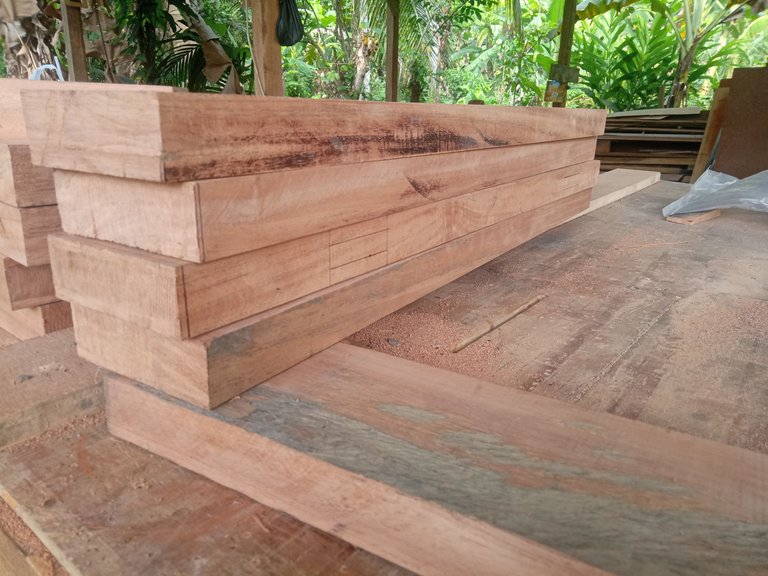
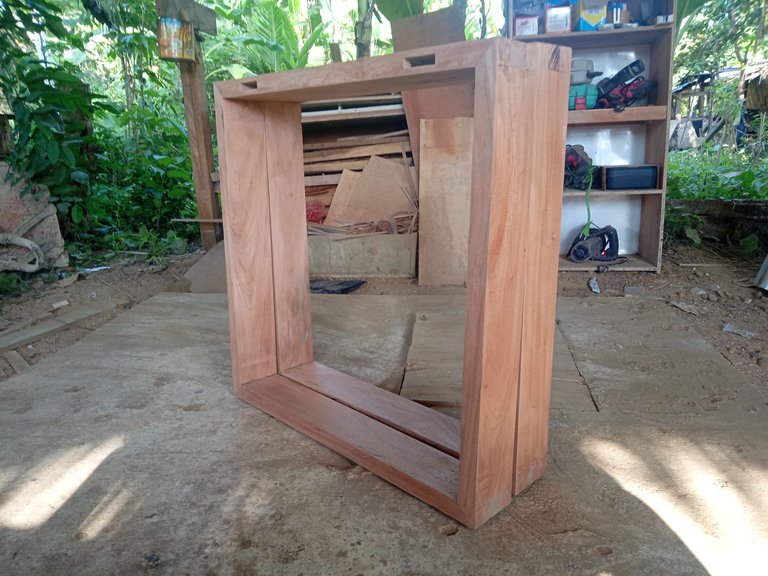
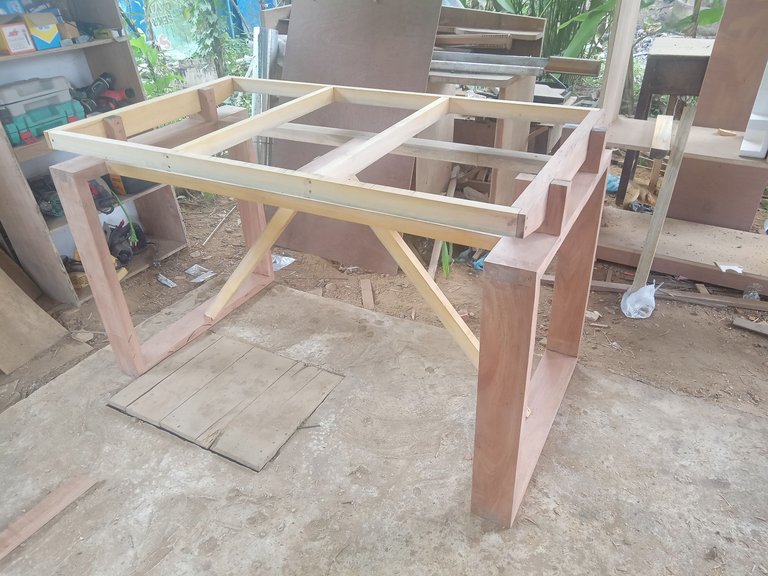
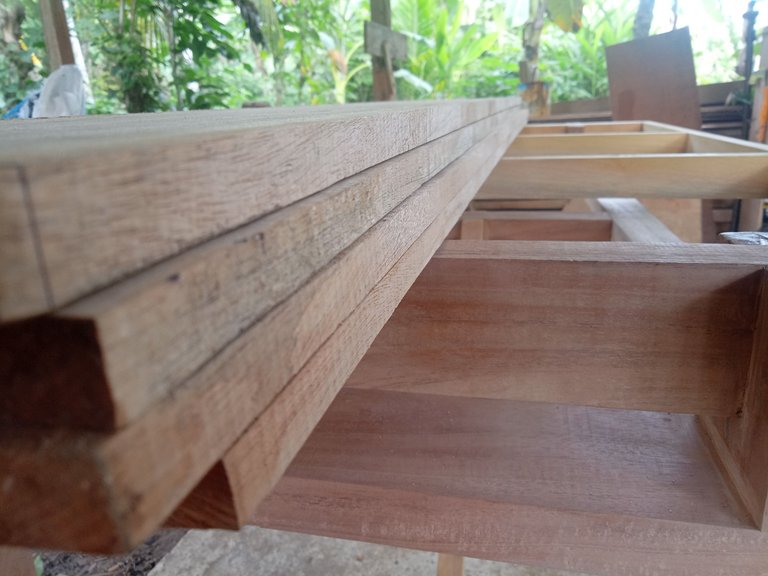
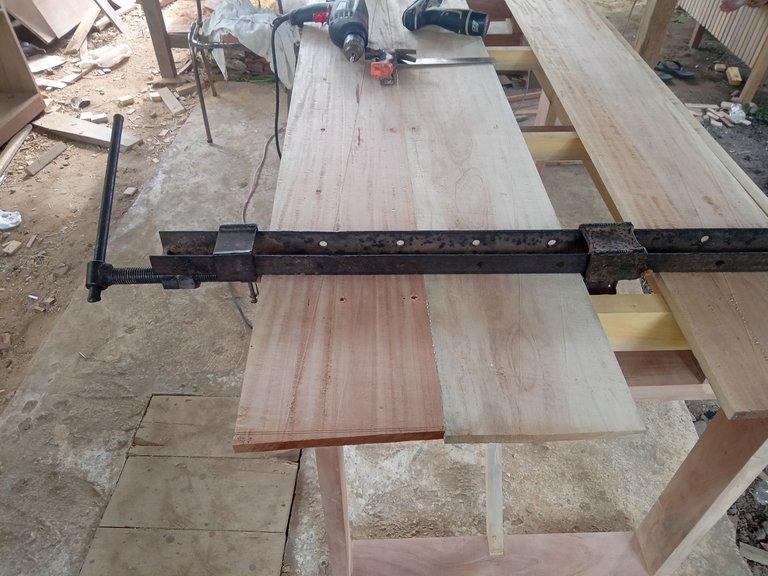
First of all I prepared wood with a size of 10cm x 3cm x 70cm for the table legs as many as 8 pieces each table leg as much as 4 pieces, in this case I needed a table saw machine to split the wood and also a planner to shave the wood so that everything was the same precision .
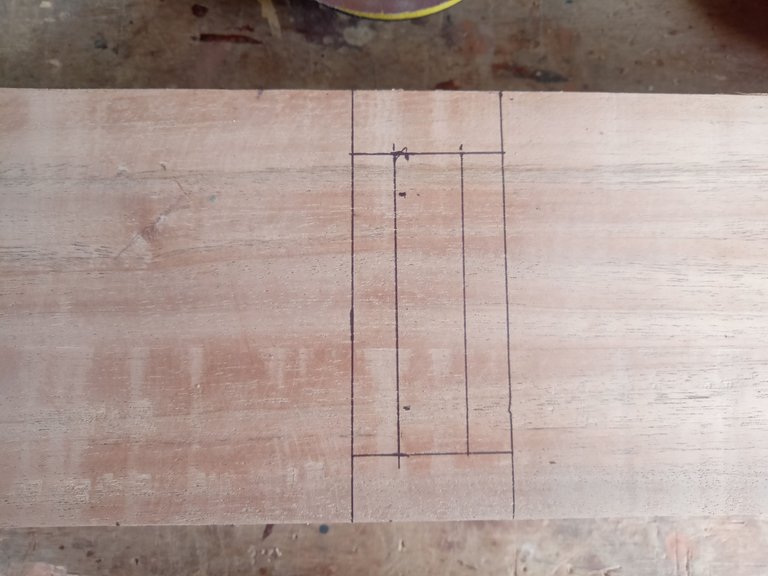
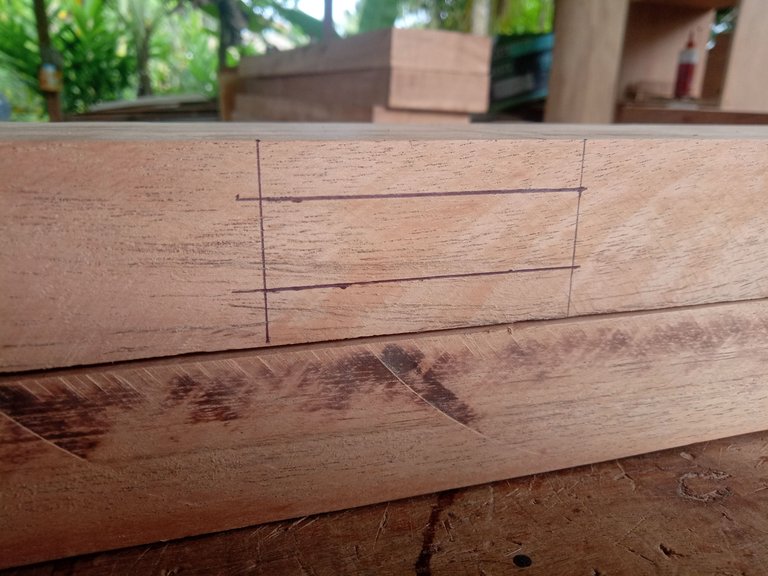
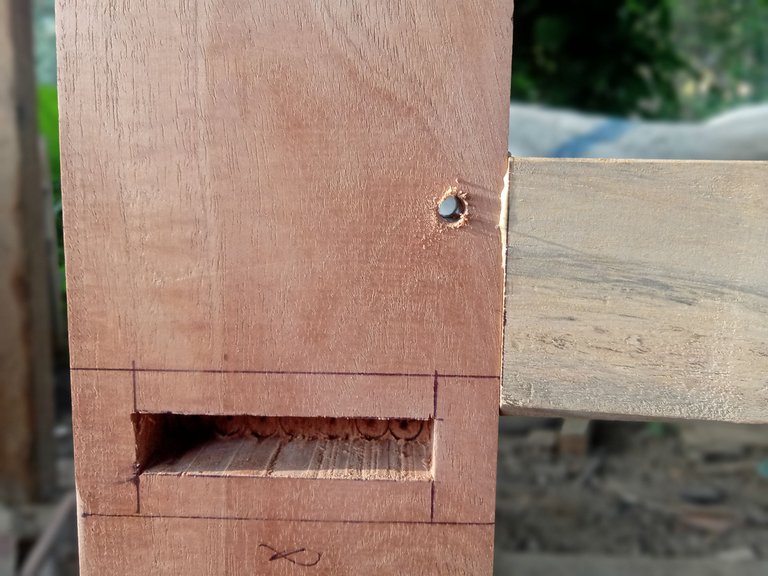
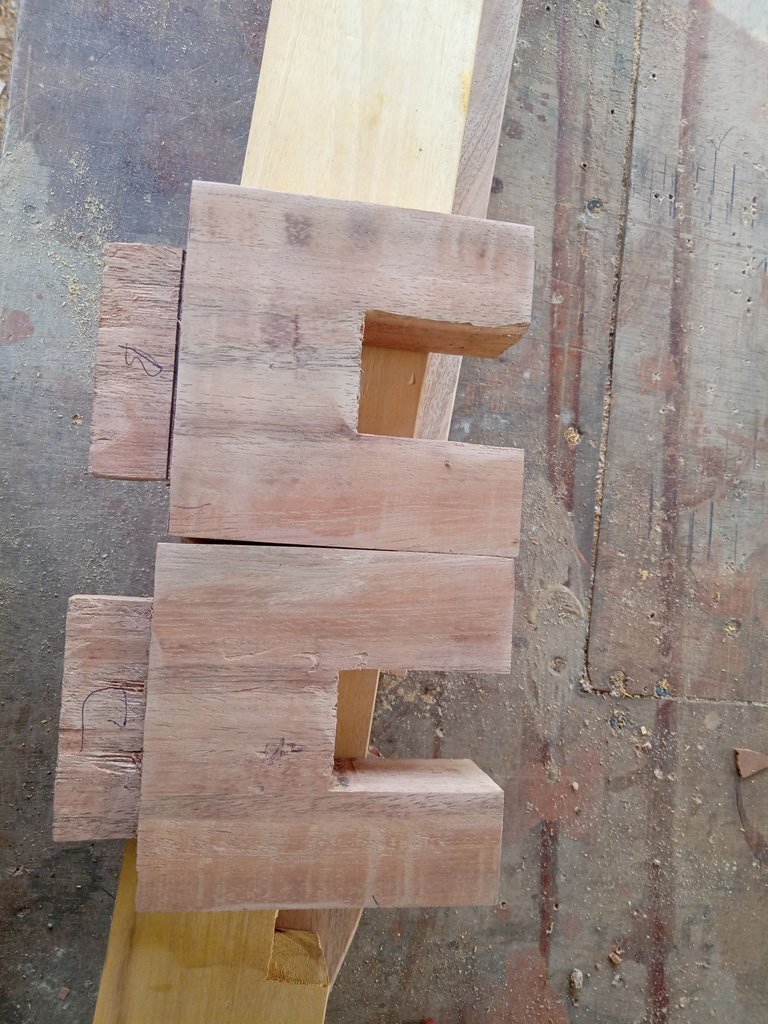
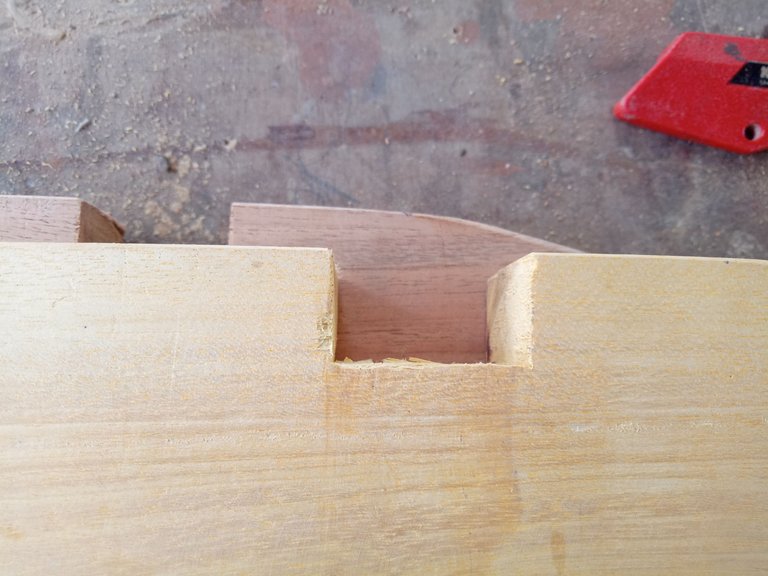
After the wood was ready I made a line for joining the square feet using a hole connection system which I combined with a 90 degree joint to make it more solid and strong, for this process I used a Chisel Mortising machine to make holes.
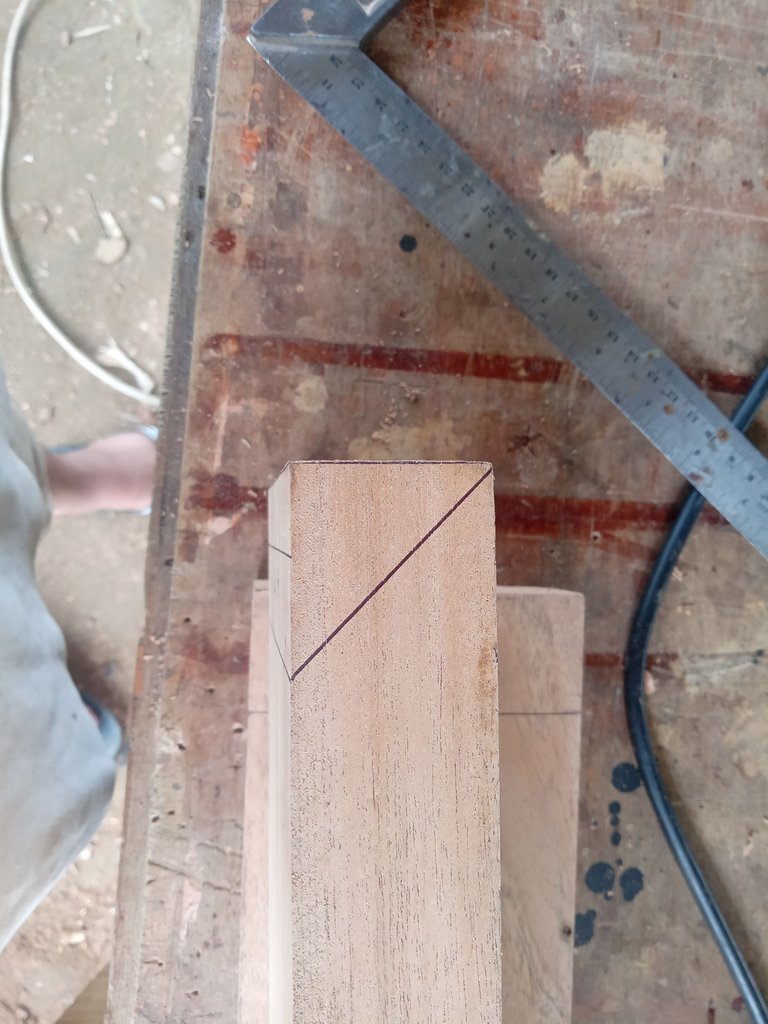

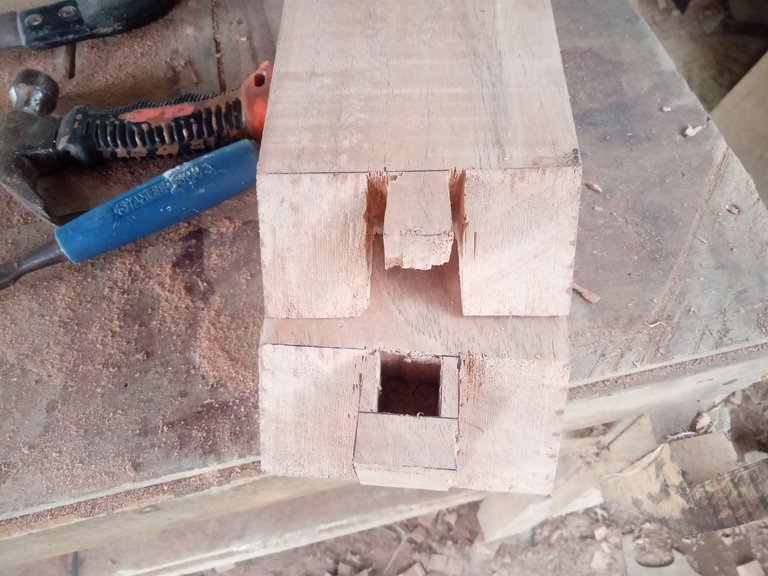
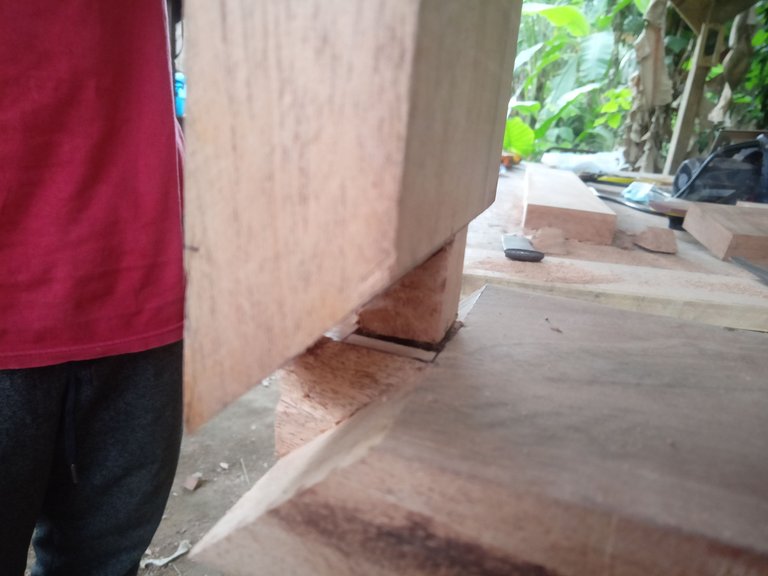
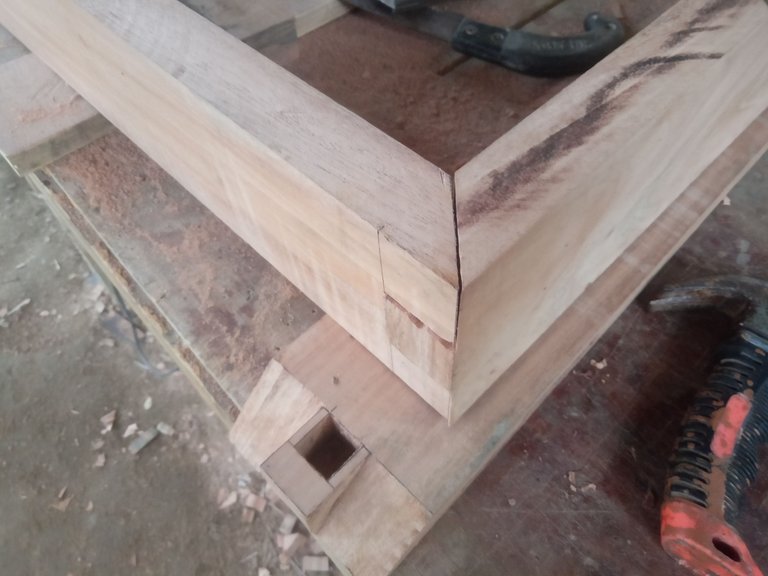
After I made the connection, I didn't assemble it right away because I had to make a hole in the top side of the leg as a connector between the left and right legs and also the top side as a connector between the table leg and the table floor.
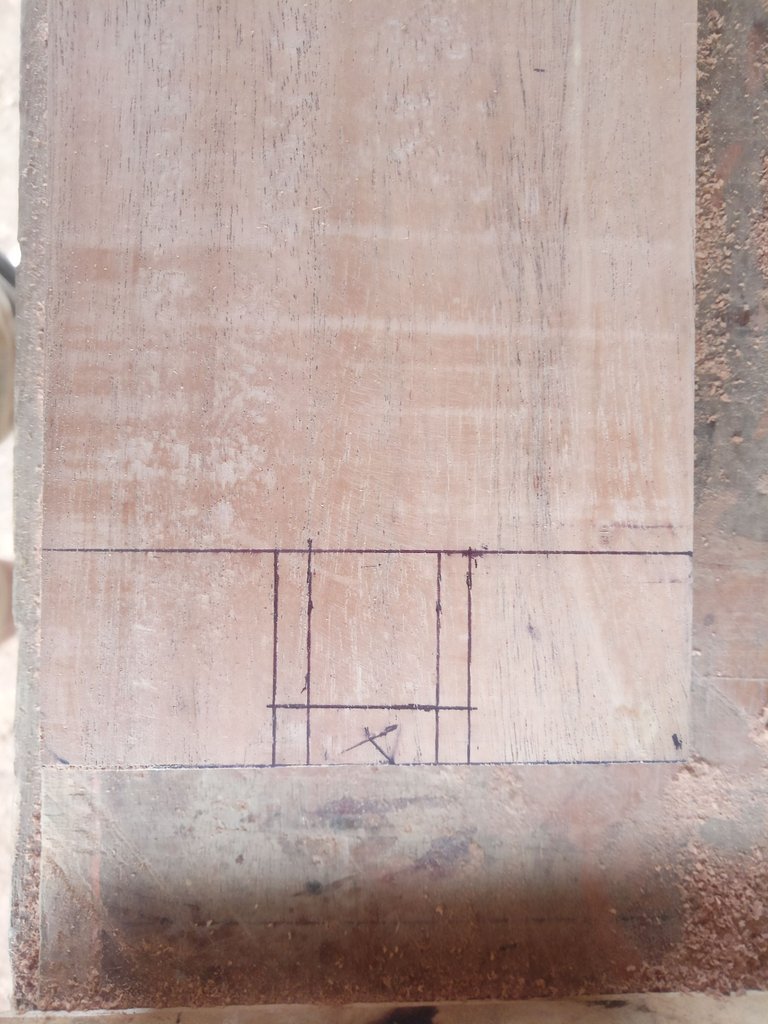
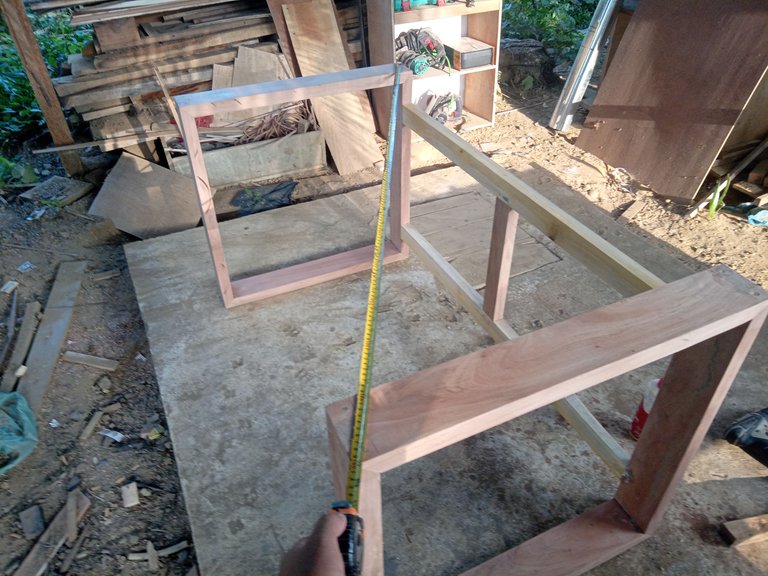
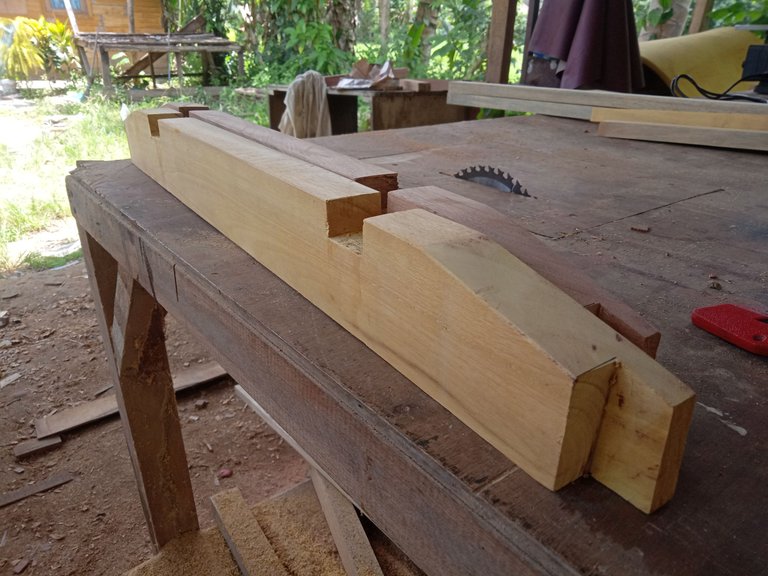
And also I prepared wood to connect the 2 legs of the table with a size of 6cm x 3cm x 126cm in this case the additions and subtractions must really fit so that the size results are as expected, the size for the distance between the outside of the right and left legs of the table is 140cm then the wood for the connection must be 126cm long because 3cm from the two ends of the wood is made as a peg which will later enter into the hole that I have made, the remaining 120cm will be added and the size of each leg is 10cm so that the overall result is 140cm.
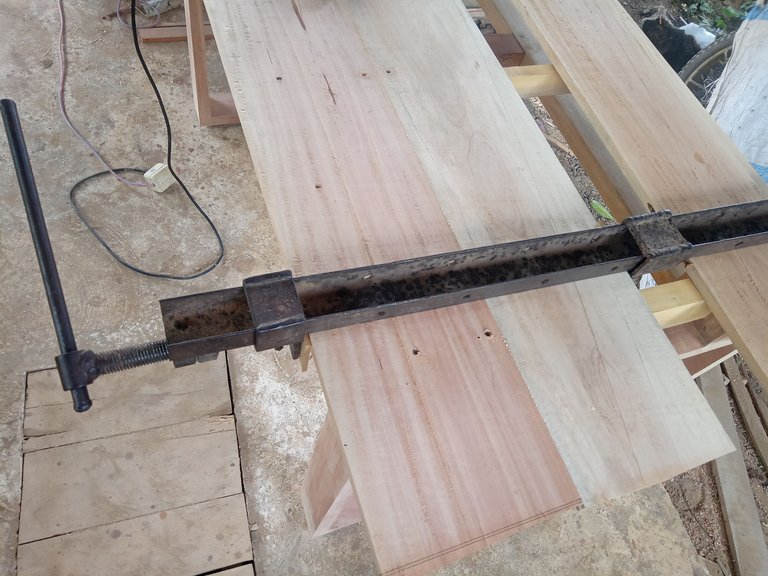
After I have prepared everything, then I assemble and connect the two table legs and don't forget to apply glue on each peg and connection.

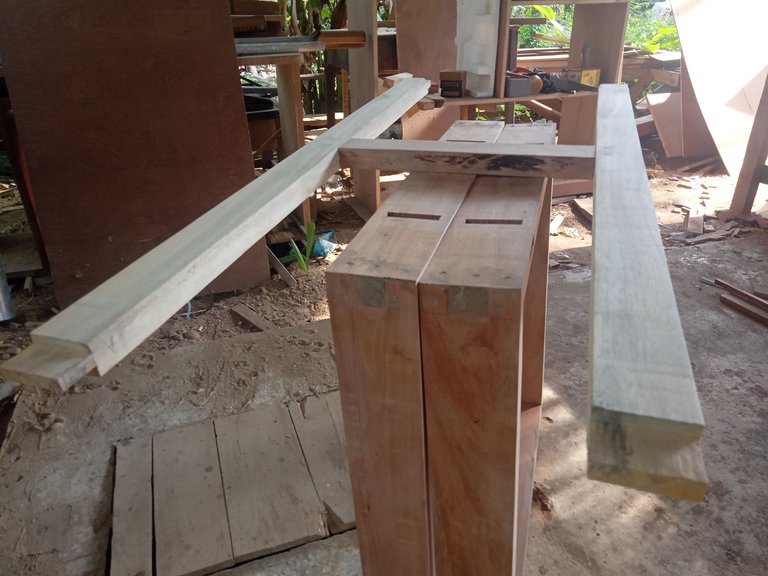
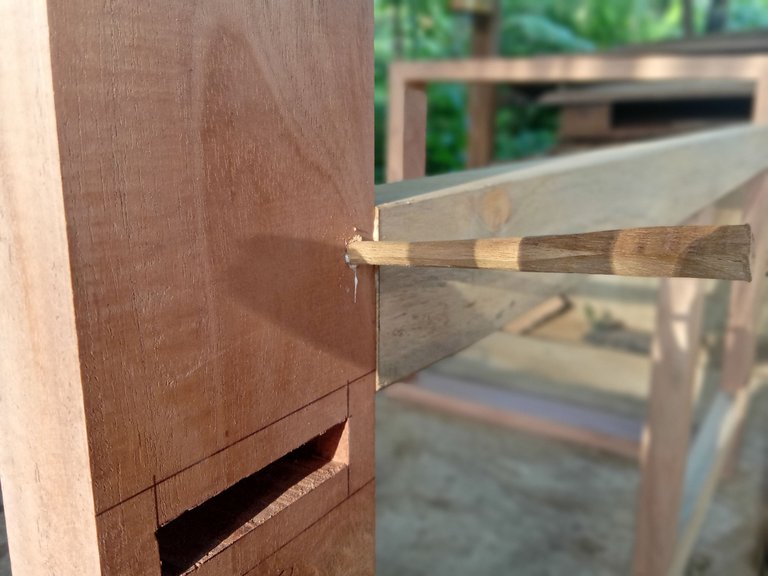
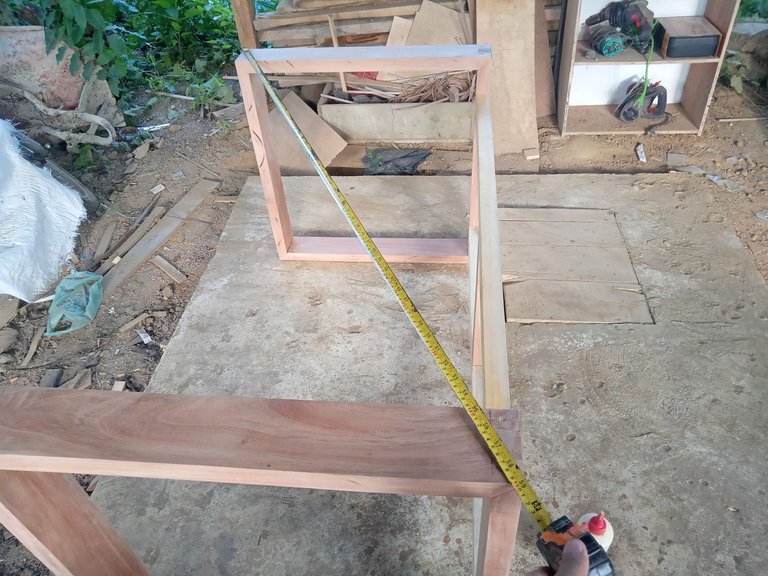
After I assembled the two legs, I made sure whether they were precise or not by measuring with a meter from the top left to the bottom right and vice versa, in the form of an x, if the size was the same, then it was precise, that's how to measure it.
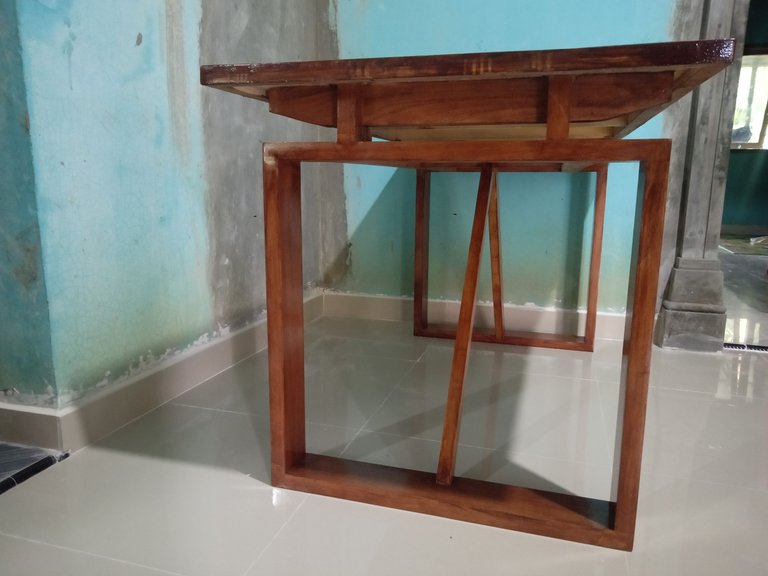
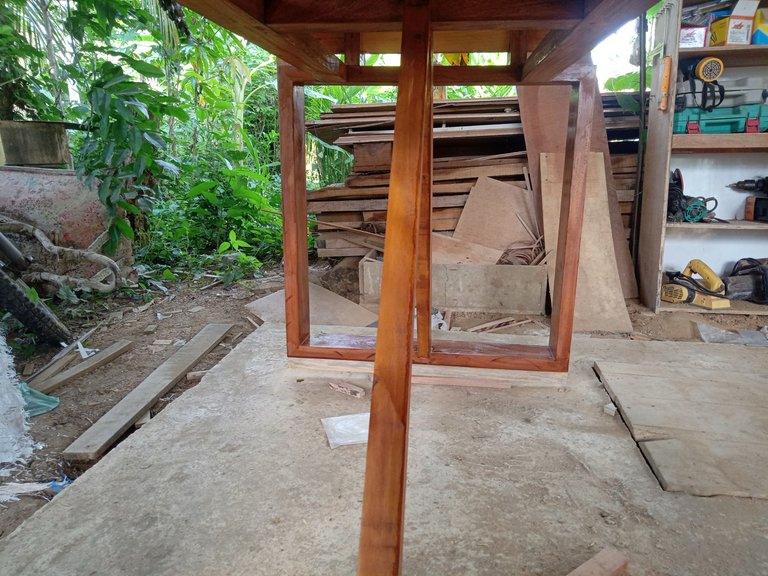
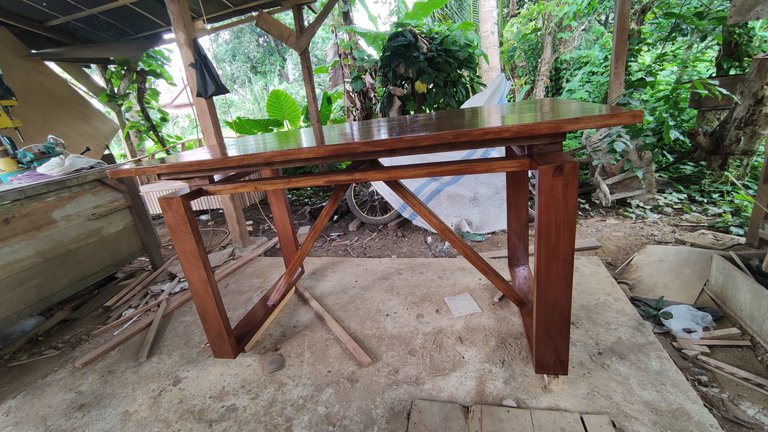
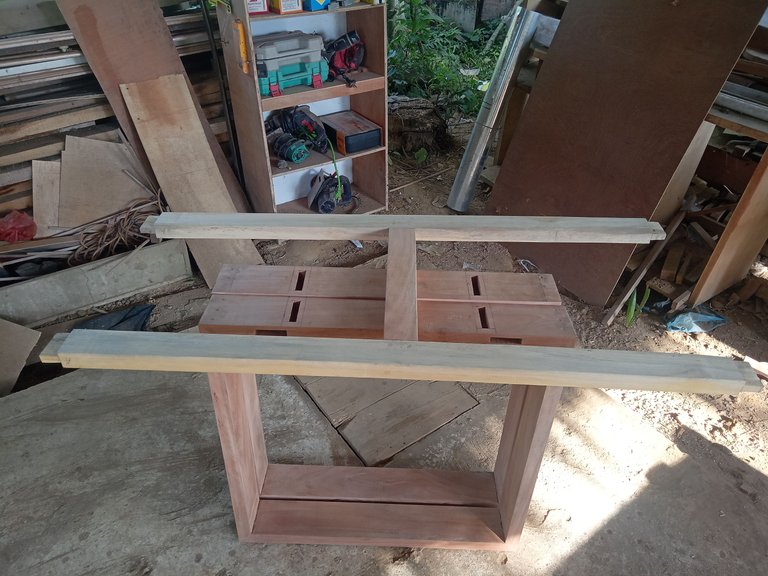
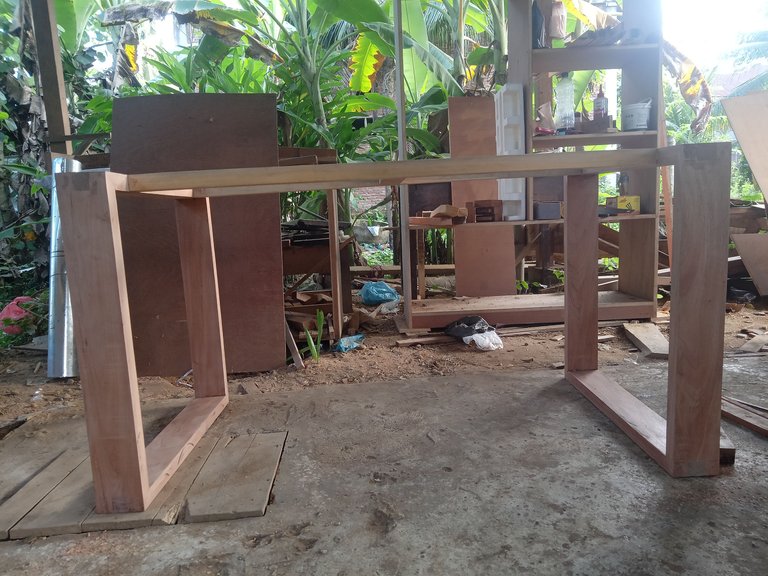
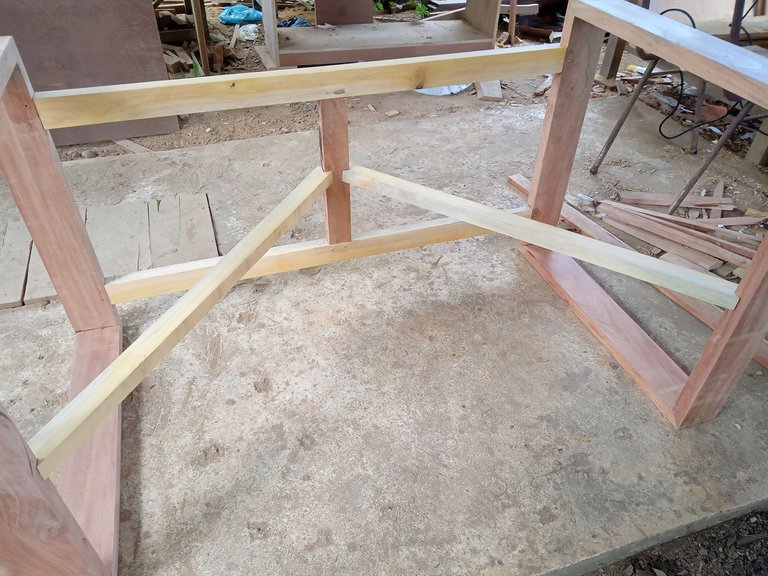
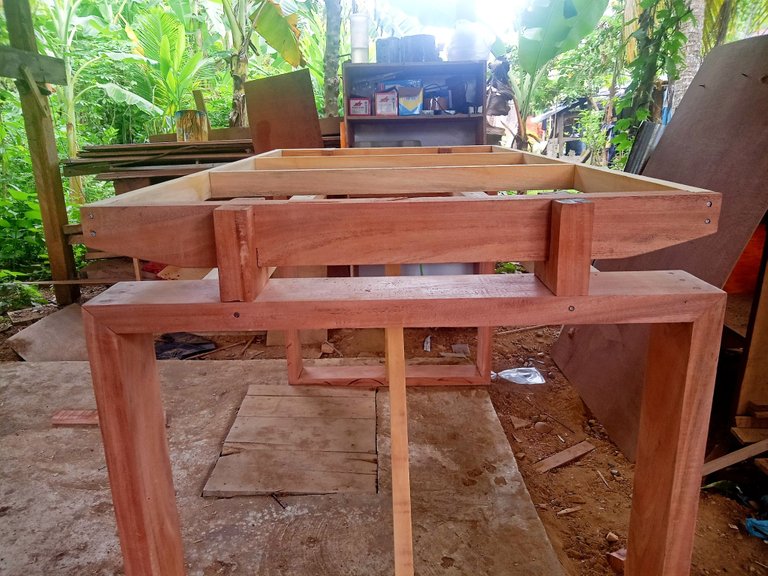
Then I added a support as a holder so that the table is more solid and strong from each table leg connecting to the wood that connects the two legs, shaped like the letter A.
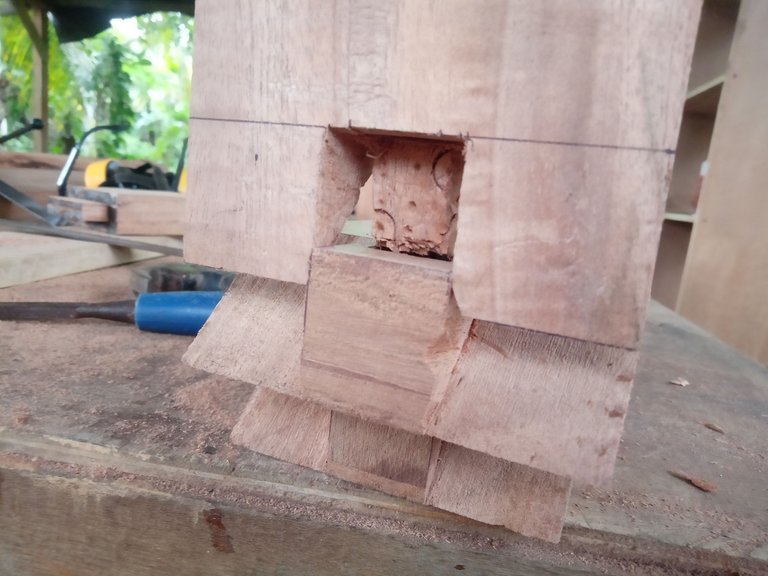
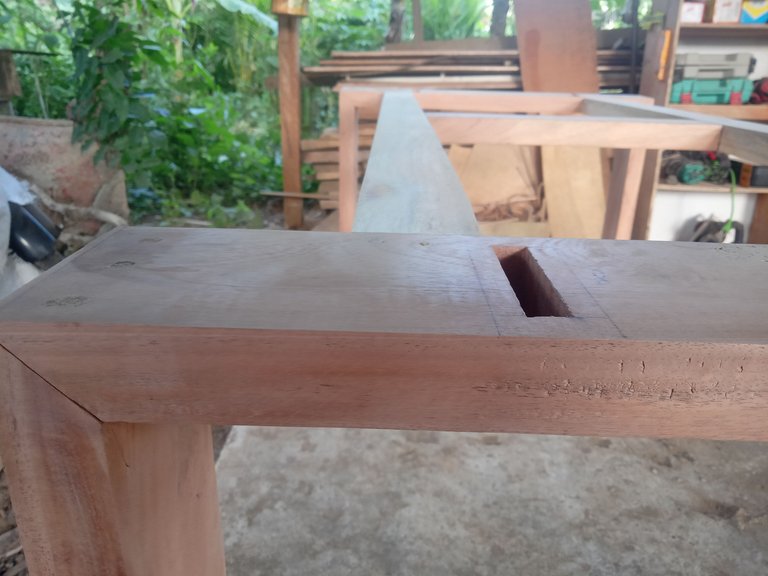
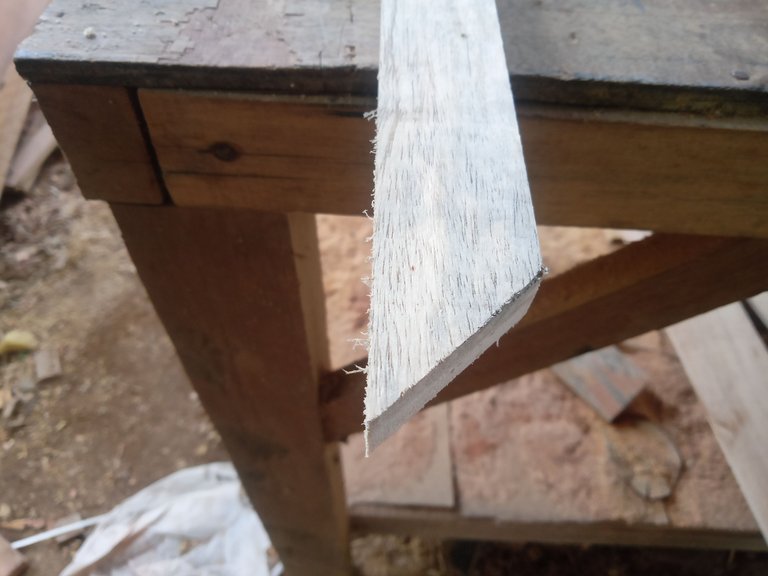
Then I made a connection between the legs and the base for the table floor using wood that is the same size as the legs but only has a length of 12 cm because 2 cm of 12 cm will go into the hole as a peg.
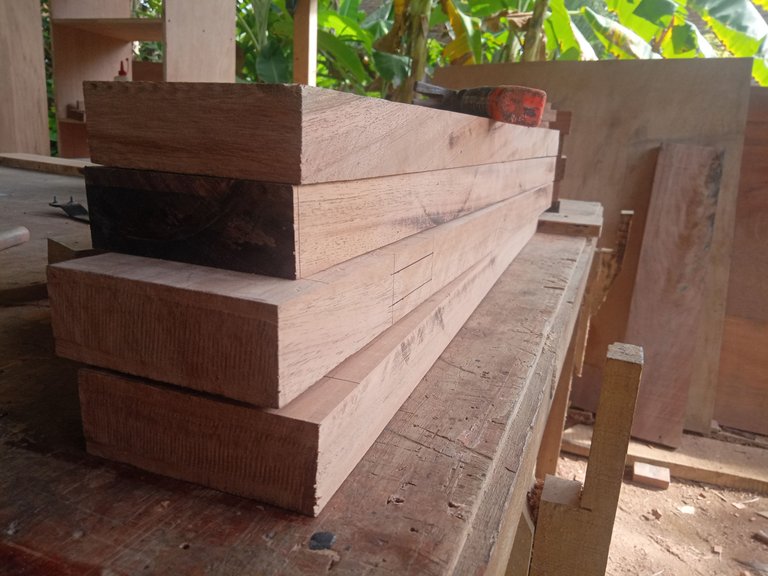
Then I will unite the wood with the base wood for the table floor measuring 7cm x 3cm x 70cm equal to the length of the table legs.
Then I joined the two woods with the left and right table legs and then added wood that connected the left and right pedestals as a support for the table floor.


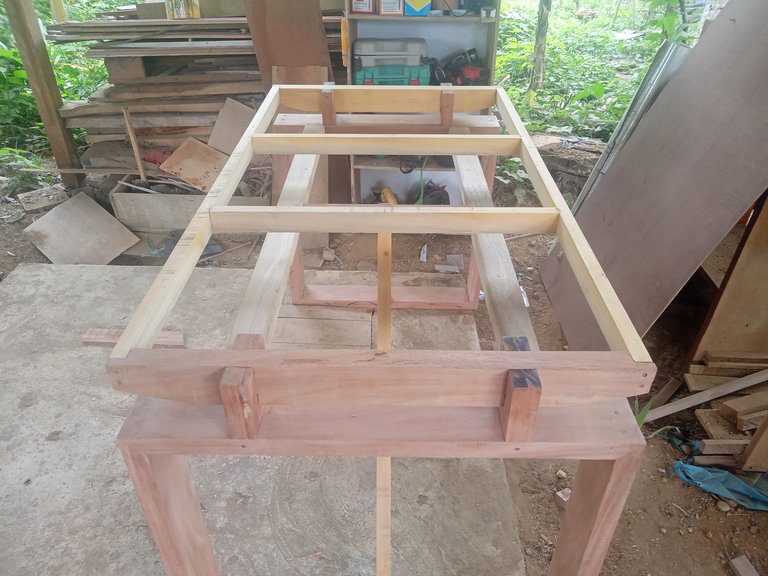
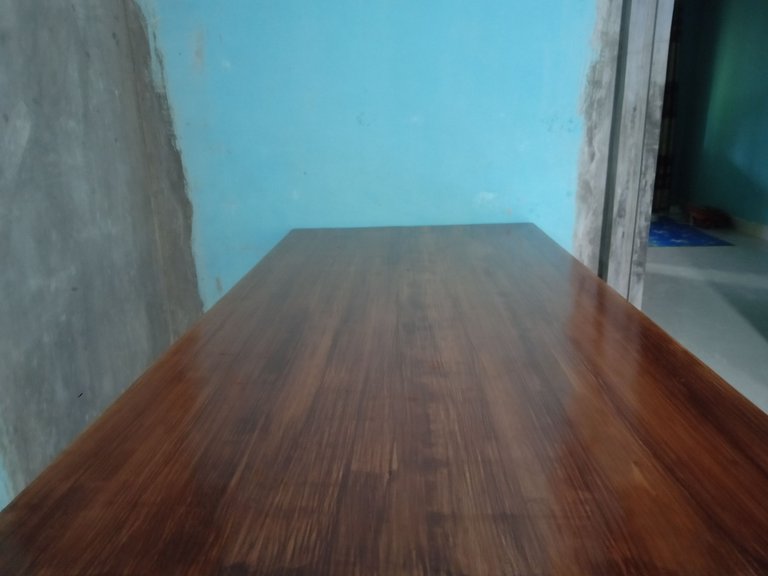
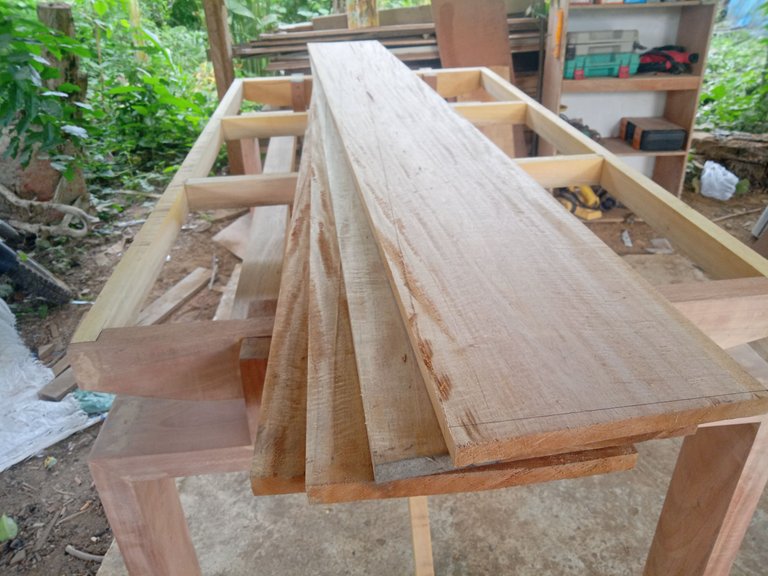
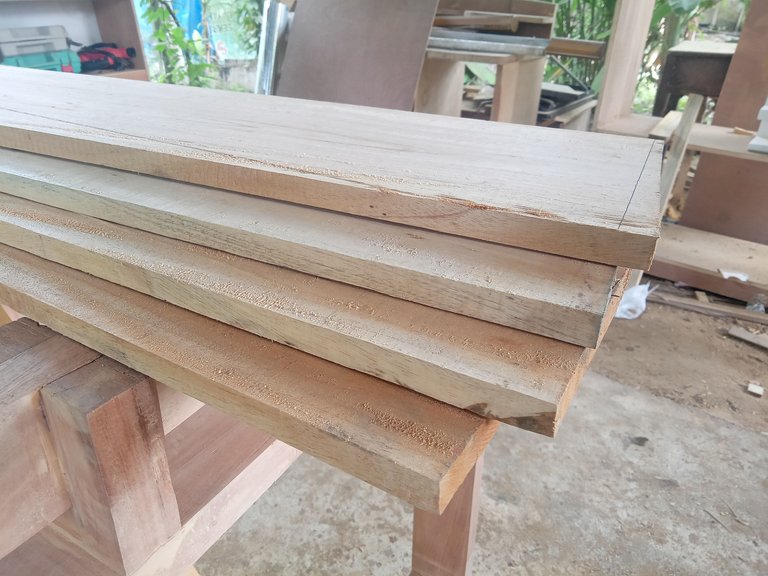
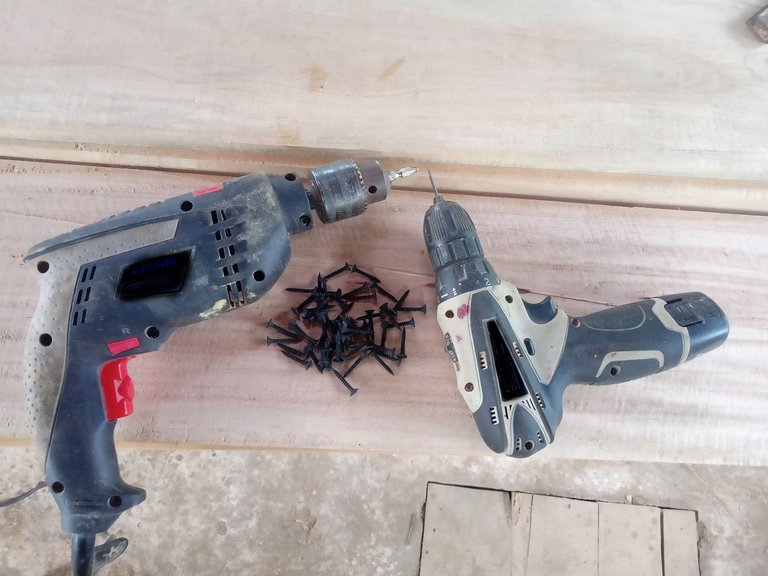
After all that was done I started the process of installing the table floor, I used 4 pieces of wooden boards measuring 20cm x 2cm x 160cm so that the overall result was 80 cm according to my design, for this screwing process I used 2 hand drills the other to make holes first the other to screw and use a press so that the board is tight.
And for the installation of this floor on each right and left side I added 10 cm more than the size of the base below which is 140 cm long while the length of the boards for the floor is 160 cm, and for the width I added 5 cm each side because the overall size of the floor is 80 cm and bottom base size 70cm.
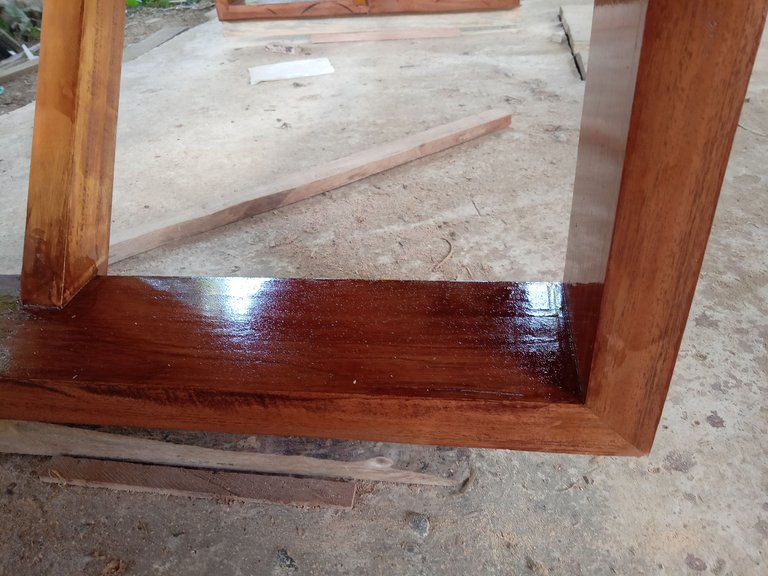
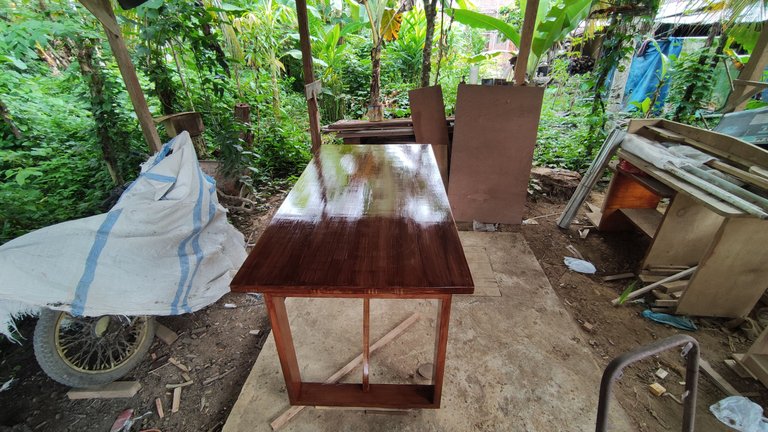
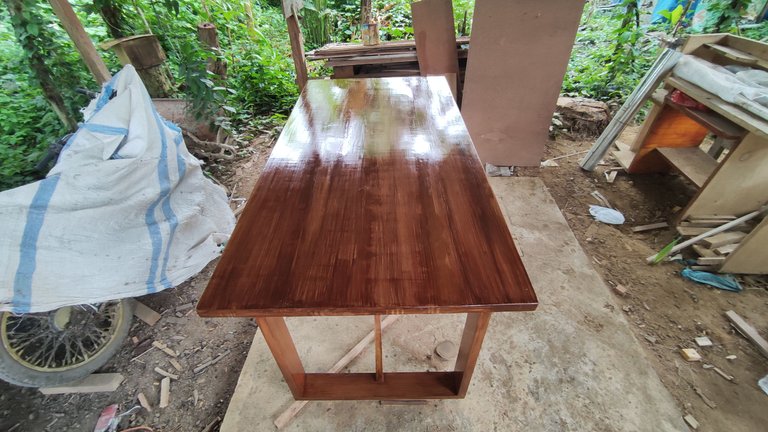
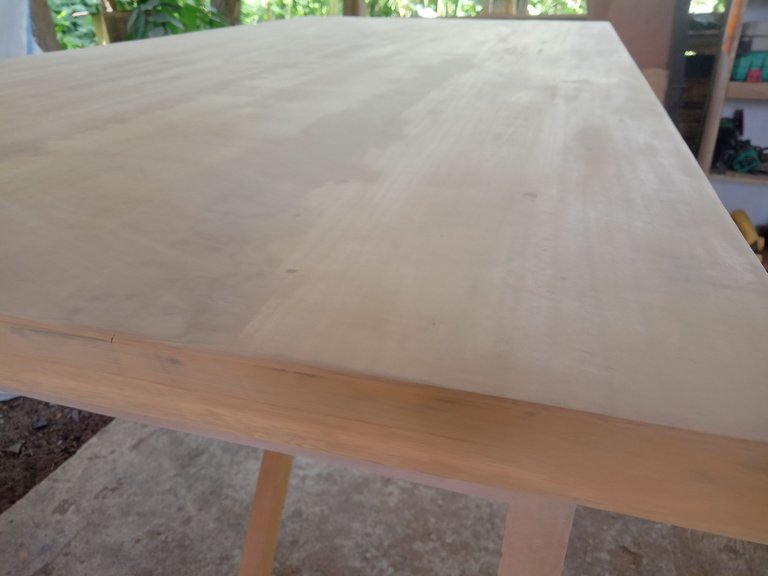
And I added wood under the outer floor as a trim to beautify the table and so that the floor looks thicker, and after the glue dries I shaved the table floor so that all parts are flat.
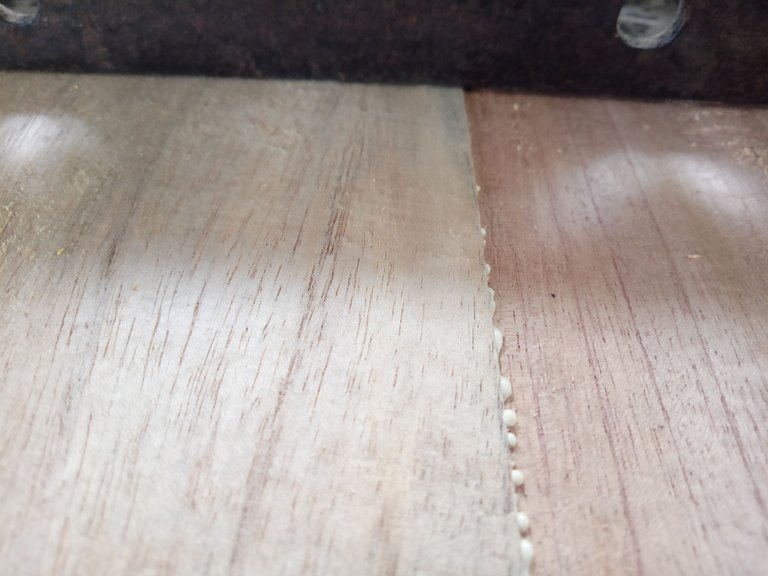

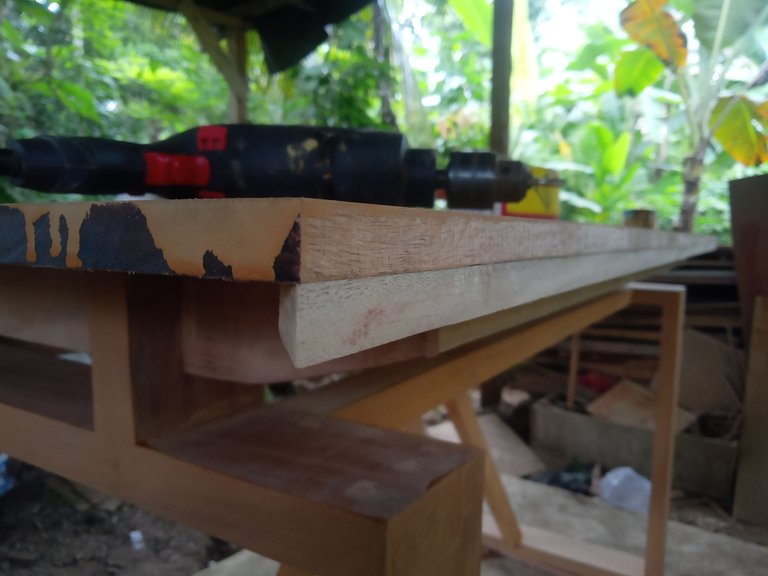
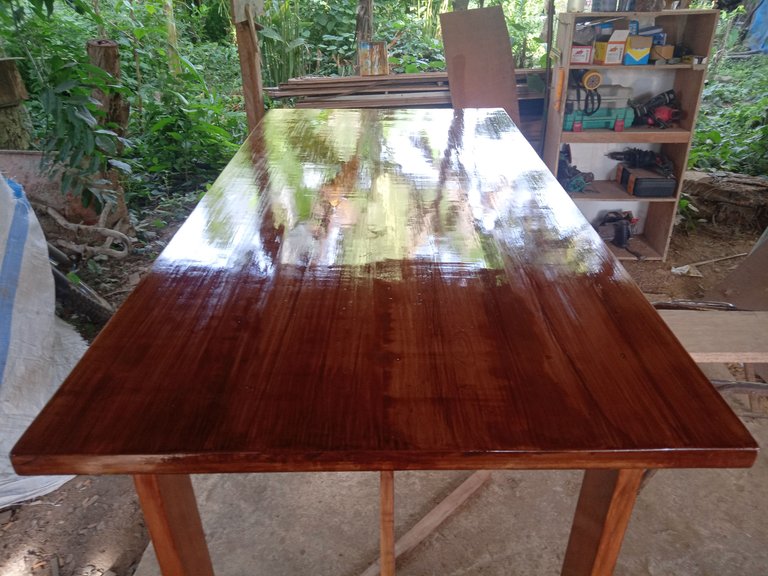
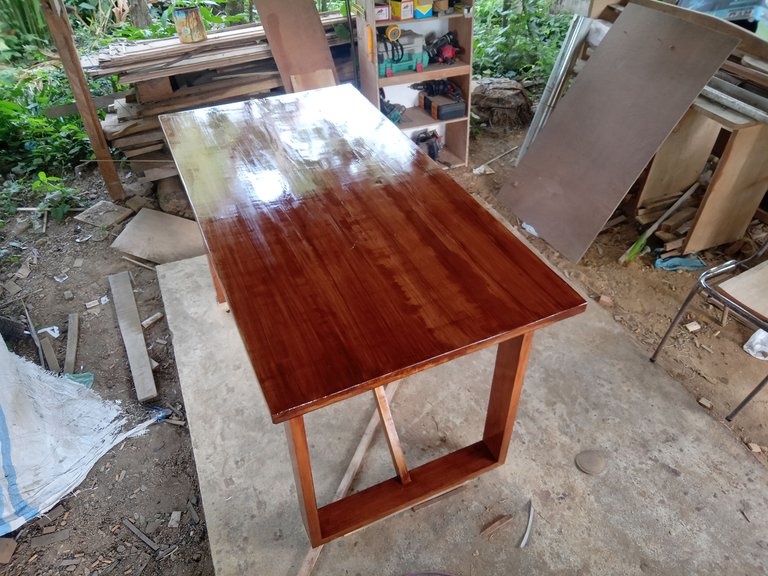
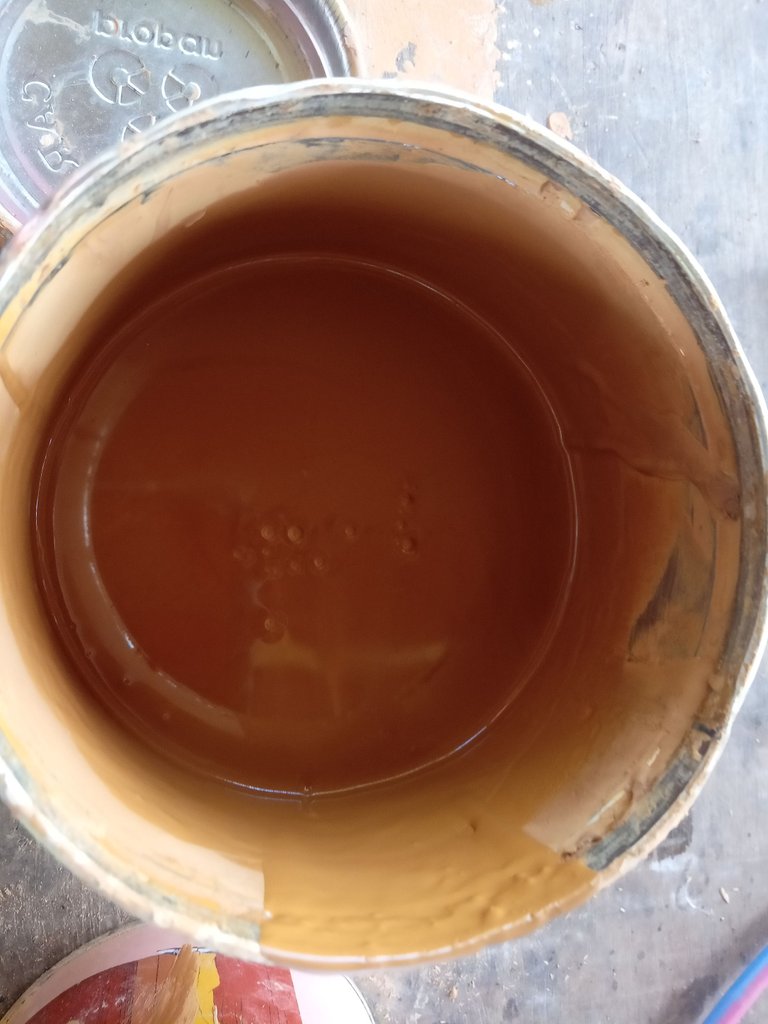
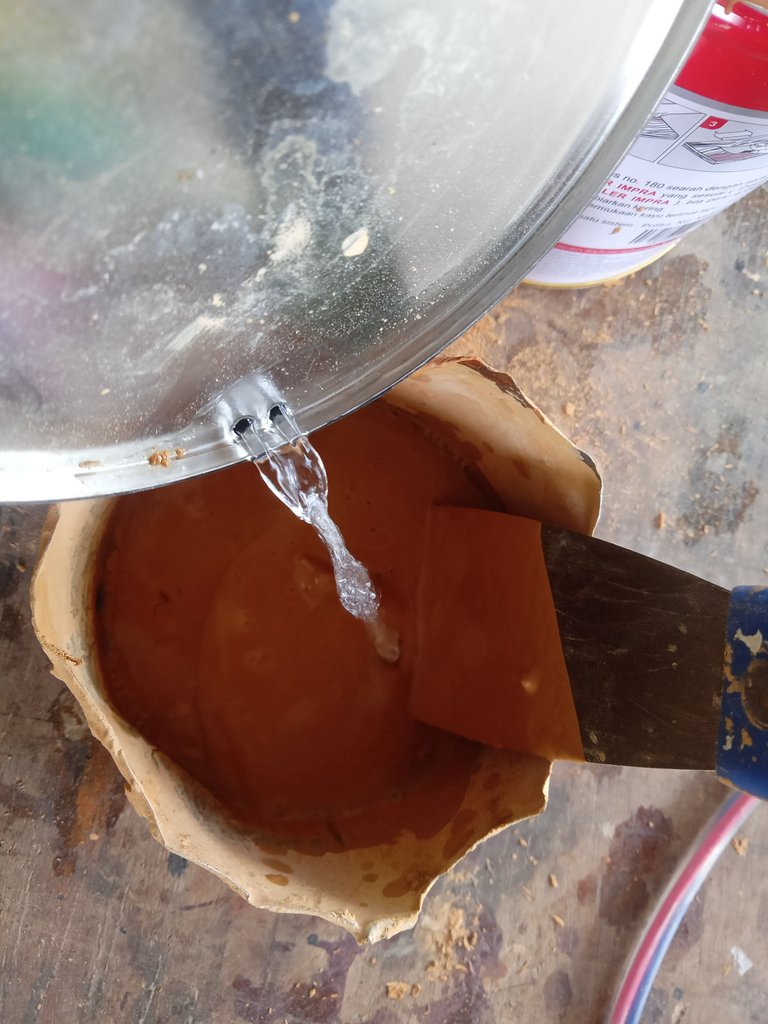
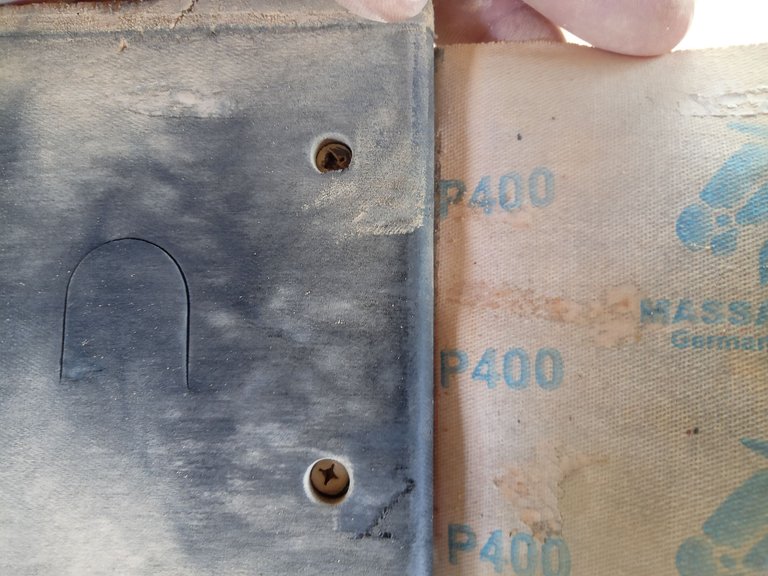
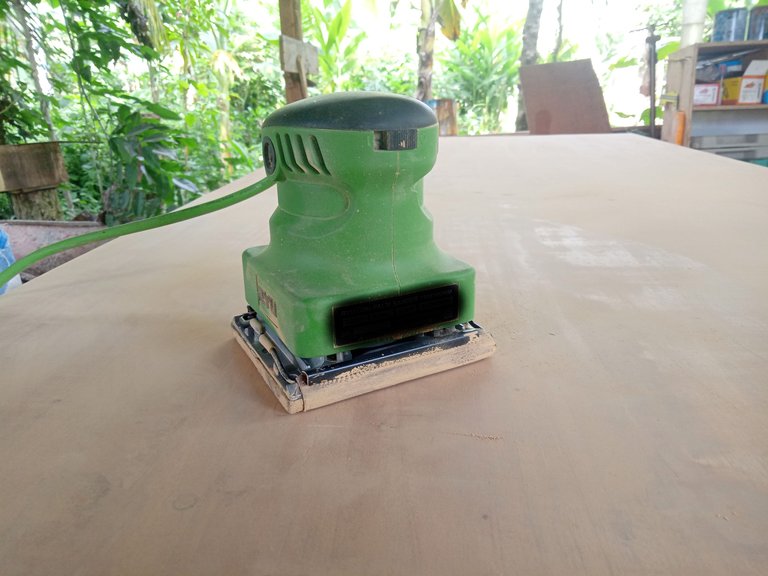
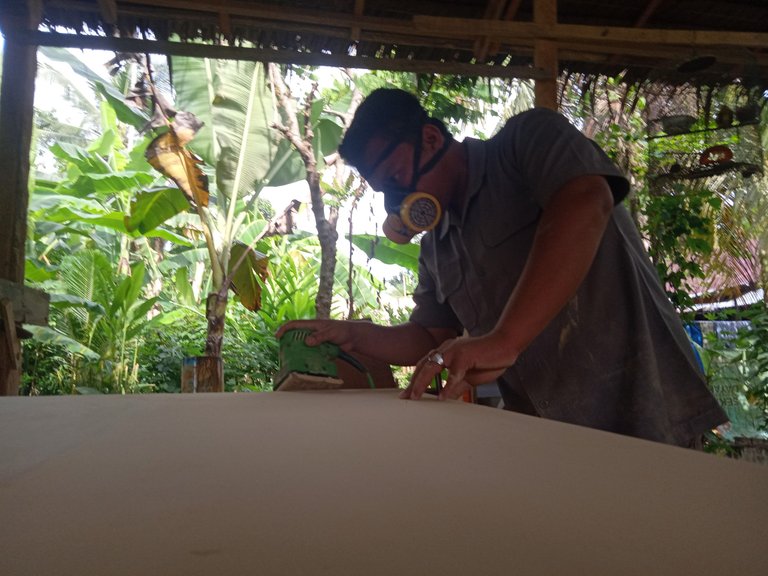
Then the last stage is the finishing process, this process consists of several stages, first sanding all parts of the table to make it smooth and even using sandpaper number 150, then entering the second stage, which is caulking all wood joints that are not too tight and also coating all table surfaces, especially the floor with putty that has been diluted with thinner so that all the wood pores are closed so that when the painting process it will look neat and shiny without having to add clear gloss and will also save a little paint.
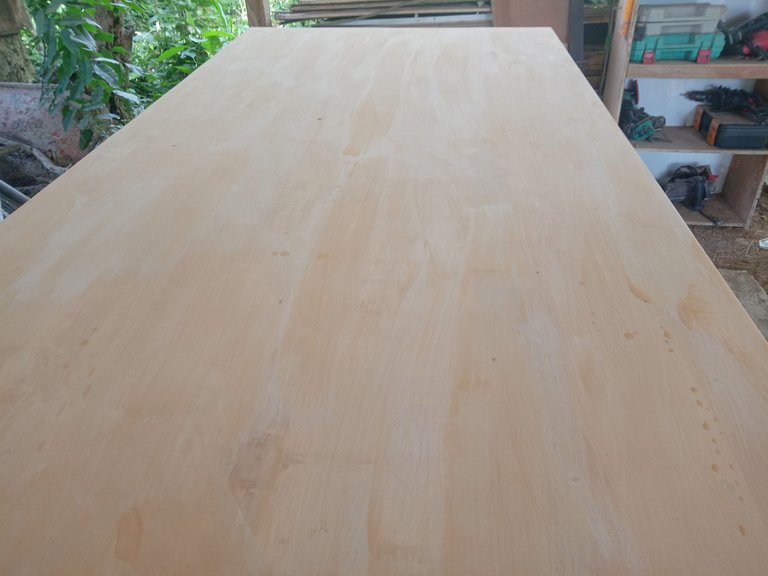
Then go to the third stage, which is sanding all parts of the table that have been coated with putty using sandpaper number 400 to make it smoother and not make the putty peel off.
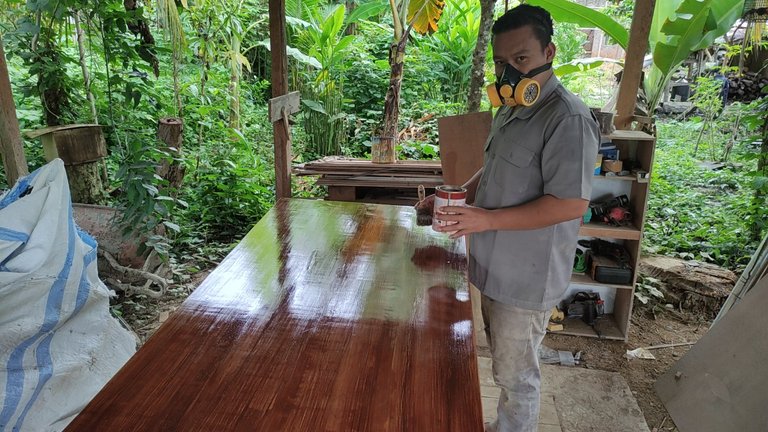
Then to the last stage of finishing, namely painting all table surfaces, for this time I used varnish paint with the color according to the consumer's request, namely the color of tobacco, this process can be repeated several times until I find the results that are in accordance with the wishes and I only repeat it as much as 2 times and the results are shiny and satisfying.


And that's the process that I did to make a dining table at the request of my consumers, hopefully what I explain can be additional knowledge to all of you. And also hopefully this design from me can be used as an example for all of you and see you in the next post.
That's really a great and detailed post mate. Really enjoyed seeing the process. You missed one detail though...what wood are you using please? :-)
Best wishes
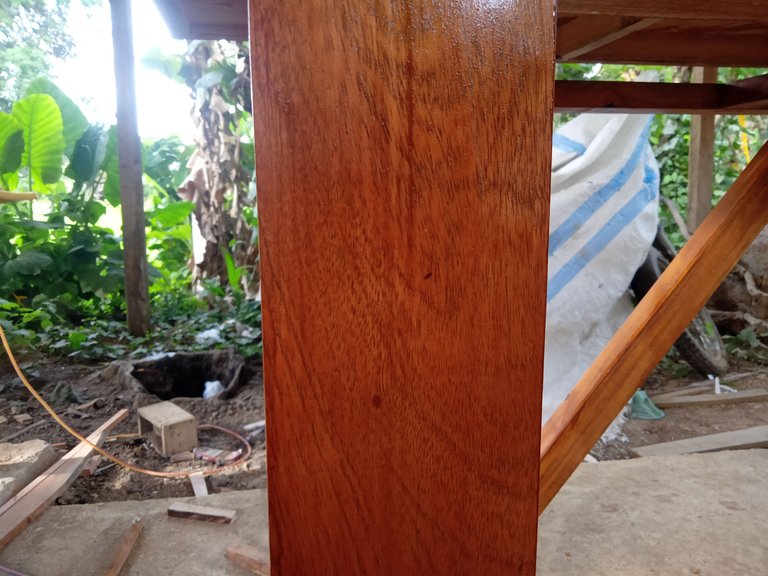
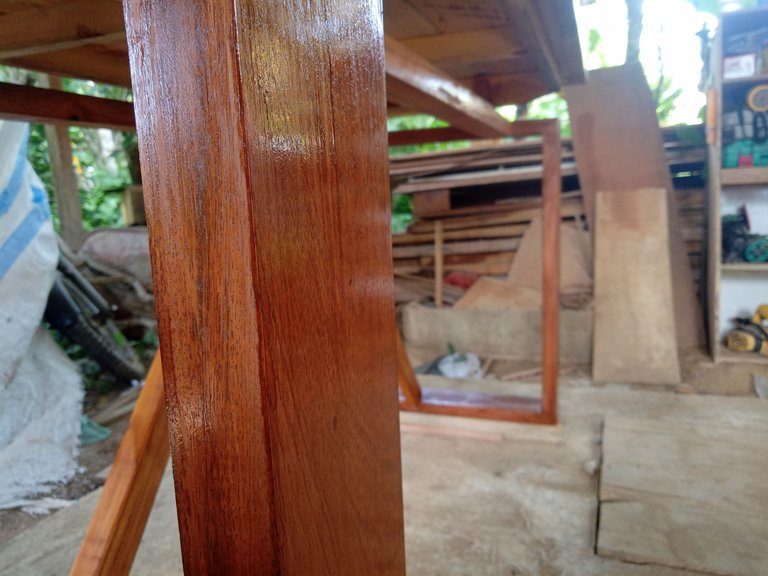
I'm so sorry, thank you for asking, I forgot to explain about the wood, the wood that I use there are 2 types of wood for the table legs and the floor I use sentang wood or its scientific name azadirachta excelsa.
And for the base of the table floor I use jackfruit wood, you can see in the manufacturing process, the dark wood is sentang wood and the bright and yellow wood is jackfruit wood, thank you for reminding me I hope my explanation is useful for you.have a great day..🙏🙏🙏
Thank you! I loved the colours and I haven't heard of anyone using Jackfruit wood before!
Jackfruit wood is wood that is easy to get in my area, and also this wood has fine fibers and the color is good, thank you....
The table is very beautiful, I love the originality in the legs, as it is not a table like the one we usually see supported by four simple legs. It is a bit risky but exciting at the same time when a client wants you to be inspired and create your own original design and in the end it is very satisfying because you put your personal stamp on it.
Te quedó muy hermosa la mesa, me encanta la originalidad en las patas, ya que no es una mesa como la que normalmente vemos apoyada en cuatro patas simples. Es un poco arriesgado pero emocionante a la vez cuando un cliente desea que te inspires y crees un diseño propio y original y al final es muy satisfactorio porque le imprimes tu sello personal
thank you very much for the support, I'm happy to see you like the table design that I made...
Thank you for taking us through the whole journey of making the table. I love the details ♥️
You're welcome,have a great day.
greetings architecturedesign+design, the table looks quite beautiful with an amazing design, if I may know how many days you will complete this project.,
Thank you for the support and I'm glad you like it, it took me 4 days to complete this project...
amazing, friends, greetings furniture:)
Thank you for sharing this amazing post on HIVE!
Your content got selected by our fellow curator @priyanarc & you just received a little thank you via an upvote from our non-profit curation initiative!
You will be featured in one of our recurring curation compilations and on our pinterest boards! Both are aiming to offer you a stage to widen your audience within and outside of the DIY scene of hive.
Join the official DIYHub community on HIVE and show us more of your amazing work and feel free to connect with us and other DIYers via our discord server: https://discord.gg/mY5uCfQ !
If you want to support our goal to motivate other DIY/art/music/homesteading/... creators just delegate to us and earn 100% of your curation rewards!
Stay creative & hive on!
Thanks @priyanarc for the support i appreciate that...🙏🙏🙏
Congratulations @lancang! We're delighted to specially curate your awesome publication and award it RUNNER-UP in Architecture Brew #62. More power!
Thank you for subscribing to Architecture+Design, an OCD incubated community on the Hive blockchain.
Thank you very much for the support,i appreciate that.🙏🙏🙏🙏
With utmost pleasure dear @lancang. Keep up the amazing posts! 😀