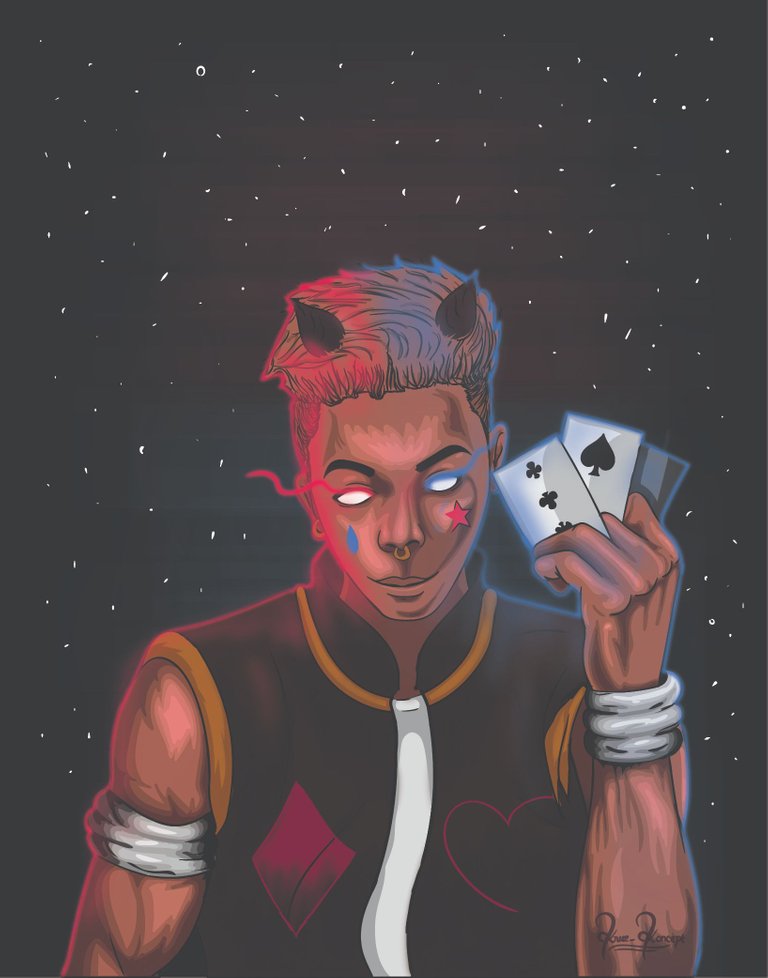
HISOKA CHARACTER RECREATION - DIGITAL ART
_________HISOKA__________
Hi guys, how are you doing today.
_____Welcome To My New Post_____
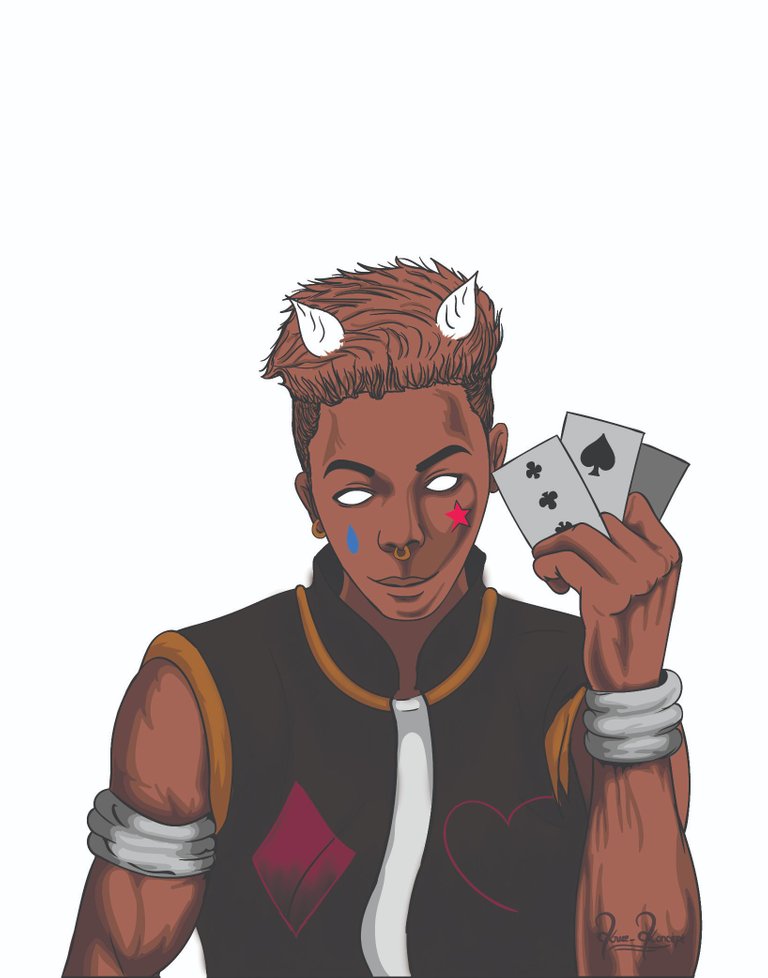
Today I'll be sharing with you all character recreation I made using one of the characters from an anime series I watched titled "HUNTER X HUNTER" and the name of the character is HISOKA
For the recreation, I decided to use myself as a reference in replicating the character in a unique African way
I know it's rare to see an African character on animes which is what really motivated me into doing this particular work, it's more like fan art also to me cos I still had the original character design features and costume intact while I input my own changes to it.
Stay tuned as I break down the creation process...
I hope you like it
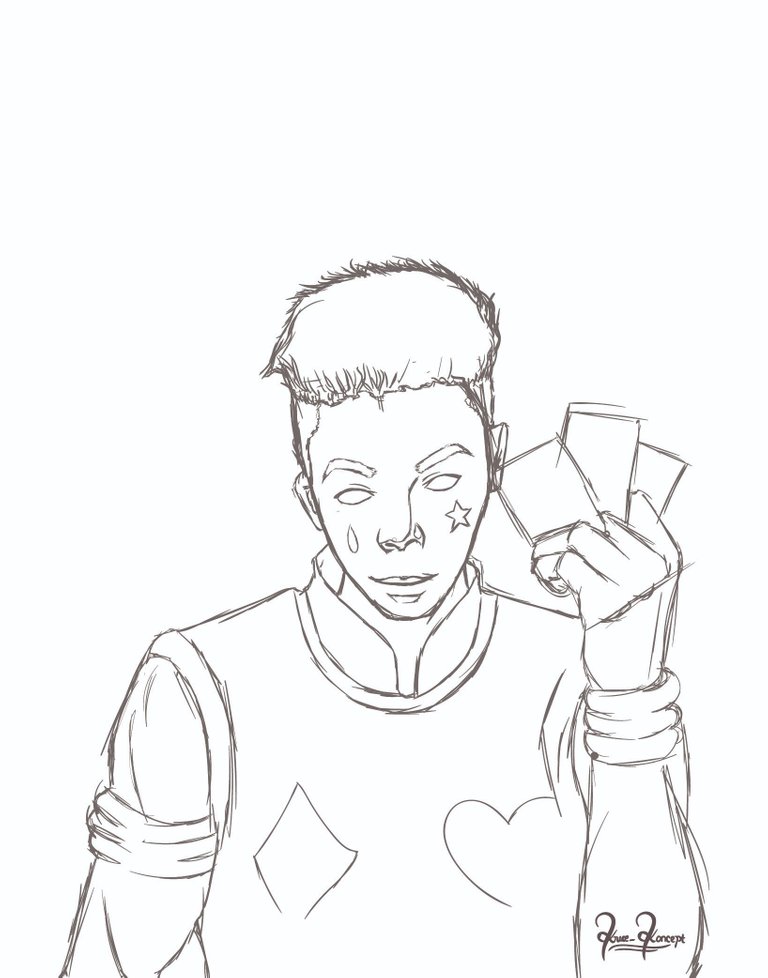
___________ PROGRESS ___________
Note: This is an original character created using myself as a reference.
Step 1: I created a quick rough sketch of how I wanted my character to be positioned with no specific details at all by using a stick man figure guide.
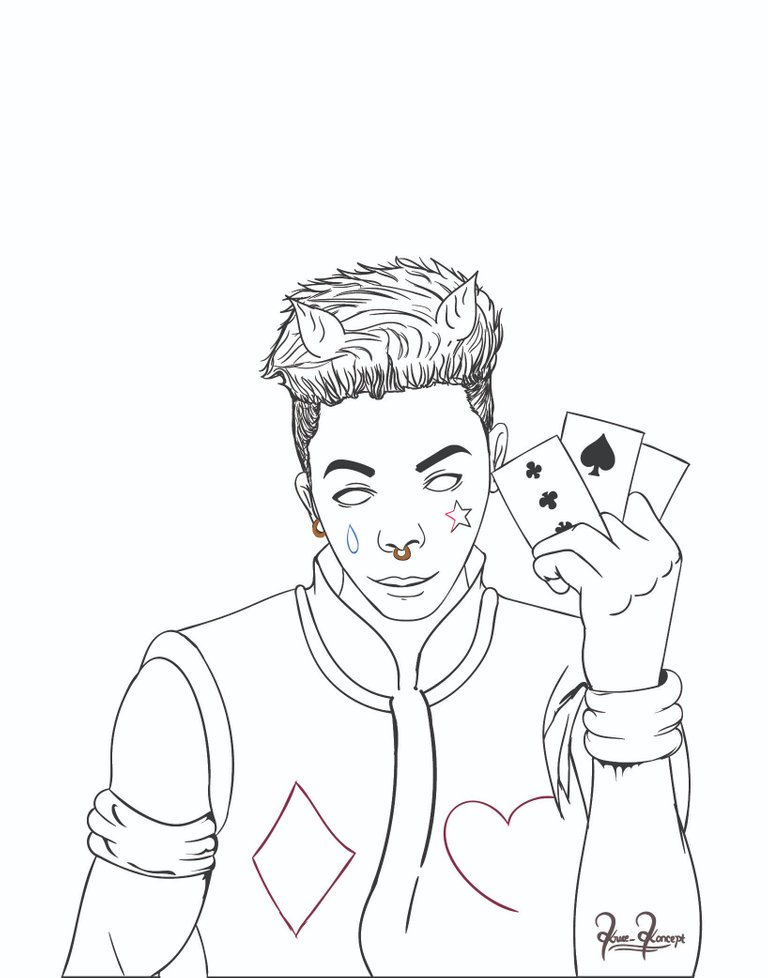
Step 2: on this stage I created my neat line Art using the previous stage which is the step 1. On this stage, I added and also use a different color for the outline of some tattoo on his face and some other features on his body.
Step 3: Here on this stage I established my first layer of colour on every aspect of the art such as the face, the face tattoo, the cloth and so on.
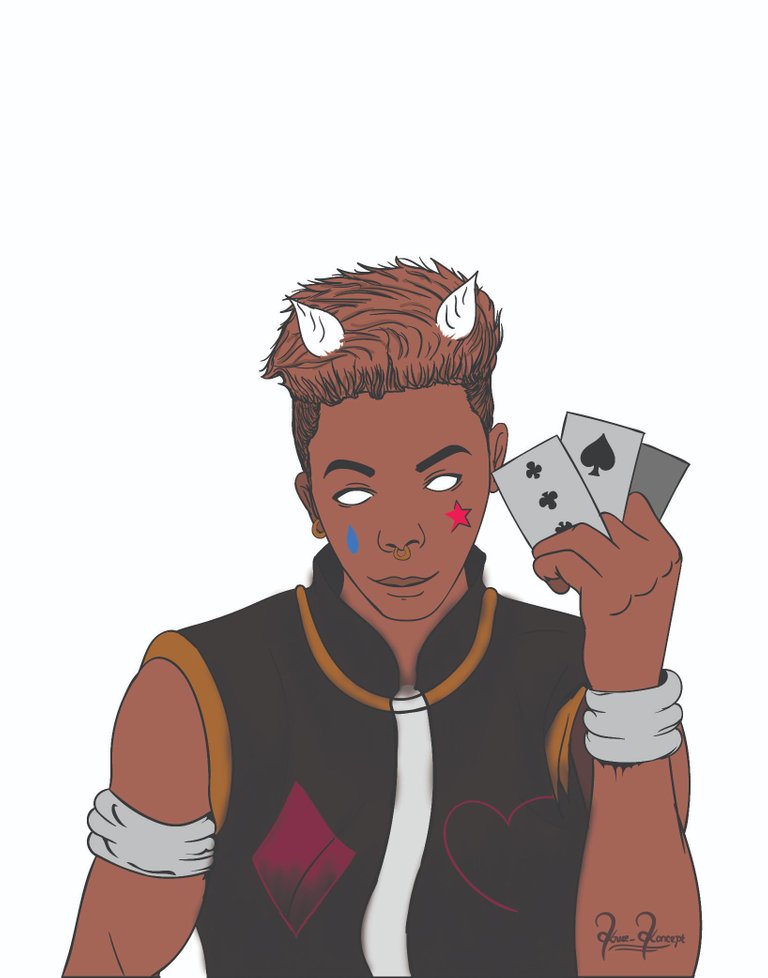
Step 4: on this stage, I added my first Shadow cast on the character, I made it light because the purpose of this first Shadow is to cover and show the overall area of the character that has shadow on it.

Step 5: Here I started adding more shades to the character such as the cloth, body and also the head. This step wasn't so add because I had already figured out where the shadow will be from the previous stage.
Step 6: On this stage I added my first light to the art using same technique when adding the first layer of shadow for same reason

Step 7: On this layee I added more light the art
Step 8: here I finally established my background by using a dark color and making a faint colours blurr brush strong on the background to give it a little bit of neon feel. I also added my finally touches of light on the art in general
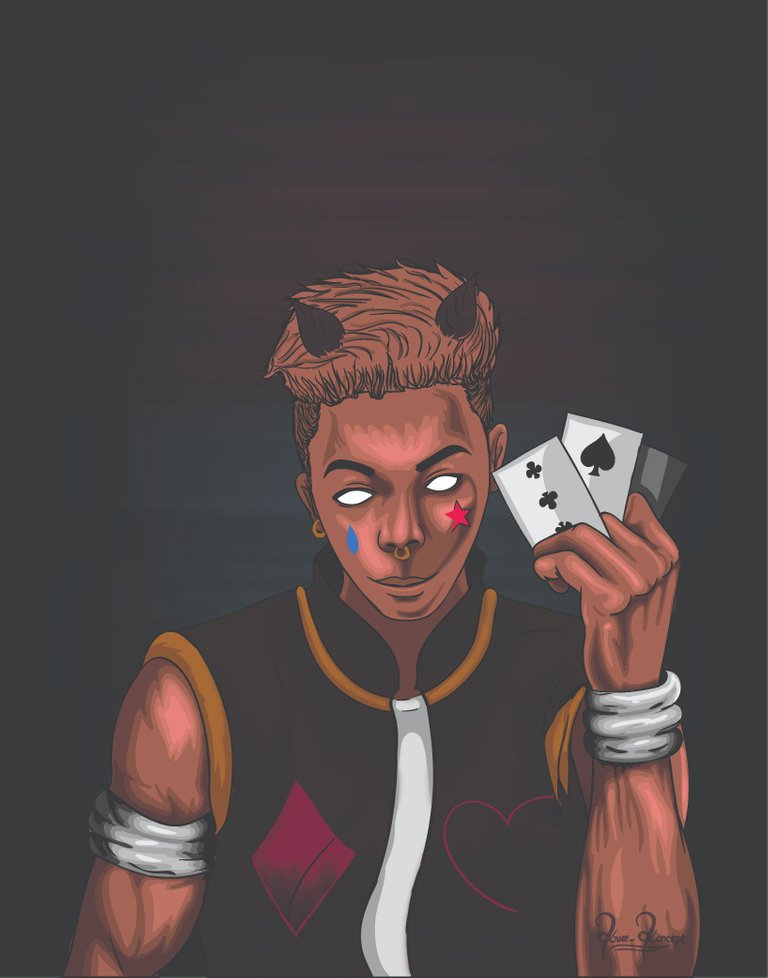
Step 9: finally Here I added my rim light to the art using a blurr brush effect and also added some styling to the art to give it a very light shimmering look and also added to the aesthetic of the whole art
___ THANK YOU FOR YOUR TIME ___
... Kindly share your thoughts in the comments session. Thank you.
Nice
Thank you 😊