Replacing A Torn Door Screen
A couple weeks ago my dog Biggie torn the door screen while chasing a bee inside the house and of course us humans had to replace that haha!
Replacing the door screen might seem like a hard task at first but trust me it's super easy and anyone can do it! You don't need any special tools or knowledge to do that, just time and patience! Let's get straight down to it
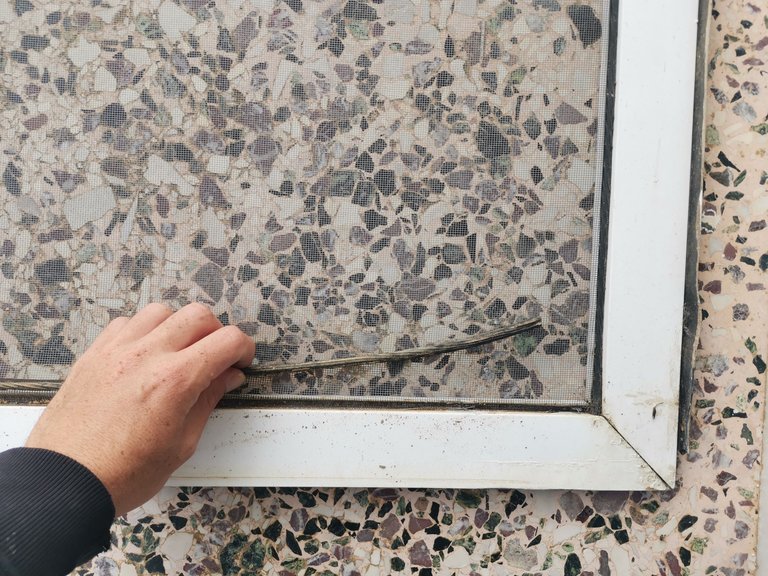
Step 1 - Remove the door and the torn screen
There are many ways to remove the screen door depending on the type of door you have. I have a sliding door so all I had to do was to grab the door, lift it up and voila, it was off the tracks!

Next you'll have to remove the torn screen. The best practice is to remove the side casings of the door so you can then remove the rubber bands inside much easier but in my case the casings were very old and couldn't be removed so the only way I could do this was by removing the bands directly.
You can remove them using a screwdriver but be careful not to apply too much pressure cause you might cut the bands or damage the casing.
After removing all the bands take out your old screen and get ready to install the new one!
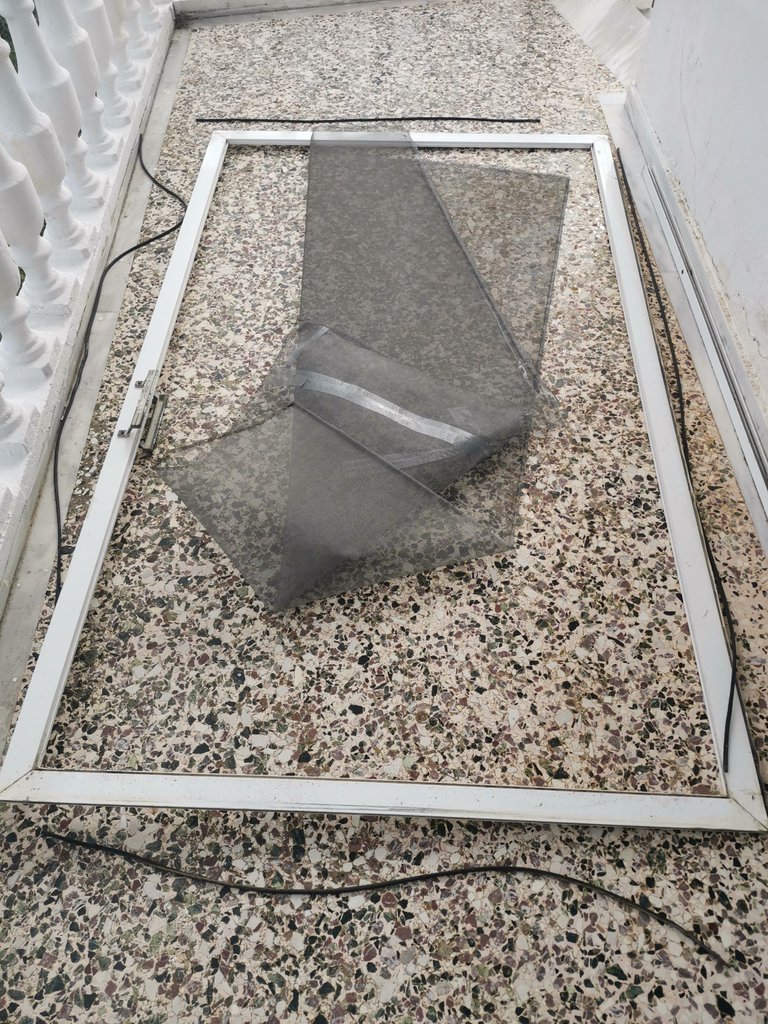
TIP : Always clean the dust in niches after removing the bands.
Step 2 - Install the new screen
This is the trickiest and hardest part of the job so you must be extra carefull.
Place the new screen on the door, make sure there's plenty of screen left in all 4 sides and get ready for the installation hehe!
We'll start from top so take the rubber band, place it on the niche and start applying light pressure with the screwdriver until it's inside. Be careful not to apply too much pressure or you'll end up tearing the bands apart and we don't want that!
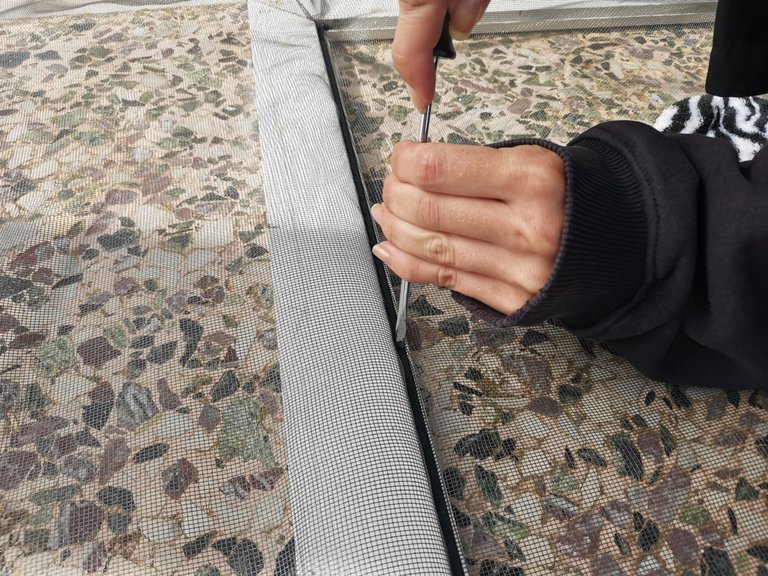
Next you should install the bands on the bottom but before you do that make sure you have streched your sceen a bit so it can look good when we're done!

Follow the same patern in the other 2 sides of the door
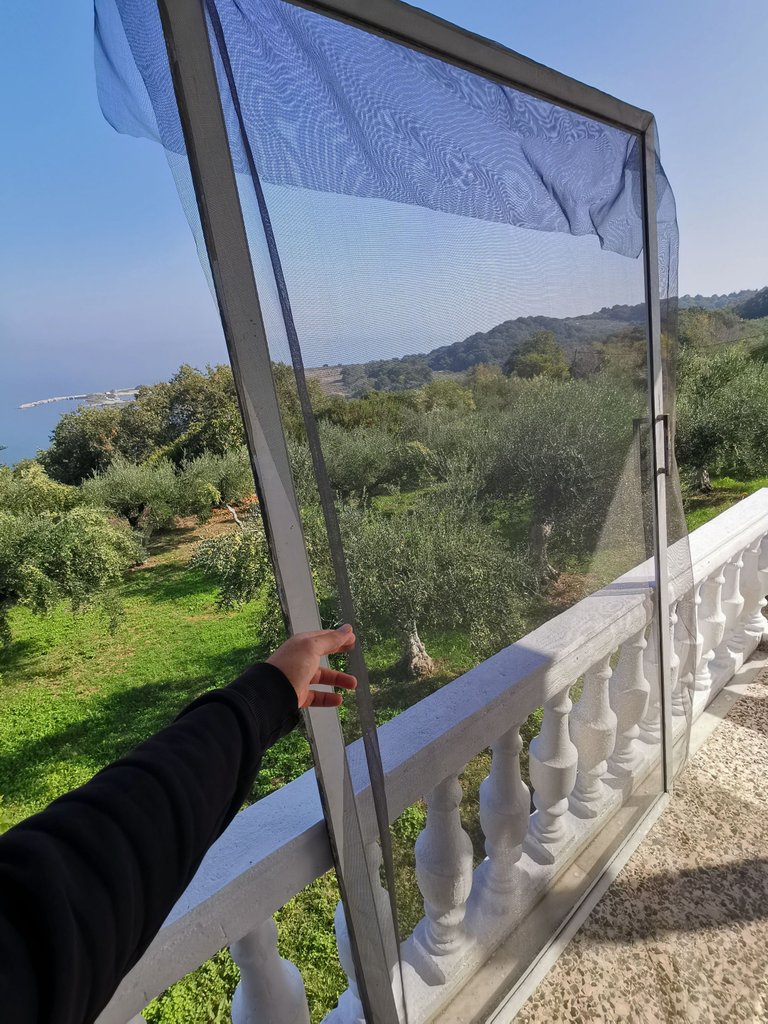
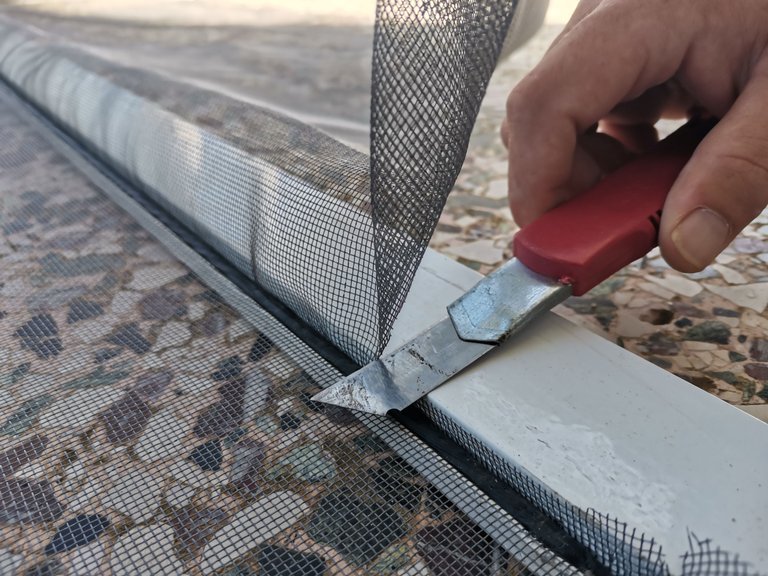
Step 3 - Cut the remaining screen
There's only one thing left to do after installing the rubber bands in all 4 sides of the doors and that's to cut the extra screen with a cutter.
You must be extra careful while cutting cause one wrong move might end up damaging the new screen. Take your time and do it right, don't rush!
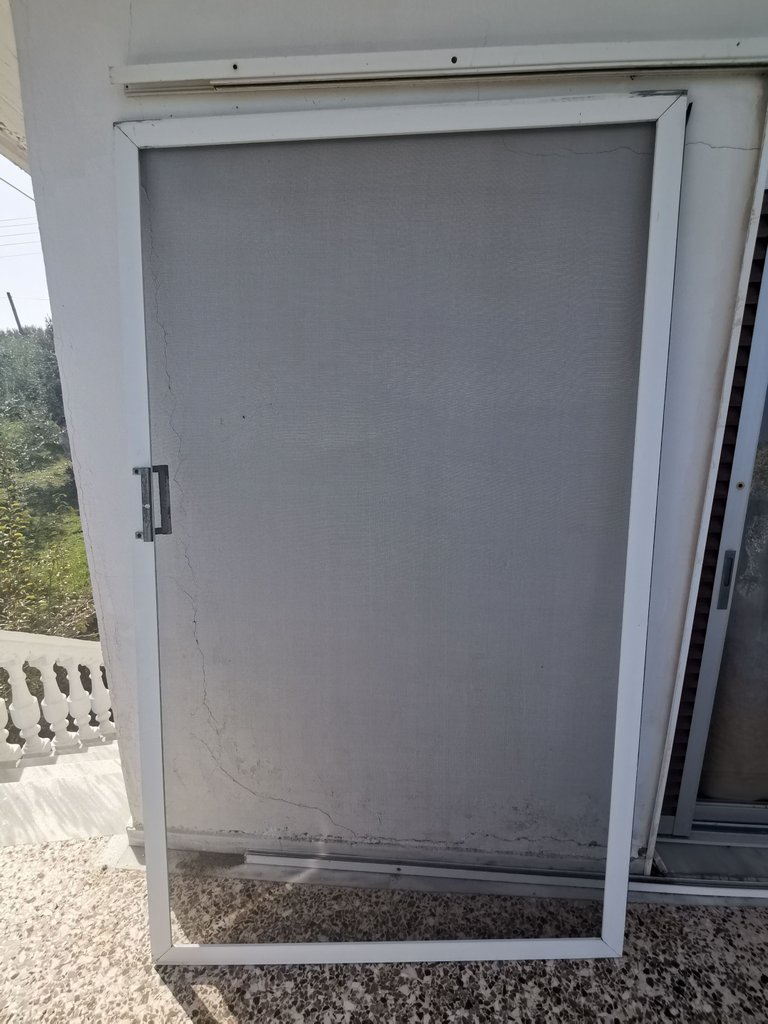
After cutting all extra screen place the door back to it's place and voila, you just replaced your old torn door screen! Still feeling proud about it hehehe!
Hope you enjoyed this DIY tutorial and trust me, it's WAY easier than it looks! I saved more than $40 by doing this myself, learnt something new and had a lot of fun during the proccess!
Cheers everyone and happy repairs hehe!
P.S. Excuse me for my English, not my native language and "repairs slang" is hard to grasp hehe!
Thank you all for your support
As a full-time Web 3 content creator, supporting my content allows me to keep doing what I love.
Much love to everyone and always have fun.
@Knowhow92
Find me Here
🏡 Hive: https://www.peakd.com/@knowhow92
☀️ Odysee : https://odysee.com/@knowhow92:d
🏡 Torum : https://www.torum.com/u/knowhow92
📹 Youtube : Knowhow92 on Youtube
📱 Twitter : https://twitter.com/theocharis_ch
📷 Instagram : https://www.instagram.com/haris_housos/
https://twitter.com/954434019499888641/status/1584846584000708609
The rewards earned on this comment will go directly to the people( @knowhow92 ) sharing the post on Twitter as long as they are registered with @poshtoken. Sign up at https://hiveposh.com.
Thank you for sharing this post on HIVE!
Your content got selected by our fellow curator elizacheng & you received a little thank you upvote from our non-profit curation initiative. Your post will be featured in one of our recurring curation compilations which is aiming to offer you a stage to widen your audience within the DIY scene of Hive.
Next time make sure to post / cross-post your creation within the DIYHub community on HIVE and you will receive a higher upvote!
Stay creative & hive on!
Dear @knowhow92,
May I ask you to review and support the new proposal (https://peakd.com/me/proposals/240) so I can continue to improve and maintain this service?
You can support the new proposal (#240) on Peakd, Ecency, Hive.blog or using HiveSigner.
Thank you!
Saving that that much money by doing something as simple as that is the smart choice. We also try to do a lot of ourselves, like painting the house ourselves for instance. It'll take longer as opposed to when we paid someone to do it, but is saves on labor costs.
Exactly! I find DIY repairs fun and also feel proud when I finish and looking at my work hehe!
@knowhow92 being the man of the house haha hell yeah!