Hermosa tarjeta para obsequiar en ocasiones importantes (ESP/ENG)
ESPAÑOL
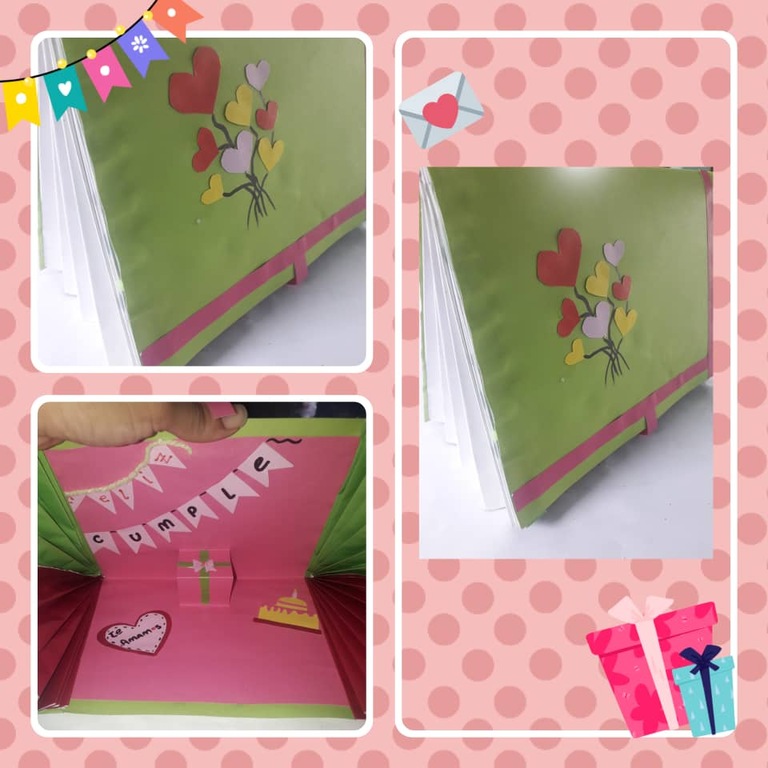
Hola mis amigos de #hivediy un gusto saludarles hoy quiero compartirles este hermoso detalle, ya que nunca pasan de moda, si no encuentras que obsequiar en un momento tan importante o especial este es uno de ellos, siempre van a estar allí para recordarnos lo mucho que nos quieren y lo importante que somos en la vida de alguien, así como también para darnos fuerza para seguir con nuestros planes y cumplir nuestras metas.
Son detalles muy sencillos pero le puede cambiar la vida a una persona solo con las hermosas palabras que están escritas allí. Es por ello que quise mostrarles esta hermosa tarjeta que además puedes agregarle un dulce o un accesorio pequeño; es muy sencilla de elaborar a continuación verán el paso a paso y los materiales que utilizaremos son los siguientes.
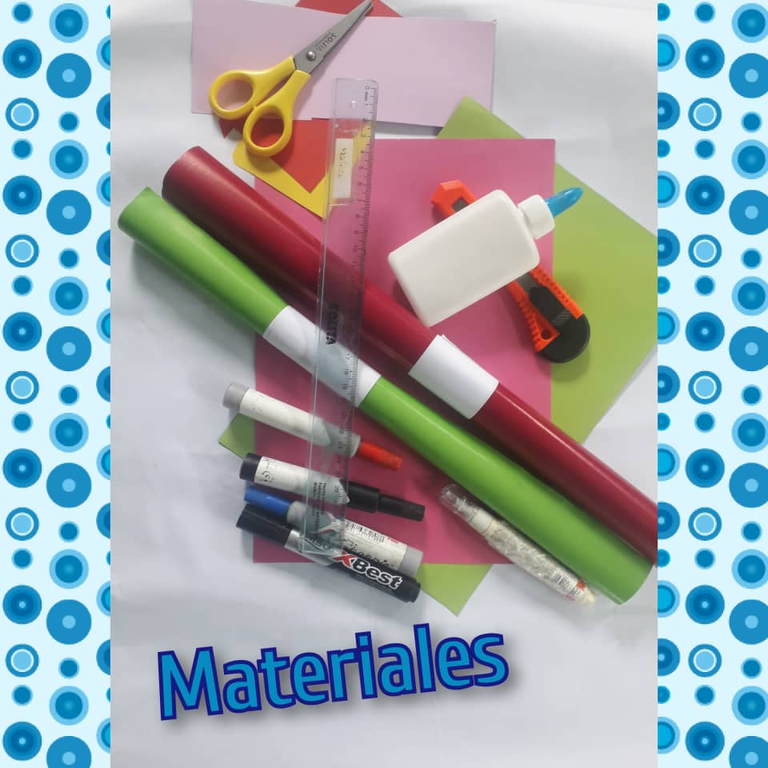
Materiales:
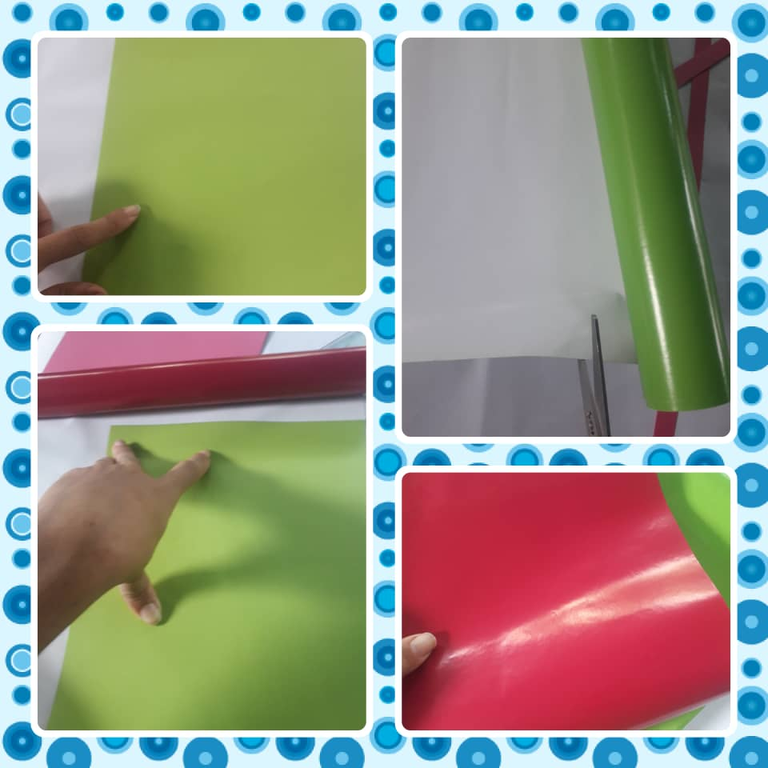
- Cartulina verde
- Cartulina rosa
- Retazos de cartulinas de diferentes colores (detalles)
- Pliego de papel lustrillo verde
- Pliego de papel lustrillo rosa
- Regla
- Tijera
- Exacto (opcional)
- Marcadores
- Pega blanca escolar
- Lápiz
Una vez que tengamos todos estos materiales iniciaremos con el paso a paso de esta hermosa creación.
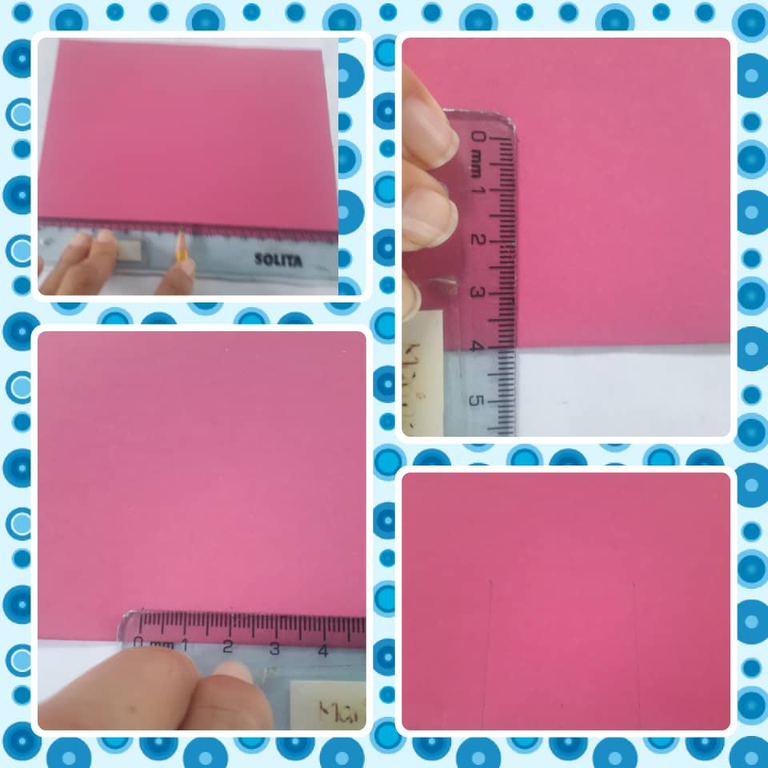
Las cartulinas con las que trabajaremos en este caso son tamaño oficio el tamaño puede variar según su gusto.
Paso 1:
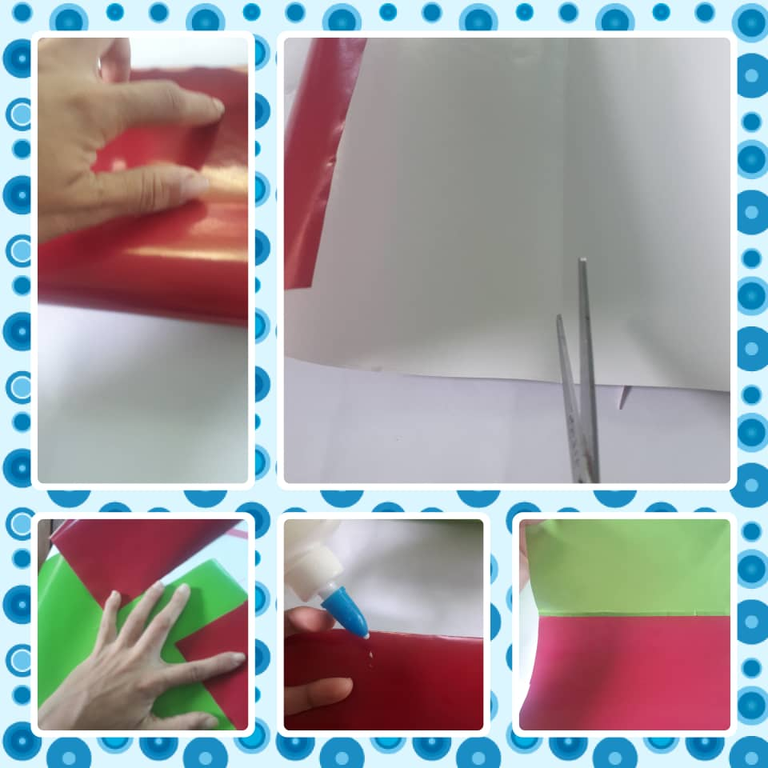
Tomamos la cartulina rosa esta es la que irá en la parte de adentro de la tarjeta marcamos con el lápiz un marco de 1cm y recortamos.
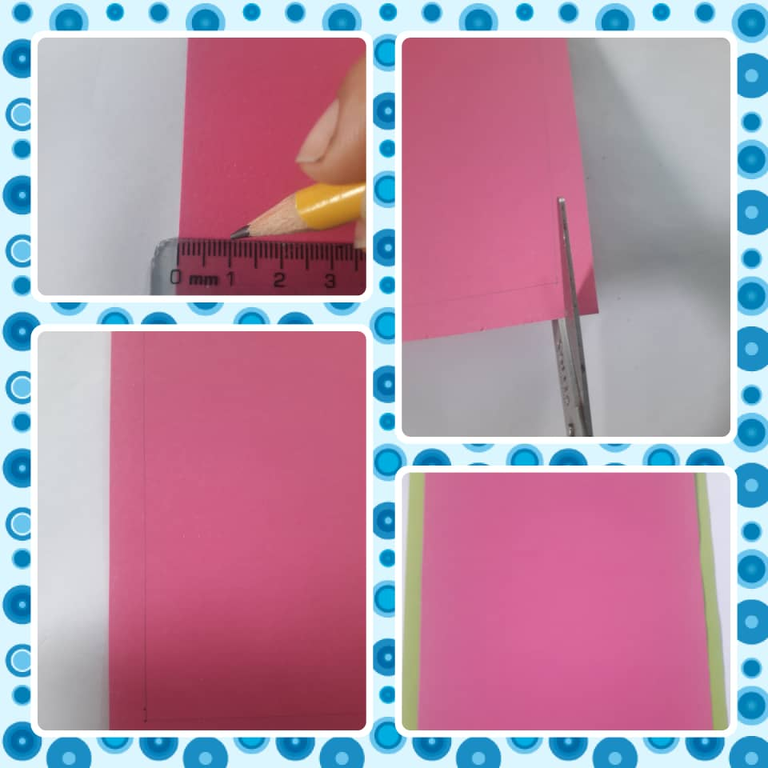
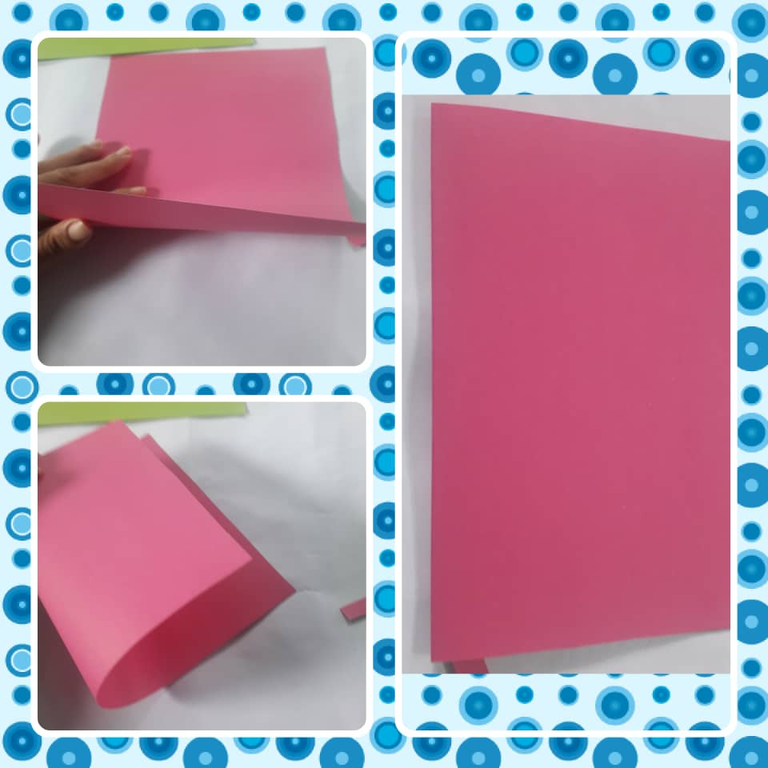
Paso 2:
Tomamos la cartulina ya cortada y la doblamos a la mitad.
Paso 3:
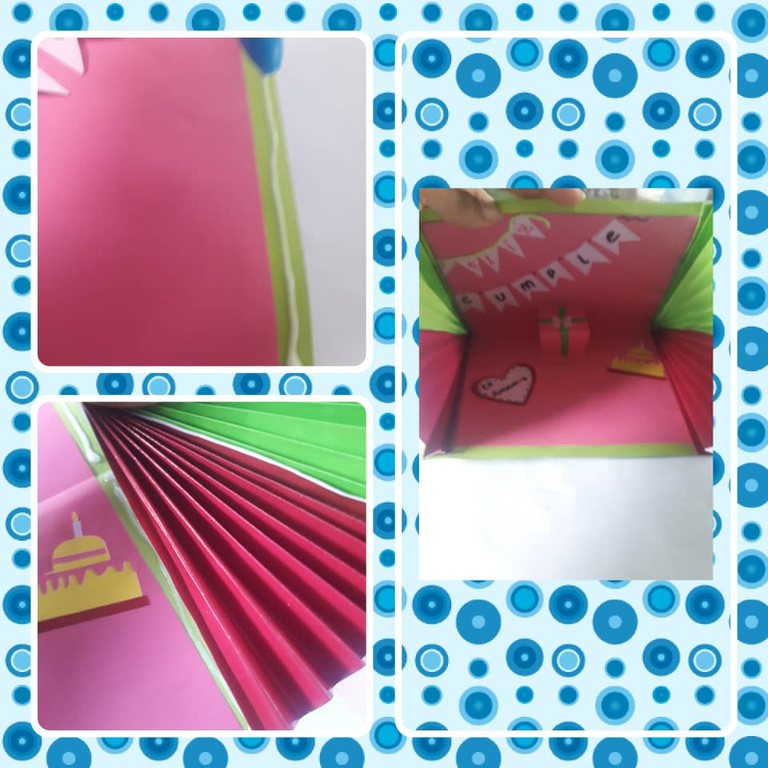
Nos colocamos hacia donde está doblada la cartulina y con una regla medimos la mitad y desde esa mitad partimos de 2cm por ambos extremos marcamos con el lápiz, y desde allí hacia la parte superior hacemos un trazo de 4cm en cada extremo quedando de esta forma.
Paso 4:
Una vez elaboradas las líneas de 4cm, proseguimos con la tijera a recortar justo en ambas líneas y doblamos hacia adentro.
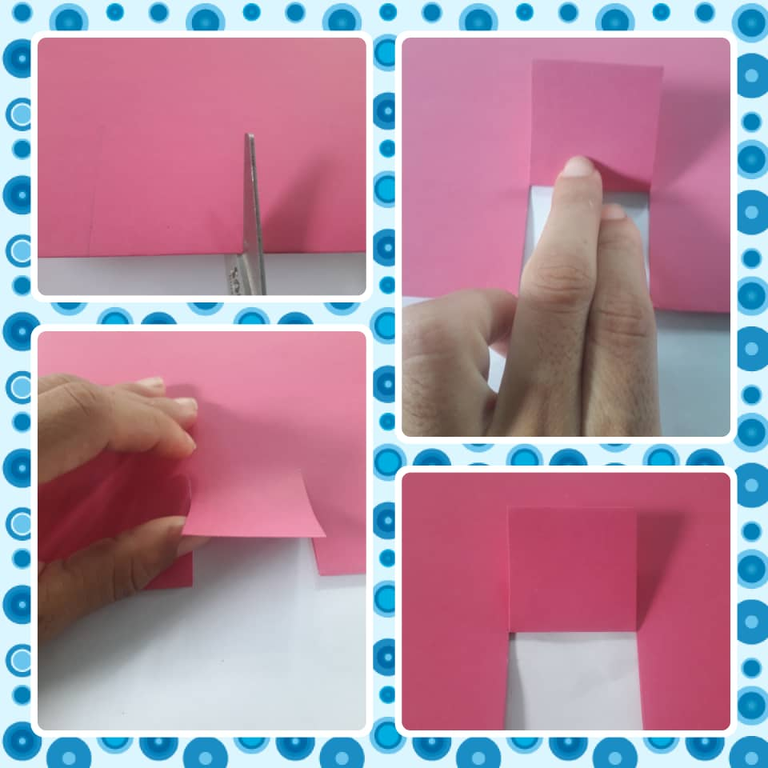
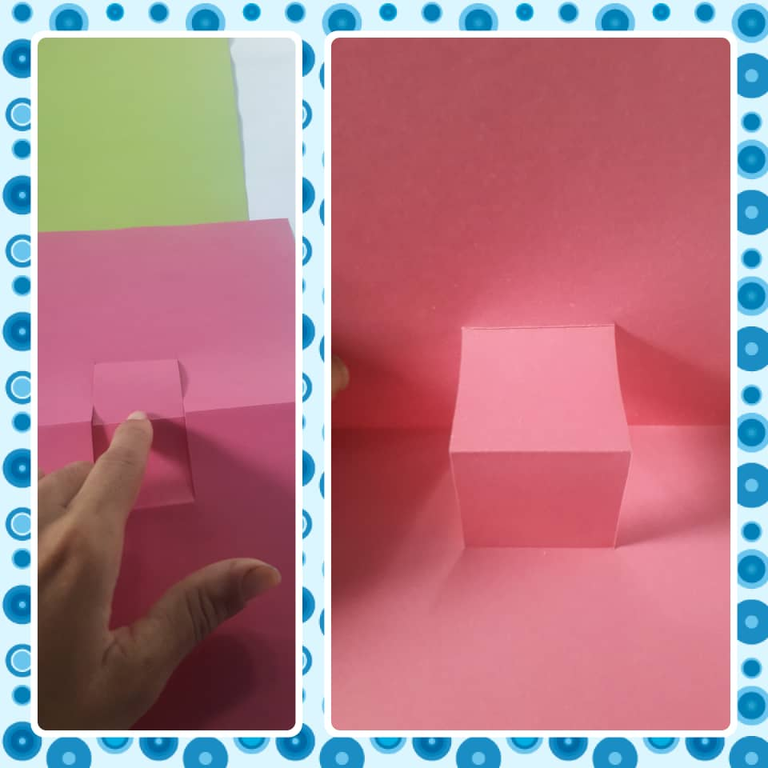
Paso 5:
Con la mano eso que ya cortamos le hacemos presión hacia adentro y volteamos la cartulina y nos quedaría de esta forma.
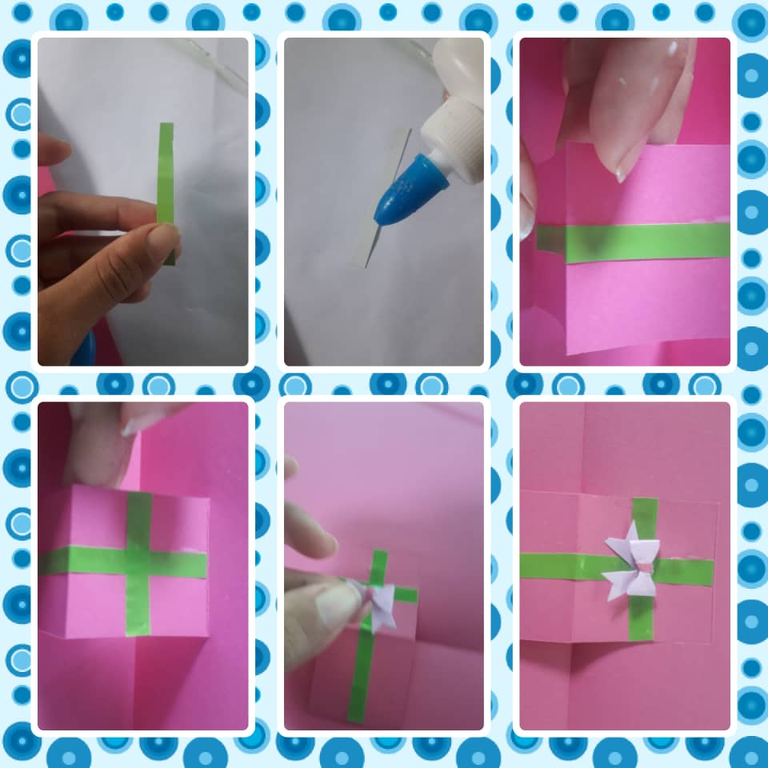
Paso 6:
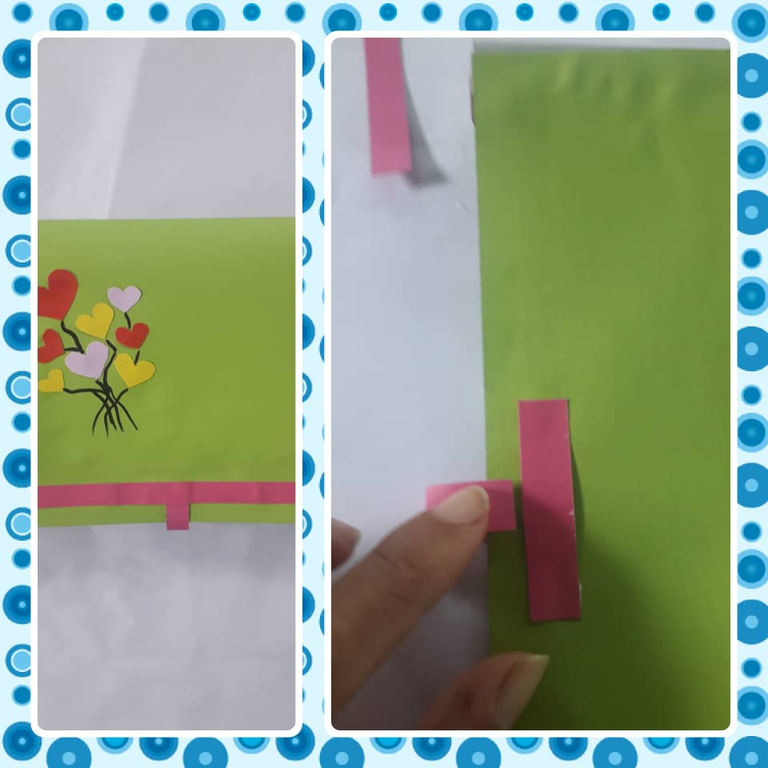
Con el papel lustrillo verde cortamos unas tiras 0,5 cm de grosor y la pegamos de esta forma en el cubo que nos quedó y luego le pegamos un lacito yo particularmente lo elaboré de cartulina ustedes pueden hacerlo con cinta.
Paso 7:
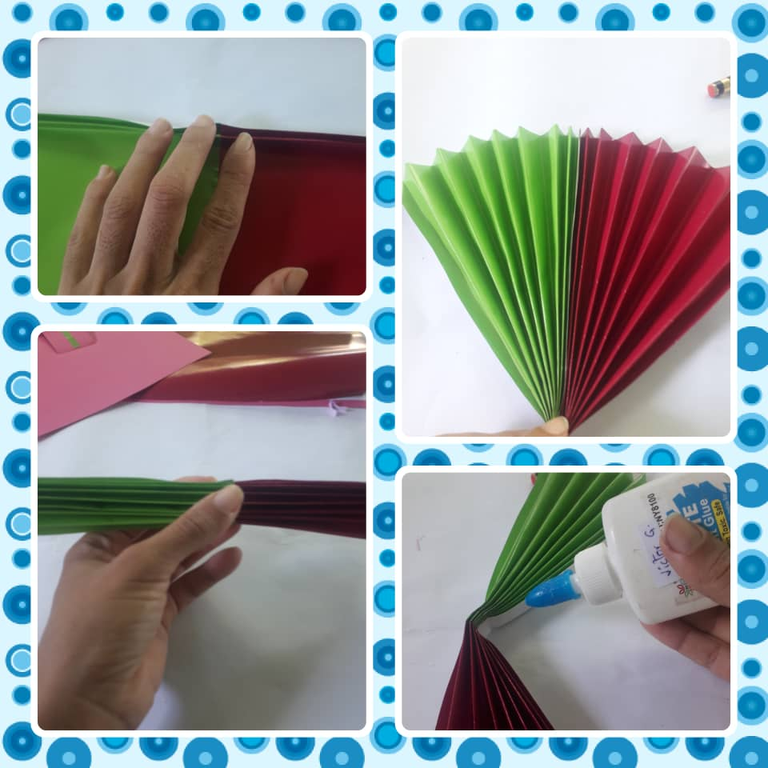
Tomamos la cartulina verde como referente para marcar en el papel lustrillo verde y el rosa y recortamos.
Paso 8:
Una vez cortado ambos papeles los doblamos a la mitad y cortamos nuevamente y así pegar una mitad verde con una rosa quedándonos de esta forma. (yo lo quise elaborar de esta manera para que quede bicolor pero si usted lo desea unicolor corte el papel tamaño oficio).
Paso 9:
Luego de pegar el papel procedemos a hacer un acordeón colocando el papel en forma horizontal.
Paso 10:
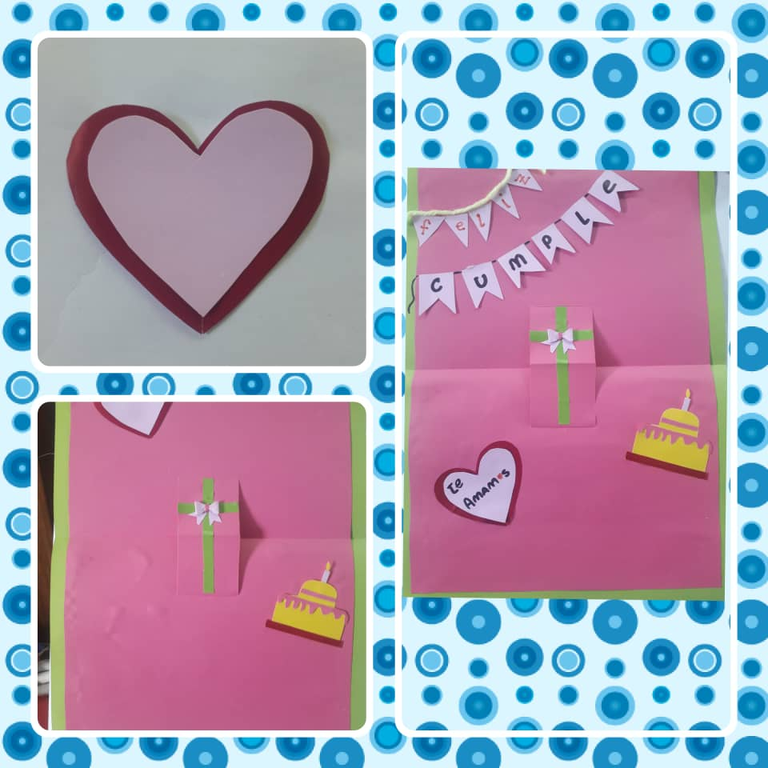
Procedemos a colocarle los detalles a la tarjeta eso queda a su imaginación y gusto yo lo hice de esta forma.
Paso 11:
En ambos extremos de la tarjeta pegamos el acordeón que hicimos.
Paso 12:
Decoramos la parte externa de la tarjeta eso el libre puede colocarle lo que usted desee de acuerdo a la ocasión yo coloqué unos globos.
Buenos mis amigos me despido espero les haya gustado es sencilla pero muy significativa para os que aprecian estas cosas. Saludos nos vemos pronto Dios me los bendiga.
Las fotos son de mi propiedad tomada con mi teléfono SAMSUNG J6, modificando las fotos con el programa Foto Collage Grid Art, y traducido con el programa Deelp traductor versión gratis.
ENGLISH
Hello my friends of #hivediy a pleasure to greet you today I want to share with you this beautiful detail, because they never go out of fashion, if you do not find what to give in such an important or special moment this is one of them, they will always be there to remind us how much they love us and how important we are in someone's life, as well as to give us strength to continue with our plans and accomplish our goals.
They are very simple details but they can change a person's life just with the beautiful words that are written there. That is why I wanted to show you this beautiful card that you can also add a candy or a small accessory; it is very simple to elaborate below you will see the step by step and the materials that we will use are the following.
Materials:
- Green card stock
- Pink cardboard
- Pieces of cardboard of different colors (details)
- Sheet of green lustrillo paper
- Sheet of pink lustrillo paper
- Ruler
- Scissors
- Exact (optional)
- Markers
- White school glue
- Pencil
Once we have all these materials we will start with the step by step of this beautiful creation.
The cardstock we will work with in this case are office size the size can vary according to your taste.
Step 1:
We take the pink cardboard this is the one that will go on the inside of the card we mark with the pencil a 1cm frame and cut out.
Step 2:
We take the already cut cardboard and fold it in half.
Step 3:
We stand towards where the cardboard is folded and with a ruler we measure the half and from that half we start from 2cm at both ends we mark with the pencil, and from there towards the top we make a 4cm stroke at each end remaining in this way.
Step 4:
Once the 4cm lines are drawn, we proceed with the scissors to trim right on both lines and fold inward.
Step 5:
With the hand that we already cut we make pressure inward and flip the cardboard and we would be like this.
Step 6:
With the green lustrillo paper we cut some strips 0.5 cm thick and glue it in this way in the bucket that we had left and then we glue a bow I particularly elaborated it with cardboard you can do it with tape.
Step 7:
We take the green cardstock as a reference to mark on the green lustrillo paper and the pink one and cut out.
Step 8:
Once both papers are cut, fold them in half and cut again and glue a green half with a pink half (I wanted to do it this way to make it bicolor but if you want it unicolor, cut the paper in office size).
Step 9:
After gluing the paper proceed to make an accordion by placing the paper horizontally.
Step 10:
We proceed to place the details on the card that is up to your imagination and taste I did it this way.
Step 11:
On both ends of the card we glue the accordion we made.
Step 12:
We decorate the outside of the card that free you can place whatever you want according to the occasion I placed some balloons.
Good bye my friends I hope you liked it is simple but very meaningful for those who appreciate these things. Greetings see you soon God bless you.
The photos are my own taken with my phone SAMSUNG J6, modifying the photos with the program Foto Collage Grid Art, and translated with the program Deelp translator free version.
the artwork does looks great, thanks for sharing.
De nada me apasiona hacerlo
Muy sencilla y práctica de hacer, gracias por compartirlo, saludos.
Gracias son detalles sencillos pero muy significativos.
https://leofinance.io/threads/view/hive-130560/re-leothreads-41ckaxsy
https://twitter.com/hivediy47901/status/1706416290083000766