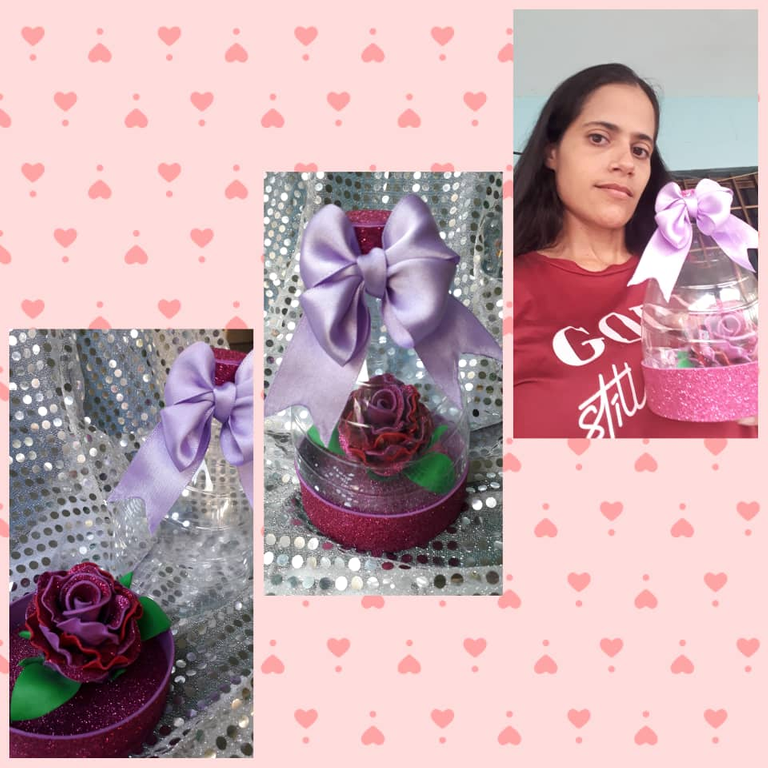
(ESP/ING) Hermoso detalle para un ser querido, elaborado con una Botella plástica y Foami.
ESPAÑOL
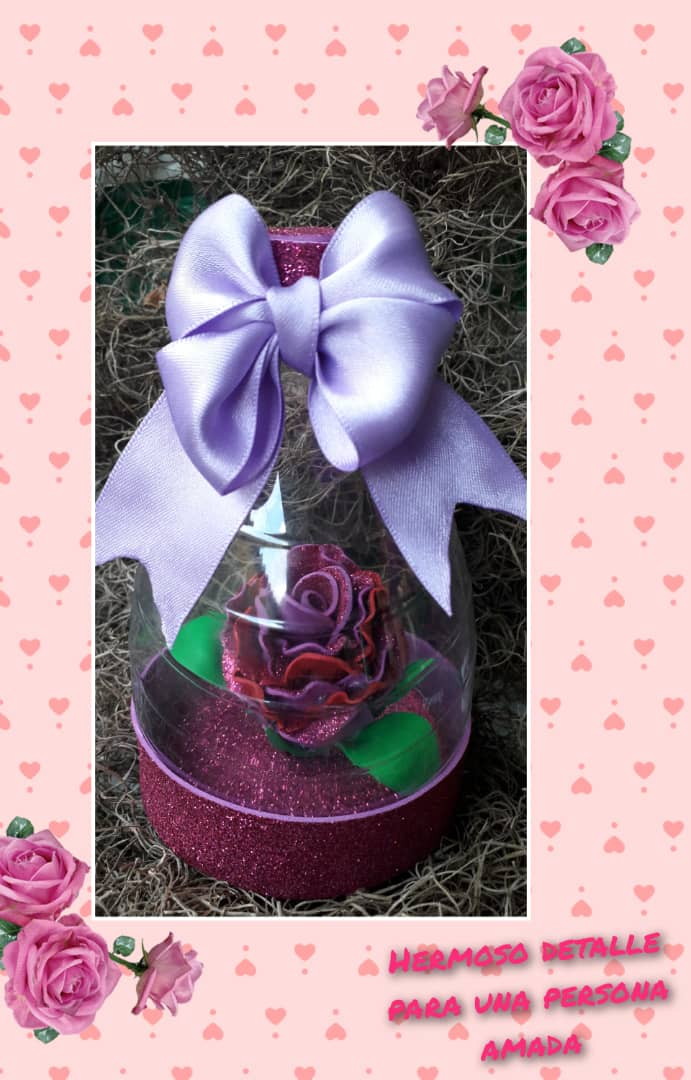
Hola mis amigos de #HIVEDIY quiero mostrarles el día de hoy un lindo detalle que elaboré para dárselo a una persona a la que aprecio y quiero mucho.
Este hermoso presente se los comparto ya que es una idea muy fácil y económica; se elabora principalmente con una botella de reciclaje y pocos materiales, pueden hacer estos presentes para regalárselos a su pareja, madre, hijos, algún familiar y amigos; yo particularmente le agregué una rosa ustedes mis amigos pueden colocarle aparte de la rosa, dulces como chocolates, galletas, mini suspiros, caramelos o accesorios como anillos, zarcillos, pulseras. Entre otros. En fin los presentes que a ustedes se les ocurra. Además pueden decorarlos a su gusto, agregarles más detalles en la parte inferior como cintas, piedritas, botones, florecitas etc.
Para su elaboración les muestro a continuación los siguientes materiales:
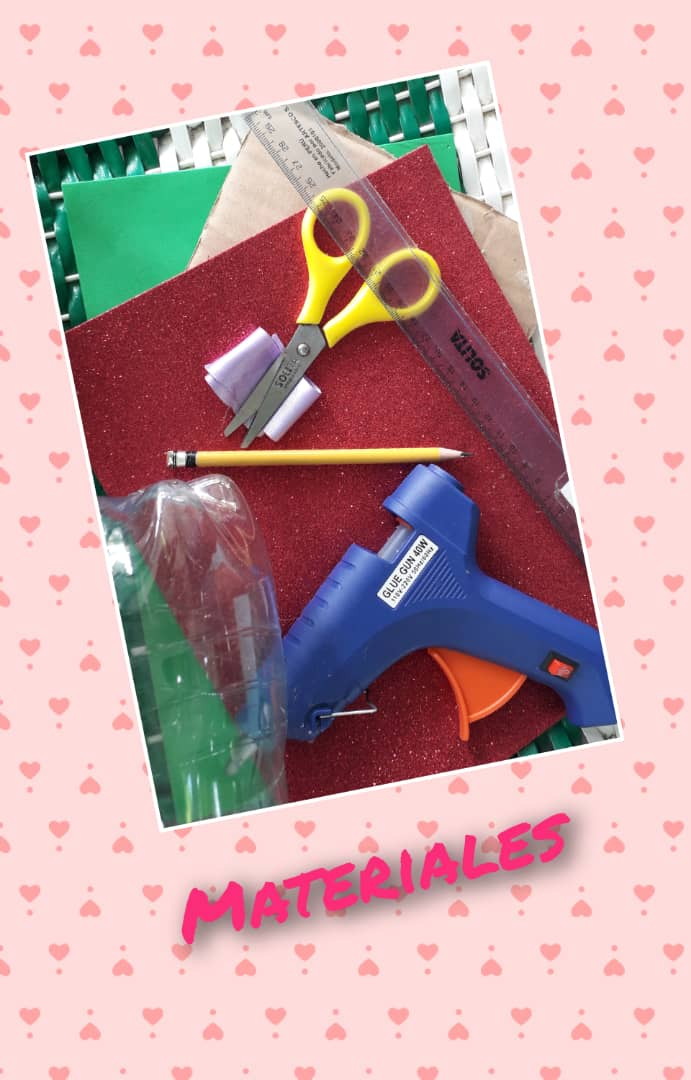
Materiales:
- 1 Botella de refresco de 2 litros
- 2 Foamis (color de su preferencia)
- 1 Pistola de silicón
- 1 Barra de Silicón
- ½ Metro de Cinta de Raso (color Opcional)
- Tijera
- Regla
- Lápiz
Bueno mis amigos después de mostrarles los materiales con los que trabajaremos procedemos a enseñarles el paso a paso de nuestra creación:
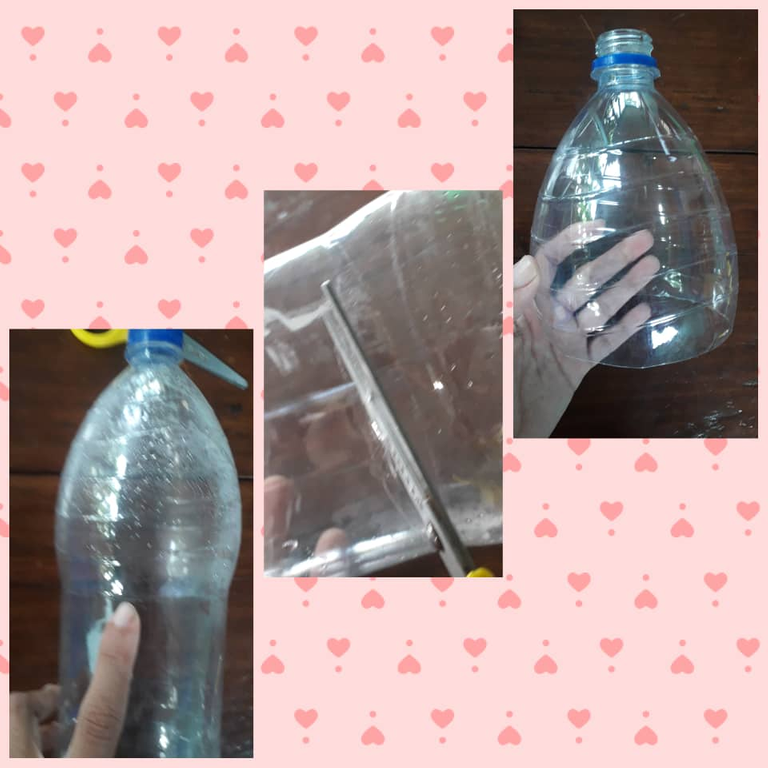
Paso 1:
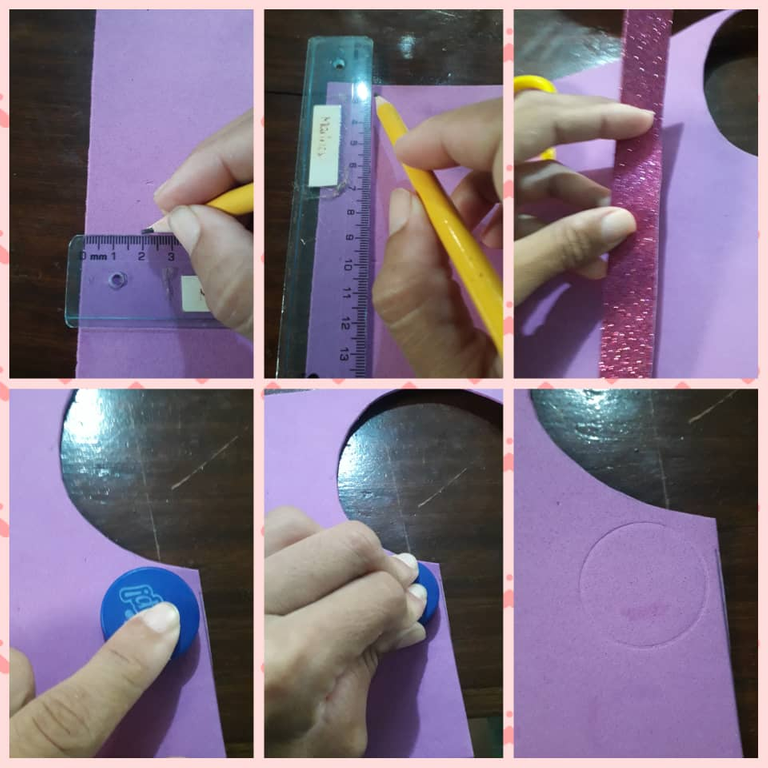
Tomamos la botella plástica y en la parte superior de la botella se observa una línea por dónde cortaremos la botella, si su botella no la tiene cortamos midiendo con una regla desde el pico de la botella 16cm hasta abajo.
Paso 2:
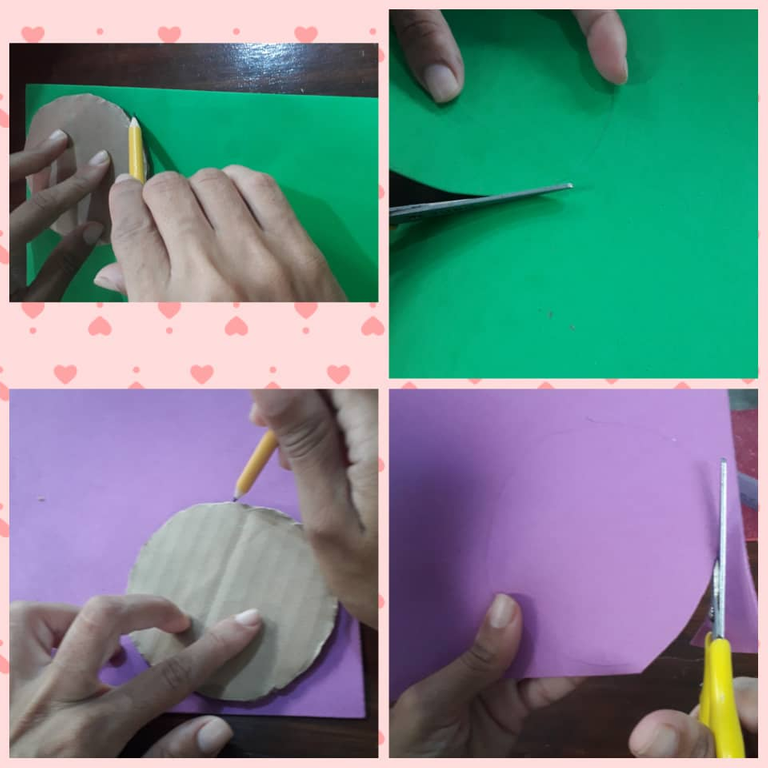
Una vez cortada la botella, tomamos un pedazo de cartón y marcamos la parte inferior de la botella que cortamos quedando un circulo, y procedemos a cortar.
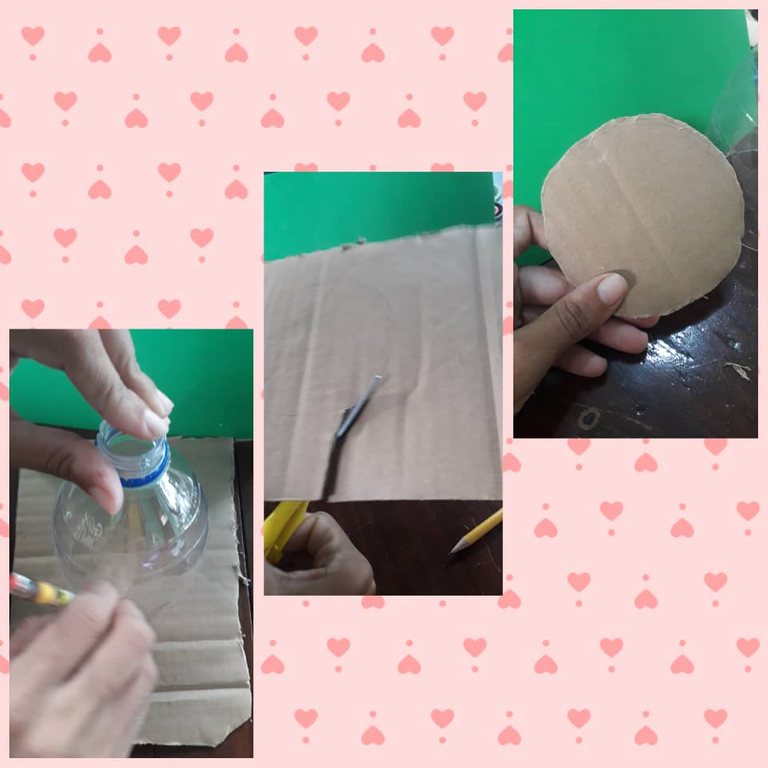
Paso3:
Luego tomamos el cartón y marcamos en el foami verde y el escarchado y recortamos.
Paso 4:
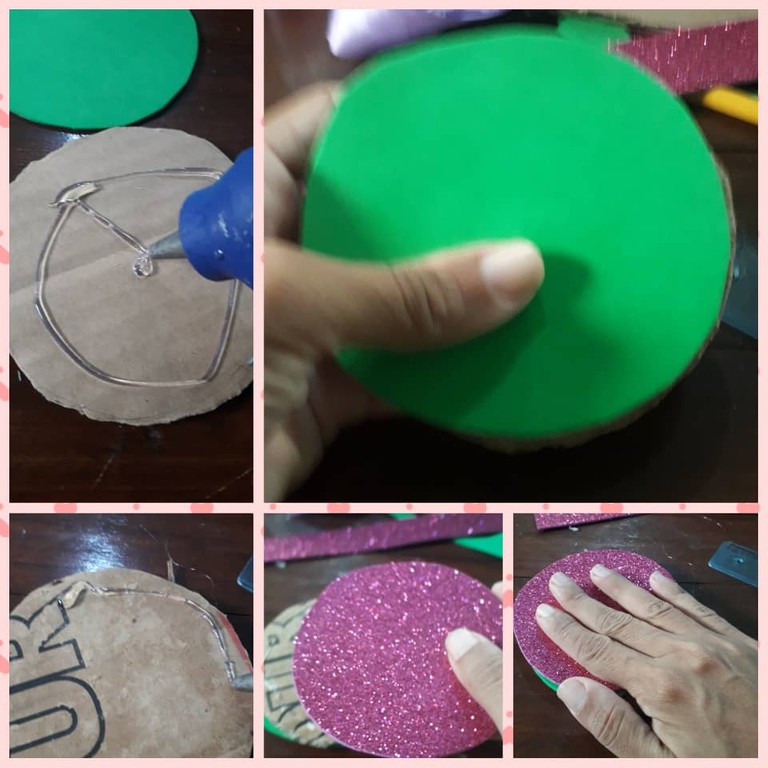
Tomamos los dos círculos de foami ya recortados y pegamos con silicón en ambos lados del cartón.
Paso 5:
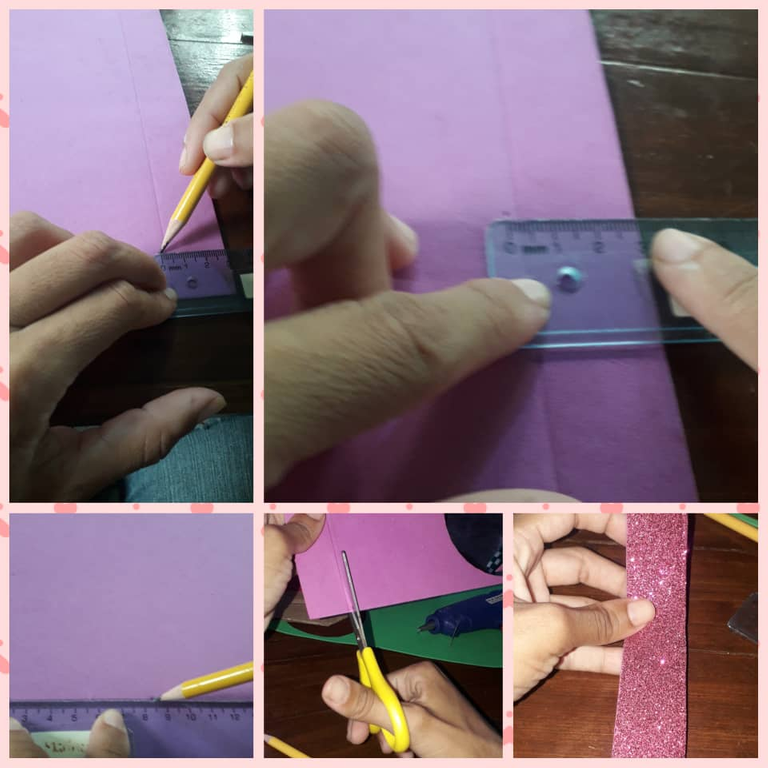
Con la regla medimos una tira de foami de 3cm de ancho y 35cm de largo aproximadamente.
Paso 6:
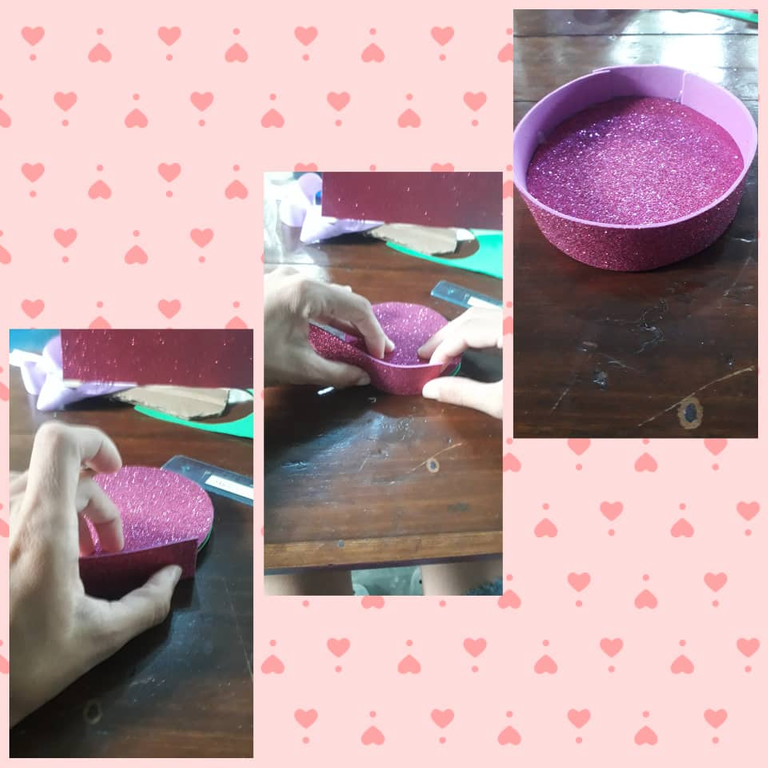
Pegamos la tira de foami por todo el borde del círculo quedando de esta forma.
Paso 7:
Cortamos una tira de foami de 2cm de ancho y 12cm de largo, con la tapa marcamos un circulo en el foami y procedemos a cortar.
Paso 8:
Una vez teniendo la tira y el círculo de foami ya cortados procedemos a pegar en la tapa de la botella.

Paso 9:
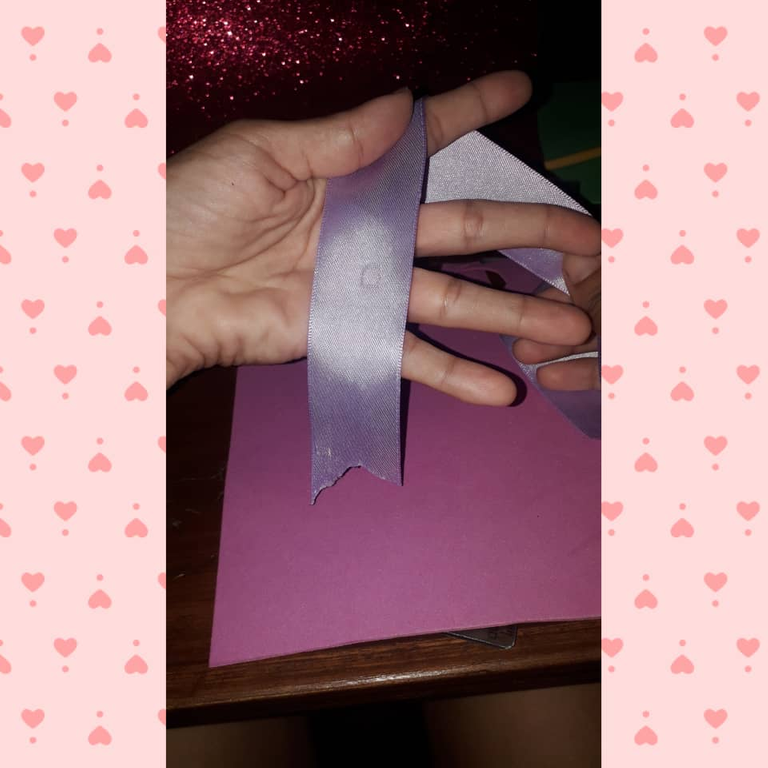
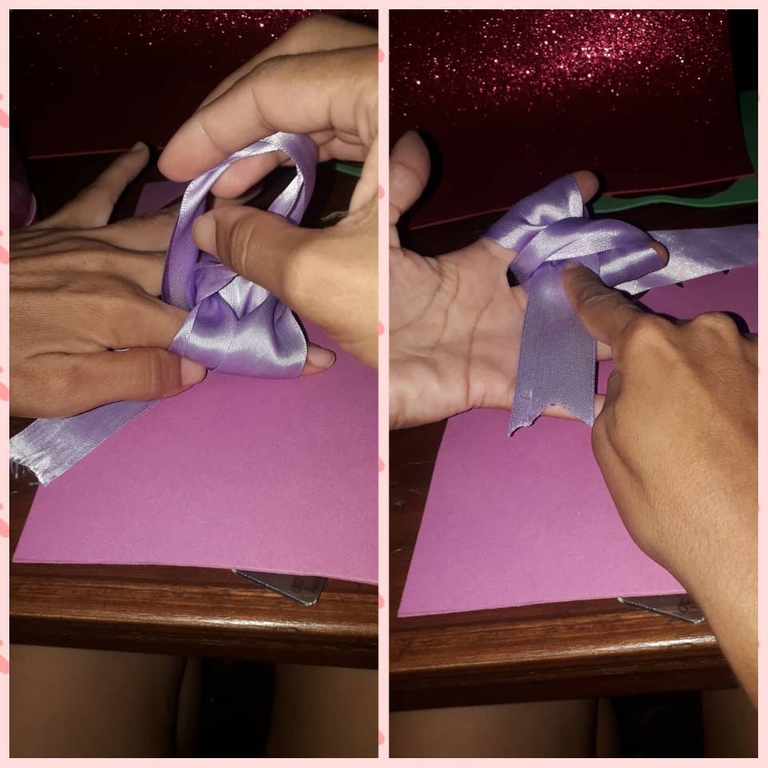
Hacemos para decorar un hermoso lazo que haremos con ½ metro de cinta de raso que aquí les muestro unas imágenes de como lo elaboré:
- Coloco la cinta en mi mano de esta forma:
- Entrelazo mi cinta entre los dedos índice y medio dando dos vueltas.
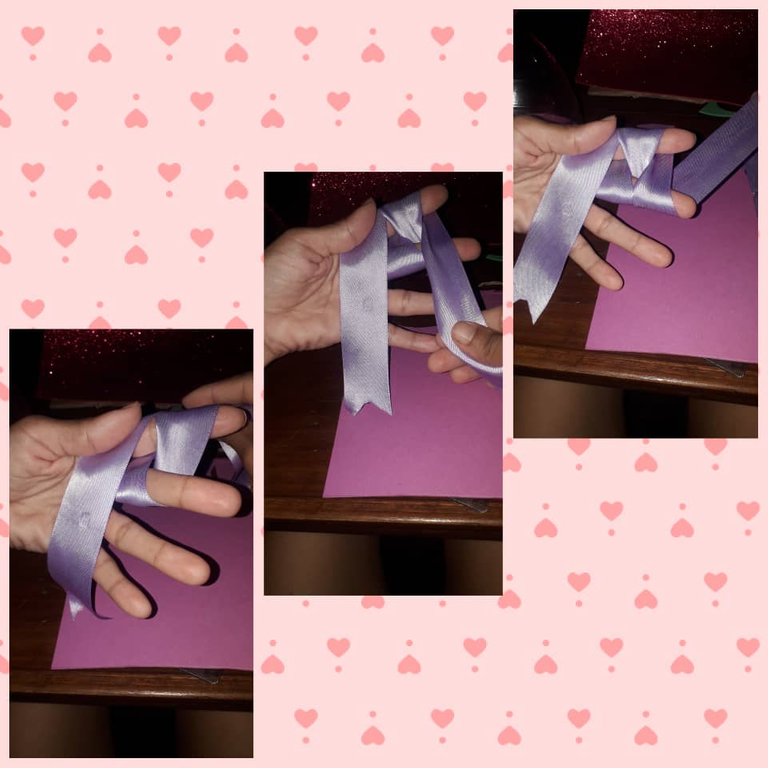
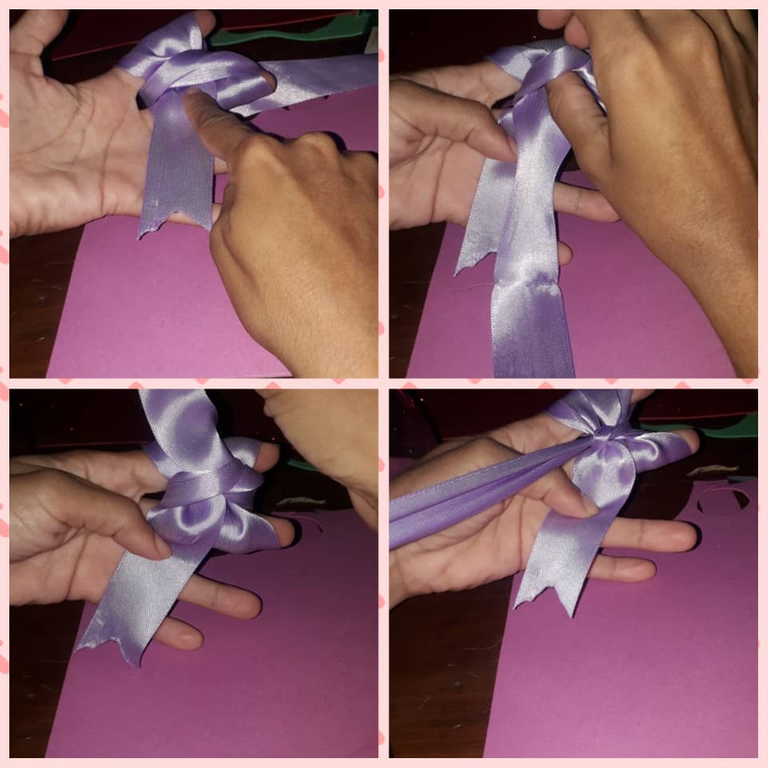
- Luego pasamos la cinta por arriba y la metemos en medio de mis dedos en la parte final como se muestra en la imagen:
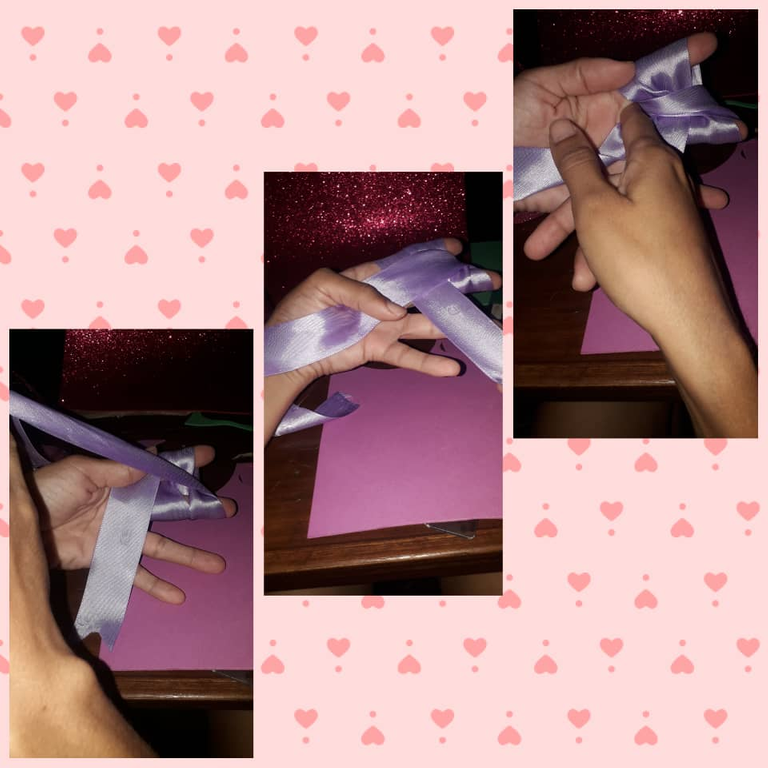
- La saco por el otro lado poco a poco para no desarreglar la cinta y la llevamos a la parte superior de mi mano
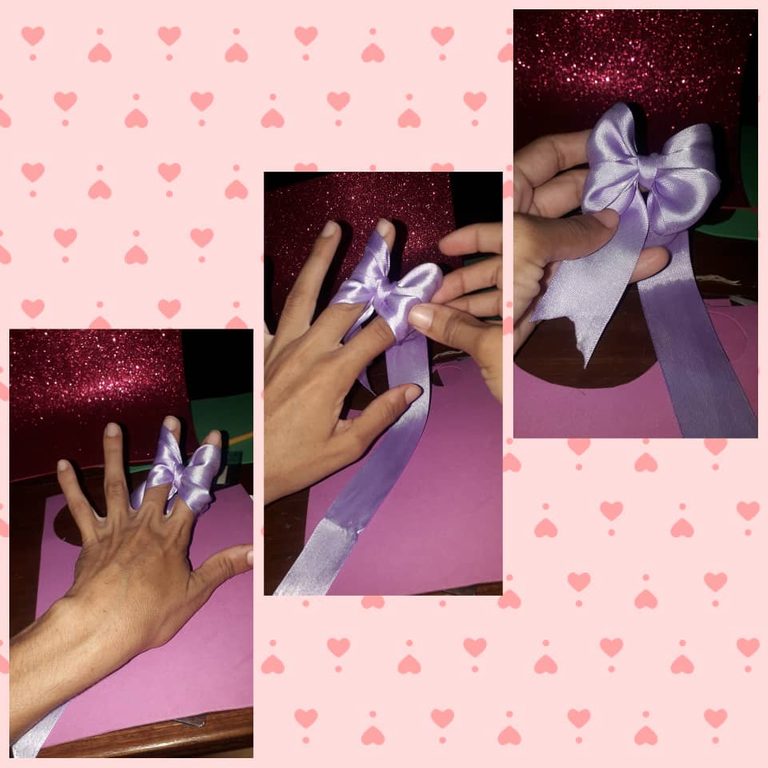
- Procedemos a hacer un nudo pasando la cinta de esta forma y ajustamos.
- Poco a poco retiramos la cinta de nuestros dedos y así tendremos este lazo hermoso.
Paso 10:
Pegamos el lazo en la parte superior de la botella.
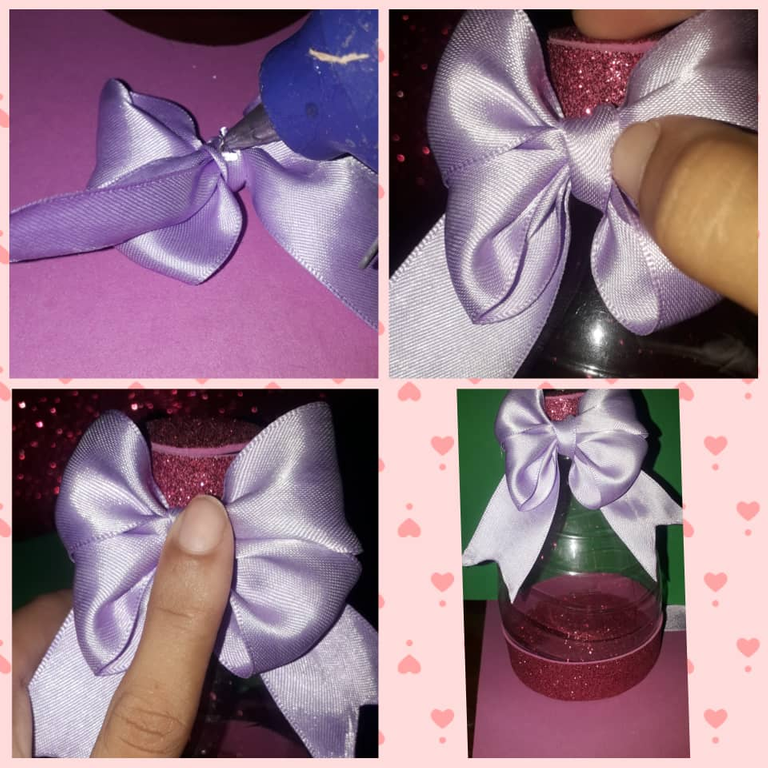
Paso 11:
Colocamos una rosa dentro de este detalle, puede ser la que usted desee, yo coloque esta de foami pero usted puede colocar una natural, plástica o de tela.
Bueno mis amigos espero les haya gustado mi creación hasta otra oportunidad. Dios los bendiga.

Las fotos son de mi propiedad tomadaS con mi teléfono SAMSUNG J6, modificando las fotos con el programa Foto Collage Grid Art y traducido con el programa Deelp traductor versión gratis.
ENGLISH
Hello my friends of #HIVEDIY I want to show you today a nice detail that I made to give it to a person that I appreciate and love very much.
This beautiful present I share with you because it is a very easy and economical idea; it is made mainly with a recycling bottle and few materials, you can make these presents to give them to your partner, mother, children, a relative and friends; I particularly added a rose you my friends can place apart from the rose, sweets like chocolates, cookies, mini sighs, candies or accessories such as rings, earrings, bracelets. Among others. In short, whatever gifts you can think of. You can also decorate them as you like, add more details at the bottom, such as ribbons, stones, buttons, flowers, etc.
For its elaboration I show you the following materials:
Materials:
1 bottle of soda
1 2 liter soda bottle
2 Foamis (color of your choice)
1 Silicone gun
1 Silicone Stick
½ Meter of Satin Ribbon (Optional color)
Scissors
Ruler
Pencil
Well my friends after showing you the materials we will work with we will proceed to show you the step by step of our creation:
Step 1:.
We take the plastic bottle and at the top of the bottle there is a line where we will cut the bottle, if your bottle does not have it we cut measuring with a ruler from the top of the bottle 16cm to the bottom.
Step 2:.
Once the bottle is cut, we take a piece of cardboard and mark the bottom of the bottle that we cut leaving a circle, and proceed to cut.
Step3:
Then we take the cardboard and mark on the green foami and frosting and cut out.
Step 4:
We take the two foami circles already cut out and glue with silicone on both sides of the cardboard.
Step 5:
With the ruler we measure a strip of foami 3cm wide and 35cm long approximately.
Step 6:.
We glue the foami strip all around the edge of the circle looking like this.
Step 7:
We cut a strip of foami 2cm wide and 12cm long, with the lid we mark a circle on the foami and proceed to cut.
Step 8:.
Once we have the strip and the circle of foami already cut we proceed to glue on the bottle cap.
Step 9:.
We make to decorate a beautiful bow that we will do with ½ meter of satin ribbon that here I show you some images of how I elaborated it:
- I place the ribbon on my hand like this:
- I intertwine my ribbon between my index and middle fingers making two wraps.
- Then we pass the ribbon over the top and tuck it in between my fingers at the end as shown in the image:
- I pull it out the other side little by little so as not to mess up the ribbon and we bring it to the top of my hand.
- We proceed to tie a knot passing the ribbon this way and adjust.
- Little by little we remove the ribbon from our fingers and we will have this beautiful bow.
Step 10:
We glue the ribbon on the top of the bottle.
Step 11:.
We place a rose inside this detail, it can be the one you want, I placed this one made of foami but you can place a natural, plastic or fabric one.
Well my friends I hope you liked my creation until another opportunity. God bless you.
The photos are my own taken with my phone SAMSUNG J6, modifying the photos with the program Foto Collage Grid Art and translated with the program Deelp translator free version.
¡Felicidades! Esta publicación obtuvo upvote y fue compartido por @la-colmena, un proyecto de Curación Manual para la comunidad hispana de Hive que cuenta con el respaldo de @curie.
Si te gusta el trabajo que hacemos, te invitamos a darle tu voto a este comentario y a votar como testigo por La Colmena.
Si quieres saber más sobre nuestro proyecto, te invitamos a acompañarnos en nuestro servidor de Discord.
Congratulations @kelvimari2023! You have completed the following achievement on the Hive blockchain And have been rewarded with New badge(s)
Your next target is to reach 1750 upvotes.
You can view your badges on your board and compare yourself to others in the Ranking
If you no longer want to receive notifications, reply to this comment with the word
STOPCheck out our last posts: