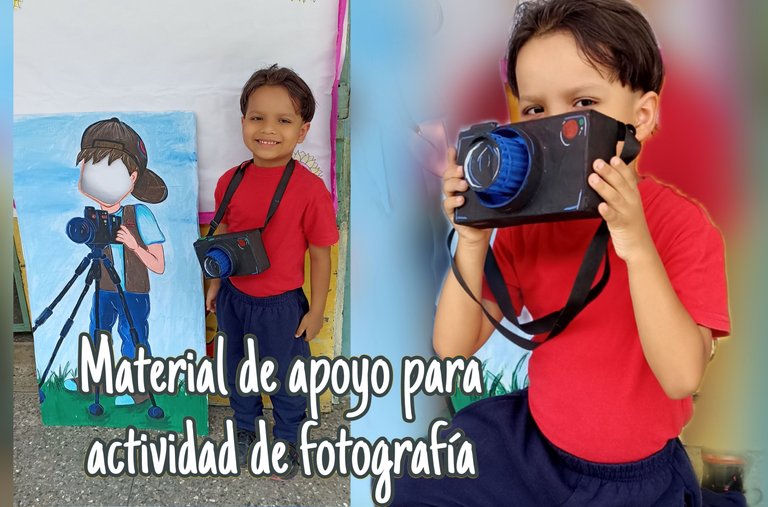
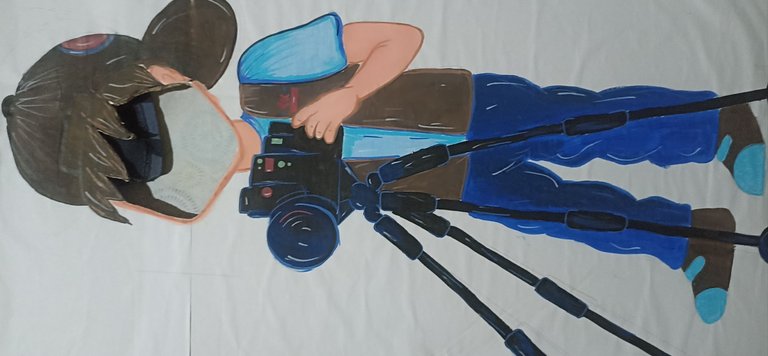
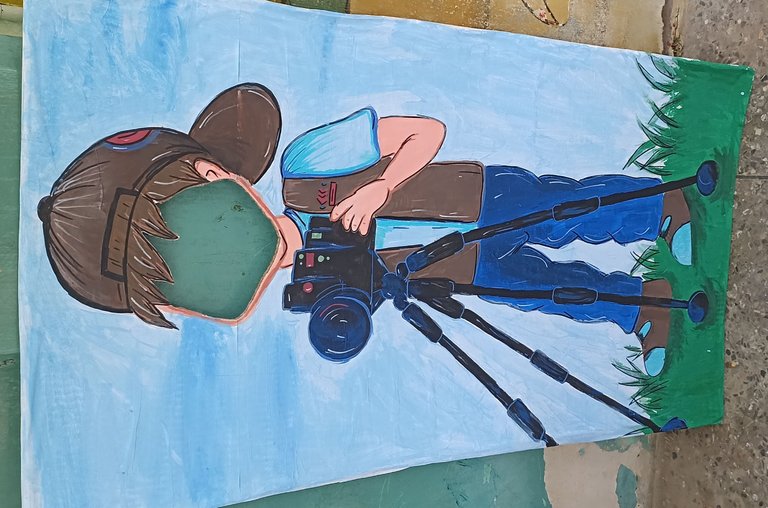
Material de apoyo para actividad de fotografía en la escuela- Pancarta y camara hecha con material reciclado
Hey queridos amigos de Hive
Espero que se encuentren súper bien esta noche. He estado ausente últimamente porque mi hijo tenía muchísimas tareas pendientes y, además, por cortes de electricidad se me ha hecho muy difícil culminar todo y publicar al mismo tiempo. Nos quedamos casi 8 horas sin luz, así que el poco tiempo que teníamos con electricidad lo teníamos que aprovechar para hacer todo lo que debíamos. ¡Por fin hoy cerramos estas partes de la exposición!
Hey dear friends of Hive
I hope you are doing super well tonight. I've been absent lately because my son had a lot of pending tasks and, in addition, due to power outages it has been very difficult for me to finish everything and publish at the same time. We were almost 8 hours without electricity, so the little time we had with electricity we had to take advantage of it to do everything we had to do. Finally today we close these parts of the exhibition!
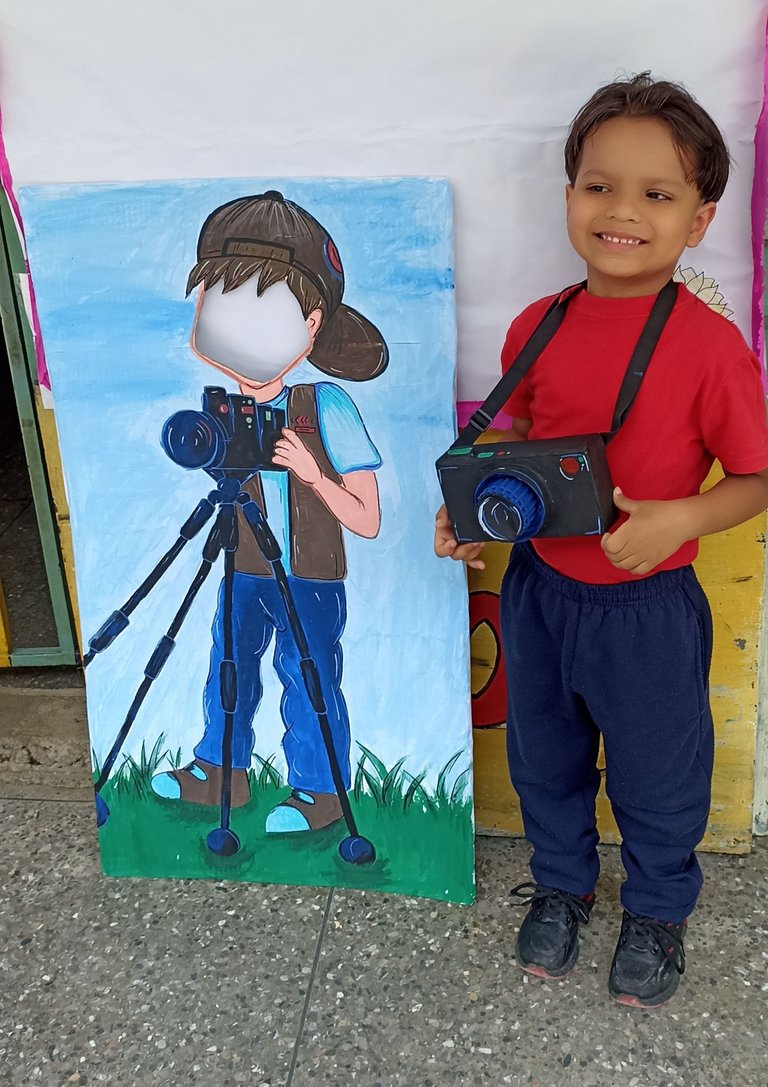
Hoy quería compartirles este material de apoyo para la presentación donde mi hijo explica la profesión del fotógrafo. Él estaba un poco molesto porque quería ser bombero, pero la profesión que le tocó en la clase fue fotógrafo. Así que quise hacérsela lo más bonita y creativa posible para que disfrutara exponerla y pasara un buen rato.
Today I wanted to share with you this material to support the presentation where my son explains the profession of the photographer. He was a little upset because he wanted to be a firefighter, but the profession he had in the class was photographer. So I wanted to make it as beautiful and creative as possible for him to enjoy the presentation and have a good time.
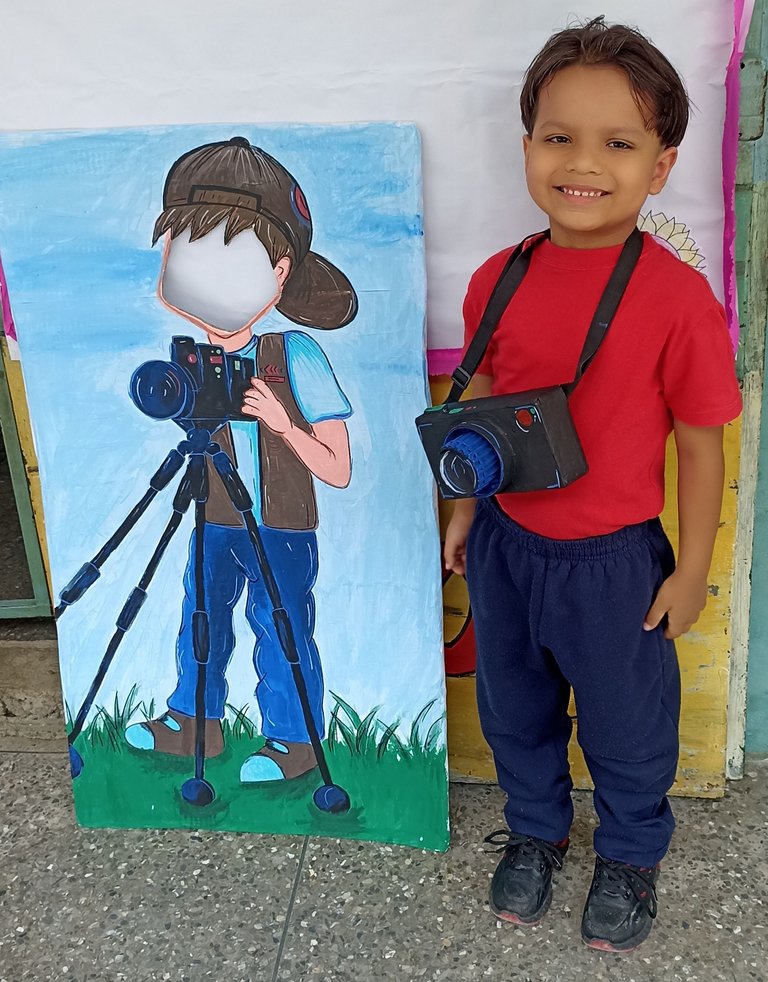
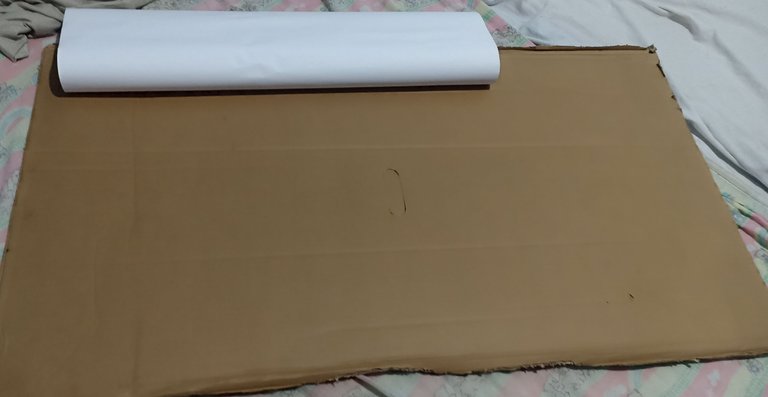
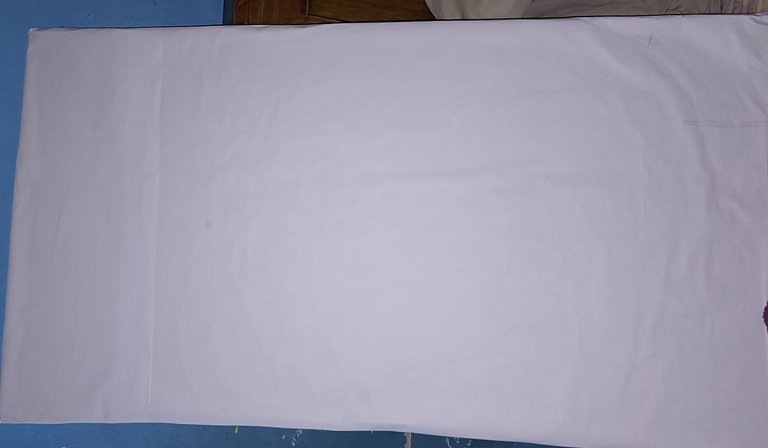
La temática era sobre las profesiones. La idea de la maestra era que colocaran en un cartón al personaje y dejaran un espacio donde los niños colocarían su cara a la hora de exponer. Busqué el cartón más grande que pude, lo forré de papel bond y realicé el boceto del dibujo. Tuve que hacerlo sin luz, así que cuando llegó la electricidad, empecé a pintar.
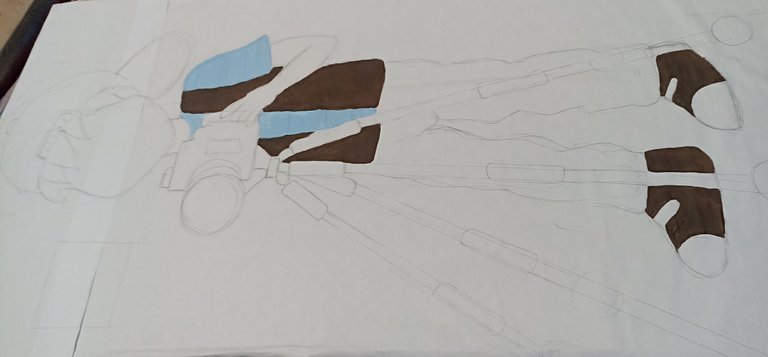
Quise crearle un estilo de uniforme al personaje. Le hice un chaleco de color marrón y una gorra, le pinté la camisa de color azul y el pantalón. El pantalón fue un momento muy creativo: quería hacerlo estilo jean, así que mezclé azul y negro hasta lograr ambos tonos con sombra y luz. ¡Me gustó muchísimo el resultado! Los zapatos son del mismo color marrón que el chaleco, con un poco de azul para combinar. El cabello también es marrón.
The theme was about professions. The teacher's idea was to place the character on a cardboard and leave a space where the children would place their face when it was time to exhibit. I found the biggest cardboard I could, lined it with bond paper and made a sketch of the drawing. I had to do it without light, so when the electricity came on, I started painting.
I wanted to create a uniform style for the character. I made a brown vest and a cap, painted the shirt blue and the pants. The pants were a very creative moment: I wanted to make them jean style, so I mixed blue and black to achieve both tones with shadow and light. I really liked the result! The shoes are the same brown as the vest, with a bit of blue to match. The hair is also brown.

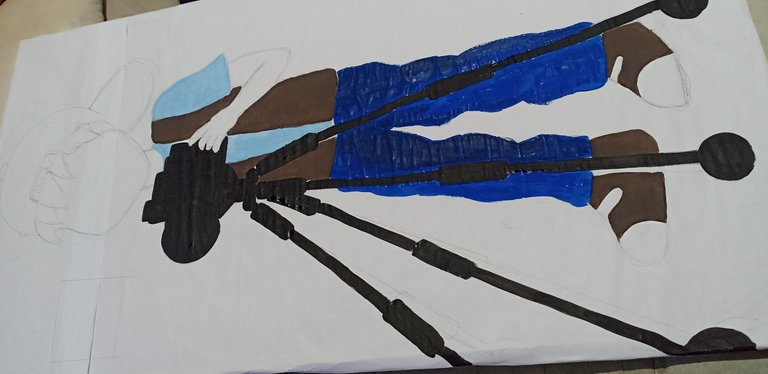
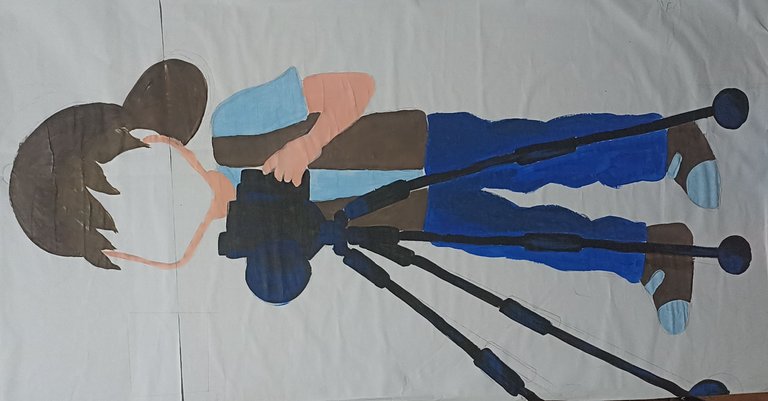
Al culminar todo el dibujo, fui resaltando todos los bordes con marcadores acrílicos para ir dándole sombra y luz a todo el dibujo. Luego, apliqué marcador negro. La cámara fue lo que más me gustó. La hice de color negro con azul y con bastantes detalles de luz que me encantaron. Por último, realicé el fondo, que fue más sencillo: solo hice un gramado con verde y un gran cielo en color azul. ¡Y listo!
When I finished the whole drawing, I highlighted all the edges with acrylic markers to give shadow and light to the whole drawing. Then, I applied black marker. The camera was what I liked the most. I made it in black with blue and with lots of light details that I loved. Finally, I made the background, which was simpler: I just made a green grass and a big blue sky. And that was it!
 )
)

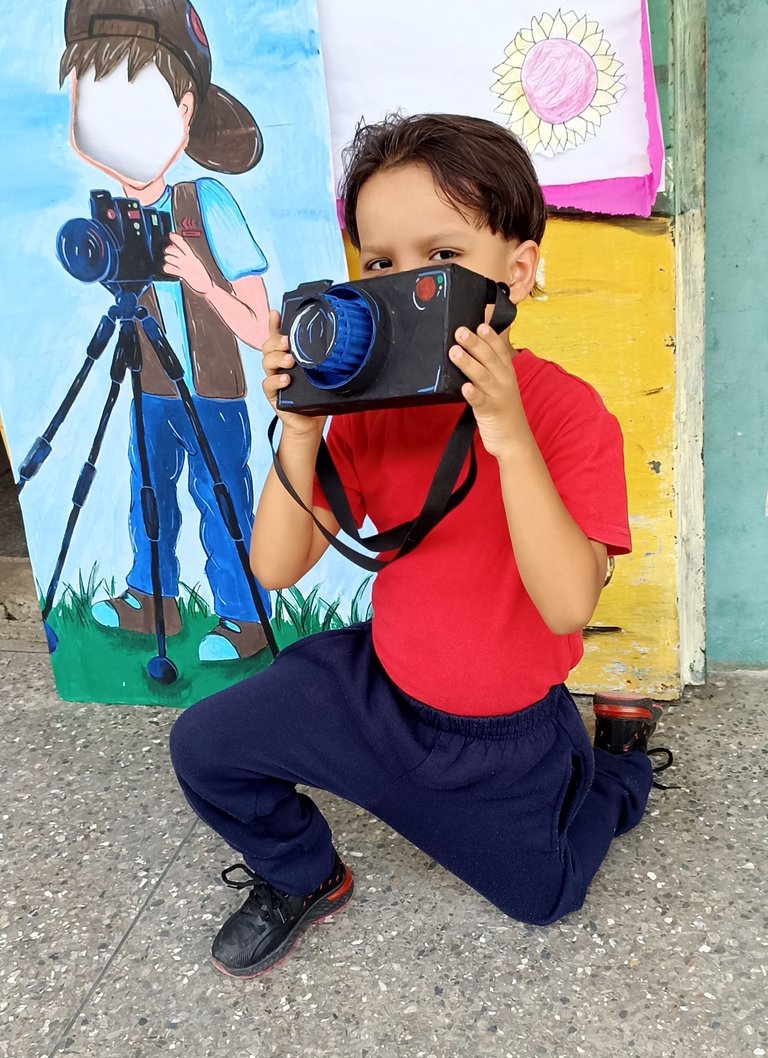
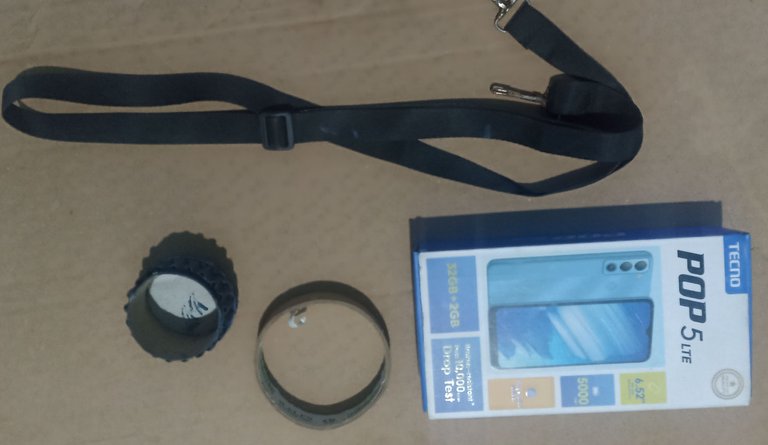
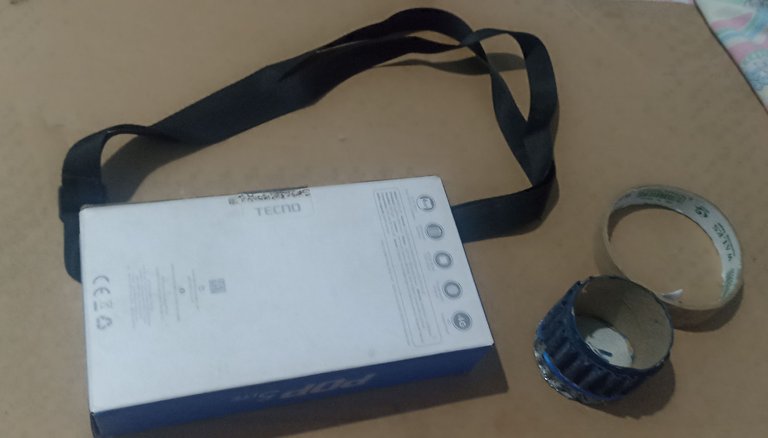
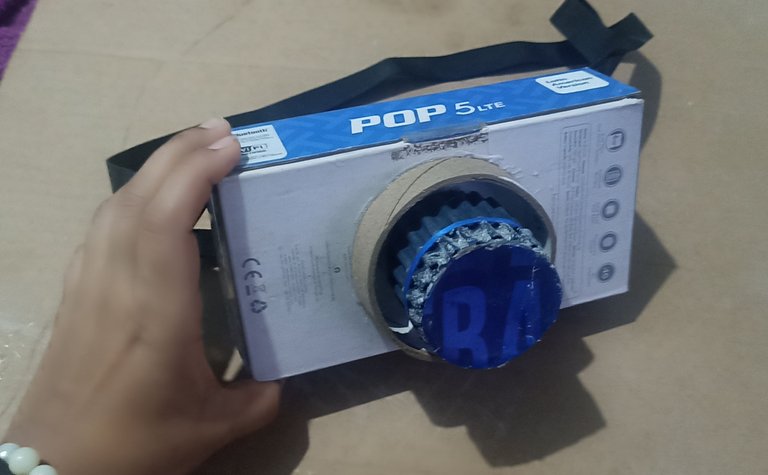
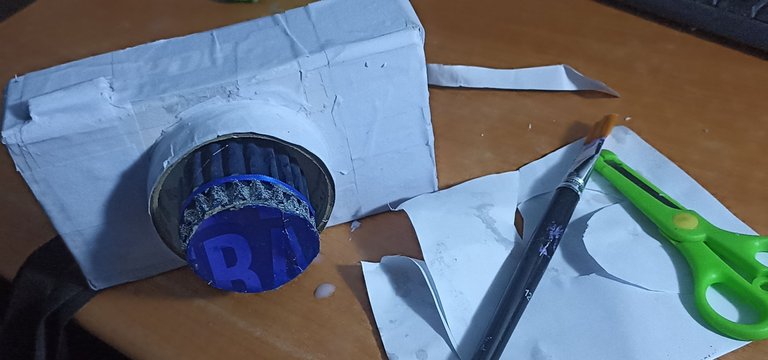
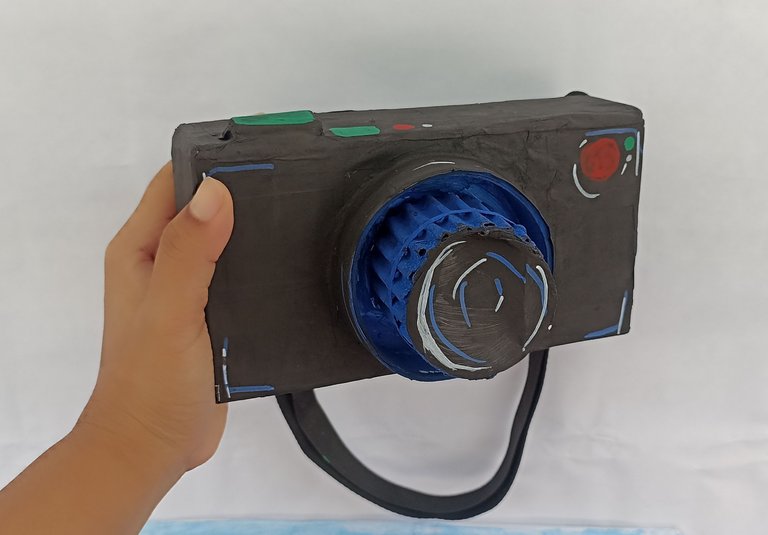
Seguidamente, tenía que hacerle la cámara que se llevaría mi hijo en el cuello. Tomé una caja de teléfono, un aro de cinta, un círculo de cartón que tenía mi mamá y una correa de bolso. Jajaja, ¡con silicona líquida pegué todas las partes dejando la correa en la parte de adentro! Luego, la cubrí con papel y pega para darle más fuerza y dureza. Mientras esperaba que secara, empecé a pintar toda la cámara de color negro y un poco de azul en el lente. Al secarse, le hice algunos detalles en rojo, azul y blanco, como si fueran luces, botones y mucho más.
Next, I had to make the camera that my son would wear around his neck. I took a phone box, a ribbon ring, a cardboard circle my mom had and a purse strap. Haha, with liquid silicone I glued all the parts together leaving the strap on the inside! Then, I covered it with paper and glue to give it more strength and hardness. While waiting for it to dry, I started to paint the whole camera in black and a little blue on the lens. When it dried, I made some details in red, blue and white, as if they were lights, buttons and much more.
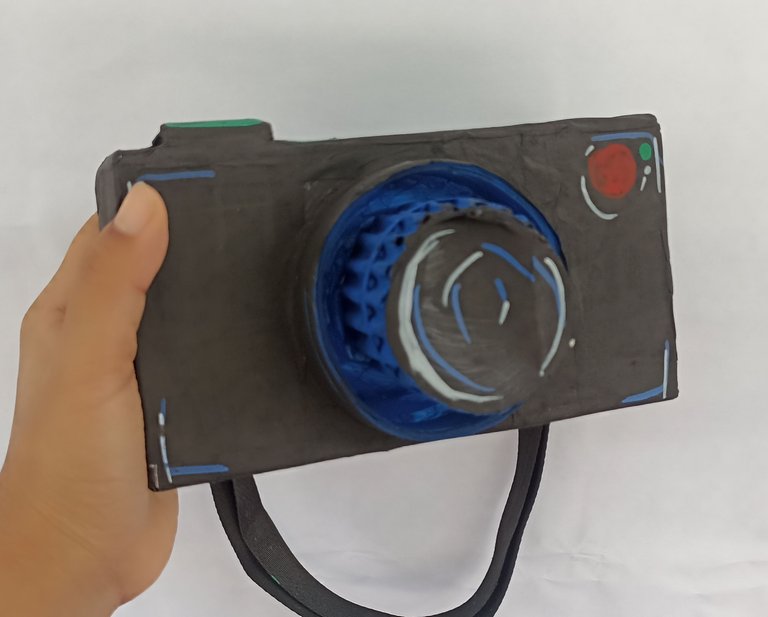
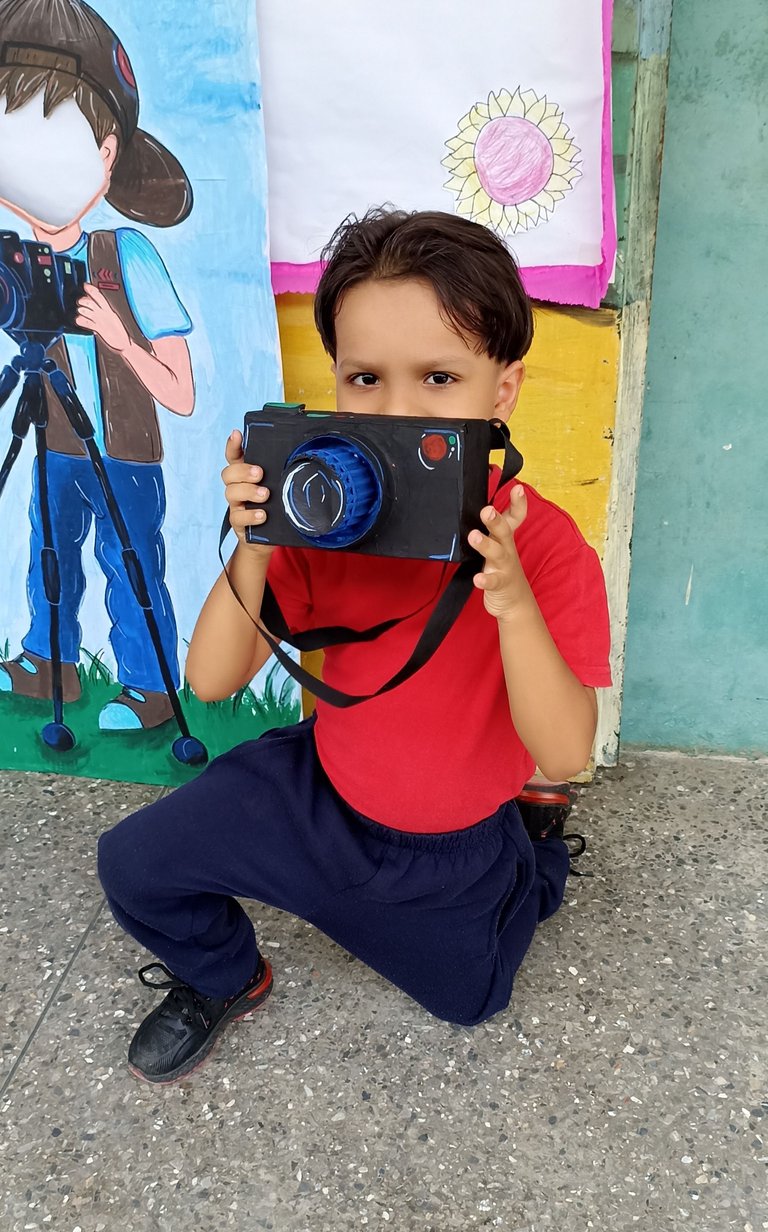
Aquí les comparto el resultado final de esta actividad de mi hijo sobre la fotografía. Ya después de todo el proceso, estaba encantado y feliz. Aquí les comparto con mucho cariño las fotos. Como siempre, muchas gracias por el apoyo y su tiempo. Nos vemos en una próxima publicación. ¡Un abrazo!

that is inspirational
Gracias por el apoyo un abrazo @joeyarnoldvn
So creative, I thought it was a real camera, you are so gifted to be conversant in making that camera, I am impressed 👍
Your son loves it so much, he smiles as he carry it.
Oye muchisimas gracias muy lindo de tu parte, quiero darte mis mas sincero agradecimiento por tus palbras de apoyo y de motivacion, un abrazo @repayme4568
Welcome
Todo quedó increíble, me gustaron mucho los detalles en el dibujo. Buen trabajo.
Hermoso este angelito en su actividad.
Asombrosos trabajos, a tu pequeño se le nota la felicidad en su rostro por tan espléndido trabajo, muchas gracias por compartir.
Tu comunidad artesana ahora es testigo

Hola amiga, que bonito ese trabajo que hiciste para así apoyar a tu pequeño, donde todo esta increíble y me gusto como quedó la cámara ya que parece muy real. Además estas son las últimas fechas de clase y quedan muchas actividades por hacer y entregar. Éxitos.
https://twitter.com/hivediy47901/status/1788772245130584219