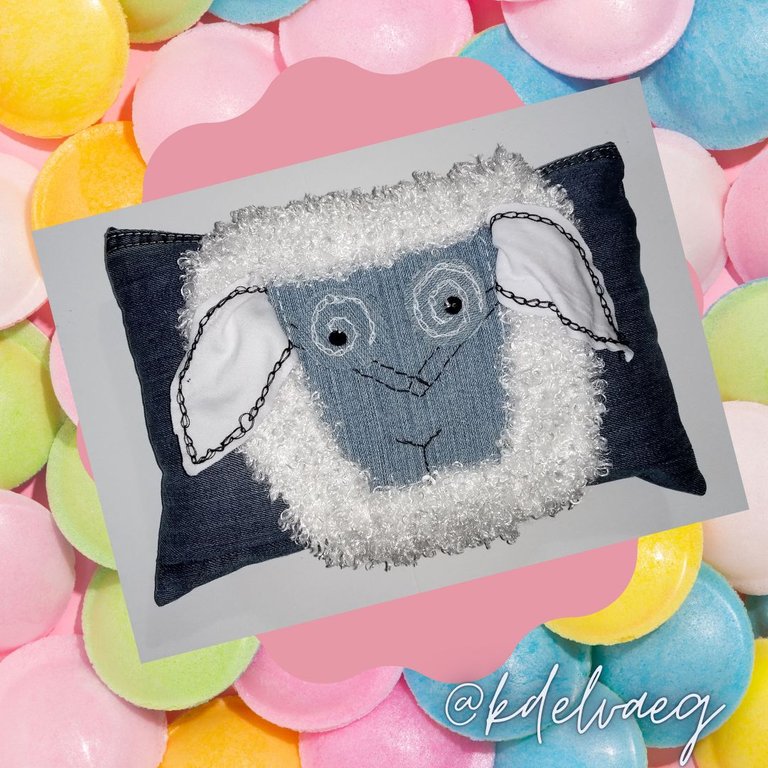
ENG-ESP 🌌 Beautiful decorative cushion made from recycled material 🐑 Hermoso cojín decorativo hecho con material reciclado


Hello my dear readers of this community, I hope you are well and that you have or have had an excellent day.
There are so many things I have to do and show you the steps by steps, that I can't decide which one to publish first, but for today I bring you a beautiful cushion, made in jean fabric and with a sheep design, without further details, I show you how I made it.
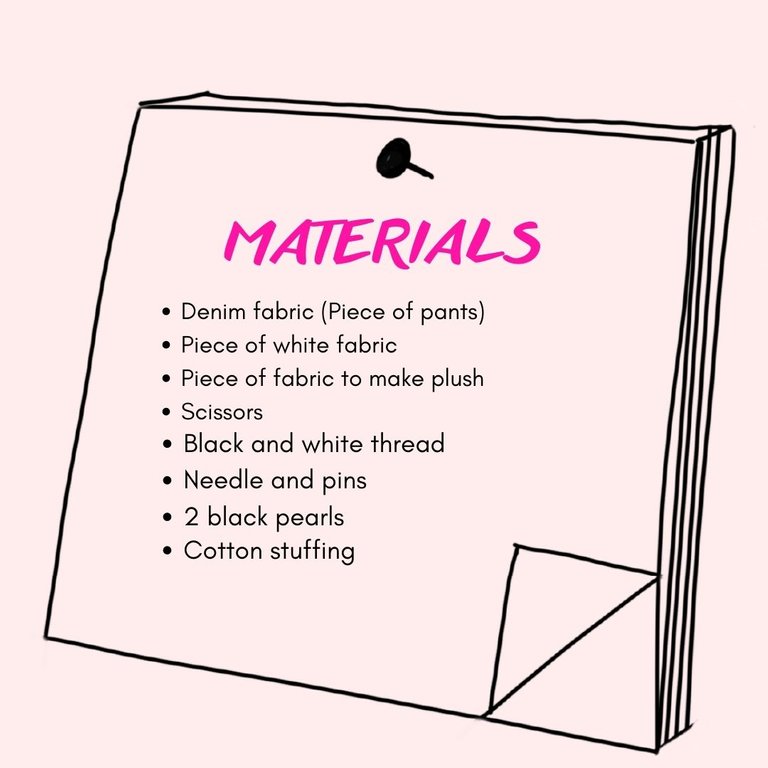
Procedure:
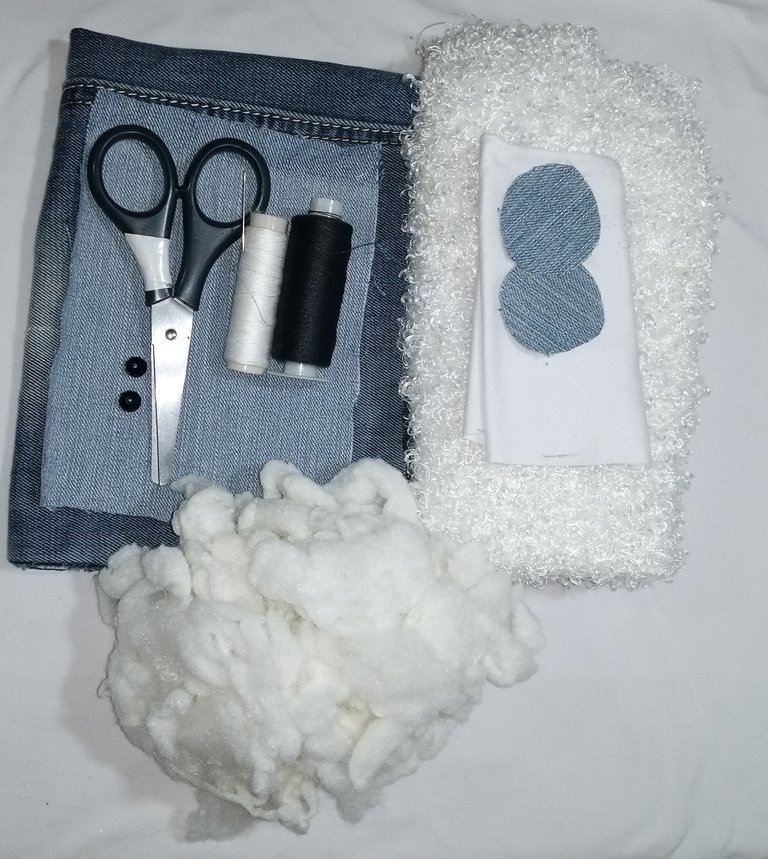
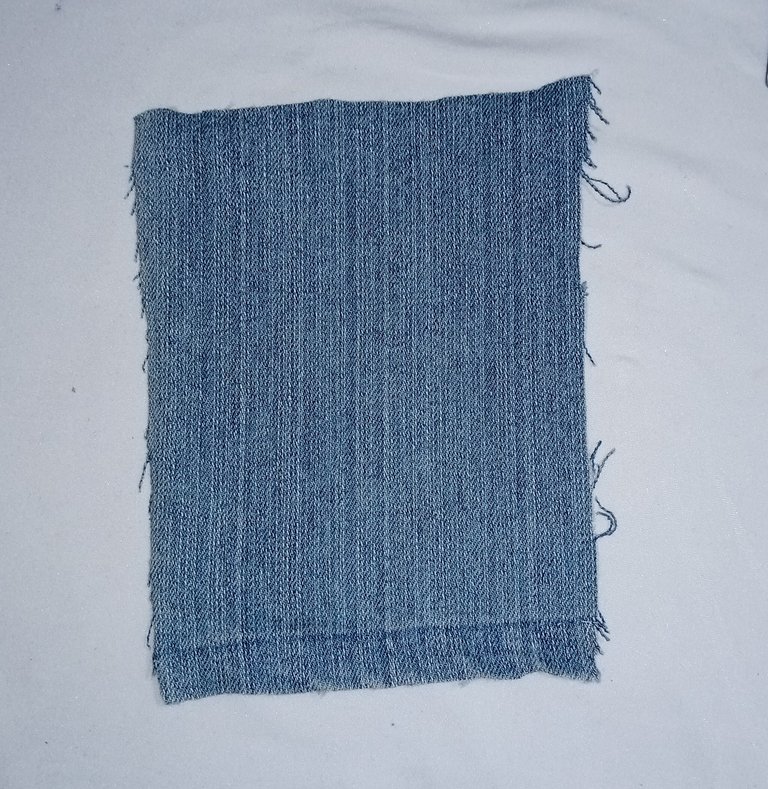
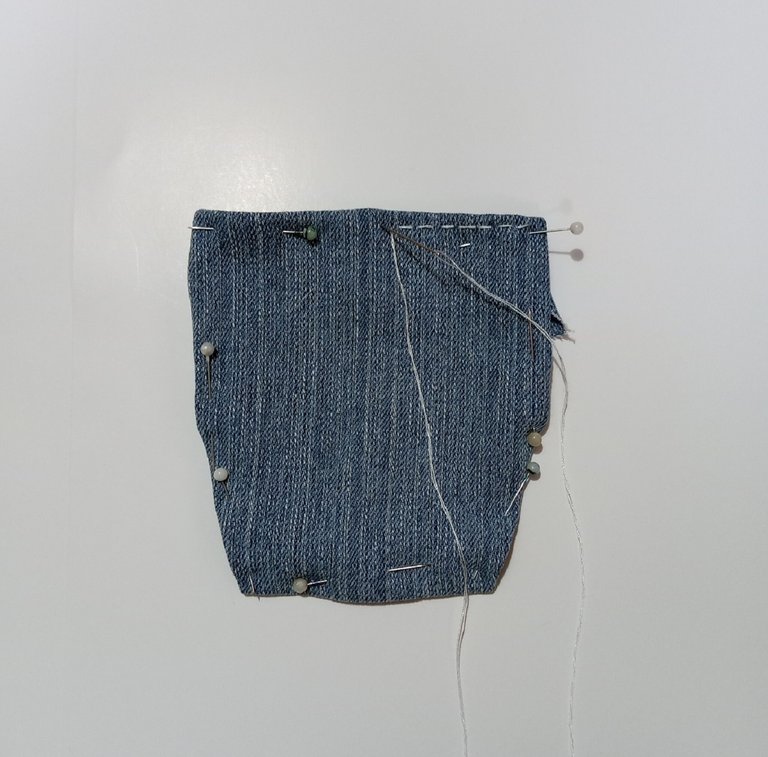
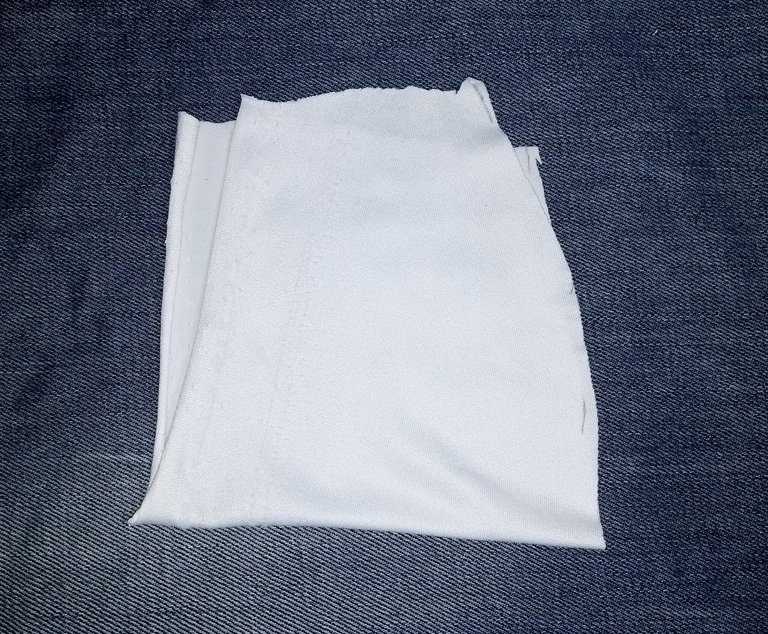
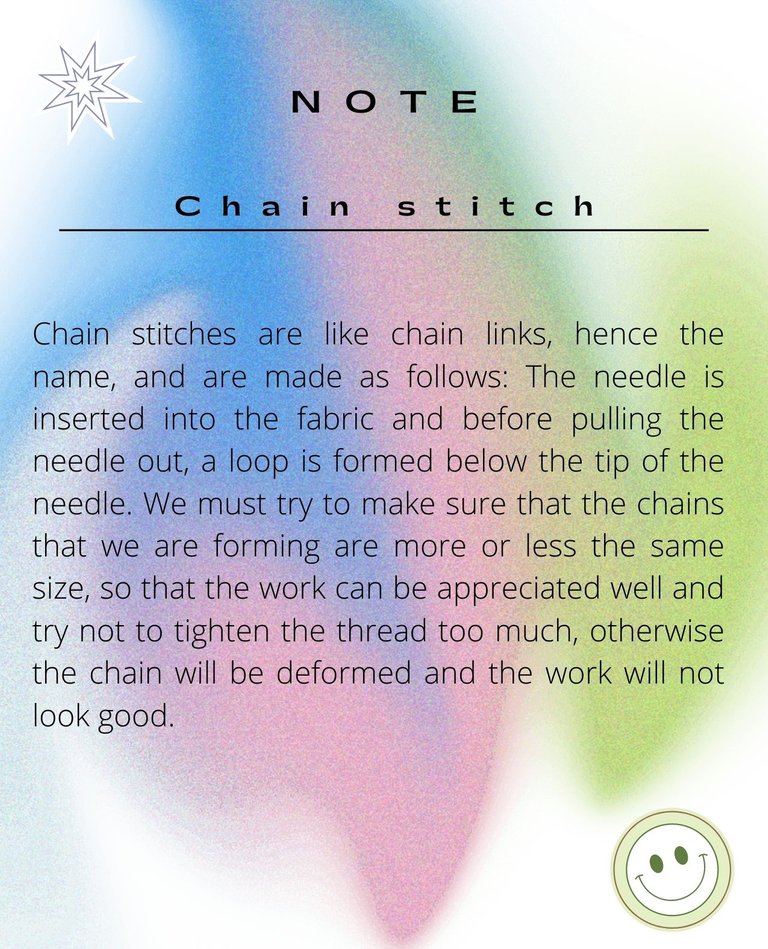
I had a piece of light-colored pants, which I cut out and folded the edges and pinned them, I sewed with a straight stitch all around, as I don't have a sewing machine, I sewed it by hand, as shown in the image.

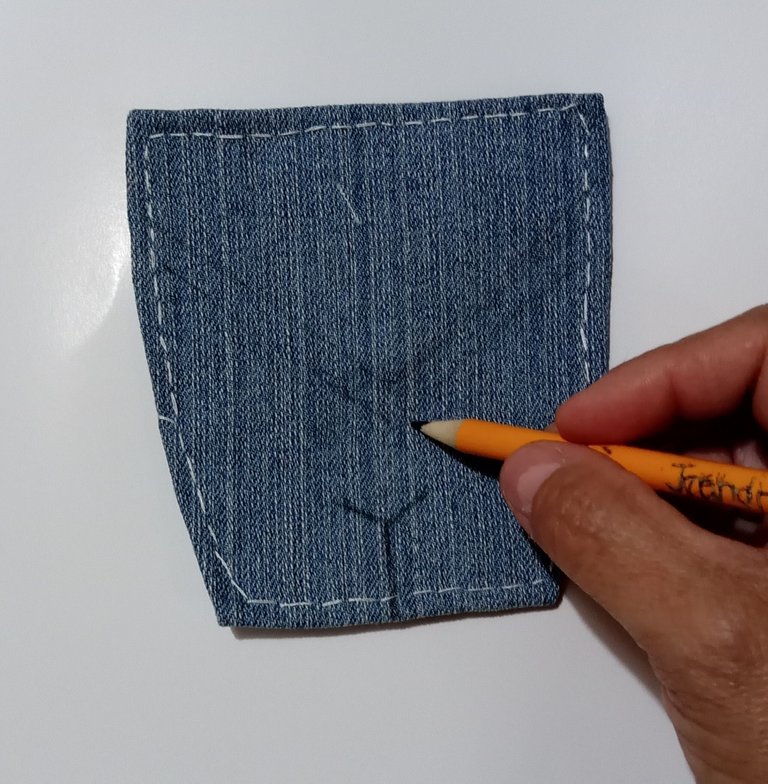
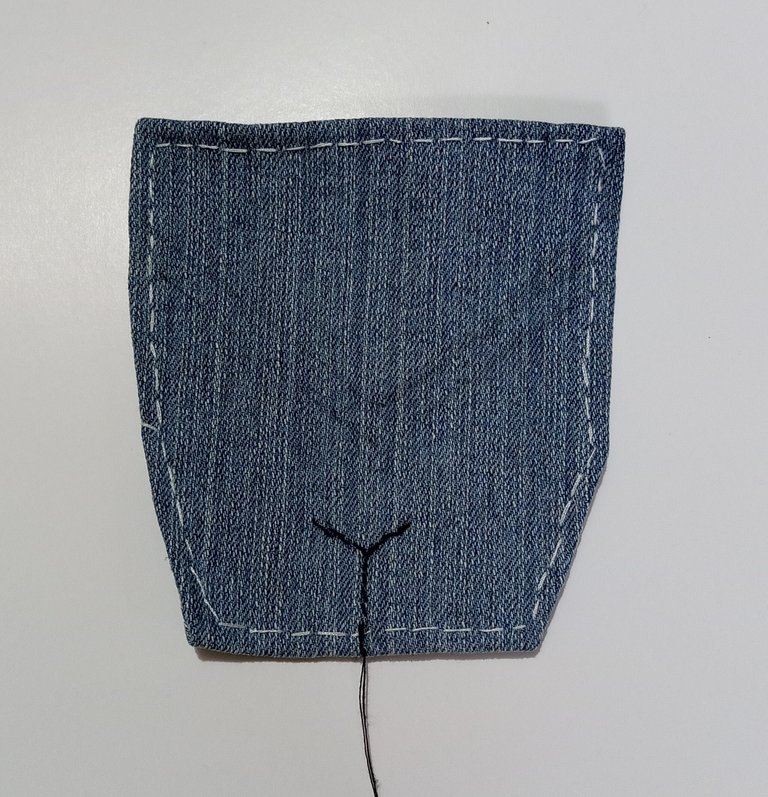
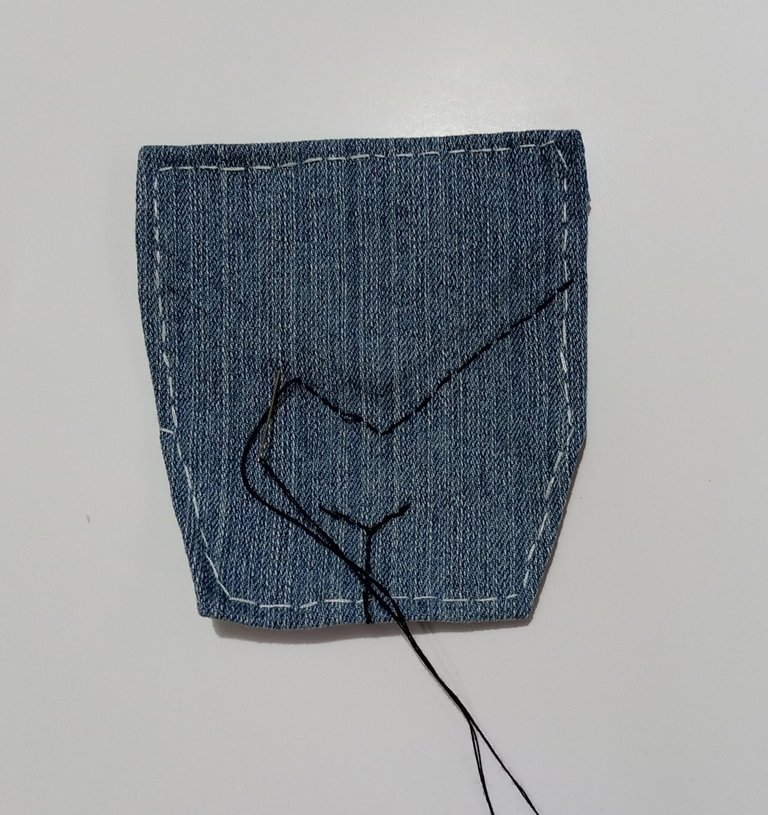
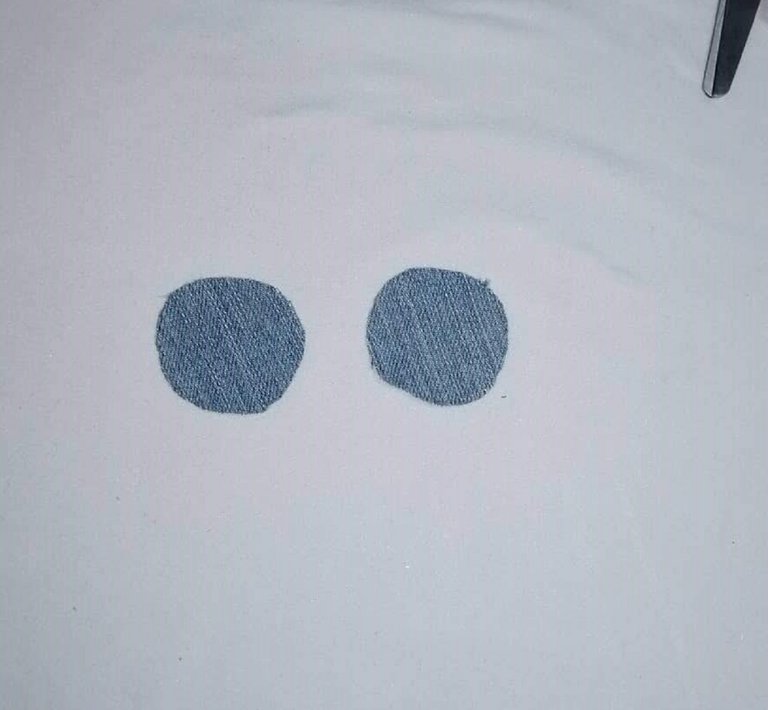
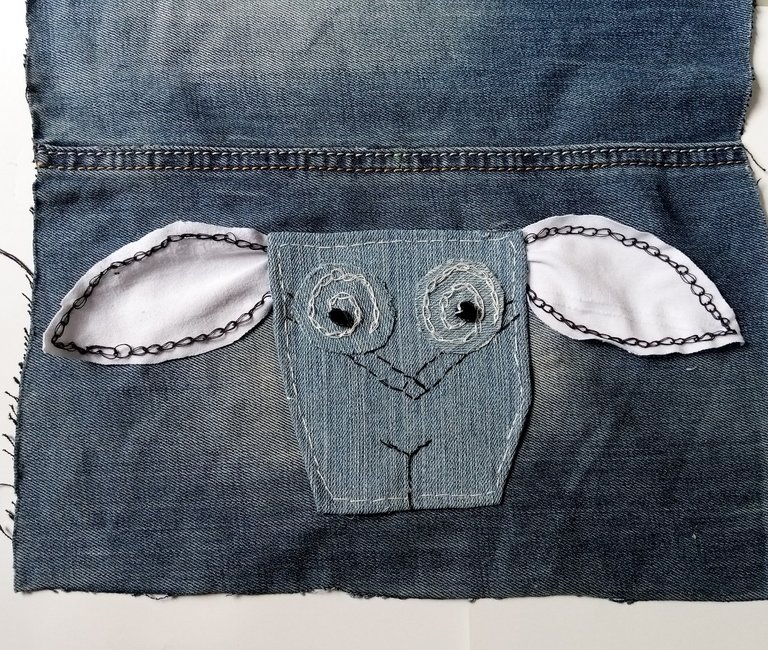
Once I have sewn the piece, with the pencil, I will mark what will be the sheep's mouth and nose. And I will sew with the black thread with a straight stitch.
 |  |
|---|
 |  |
|---|
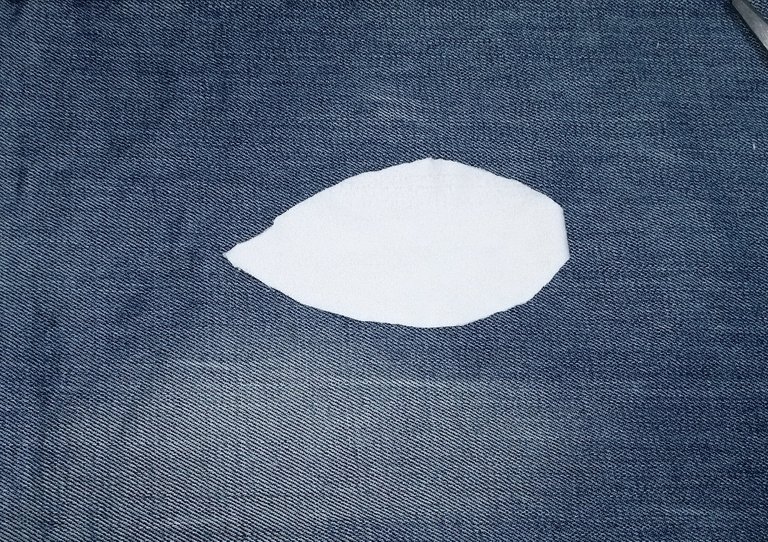
With the piece of white fabric, I made the sheep's ears, for this I cut out two pieces, as shown in the image.
 |  |
|---|
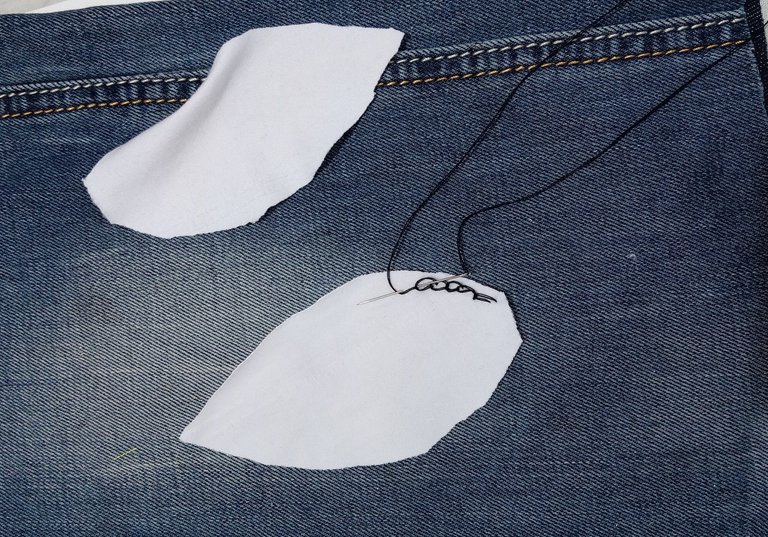
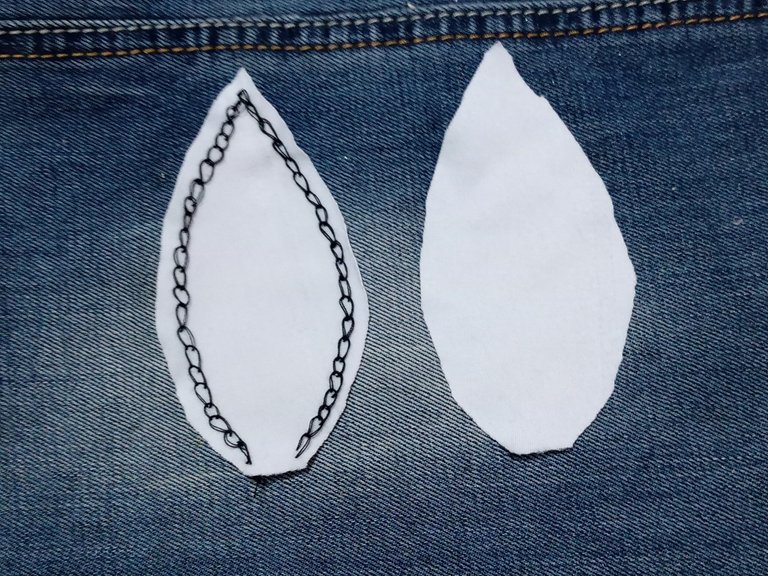
With the black thread, I sewed all around the ear, leaving 5 mm of separation from the edge, I sewed with chain stitches.
 |  |
|---|
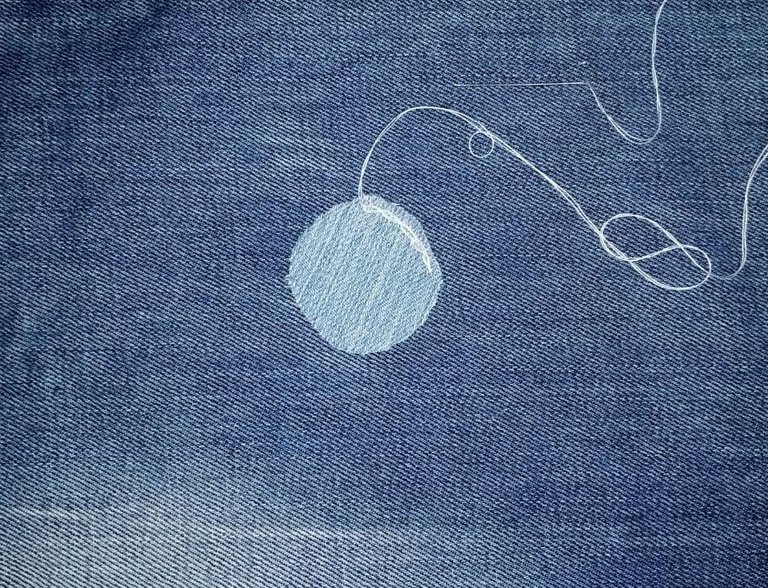
Now with the jean fabric, I will cut out two circles of approximately 3 cm in diameter. With the white thread and the chain stitch, I will form a spiral around the circle and in the center I will place a black pearl, as shown in the pictures.
 |  |  |
|---|
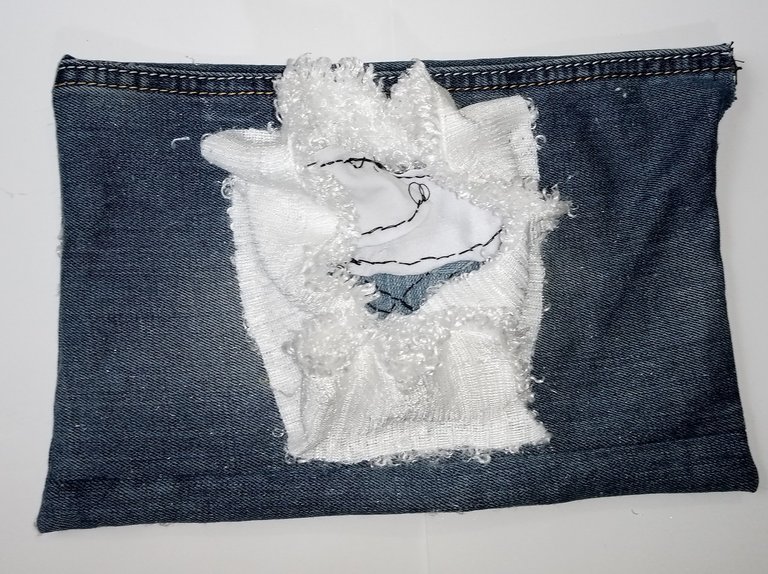
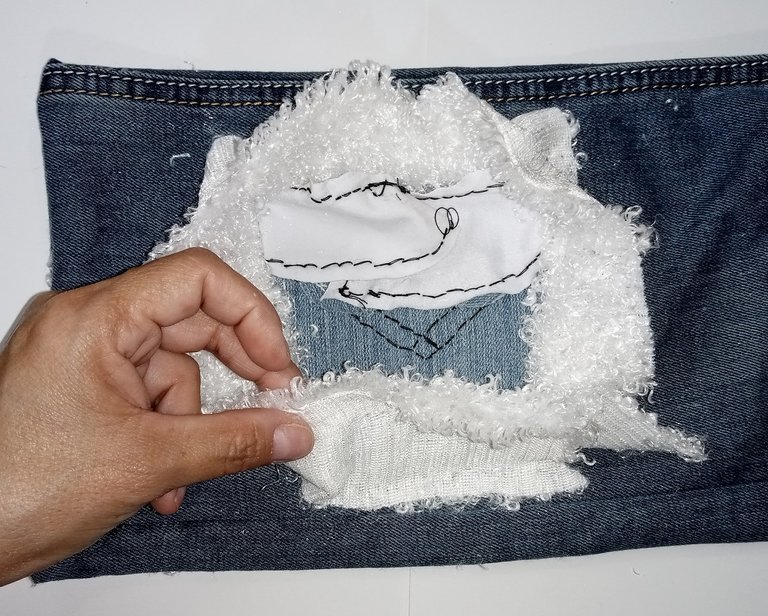
Once I have all the pieces assembled, I will glue the eyes and ears to the sheep's face and then the face to the fabric of the cushion, gluing the ears loosely.
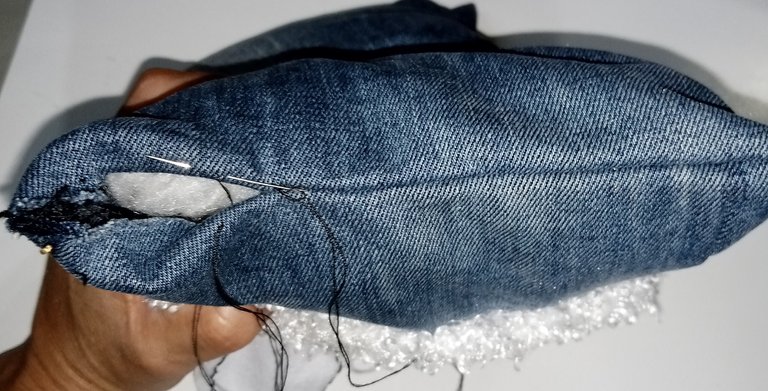
The fabric I will use to make the cushion was the leg of a pair of pants, so it is wider at the top than at the bottom, so I unpicked one side of the leg and matched it so that the cushion would be the same size.
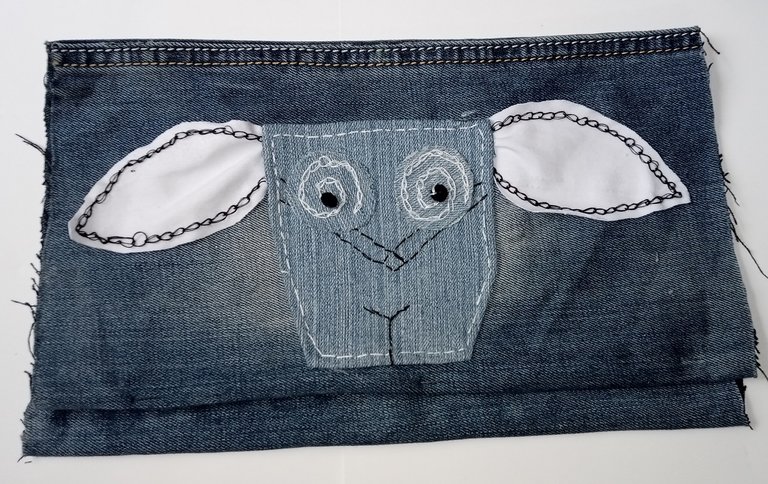
Once the fabric is even to form the cushion, I sewed it closed and left an opening where I will insert the stuffing cotton.
Cut a strip of the white plush fabric, about 5 cm wide and about the length of the sheep's face. With the silicone I will glue it all around the face, making a 5 mm fold on the edges, so that the edge is well secured so that it does not release the fluff.
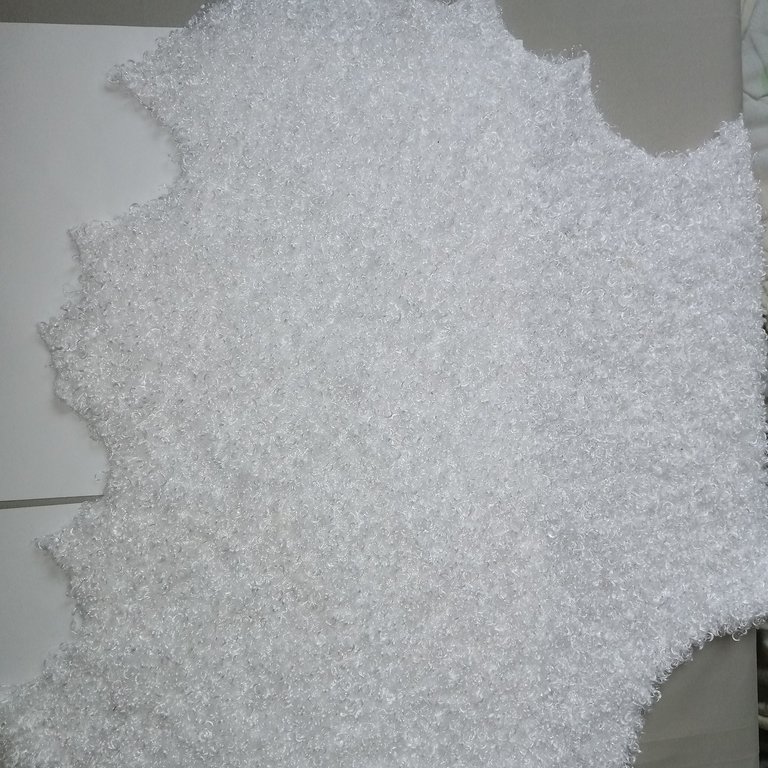
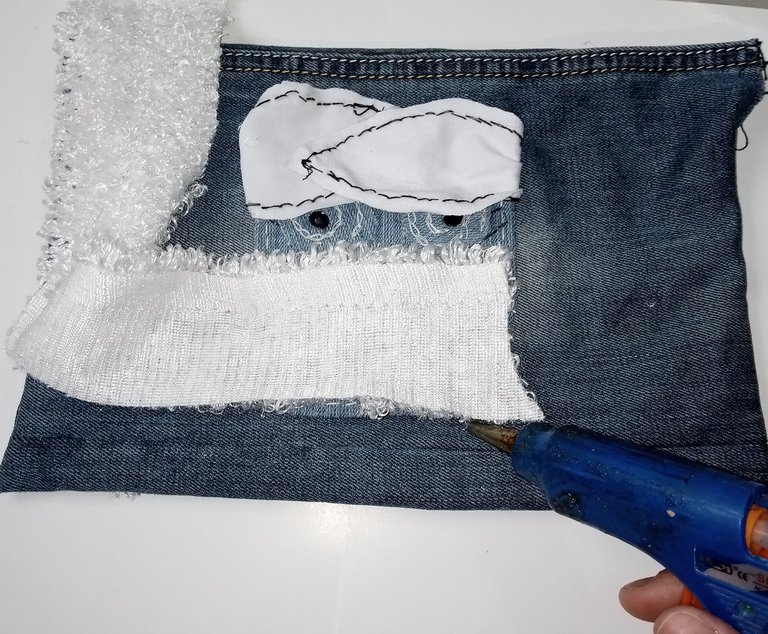
In the part where the corners are, I will fold the fabric as shown in the image, so that when I turn it over, it won't shrink and there will be enough fabric left to cover the corner well.
And fold the ears inwards so that they are above the plush fabric, I want them to be loose and able to move.
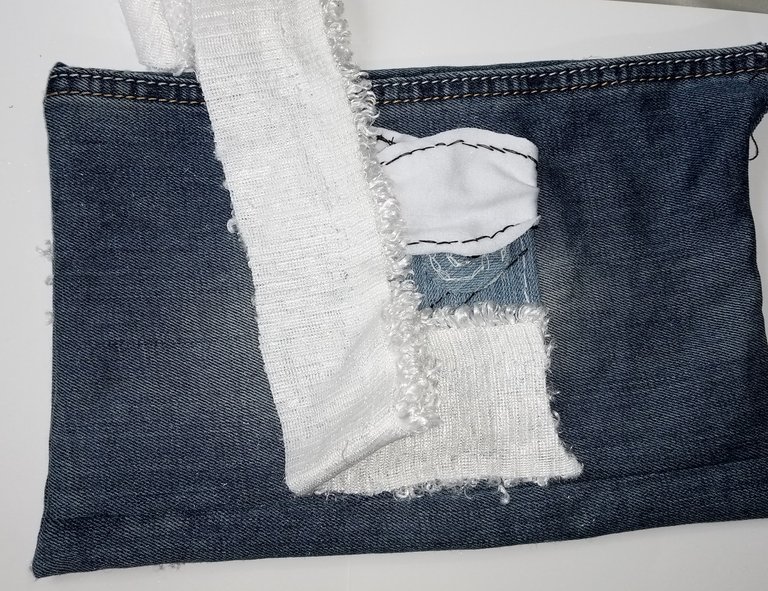
Once all the fabric is glued around the face, fold the edge of the fabric and glue it 2 cm away from the edge of the face.
 |  |
|---|
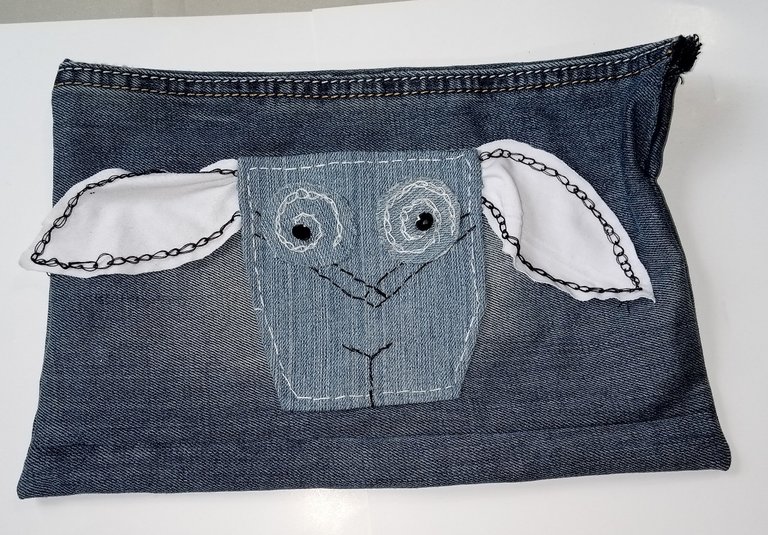
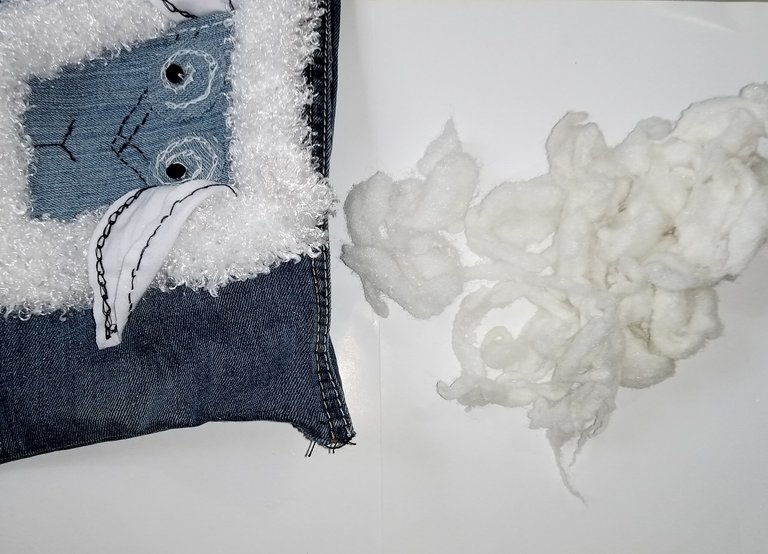
Finally I will stuff the cushion with the cotton and close the opening.
 |  |
|---|
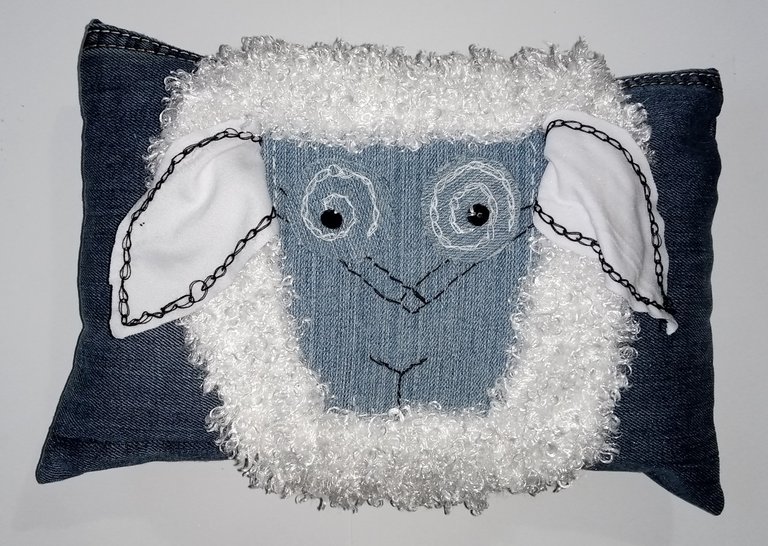
And now the cushion is ready to use, as you can see it is super easy to make, and for those who have a sewing machine it would be much faster to do.
I hope you liked it and that it serves as inspiration to make it and give it the personal touch you want.
I say goodbye as always, but not before thanking you for taking a little of your valuable time to visit my blog, I hope to see you in my next publication, be well and take care of yourselves.
Original creation content:
🐑 All photos are my own taken and edited with my Alcatel cell phone.
☁️ The cover image was made with Canva application and edited by me.
🐑 The divider were taken from the Canva page and edited by me in Paint.
☁️ The English translation was done with the help of DeepL.

Hola mis queridos lectores de esta comunidad, espero que se encuentren bien y que tengan o hayan tenido un excelente día.
Son tantas las cosas que tengo por hacer y mostrarle los pasos a pasos, que no me decido por cual publicar primero, pero para el día de hoy les traigo, un bello cojín, confeccionado en tela de jean y con un diseño de una oveja, sin más detalle, les muestro como lo realice.
Procedimiento:
Tenía un retazo de pantalón de color claro, el cual recorte y le doble las orillas sujetándolos con alfileres, cosí con puntada recta por todo el alrededor, como no tengo maquina de coser, lo cosí a mano, quedando como se muestra en la imagen.
Una vez que cosí la pieza, con el lápiz, voy a marcar lo que será la boca y la nariz de la oveja. Y coseré con el hilo negro con puntada recta.
| |
|---|
| |
|---|
Con el retazo de tela blanca, hice las orejas de la oveja, para ello recorté dos piezas, tal como se muestra en la imagen.
| |
|---|
Con el hilo negro, cosí por todo el alrededor de la oreja, dejando 5 mm de separación desde el borde, cosí con puntadas de cadeneta.
| |
|---|

Ahora con la tela de jean, recortaré dos círculos de 3 cm de diámetro aproximadamente. Con el hilo blanco y con la puntada de cadeneta, formare un espiral en todo el círculo y en el centro colocaré una perla negra, tal como se muestra en las imágenes.
| | |
|---|
Una vez que ya tengo todas las piezas armadas, con el silicon pegaré los ojos y las orejas a la cara de la oveja y luego la carita a la tela del cojín, pegando las orejas sueltas.
La tela con que haré el cojín, era la pata de un pantalón, por lo tanto es más ancha en la parte de arriba que en la de abajo, así que descosí un lado de la pata y empareje para que me quede el cojín del mismo tamaño.
Ya con la tela pareja para formar el cojín, cosí para cerrarlo y deje una abertura por donde introduciré el algodón de relleno.
Corte una tira de la tela de peluche blanca, de aproximadamente 5 cm de ancho y de largo del contorno de la cara de la oveja. Con el silicon la pegare por todo el alrededor de la cara, haciendo un dobles de 5 mm en las orillas, así se asegura bien la orilla para que no suelte las pelusas.
En la parte donde están las esquinas, haré un doblez a la tela tal como se muestra en la imagen, para que a la hora de darle vuelta, no vaya a quedar encogido y quede suficiente tela para poder cubrir bien la esquina.
Y doble las orejas hacia adentro para que me queden por encima de la tela de peluche, quiero que queden sueltas y se puedan mover.
Una vez pegada toda la tela por alrededor de la cara, doble la orilla de la tela y la pegue a 2 cm de distancia de la orilla de la cara.
| |
|---|
Por último rellenaré el cojín con el algodón y cerraré la abertura.
| |
|---|
Y ya está el cojín listo para usarlo, como pueden ver es super fácil de hacer, y para aquellos que tienen máquina de coser pues seria mucho mas rápido de hacer.
Espero que les haya gustado y que sirva de inspiración para realizarlo y darle el toque personal que deseen.
Me despido como siempre, no sin antes agradecerles que me hayan dedicado un poco de su valioso tiempo para visitar mi blog, los espero en mi próxima publicación, pórtense bien y cuídense mucho.
Contenido de creación original:
🐑 Todas las fotos son de mi propiedad tomada y editadas con mi celular Alcatel.
☁️ La imagen de portada fue realizada con la aplicación Canva y editada por mi.
🐑 El separador fueron tomado de la página Canva y editado por mí en Paint.
☁️ La traducción al idioma inglés fue realizada con ayuda de DeepL.
Wow...this is super beautiful and creative.
Imagine using only a needle to achieve this neat work 👏👏👏🎉🎉
Good job friend...just got an inspiration now👌
Thank you I'm very excited that it inspired you, that was the idea. I made the work as delicate as I could so that it would have a good finish. Thanks for visiting my blog.
Uwc🤗
Congratulations @kdelvaeg! You have completed the following achievement on the Hive blockchain and have been rewarded with new badge(s):
Your next target is to reach 200 comments.
You can view your badges on your board and compare yourself to others in the Ranking
If you no longer want to receive notifications, reply to this comment with the word
STOPTo support your work, I also upvoted your post!
Check out the last post from @hivebuzz:
Support the HiveBuzz project. Vote for our proposal!
Thank you for sharing this amazing post on HIVE!
Your content got selected by our fellow curator @rezoanulvibes & you just received a little thank you via an upvote from our non-profit curation initiative!
You will be featured in one of our recurring curation compilations and on our pinterest boards! Both are aiming to offer you a stage to widen your audience within and outside of the DIY scene of hive.
Join the official DIYHub community on HIVE and show us more of your amazing work and feel free to connect with us and other DIYers via our discord server: https://discord.gg/mY5uCfQ !
If you want to support our goal to motivate other DIY/art/music/homesteading/... creators just delegate to us and earn 100% of your curation rewards!
Stay creative & hive on!
Thank you for your support.