(Esp/Eng) DULCE Y ADORABLE GALLETA DE GENJIBEE EN GOMA EVA/ SWEET AND ADORABLE EVA RUBBER GENJIBEE COOKIE
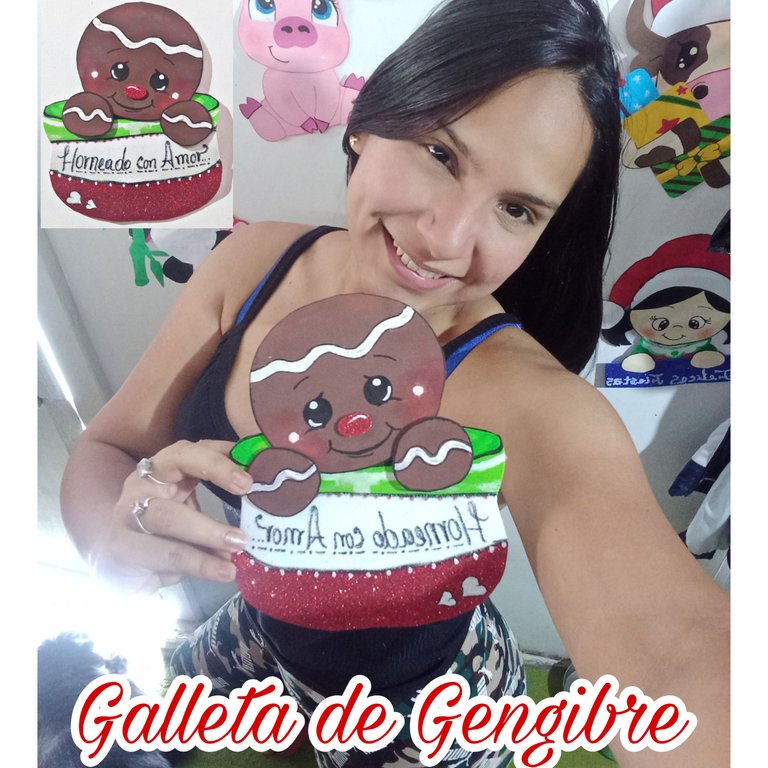
Feliz fin de semana queridos amigos artesanos, deseo que tengan mucha salud y éxitos. Hoy quiero mostrarle cómo hacer una Dulce y adorable galleta de gemjibre en Goma Eva. Espero les guste.
Happy weekend dear crafty friends, I wish you lots of health and success. Today I want to show you how to make a Sweet and adorable gingerbread cookie in Eva Gum. I hope you like it.

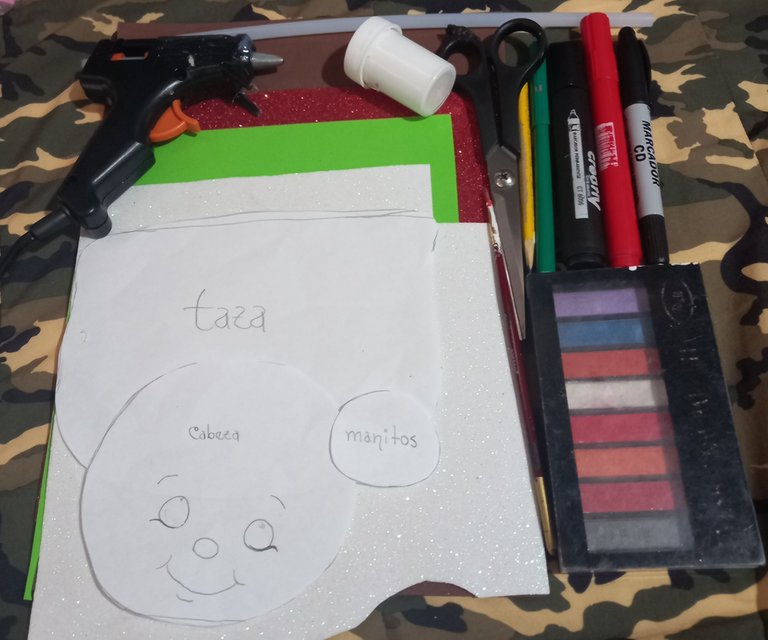
MATERIALES:
- Goma Eva verde, blanca y roja.
- Patrones de la galleta y la taza.
- silicon en barra.
- Pistola de silicón.
- Tempera blanca.
- Pincel.
- Marcadores.
- Tijeras.
- Lápiz.
MATERIALS:
- Green, white and red eva rubber.
- Patterns of the cookie and the cup.
- Silicone stick.
- Silicone gun.
- White tempera.
- Paintbrush.
- Marker pens.
- Scissors.
- Pencil.
PROCEDIMIENTO
PROCEDURE
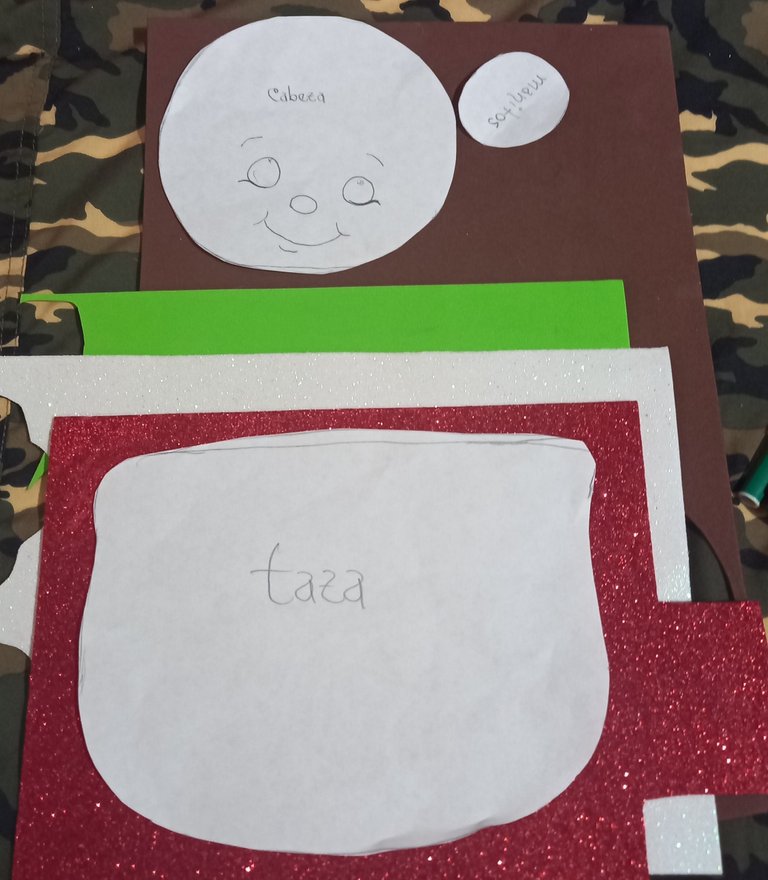
Iniciamos marcando y recortando todos los patrones.
We start by marking and cutting out all the patterns.
Luego comenzaremos a pintar la carita de la galleta, en éste caso hacemos primero los ojos, después la nariz que está hecha de goma Eva roja, continuamos con la boca, las cejas y el toque de rubor en las mejillas.
Then we will begin to paint the face of the cookie, in this case we first make the eyes, then the nose which is made of red Eva rubber, we continue with the mouth, the eyebrows and the touch of blush on the cheeks.
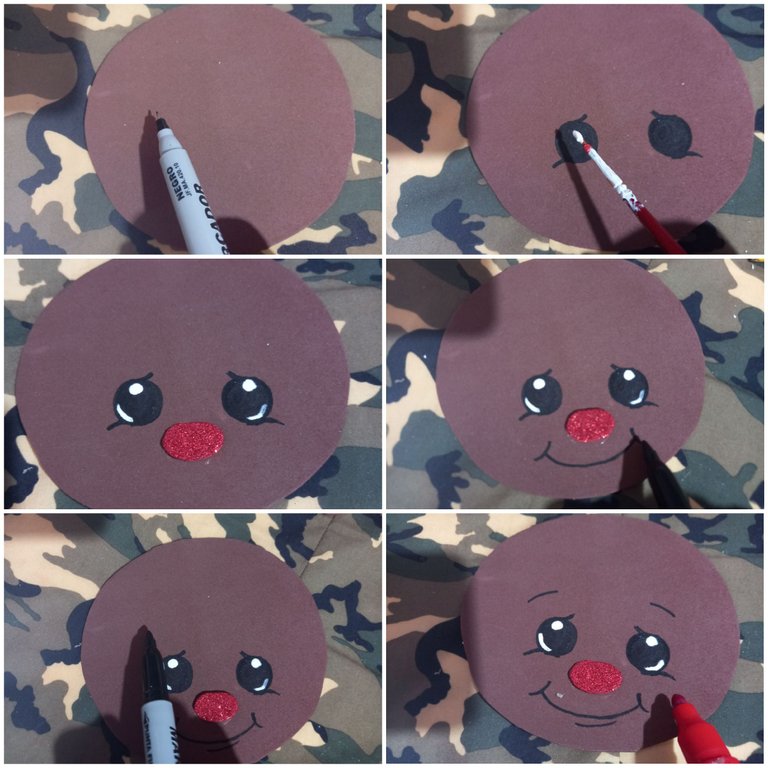
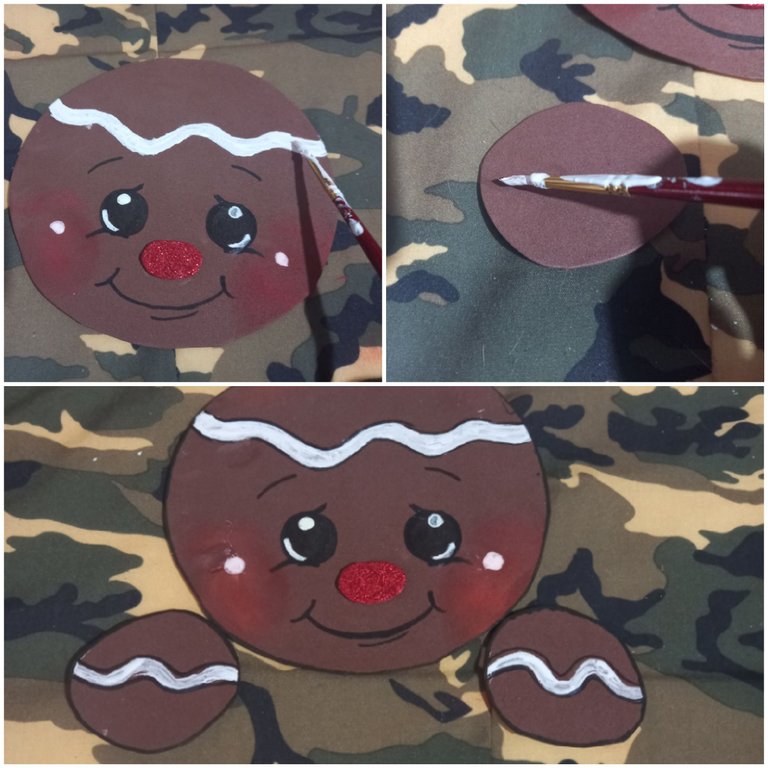
Después pintaremos el glaseado de la galleta con témpera blanca, en la frente y las manos, remarcamos todo el contorno de estos con marcador negro.
Then we will paint the icing on the cookie with white tempera, on the forehead and hands, we mark all the outline of these with black marker.
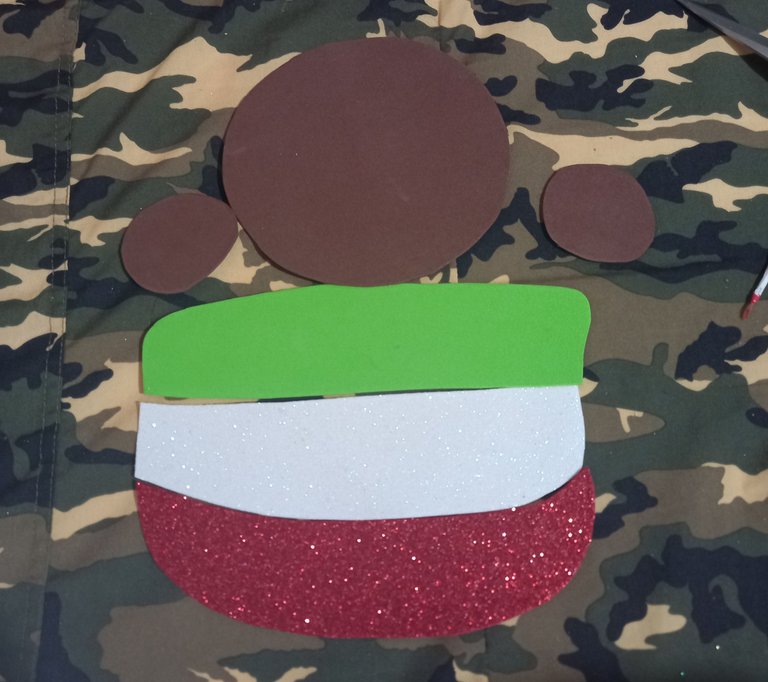
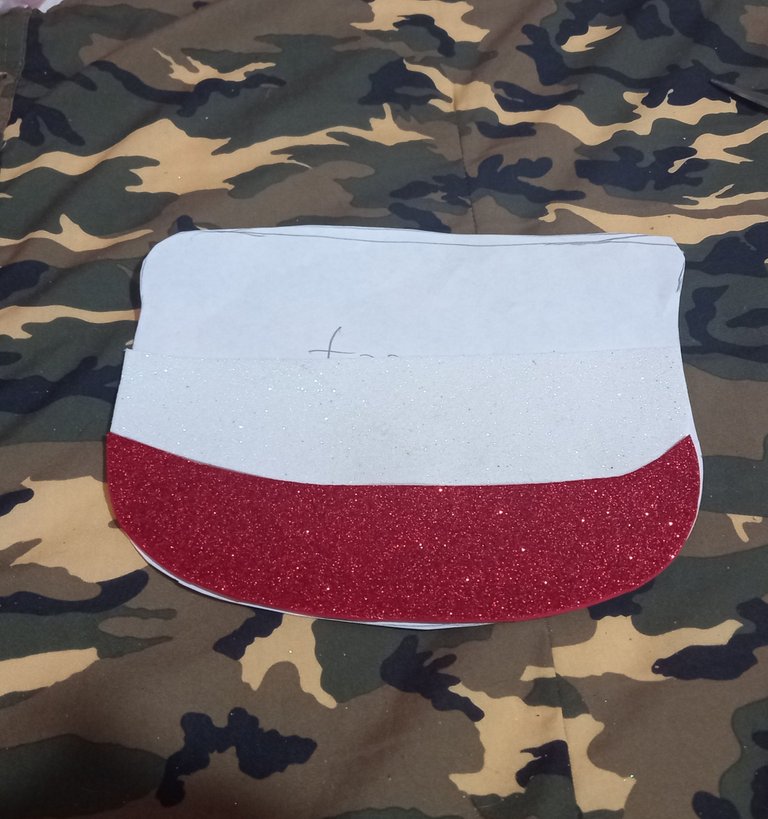
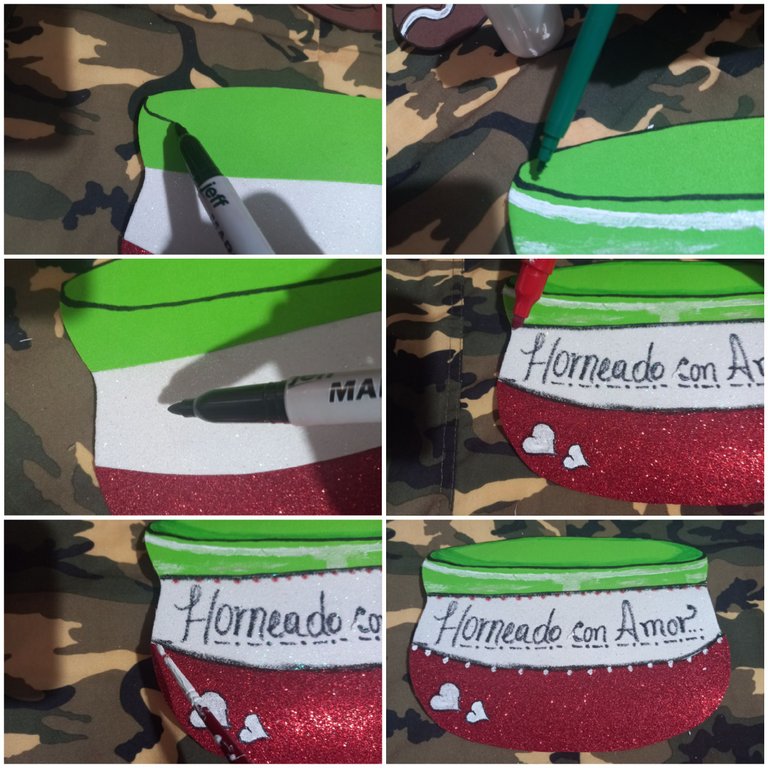
Posteriormente hamaremos la taza pegando las tres piezas una por una, sobre el mismo patrón que uzamos para no trabajar pieza sobre pieza.
Afterwards, we will glue the three pieces one by one, on the same pattern we used so as not to work piece by piece.
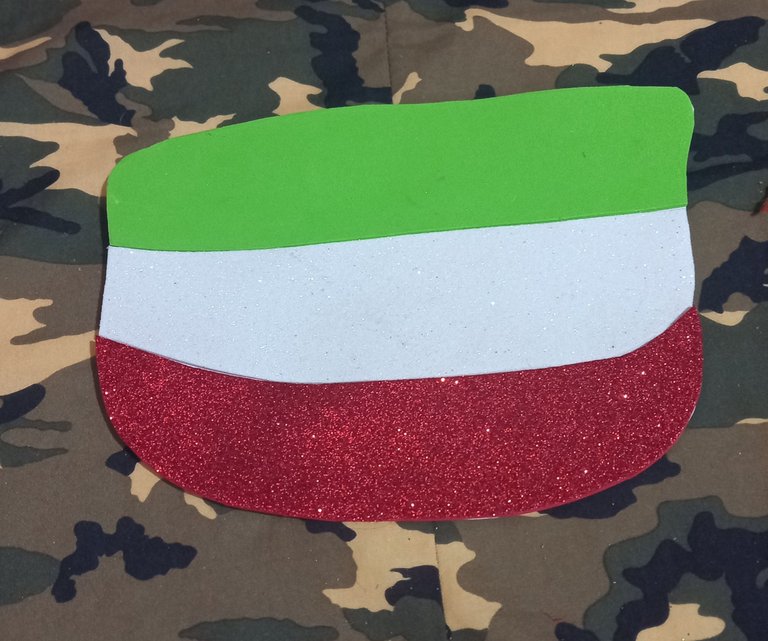
Con marcador negro y verde hacemos el detalle de la orilla y el fondo de la taza, de igual manera pintaremos dos corazones 💕 en la parte inferior de la taza y terminaremos los detalles con marcador rojo, tempera blanca y marcador negro.
With black and green marker we make the detail of the border and the bottom of the cup, in the same way we will paint two hearts 💕 at the bottom of the cup and we will finish the details with red marker, white tempera and black marker.
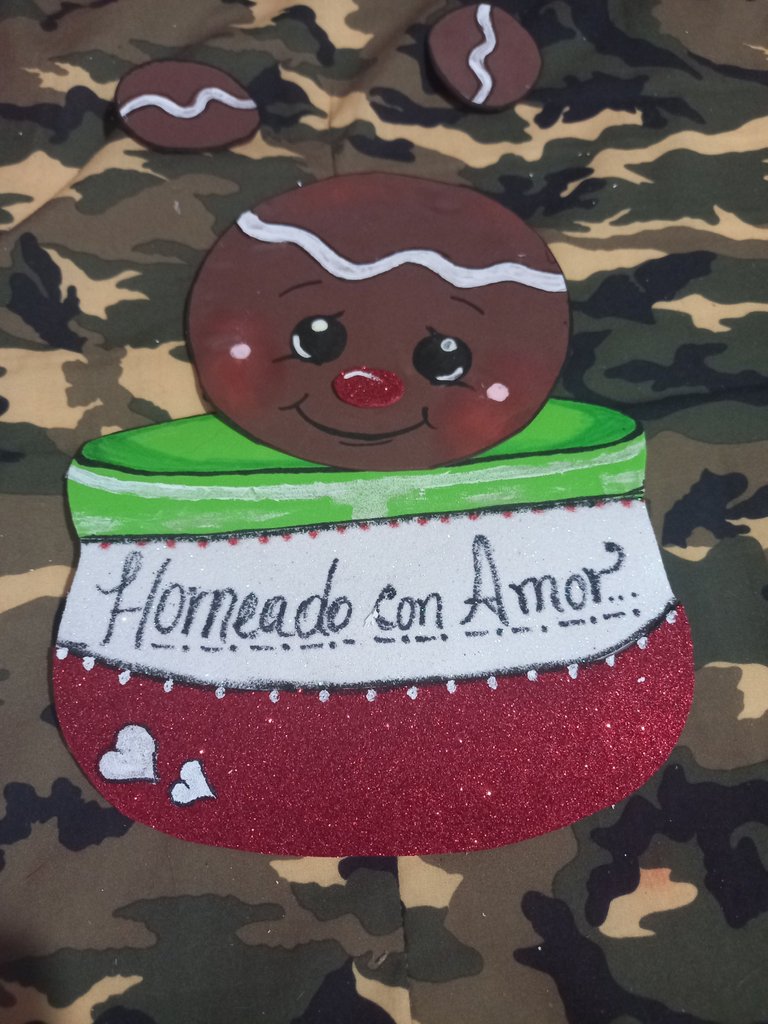
Finalizamos pegando la cabeza en la parte superior de la taza de tal manera que simule estar dentro de ésta, Seguidamente pegamos las manitos a cada lado, entre la cara y la taza.
We finish by gluing the head on the top of the cup so that it looks like it is inside the cup, then we glue the hands on each side, between the face and the cup.
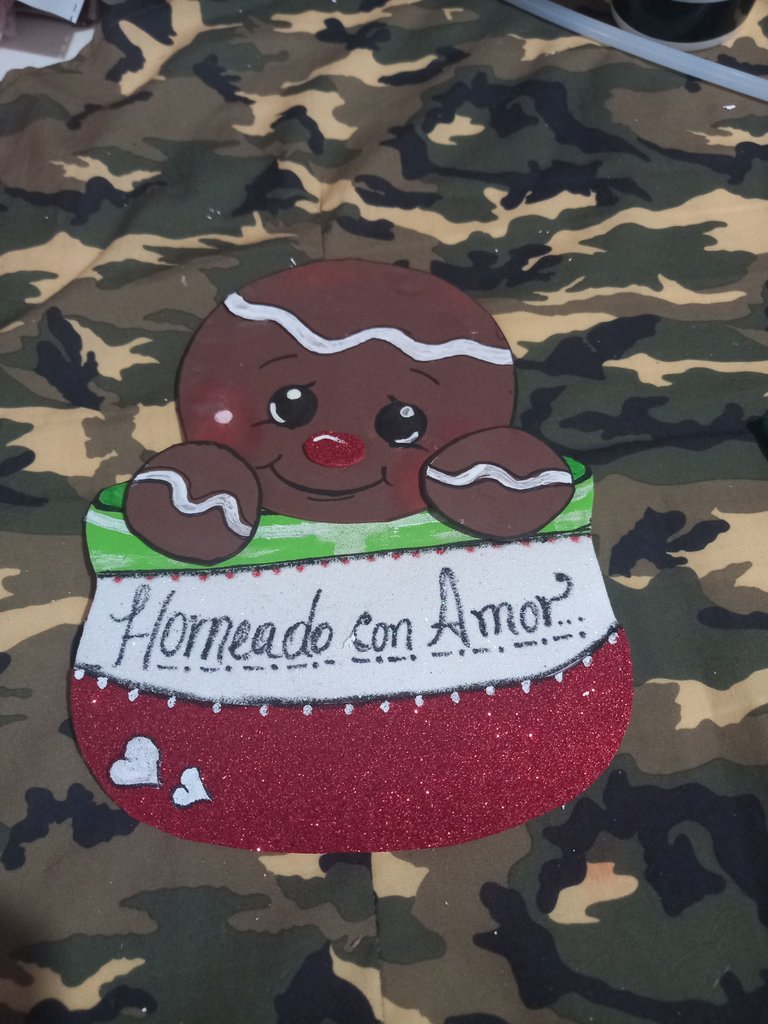
RESULTADO FINAL
FINAL RESULT

Espero que éste material haya sido de su agrado queridos amigos. Gracias por visitar.
DIOS LOS BENDIGA MUCHO
I hope this material has been to your liking dear friends. Thank you for visiting.
Congratulations @kathelopez77! You have completed the following achievement on the Hive blockchain and have been rewarded with new badge(s):
Your next target is to reach 50 upvotes.
You can view your badges on your board and compare yourself to others in the Ranking
If you no longer want to receive notifications, reply to this comment with the word
STOPCheck out the last post from @hivebuzz: