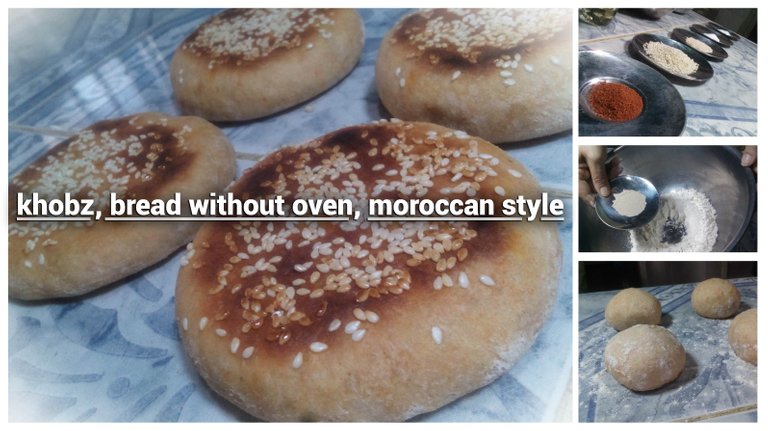
Khobz, bread without oven, Moroccan style (English/Spanish)
A loving greeting to all my Hive friends, I hope you have a happy Sunday. It gives me great joy to be with you once again in this beautiful food community, especially because, in addition to sharing my recipes, I also learn amazing things from everyone who gathers here every week with their delicious dishes and wonderful cooking tips. Last time I brought you my recipe for Pita bread, which as I mentioned in the post is one of my favorites. However I keep many bread recipes that I make all the time and have taught in community spaces as a tasty alternative. So I thought I would continue to share with you the bread recipes that I love and that are cruelty free.
One of them is Khobz, it is a series of bread of Moroccan origin, it is delicious, does not require oven and is ideal to enjoy with some stew as it is a salty and spicy bread, so you can imagine its rich flavor. There are about 8 variants of Khobz, today I will share with you the recipe I use and it is really delicious and simple.
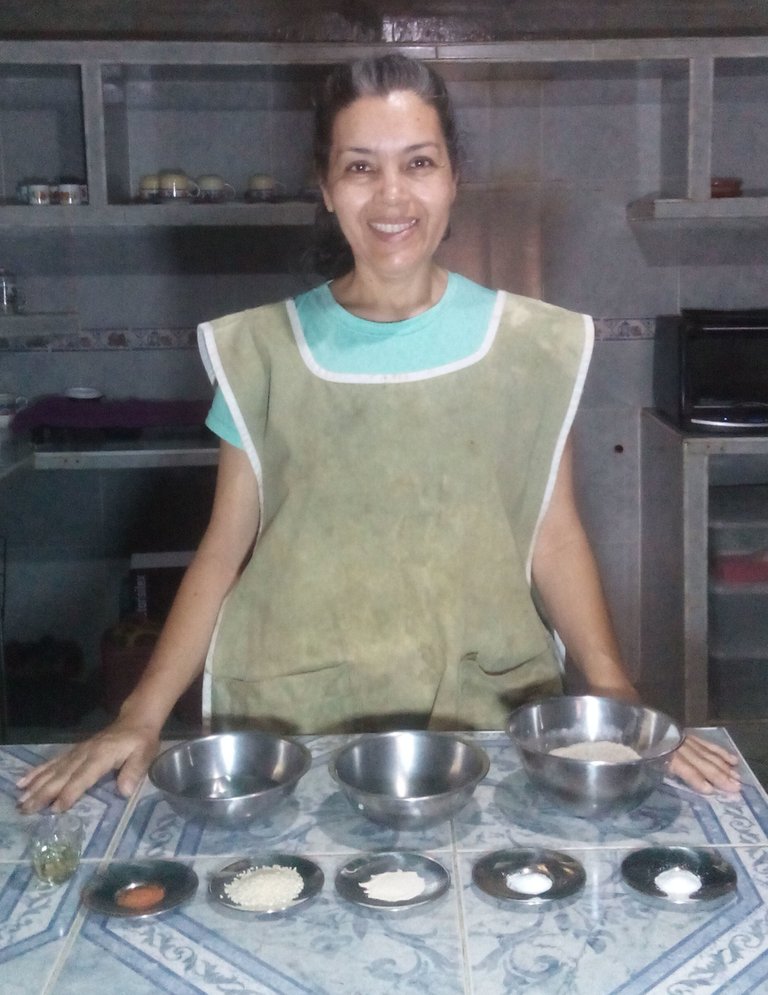
Here are the ingredients and quantities for 4 loaves, then we will start with the step by step.
Ingredients
- 170 gr wheat flour
- 25 gr corn flour
- 5 grams of sugar
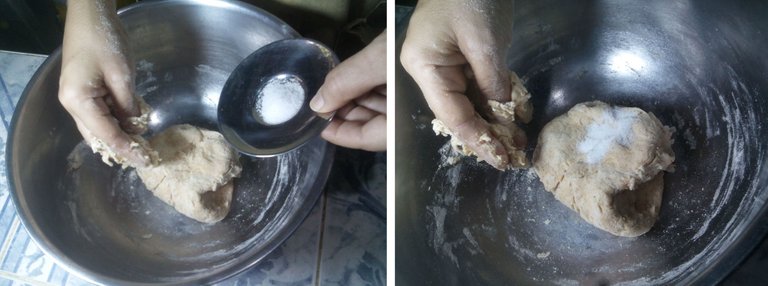
- 5 grams of salt
- 4 gr yeast
- 125 ml of warm water
- ½ tablespoon paprika
- 8 ml of oil
- 1 tablespoon sesame seeds

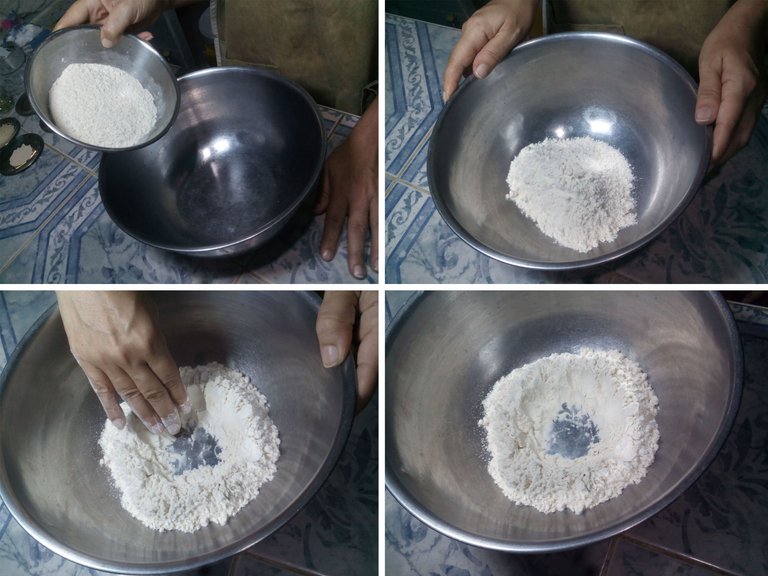
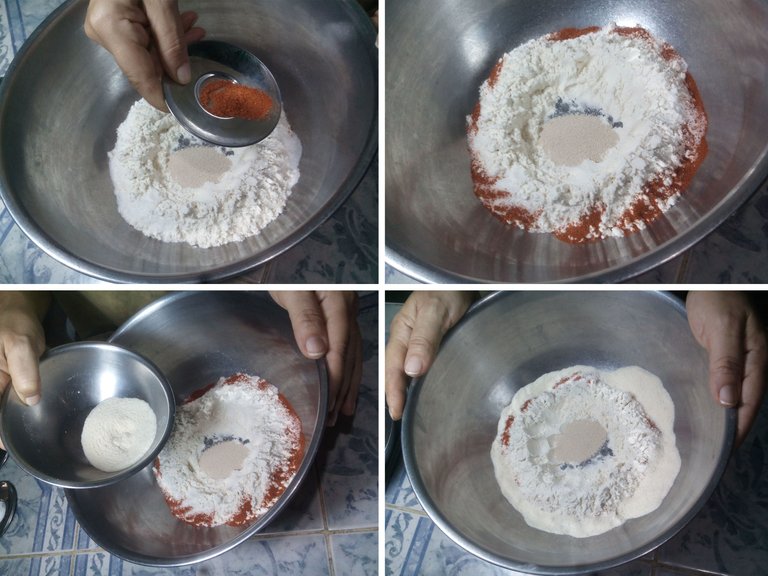
We will start by pouring the wheat flour in a bowl, with the hand we will make a hole in the center, so that it is in the shape of a volcano. You will always see this in my bread recipes, because it is a principle that I learned to activate the yeast and it has worked very well, so I try to do it with all the breads that have yeast.
Then add the yeast in the hole we opened, we will also take the opportunity to sprinkle the sugar over the flour.
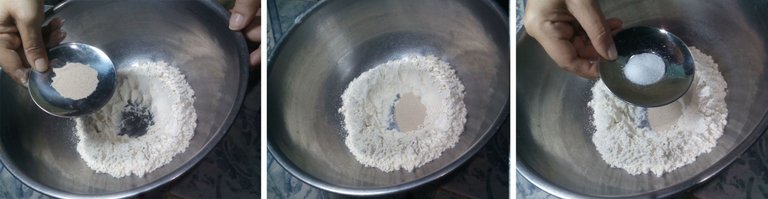
Then we will pour the paprika over the flour and sugar. Immediately we will do the same with the corn flour. With this our volcano will be ready for us to activate the yeast.
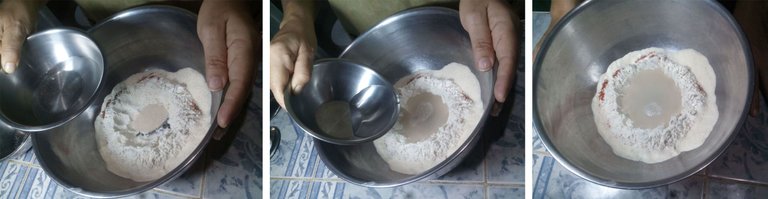
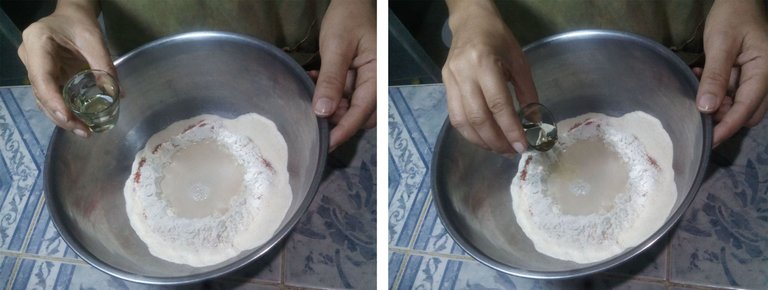
To activate the yeast we must warm the water, it is important that this is not hot or boiling because if so it will have the opposite effect. I don't have a kitchen thermometer so I guide myself by the sensation on my skin, it must be bearable to the touch. Here in Venezuela it is called teapot temperature, it is a popular reference. If the water is too cold it will not have any effect on the yeast either. When the water is lukewarm, pour it over the yeast in the hole of the volcano and wait about 5 minutes. In this time we can take advantage to incorporate the oil.
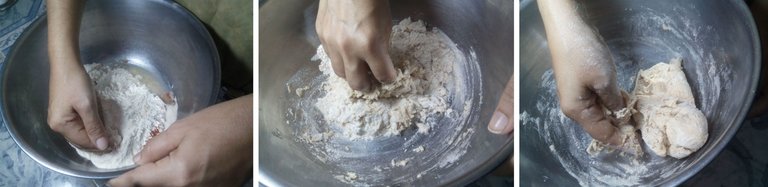
When the 5 minutes have elapsed we can begin to knead in an enveloping way, until all the ingredients are integrated. Finally add the salt and knead until it is integrated, because as I have said on other occasions, salt does not allow the yeast to activate, so we add it at the end to not interfere in the process.
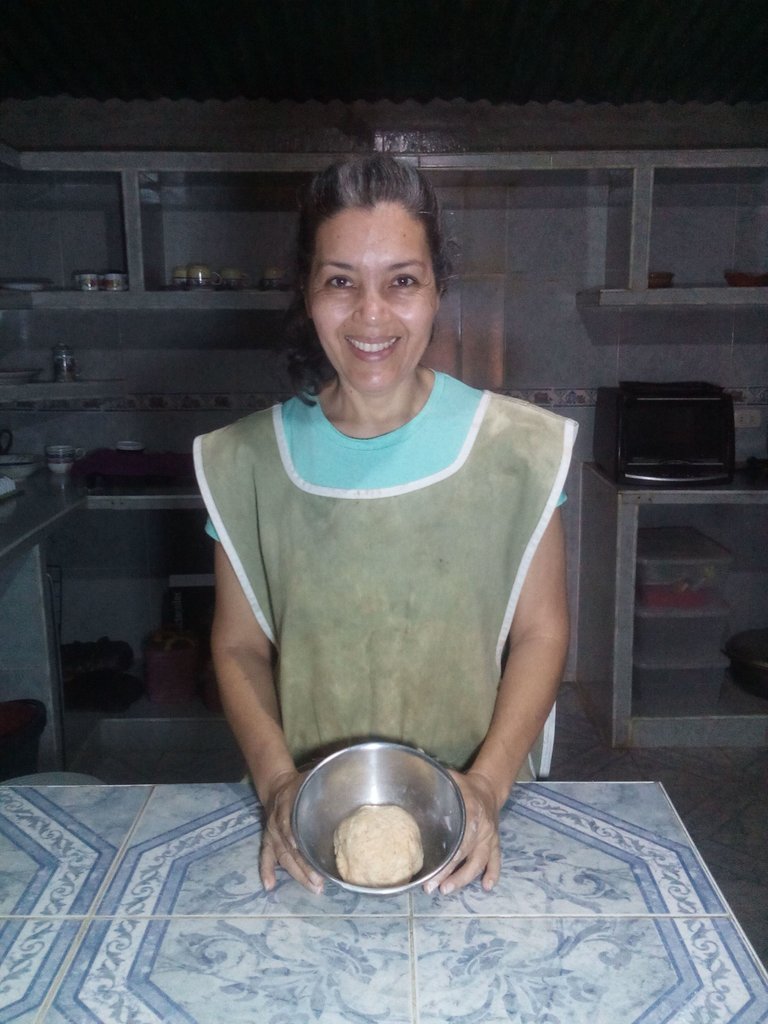
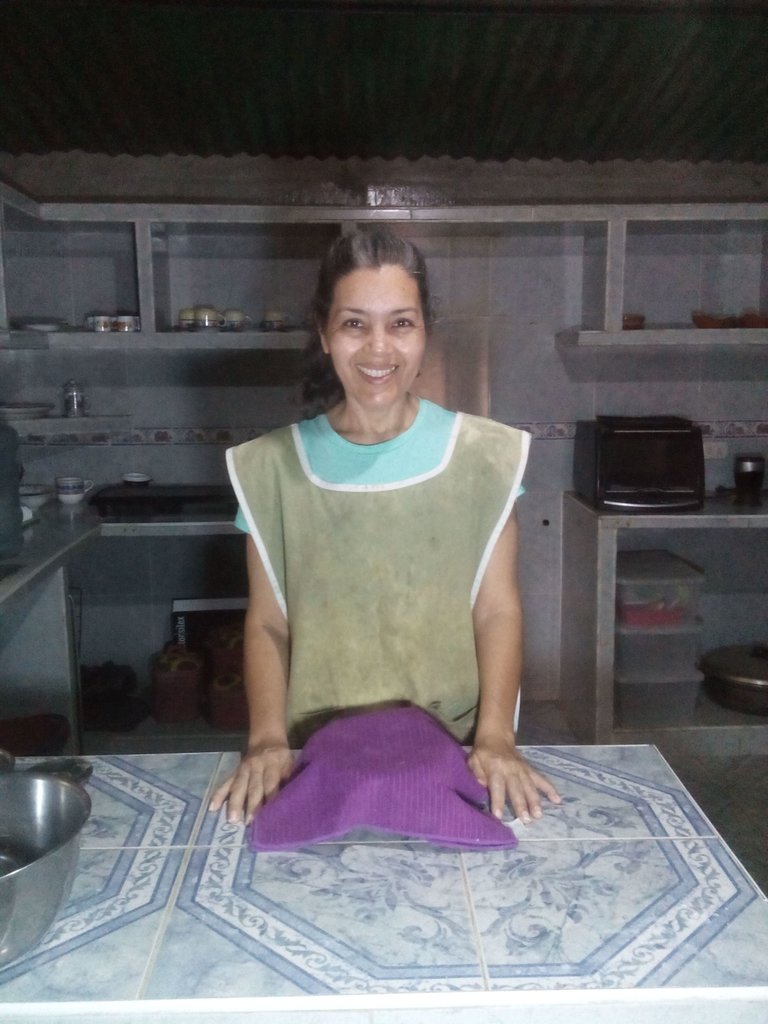
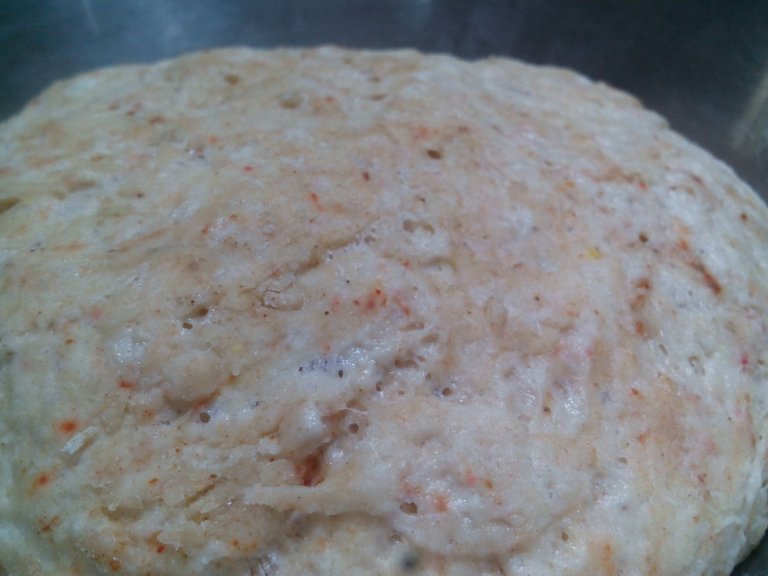
When we have a single dough, with all the ingredients perfectly integrated, cover the bowl with a cloth and put it in a dark place, leaving it to rest for an hour. After this time it will have leavened and we will notice the difference, as in the following photo.
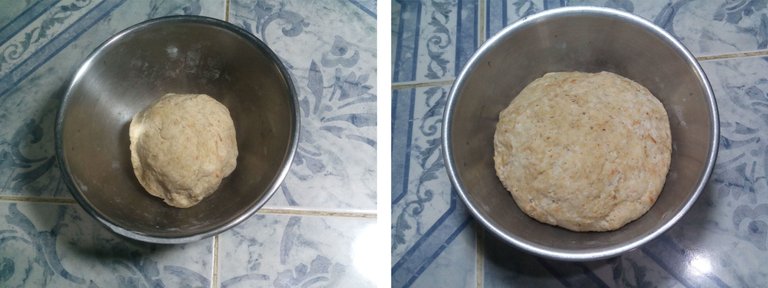
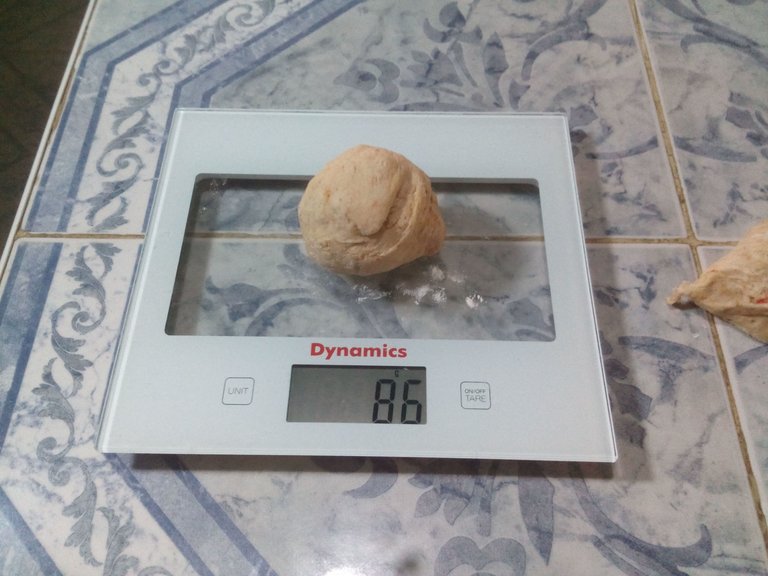
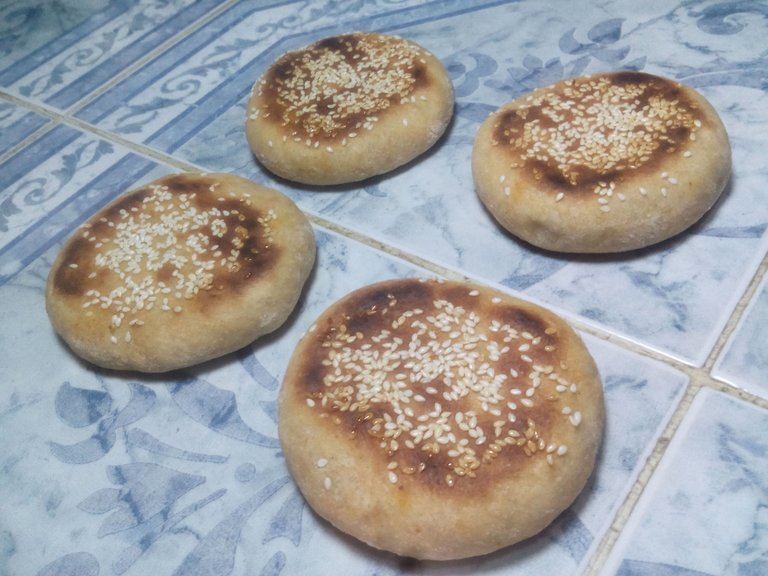
The dough in total weighed 337 gr, so we will divide it into four parts of 86 gr each, approximately.

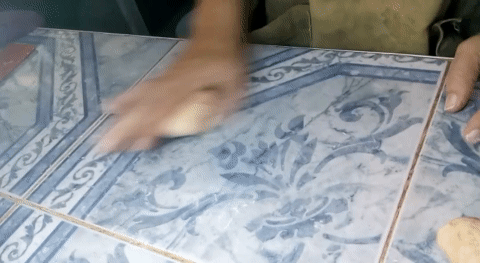
We will take each part and make a ball with it, for this we will use the technique of boleo, which consists of taking the portion in the center of the hand and move it in circles making light pressure against the table.
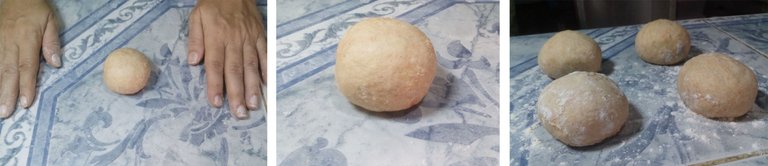
Then we will take each ball and flatten it using our hand, it is not necessary to use the rolling pin, because the thickness should be noticeable, about a centimeter and a half.
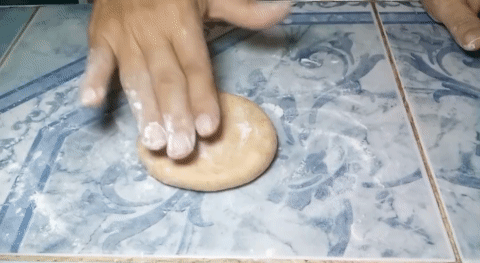
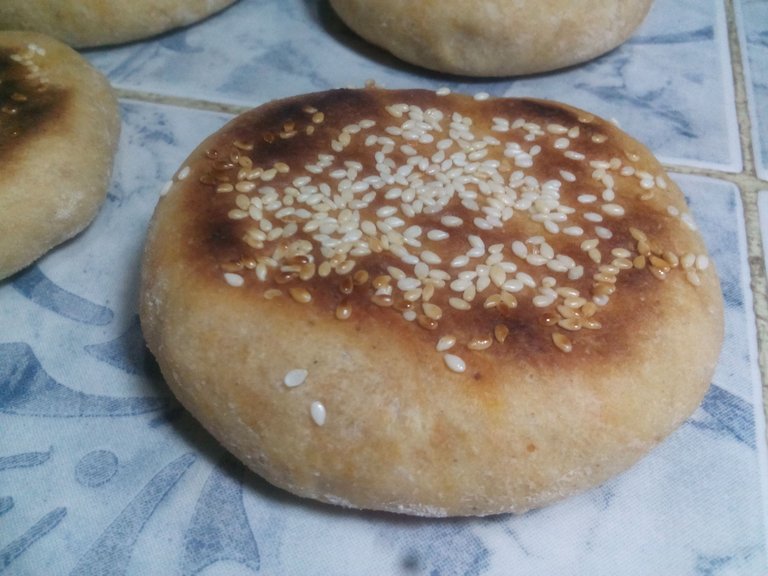
When it is flattened with a brush we will put oil on it and sprinkle some sesame seeds on top. This is how we will do it with all four.
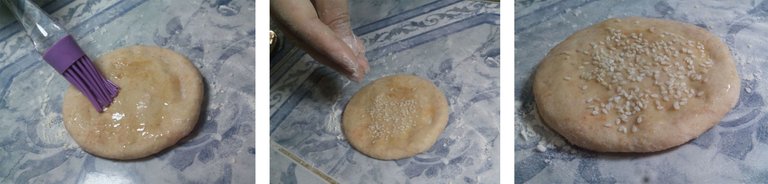
Next in a hot griddle or budare, greased with a little oil, we will put our bread at medium temperature. We will let it cook on one side and then turn it over to cook on the other side.

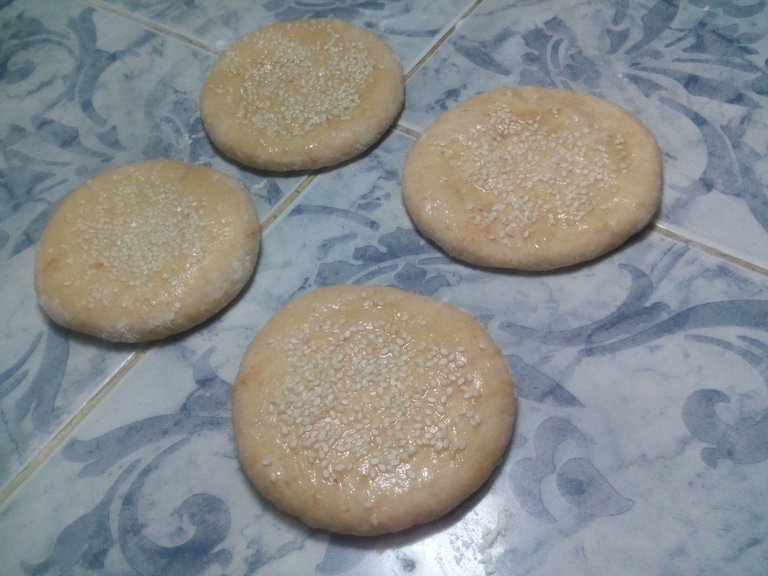
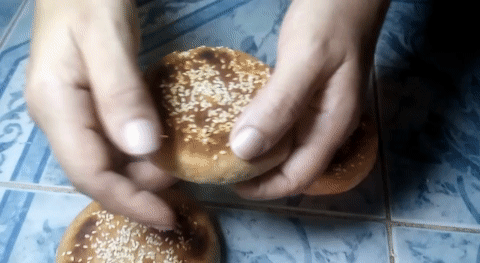
Our bread is ready, it has a crunchy texture on the outside and soft on the inside and a very special flavor generated by the sesame, paprika and the combination of flours. I hope you enjoyed the process and like the result, I really enjoyed making this recipe with you, see you next time.
Original content by the author.
Resources: Tablet ZTE E10Q
Own photos
Translated with Deepl.com
All Rights Reserved || @jetta.amaya// 2023
Khobz, pan sin horno, estilo marroquí (Ingles/Español)
Un saludo amoroso para todos mis amigos de Hive, espero tengan un feliz domingo. Me da mucha alegría estar con ustedes una vez más en esta bella comunidad de comida, sobre todo porque, además de compartir mis recetas, también aprendo cosas increíbles de todos los que se reúnen aquí cada semana con sus deliciosos platos y maravillosos consejos de cocina. La última vez les traje mi receta de Pan pita, que como bien lo mencione en el post es una de mis favoritas. Sin embargo guardo muchas recetas de pan que hago constantemente y que he enseñado en espacios comunitarios como una rica alternativa. Así que pensé que seguiré compartiendo con ustedes las recetas de pan que me encantan y que son libres de crueldad.
Una de ellas es el Khobz, se trata de una serie de pan de origen marroquí, es delicioso, no requiere horno y es ideal para disfrutar con algún guiso ya que es un pan salado y especiado, así que ya se imaginaran su rico sabor. Existen aproximadamente unas 8 variantes de Khobz, hoy les compartiré la receta que yo utilizo y que es realmente deliciosa y sencilla.
A continuación les dejaré los ingredientes y cantidades para 4 panes, enseguida empezaremos con el paso a paso.
Ingredientes
- 170 gr de harina de trigo
- 25 gr de harina de maíz
- 5 gr de azúcar
- 5 gr de sal
- 4 gr de levadura
- 125 ml de agua tibia
- ½ cucharada de paprika
- 8 ml de aceite
- 1 cucharada de ajonjolí
Empezaremos vertiendo la harina de trigo en un bol, con la mano haremos un agujero en el centro, de manera que quede con la forma de un volcán. Esto lo verán siempre en mis recetas de pan, pues es un principio que aprendí para activar la levadura y me ha funcionado muy bien, así que trato de hacerlo con todos los panes que llevan levadura.
Enseguida agregaremos la levadura en el agujero que abrimos, aprovecharemos también para esparcir el azúcar sobre la harina.
A continuación vamos a verter la paprika sobre la harina y el azúcar. De inmediato haremos lo mismo con la harina de maíz. Con esto último nuestro volcán estará listo para que activemos la levadura.
Para activar la levadura debemos entibiar el agua, es importante que esta no se caliente ni hierva pues de ser así tendrá un efecto contrario. No tengo termómetro de cocina así que me guio por la sensación en mi piel, debe ser soportable al tacto. Aquí en Venezuela se le llama temperatura de tetero, es un referente popular. Si el agua está muy fría tampoco tendrá ningún efecto sobre la levadura. Cuando el agua ya este tibia la vertemos sobre la levadura en el agujero del volcán y esperaremos unos 5 minutos. En este tiempo podemos aprovechar para incorporar el aceite.
Cuando transcurran los 5 minutos podemos empezar a amasar en forma envolvente, hasta que todos los ingredientes se integren. Por ultimo agregaremos la sal y amasaremos hasta integrarla, pues como lo he dicho en otras ocasiones, la sal no permite que la levadura se active, así que la agregamos al final para no interferir en el proceso.
Cuando ya tengamos una sola masa, con todos los ingredientes perfectamente integrados, cubrimos el bol con un paño y lo ponemos es un lugar oscuro, dejándolo reposar por una hora. Al transcurrir este tiempo ya habrá leudado y notaremos la diferencia, tal como en la siguiente foto.
La masa en total pesó 337 gr, así que la dividiremos en cuatro partes de 86 gr cada una, aproximadamente.
Tomaremos cada parte y haremos con ella una bola, para ello utilizaremos la técnica del boleo, que consiste en tomar la porción en el centro de la mano y moverla en círculos haciendo presión leve contra la mesa.
Después tomaremos cada bolita y la aplanaremos utilizando nuestra mano, no es necesario utilizar el rodillo, pues el grosor debe ser notable, aproximadamente un centímetro y medio.
Cuando ya esté aplanado con una brochar le pondremos aceite y por encima esparciremos un poco de ajonjolí. Así lo haremos con las cuatro.
En seguida en una plancha o budare caliente, engrasada con un poco de aceite, podremos nuestro pan a temperatura media. Lo dejaremos cocinar por un lado y luego la voltearemos para que se cocinen por el otro.
Ya está listo nuestro pan, tiene una textura crujiente por fuera y suave por dentro y un sabor muy especial generado por el ajonjolí, la paprika y la combinación de las harinas. Espero disfrutaran del proceso y les guste el resultado, yo disfrute mucho hacer esta receta junto a ustedes, hasta la próxima.
Contenido original del autor.
Recursos: Tableta ZTE E10Q
Fotos propias
Traducido con Deepl.com
Todos los derechos reservados || @jetta.amaya// 2023
Thank you for your support.
https://twitter.com/3792991882/status/1647702330698092544
The rewards earned on this comment will go directly to the people( @baboz ) sharing the post on Twitter as long as they are registered with @poshtoken. Sign up at https://hiveposh.com.
Qué panes tan bonitos, @jetta.amaya 😋 La mezcla con harina de maíz siempre me ha encantado, no solo por el sabor, sino por su textura más densa y suave. ¡Saludos! 💚🌿
Me alegro que te gustaran. La mezcla es perfecta, quedan con la densidad justa y el sabor que le añade es riquísimo. Un abrazo, espero la hagas y me comentes.
Hola @jetta.amaya que pames tan hermosos, me encanta que no sea necesario utilizar el horno, también me gusta mucho el toque de paprika.
Es una receta que definitivamente tengo que hacer.
Un abrazo. 🤗🌷🌸
Hola @adonisr, quedan esponjosos y deliciosos, sin necesidad de horno que es una gran ventaja. Espero que te atrevas a hacerlos y me comentes si te gusto. Un abrazo
Thank you for your support
Your bread is amazing, I love the way you bake it without an oven, it sounds so easy for those who don't have an oven at home. And it happened to me once, how hard is it to make baked bread without oven, but it's so simple, I love it.
I'm glad you liked my recipe, it's delicious and easy to make without the need of an oven. Thanks for visiting my post.
So nice food
Hola @jetta.amaya, se ven deliciosos los panes, es una gran opción para no usar el horno y preparar un rico snack, tengo que probar estos panes, gracias por compartir.
Feliz inicio de semana!
Definitivamente es un delicioso snack o para el desayuno o cena es una gran opción, espero te animes a probarla la receta y me comentes. Gracias por visitar mi post.
https://leofinance.io/threads/@crypptogalz/re-leothreads-2bpamd5tg
The rewards earned on this comment will go directly to the people ( crypptogalz ) sharing the post on LeoThreads,LikeTu,dBuzz.