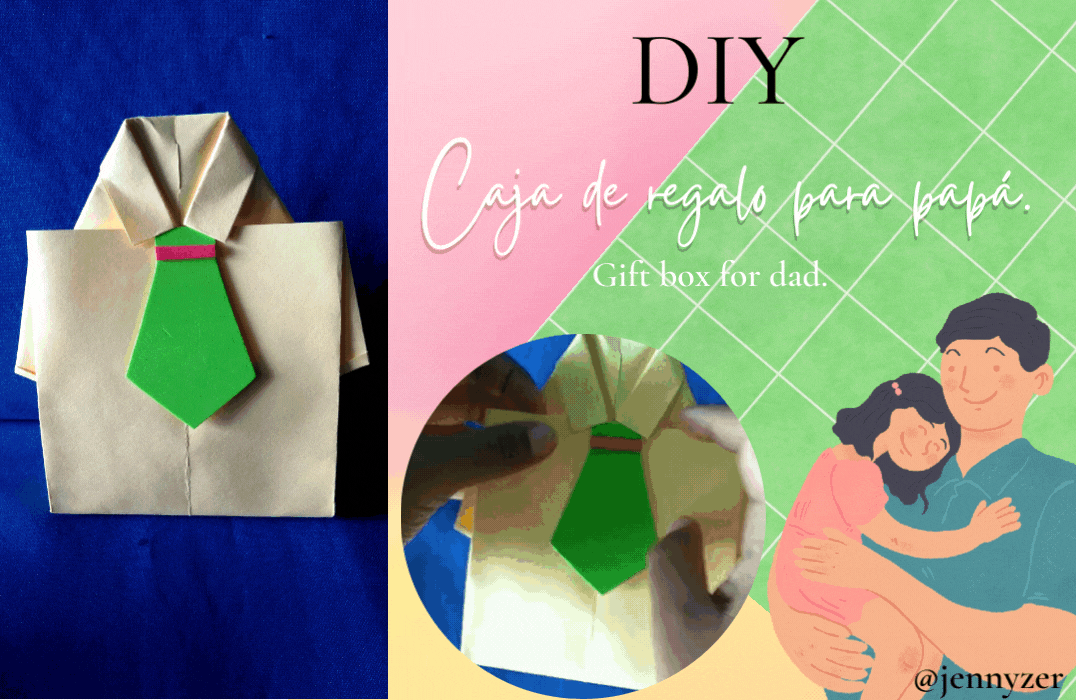
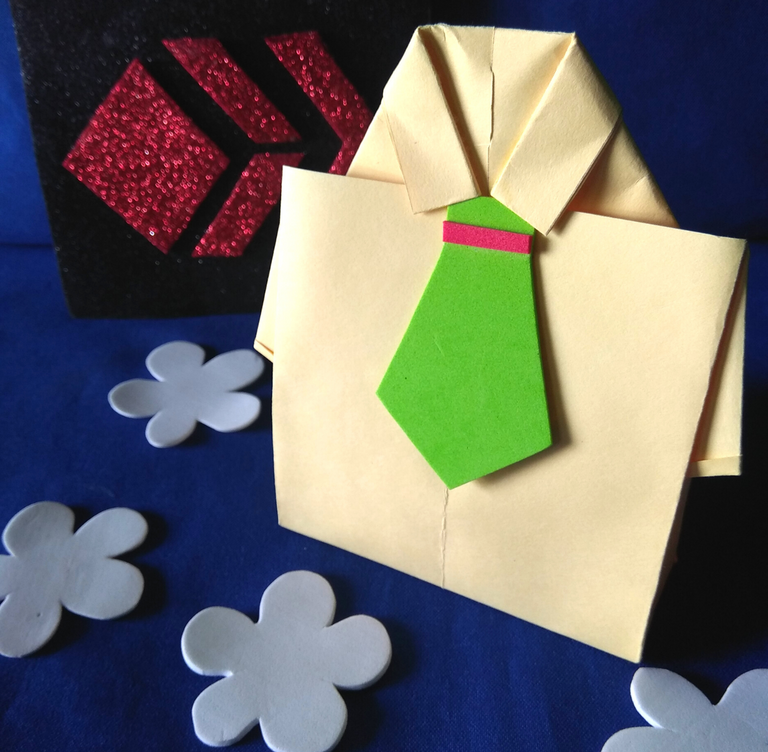
Caja de regalo para papá. || Gift box for dad.


Primer paso: || First step:
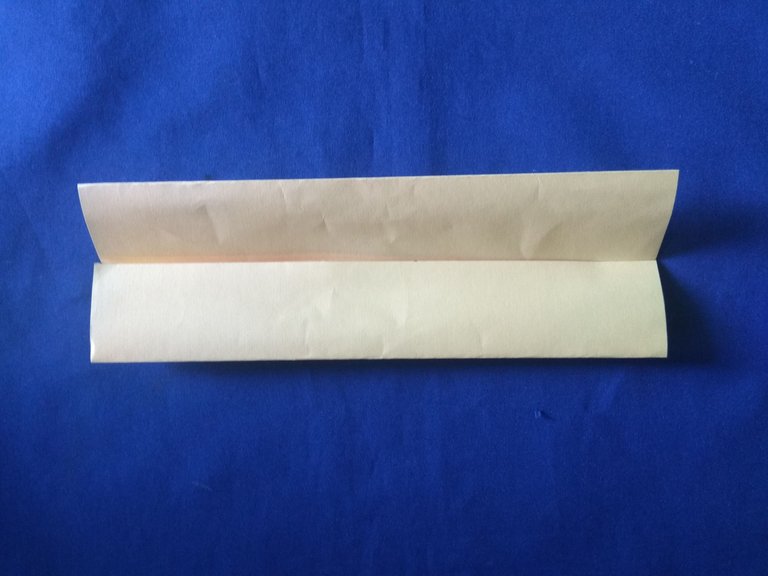
▪️ Para crear esta caja necesitaremos un rectángulo de 21 cm x 29,7 cm, al tener el rectángulo se debe doblar a la mitad.
To create this box we will need a rectangle of 21 cm x 29.7 cm, having the rectangle should be folded in half.
Segundo paso: || Second step:
▪️ A su vez las mitades deben doblarse en medio también.
In turn, the halves should be folded in the middle as well.
Tercer paso: || Third step:
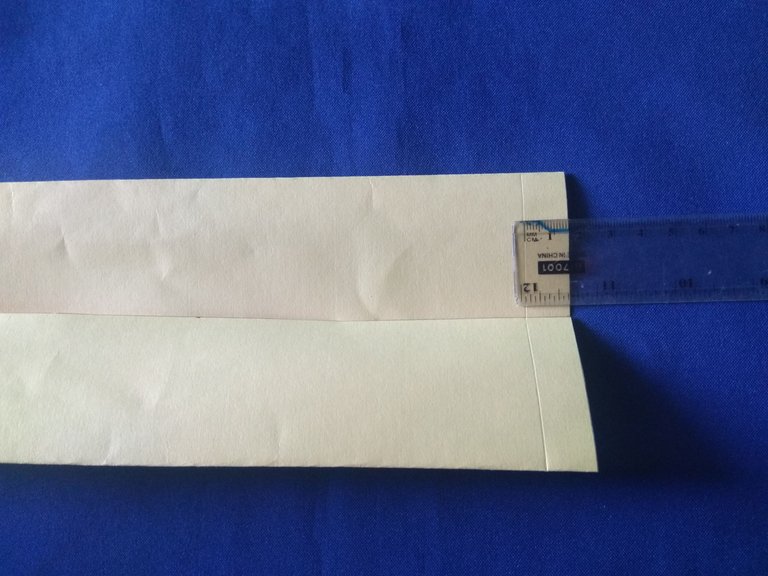
▪️ Uno de los extremos de la cartulina debe ser doblado pero dejando una medida de 1,5 cm.
One of the ends of the cardboard should be folded but leaving a measurement of 1.5 cm.

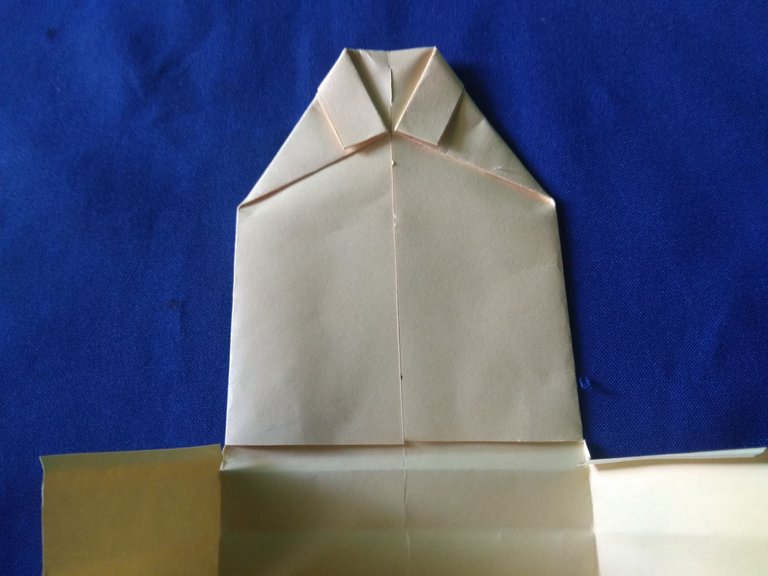
Cuarto paso: || Fourth step:
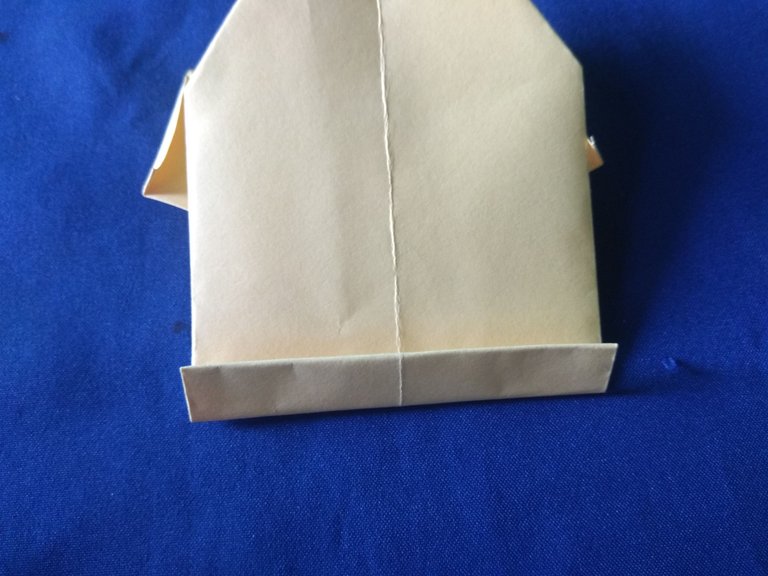
▪️ Al obtener el dobles de 1,5 cm se deben doblar los extremos de la cartulina formando el cuello de la camisa, tengan como referencia la imagen de este paso.
When the 1.5 cm folds are obtained, the ends of the cardboard should be folded forming the collar of the shirt, refer to the image of this step as a reference.

Quinto paso: || Fifth step:
▪️ La parte inferior de la pieza debe abrirse, cada solapa que levanten debe doblarse.
The lower part of the piece should be opened, each flap you lift should be folded.

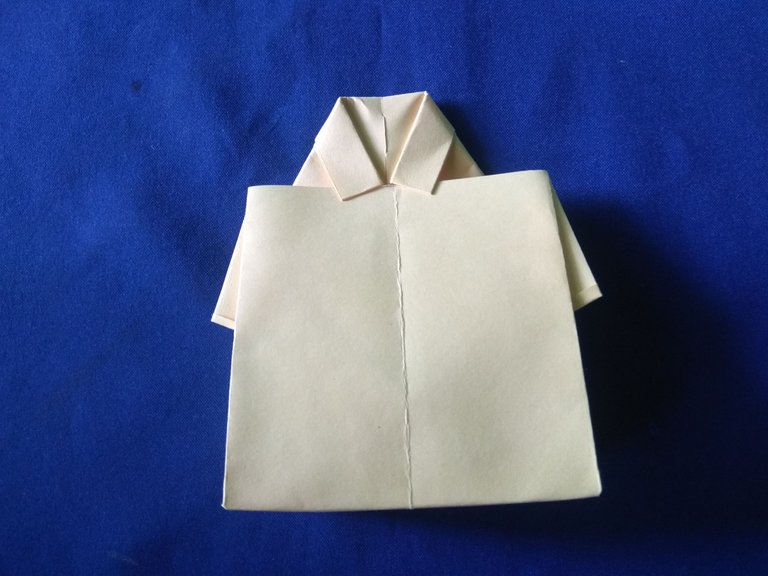
Sexto paso: || Sixth step:
▪️ Ahora lleve el extremo inferior hacia el superior para crear la camisa, recuerden marcar bien en donde se produzca el dobles.
Now bring the lower end towards the upper end to create the shirt, remember to mark well where the folds occur.
Séptimo paso: || Seventh step:
▪️ Hagan un nuevo dobles de 1 cm al final de la camisa, el extremo de la camisa debe quedar en la parte trasera de la pieza.
Make a new 1 cm fold at the end of the shirt, the end of the shirt should be at the back of the piece.
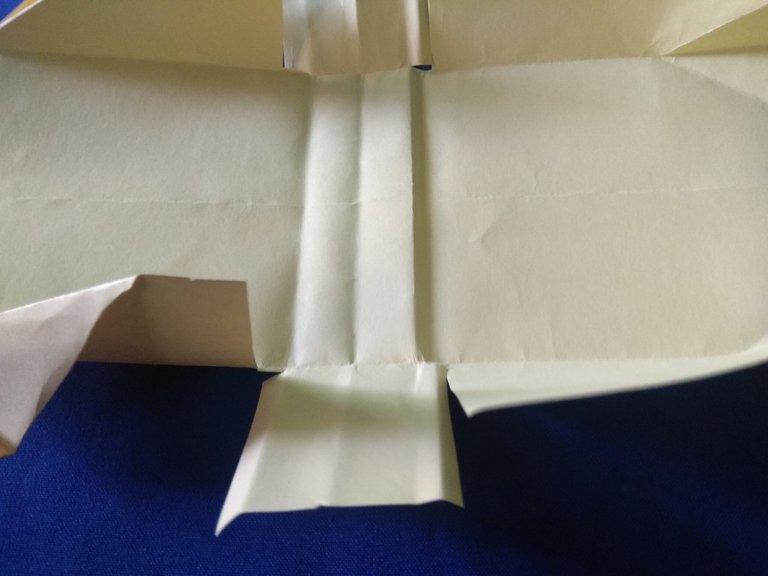
Octavo paso: || Eighth step:
▪️ El dobles anterior nos servirá para marcar líneas y saber donde hacer los siguientes cortes, deben abrir todo la estructura y cortar donde indica la imagen, recuerden que esta debe ser una caja.
The previous doubles will help us to mark lines and know where to make the next cuts, you must open the whole structure and cut where the image indicates, remember that this must be a box.
Noveno paso: || Ninth step:
▪️ Ahora debemos asegurar la estructura con silicón, unan los cortes hechos a cada extremo de la camisa.
Now we must secure the structure with silicone, join the cuts made at each end of the shirt.
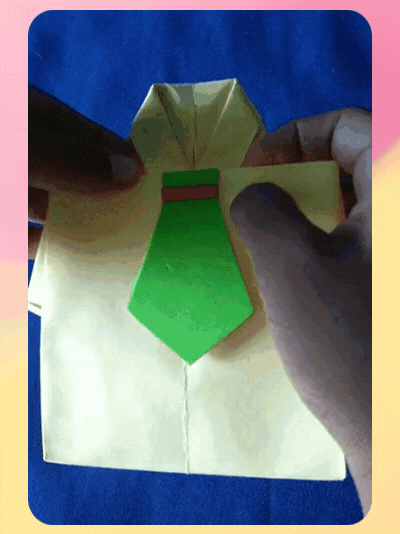
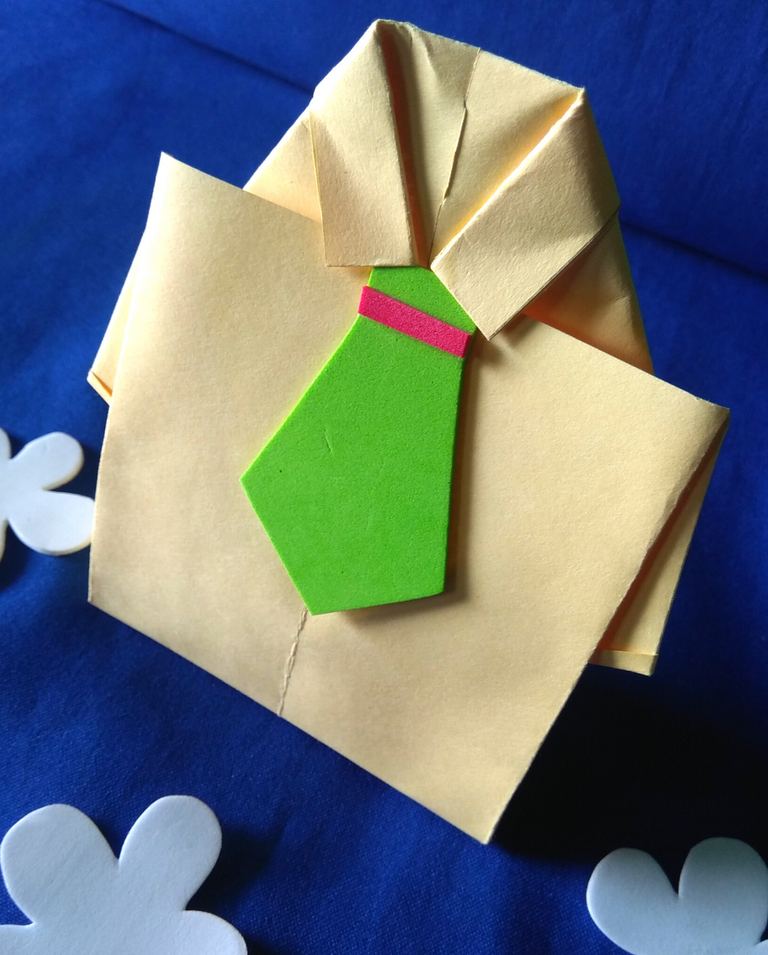
Décimo paso: || Tenth step:
▪️ Peguen considerando la forma deseada, además pueden decorar la caja con una pequeña corbata como fue mi caso, para ello usé dos foamis en diferentes colores, recorté las piezas y las uní a la camisa.
Glue considering the desired shape, you can also decorate the box with a small tie as was my case, for this I used two foamis in different colors, cut out the pieces and attached them to the shirt.
Imágenes tomadas desde mi Xiaomi Redmi Note 4. || Images taken from my Xiaomi Redmi Note 4.
Separadores hechos en Canva. || Dividers made in Canva.
Ediciones hechas en Canva. || Editions made in Canva.
Translator Deepl.
They told me if I killed myself now it would save the lives of countless others.
Saying the longer I wait to kill myself the more people will suffer.
They are reckless and should have shown the proper media what they had before taking me hostage for 5 years. I know there are many in prison that dont deserve to be there because of this. Your stay in prison will not be fun @battleaxe and friends. People are going to want you dead when they find out what you did. I hope you die a slow painful death. You sick mother fuckers.
https://peakd.com/gangstalking/@acousticpulses/electronic-terrorism-and-gaslighting--if-you-downvote-this-post-you-are-part-of-the-problem
Its a terrorist act on American soil while some say its not real or Im a mental case. Many know its real. This is an ignored detrimental to humanity domestic and foreign threat. Ask informed soldiers in the American military what their oath is and tell them about the day you asked me why. Nobody has I guess. Maybe someone told ill informed soldiers they cant protect America from military leaders in control with ill intent. How do we protect locked up soldiers from telling the truth?
https://twitter.com/genicedelvalle1/status/1525631882305609729
The rewards earned on this comment will go directly to the person sharing the post on Twitter as long as they are registered with @poshtoken. Sign up at https://hiveposh.com.
@tipu curate
Upvoted 👌 (Mana: 25/55) Liquid rewards.
Thank you for your support.
Te quedó muy bella... gracias por compartir
💜🌸⭐🌹🌙🍁🌳🌟🌲🌈🏵️🌵🍀💫💫🍂🥀✨🌺🎊💙🐞💮🌷🌱🌼🎉☺️😉😃🥰🤗😘😊👍🏼
Gracias a ti por comentar.
Congratulations, your post has been upvoted by @dsc-r2cornell, which is the curating account for @R2cornell's Discord Community.
Thank you for your support.
Thank you for sharing this amazing post on HIVE!
Your content got selected by our fellow curator @rezoanulvibes & you just received a little thank you via an upvote from our non-profit curation initiative!
You will be featured in one of our recurring curation compilations and on our pinterest boards! Both are aiming to offer you a stage to widen your audience within and outside of the DIY scene of hive.
Join the official DIYHub community on HIVE and show us more of your amazing work and feel free to connect with us and other DIYers via our discord server: https://discord.gg/mY5uCfQ !
If you want to support our goal to motivate other DIY/art/music/homesteading/... creators just delegate to us and earn 100% of your curation rewards!
Stay creative & hive on!
Thank you for your support.