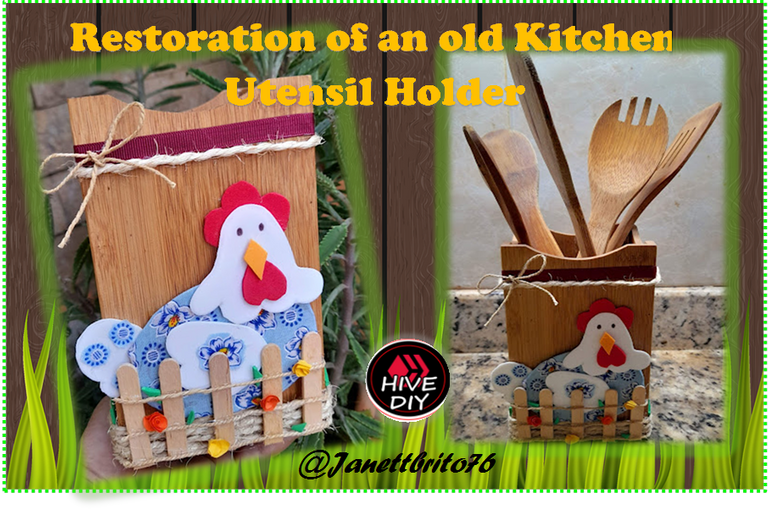
[ESP-ENG] Restauración de un viejo Porta Utensilio de Cocina // Restoration of an old Kitchen Utensil Holder

Saludos a todos mis queridos amigos artesanos de esta hermosa comunidad de #HiveDiy, espero estén pasando un bonito fin de semana en compañía de sus seres queridos. Una vez mas bienvenidos a mi blog. En esta noche les quiero compartir como restaure este viejo porta utensilios de cocina. Les cuento que este se me fue desarmando poco a poco y siempre lo trataba de remendar pero hasta que le llego su hora de darle una segunda oportunidad. Tener un porta utensilios en nuestra cocina es algo genial ya que tener ordenados los utensilios a veces resulta una tarea imposible y mas cuando nuestras cocinas no son grande, así tengamos muebles de almacenaje, siempre tenemos rodando algún utensilio de la cocina por el mesón. Los porta utensilios nos ayuda a tener organizada nuestra cocina, y ademas nos ayuda a cambiar la apariencia a nuestra cocina incorporándole elegancia y funcionalidad.
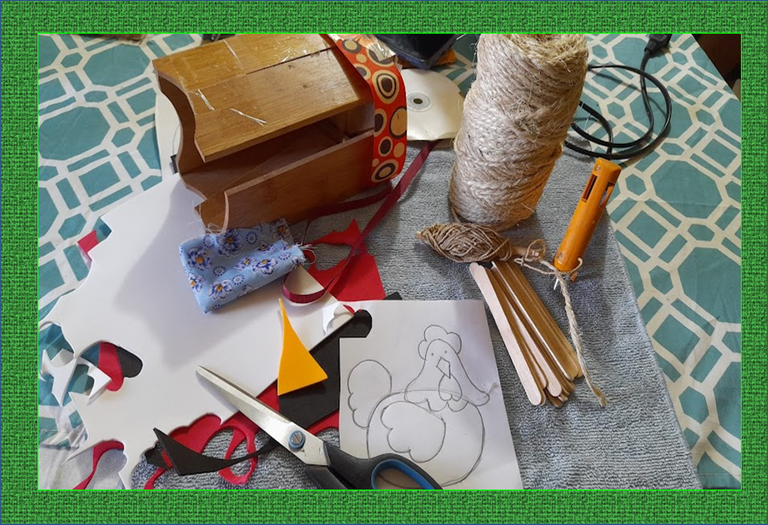
Para la restauración de este viejo porta utensilios de cocina utilice hilo pabilo, mecatillo, paletas, tela, cinta para decorar y foami para realizar una simpática gallinita y un poco de creatividad. Bueno amigos no te pierdas el paso a paso para hacer hacer brillar nuestra cocina con este maravilloso porta utensilios de cocina, sino tienes uno puedes elaborar uno con botellas platicas y cartón, son geniales. Vamos manos a la obra !!

Greetings to all my dear artisan friends from this beautiful #HiveDiy community, I hope you are having a nice weekend in the company of your loved ones. Once again welcome to my blog. Tonight I want to share with you how I restored this old kitchen utensil holder. I tell you that this one was disarming me little by little and I always tried to mend it but until it was time to give it a second chance. Having a utensil holder in our kitchen is a great thing since having the utensils organized is sometimes an impossible task and even more so when our kitchens are not large, even if we have storage furniture, we always have a kitchen utensil rolling around the counter. Utensil holders help us keep our kitchen organized, and also help us change the appearance of our kitchen by incorporating elegance and functionality.
For the restoration of this old kitchen utensil holder, use wick thread, mecatillo, palettes, fabric, decorating tape and foami to make a nice little hen and a little creativity. Well friends, do not miss the step by step to make our kitchen shine with this wonderful kitchen utensil holder, if you do not have one you can make one with plastic bottles and cardboard, they are great. Let's get to work!!

- Porta utensilio
- Silicon
- Mecatillo
- Foami (blanco, rojo, naranja)
- Paletas
- Hilo pabilo
- Tela
- Figura gallina
- Utensil holder
- Silicon
- mecatillo
- Foami (white, red, orange)
- Palettes
- wick thread
- Cloth
- Chicken figure

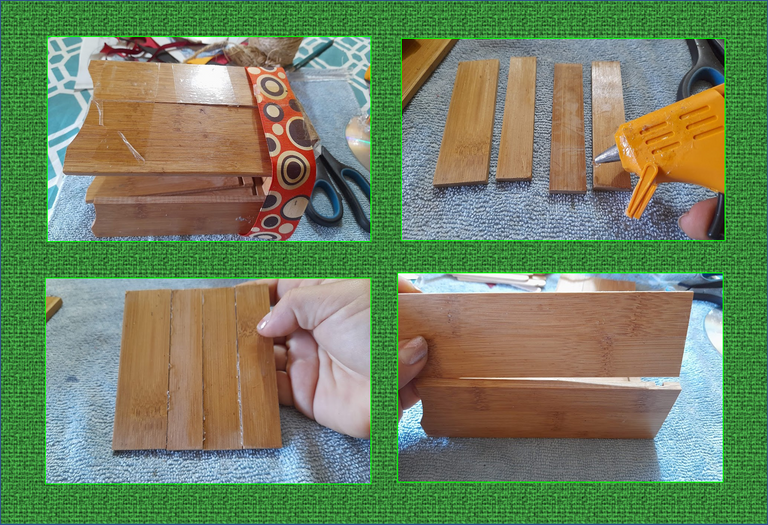
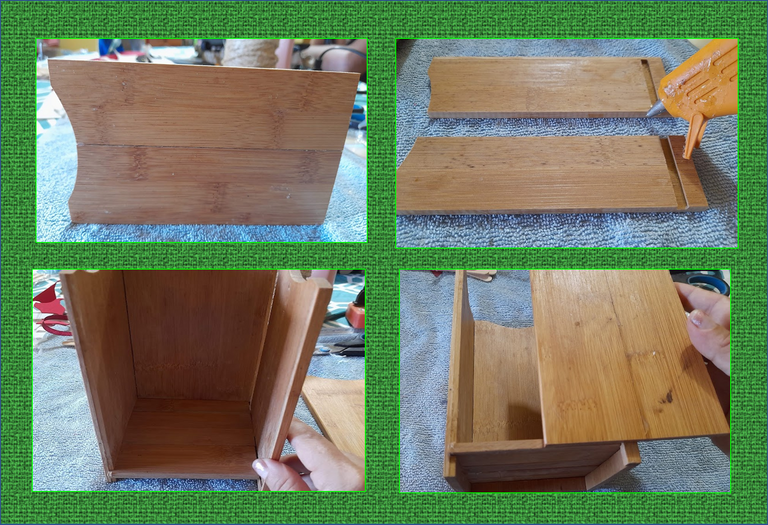
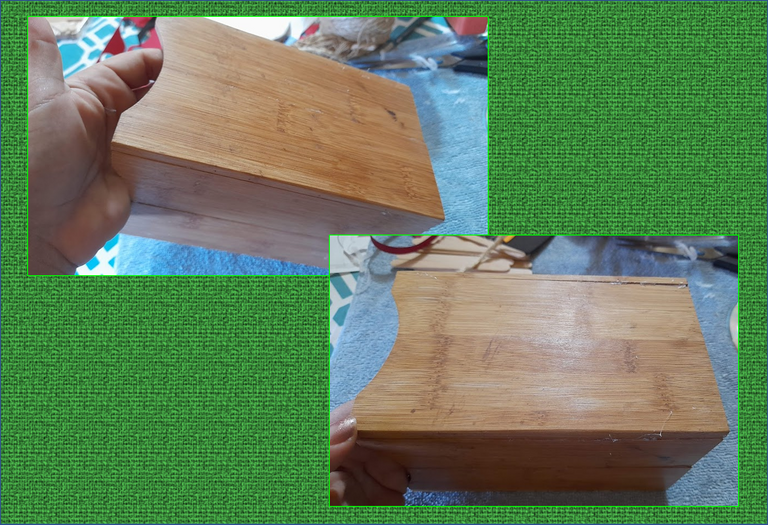
1: Inicie quitando las cosas que le había colocado para remendarlo, luego con el silicon procedí a pegar una a una aquellas piezas que se habían despegado y volví armar mi porta utensilios de cocina, quedando como nuevo.
1: I started by removing the things that I had placed on it to mend it, then with the silicone I proceeded to glue those pieces that had come off one by one and reassembled my kitchen utensil holder, leaving it as good as new.
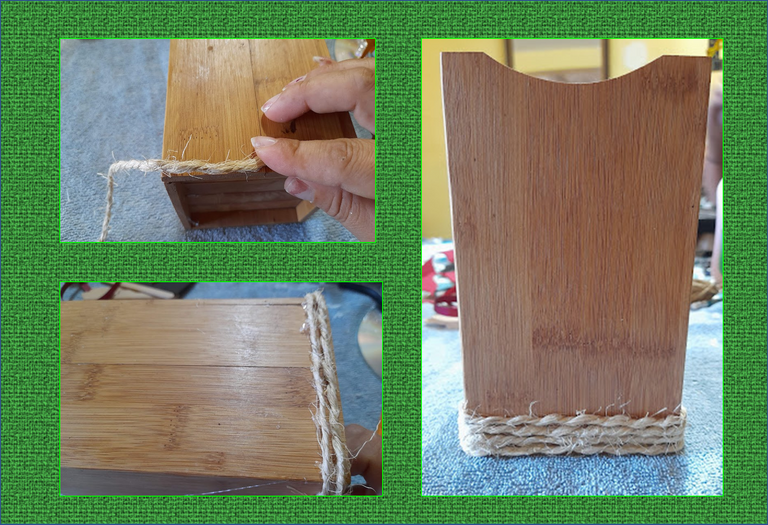
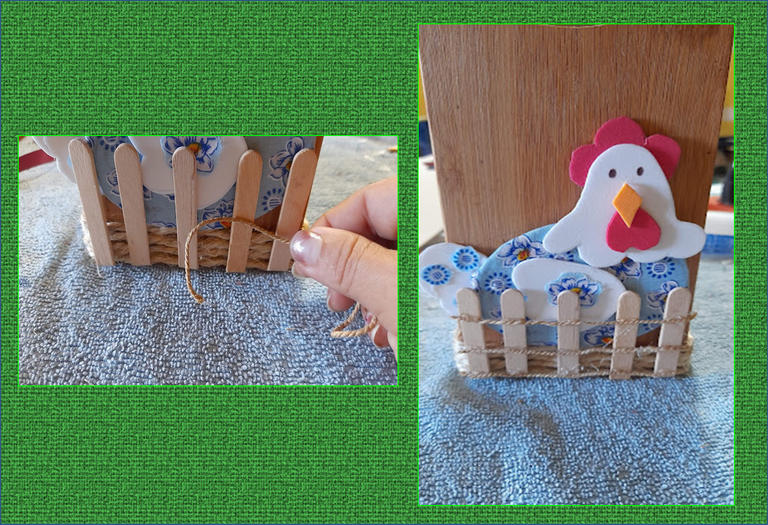
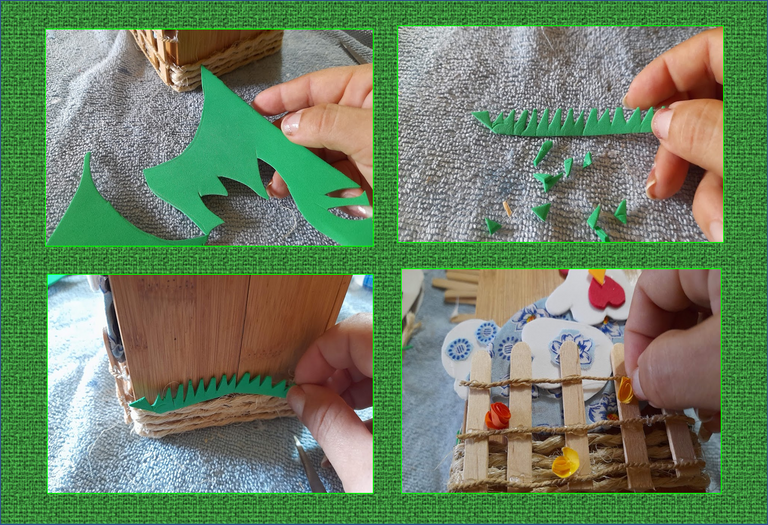
2: Luego para darle una nueva presentación a el porta utensilios, iniciamos pegando un poco de mecatillo por todo el contorno en la parte inferior de la base.
2:Then to give a new presentation to the utensil holder, we start by gluing a bit of mecatillo around the entire contour in the lower part of the base.
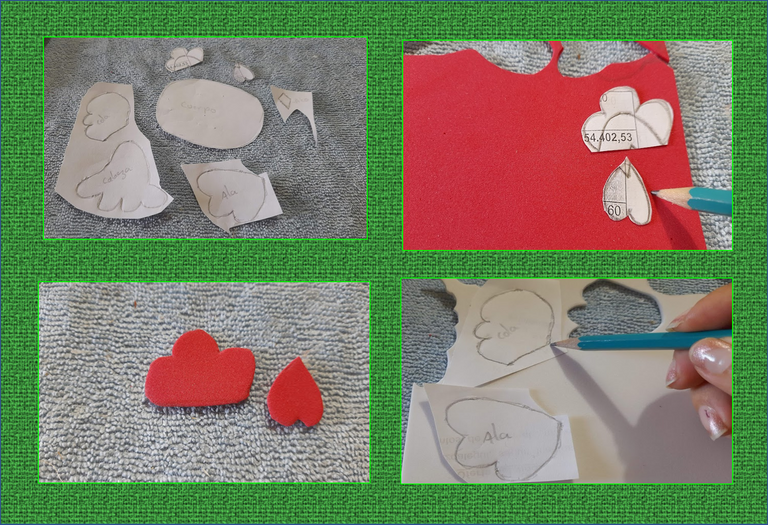
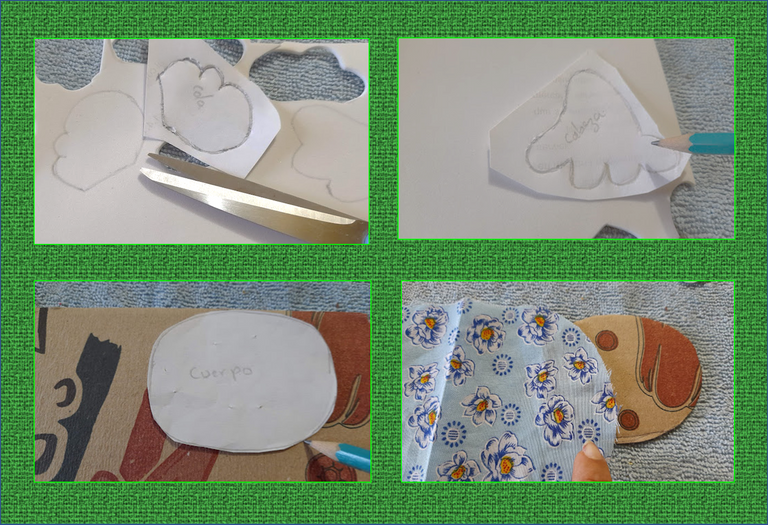
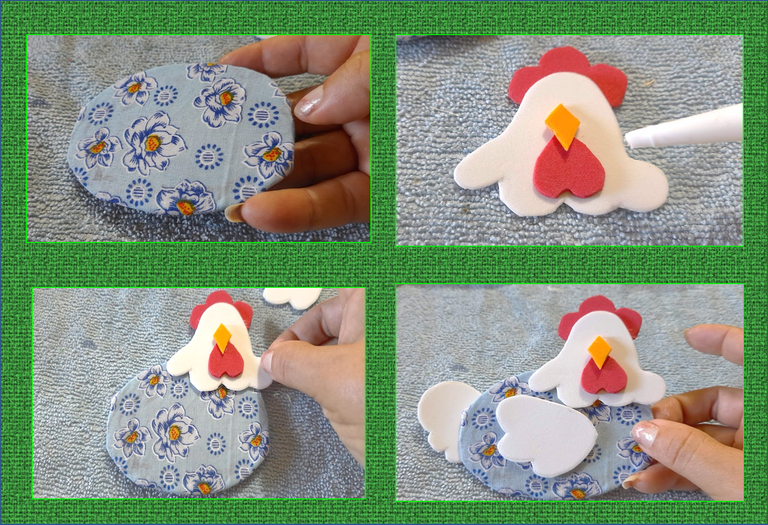
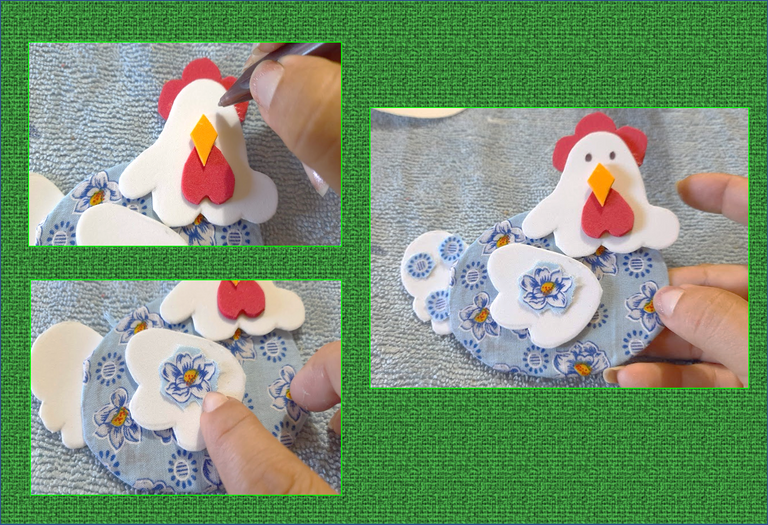
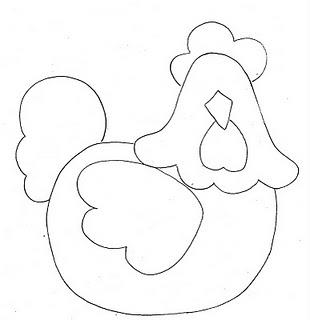
3: Seguidamente tomamos la figura de la gallinita y recortamos cada pieza y luego procedemos a marcarlos en los correspondientes foami. para la cresta y la nariz la marcamos en el foami rojo, en el foami blanco marcamos la cola, ala y cabeza y para el cuerpo lo marcamos en cartón luego lo forramos con la tela y procedemos armar nuestra gallinita, con la ayuda de un lapicero le realizamos unos ojitos y para darle un poco de color a la cola y ala recortamos de la tela con que forramos el cuerpo algunos detallitos.
3: Next we take the figure of the little hen and cut out each piece and then proceed to mark them on the corresponding foami. for the crest and the nose we mark it on the red foami, on the white foami we mark the tail, wing and head and for the body we mark it on cardboard then we cover it with the fabric and proceed to assemble our chicken, with the help of a pen We make some eyes and to give a little color to the tail and wing we cut some details from the fabric with which we lined the body.
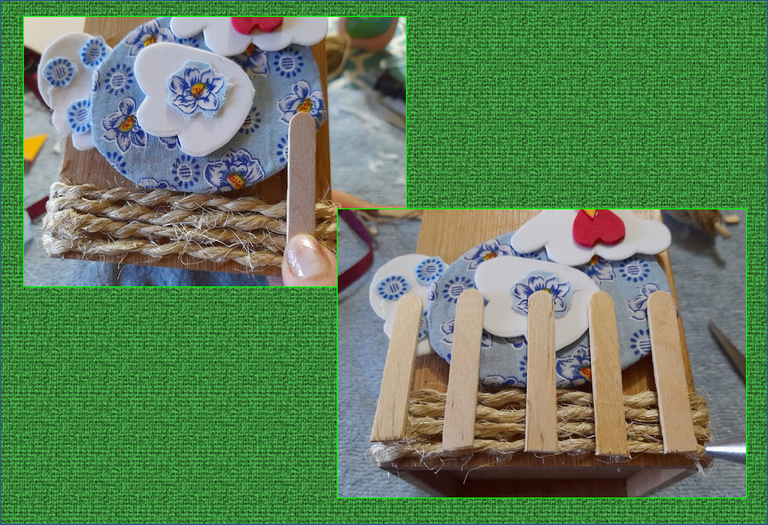
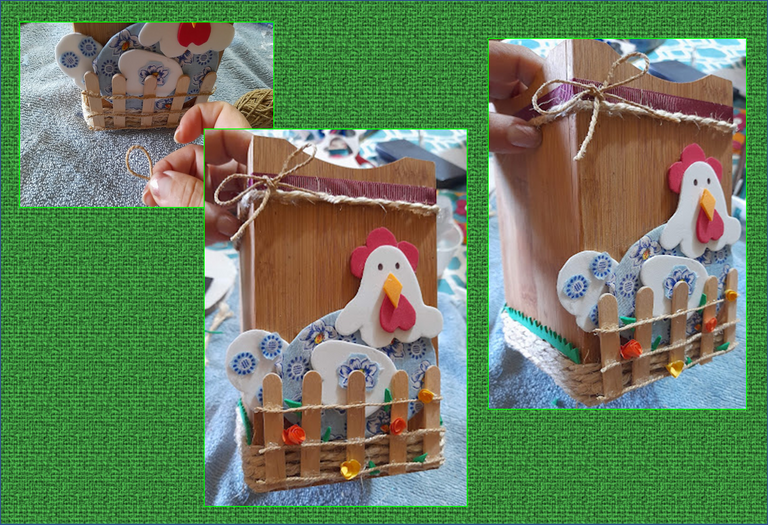
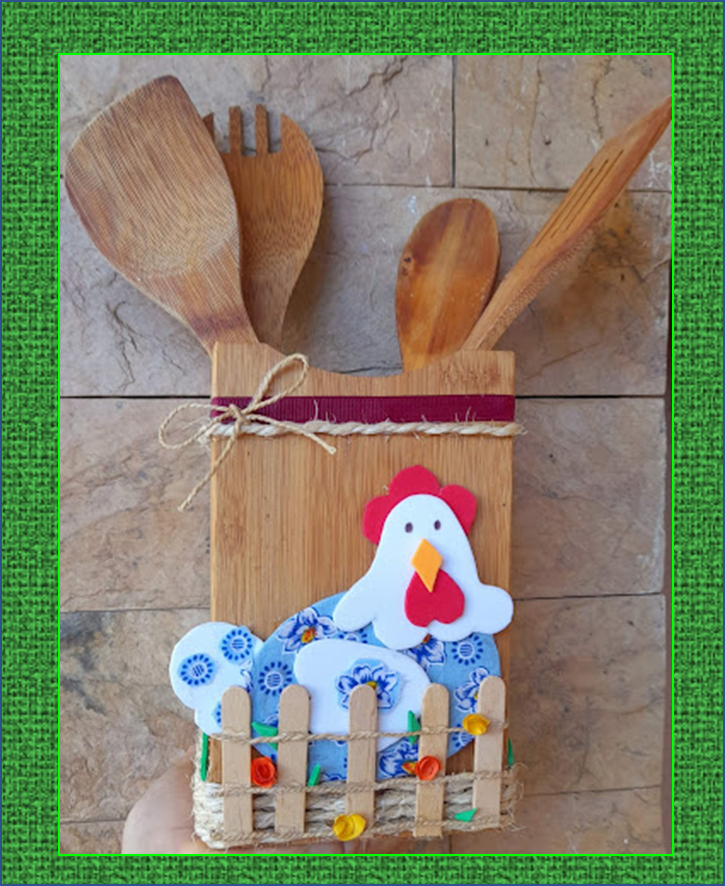
4: Seguidamente procedemos a pegar nuestra gallina al porta utensilios, luego tomamos la cinta vinotinto y el mecatillo y lo pegamos en la parte superior de la base como pueden ver en las imágenes, después medimos el alto que queremos las paletas para simular un corral y procedemos a pegarlas y decoramos con el hilo y unas mini rositas y con el foami verde realizamos unas pequeñas hierbas y la pegamos por el alrededor de la base y para finalizar le realizamos un lacito de hilo y lo pegamos en una esquina del porta utensilios.
4: Then we proceed to stick our hen to the utensil holder, then we take the burgundy tape and the mecatillo and stick it on the top of the base as you can see in the images, then we measure the height that we want the pallets to simulate a corral and we proceed to stick them and decorate with the thread and some mini roses and with the green foami we make some small herbs and stick it around the base and to finish we make a little bow of thread and stick it on one corner of the utensil holder.
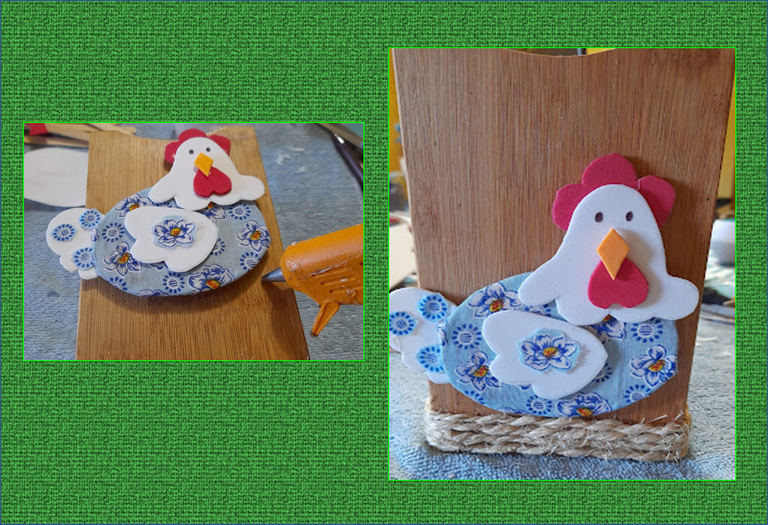

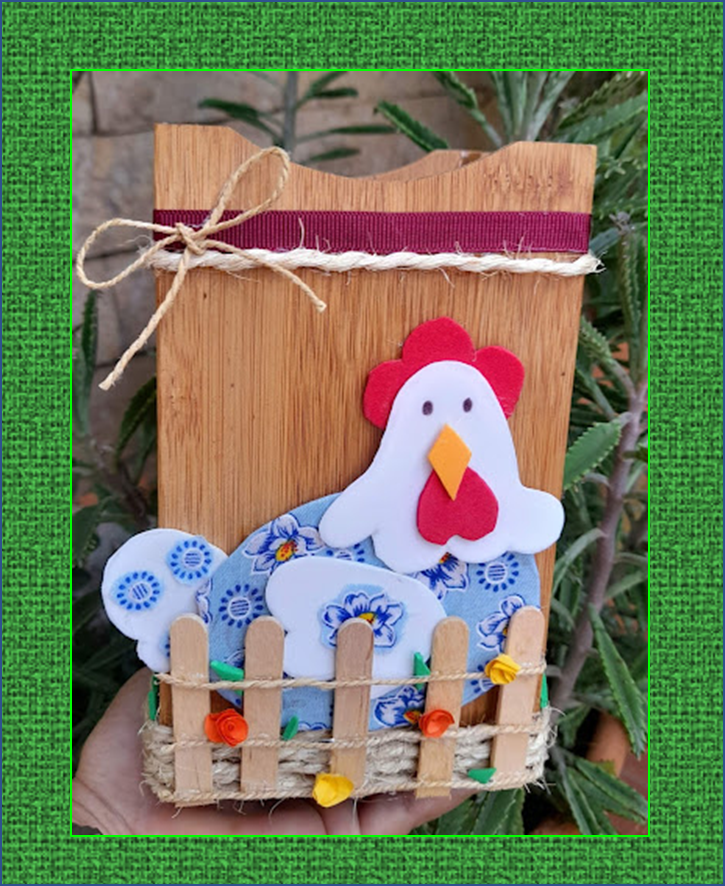
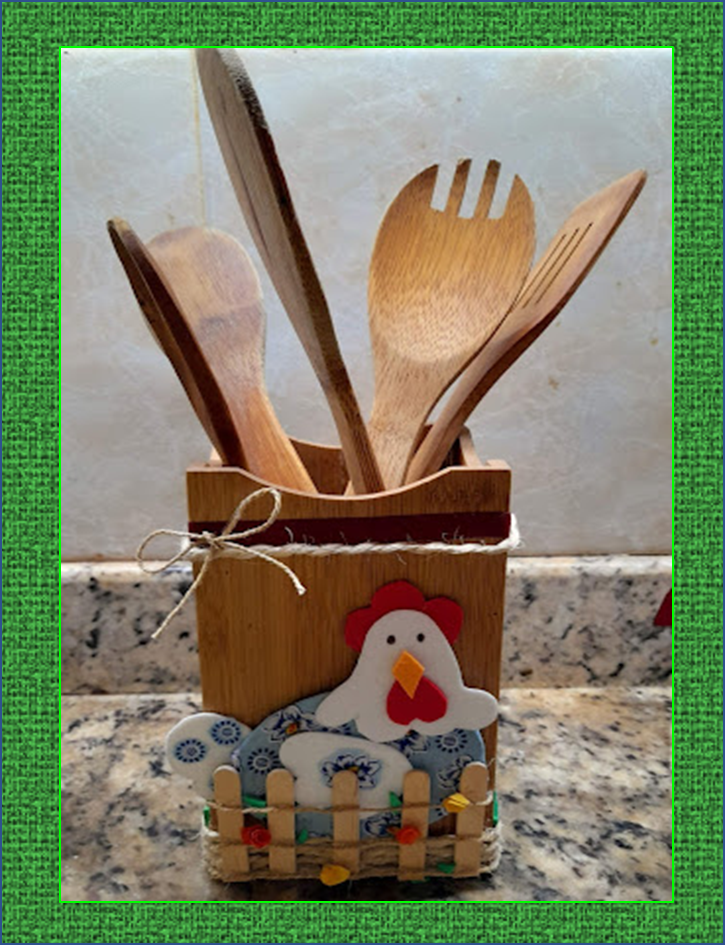
Listo, este es el resultado final de mi restauración del porta utensilios de cocina. ¡Espero les haya gustado mi proyecto de hoy!!
¡Hasta una próxima publicación!
Done, this is the final result of my kitchen utensil holder restoration. I hope you liked my project today!!
Until a next publication!

Fuente portada
Fuente Separador
Fuente Gallina


Las fotografías fueron tomadas con un teléfono inteligente Samsung A12, el texto fue traducido al ingles con el traductor de Google. link
El banner fue diseñado en canvas link
The photographs were taken with a Samsung A12 smartphone, the text was translated into English with the Google translator.
The banner was designed on canvas
Que bonita te quedo tu Restauración manita
Me encantó amiga, muy bonita esa gallinita. Besos Dios te bendiga.
Muy bonito Janett.
Saludos, le quedo genial. Debe lucir muy bien en la cocina, siga así mucho ánimo y buena suerte.
Heeermooosooooo!!! Ya voy y hago uno para mí también!... que ideal para decorar tu cocina! Además de útil es súper decorativo y transmite una vibra de hogar, de calidez humana y amor en familia; no sé porque pero éste tipo de decoraciones siempre las asocio con amor en familia y atención materna, de los guisos deliciosos de la abuela... Que gratos recuerdos me ha inspirado tu creación. Gracias por compartir! Bendiciones!
Thank you for sharing this amazing post on HIVE!
Your content got selected by our fellow curator @rezoanulvibes & you just received a little thank you via an upvote from our non-profit curation initiative!
You will be featured in one of our recurring curation compilations and on our pinterest boards! Both are aiming to offer you a stage to widen your audience within and outside of the DIY scene of hive.
Join the official DIYHub community on HIVE and show us more of your amazing work and feel free to connect with us and other DIYers via our discord server: https://discord.gg/mY5uCfQ !
If you want to support our goal to motivate other DIY/art/music/homesteading/... creators just delegate to us and earn 100% of your curation rewards!
Stay creative & hive on!