[ESP-ENG] ♻️ Practico Organizador de Cosméticos elaborado con material de reciclaje ♻️ Practical Cosmetics Organizer made with recycling material ♻️
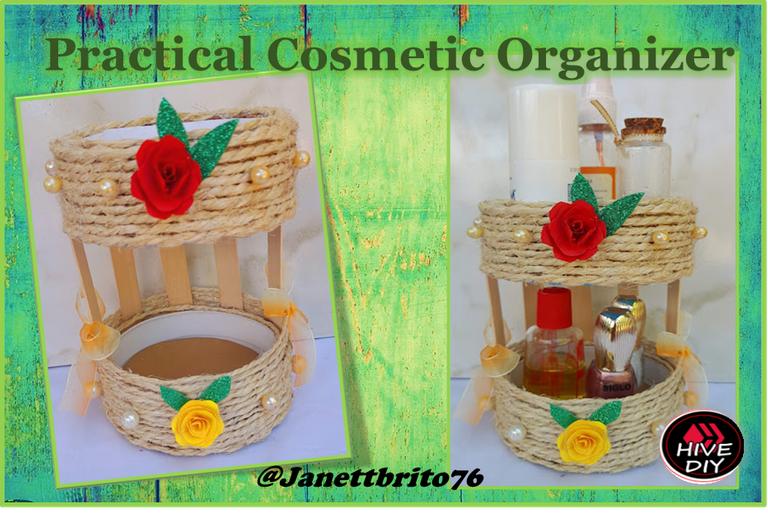

Hola mis queridos amigos feliz Viernes para todos, espero hayan pasado un feliz día y que se encuentren llenos de salud. Bienvenidos nuevamente a mi blog. En esta oportunidad les voy a compartir el paso a paso de como realizar un practico organizador de productos cosméticos, de higiene personal, para organizar tus maquillaje, productos de belleza entre otros, el cual lo puedes colocar en el baño, en tu peinadora o en el closet. Este organizador es fácil, practico y económico y sostenible, ya que con el podrás tener ordenadas tus cosas y así tendrás todo a la mano a la hora de buscar algo, lo mejor de todo esto es que estamos reutilizando materiales reciclados. Para la realización de este practico organizador utilice cartón, mecatillo, paletas,un envase plástico donde viene la crema de arroz y algunos detallitos como unas perlitas plásticas y unas rositas de papel. Bueno,no te pierdas el paso a paso para hacer este Practico organizador de cosméticos. Vamos manos a la obra !!

Hello my dear friends happy Friday to all, I hope you have had a happy day and that you are full of health. Welcome back to my blog. In this opportunity I am going to share the step by step of how to make a practical organizer of cosmetic products, personal hygiene, to organize your makeup, beauty products among others, which you can place in the bathroom, in your hairdresser or in The closet. This organizer is easy, practical, economical and sustainable, since with it you can have your things organized and thus have everything at hand when looking for something, the best thing about all this is that we are reusing recycled materials. To make this practical organizer, use cardboard, mecatillo, pallets, a plastic container where the cream of rice comes and some little details such as some plastic pearls and some paper roses. Well, don't miss the step by step to make this practical cosmetic organizer. Let's get to work!!

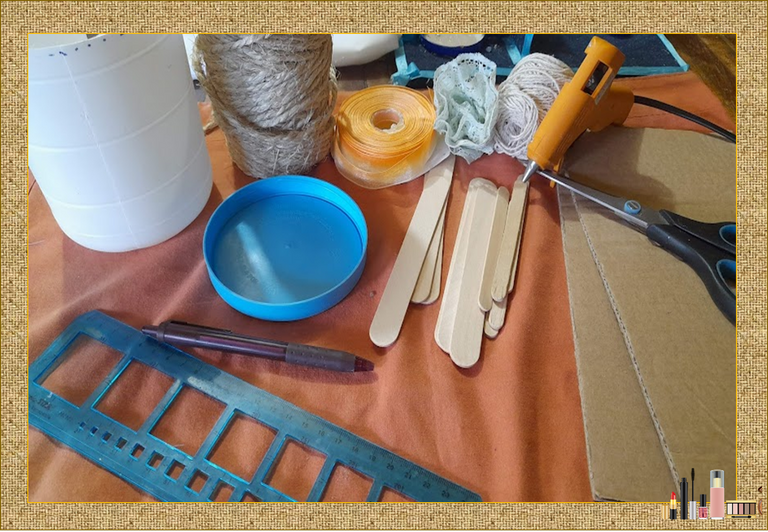
- Envase y tapa plástica
- Silicon
- Mecatillo
- Cinta amarilla
- Cartón
- Tijera
- Foami marrón y blanco
- Plastic container and lid
- Silicon
- mecatillo
- Yellow tape
- Paperboard
- Scissor
- Brown and white foam

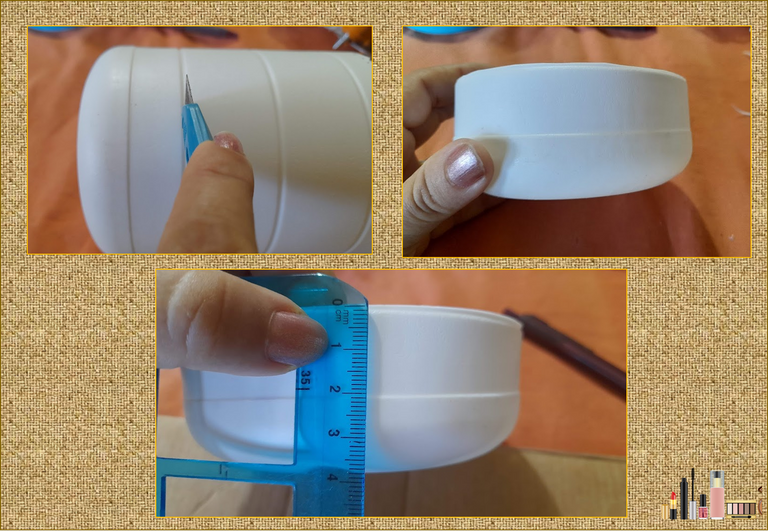
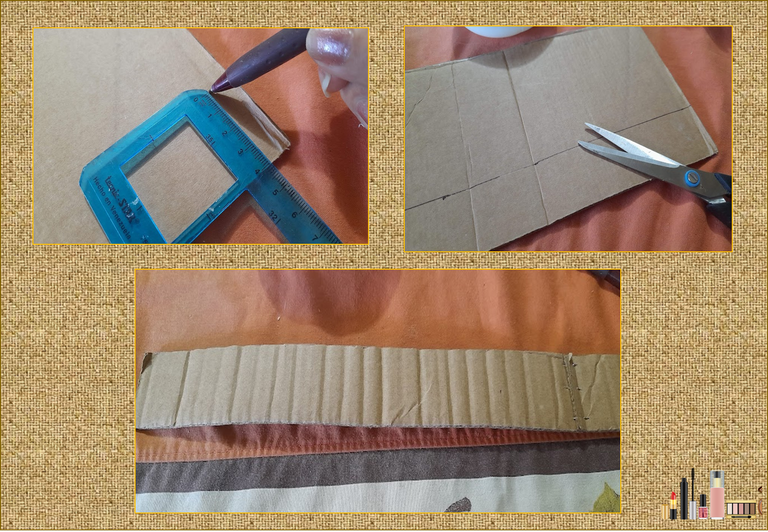
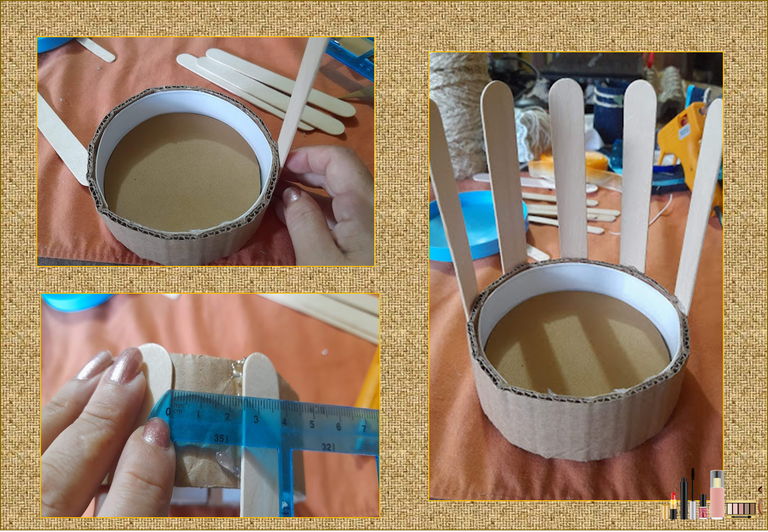
1: Con la ayuda de un cuters cortamos el envase plástico a una altura de 3cm de alto, luego marcamos en el cartón una tira de 4 cm de ancho por 36 cm de largo.
1: With the help of a cutter, we cut the plastic container to a height of 3cm, then we mark a strip of 4 cm wide by 36 cm long on the cardboard.
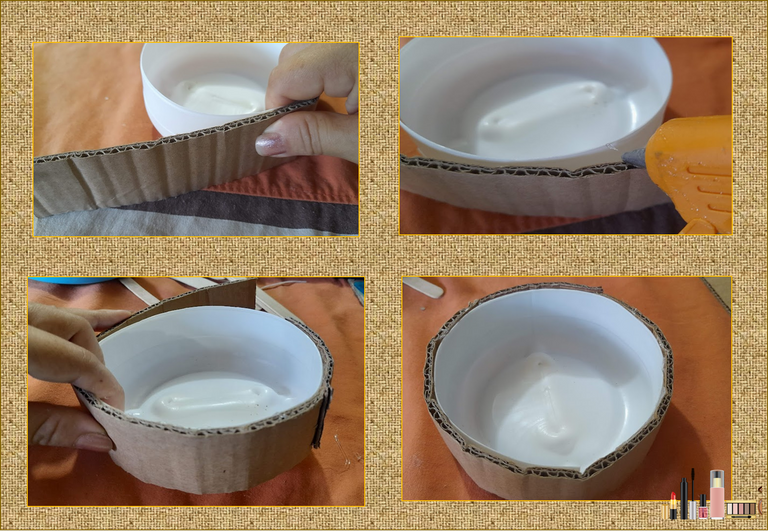
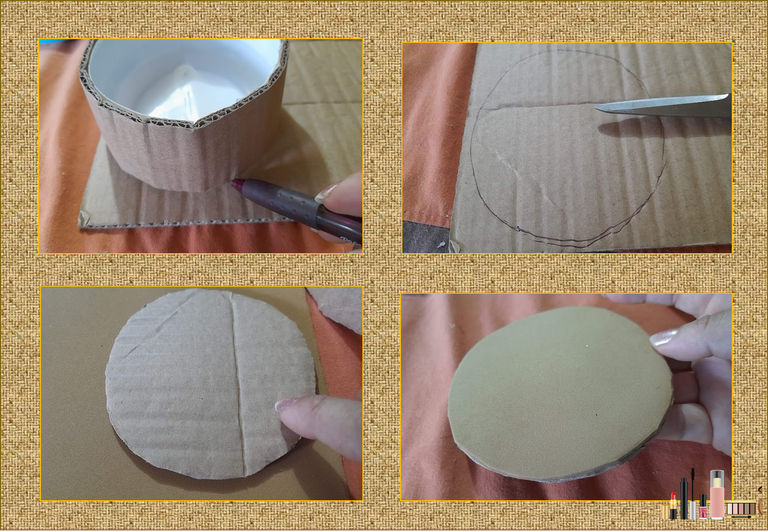
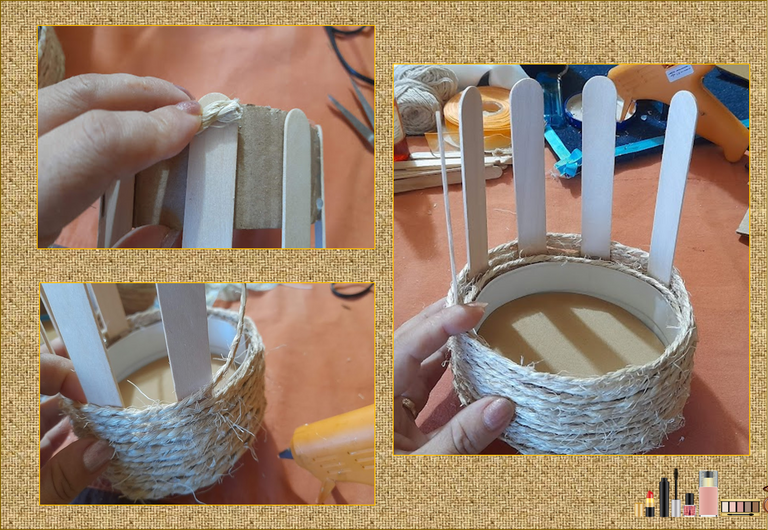
2: Una vez cortada la tira de cartón procedemos a pegarla al contorno de la base ya cortada, luego marcamos en el cartón la circunferencia del envase recortamos y pegamos en el foami marrón, seguidamente la pegamos dentro del envase. Luego tomamos las paletas y procedemos a pegarlas solo a la mitad de la circunferencia del envase a una distancia de separación de 2,5 cm una de la otra, como se puede observar en las imágenes.
2:Once the cardboard strip has been cut, we proceed to glue it to the contour of the already cut base, then we mark the circumference of the container on the cardboard, cut it out and paste it on the brown foami, then paste it inside the container. Then we take the popsicles and proceed to glue them only to the middle of the circumference of the container at a separation distance of 2.5 cm from each other, as can be seen in the images
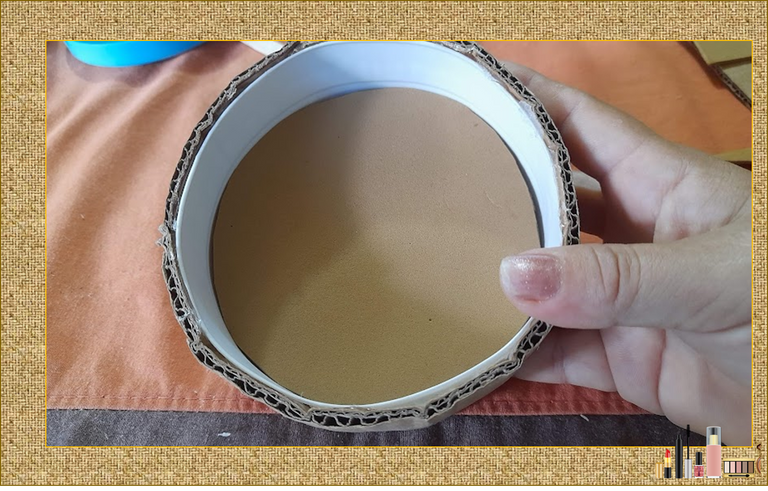
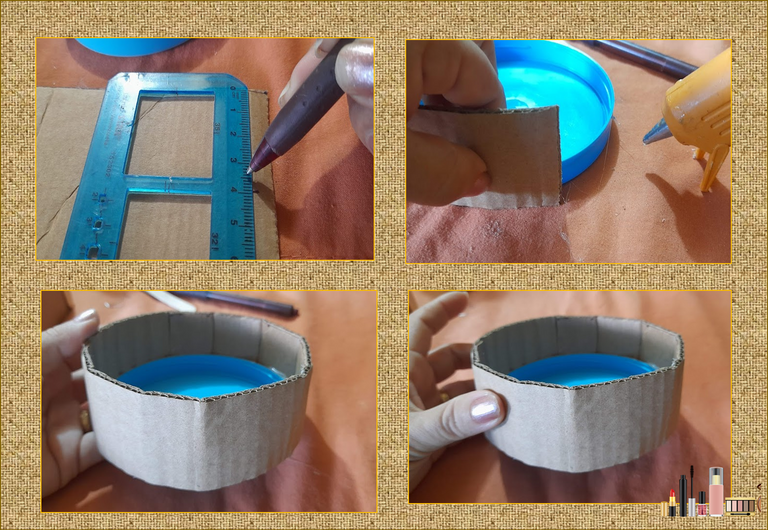
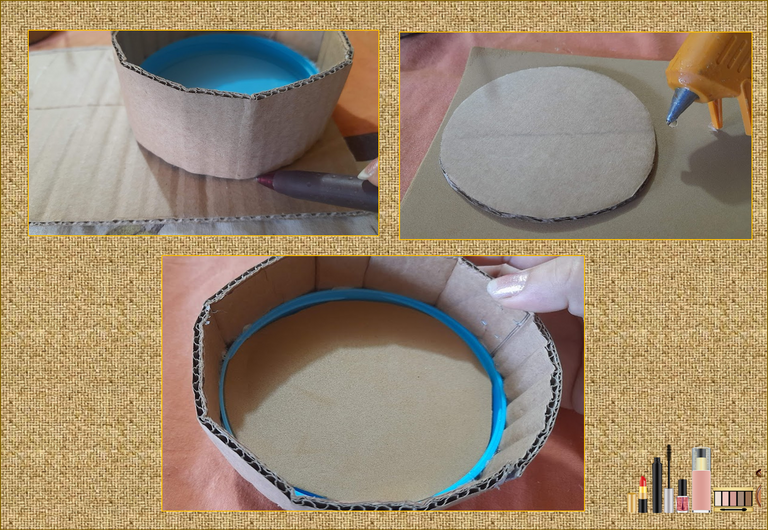
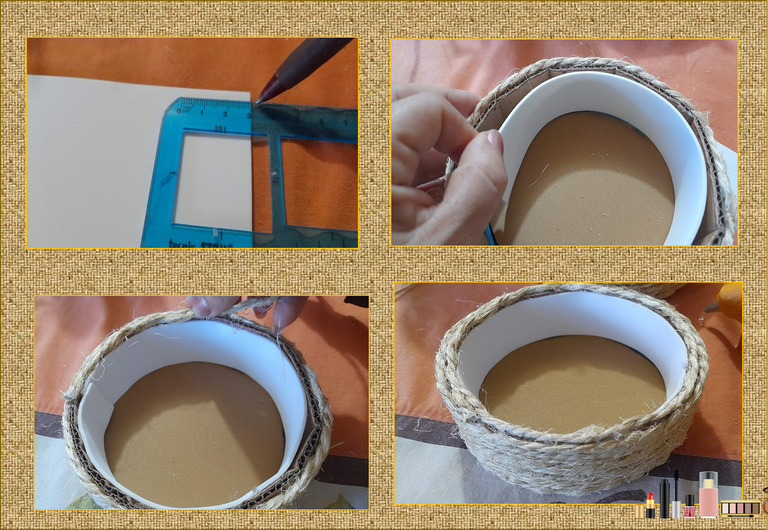
3: Luego volvemos a recortar una tira de cartón de 4 cm X 36 cm y procedemos a pagarla por el alrededor de la tapa, seguidamente marcamos su circunferencia en el cartón recortamos y pegamos al foami marrón y luego la pegamos dentro de la base.
3: Then we cut a 4 cm X 36 cm strip of cardboard again and proceed to pay it around the lid, then we mark its circumference on the cardboard, cut it and glue it to the brown foami and then glue it inside the base.
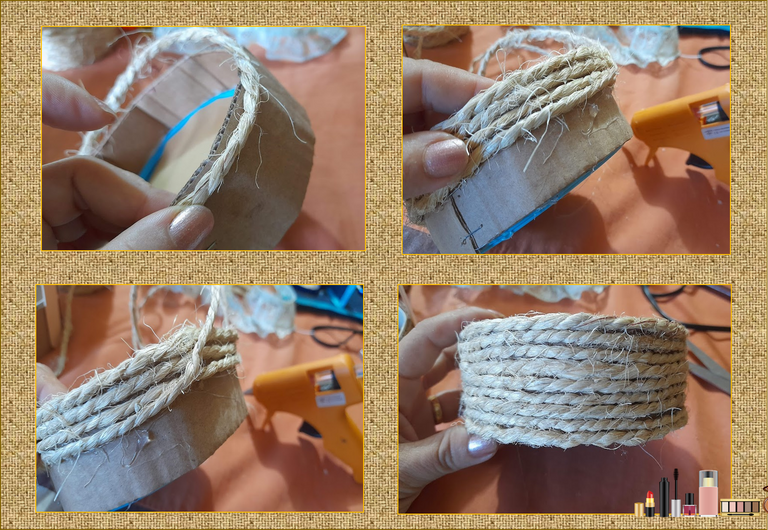
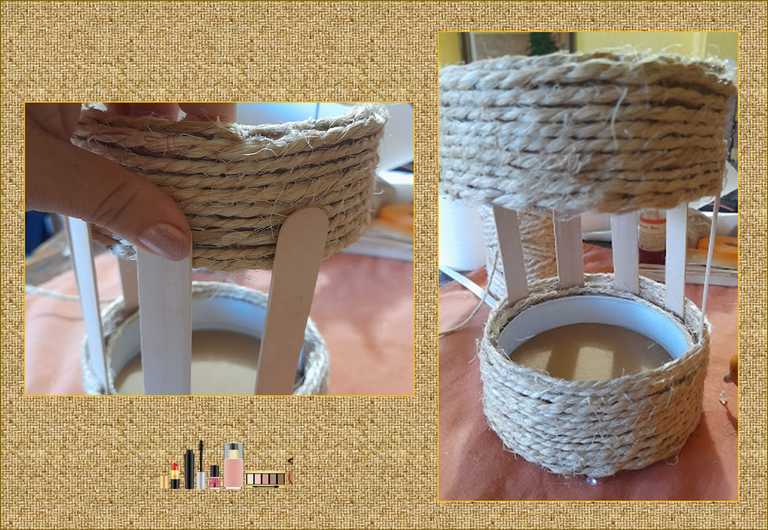
4: Ahora procedemos a pegar con silicon el mecatillo por el alrededor de cada una de las base, luego recortamos una tira de foami blanco 4cmx36cm para pegarla por dentro de la tapa y seguidamente pegamos por el borde un poco de mecatillo, como se puede observar.
4: Now we proceed to glue the string around each of the bases with silicone, then we cut a 4cmx36cm strip of white foami to stick it inside the lid and then we glue a bit of string around the edge, as you can see.
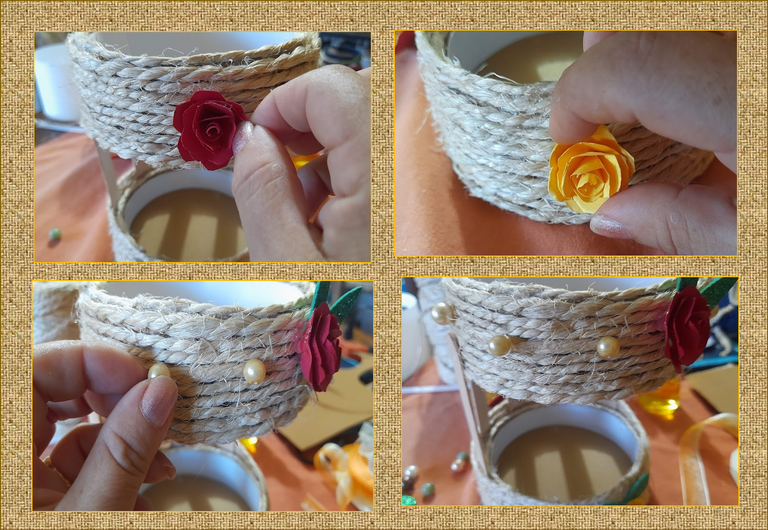
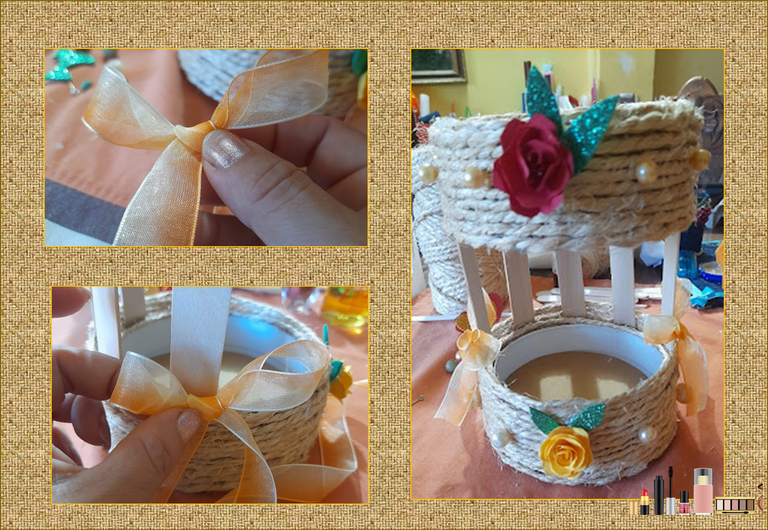
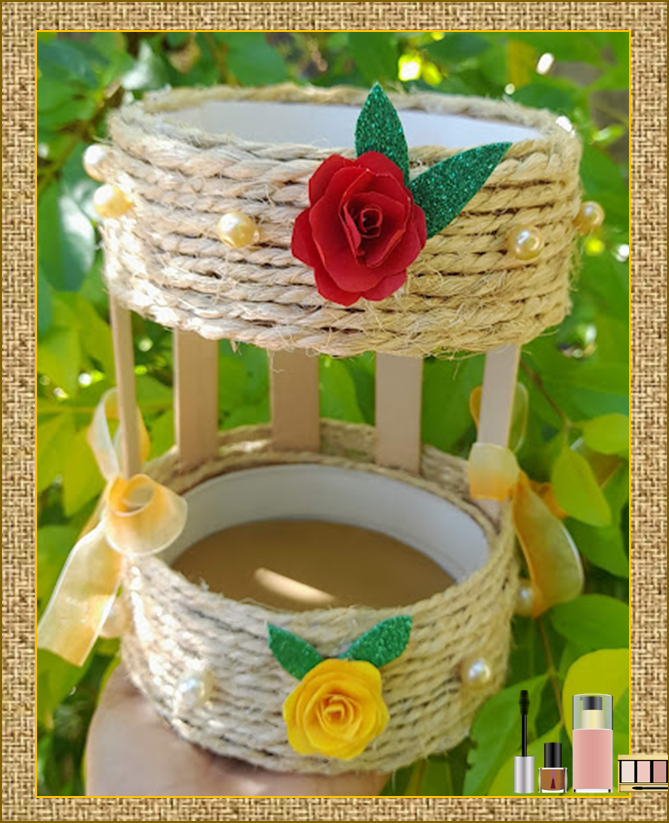
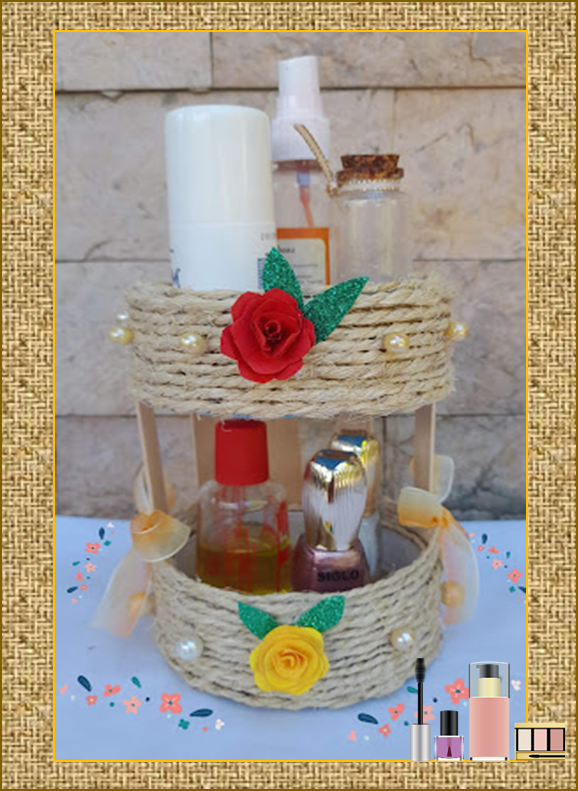
5: Para finalizar unimos las base y procedemos a decorar con unas rositas el centro de cada una de las base y por el alrededor le pegamos las perlitas de plástico, luego realizamos dos lacitos con la cinta amarilla y lo pegamos en cada esquina de la base inferior.
5: To finish, we unite the bases and proceed to decorate the center of each of the bases with some roses and around it we glue the plastic pearls, then we make two little bows with the yellow tape and we glue it on each corner of the lower base.
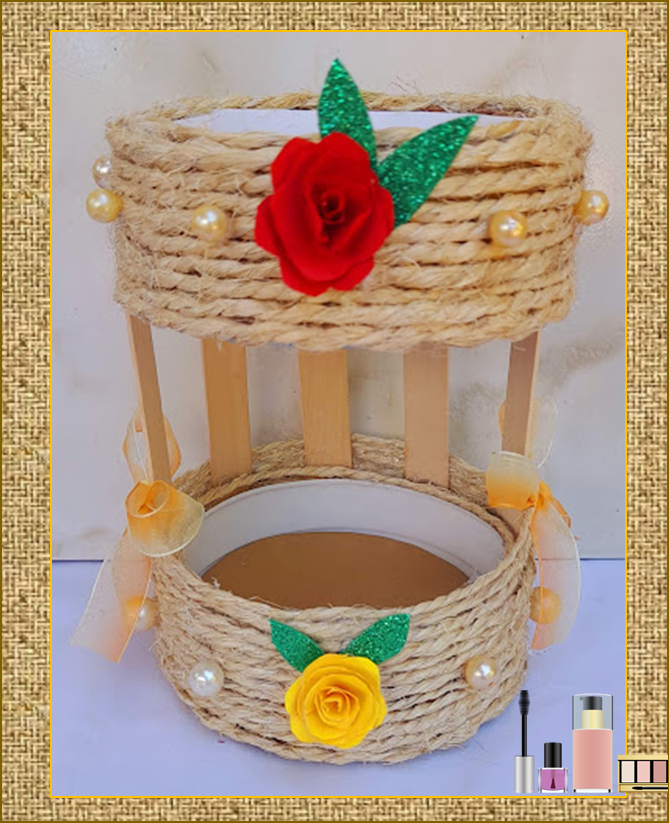
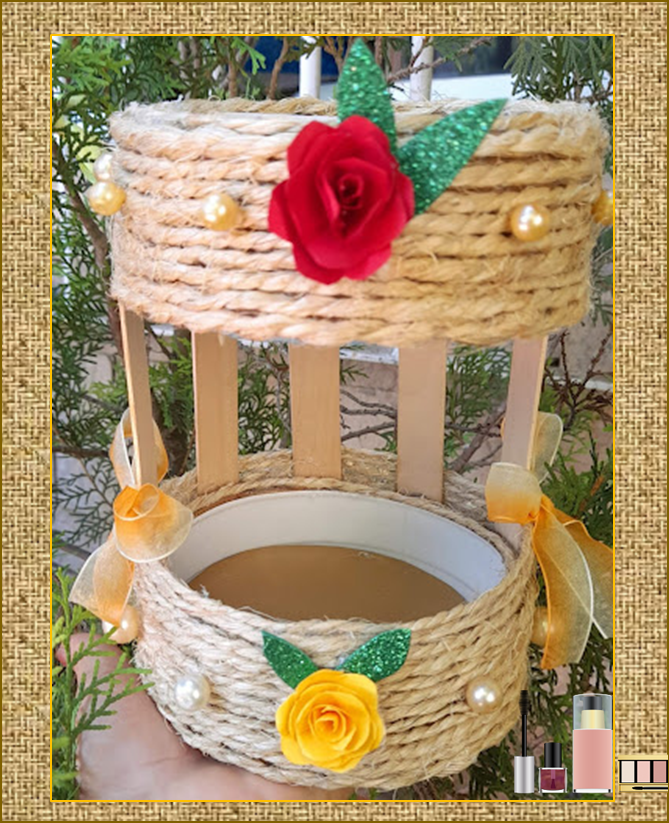
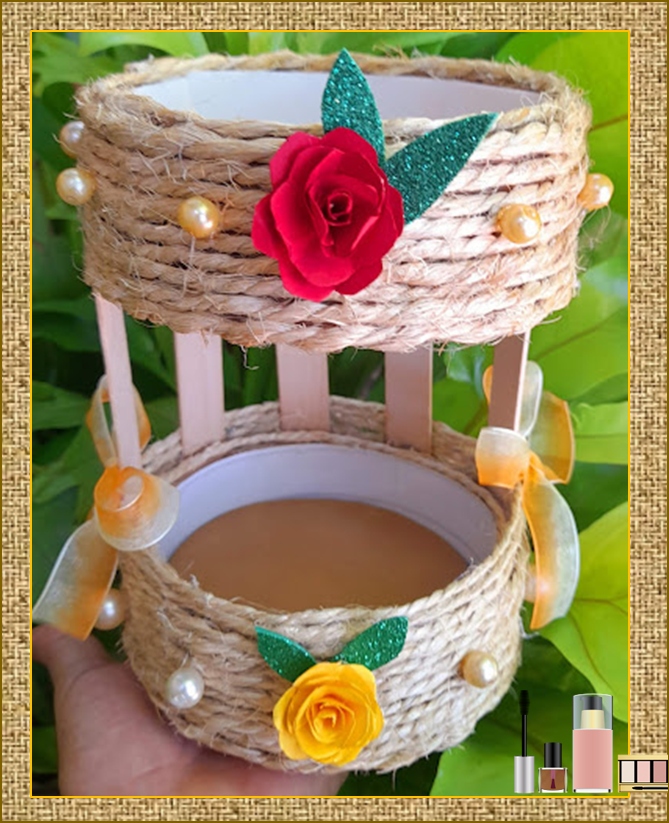
Listo, este es el resultado final de mi practico organizador de cosméticos elaborado con material de reciclaje. Espero se animen a realizar este lindo organizador.
¡Espero les haya gustado mi proyecto de hoy!!
¡Hasta una próxima publicación!
Done, this is the final result of my practical cosmetics organizer made with recycling material. I hope you are encouraged to make this beautiful organizer.
I hope you liked my project today!!
Until a next publication!

Fuente portada
Fuente Separador


Las fotografías fueron tomadas con un teléfono inteligente Samsung A12, el texto fue traducido al ingles con el traductor de Google.
El banner fue diseñado en canvas
The photographs were taken with a Samsung A12 smartphone, the text was translated into English with the Google translator.
The banner was designed on canvas
Está muy lindo y delicado me gusta
Que hermoso te quedo, !PIZZA
PIZZA Holders sent $PIZZA tips in this post's comments:
@hernleon74(1/5) tipped @janettbrito76 (x1)
You can now send $PIZZA tips in Discord via tip.cc!
Saludos, me alegra ver su buen trabajo, mucho ánimo y suerte.
Excelente muy lindo y elegante quedó ese porta cosméticos. Gracias por compartir 😉
Realmente hermoso y útil, haré uno para mí. Gracias por compartir @janettbrito76
Muy buena creatividad @ janettbrito76, te quedo hermoso, saludos.
Congratulations @janettbrito76! You have completed the following achievement on the Hive blockchain and have been rewarded with new badge(s):
Your next target is to reach 26000 upvotes.
You can view your badges on your board and compare yourself to others in the Ranking
If you no longer want to receive notifications, reply to this comment with the word
STOPCheck out the last post from @hivebuzz:
Support the HiveBuzz project. Vote for our proposal!
What a lovely idea!