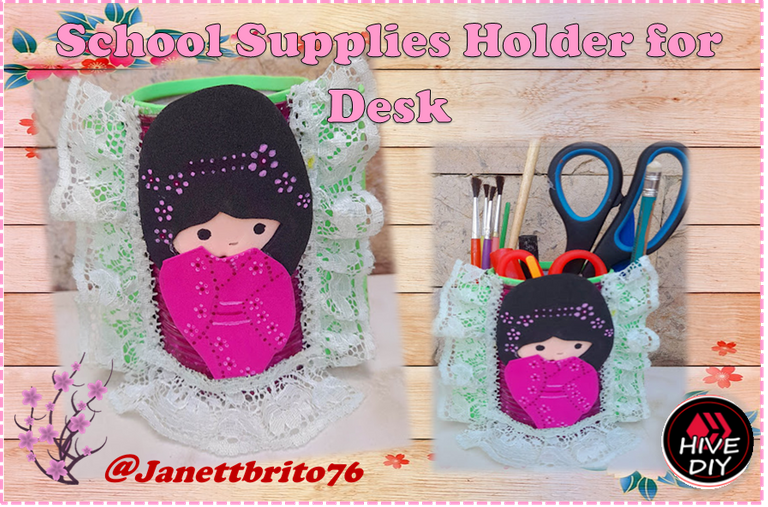
[ESP-ENG] Porta Útiles Escolares Para Escritorio con Material de Reciclaje ♻️ School Supplies Holder for Desk with Recycling Material

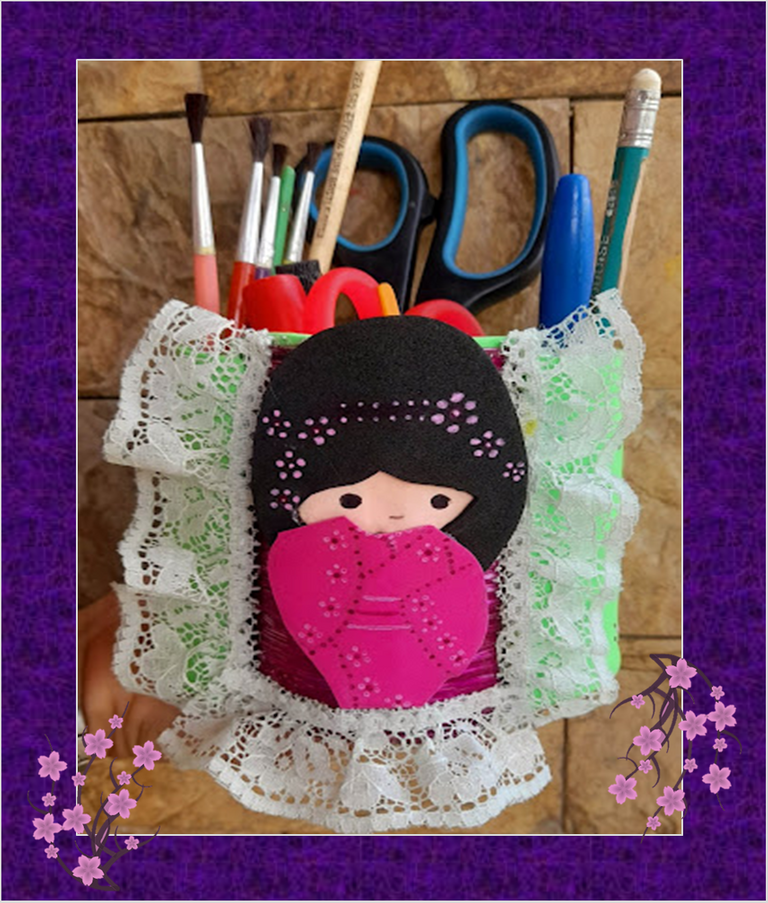
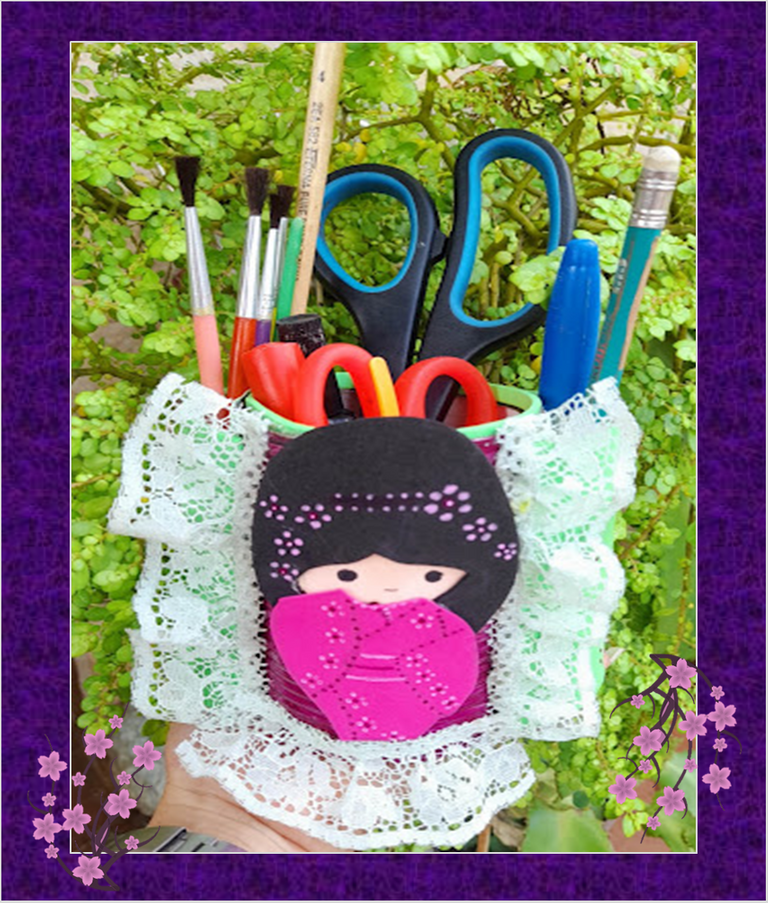
Buenas noches para todos mis queridos amigos crafteros y artesanos que día a día estamos creando tantas cosas lindas para presentarla en esta estupenda comunidad de #HiveDiy, espero que todos se encuentren chevére y llenos de salud y mucha energía. En esta noche les voy a mostrar el paso a paso de como realice un hermoso porta útiles escolares para escritorio con material de reciclaje, el cual lo elabore con una lata de pasta de tomate reciclada y unos tubos de papel higiénico y lo decore con una linda figura de una muñeca japonesa, particularmente a mi siempre me ha gustado sus peinados y sus atuendos especialmente las telas tan coloridas que utilizan para sus vestimenta... Bueno amigos este lindo porta útiles nos ayuda a organizar todas esas pequeñas herramientas que tenemos siempre encima del escritorio y así tener un poco mas de espacio y a su vez nos decora un poco nuestro espacio de trabajo; lo mejor de todo de este tipo de porta útiles es que lo puedes personalizar con la temática que mas te guste y del color que mas te agrade, también lo puedes forrar con alguna tela que te guste, estoy casi segura que les van a encantar la idea. Entonces no te pierdas el paso a paso para hacer este lindo porta utilices escolares de escritorio. Manos a la obra!!

Greetings Friends !!
Good night to all my dear craftsmen and artisan friends who are creating so many beautiful things every day to present it in this wonderful #HiveDiy community, I hope everyone is cool and full of health and lots of energy. Tonight I am going to show you the step by step of how to make a beautiful school supplies holder for the desk with recycling material, which I make with a can of recycled tomato paste and some toilet paper tubes and decorate it with a cute figure of a Japanese doll, particularly I have always liked their hairstyles and their outfits, especially the colorful fabrics they use for their clothing... Well friends, this cute tool holder helps us organize all those little tools that we always have on top of the desk and thus have a little more space and in turn decorates our work space a little; The best of all of this type of tool holder is that you can customize it with the theme that you like the most and the color that you like the most, you can also cover it with any fabric that you like, I am almost sure that they will love it idea. Then don't miss the step by step to make this cute school stationery holder. Let's do it!!


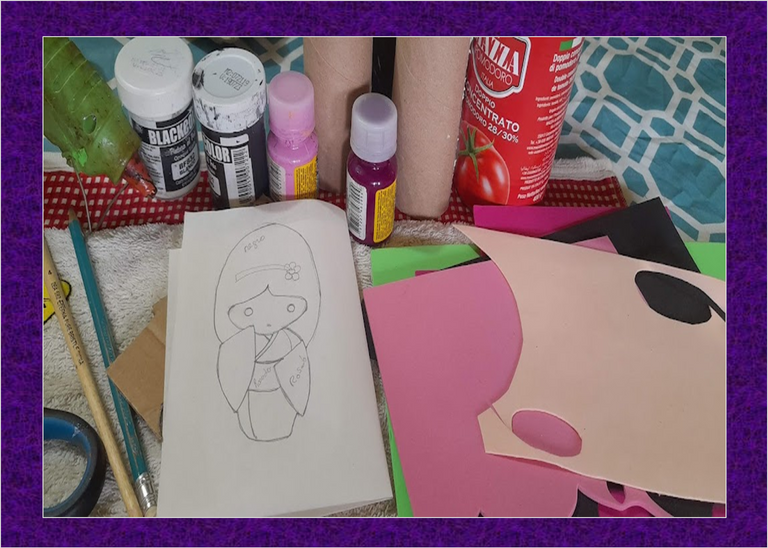
- Lata de tomate reciclada
- Pinturas (rosada, morada y negra)
- Foami (rosado, negro, verde y color carne)
- Tubo de Rollo de papel higiénico
- Cartón
- Silicon
- Encaje verde
- Tijera
- Recycled tomato can
- Paints (pink, purple and black)
- Foami (pink, black, green and flesh color)
- Toilet Paper Roll Tube
- Cardboard
- Silicon
- Green lace
- Scissors

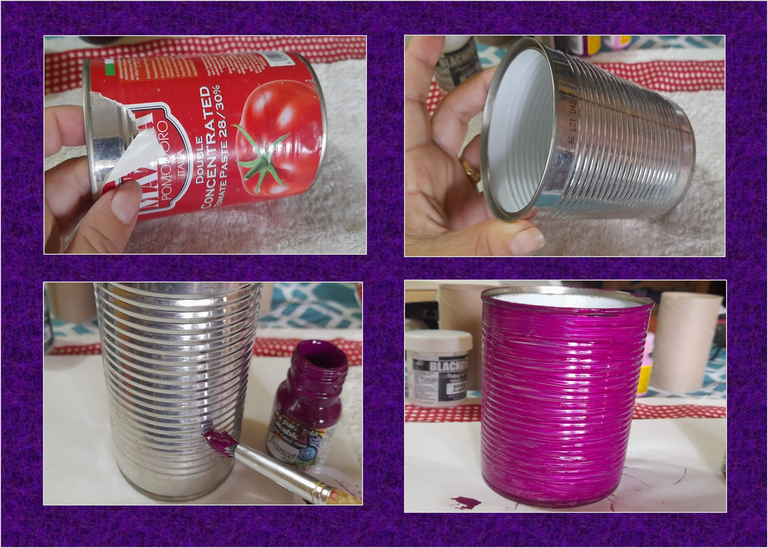
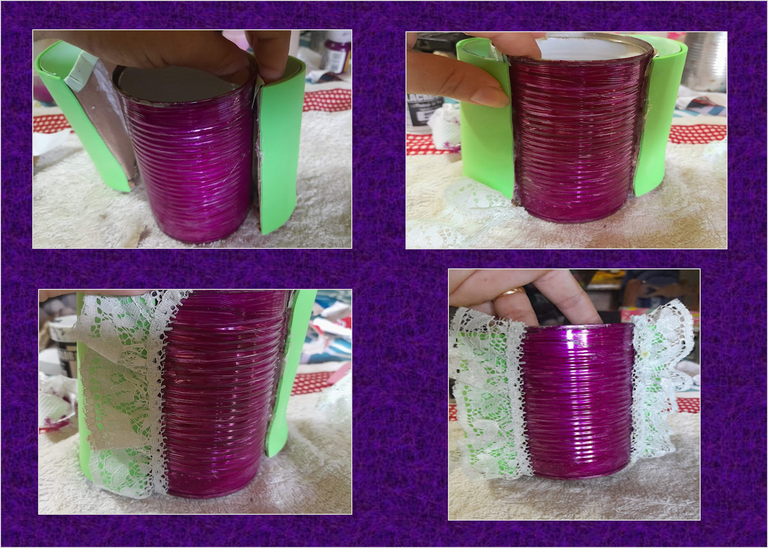
1: Comenzamos limpiando muy bien nuestra lata, luego procedemos a pintarla de morada, dejamos secar y si amerita le damos una segunda pintada.
1: We start by cleaning our can very well, then we proceed to paint it purple, let it dry and if it deserves we give it a second painting.
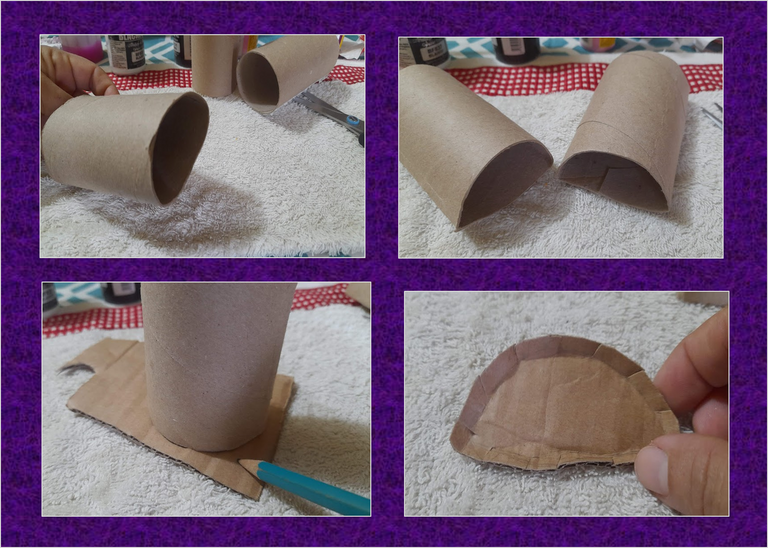
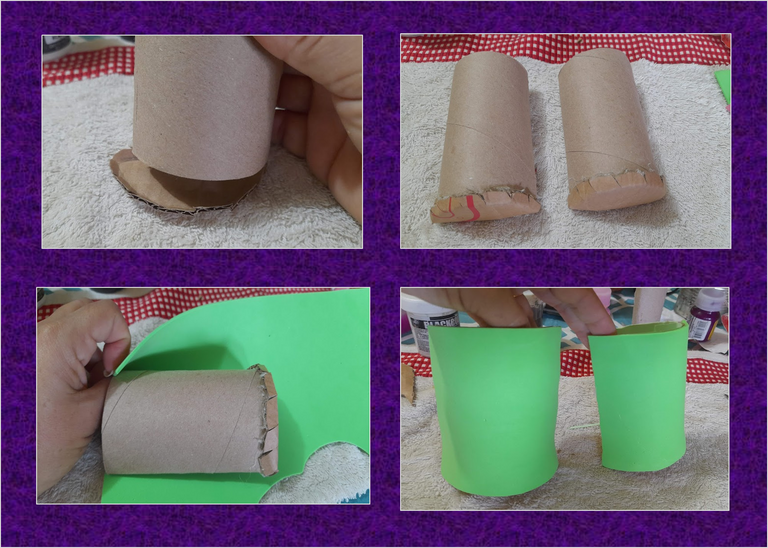
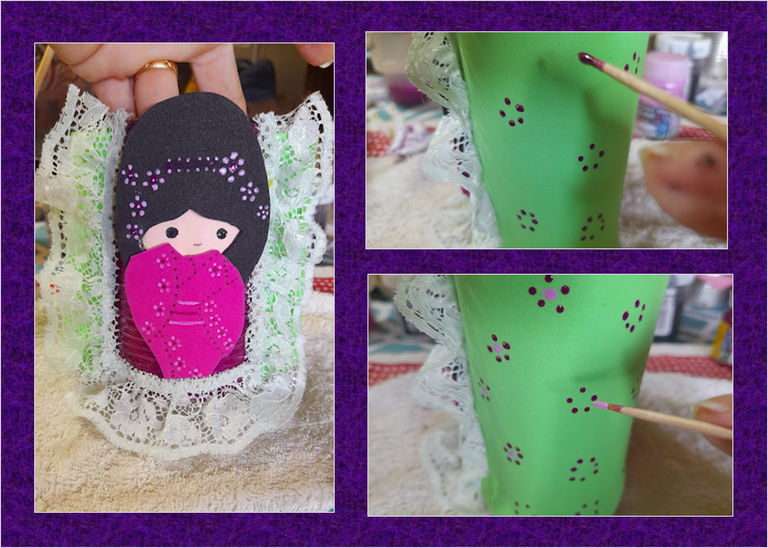
2: Ahora tomamos los tubos de papel y los achatamos por uno de sus lados formando un medio circulo, luego tomamos el cartón y le realizamos una tapa,como pueden ver en las imágenes, seguidamente procedemos a forrarlos con el foami verde y después lo pegamos por los laterales de la lata, decoramos con un poco de encaje verde el lateral de los tubos ya pegados.
2: Now we take the paper tubes and flatten them on one of their sides forming a half circle, then we take the cardboard and make a lid on it, as you can see in the images, then we proceed to cover them with the green foami and then we glue it on the sides of the can, we decorate the side of the already glued tubes with a little green lace.
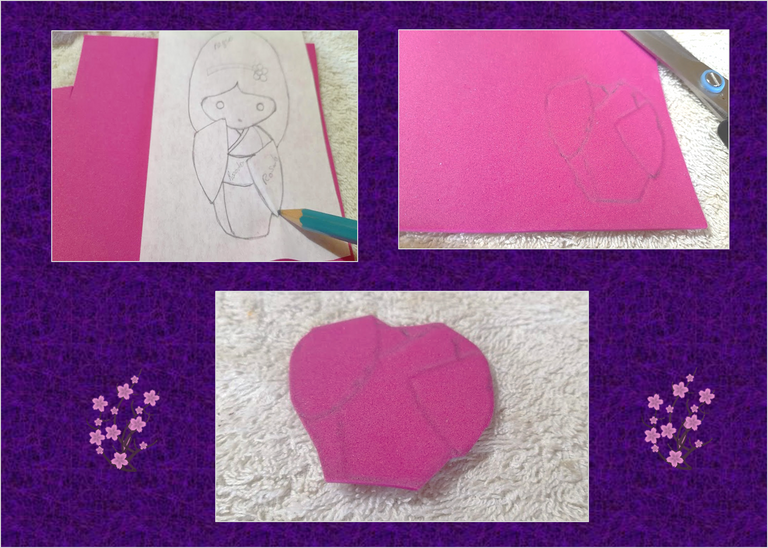
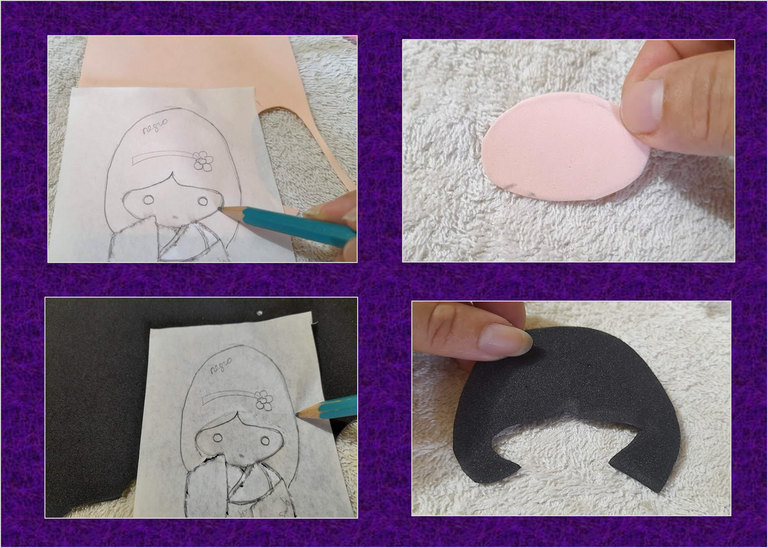
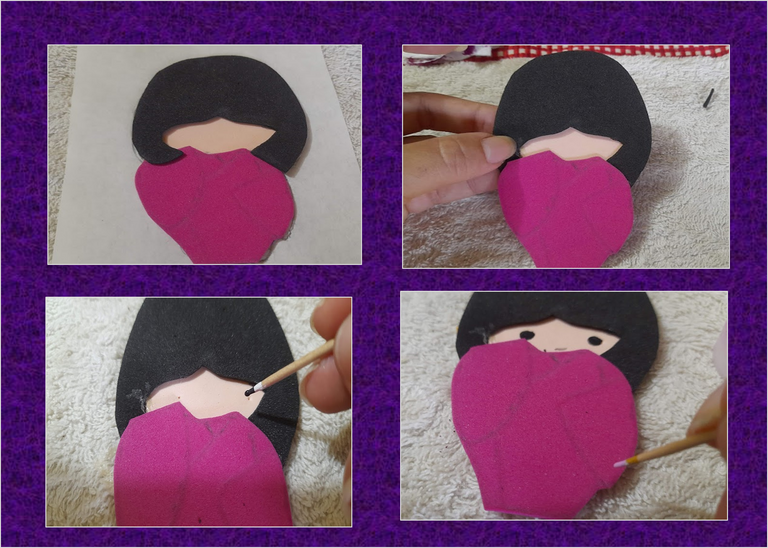
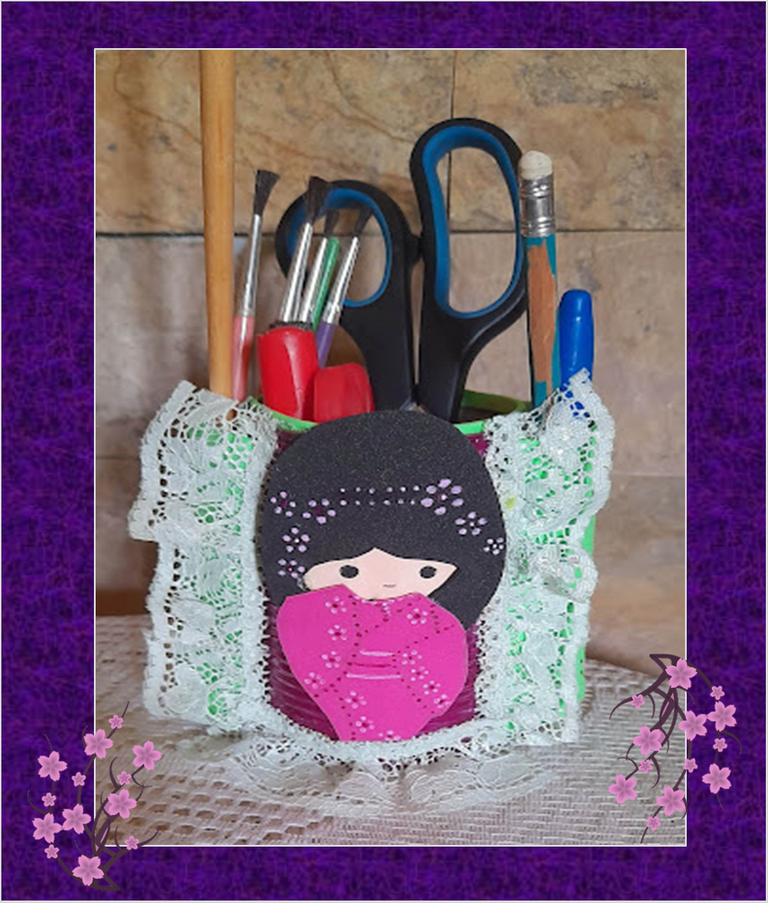
3: Procedemos a realizar la muñeca japonesa. comenzamos marcando en el foami rosado el vestido, la carita la marcamos en el foami color carne y el cabello en el foami negro luego recortamos y armamos nuestra muñeca. Después con la ayuda de un palillo y pintura negra le realizamos los ojitos y nariz, y con la pintura rosada le realizamos en el borde del vestido una serie de florecitas.
3: We proceed to make the Japanese doll. We begin by marking the dress on the pink foami, we mark the face on the flesh-colored foami and the hair on the black foami, then we cut out and assemble our doll. Then with the help of a toothpick and black paint we make the eyes and nose, and with the pink paint we make a series of little flowers on the edge of the dress.
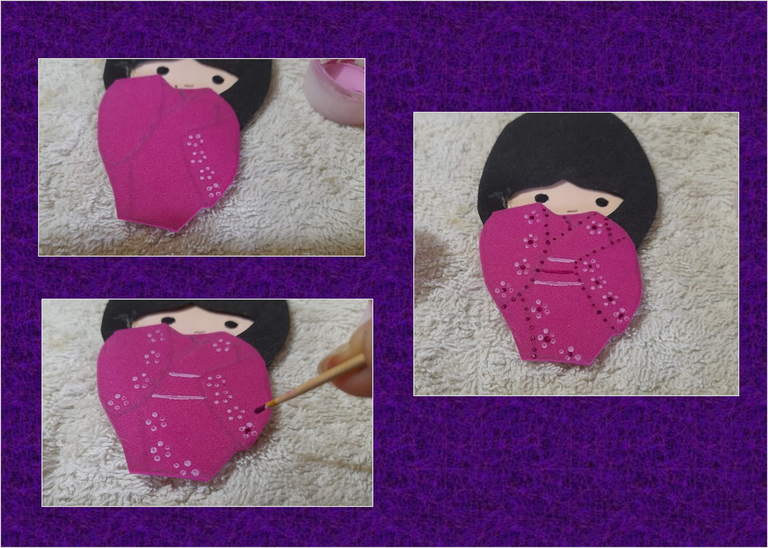
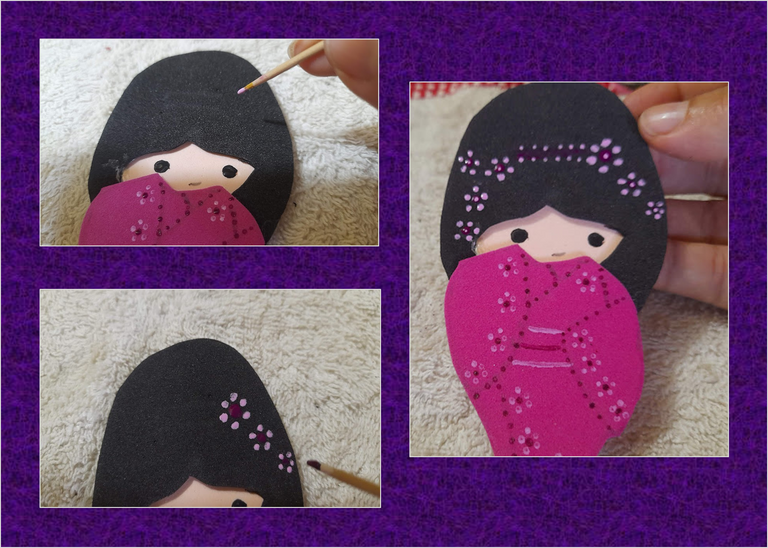
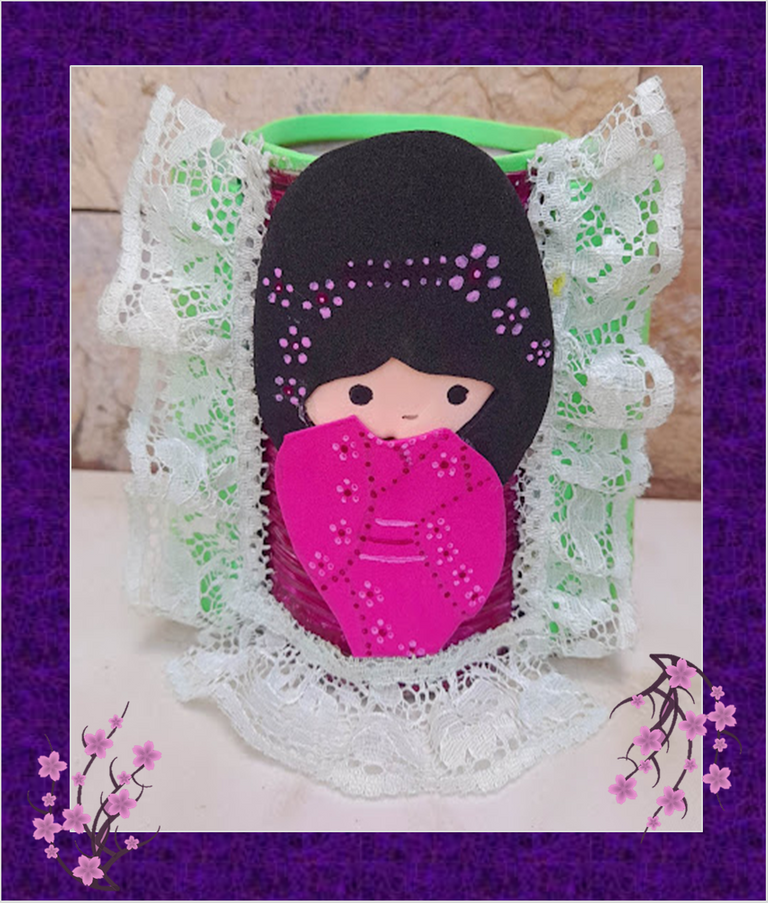
4: Luego con el palillo y la pintura rosada le realizamos una flores en el cabello, seguidamente procedemos a pegar la muñeca en nuestra base y por el borde superior de la lata le colocamos una tira de foami verde para evitar cortarnos, luego para finalizar decoramos los laterales con unas flores realizadas con la pintura rosada y morada, como pueden ver en las imágenes.
4: Then with the toothpick and the pink paint we make flowers in her hair, then we proceed to glue the doll on our base and on the top edge of the can we place a strip of green foami to avoid cutting ourselves, then to finish we decorate the sides with some flowers made with pink and purple paint, as you can see in the images

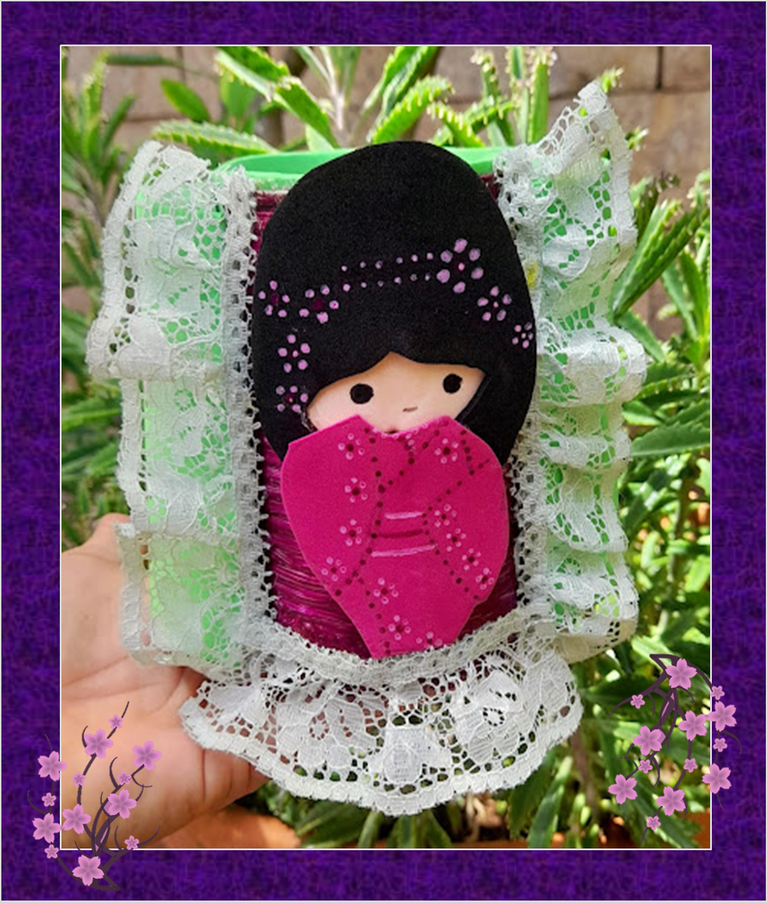
Listo, así de hermoso me quedo mi Porta Útiles Escolares Para Escritorio con Material de Reciclaje .¡Espero les haya gustado mi proyecto de hoy!.
¡Hasta una próxima publicación!
Done, that's how beautiful my School Supplies Holder for Desk with Recycling Material is. I hope you liked my project today!.
Until a next post!
Fuente portada
Fuente Separador
Imagen Referencial


Las fotografías fueron tomadas con un teléfono inteligente Samsung A12, el texto fue traducido al ingles con el traductor de Google.Link
El banner fue diseñado en canvas Link
The photographs were taken with a Samsung A12 smartphone, the text was translated into English with the Google translator Link
The banner was designed on canvas Link
me encanto tu trabajo amiga, te felicito.
Gracias amiga cruz. Saludos 🤗
Que linda Joponesa me encanta . Que tengas buenas noches y feliz amanecer🌼
Gracias,igualmente para ti. Abrazo 🤗
Hermoso amiga, me encanta esa muñequita asiática.
Gracias amiga, si vale son hermosas. Gracias por leer y comentar. saludos
Thank you for sharing this amazing post on HIVE!
Your content got selected by our fellow curator @rezoanulvibes & you just received a little thank you via an upvote from our non-profit curation initiative!
You will be featured in one of our recurring curation compilations and on our pinterest boards! Both are aiming to offer you a stage to widen your audience within and outside of the DIY scene of hive.
Join the official DIYHub community on HIVE and show us more of your amazing work and feel free to connect with us and other DIYers via our discord server: https://discord.gg/mY5uCfQ !
If you want to support our goal to motivate other DIY/art/music/homesteading/... creators just delegate to us and earn 100% of your curation rewards!
Stay creative & hive on!