[ESP-ENG]🌼 Lindo Dulcero con Temática Tropical 🌼 Cute Candy Box with Tropical Theme🌼


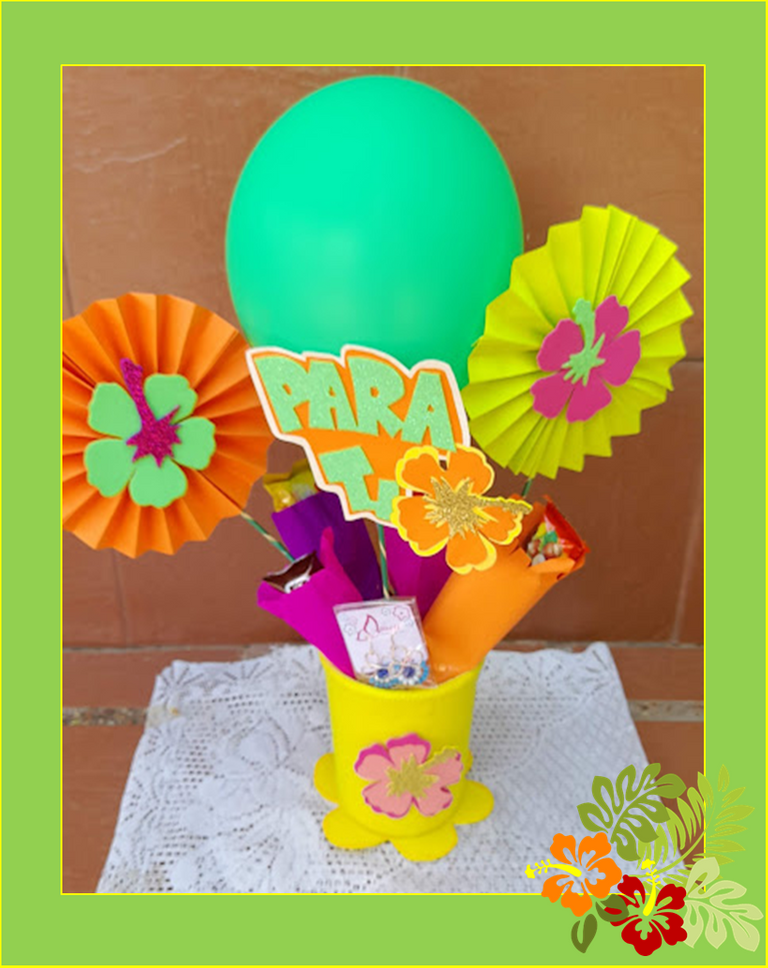
Hola, mis queridos artesanos y crafteros bendecida noche para todos los que ponemos día a día un granito en esta grandiosa comunidad de #HiveDiy, espero se encuentren bien de salud y que hayan pasado un excelente fin de semana. Bienvenidos a mi blog. En esta noche les quiero compartir el paso a paso de como realice este lindo dulcero con temática tropical para regalarselo a mi madre el día de su cumpleaños que ya solo faltan dos días y poco a poco le he ido preparando varios presentes para sorprenderla ese día. Como el topper que le realice fue inspirado en una temática tropical entonces quise realizarle este dulcero también con la misma temática que se que le va encantar ya que a ella le gustan mucho las flores...
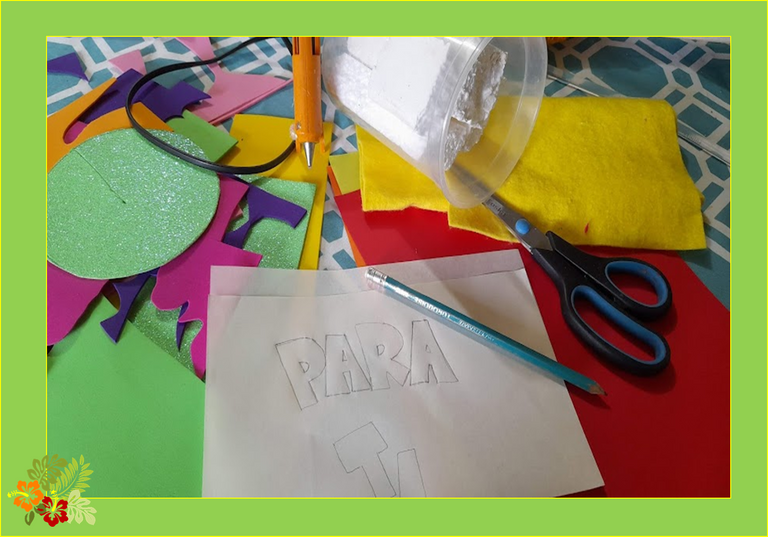
Este lindo dulcero lo realice con un envase plástico que tenia reservado para esta manualidad y estoy casi segura que todas tenemos en casa porque son de esos donde viene el arroz chino o sopas, el cual lo decore con unas coloridas cayenas realizadas en cartulina y unos hermosos rosetones coloridos. Este dulcero queda ideal para decorar la mesa de la torta o simplemente lo puedes utilizar para obsequiar como cotillones en los cumpleaños y lo mejor de todo es que lo puedes forrar y decorar con la temática que mas te guste o le guste al cumpleañero(a) ya que solo tienes que tener un poco de creatividad para crear un original dulcero para regalar en los cumpleaños. Amigos, no se pierdas el paso a paso para hacer este lindo dulcero colorido para cumpleaños. ¡¡Vamos manos a la obra!!

Hello, my dear artisans and crafters, a blessed night to all of us who put a grain of salt every day in this great #HiveDiy community, I hope you are in good health and that you have had an excellent weekend. Welcome to my blog. Tonight I want to share with you the step by step of how to make this beautiful tropical-themed candy box to give it to my mother on her birthday, which is only two days away and little by little I have been preparing several presents to surprise her that day. As the topper that I made for her was inspired by a tropical theme, so I wanted to make this candy also with the same theme that I know she will love since she likes flowers a lot...
I made this cute confectioner with a plastic container that I had reserved for this craft and I am almost sure that we all have it at home because they are one of those where Chinese rice or soups come from, which I decorate with some colorful cayennes made in cardboard and some beautiful colorful rosettes. This confectioner is ideal to decorate the cake table or you can simply use it to give as party favors on birthdays and best of all is that you can cover it and decorate it with the theme that you like the most or that the birthday person likes. since you only have to have a little creativity to create an original candy box to give away on birthdays. Friends, don't miss the step by step to make this cute colorful candy box for birthdays. Let's get to work!!


- Cartulina (amarillo,naranja,verde,rodada, fucsia)
- Silicon / pega
- foami (verde, dorado, morado, amarillo)
- Palito de altura
- Letras
- Fieltro amarillo
- Envase plástico
- Anime
- Cardboard (yellow, orange, green, rolled, fuchsia)
- Silicon / glue
- foami (green, gold, purple, yellow)
- height stick
- Letters
- Yellow felt
- Plastic container
- Anime

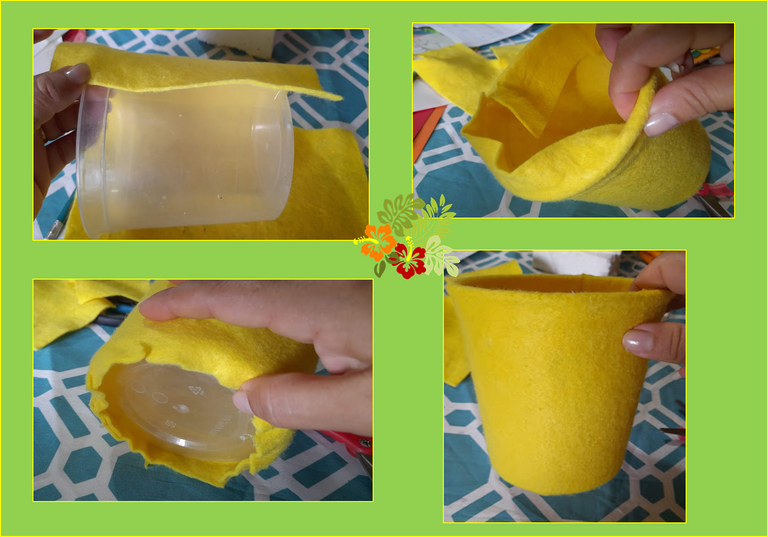
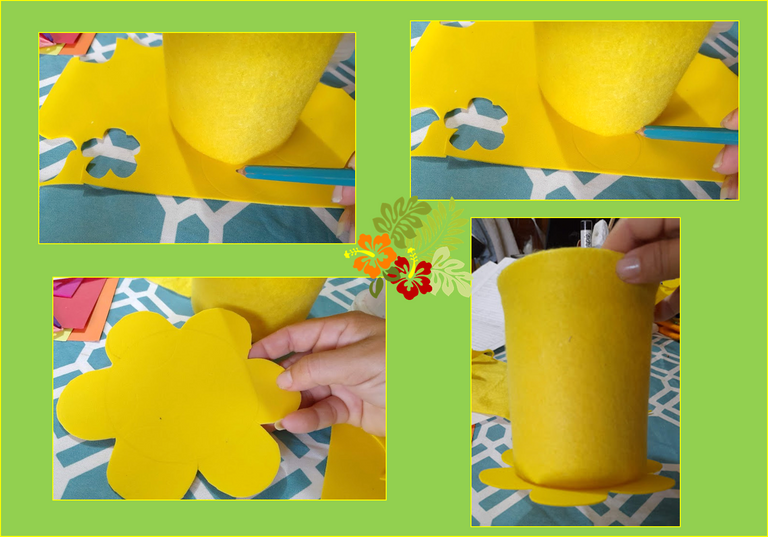
1: Iniciamos forrando nuestro envase plástico con el fieltro amarillo dejando 4 cm por encima del envase para luego forrar el borde, como pueden ver en las imágenes. Luego marcamos la circunferencia del envase y por el borde le realizamos unos pétalos para formar una flor y procedemos a pegarlo en la parte de abajo del envase.
1: We start by lining our plastic container with the yellow felt, leaving 4 cm above the container and then lining the edge, as you can see in the images. Then we mark the circumference of the container and along the edge we make some petals to form a flower and proceed to glue it to the bottom of the container.
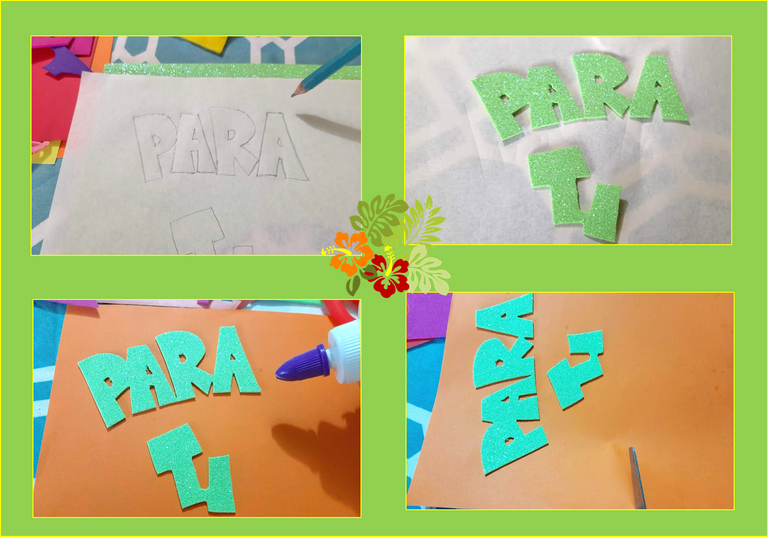
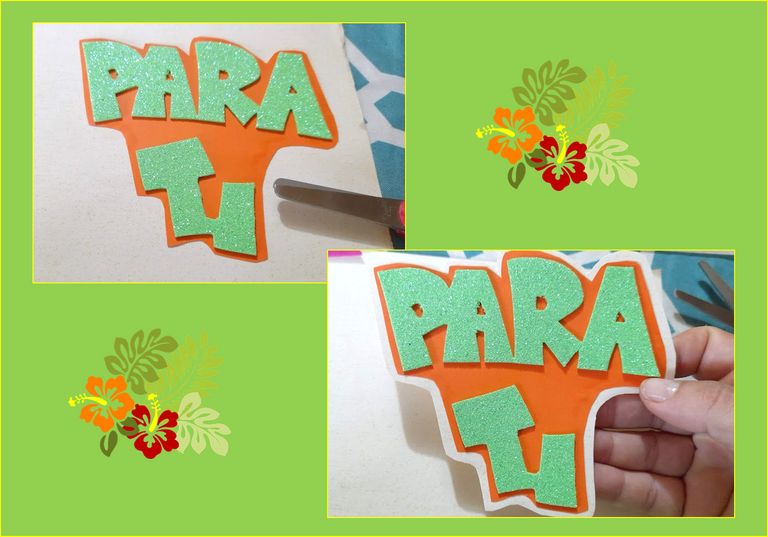
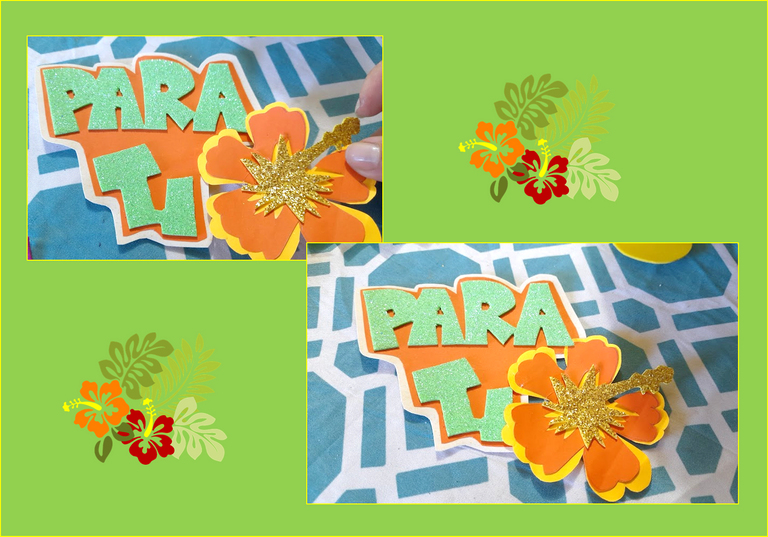
2: Ahora procedemos a realizar las letras de nuestro hablador, las cuales las marcamos en el foami verde luego las recortamos y las pegamos en la cartulina naranja y le dejamos un borde, después la volvemos apegar en otra cartulina blanca y le dejamos también un borde.
2: Now we proceed to make the letters of our talker, which we mark on the green foami then we cut them out and paste them on the orange cardboard and leave a border, then we stick it again on another white cardboard and also leave a border.
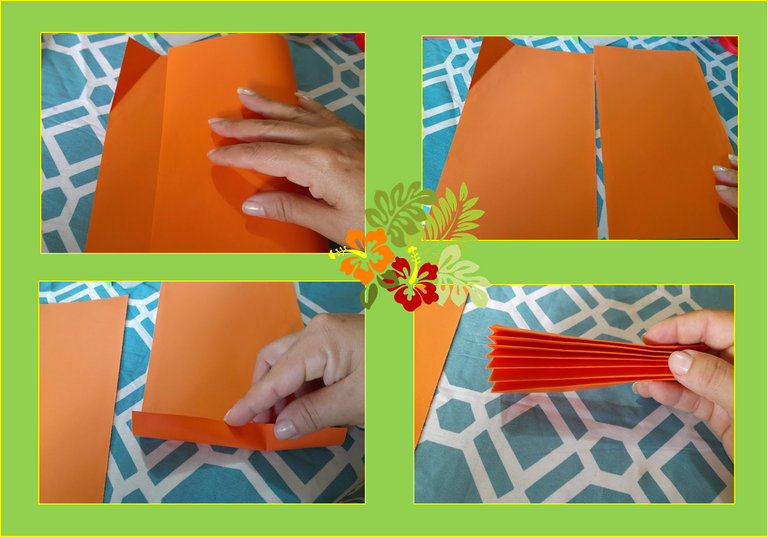
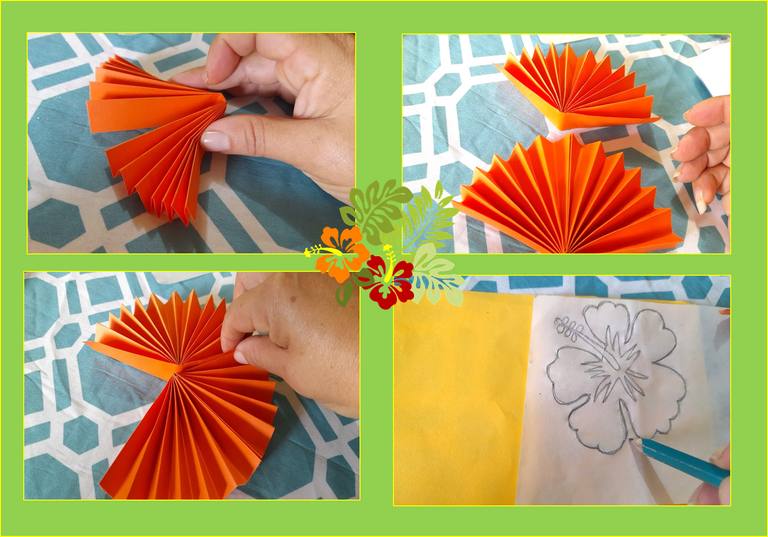
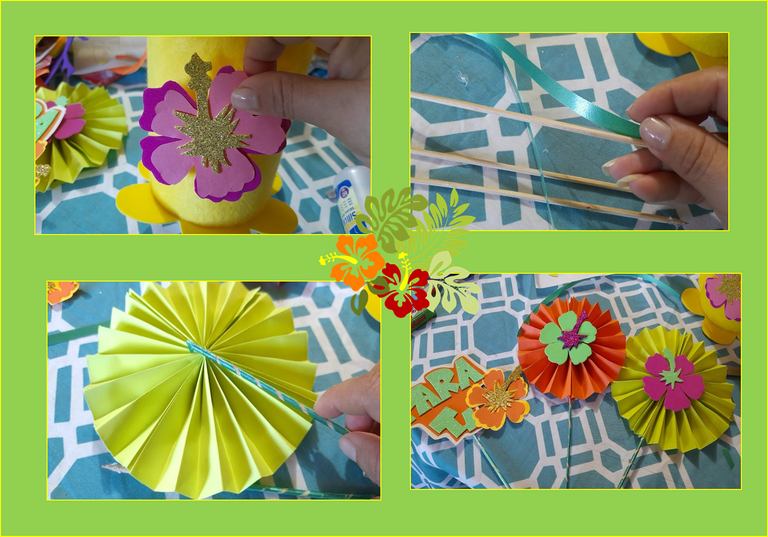
3: Para realizar los rosetones, tomamos una cartulina naranja tamaño carta y la doblamos a la mitad y recortamos, luego doblamos cada parte formando un acordeón lo doblamos y pegamos los extremos, luego que tengamos los dos abanicos los pegamos y formamos el rosetón, como pueden ver en las imágenes, después realizamos unas cayenas y luego procedemos a pegar unas a los rosetones y otra al hablador.
3: To make the rosettes, we take a letter-size orange cardboard and fold it in half and cut it, then we fold each part forming an accordion, we fold it and glue the ends, after we have the two fans we glue them and form the rosette, as you can see in the images, then we make some cayennes and then we proceed to glue some to the rosettes and another to the talker.
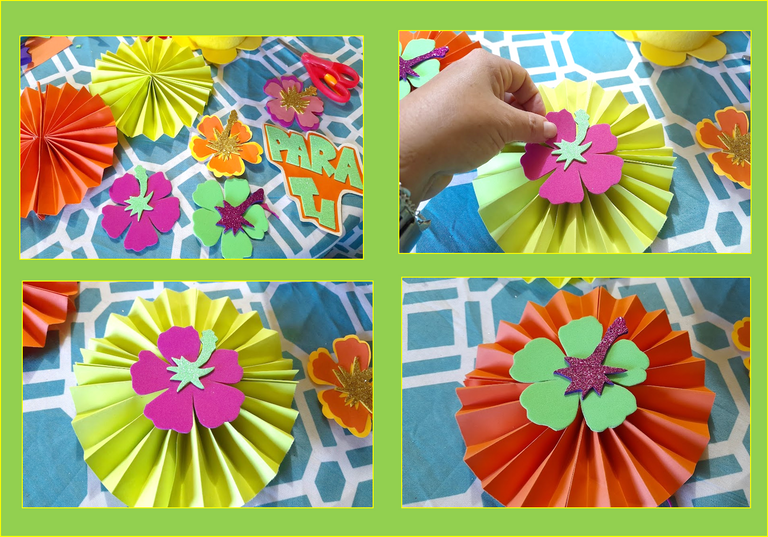
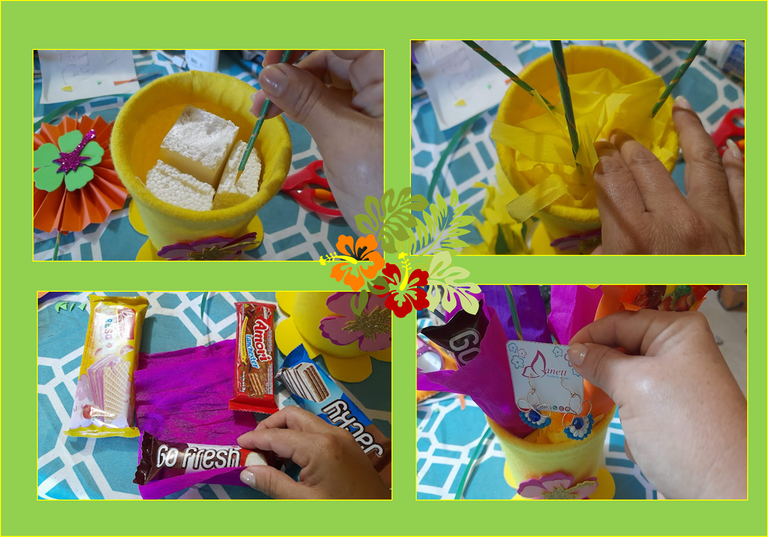
4: Por ultimo procedemos a decorar nuestro envase, pegamos una flor en el centro del envase, luego forramos los palitos de altura y los pegamos por la parte de atrás de los rosetones y del hablador, seguidamente le colocamos el anime dentro del envase, luego introducimos los rosetones y habladores y rellenamos con los chocolates y los aretes que le había realizado a mi madre en un post anterior.
4: Finally we proceed to decorate our container, we paste a flower in the center of the container, then we cover the height sticks and paste them on the back of the rosettes and the talker, then we place the anime inside the container, then we introduce the rosettes and talkers and filled with chocolates and earrings that I had made for my mother in a previous post.
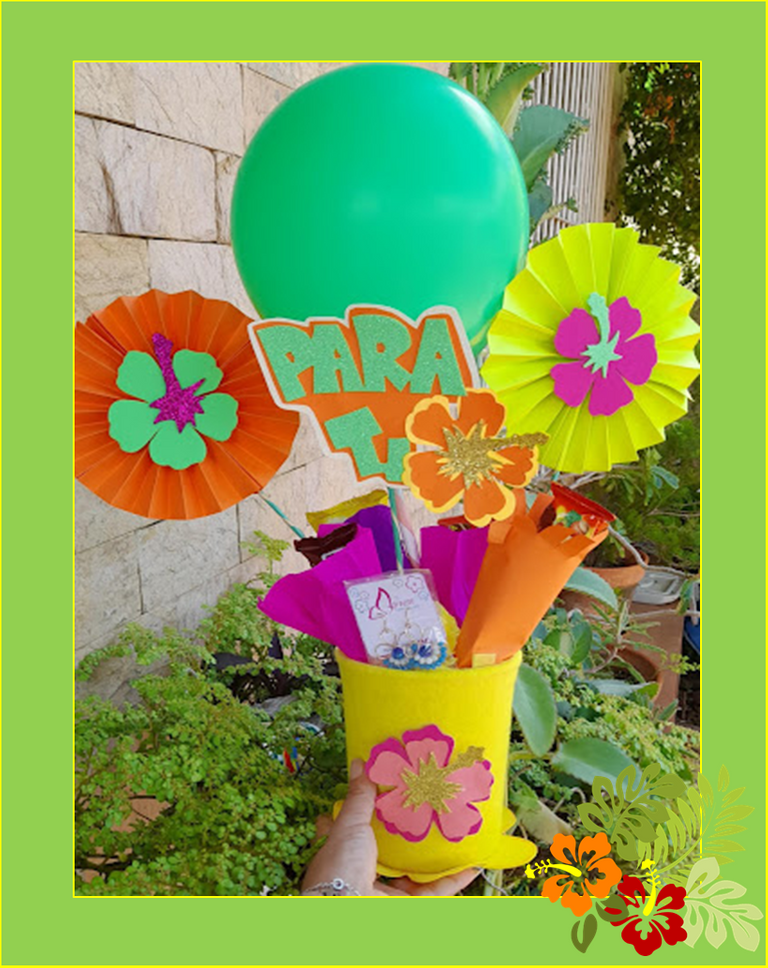
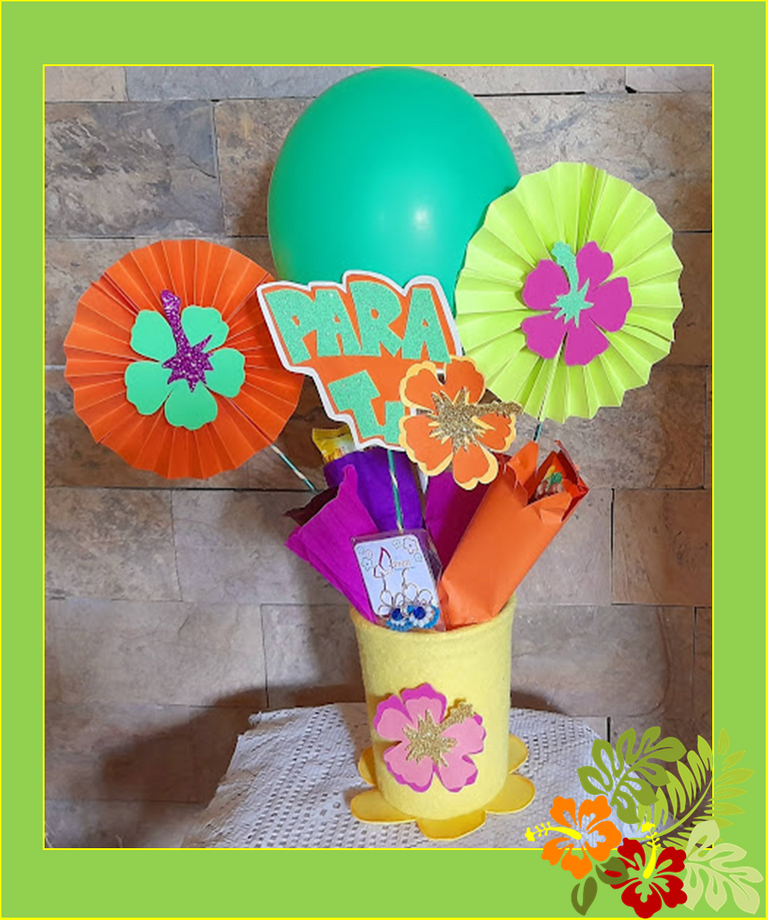
Listo, este es el resultado final de mi lindo y espectacular dulcero tropical para regalárselo a mi Mi Madre el día de su cumpleaños .¡Espero les haya gustado mi proyecto de hoy y se animen a realizar este lindo dulcero.
¡Hasta una próxima publicación!
Done, this is the final result of my beautiful and spectacular tropical candy box to give it to my Mother on her birthday. I hope you liked my project today and are encouraged to make this beautiful candy box.
Until a next post!

Fuente portada
Fuente Separador


Las fotografías fueron tomadas con un teléfono inteligente Samsung A12, el texto fue traducido al ingles con el traductor de Google
El banner fue diseñado en canvas
The photographs were taken with a Samsung A12 smartphone, the text was translated into English with the Google translator.
The banner was designed on canvas
Te quedo Hermoso y se ve ideal para las fiestas
Thank you for sharing this amazing post on HIVE!
Your content got selected by our fellow curator @rezoanulvibes & you just received a little thank you via an upvote from our non-profit curation initiative!
You will be featured in one of our recurring curation compilations and on our pinterest boards! Both are aiming to offer you a stage to widen your audience within and outside of the DIY scene of hive.
Join the official DIYHub community on HIVE and show us more of your amazing work and feel free to connect with us and other DIYers via our discord server: https://discord.gg/mY5uCfQ !
If you want to support our goal to motivate other DIY/art/music/homesteading/... creators just delegate to us and earn 100% of your curation rewards!
Stay creative & hive on!