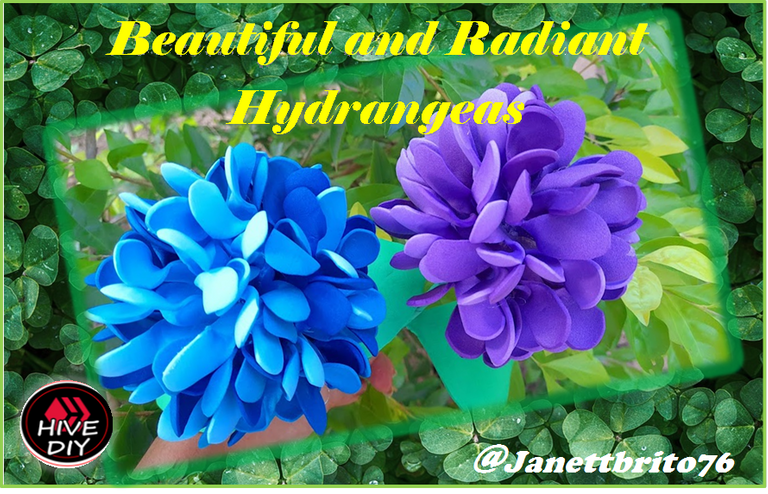
[ESP-ENG] 💮 Hermosas y Radiantes Hortensias 💮 Beautiful and Radiant Hydrangeas 💮


Feliz viernes para todos mis queridos amigos artesanos y creativos que día a día ponen a volar su imaginación para presentar sus hermosos proyecto en esta estupenda comunidad de #HiveDiy, espero se encuentren llenos de salud y alegría. En esta ocasión les quiero regalar el paso a paso de como realice estas hermosas y radiantes hortensias elaboradas en foami. Les cuento que Hoy borrando unas fotos del google me encontré unas cuando fui a conocer la colonia Tovar un pueblo que se encuentra en el estado Aragua, Venezuela y en una de esas fotos estaban esas bellas hortensias que se encontraban por los alrededores de las cabañas donde estábamos hospedados. Luego me puse a Indagar sobre ellas y me entero que esa flor esta cargada de muchos símbolos, como de gratitud, de gracia, de belleza y también de abundancia, debido a la cantidad abundante de flores y a su forma redonda tan generosa... Es por eso que siempre he dicho " todos los días se aprende algo nuevo". Estas hermosas hortensias las puedes utilizar para realizar arreglos florales o simplemente para decorar cualquier lugar de tu hogar o obsequiarlas a alguien en especial. Esta radiantes flores son fáciles y económica de hacer y estoy segura que les encantara la idea. Entonces no te pierdas el paso a paso. Manos a la obra!!

Happy Friday to all my dear artisan and creative friends who day by day put their imagination to flight to present their beautiful projects in this wonderful #HiveDiy community, I hope you are full of health and joy. On this occasion I want to give you the step by step of how to make these beautiful and radiant hydrangeas made in foami. I tell you that today deleting some photos from google I found some when I went to see the Tovar neighborhood, a town that is in the state of Aragua, Venezuela and in one of those photos there were those beautiful hydrangeas that were around the cabins where we were staying Then I began to inquire about them and I found out that this flower is loaded with many symbols, such as gratitude, grace, beauty and also abundance, due to the abundant number of flowers and its generous round shape... It is That's why I've always said "every day you learn something new". You can use these beautiful hydrangeas to make flower arrangements or simply to decorate any place in your home or give them to someone special. These radiant flowers are easy and inexpensive to make and I'm sure you'll love the idea. Then do not miss the step by step. Let's do it!!

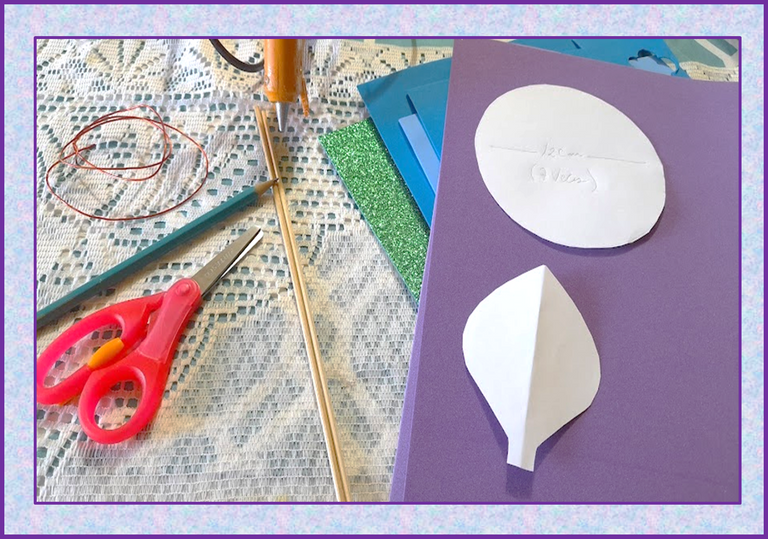
- Foami (morado claro y oscuro, azul claros y oscuro, verde)
- Palitos de altura
- Tijera
- Alambre de cobre
- Silicon
- Foami (light and dark purple, light and dark blue, green)
- Height sticks
- Scissors
- Copper wire
- Silicon

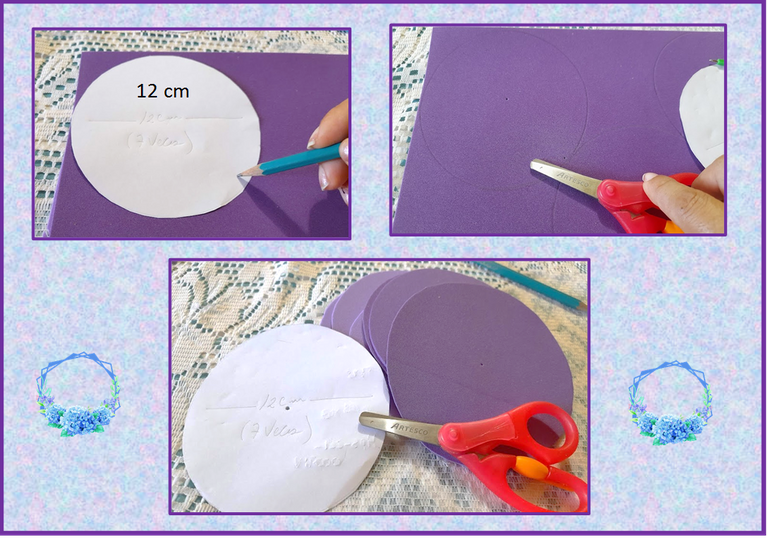
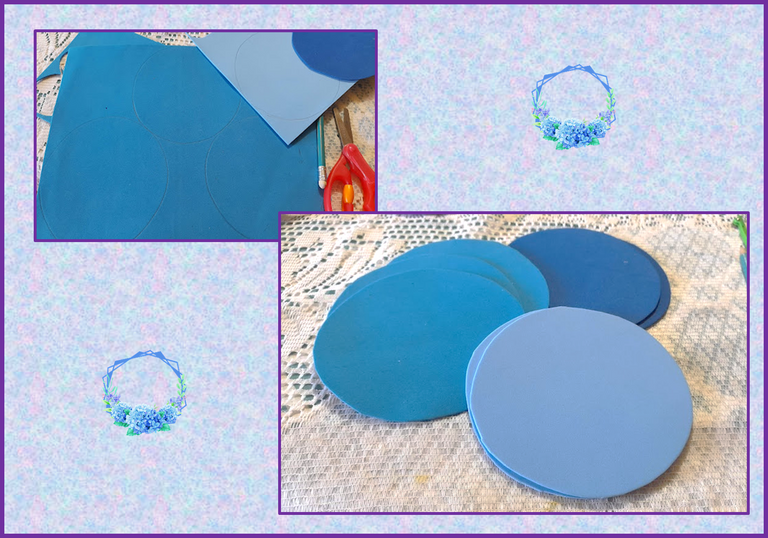
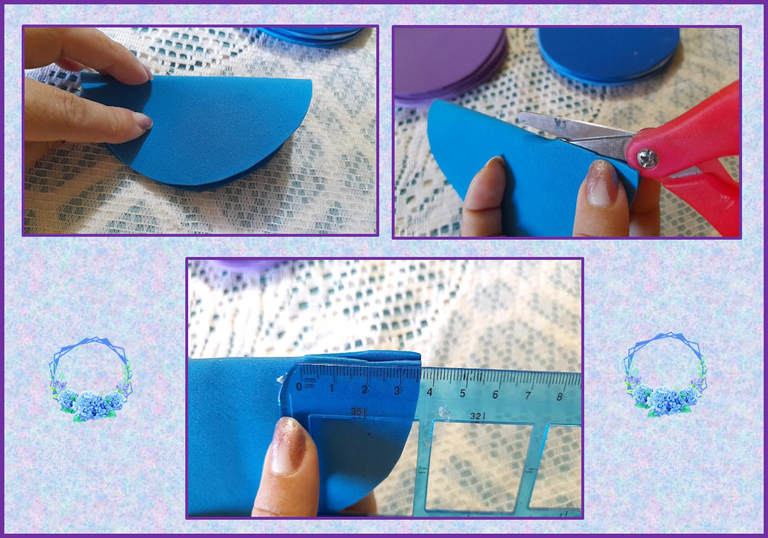
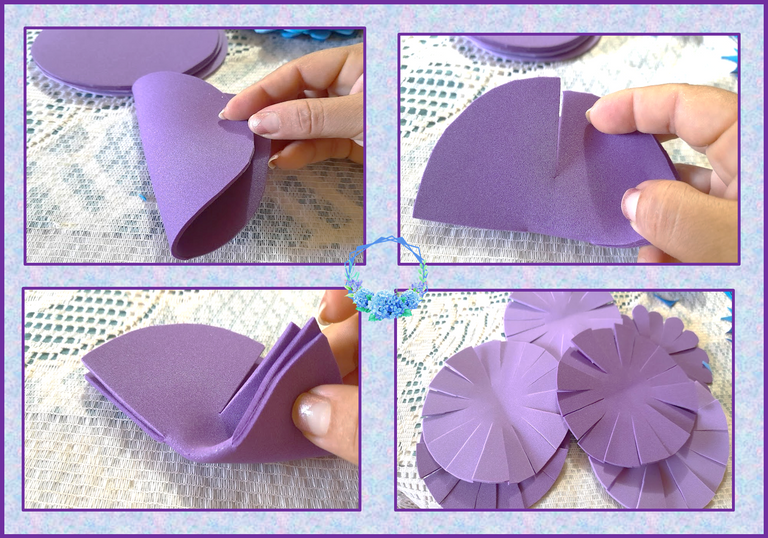
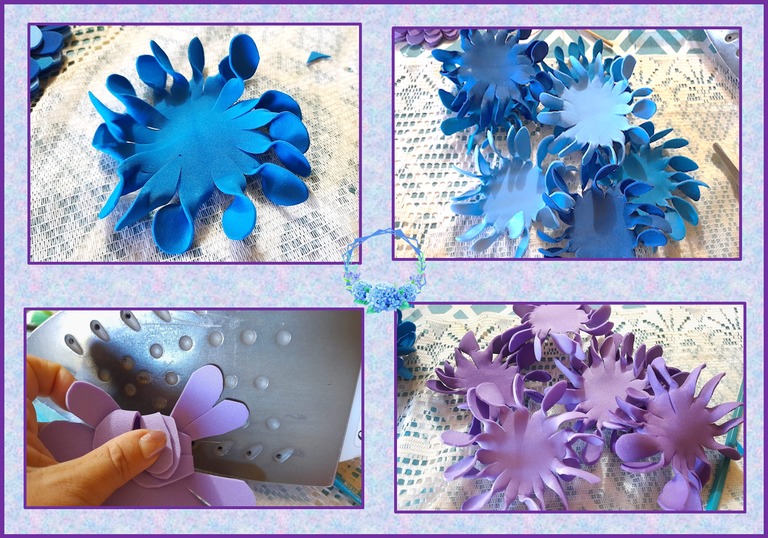
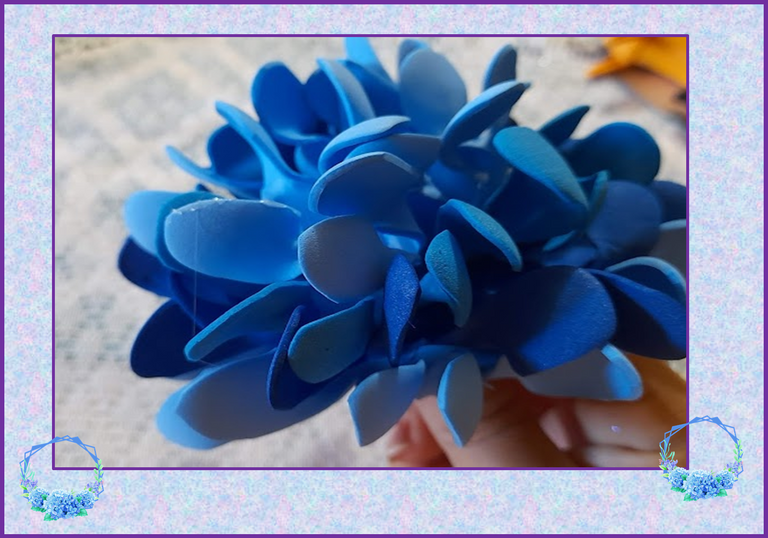
1: Comenzamos marcando en el foami morado claro y oscuro 7 círculos de 12 cm, luego recortamos, seguidamente marcamos y recortamos 7 círculos de 12 cm entre los tres distintos foami azules.
1: We start by marking on the light and dark purple foami 7 circles of 12 cm, then we cut, then we mark and cut out 7 circles of 12 cm between the three different blue foami.
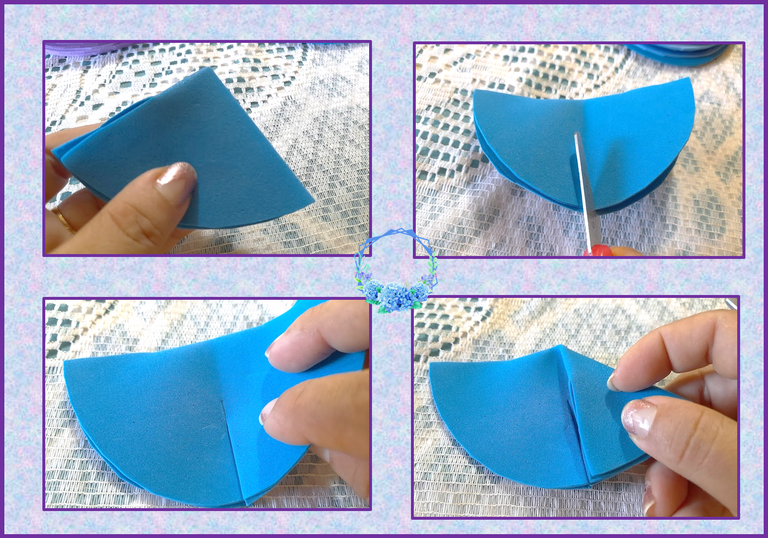
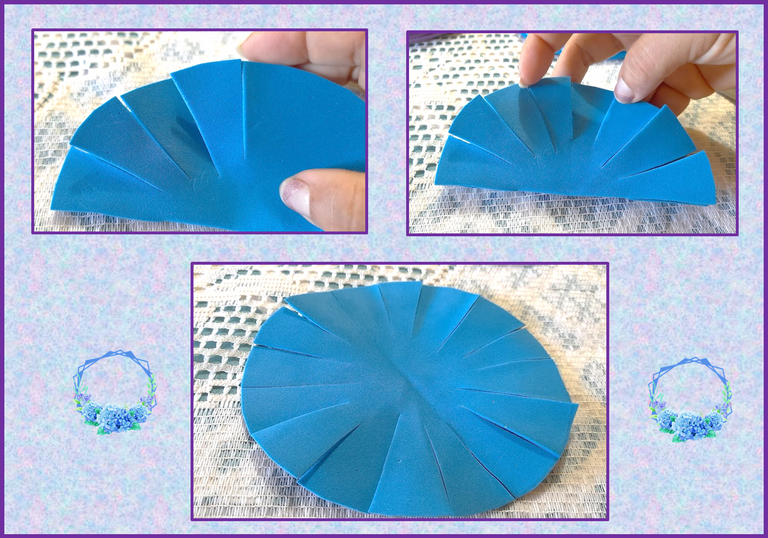
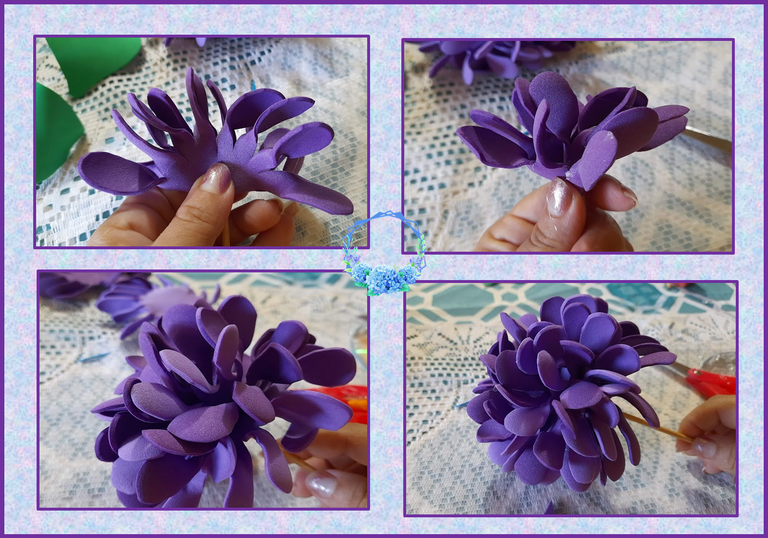
2: Ahora procedemos a realizar cada capa de pétalos, para esto doblamos el circulo a la mitad y lo cortamos a 3,5 cm de afuera hacia el centro por ambos lados como pueden ver en las imágenes, luego volvemos a doblar a la mitad y volvemos a cortar, seguidamente la mitad que doblamos la volvemos a doblar hasta formar 8 pétalos como pueden ver en las imágenes, repetimos el mismo proceso hasta completar las 7 capas, de la misma manera realizamos la flor morada.
2: Now we proceed to make each layer of petals, for this we fold the circle in half and cut it 3.5 cm from the outside to the center on both sides as you can see in the images, then we fold it in half again and cut it again. cut, then the half that we fold we fold again to form 8 petals as you can see in the images, we repeat the same process until completing the 7 layers, in the same way we make the purple flower.
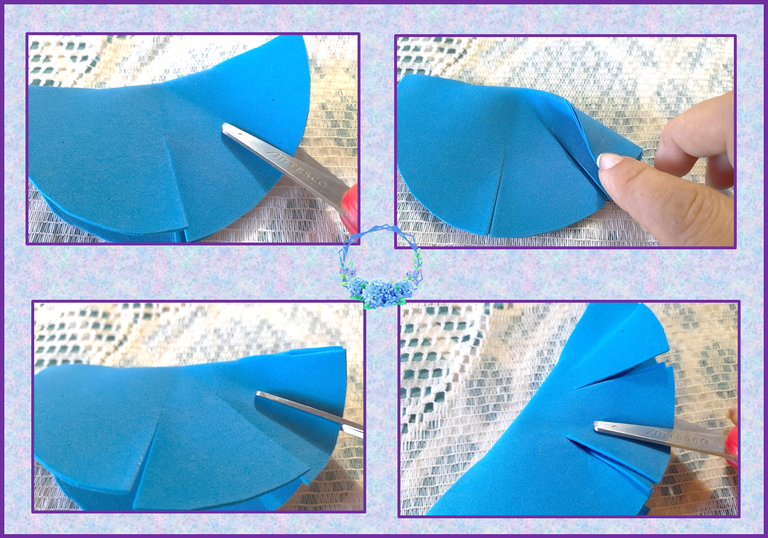
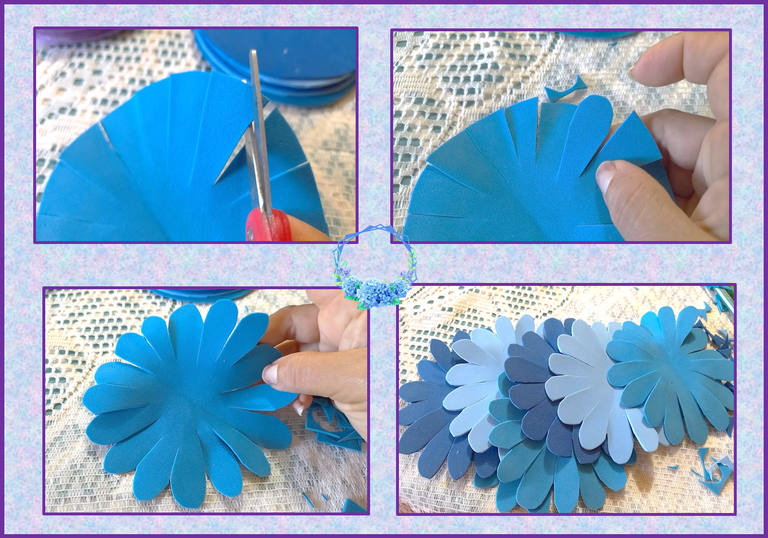
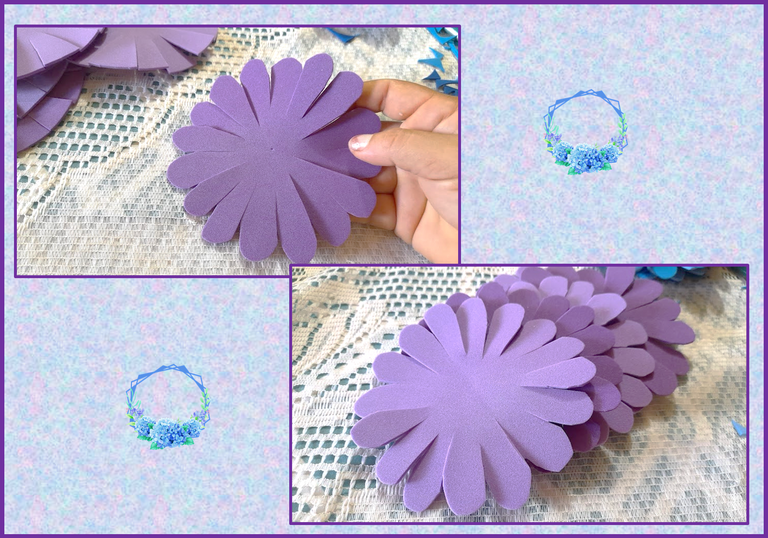
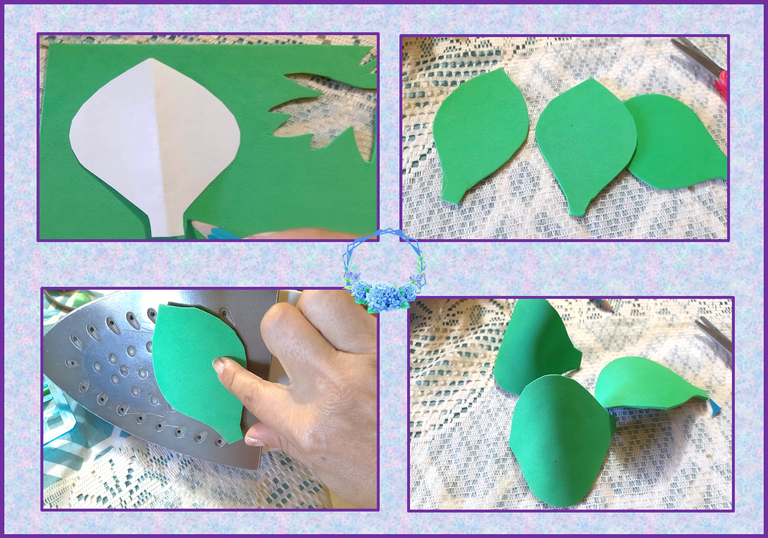
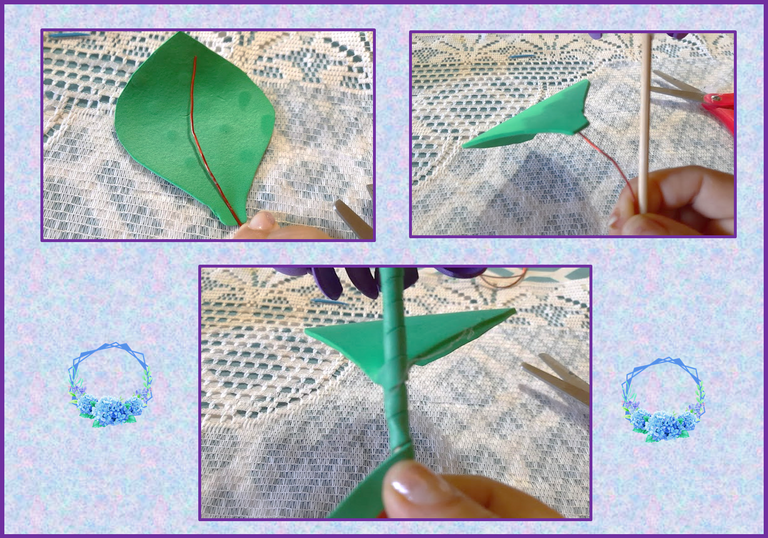
3: Ya cortadas todas las capas, con la ayuda de la tijera procedemos a realizar en la punta de cada pétalo unas pequeñas muecas, repetimos el mismo procedimiento para el resto de las capas. Luego con la ayuda de la plancha vamos calentando con mucho cuidado cada pétalo y los torcemos un poco como pueden ver en las imágenes,repetimos el mismo proceso para todas las capas tanto azules como moradas, seguidamente marcamos en el foami verde unas hojas, recortamos y le damos un poco de forma con la plancha.
3: Once all the layers have been cut, with the help of scissors we proceed to make small faces at the tip of each petal, we repeat the same procedure for the rest of the layers. Then with the help of the iron we carefully heat each petal and twist them a little as you can see in the images, we repeat the same process for all the layers, both blue and purple, then we mark some leaves on the green foami, cut and we give it a little shape with the iron.
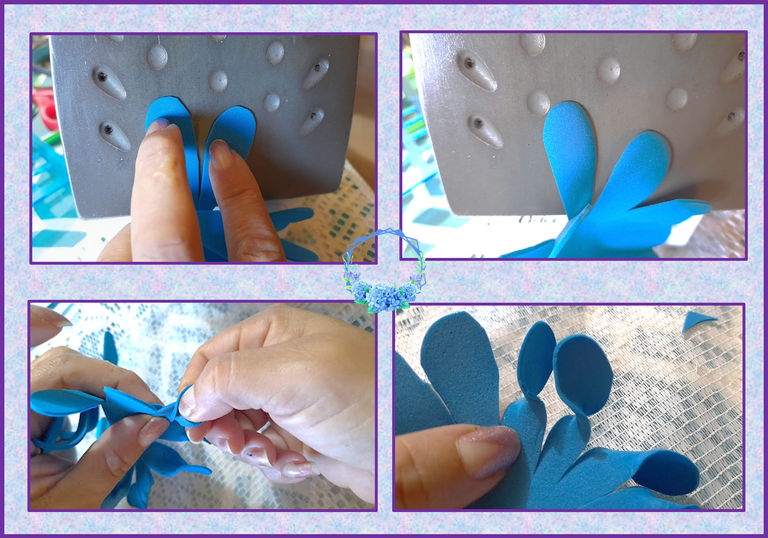
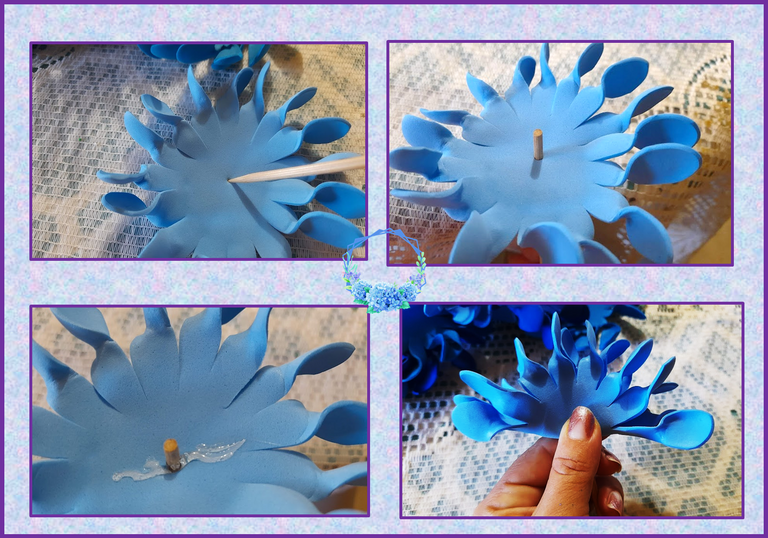
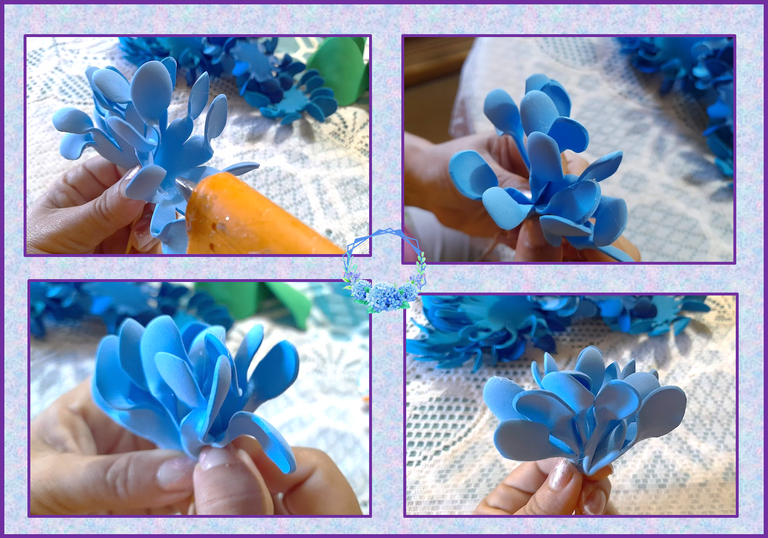
4: Ya formadas las capas procedemos armar nuestras flores, primero introducimos el palito de altura por el centro de una de las capas, luego le colocamos un poco de silicon en forma vertical y pegamos, seguidamente por los lados abrimos un poco y le colocamos nuevamente silicon y pegamos, luego vamos introduciendo una a una cada capa y vamos pegando, como pueden ver en las imágenes; para pegar la ultima capa le realizamos un corte y le cortamos un poquito y luego la pegamos al resto de las capas. Por ultimo pegamos las hojas al alambre de cobre y seguidamente procedemos a unirla al palito de altura y forramos con una tira de foami verde.
4: Once the layers are formed, we proceed to assemble our flowers, first we introduce the height stick through the center of one of the layers, then we place a little silicone vertically and paste, then we open a little on the sides and place it again silicon and paste, then we introduce each layer one by one and paste, as you can see in the images; to paste the last layer we make a cut and cut it a little and then we paste it to the rest of the layers. Finally we glue the leaves to the copper wire and then we proceed to join it to the height stick and cover it with a strip of green foami.


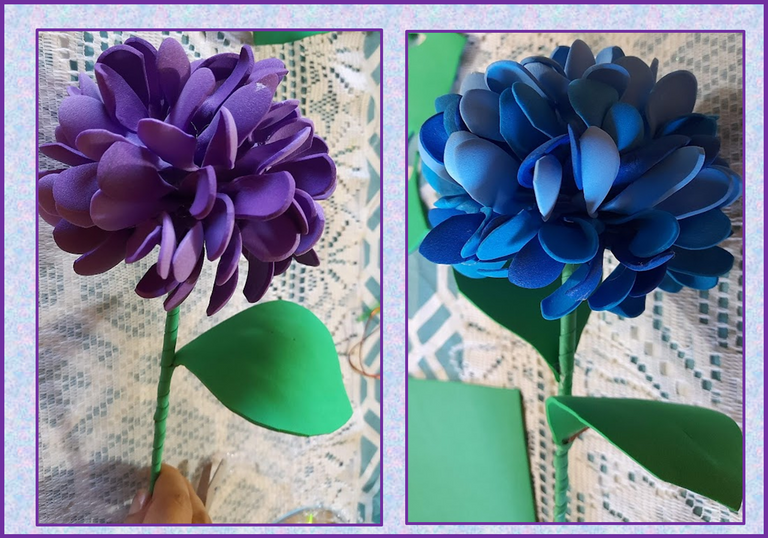
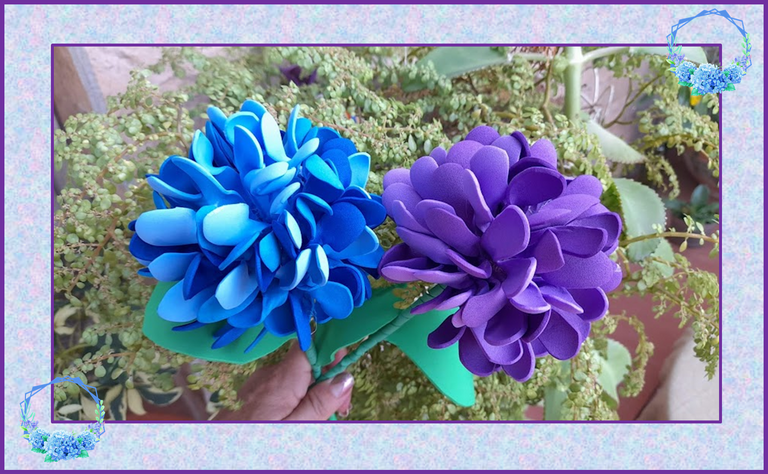
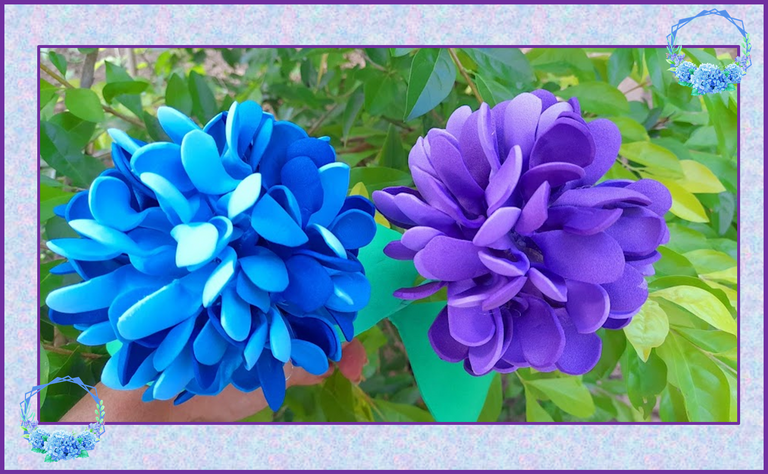
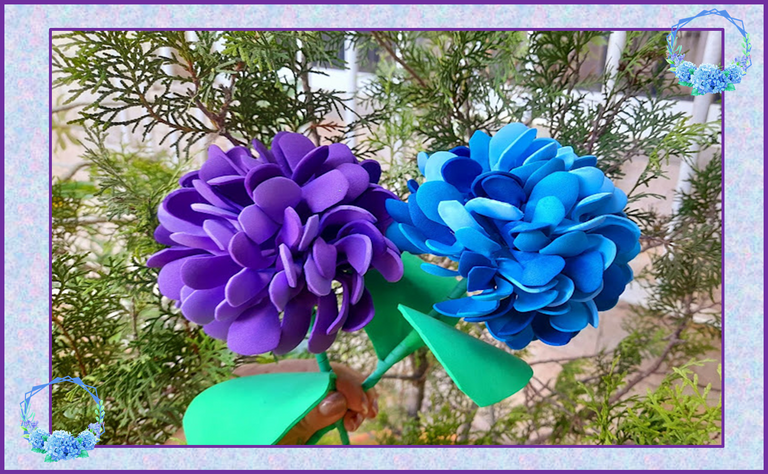
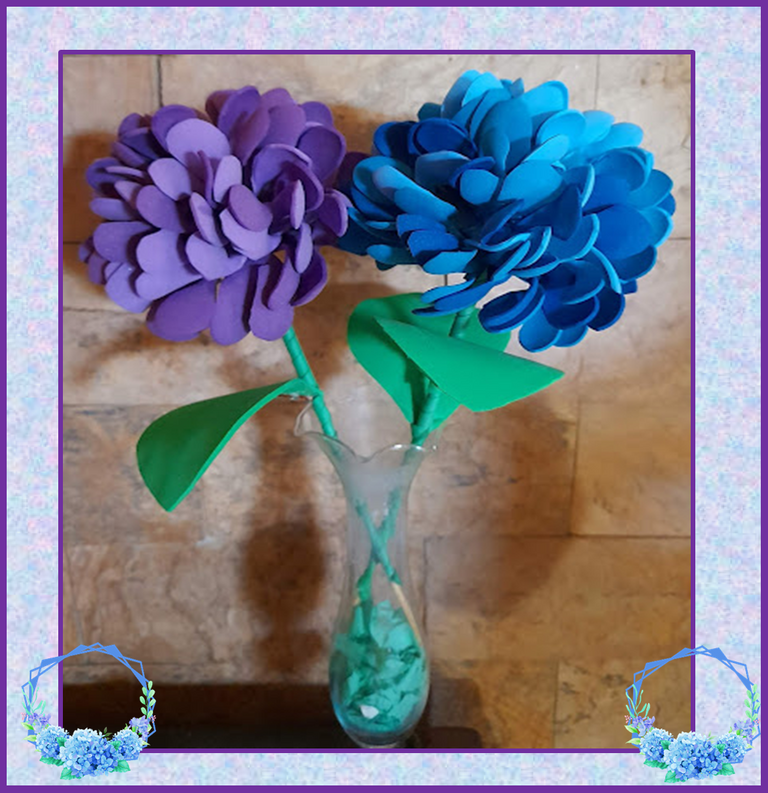
Listo, así de hermosas y radiantes me quedaron mis hortensias. ¡Espero les haya gustado mi proyecto de hoy!.
¡Hasta una próxima publicación!
Done, that's how beautiful and radiant my hydrangeas were. I hope you liked my project today!
Until a next post!
Fuente portada
Fuente Separador
Imagen de mi autoría


Las fotografías fueron tomadas con un teléfono inteligente Samsung A12, el texto fue traducido al ingles con el traductor de Google.
El banner fue diseñado en canvas
The photographs were taken with a Samsung A12 smartphone, the text was translated into English with the Google translator.
The banner was designed on canvas
Electronic-terrorism, voice to skull and neuro monitoring on Hive and Steem. You can ignore this, but your going to wish you didnt soon. This is happening whether you believe it or not. https://ecency.com/fyrstikken/@fairandbalanced/i-am-the-only-motherfucker-on-the-internet-pointing-to-a-direct-source-for-voice-to-skull-electronic-terrorism
guaoo... te quedaron hermosas amiga
Gracias yeni, me alegra que te hayan gustado. Saludos
Muy hermoso tu trabajo amiga, Saludos
Que lindas esas Hortensias, te quedaron espectacular 👌
Gracias hermana, te reto a que realices unas son fáciles de realizar.
me encantó quedo muy genial !!
Gracias por leer y comentar mis post
Por un momento pensé que se trataban de flores reales... Que hermosas!
Si amiga, es que también los colores son tan reales que parecieran de verdad
Un saludo mi querida amiga @janettbrito76, muy hermosas e ingeniosas flores de Hortensias; dan un colorido alegre a cualquier entorno donde las coloquemos; ya que son bastante llamativas por su forma pomposa. Gracias por compartir amiga; saludos y bendiciones.
Gracias amiga @kathy steele, me alegra que te gusten mis flores, si de verdad embellecen cualquier lugar. gracias por leer y comentar mis post. Saludos y abrazos
hola, amiga me encantaron tus flores, muy bonitas te quedaron, te felicito.
Gracias amiga Cruz, son bastante sencillas de elaborar, anímate a realizar unas, quedan lindas en un florero. solo tienes que tener cuidado con la plancha porque yo me queme varias veces realizando las flores.