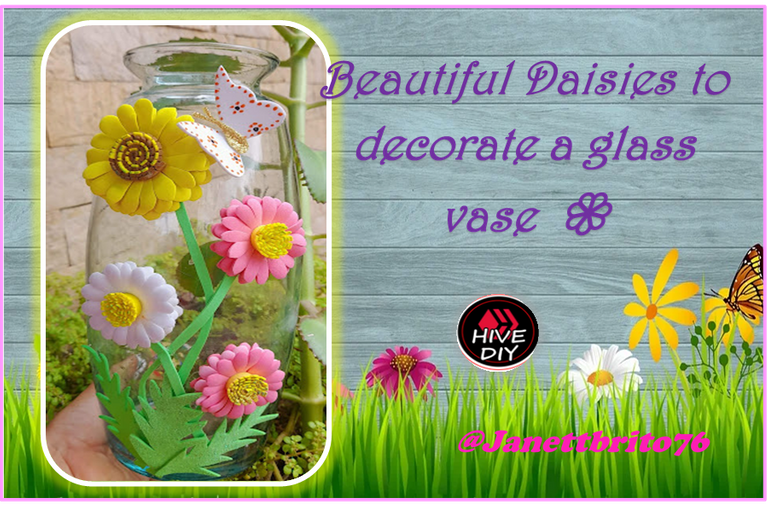
[ESP-ENG] 💮 Hermosas Margaritas para decorar un florero de vidrio 💮 Beautiful Daisies to decorate a glass vase 💮

Feliz Domingo tengan todos mis queridos creadores de esta estupenda comunidad de #HiveDiy, espero que descansen y que esta semana por venir sea para todos productiva y llena de muchas energías positivas y sobre todos mucha salud.
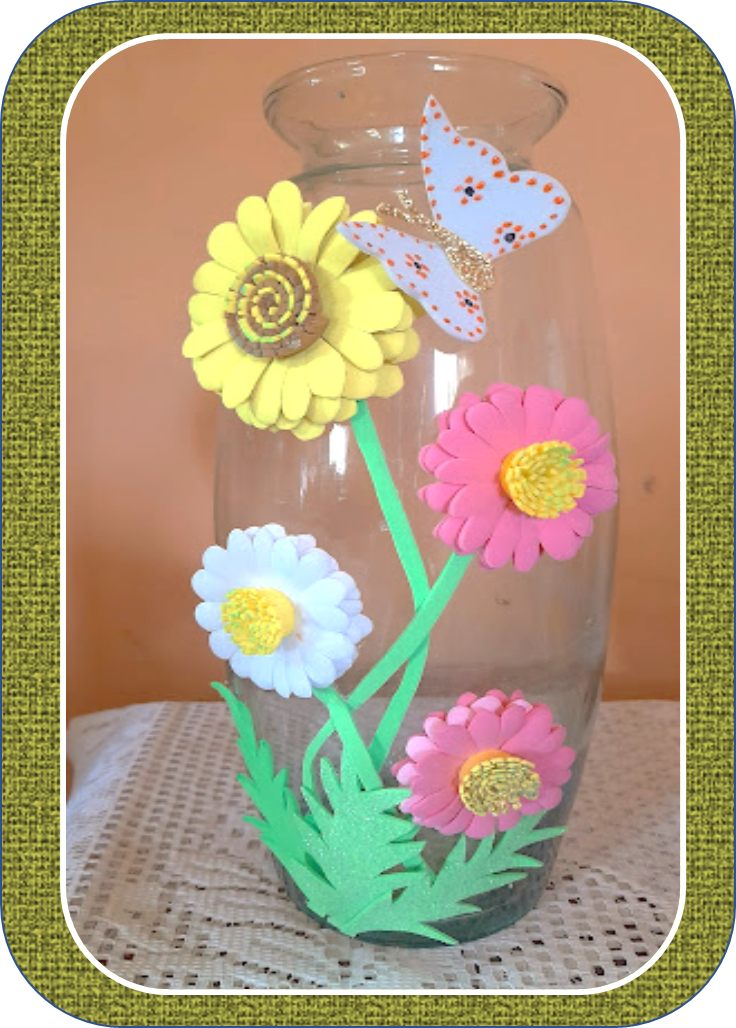
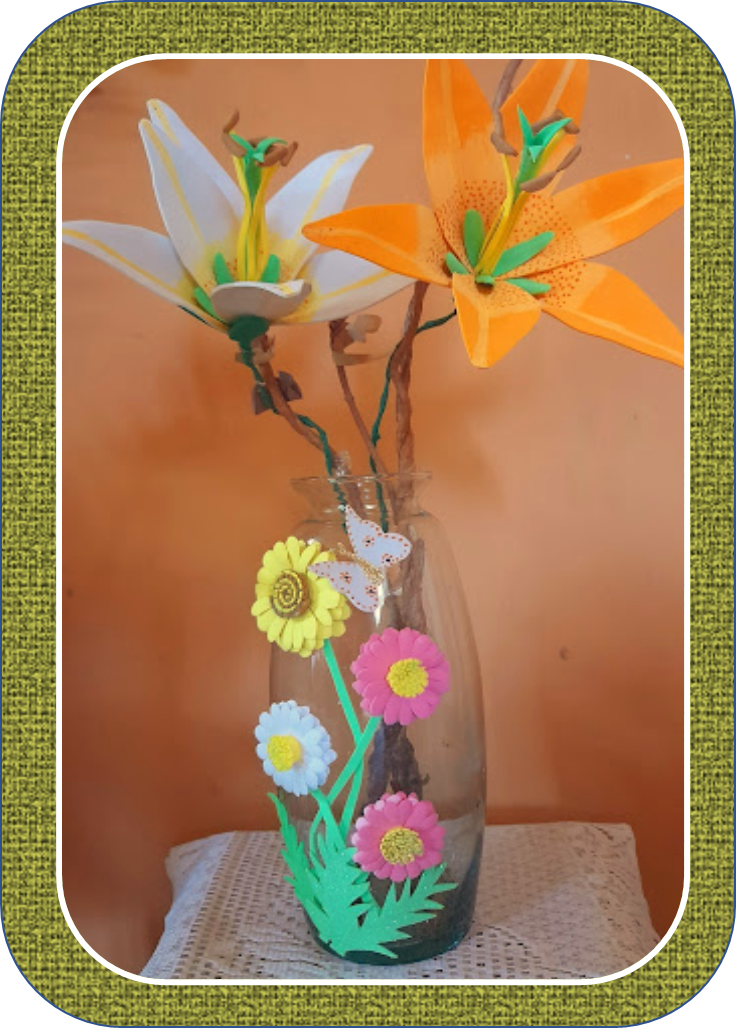
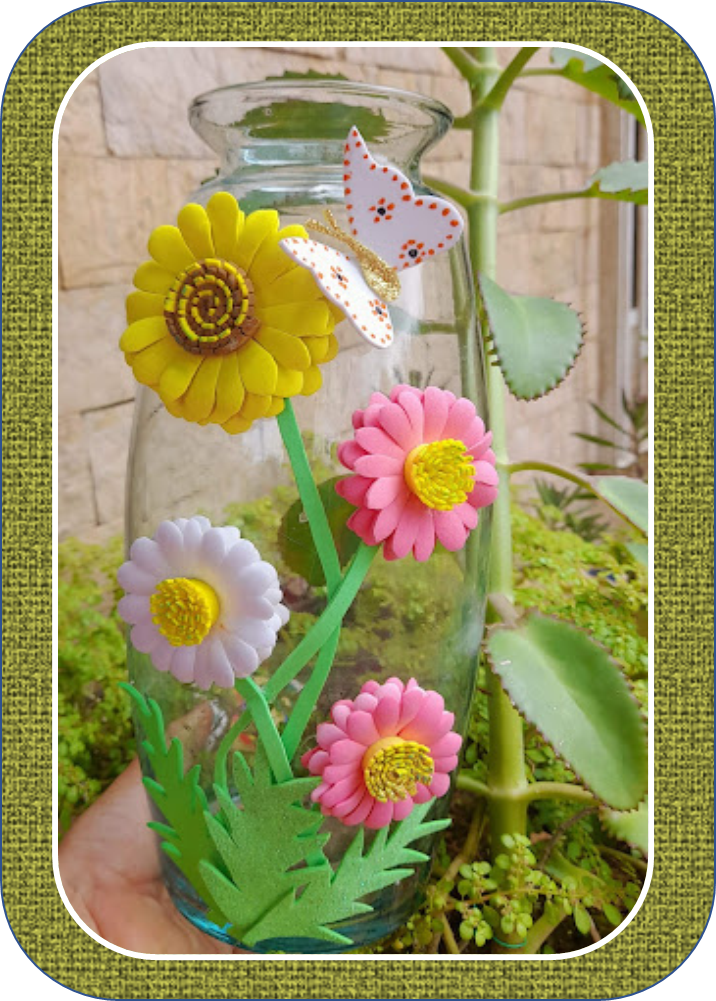
Bienvenidos nuevamente a mi blog, en esta ocasión les quiero mostrar el paso a paso de como realizar unas hermosas y coloridas margaritas las cuales las utilizare para la decoración de un florero de vidrio.
Les cuento que hay diferentes técnicas para decorar un florero,la más común es el de usar pinturas acrílicas y realizar algunos detalles sobre el, estos floreros de vidrios se encuentran de muchos modelos ya que estos son usados comúnmente como objetos decorativos en el interior de nuestro hogar, pero amigos quise salir un poco de lo común y realice unas lindas y coloridas margaritas en foami para decorar el florero de vidrio, la técnica que utilice es sencilla pero exclusiva , ya que el efecto 3D que les dan esas estupendas flores es realmente original y de verdad quede sorprendida con lo hermosos que se ve ahora ese florero de vidrio el cual le da un toque especial a mi sala. Esta idea es genial ya que puedes utilizar los colores de foami que mas te gusten y realizar tu propia decoración y con la temática que mas te agrade. Entonces no te pierdas el paso a paso para hacer estas hermosas y coloridas margaritas. ¡¡Manos a la obra!!

Good evening friends Hivers
Happy Sunday to all my dear creators of this wonderful #HiveDiy community, I hope you rest and that this week to come is productive for everyone and full of many positive energies and above all good health.
Welcome back to my blog, this time I want to show you step by step how to make beautiful and colorful daisies which I will use to decorate a glass vase.
I tell you that there are different techniques to decorate a vase, the most common is to use acrylic paints and make some details on it, these glass vases are found in many models since these are commonly used as decorative objects inside our home, but friends I wanted to get out of the ordinary and make some pretty and colorful daisies in foami to decorate the glass vase, the technique I use is simple but exclusive, since the 3D effect that these wonderful flowers give them is really original and I was really surprised with how beautiful that glass vase looks now, which gives a special touch to my living room. This idea is great since you can use the colors of foami that you like the most and make your own decoration and with the theme that you like the most. Then don't miss the step by step to make these beautiful and colorful daisies. Let's do it!!

- Foami(blanco, rosado, amarillo, verde, marrón)
- Silicon
- Tijera
- Foami(white, pink, yellow, green, brown)
- Silicon
- Scissors
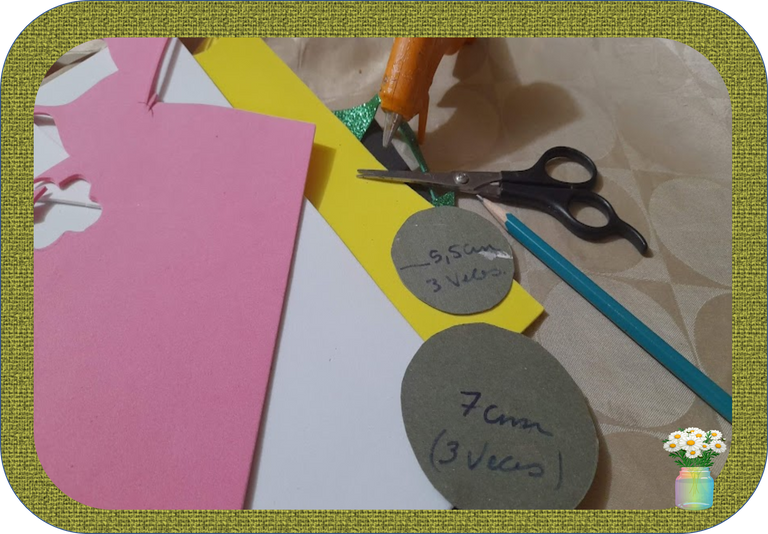

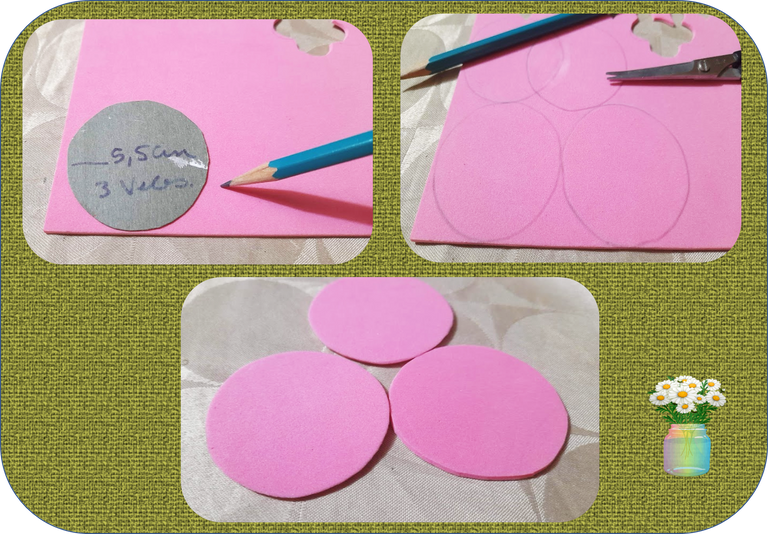
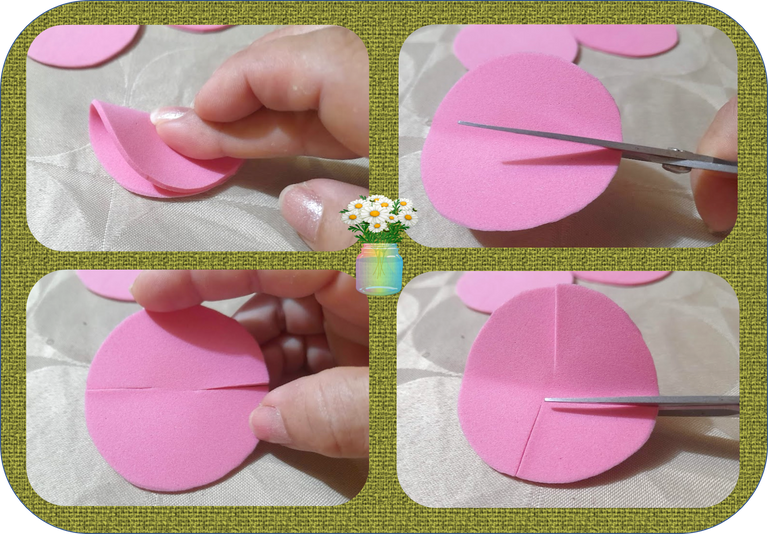
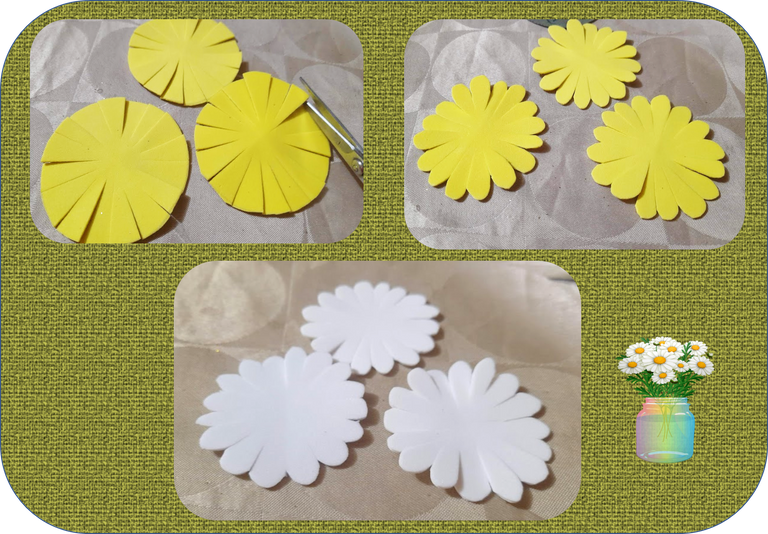
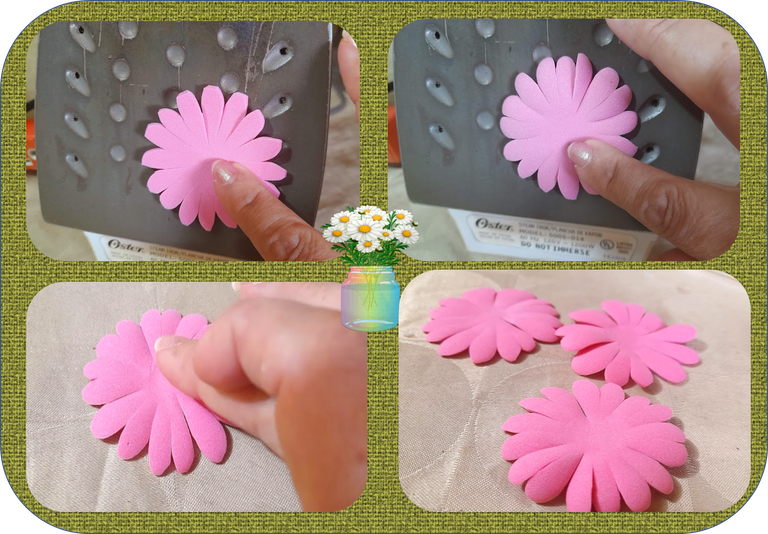
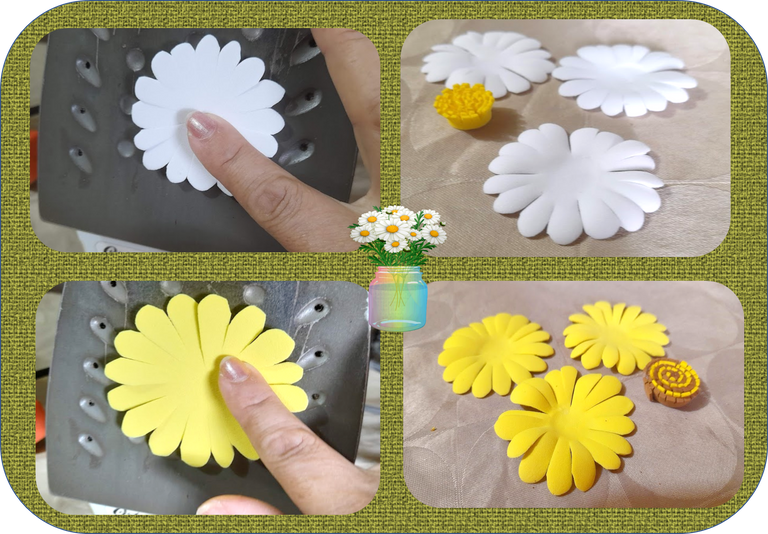
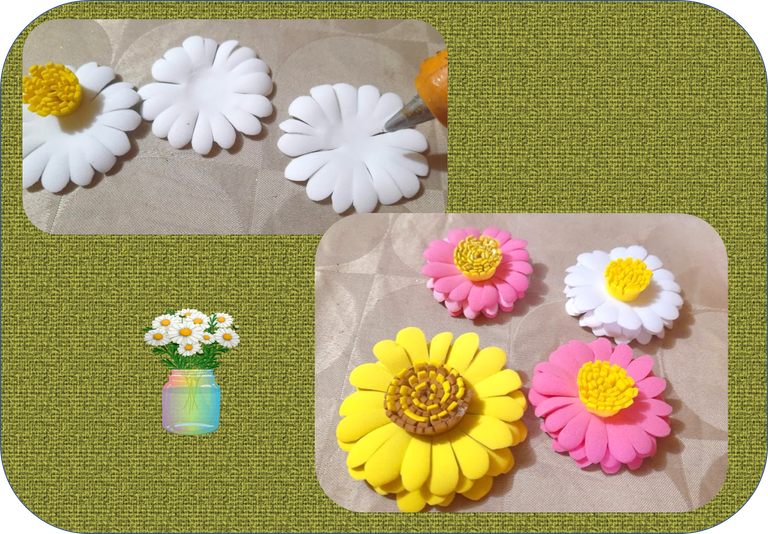
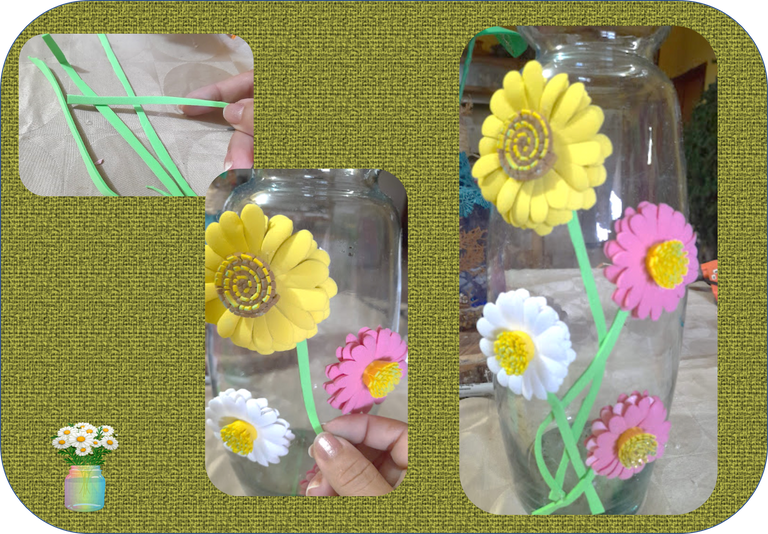
1: Para la realización de las margaritas iniciamos marcando y recortamos en el foami rosado tres círculos de 5,5 cm de radio, la margarita amarilla es un poco más grande para esta tomamos el foami amarillo, marcamos y recortamos tres círculos de 7 cm de radio y para la margarita blanca marcamos y recortamos tres círculos de 5,5 cm de radio.
1: To make the daisies, we start by marking and cutting out three circles with a radius of 5.5 cm from the pink foami. The yellow daisy is a little larger. For this, we take the yellow foami, mark and cut out three circles with a radius of 7 cm. for the white daisy we mark and cut out three circles with a radius of 5.5 cm.

2: Ahora para la realización de cada pétalo, tomamos uno a uno los círculos y lo doblamos a la mitad y con la tijera cortamos por la marca dejando aproximadamente un centímetro antes de llegar al centro como pueden ver en las imágenes, luego volvemos a doblar a la mitad y cortamos nuevamente dejando un centímetro de separación, repetimos el mismo procedimiento hasta realizar 16 cortes. Este procedimiento lo realizamos a todos los círculos para formar las margaritas.
2: Now for the realization of each petal, we take the circles one by one and fold it in half and with the scissors we cut through the mark leaving approximately one centimeter before reaching the center as you can see in the images, then we fold again to the half and cut again leaving a centimeter apart, repeat the same procedure until making 16 cuts. We do this procedure to all the circles to form the daisies.
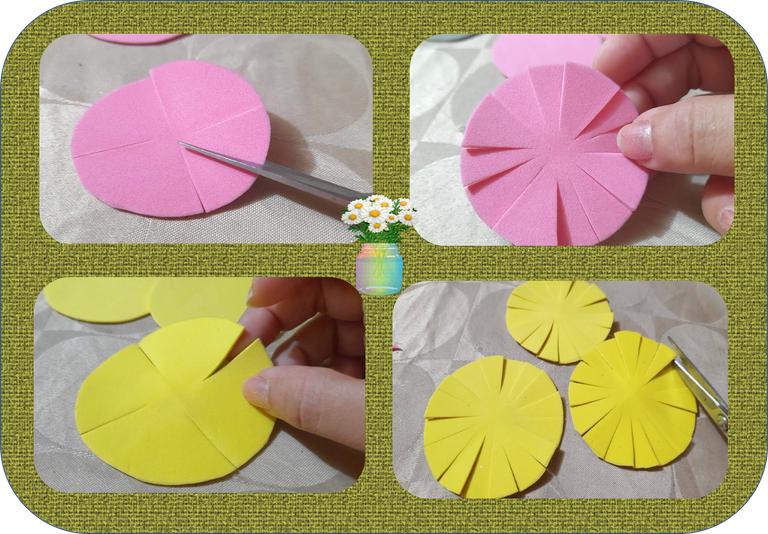
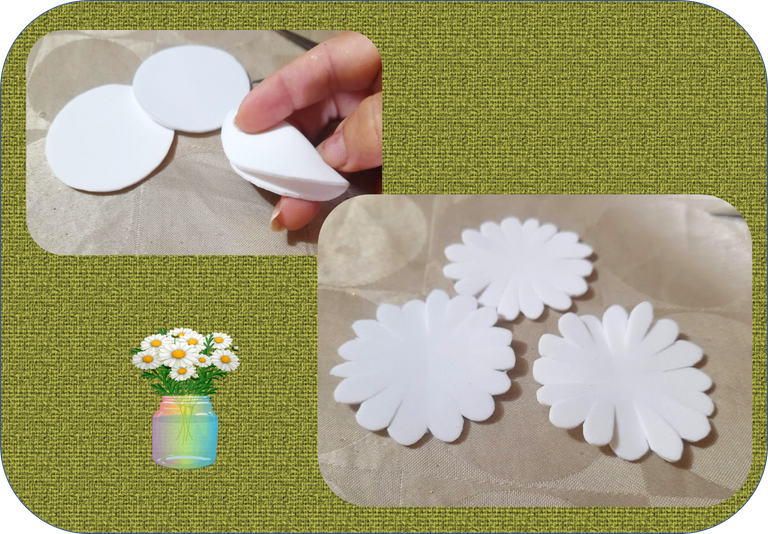
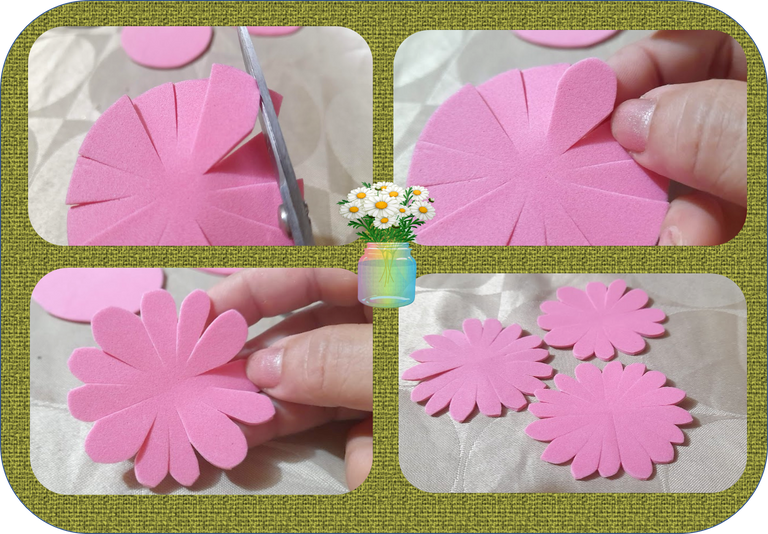
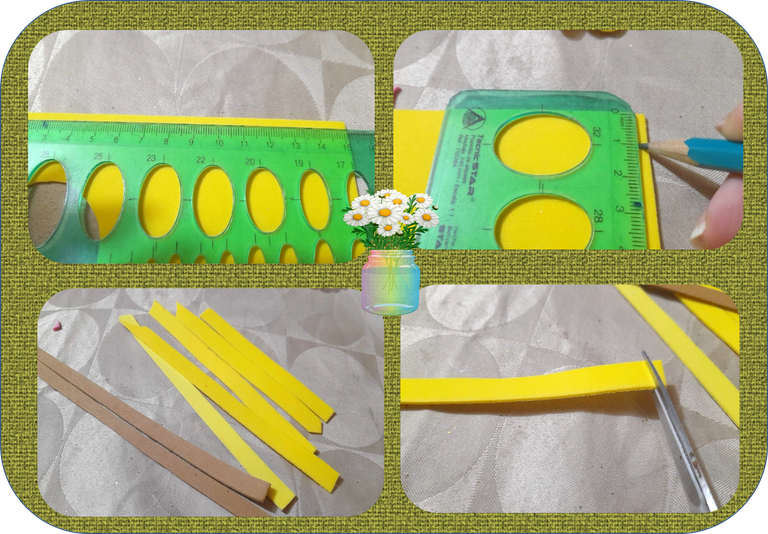
3: Con la ayuda de la tijera le realizando a cada pétalo de cada una de las flores una pequeña curva, como pueden ver en las imágenes.
3: With the help of scissors, making a small curve to each petal of each of the flowers, as you can see in the images.
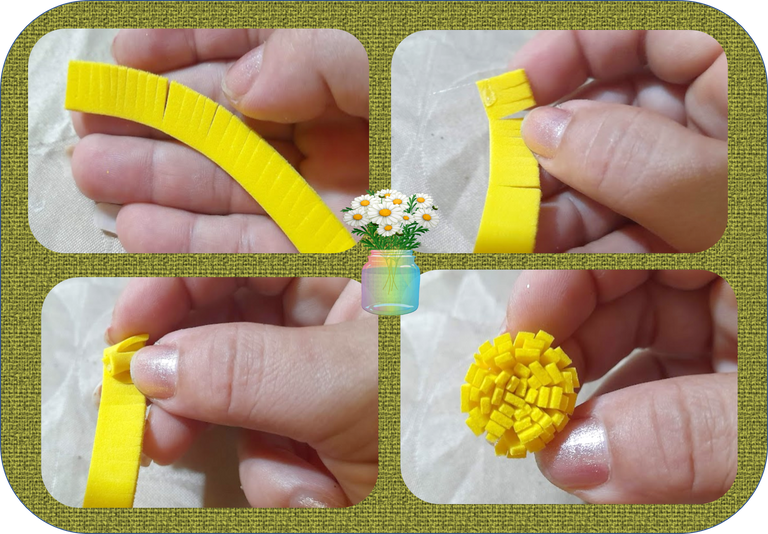
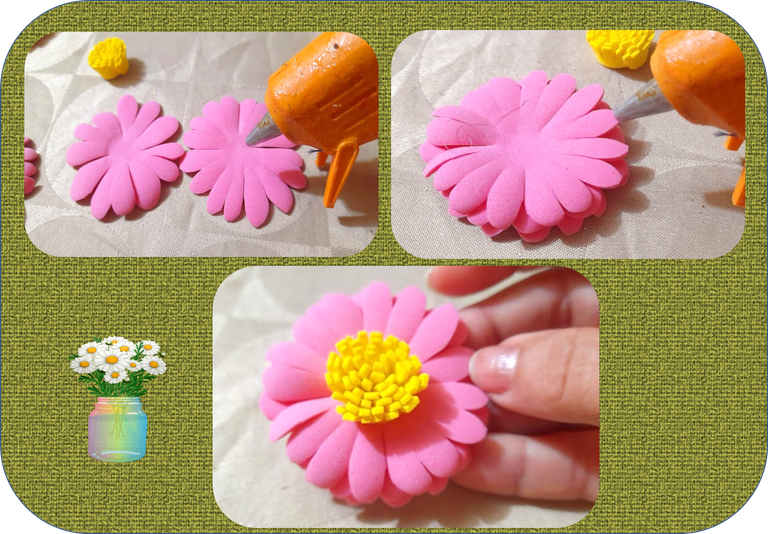
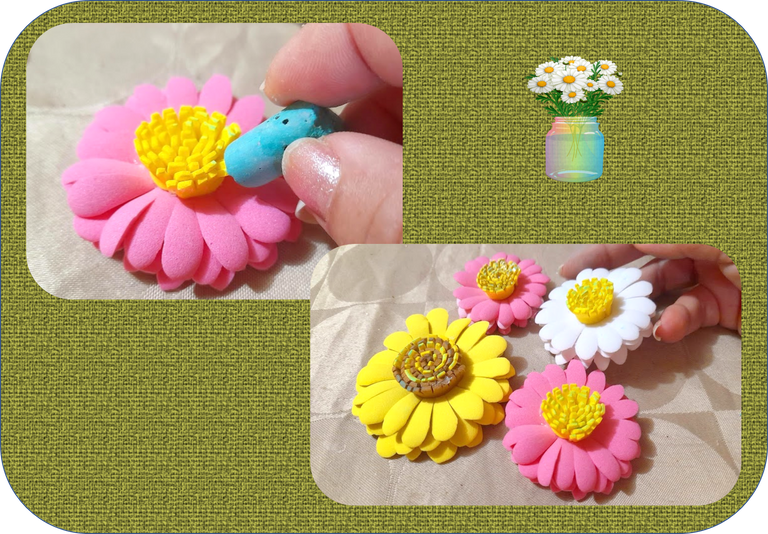
4: Ahora para realizar los pistilos de nuestras margaritas recortamos unas tiras de foami amarillo y marrón de 15 cm de largo por 1 cm de ancho, luego con la tijera le realizamos unos pequeños cortes, seguidamente le colocamos una gota de silicon en una de las puntas y procedemos a enrollar hasta formar el pistilo, como pueden ver en las imágenes.
4: Now to make the pistils of our daisies we cut some strips of yellow and brown foami 15 cm long by 1 cm wide, then with the scissors we make some small cuts, then we place a drop of silicone on one of the ends and We proceed to roll up to form the pistil, as you can see in the images.
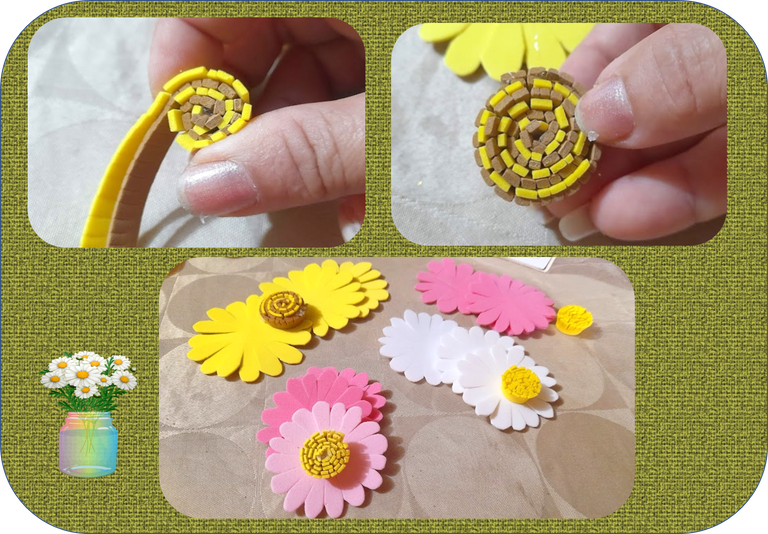
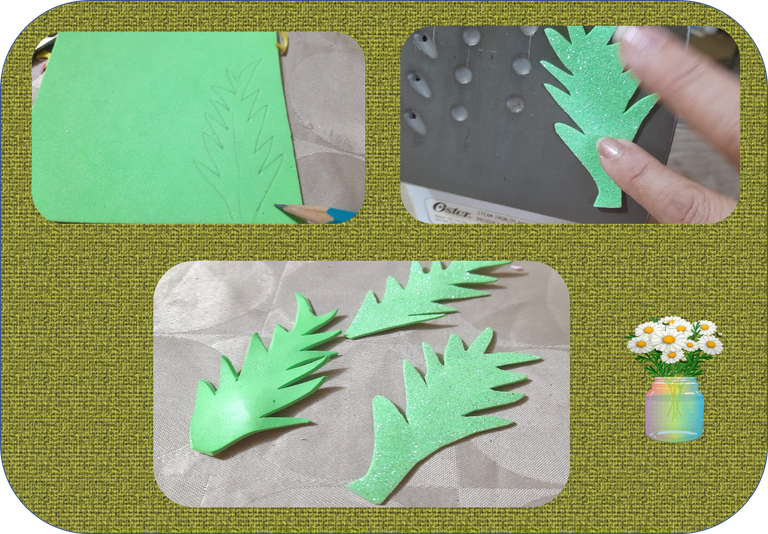
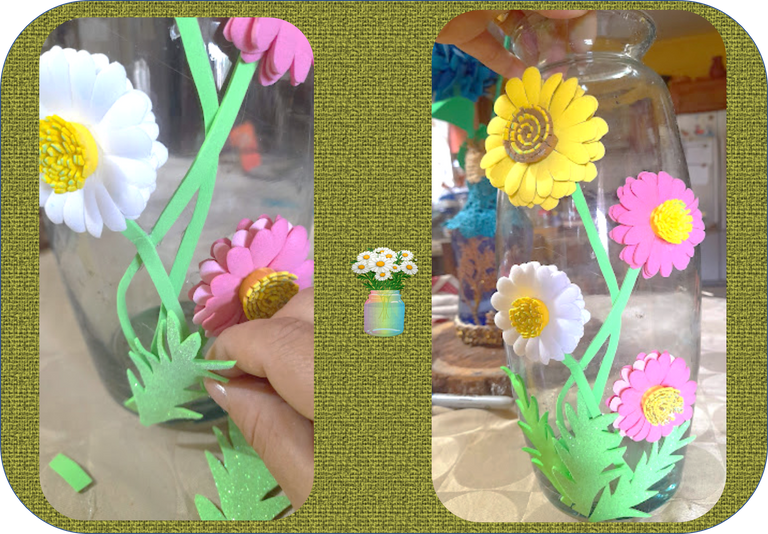
5: Ahora con la ayuda de la plancha procedemos a calentar cada pieza de muestras margaritas para darle un poco de movimiento, luego en el foami verde realizamos unas hojas y también les damos un poco de movimiento con la plancha.
5: Now with the help of the iron we proceed to heat each piece of daisy samples to give it a little movement, then in the green foami we make some leaves and we also give them a little movement with the iron.
6: Para finalizar nuestras margaritas procedemos a pegar cada una de las capas y en el centro el pistilo, repetimos el mismo procedimiento para cada flor, luego con una tiza verde pintamos un poco los pistilos.
6:To finish our daisies we proceed to paste each of the layers and in the center the pistil, we repeat the same procedure for each flower, then with a green chalk we paint a little the pistils.
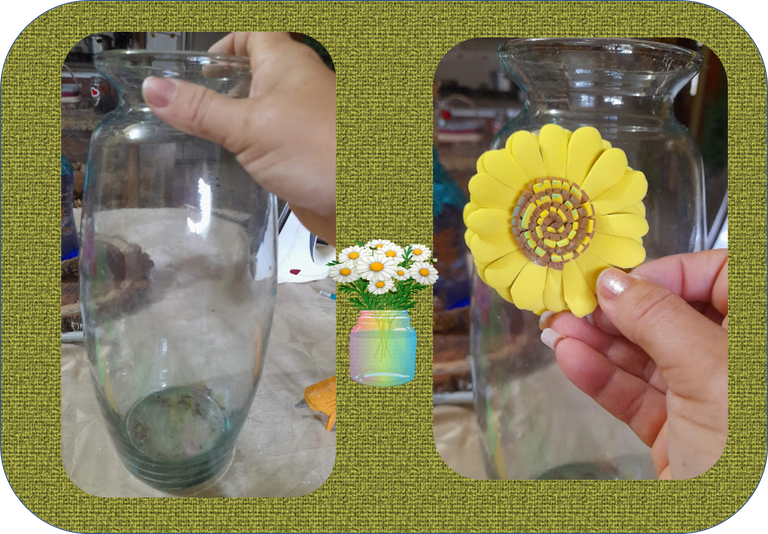
7: Finalmente procedemos a decorar nuestro florero de vidrio, pegamos primero cada una de las flores dándole nuestro estilo luego recortamos unas tiras de foami verde y simulamos el tallo y en la parte inferior del florero pegamos las hojas.
7: Finally we proceed to decorate our glass vase, first we glue each of the flowers giving it our style then we cut some strips of green foami and simulate the stem and in the lower part of the vase we glue the leaves.
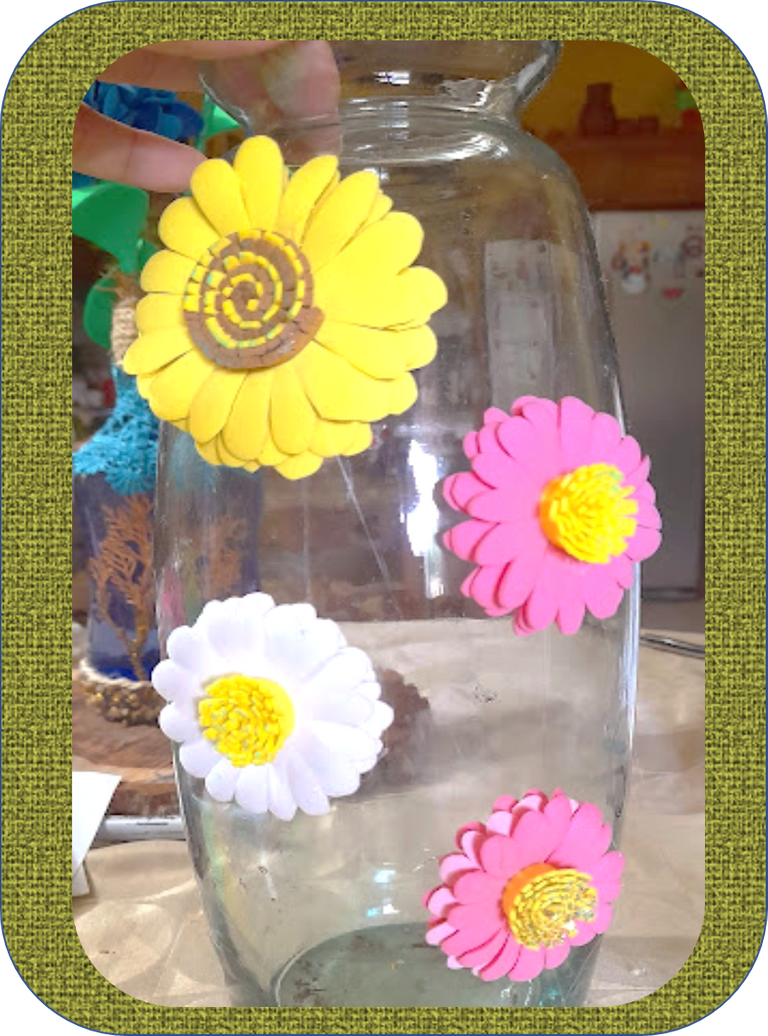
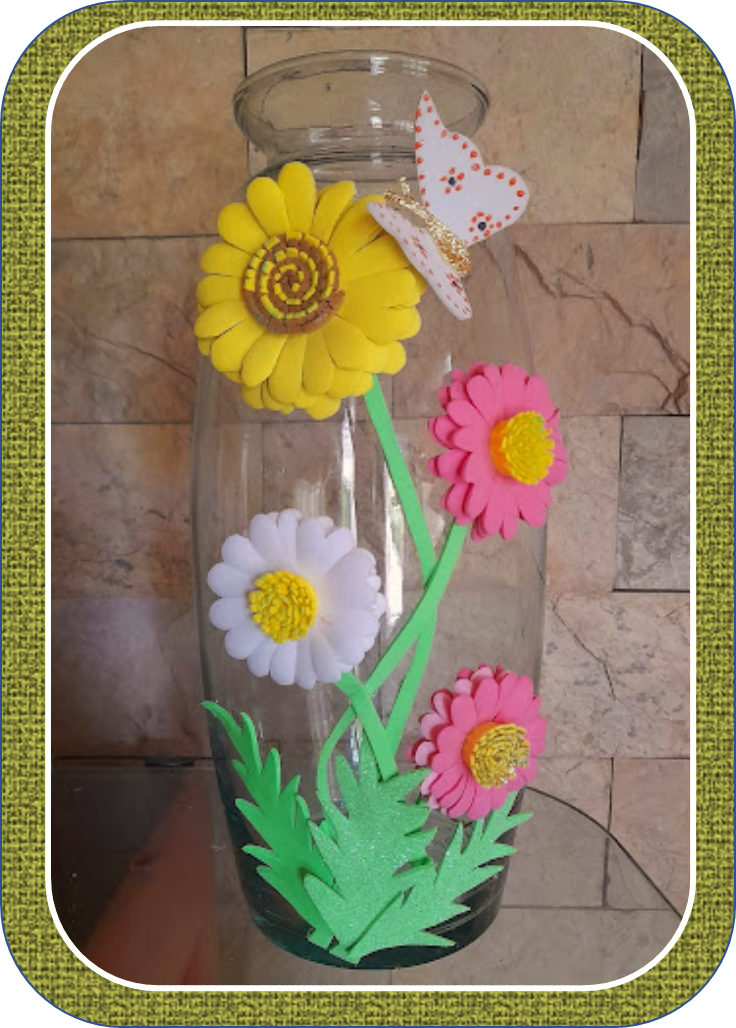
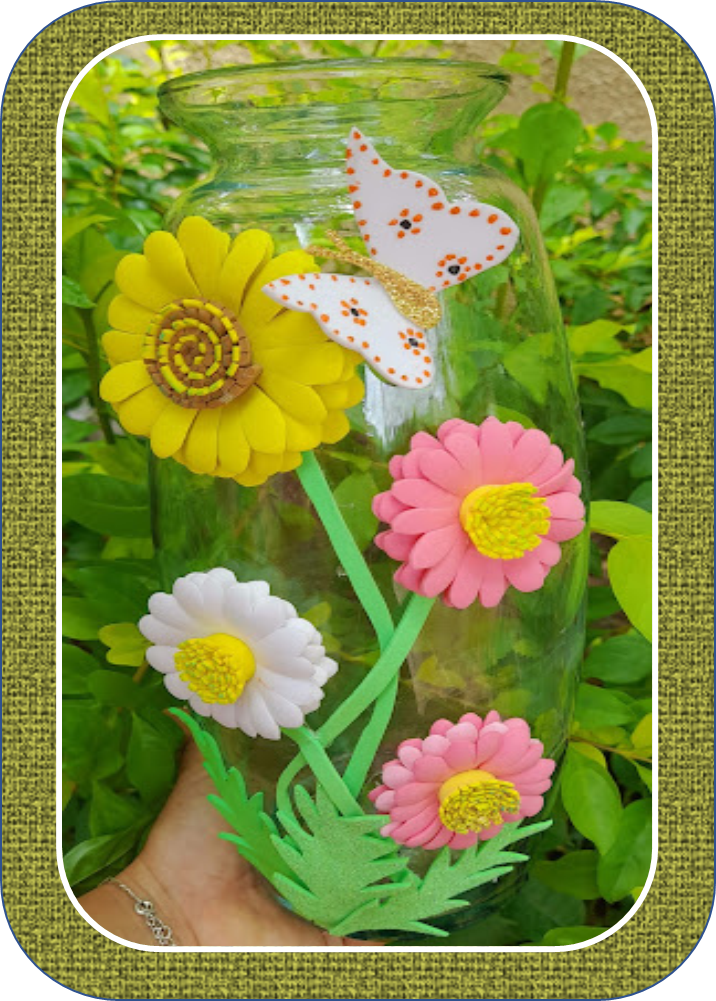
Listo, así de hermosas y originales me quedaron mis coloridas margaritas las cuales les dan una decoración espectacular a mi florero de vidrio.¡Espero les haya gustado mi proyecto del día de hoy !
¡Hasta una próxima publicación amigos !
Done, that's how beautiful and original my colorful daisies are, which give a spectacular decoration to my glass vase. I hope you liked my project today!
Until a next publication friends!
Fuente portada
Fuente Separador


Las fotografías fueron tomadas con un teléfono inteligente Samsung A12, el texto fue traducido al ingles con el traductor de Google.link
El banner fue diseñado en canvas link
The photographs were taken with a Samsung A12 smartphone, the text was translated into English with the Google translator.link
The banner was designed on canvas link
hermosooo!!
Gracias por leer y comentar
Que bello
Gracias amiga yeni. 🤗
Que bello quedó el frasco decorado . Me encanta la naturaleza🌼☘ y llevandola en materiales reciclables se ven espectacular. Buen trabajo amiga
Gracias amiga 🤗 por su apoyo, a mi también me encanta la naturaleza. Feliz inicio de semana 🙌
El resultado final es precioso. Felicitaciones.
Thank you for sharing this amazing post on HIVE!
Your content got selected by our fellow curator @rezoanulvibes & you just received a little thank you via an upvote from our non-profit curation initiative!
You will be featured in one of our recurring curation compilations and on our pinterest boards! Both are aiming to offer you a stage to widen your audience within and outside of the DIY scene of hive.
Join the official DIYHub community on HIVE and show us more of your amazing work and feel free to connect with us and other DIYers via our discord server: https://discord.gg/mY5uCfQ !
If you want to support our goal to motivate other DIY/art/music/homesteading/... creators just delegate to us and earn 100% of your curation rewards!
Stay creative & hive on!