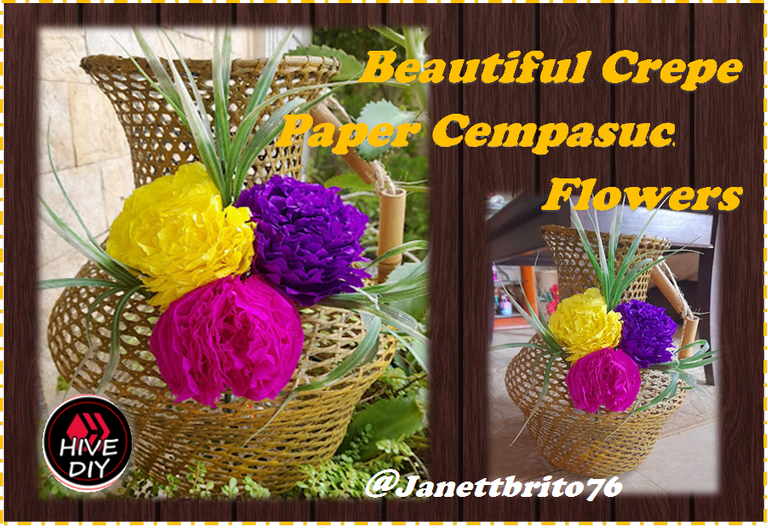
[ESP-ENG] 💮 Hermosas Flores de Cempasúchil de Papel Crepe para la restauración de una vieja cesta 💮 Beautiful Crepe Paper Cempasúchil Flowers for the restoration of an old basket 💮


Feliz y bendecido inicio de semana tengan todos mis queridos amigos artesanos de esta grandiosa comunidad de #HiveDiy, espero que hayan descansado el fin de semana y que hoy haya sido para todos ustedes un productivo día, con mucha vibra. Bienvenidos nuevamente a mi blog.
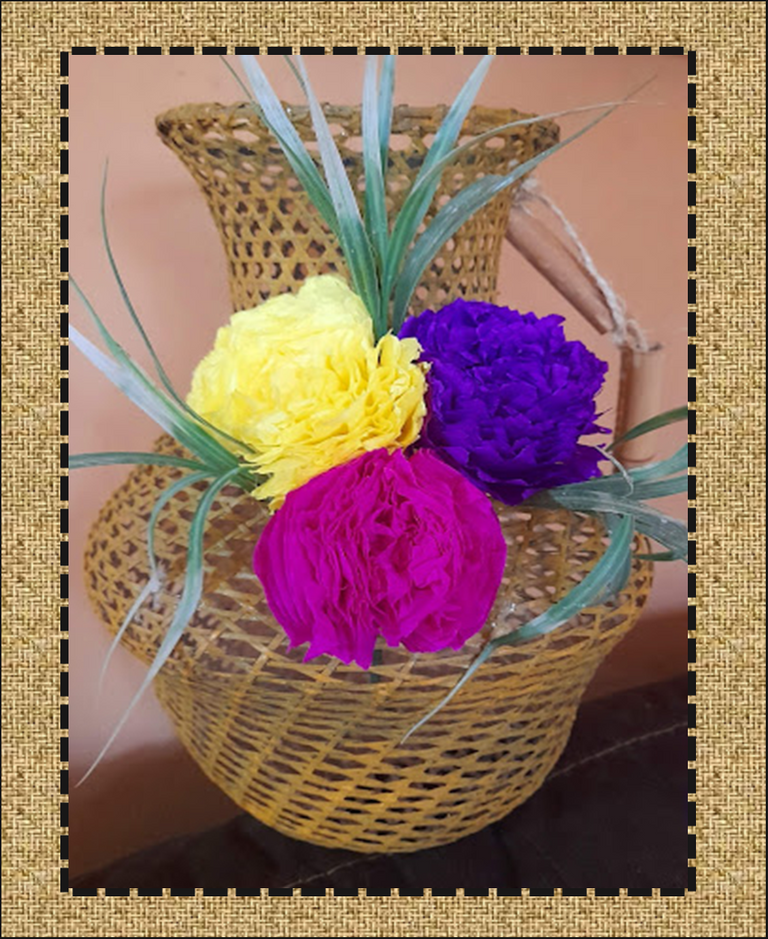
En esta oportunidad les voy a enseñar como realizar unas hermosas flores de Cempasúchil de Papel Crepe las cuales las utilice para la restauración de una vieja cesta. Les cuento que estas flores siempre las hacia cuando era una niñas para realizarle obsequios a mi mamá el día de las madres con la diferencia que como no tenia papel crepe utilizaba papel higiénico, como siempre he dicho todos los días se aprende algo nuevo, bueno les cuento que hoy buscando modelos de flores para realizar mis manualidades encontré que esas flores que yo realizaba hace muchos años se llaman Cempasúchil, las cuales son originarias de México y ellos las utilizan mas que todo el Día de muertos en los altares ya que la consideran un símbolo de vida y muerte, ademas estas flores representan para ellos el sol porque ellos las colocan ese día a sus muertos para crearle senderos, capaces de guiar a sus seres queridos a los altares...
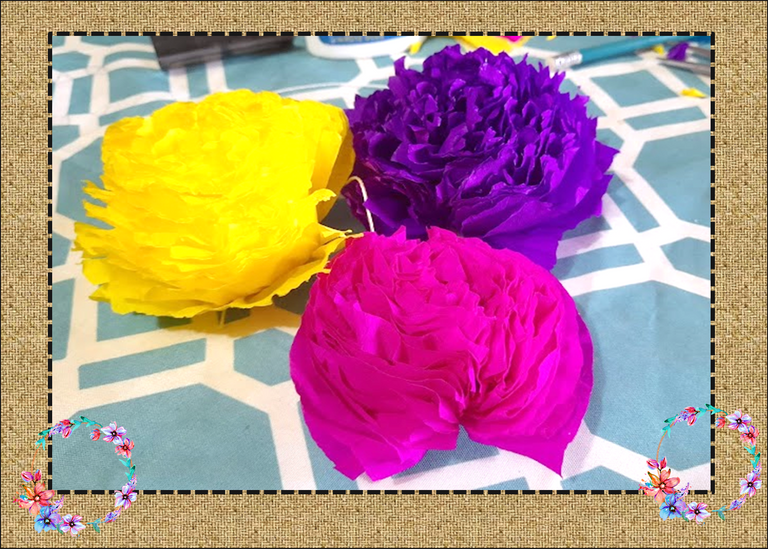
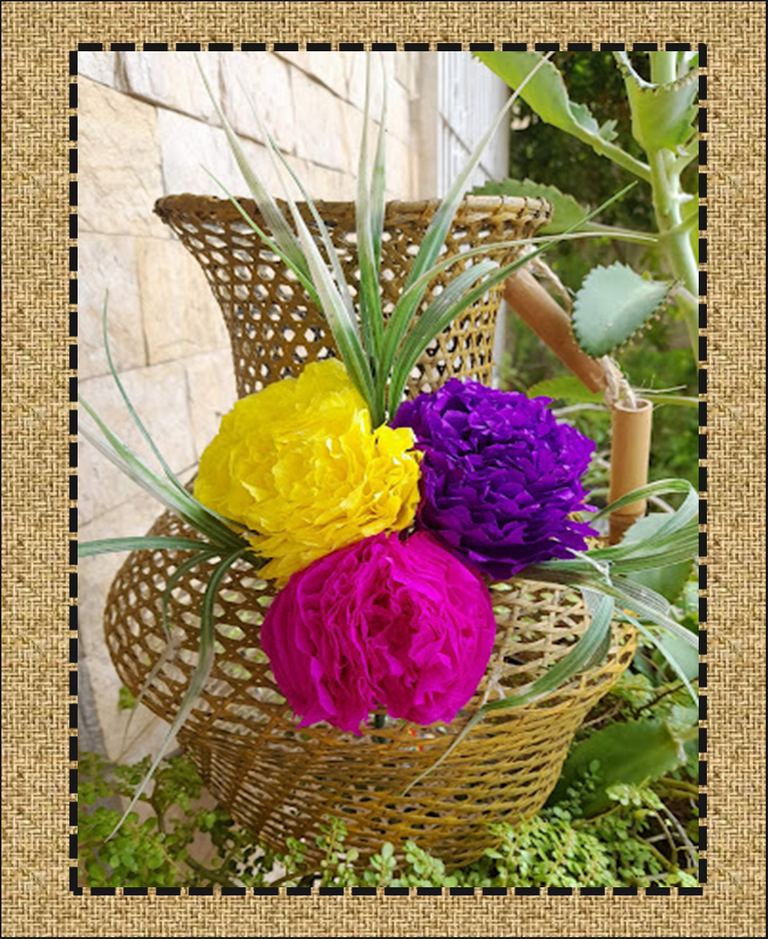
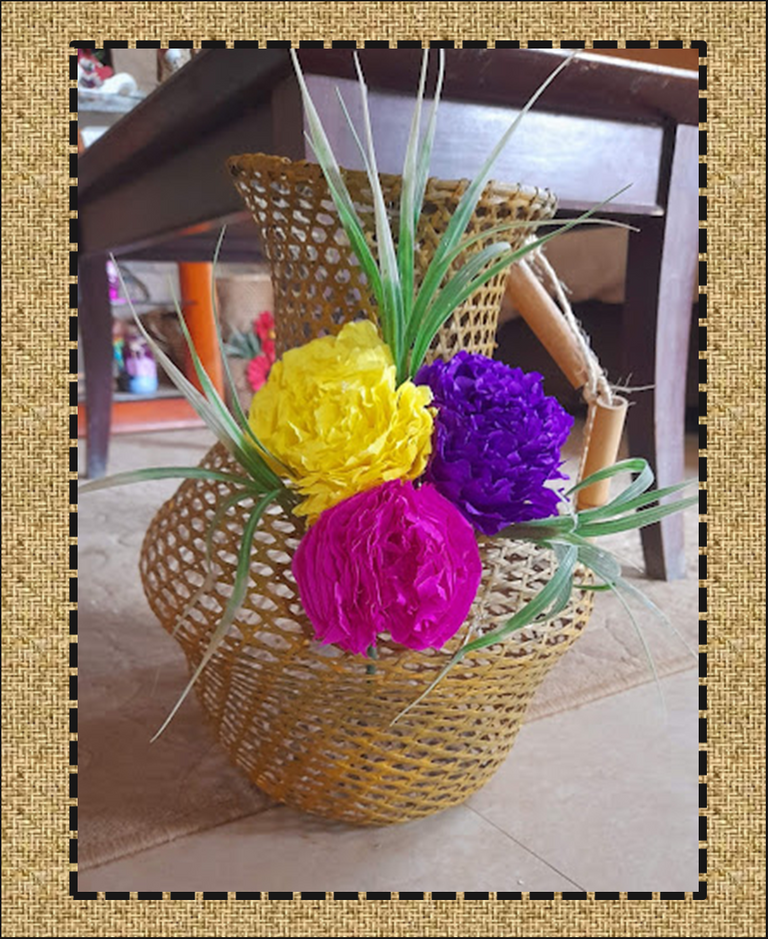
Mis artesanos para la elaboración de estas hermosas flores de Cempasúchil utilice papel crepe amarillo, fucsia y morado por que quería darle un toque alegre a la cesta y así a la sala de mi hogar les cuento que quede sorprendida con lo hermosa que se ve ahora esa vieja cesta, dándole un toque especial a mi sala. Entonces no te pierdas el paso a paso para hacer estas hermosas flores de papel crepe. ¡¡Manos a la obra!!

Hello, hello friends of #HiveDiy
Happy and blessed start of the week to all my dear artisan friends from this great #HiveDiy community, I hope you have rested the weekend and that today has been a productive day for all of you, with a lot of vibes. Welcome back to my blog.
In this opportunity I am going to teach you how to make some beautiful Crepe Paper Cempasúchil flowers which I use to restore an old basket. I tell you that I always made these flowers when I was a girl to give gifts to my mom on Mother's Day with the difference that since I didn't have crepe paper I used toilet paper, as I've always said every day you learn something new, well I tell you that today looking for models of flowers to make my crafts I found that those flowers that I made many years ago are called Cempasúchil, which are native to Mexico and they use them more than all the Day of the Dead in the altars since they consider it a symbol of life and death, in addition these flowers represent the sun for them because they place them on their dead that day to create paths, capable of guiding their loved ones to the altars...
For the elaboration of these beautiful Cempasúchil flowers, my artisans used yellow, fuchsia and purple crepe paper because I wanted to give the basket a cheerful touch and so in the living room of my home I tell you that I was surprised with how beautiful that basket looks now. old basket, giving a special touch to my living room. Then don't miss the step by step to make these beautiful crepe paper flowers. Let's do it!!

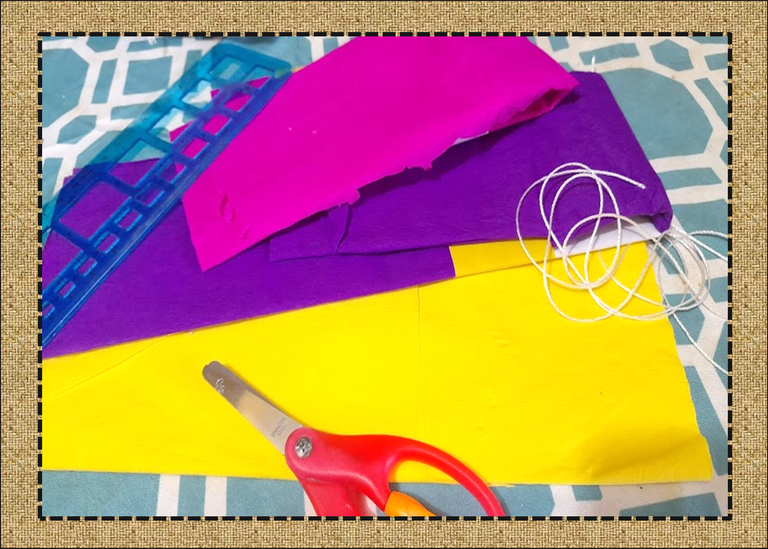
- Papel crepe amarillo, fucsia y morado
- Hilo
- Tijera
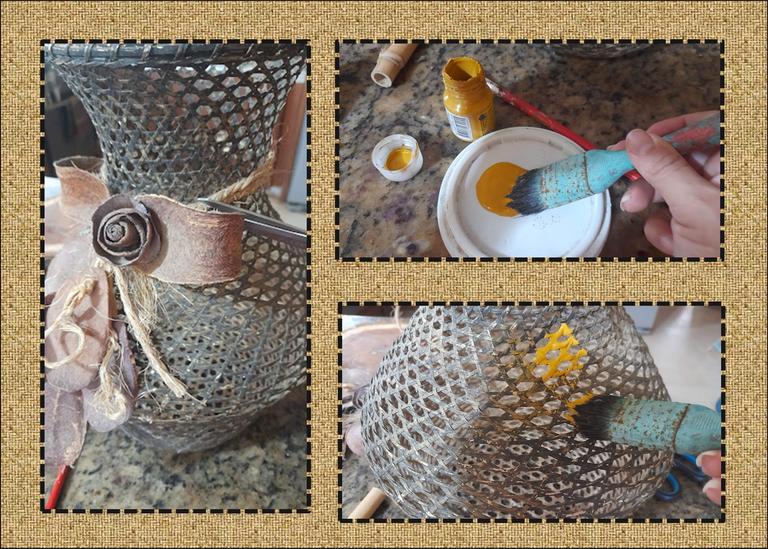
Para la restauración de la cesta:
- Pintura amarillo ocre
- Ramitas verdes plásticas
- Silicon
- Yellow, fuchsia and purple crepe paper
- Thread
- Scissors
For basket restoration:
- ocher yellow paint
- Plastic green twigs
- Silicon

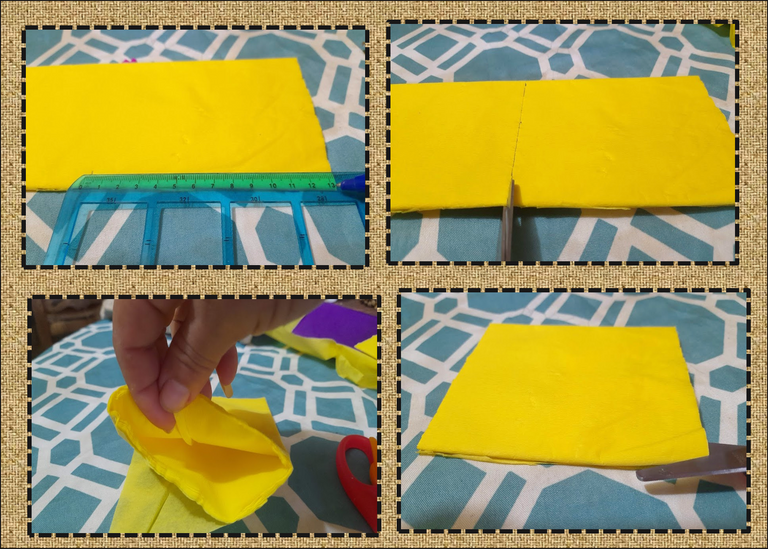
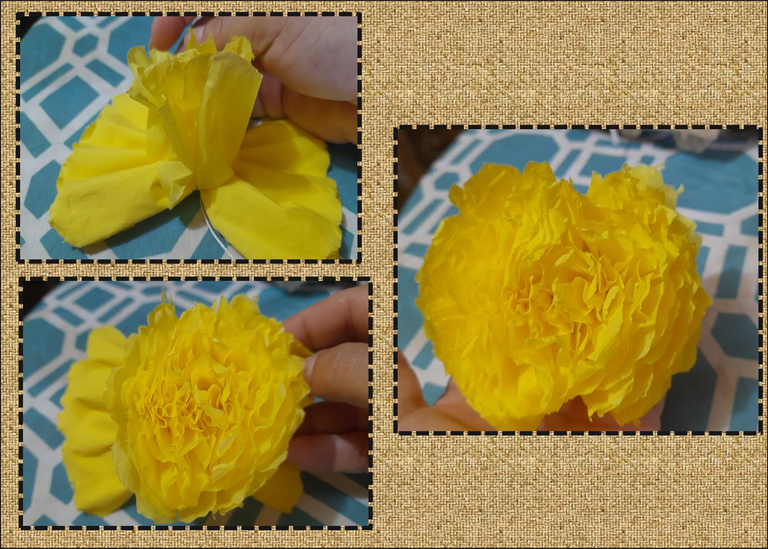
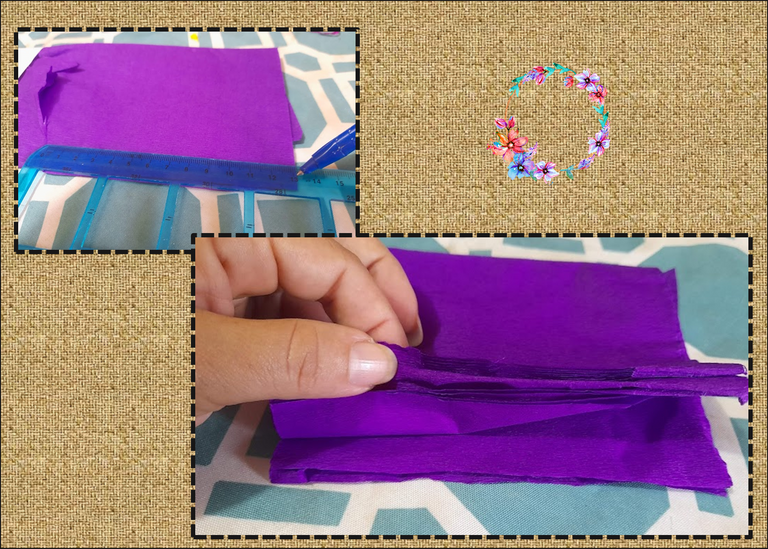
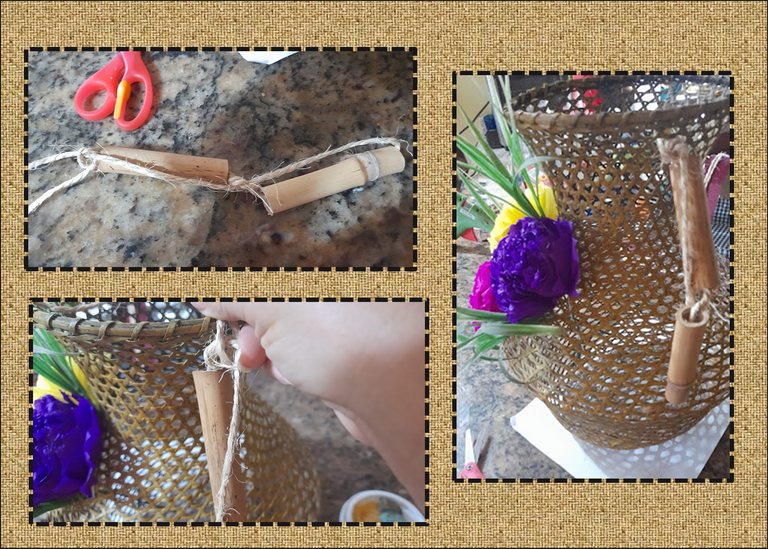
1:Tomamos el rollo de papel crepe el cual esta formado de varias capas, medimos 13 centímetros desde la orilla, luego ubicamos el centro, una vez hecho esto introducimos las tijeras en uno de los lados y corta, luego con el otro lado, esto dará varios rectángulos en mi caso obtuve 18.
1: We take the roll of crepe paper which is made up of several layers, we measure 13 centimeters from the edge, then we locate the center, once this is done we introduce the scissors on one of the sides and cut, then with the other side, this will give several rectangles in my case I got 18.
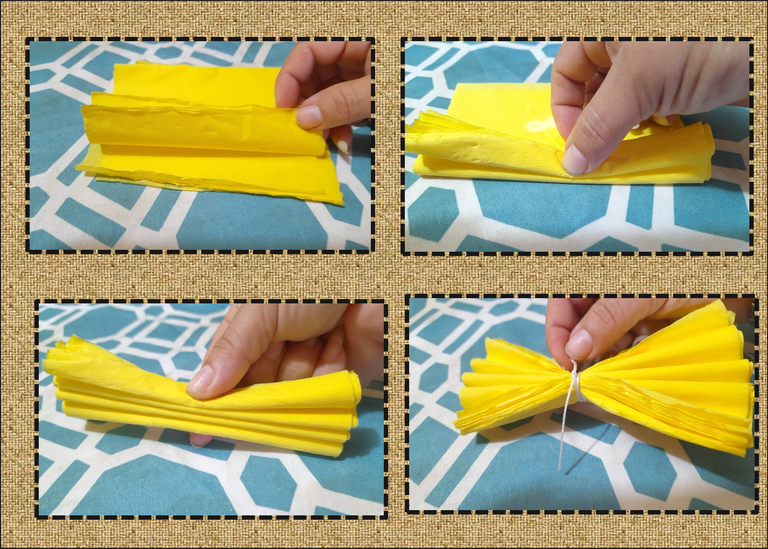
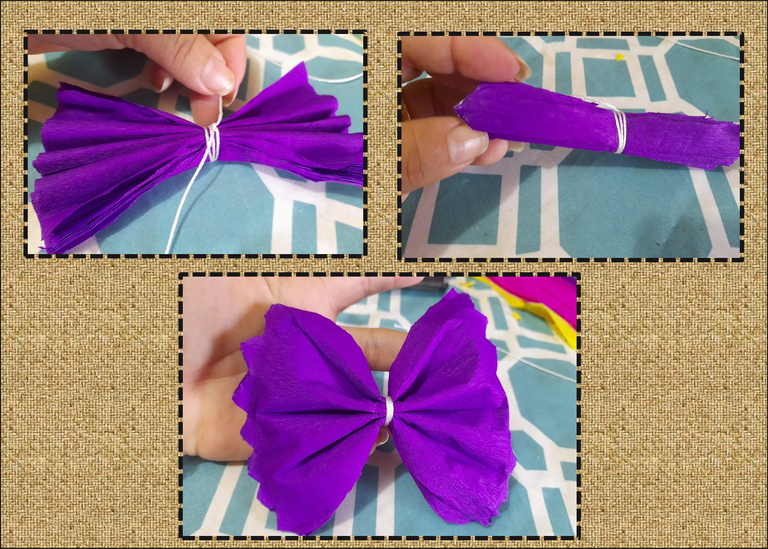
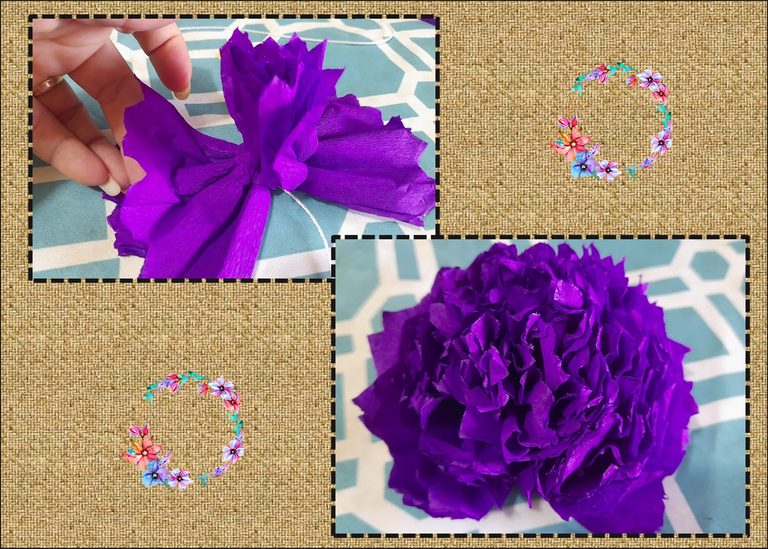
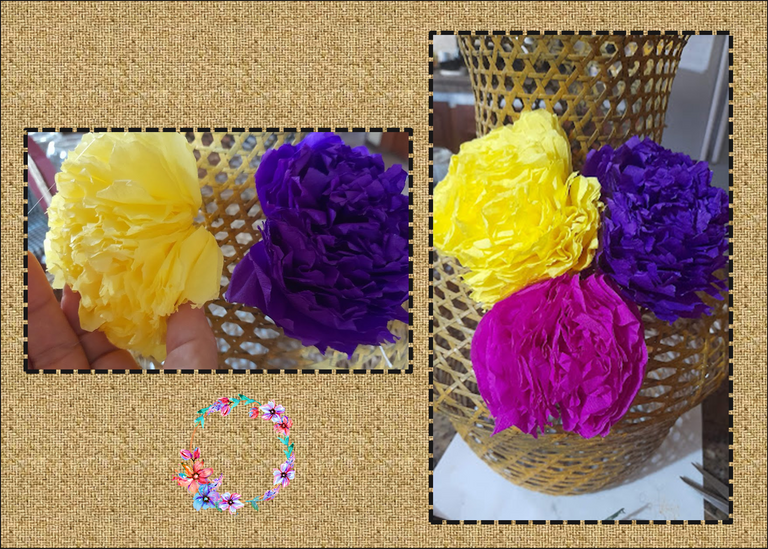
2: Ahora procedemos a doblar las hojas juntas formando un acordeón de un centímetro de ancho aproximadamente, luego tomamos el hilo y amarramos en el centro del acordeón luego con la tijera les realizamos unos cortes en cada punta como pueden ver en las imágenes, seguidamente con mucho cuidado vamos separando las hojas una a una, hasta formar la flor.
2: Now we proceed to fold the leaves together forming an accordion approximately one centimeter wide, then we take the thread and tie it in the center of the accordion, then with the scissors we make some cuts at each end as you can see in the images, then very carefully we are separating the leaves one by one, until forming the flower.

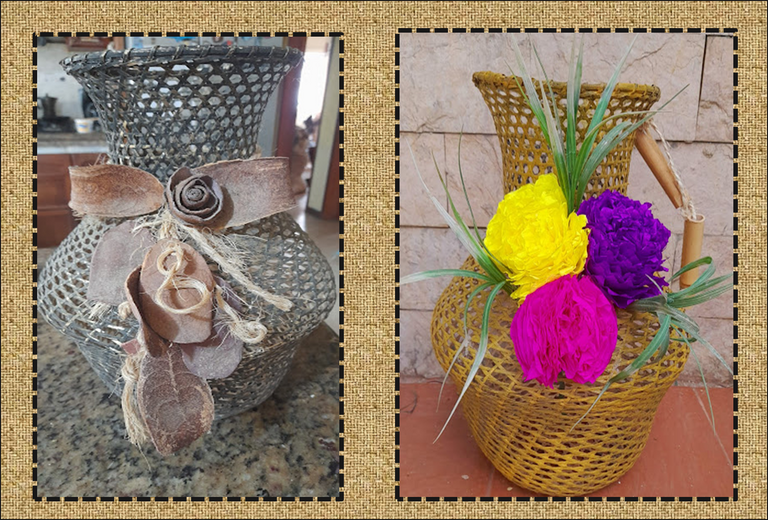
3: Tomamos nuestra cesta y le quitamos los adornos que tiene viejos y luego procedemos a pintarla con la pintura amarillo ocre, dejamos secar y seguidamente procedemos a pegar nuestras hermosas flores y ramitas verdes y con unos palitos de bambú le realice un asa y luego la sujete de un lado de la cesta.
3: We take our basket and remove the old decorations and then we proceed to paint it with ocher yellow paint, let it dry and then we proceed to glue our beautiful flowers and green twigs and with some bamboo sticks we make a handle and then hold it securely. one side of the basket.

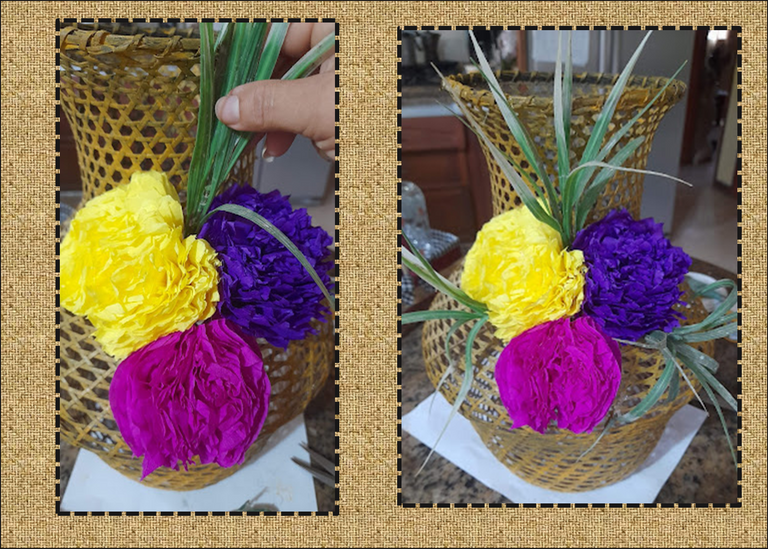
Listo, así de hermosas y originales me quedaron esas flores de Cempasúchil que le dieron otra vida a mi vieja cesta. ¡Espero les haya gustado mi proyecto de hoy !
¡Hasta una próxima publicación!
Done, that's how beautiful and original those Cempasúchil flowers were that gave another life to my old basket. I hope you liked my project today!
Until a next post!
Fuente portada
Fuente Separador


Las fotografías fueron tomadas con un teléfono inteligente Samsung A12, el texto fue traducido al ingles con el traductor de Google.link
El banner fue diseñado en canvas link
The photographs were taken with a Samsung A12 smartphone, the text was translated into English with the Google translator.link
The banner was designed on canvas link
Esta precioso. este trabajo esta muy bueno. le deseo la mejor de las suertes. Mucho animo.
Que hermosura. como siempre que buen trabajo amiga
Gracias amiga 🤗 tu también haces buenas manualidades. Saludos 🤗
Bello amiga parece un nuevo jarrón y con pocos materiales. Bendiciones y un fuerte abrazo🤗
Gracias me alegra que le haya gustado mi jarrón. 😊 saludos 🤗
Te quedo muy hermosa las flores, me gusto tu trabajo.
¡Saludo!
You have been manually curated by Brotherhood Community for sharing this awesome work.
Brotherhood community will support 5 bloggers on daily basis.
For more information about how to get curated by Brotherhood Community, check this Hive Blog.
Delegate your Hive Power to @brotherhood for supporting more such blogs and also receive curation rewards.