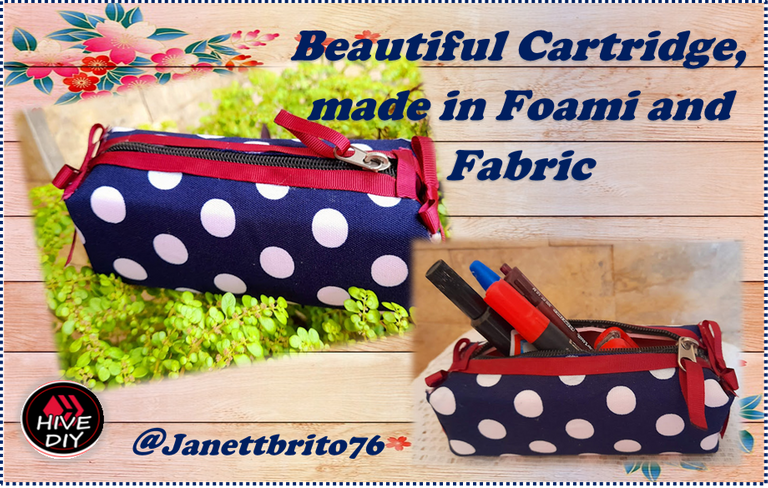
[ESP-ENG] Hermosa Cartuchera, elaborada en Foami y Tela //Beautiful Cartridge, made in Foami and Fabric

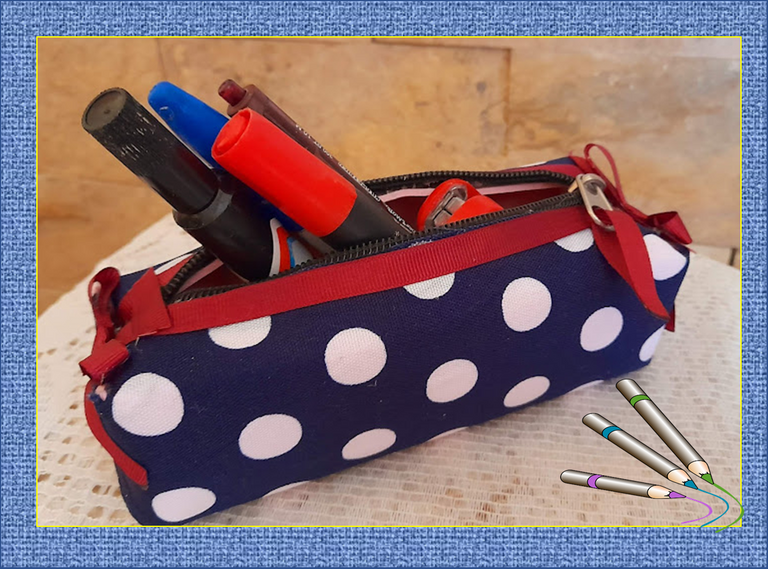
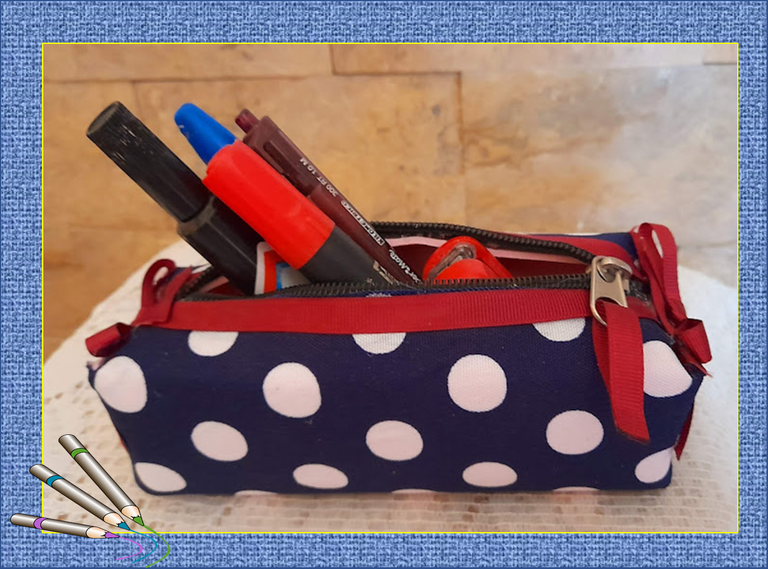
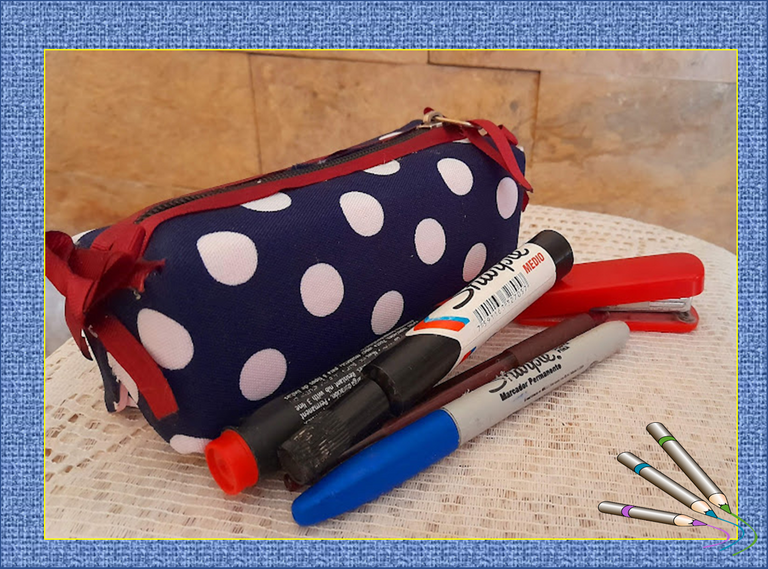
Feliz y bendecido domingo tengan todos mis queridos crafteros y artesanos que día a día dedicamos un poco de nuestro tiempo para crear muchas cosas lindas para presentarlas en esta estupenda comunidad de #HiveDiy, espero que todos se encuentren chevére y llenos de salud y mucha energía. En esta oportunidad les traigo un proyecto bonito, sencillo y práctico de realizar; amigos les cuento que hace varios meses realice una cartuchera con un rollo de cartón y tela y a una de mis sobrinas les había gusto mucho y me pidió que le hiciera una, le respondí "en cuanto tenga tiempo yo te hago una bien linda" y llego el momento, le realice esta linda y espectacular cartuchera con foami y una tela de pepas que a ella le encanta, esta hermosa cartuchera la puede utilizar para que tengan todos sus colores e implemento escolares ordenados o simplemente la puede utilizar para guardar sus cremas, toallitas, su gel antibacterial entre otras cosas o utilizarla como portacosmeticos. Amigos esta idea la pueden utilizar para obsequiarlos como cotillón en una fiesta de cumpleaños ya que la puedes forrar con la temática que te guste o los colores que mas te agraden. Amigos estoy casi segura que les van a encantar esta idea. Entonces no te pierdas el paso a paso para hacer esta linda cartuchera. Manos a la obra!!

Greetings Friends !!
Happy and blessed Sunday to all my dear crafters and artisans who dedicate a little of our time every day to create many beautiful things to present them in this wonderful #HiveDiy community, I hope everyone is cool and full of health and lots of energy. In this opportunity I bring you a beautiful, simple and practical project to carry out; friends I tell you that several months ago I made a pencil case with a roll of cardboard and cloth and one of my nieces liked it a lot and asked me to make one for her, I replied "as soon as I have time I'll make you a nice one" and it arrived moment, I made her this beautiful and spectacular pencil case with foami and a pepas fabric that she loves, this beautiful pencil case can be used to keep all her colors and school supplies organized or she can simply use it to store her creams, wipes , your antibacterial gel among other things or use it as a cosmetic bag. Friends, this idea can be used to give them as a party favor at a birthday party since you can cover it with the theme that you like or the colors that you like the most. Friends, I am almost sure that you will love this idea. Then don't miss the step by step to make this cute pencil case. Let's do it!!

- Foami rosado
- Cierre
- Tela de pepas
- Regla
- Silicon
- Cinta vino tinto
- Tijera
- Molde
- Pink foam
- Closure
- Pimple fabric
- Ruler
- Silicon
- Red wine ribbon
- Scissors
- Mold
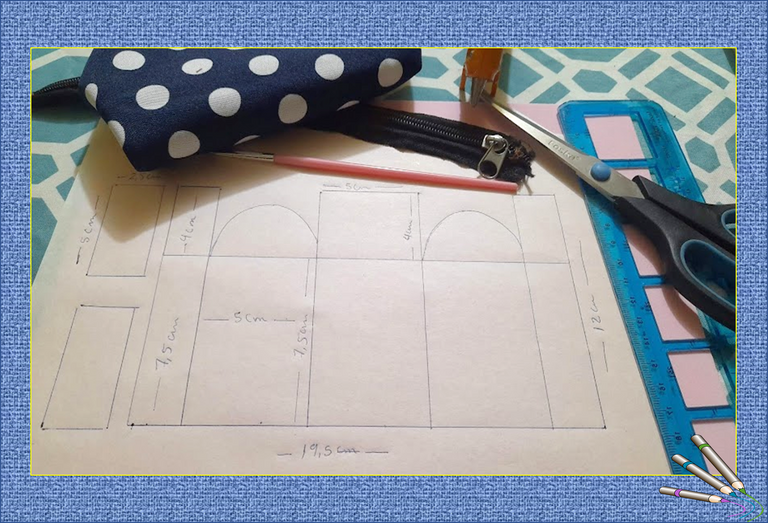

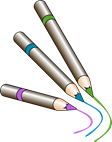
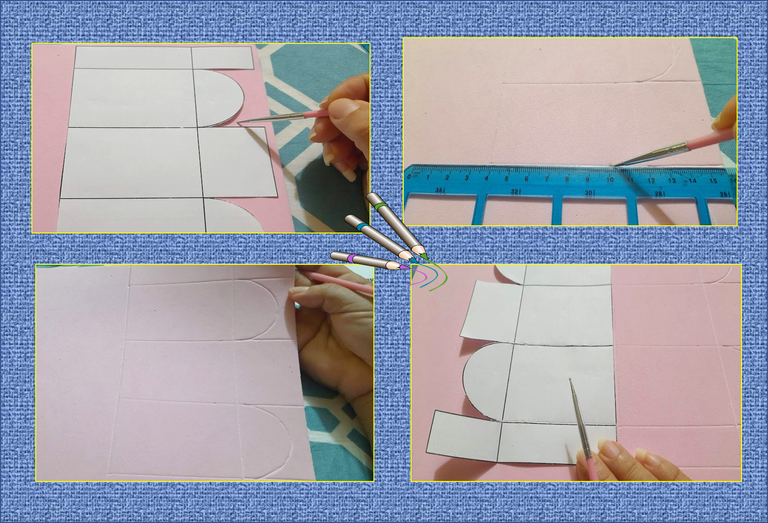
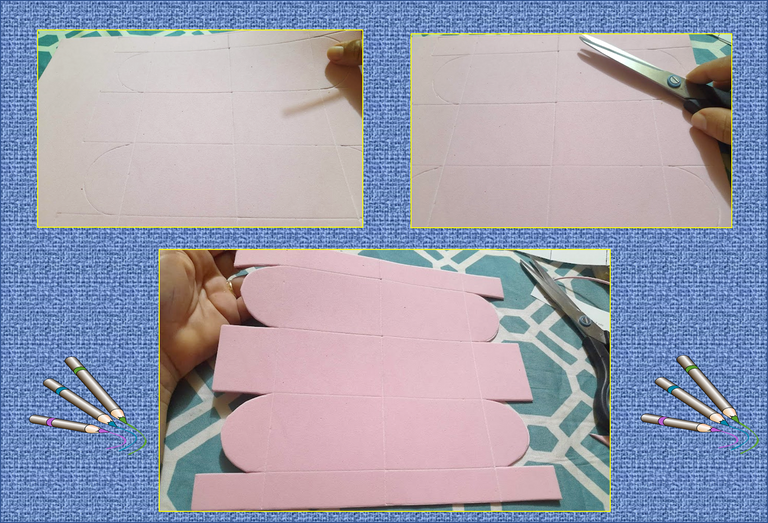
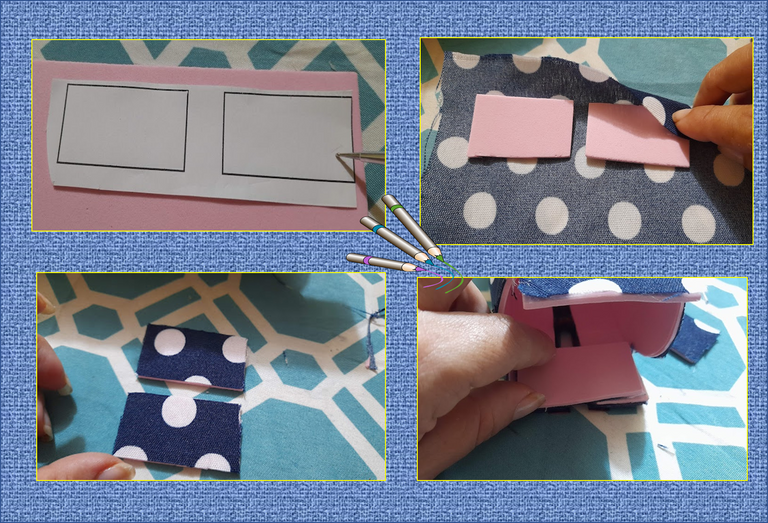
1: Iniciamos marcando muy bien el correspondiente molde de la cartuchera en el foami allí les muestro las medidas de cada lado de la cartuchera, luego marcamos el molde nuevamente debajo del ya marcado y seguidamente recortamos. como pueden ver en las imágenes.
1: We start by marking the corresponding mold of the cartridge very well in the foami there I show you the measurements of each side of the cartridge, then we mark the mold again under the already marked one and then we cut. as you can see in the images.
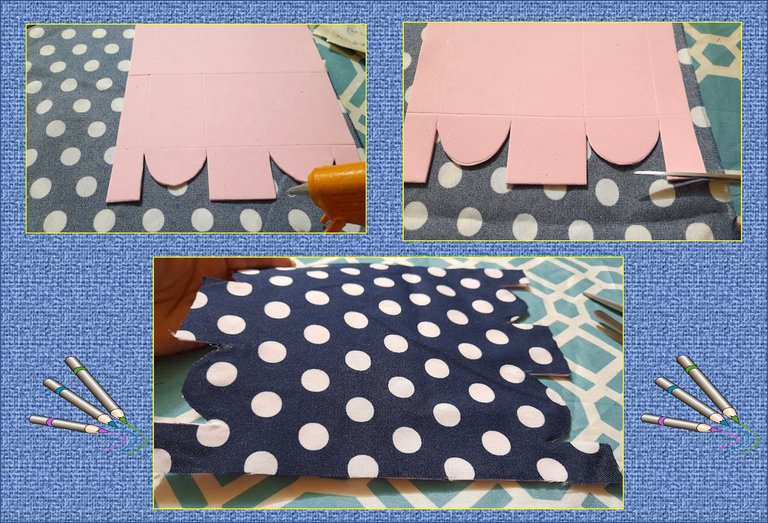
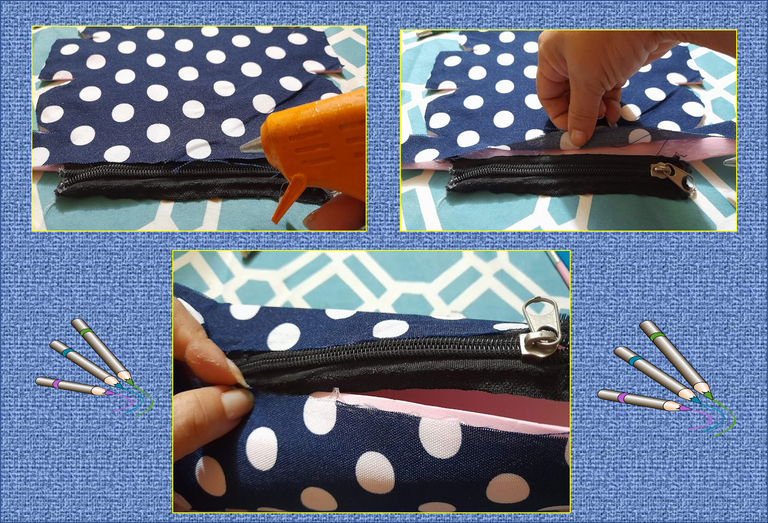
2: Luego procedemos a pegar nuestro molde del foami a la tela de pepas dejando sin pegar los laterales, ya que por esa abertura pegaremos el cierre. seguidamente remarcamos los dobles como puedes ver en la imagen.
2: Then we proceed to glue our foami mold to the pepas fabric, leaving the sides unglued, since we will glue the closure through that opening. then we highlight the doubles as you can see in the image.
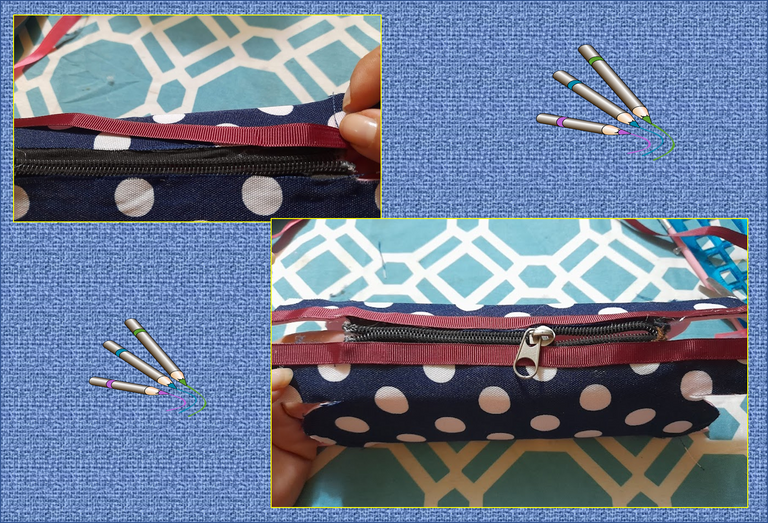
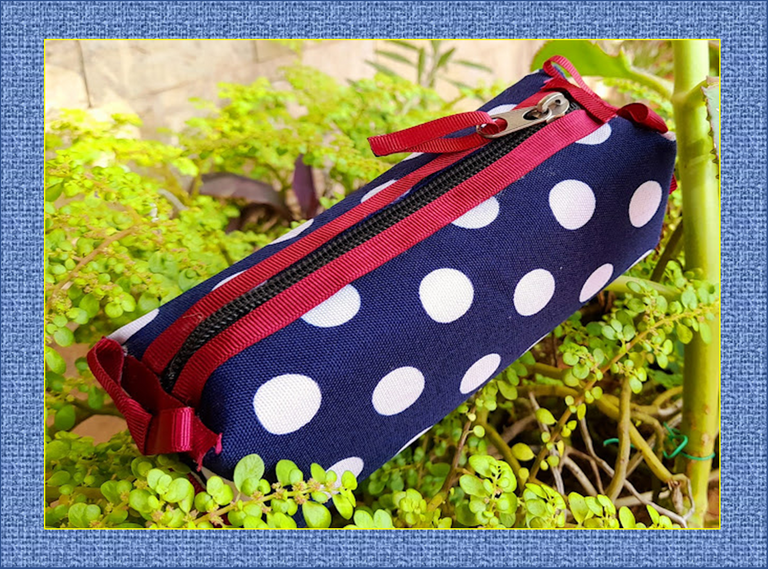
3: Ahora procedemos a pegar el cierre, uniendo cada extremo formando un rectángulo, luego tomamos la cinta vinotinto y la pegamos por el borde del cierre.
3: Now we proceed to glue the closure, joining each end forming a rectangle, then we take the burgundy tape and paste it by the edge of the closure.
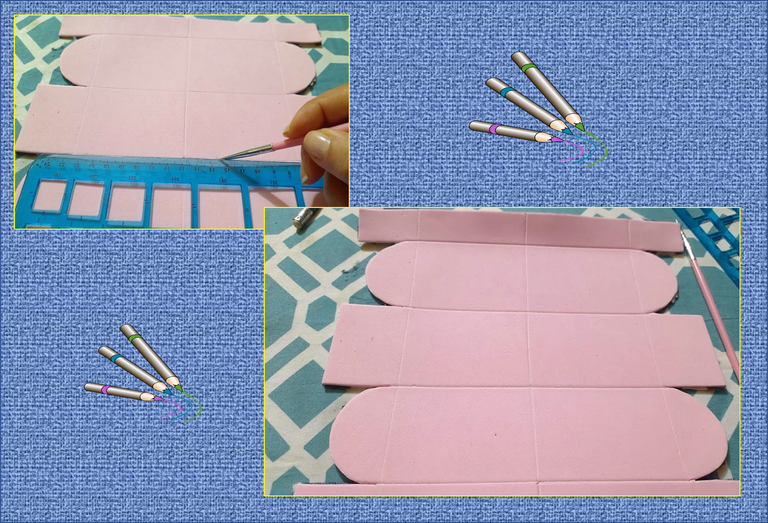
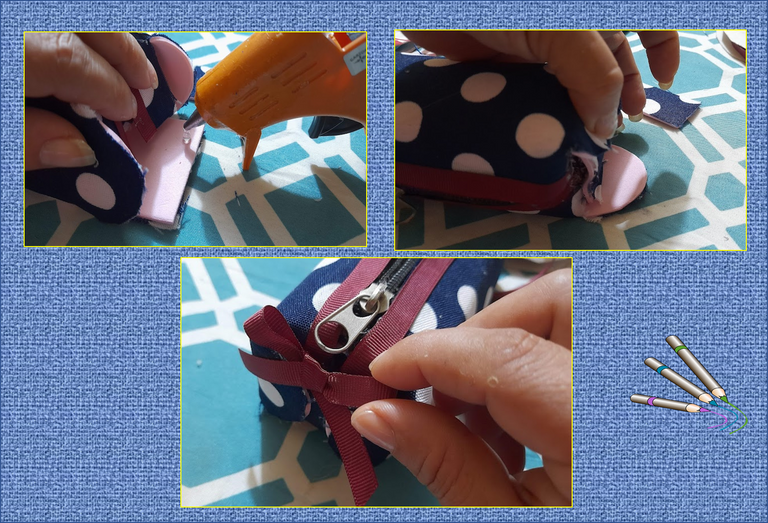
4: Marcamos los dos rectángulos en el foami y luego los forramos con la tela, seguidamente los pegamos en la punta de la base donde esta el cierre y procedemos a pegar los otros dos extremos de la base, como pueden ver en las imágenes. luego para decorarla realizamos dos lacitos con la cinta vinotinto y lo pegamos a cada lado de la cartuchera.
4: We mark the two rectangles on the foami and then we cover them with the fabric, then we glue them to the end of the base where the closure is and proceed to glue the other two ends of the base, as you can see in the images. then to decorate it we make two little bows with the burgundy ribbon and stick it on each side of the cartridge belt.
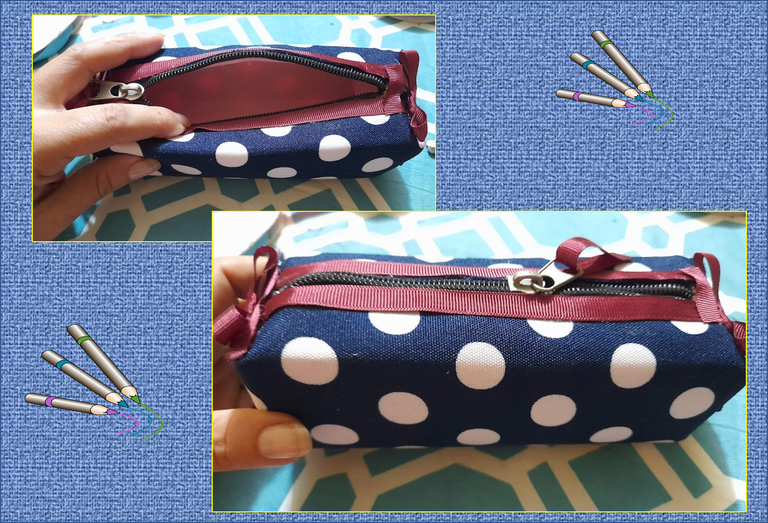
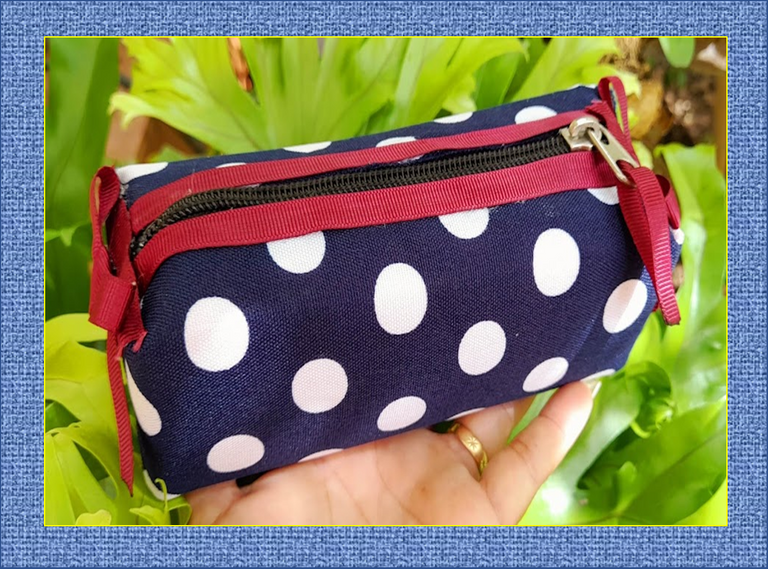
Listo, así de hermosa me quedo la cartuchera para mi querida sobrina, espero que le guste mucho a ella y la disfrute. Gracias por permitirme mostrarle cada día mis habilidades y creaciones; así como también tomarse un poco de su valioso tiempo para leerme y comentarme.
¡Espero les haya gustado mi proyecto de hoy!.
¡Hasta una próxima publicación!
Done, that's how beautiful the pencil case is for my dear niece, I hope she likes it a lot and enjoys it. Thank you for allowing me to show you my skills and creations every day; as well as taking some of her valuable time to read and comment on me.
I hope you liked my project today!
Until a next post!
Fuente portada
Fuente Separador

Las fotografías fueron tomadas con un teléfono inteligente Samsung A12, el texto fue traducido al ingles con el traductor de Google.
El banner fue diseñado en canvas
The photographs were taken with a Samsung A12 smartphone, the text was translated into English with the Google translator.
The banner was designed on canvas
Me gustó el resultado, y el paso a paso muy bien explicado.
Felicitaciones, siempre haces cosas bellas
Muy bonita cartuchera @janettbrito76 , util y muy original
Thank you for sharing this amazing post on HIVE!
Your content got selected by our fellow curator @rezoanulvibes & you just received a little thank you via an upvote from our non-profit curation initiative!
You will be featured in one of our recurring curation compilations and on our pinterest boards! Both are aiming to offer you a stage to widen your audience within and outside of the DIY scene of hive.
Join the official DIYHub community on HIVE and show us more of your amazing work and feel free to connect with us and other DIYers via our discord server: https://discord.gg/mY5uCfQ !
If you want to support our goal to motivate other DIY/art/music/homesteading/... creators just delegate to us and earn 100% of your curation rewards!
Stay creative & hive on!