[ESP-ENG] Hermosa Caja Organizadora de Calcetines / Beautiful Socks Organizer Box


Saludos para todos mis creativos amigos de Hive y feliz noches para todos los que hacen vida en esta grandiosa comunidad de #hiveDiy, espero estén llenos de mucha salud y bendiciones. Bienvenidos nuevamente a mi blog. En esta noche les quiero compartir como transforme una caja de cartón en una hermosa caja organizadora de calcetines. Como todos sabemos el cartón se puede manipular de mil maneras para hacer bonitas y sencillas creaciones y además pueden ser muy útiles a la hora de organizar la mayoría de los objetos que nunca sabemos qué hacer con ellos. Les cuento que esta idea de realizar esta caja organizadora viene porque uno de mis hijos siempre tiene perdidos sus calcetines nunca encuentra la parejas del otro calcetín. Esta linda caja organizadora esta decorada con uno de los personajes de la película "lilo y stitch" ya que esa era una de las películas que a él le encanta y se ríe mucho con stitch, es por eso que el personaje que decora su caja organizadora es stitch, ademas esta forrada con tela por dentro y por fuera. Esta es una grandiosa idea ya que esta caja la puedes colocar en un espacio dentro del closet o encima de su gavetero; lo mejor de todo es que podrá tener la satisfacción que lo hiciste tú misma y así tu hijo pueda encontrar esos calcetines que tanto busca. Esta es una manualidad bonita y fácil de realizar,solo necesitas tener un poco de creatividad para crear una hermosa caja organizadora de calcetines. No te pierdas el paso a paso. Vamos manos a la obra !!

Greetings to all my creative friends from Hive and happy night to all who make life in this great community of #hiveDiy, I hope you are full of good health and blessings. Welcome back to my blog. Tonight I want to share with you how I transformed a cardboard box into a beautiful sock organizer box. As we all know, cardboard can be manipulated in a thousand ways to make beautiful and simple creations and they can also be very useful when it comes to organizing most of the objects that we never know what to do with. I tell you that this idea of making this organizing box comes because one of my children always has his socks lost, he never finds the pairs of the other sock. This cute organizer box is decorated with one of the characters from the movie "lilo and stitch" since that was one of the movies that he loves and he laughs a lot with stitch, that's why the character that decorates his organizer box It is stitch, it is also lined with fabric inside and out. This is a great idea since this box can be placed in a space inside the closet or on top of your dresser; The best of all is that he will be able to have the satisfaction that you did it yourself and so your son can find those socks that he is looking for so much. This is a cute and easy craft to make, you just need a little creativity to create a beautiful sock organizer box. Do not miss the step by step. Let's get to work!!


- Caja de cartón
- Tela azul y blanca
- Foami (Azul, morado, negro, blanco y azul claro)
- Cinta azul
- Molde de stitch
- Tijera
- Silicon
- Carton box
- Blue and white fabric
- Foami (Blue, purple, black, white and light blue)
- blue ribbon
- stitch mold
- Scissors
- Silicon

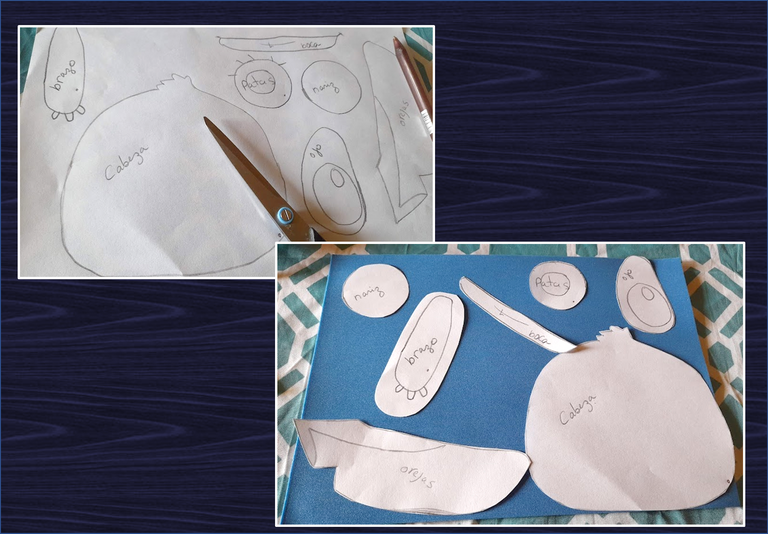
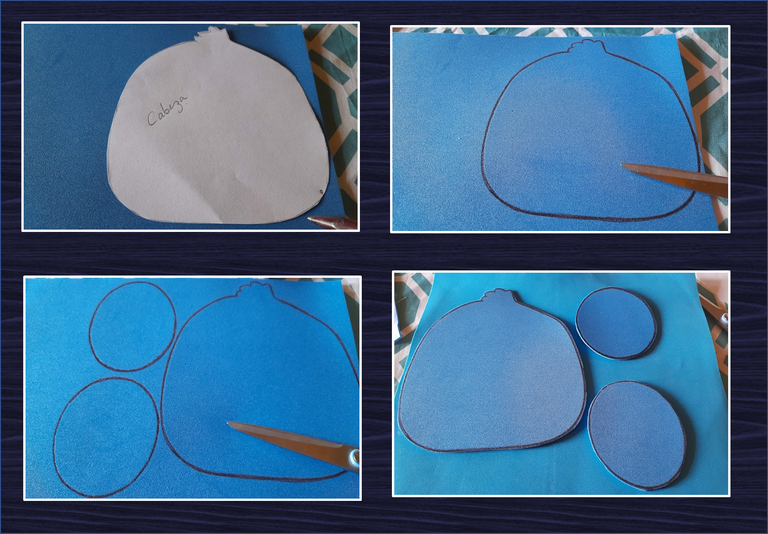
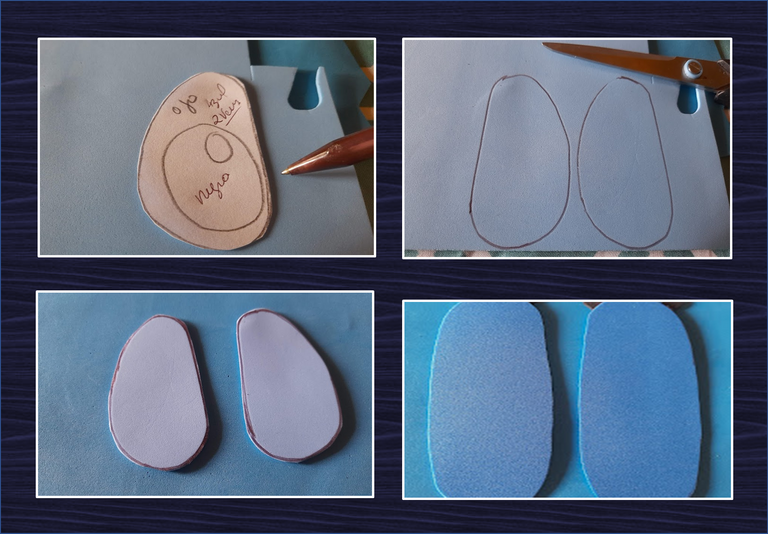
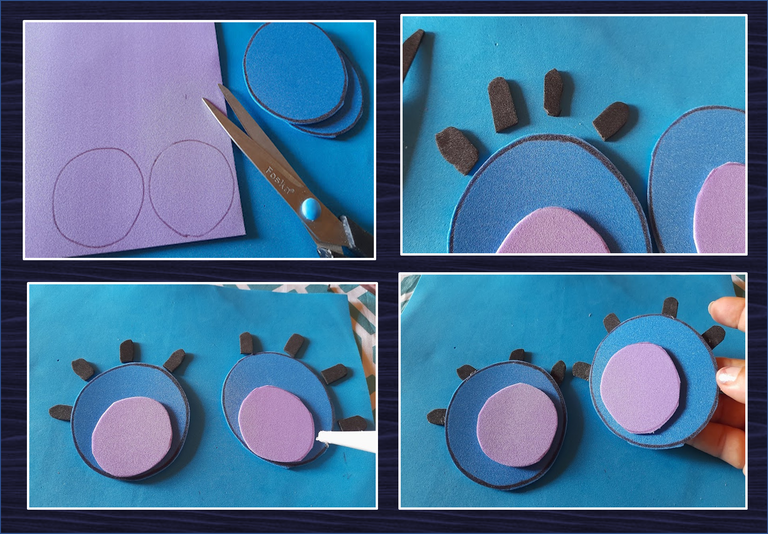
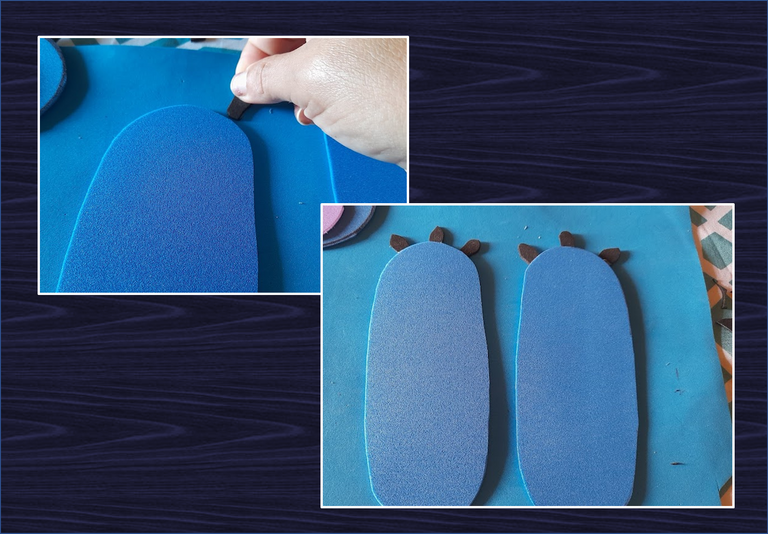
1: Iniciamos recortando cada una de las piezas de nuestro molde, luego marcamos y recortamos en el foami azul oscuro la cabeza, patas y brazos, seguidamente en el foami azul claro marcamos y recortamos la base del ojo y la boca y en el foami negro y blanco marcamos y recortamos el ojo, luego en el foami morado marcamos y recortamos las orejas.
1:We start by cutting out each of the pieces of our mold, then we mark and cut out the head, legs and arms in the dark blue foami, then in the light blue foami we mark and cut out the base of the eye and the mouth and in the black and white foami we mark and cut out the eye, then in the purple foami we mark and cut out the ears.
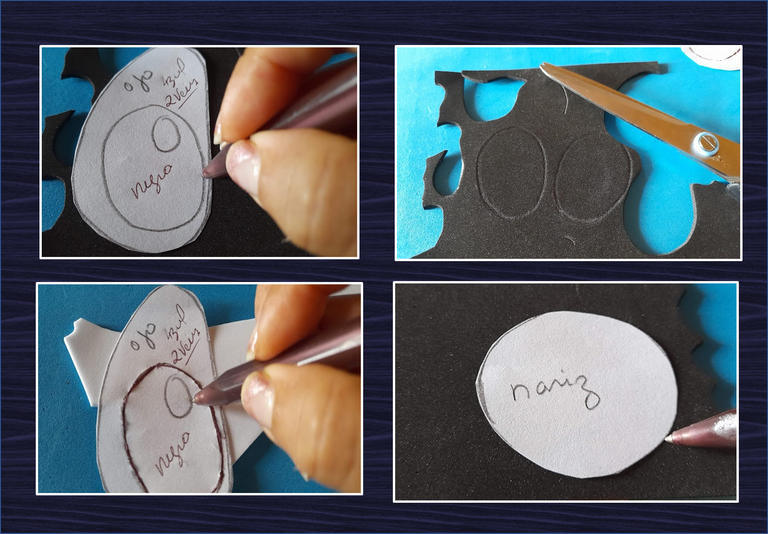
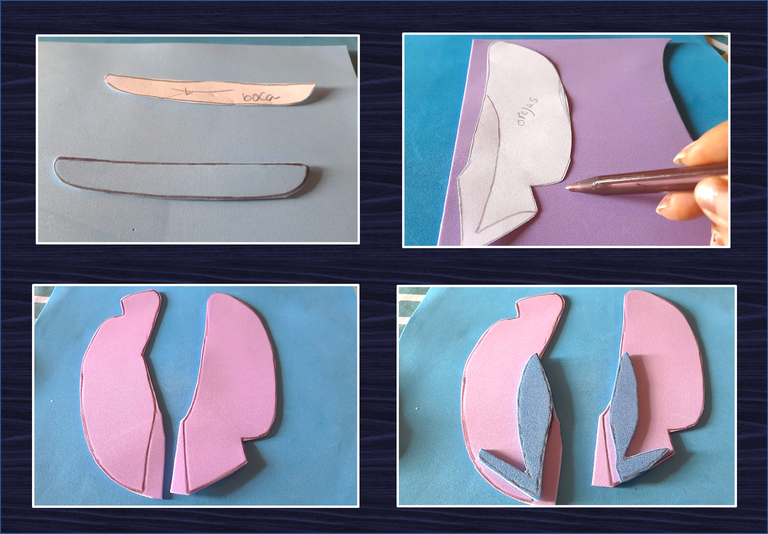
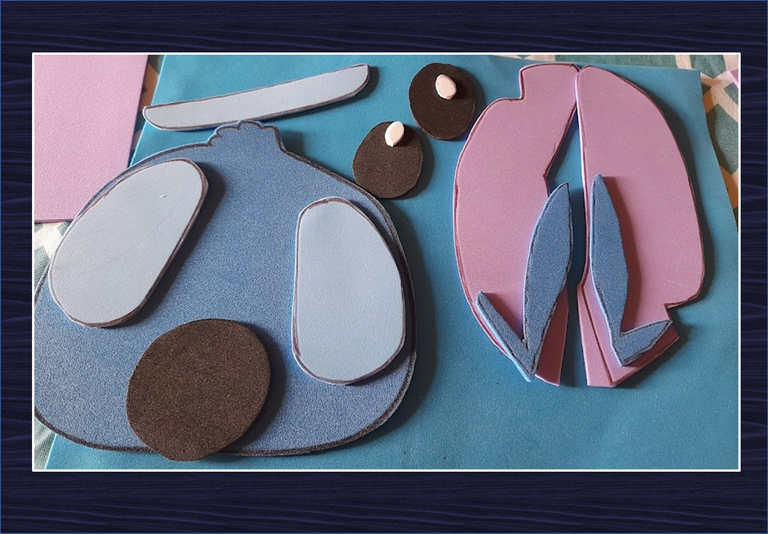
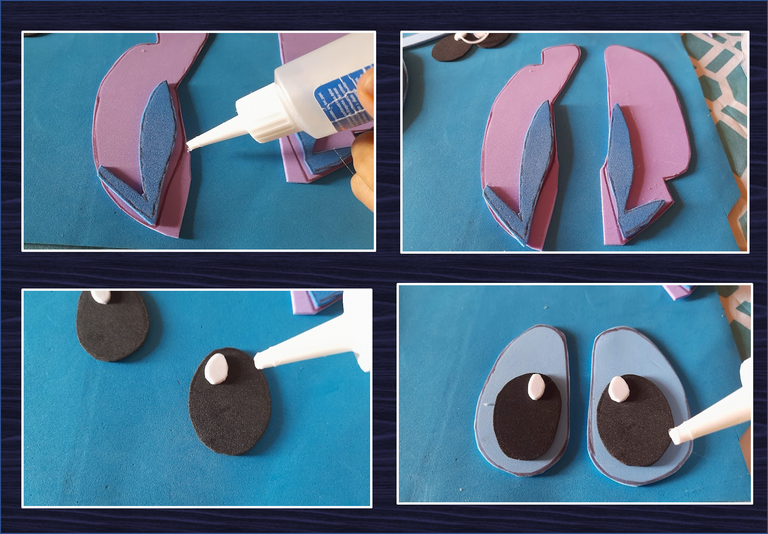
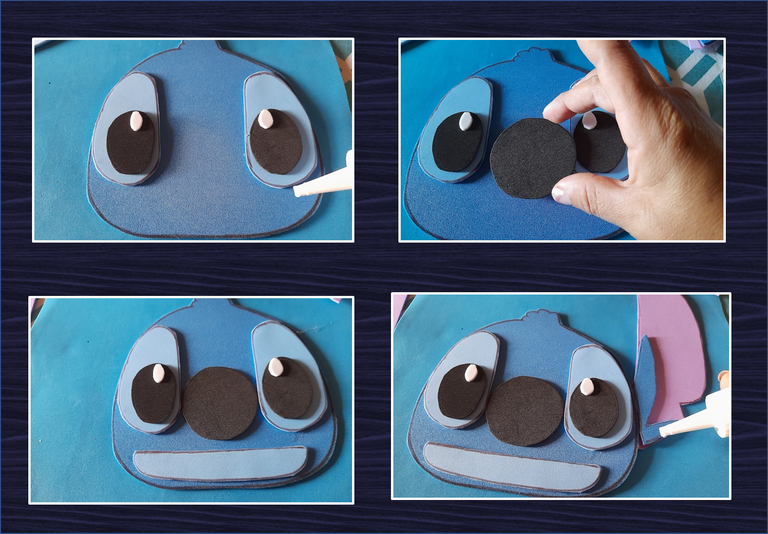
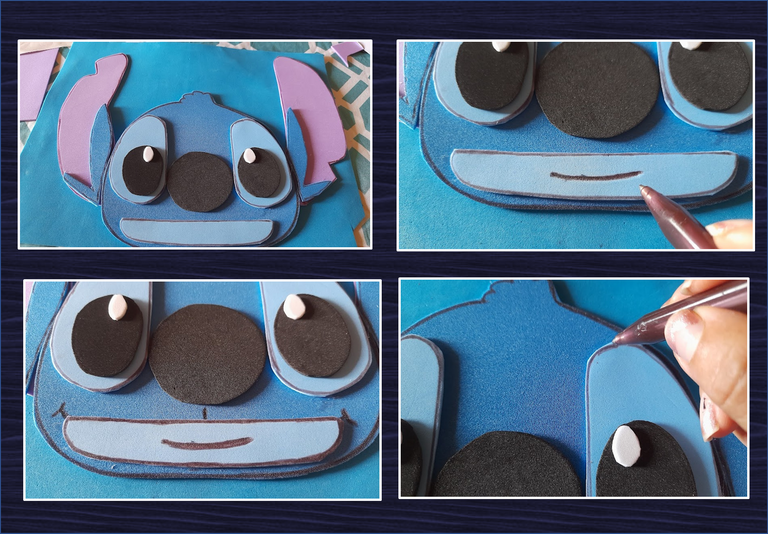
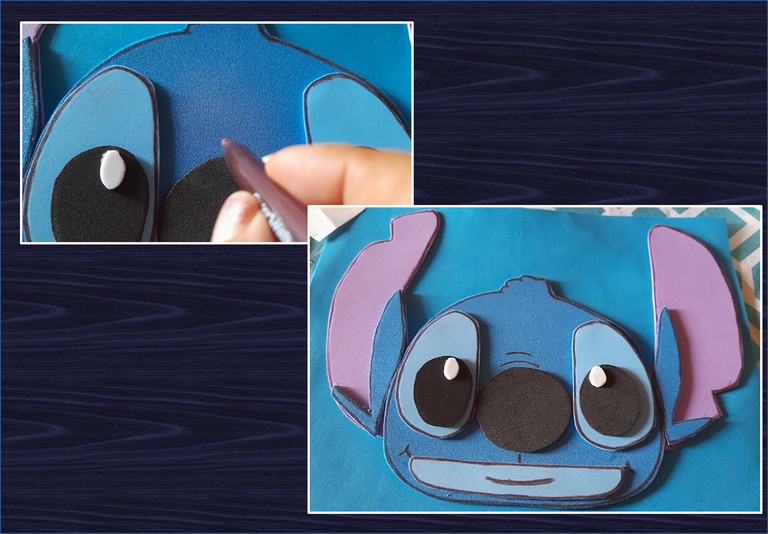
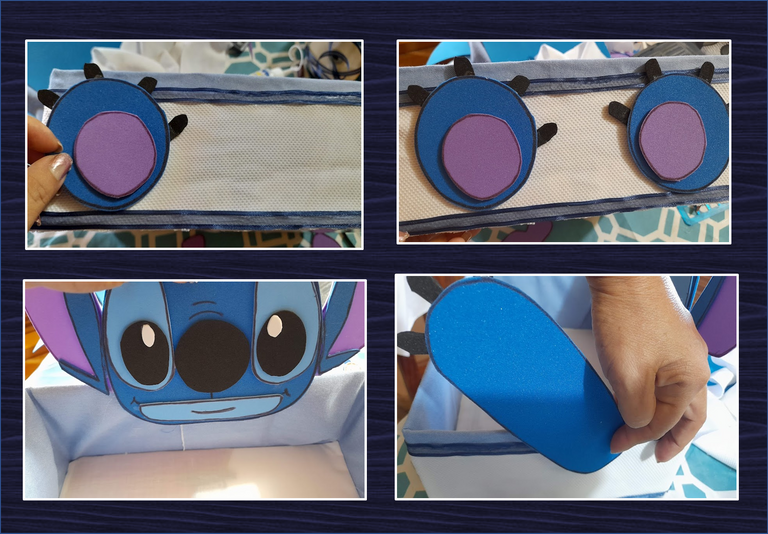
2: Una vez recortada cada una de las piezas, ahora procedemos a armarlas y a pegarlas a la cabeza, luego con el lapicero negro remarcamos todos los bordes de cada una de las piezas. Seguidamente recortamos dos círculos morados y unas uñas de foami negro luego lo pegamos al molde de las patas y en los brazos también le agregamos unas uñas.
2: Once each of the pieces has been cut, now we proceed to assemble them and glue them to the head, then with the black pen we highlight all the edges of each of the pieces. Next, we cut out two purple circles and some black foami nails, then we glued it to the mold of the legs and we also added some nails to the arms.
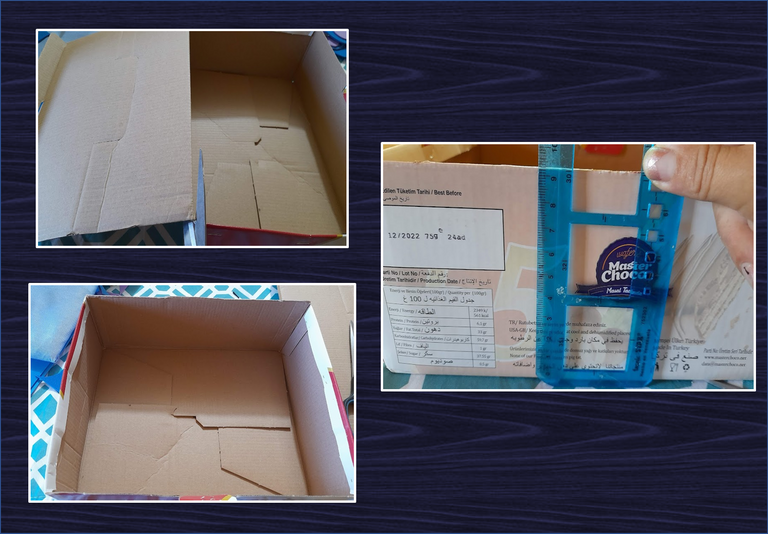
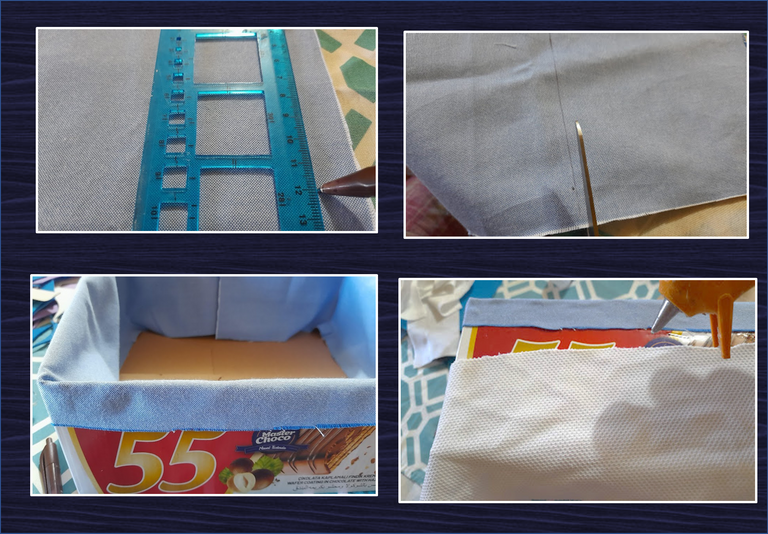
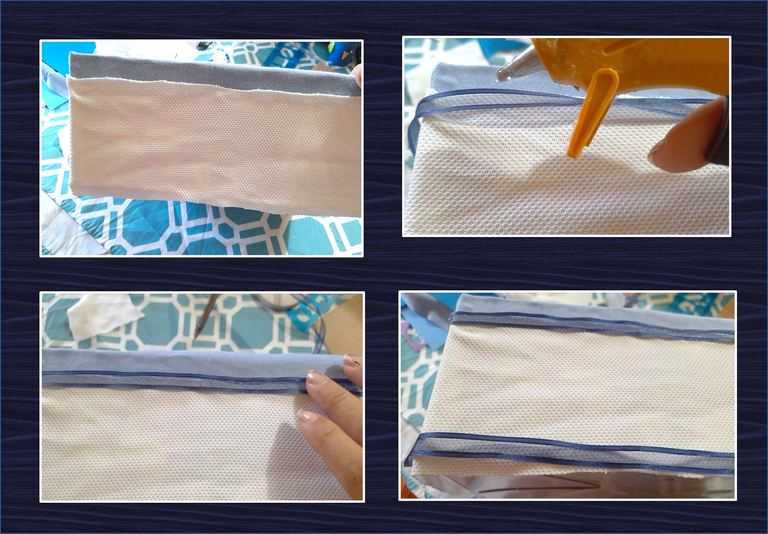
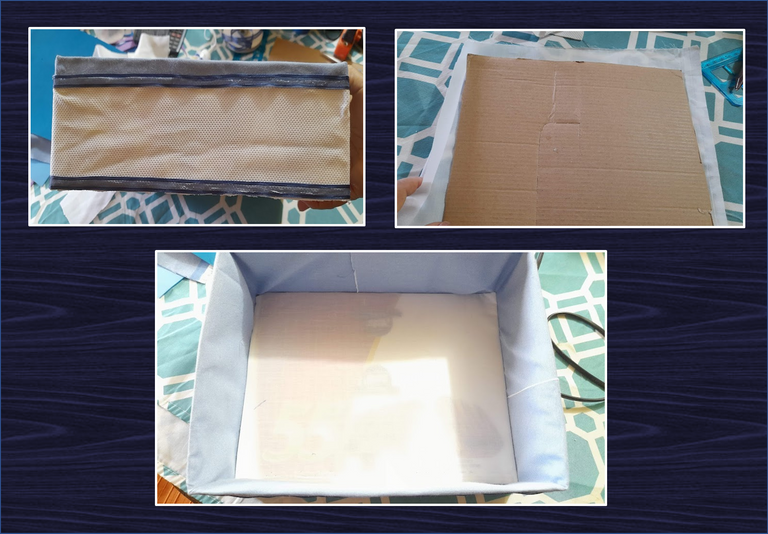
3: Ahora para forrar nuestra caja iniciamos cortando la tapa, luego medimos el alto de nuestra caja seguidamente cortamos una tira de tela azul con 2 cm mas que la medida ya tomada del alto de la caja, luego procedemos a pegarla por dentro de los laterales de la caja como se puede ver en las imágenes. Después pegamos otra tira de tela blanca para terminar de forrar la caja por fuera y con la cinta azul decoramos la separación entre las dos telas y para terminar forramos la tapa de la caja con tela blanca luego la pegamos dentro de la caja.
3: Now to line our box we start by cutting the lid, then we measure the height of our box, then we cut a strip of blue fabric 2 cm more than the measurement already taken of the height of the box, then we proceed to glue it inside the sides of the box. box as you can see in the pictures. Then we glue another strip of white fabric to finish lining the box on the outside and with the blue tape we decorate the separation between the two fabrics and to finish we line the lid of the box with white fabric then we glue it inside the box.
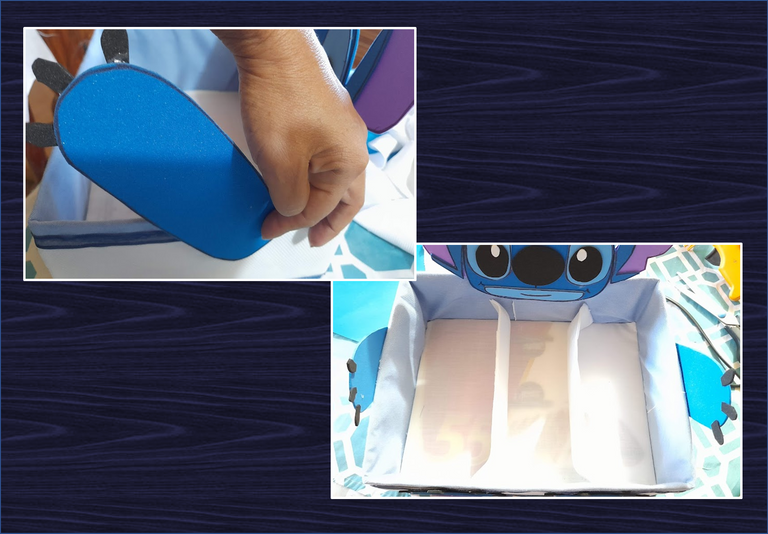
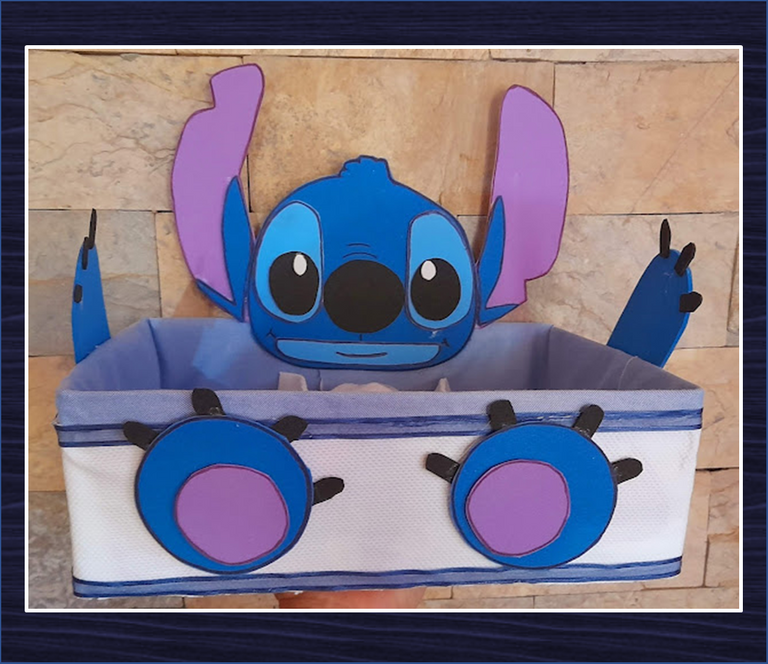
4: Para terminar nuestra caja organizadora procedemos a pegar cada una de las piezas ya armadas, primero las patas las pegamos en el frete de la caja y por los laterales pegamos los brazos y en el centro de la parte de atrás la cabeza.
4: To finish our organizing box we proceed to glue each of the pieces already assembled, first we glue the legs on the front of the box and on the sides we glue the arms and in the center of the back the head.
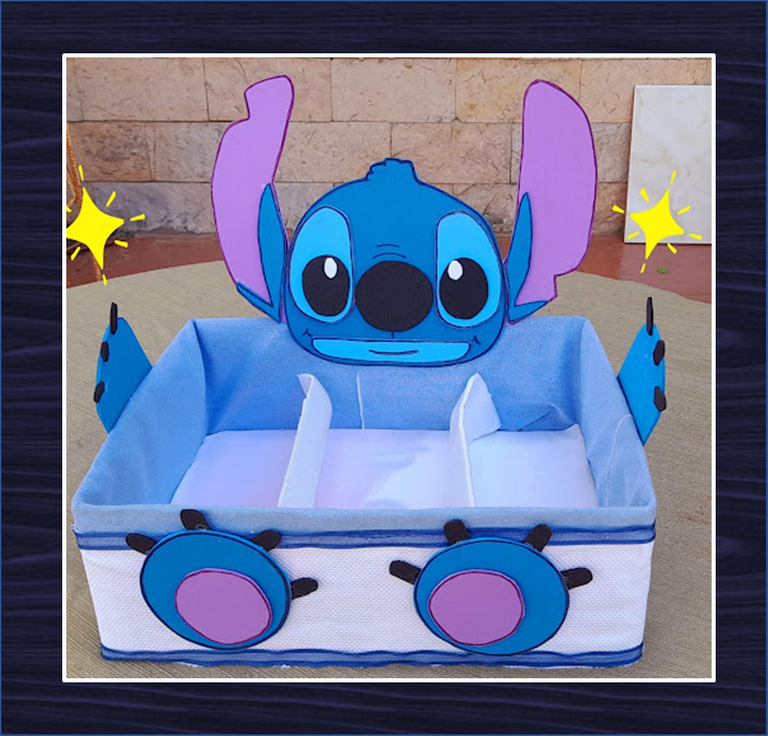
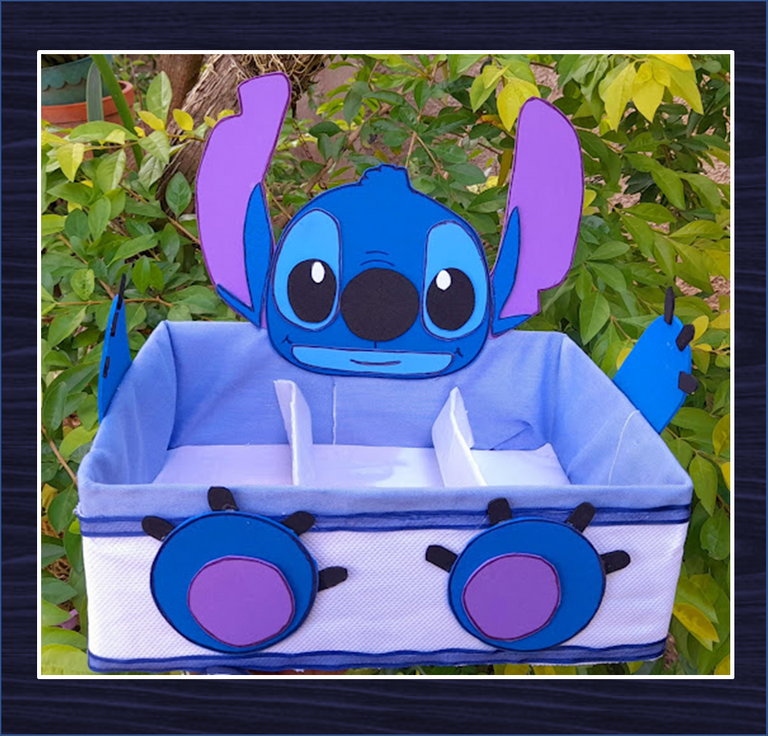
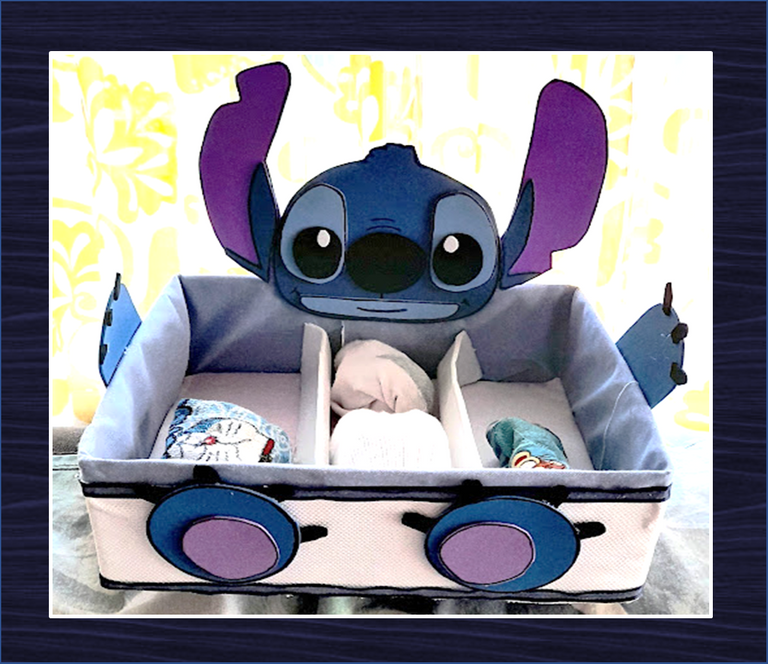
Listo, este es el resultado final de esta hermosa caja organizadora de calcetines para mi hijo. ¡Espero les haya gustado mi proyecto de hoy!!
¡Hasta una próxima publicación!
Done, this is the end result of this beautiful sock organizer box for my son. I hope you liked my project today!!
Until a next publication!
Fuente Separador
Imagen Referenial


Las fotografías fueron tomadas con un teléfono inteligente Samsung A12, el texto fue traducido al ingles con el traductor de Google.
El banner fue diseñado en canvas
The photographs were taken with a Samsung A12 smartphone, the text was translated into English with the Google translator.
The banner was designed on canvas
Hermosa caja amiga que creatividad tan maravillosa tienes, haces lindos trabajos 🤗
Gracias, por leer y comentar mis post, me alegra que te gusten
Hola amiga Muy buena la idea
Hola, si muy buena idea no solo para guardar calcetines la puedes utilizar para guardar muchas cosas. Gracias por leer y comentar
Que belleza amiga. Me encantó tu idea creativa, ese muñequito es muy lindo. A tu hijo le va a encantar. Bendiciones amiga.
Gracias amiga, si me quedo bien lindo parece una caja para guardar cosas para bebé. gracias por tus comentarios siempre lindos. Abrazos
Que linda amiga muy creativa
hola amiga, que bueno que te gusto. Gracias por leer y comentar. Saludos