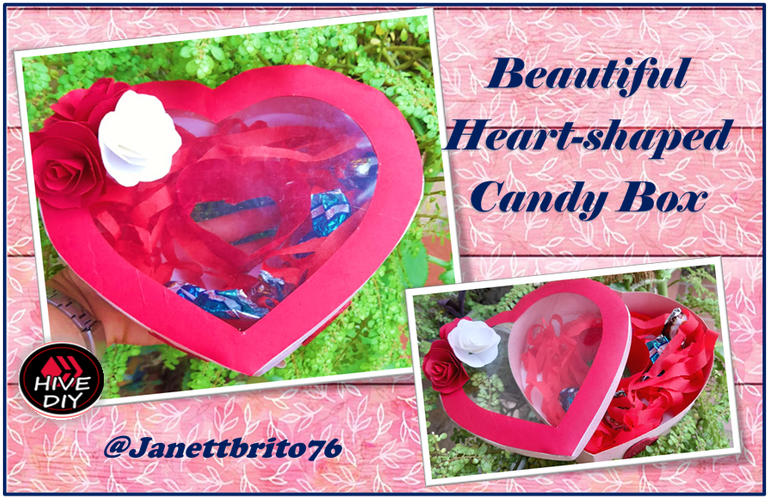
[ESP-ENG] 💝 Bella Bombonera en forma de Corazón 💕 Beautiful Heart-shaped Candy Box 💝

Feliz jueves para todos mis creativos y artesanos amigos de esta grandiosa comunidad, espero hayan pasado un excelente y productivo día y que se encuentren bien de salud. En esta oportunidad les quiero compartir una idea estupenda para regalar el día de San Valentín, la cual consta de como realizar una bella bombonera en forma de corazón elaborada con cartulina. Esta es una manualidad bastante fácil y económica, esta bella bombonera la puedes regalar a esa persona que es especial en tu vida o a un amigo(a) que les quiera obsequiar algo para ese día, esta bombonera a demas de rellenarla con bombones también la puedes rellenar de Cupcakes, caramelos, flores o con algún detalle que le quieras regalar a esa persona; Bueno amigos,no te pierdas el paso a paso de como realizar esta bella bombonera para obsequiar el día del amor y la amistad. Manos a la obra !!

💝 Greetings my dear HiveDiy friends 💝 !
Happy Thursday to all my creative and artisan friends of this great community, I hope you have had an excellent and productive day and that you are in good health. On this occasion I want to share a wonderful idea to give away on Valentine's Day, which consists of how to make a beautiful heart-shaped candy box made with cardboard. This is a fairly easy and cheap craft, you can give this beautiful candy box to that person who is special in your life or to a friend who wants to give them something for that day, you can also fill this candy box with chocolates fill with cupcakes, candies, flowers or with some detail that you want to give to that person; Well friends, do not miss the step by step of how to make this beautiful candy box to give as a gift on the day of love and friendship. Let's do it !!


- Cartulina (roja, rosada, blanca)
- Silicon
- Tijera
- Foami rojo
- Lamina de acetato
- Cartón
- Figura de corazón
- Cardstock (red, pink, white)
- Silicon
- Scissor
- Red foam
- Acetate sheet
- Paperboard
- heart figure
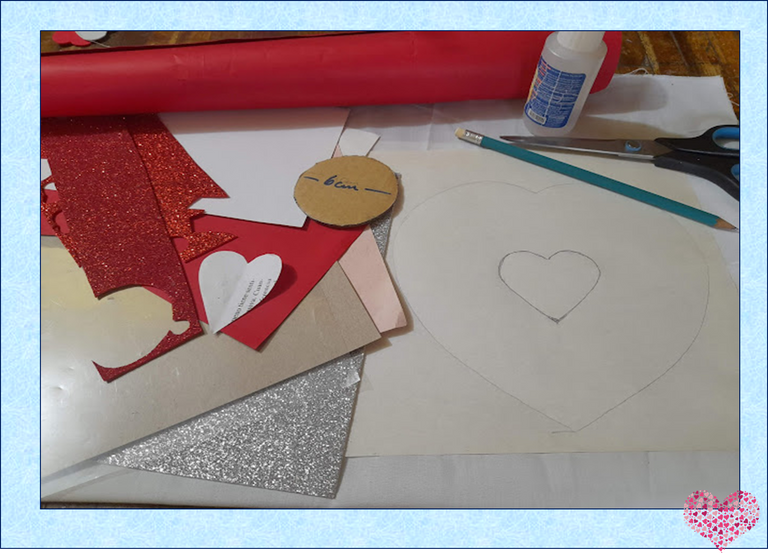

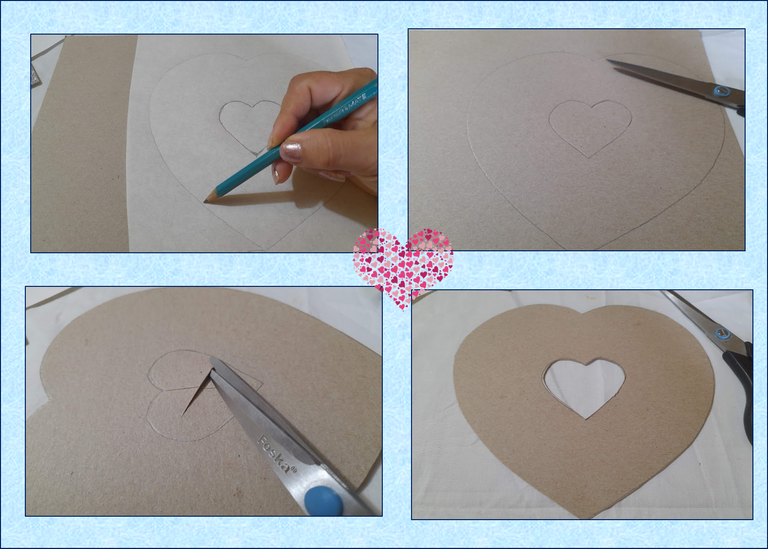
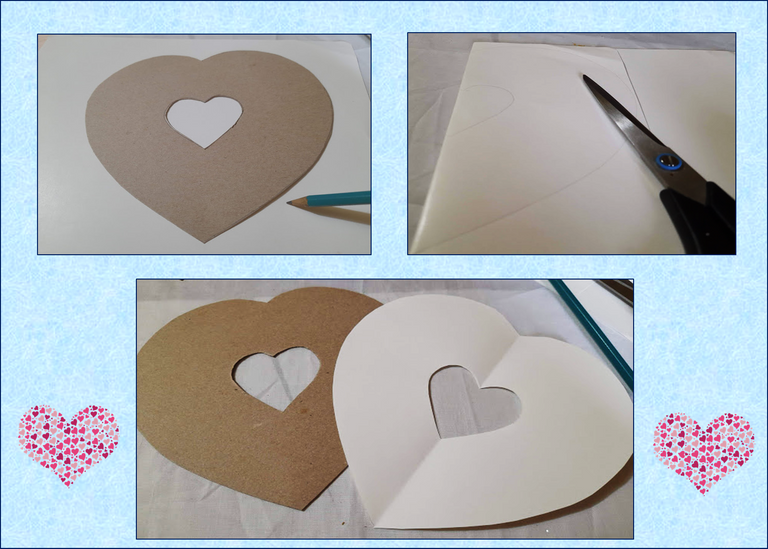
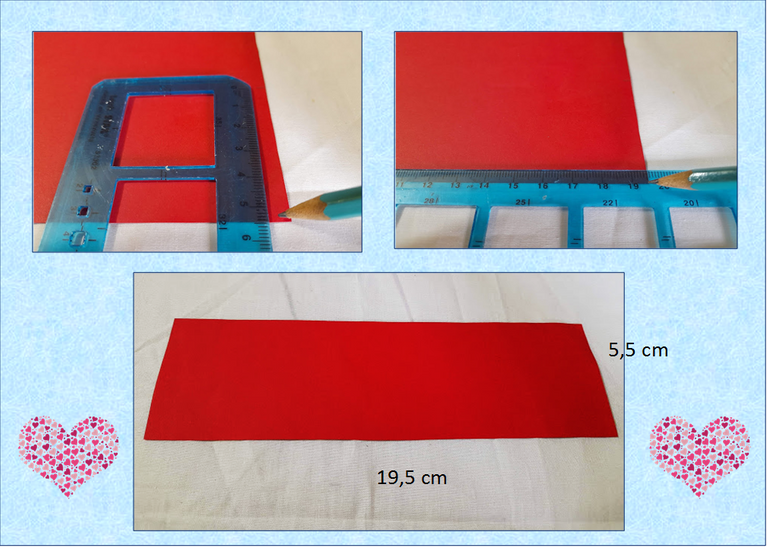
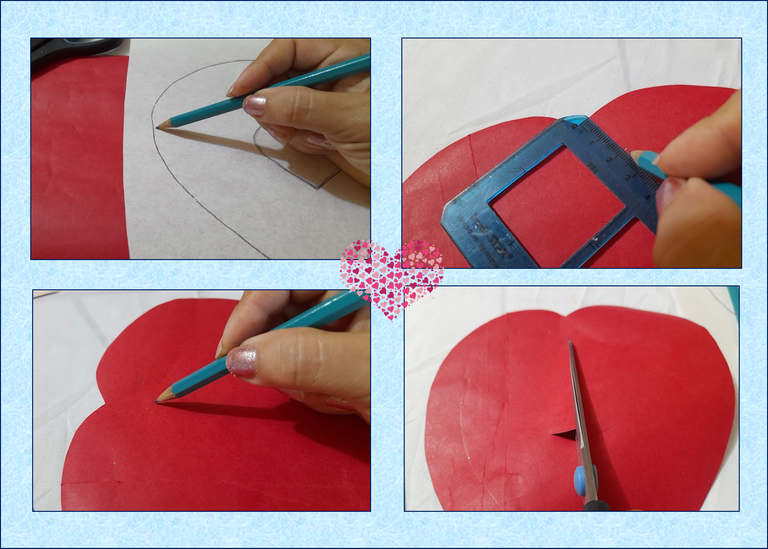
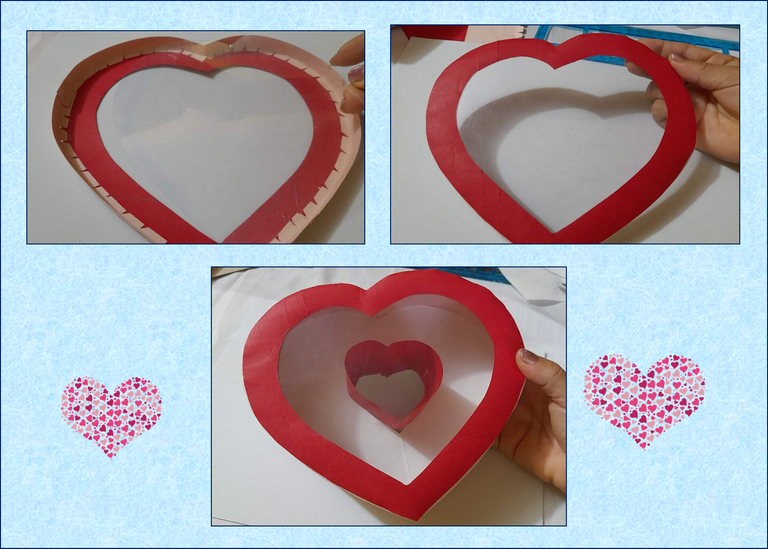
1: Iniciamos marcando en el cartón un corazón de 18 cm de ancho por 16 cm de alto, y en el centro dibujamos un corazón pequeño el cual lo recortamos, luego en la cartulina blanca volvemos a realizar el mismo corazón, estos van ha ser parte de la base de la bombonera.
1:We start by marking a heart 18 cm wide by 16 cm high on the cardboard, and in the center we draw a small heart which we cut out, then on the white cardboard we make the same heart again, these will be part of the base of the candy box. .
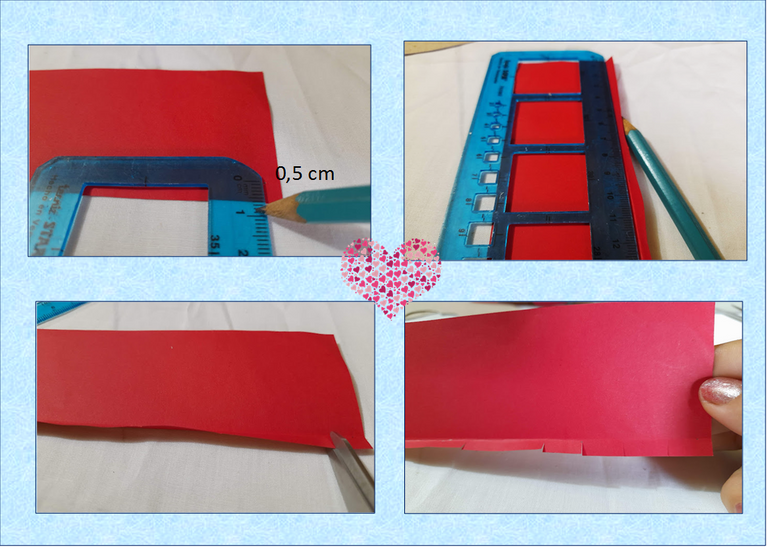
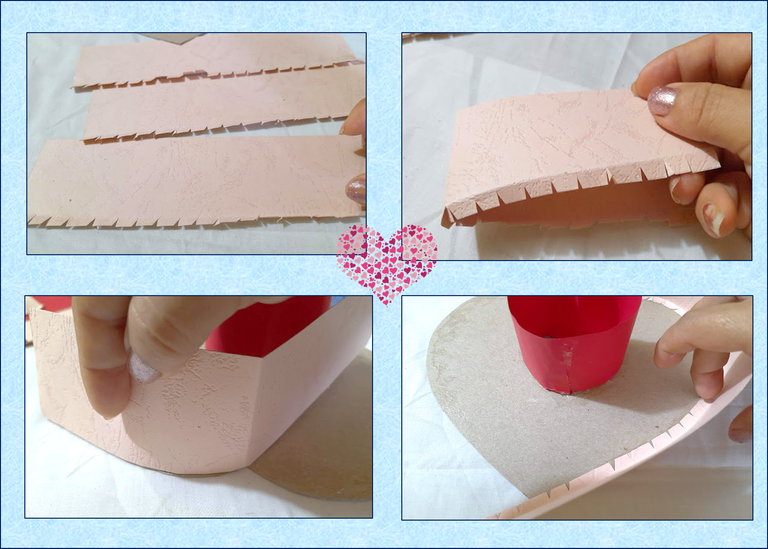
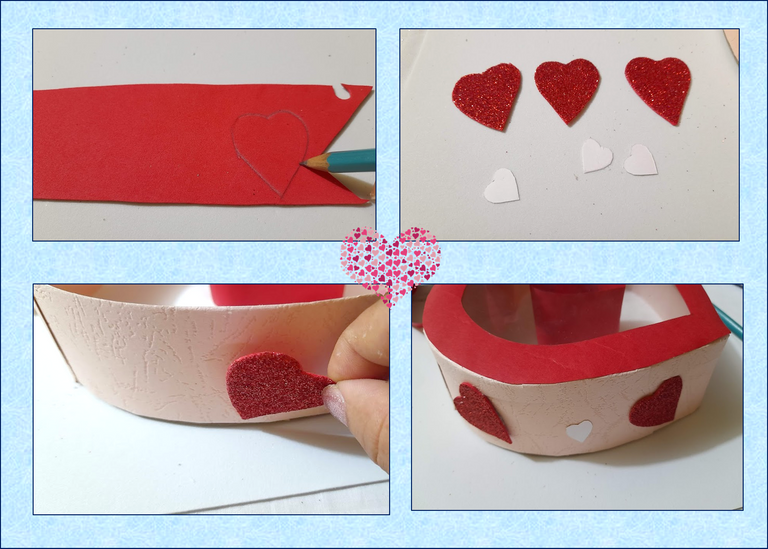
2: Luego en la cartulina roja cortamos un rectángulo de 19,5 cm de largo por 5,5 cm de alto, luego marcamos 0,5 cm a lo largo y con la ayuda de la regla doblamos, seguidamente con la tejera le realizamos varios cortes y procedemos a pegarla en el corazón pequeño que realizamos en el cartón, dándole la forma de corazón a la cartulina, como puedes observar en las imágenes.
2:Then in the red cardboard we cut a rectangle 19.5 cm long by 5.5 cm high, then we mark 0.5 cm along and with the help of the ruler we fold, then with the weaver we make several cuts and We proceed to stick it on the small heart that we made in the cardboard, giving the cardboard a heart shape, as you can see in the images.
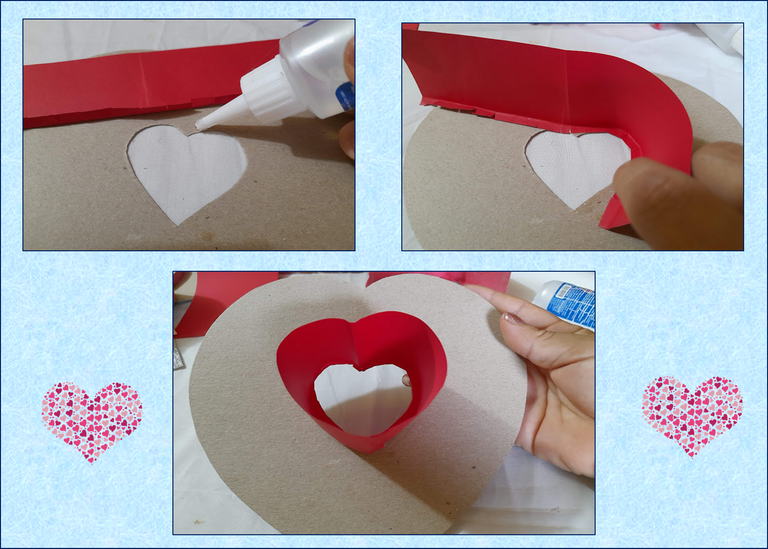
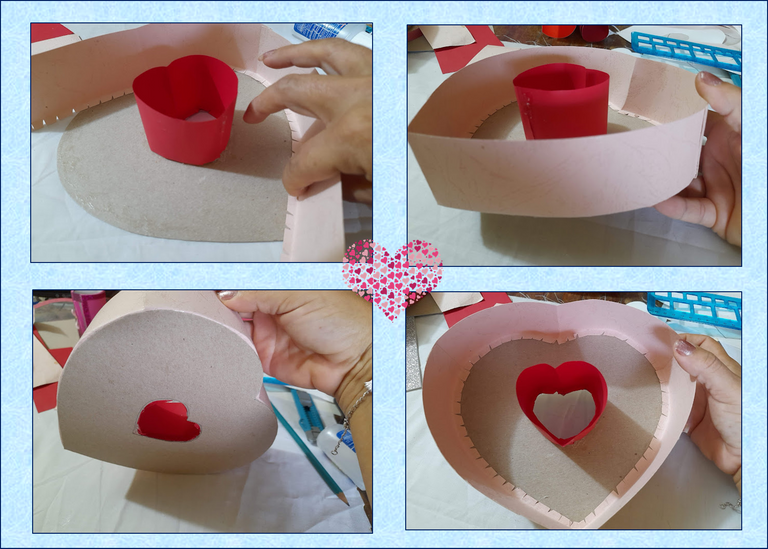
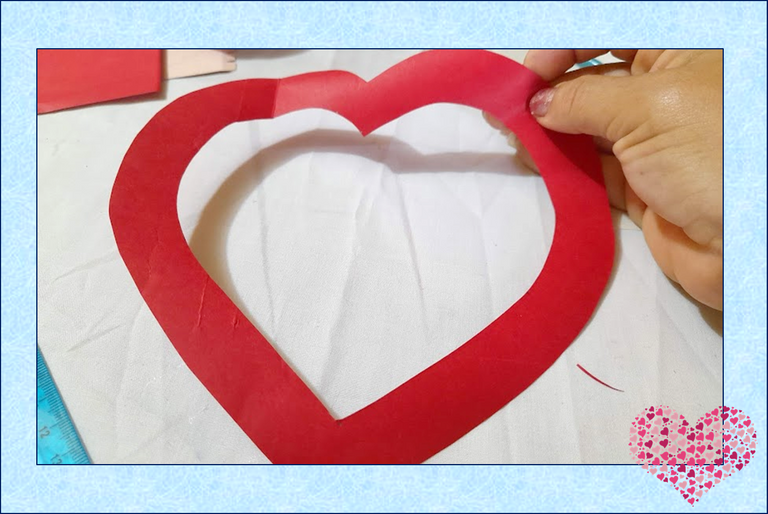
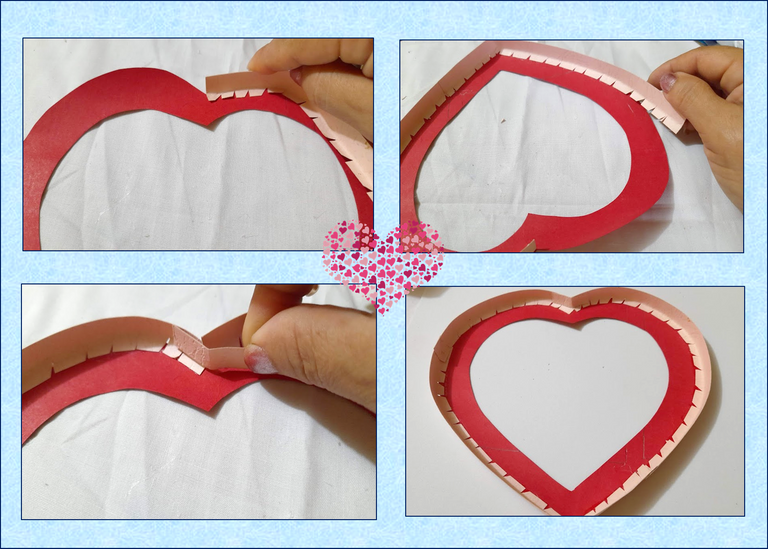
3: Ahora para realizar el contorno de nuestro corazón tomamos la cartulina rosada y realizamos dos rectángulos de 5,5 cm de ancho, luego marcamos 0,5 cm de ancho en cada rectangular y con la ayuda de la regla doblamos, seguidamente procedemos a pegarlo por todo en alrededor de la base de cartón como puedes ver en las imágenes, luego procedemos a pegar el corazón de cartulina blanca que habíamos realizado en paso 1 dentro de nuestra base.
3: Now to make the outline of our heart we take the pink cardboard and make two rectangles 5.5 cm wide, then we mark 0.5 cm wide in each rectangular and with the help of the ruler we fold, then we proceed to paste it all over around the cardboard base as you can see in the images, then we proceed to glue the white cardboard heart that we had made in step 1 inside our base.
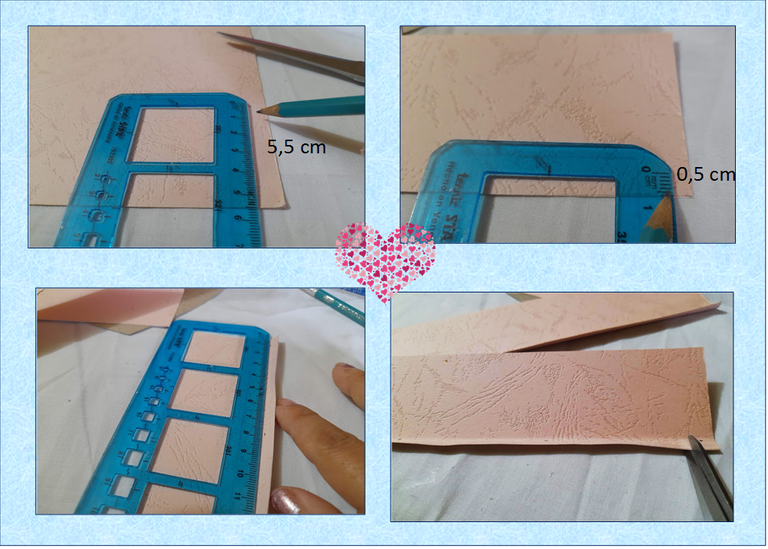
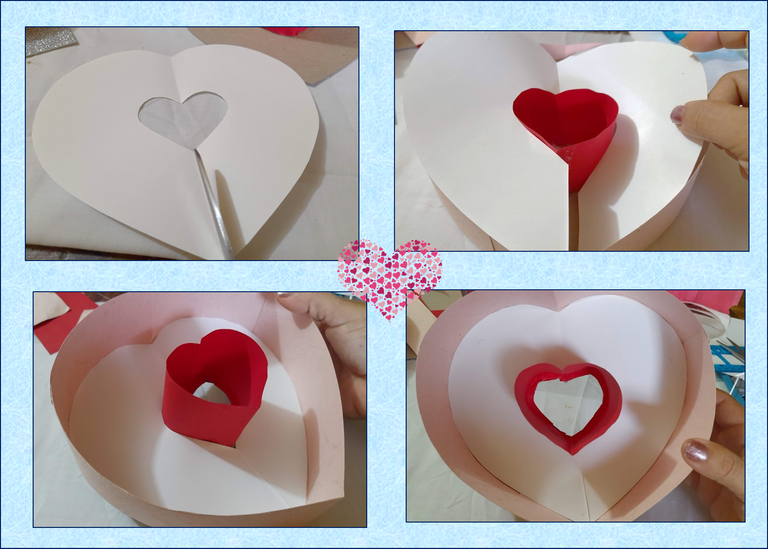
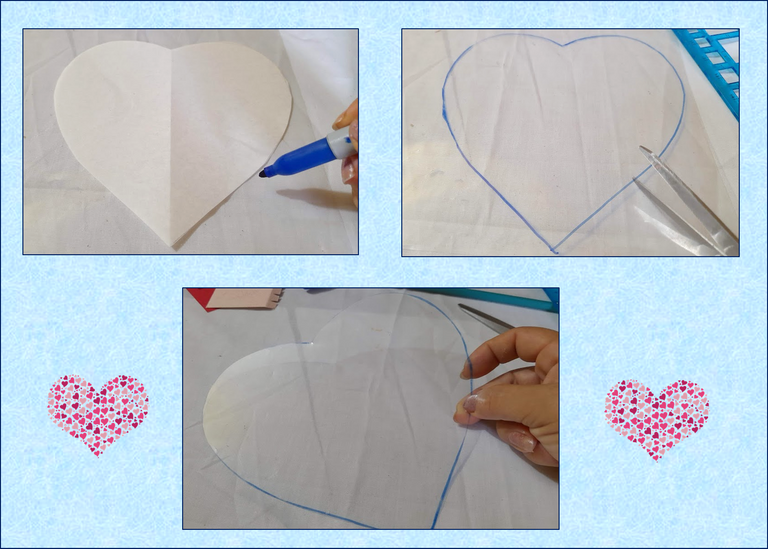
4: Para realizar la tapa de nuestra bombonera, tomamos la lamina de acetato y realizamos un corazón de 16cm de ancho por 14 cm de alto, luego en la cartulina roja realizamos el mismo corazón que utilizamos para la base marcamos 2cm por todo el borde del corazón y recortamos como puedes ver en las imágenes.
4:To make the lid of our candy box, we take the acetate sheet and make a heart 16cm wide by 14cm high, then on the red cardboard we make the same heart that we used for the base, we mark 2cm around the edge of the heart and We cut as you can see in the pictures.
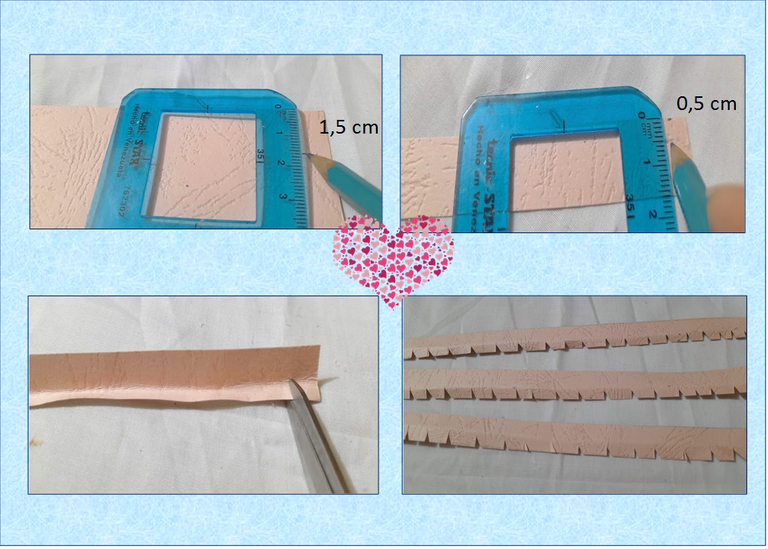
5:Luego, en la cartulina rosada recortamos 3 tiras de 1,5 cm de ancho luego marcamos 0,5 cm de ancho en cada tira y con la regla doblamos, luego le realizamos varios cortes, seguidamente procedemos a pegarla por todo el alrededor de nuestro corazón, luego le pegamos el corazón que realizamos en la lamina de acetato y lista nuestra tapa.
5:Then, in the pink cardboard we cut 3 strips of 1.5 cm wide, then we mark 0.5 cm wide on each strip and with the ruler we fold, then we make several cuts, then we proceed to paste it all around our heart , then we stick the heart that we made on the acetate sheet and our cover is ready.
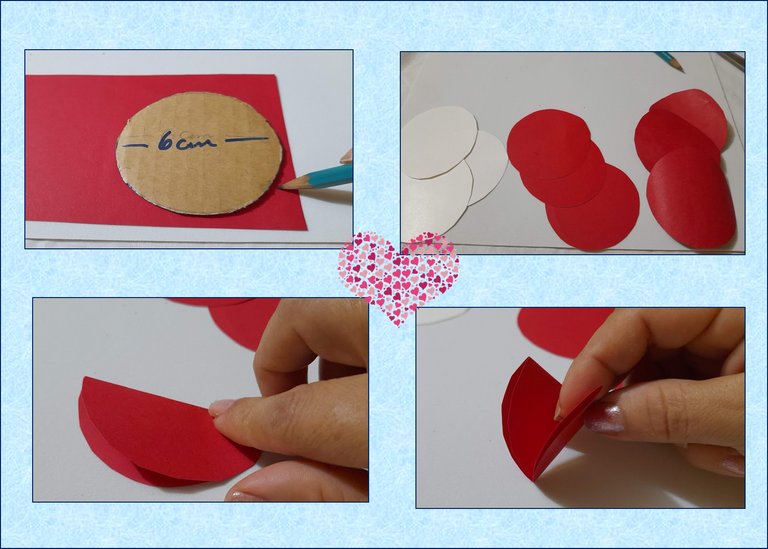
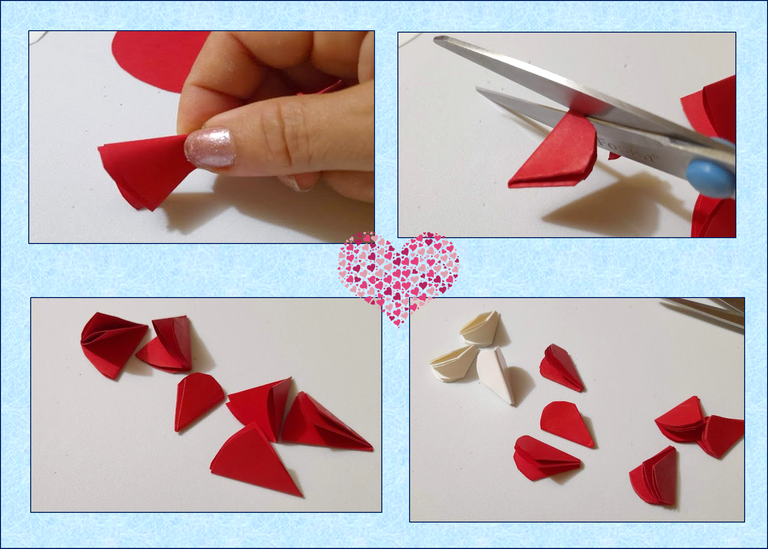
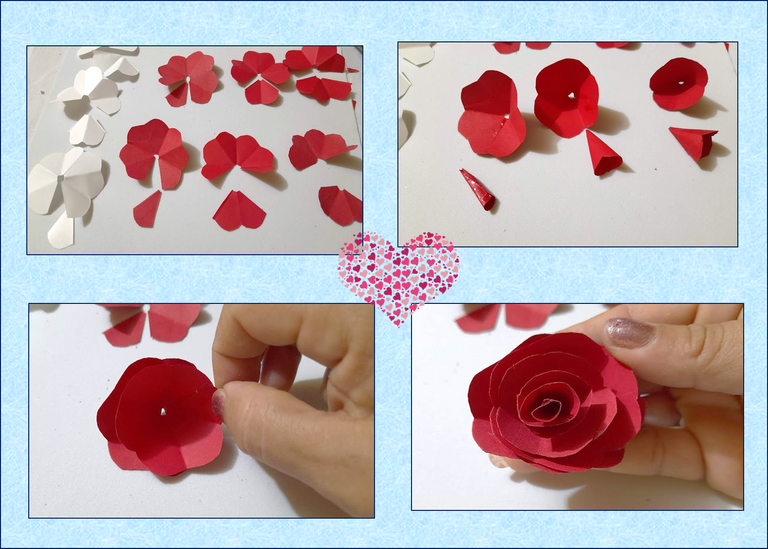
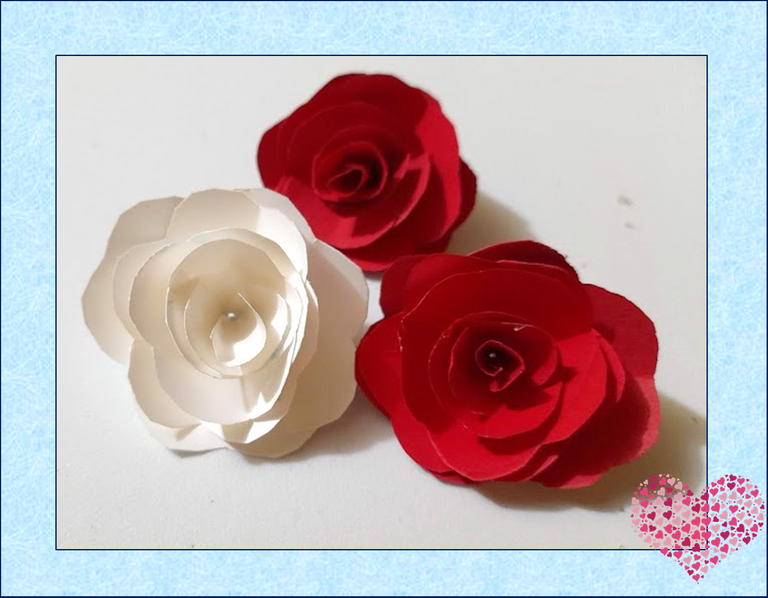
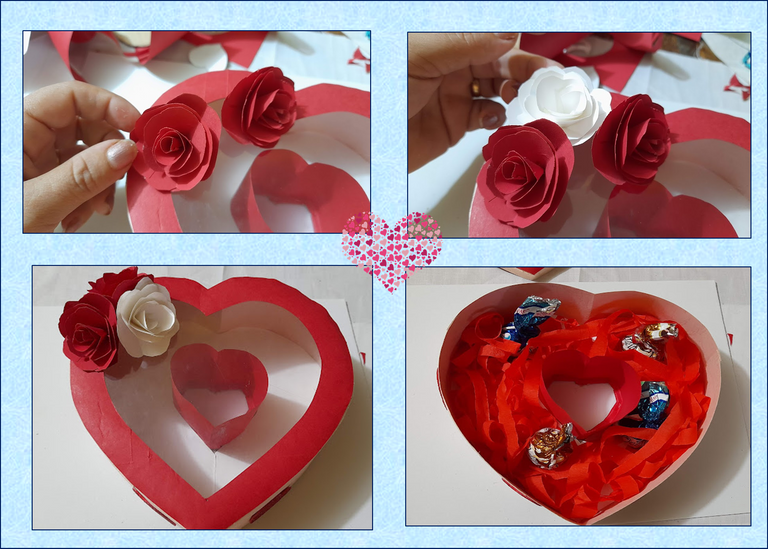
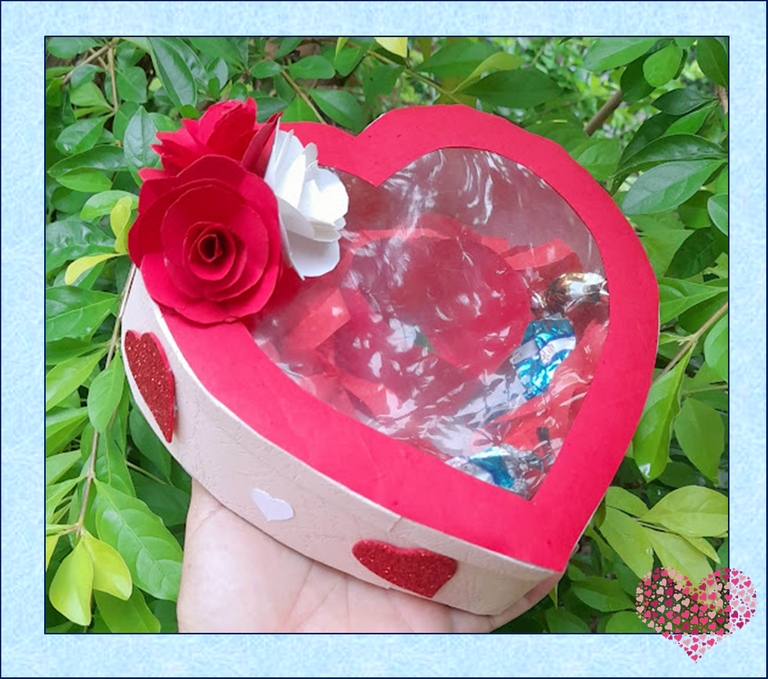
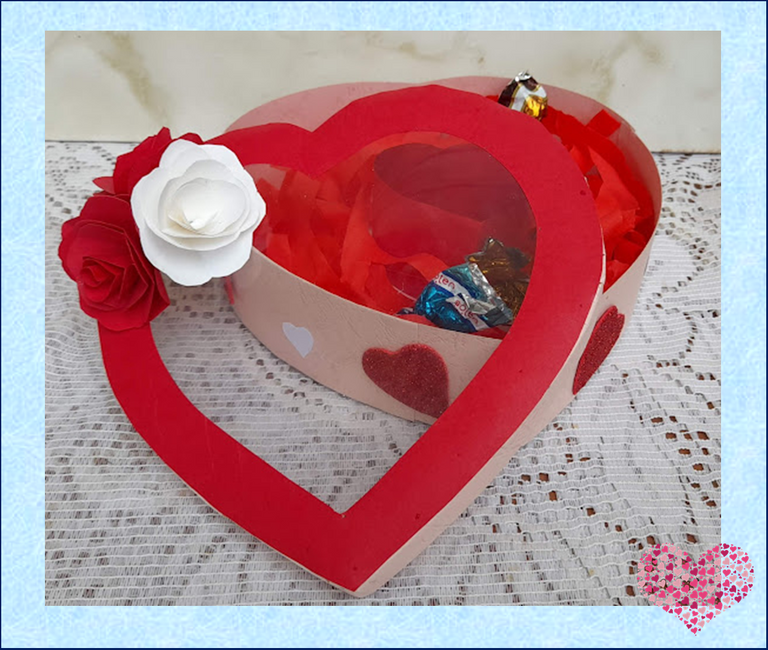
6: Para decorar nuestra bombonera le realizamos una rosas. para cada una iniciamos recortando tres círculos de 6cm, luego doblamos tres veces cada circulo y con la tijera le realizamos una pequeña curva en la parte superior y luego procedemos a recortar cada pétalo como pueden ver en las imágenes y seguidamente formamos nuestras rosas, tambien le realizamos unos corazones en foami rojo para decorar por el alrededor de la base.
6:To decorate our candy box we make a rose. For each one we start by cutting three 6cm circles, then we fold each circle three times and with the scissors we make a small curve on the upper part and then we proceed to cut each petal as you can see in the images and then we form our roses, we also We make some hearts in red foami to decorate around the base.
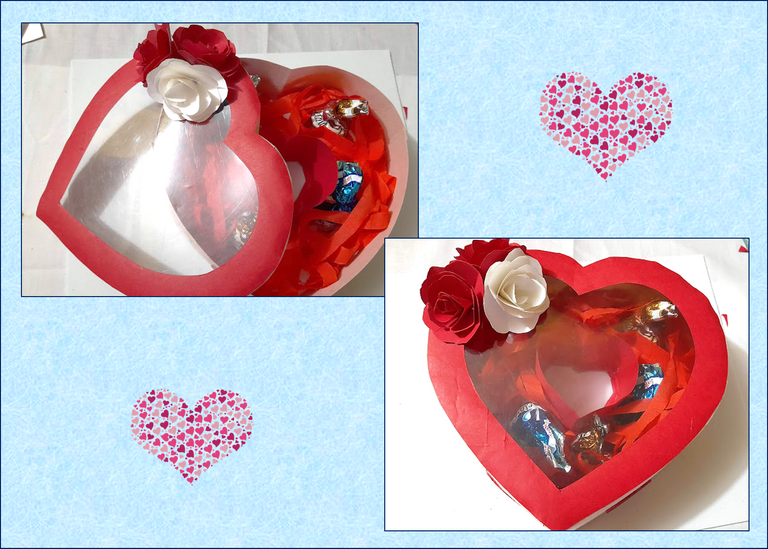
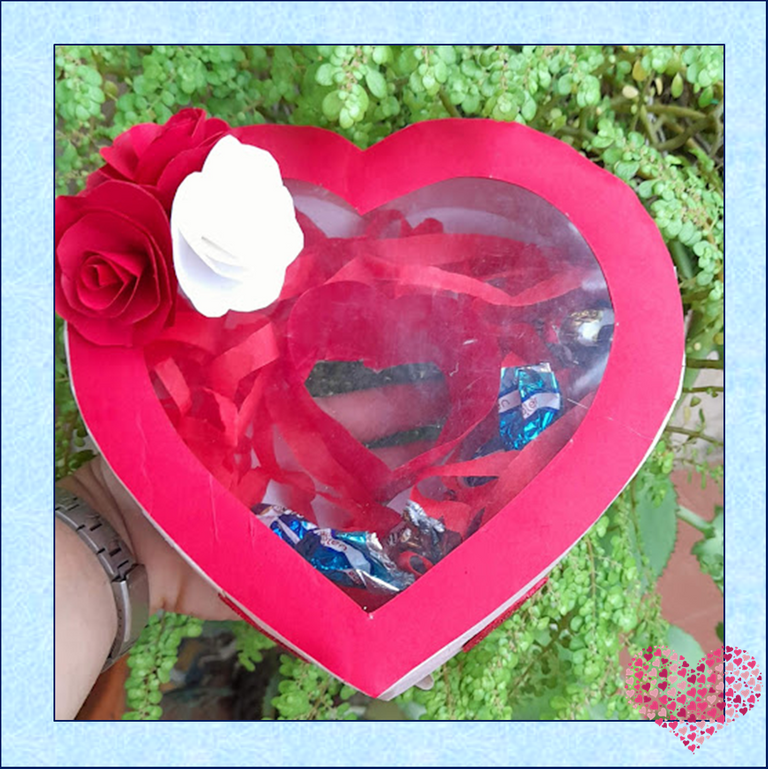
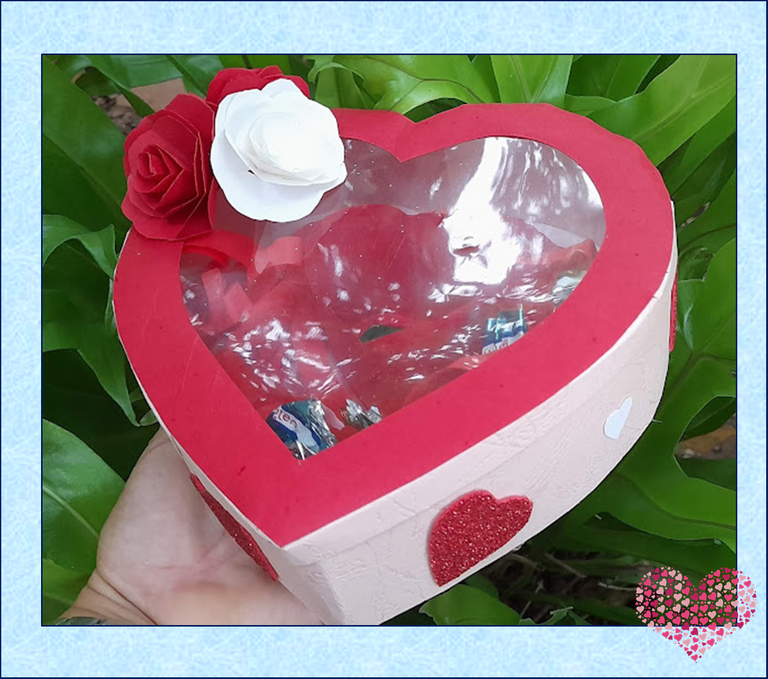
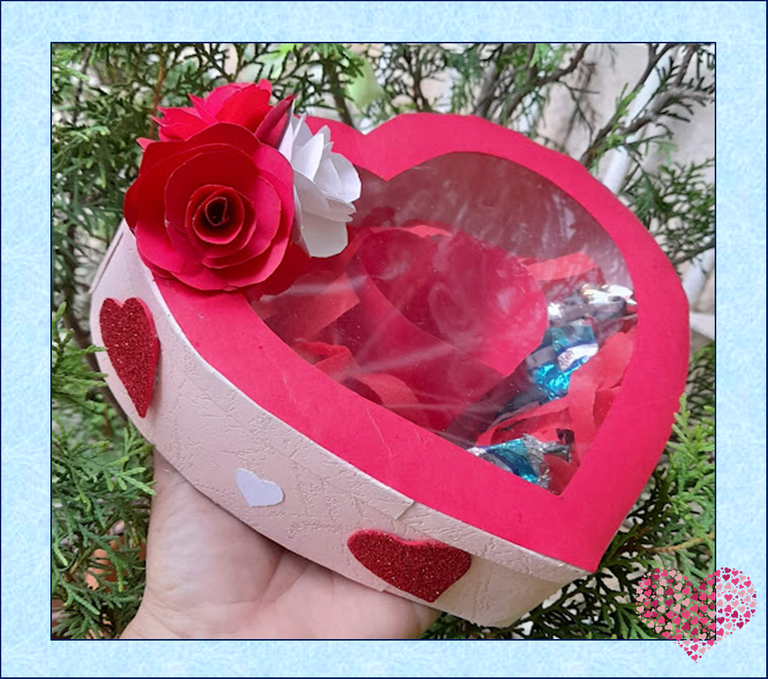
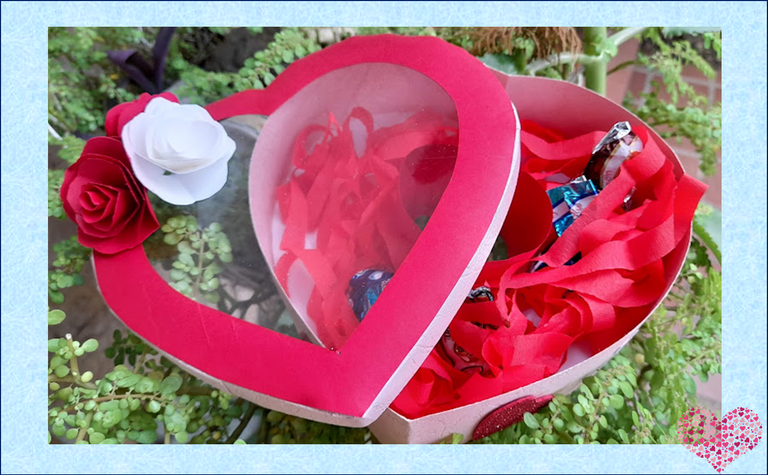
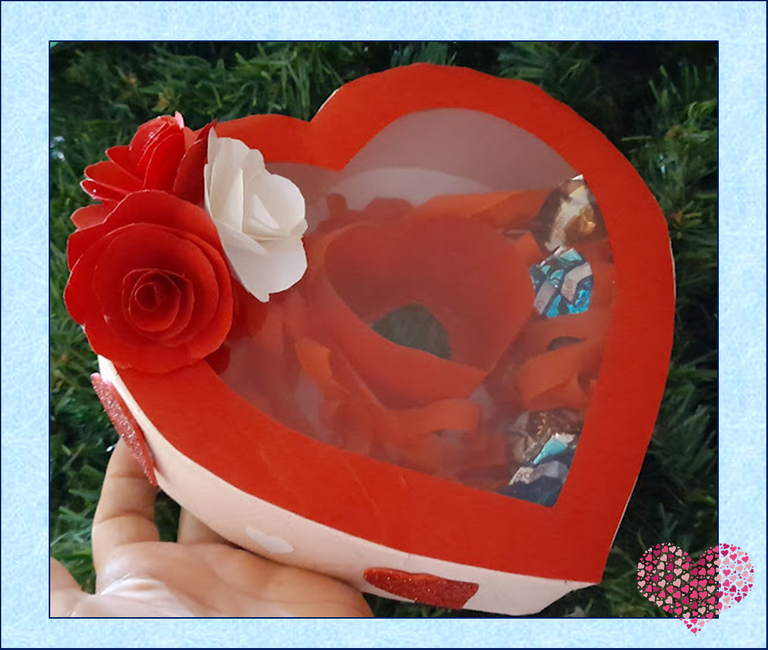
Listo, este es el resultado final de mi bella bombonera para regalar el día de los enamorados.¡Espero les haya gustado mi proyecto de hoy.
💕 ¡Hasta una próxima publicación! 💕
Done, this is the final result of my beautiful candy box to give away on Valentine's Day. I hope you liked my project today.
💕 Until a next post! 💕
Fuente portada
Fuente Separador

Las fotografías fueron tomadas con un teléfono inteligente Samsung A12, el texto fue traducido al ingles con el traductor de Google.
El banner fue diseñado en canvas
The photographs were taken with a Samsung A12 smartphone, the text was translated into English with the Google translator.
The banner was designed on canvas
Hermoso detalle amiga, un guerte abrazo y Dios te bendiga.
gracias amiga @aksurevm89. Saludos
Muy linda ideal para regalo de san valentí👍💞
Gracias amiga @leidys01, que bueno que te gusto y gracias por leer mis post
Saludos, está bastante bueno el post, bien detallado. Muy apropiado para la celebración del mes, Que tenga buen ánimo y mucha suerte.
Gracias @soltecno por leer y comentar mis post. Saludos