[ENG-ESP] Elegant and Glamorous 3D Cup with recycled material // Elegante y Glamorosa Copa en 3D con material de reciclaje

Greetings and blessed Sunday! HIVE friends, I hope you are having a great weekend with your family and I wish you good health and positive energy to all my friends of this great #HiveDiy community.
This time I want to share with you the step by step of my project today, which is an elegant and glamorous 3D cup that I made with recycled cardboard, foami, acetate sheet and ribbon. Well as many know I love recycling and whenever I can do it I do it, because it is one of the ways we can help our planet, these are materials that then accumulate in our home and then we throw them away, but you can see that with cardboard you can make endless things to decorate and look great friends, I invite you to recycle and create wonderful things...
My friends I tell you that I was going to paint this cup but when the time came to decorate it, I said to myself but for me they represent elegance, glamor, special toasts, such as engagements, marriages ... and that's why I decorate it that way. This is a great idea to decorate a special event or simply to decorate the living room of your home or if you have a bar in your home this glass is perfect to decorate it. Well my dear creators, don't miss the step by step of how to make this glamorous 3D cup with recycled material, let's get to work!

¡Saludos y bendecido domingo! Amigos de HIVE espero estén pasando un grandioso fin de semana en unión familiar. Espero se encuentren muy bien y Les deseo mucha salud y energías positivas a todos mis amigos de esta estupenda comunidad de #HiveDiy.
En esta oportunidad les quiero compartir el paso a paso de mi proyecto del día de hoy, el cual trata de una elegante y glamorosa copa 3D que realice con cartón reciclado, foami, lamina de acetato y cinta. Pues como muchos saben a mi me encanta reciclar y siempre que pueda hacerlo lo hago, ya que es una de las maneras que podemos ayudar a nuestro planeta, estos son materiales que luego se van acumulando en nuestro hogar y luego lo tiramos a la basura, pero pueden ver que con el cartón se pueden realizar infinidades de cosas para decorar y quedan estupendas amigos, los invito a reciclar y a crear cosas maravillosas...
Mis amigos les cuento que esta copa la iba a realizar pintándola pero cuando llego el momento para decorarla, me dije pero si para mi ellas representan la elegancia, el glamour, brindis especiales, como compromisos, matrimonios...y es por eso que la decore de esa manera. Esta es una idea genial para decorar algún evento especial o simplemente para decorar la sala de tu hogar o si posees un bar en tu casa esta copa es perfecta para decorarlo. Bueno mis queridos creadores no se pierdan el paso a paso de como realice esta glamorosa copa 3D con material de reciclaje. ¡¡Manos a la obra!!


- Cardboard
- Acetate sheet
- Eva rubber or foami (gold, frosted brown, frosted green and frosted purple)
- Yellow ribbon
- Cork
- Silicon
- Scissors
- Cutters
- Cartón
- Lamina de acetato
- Goma eva o foami ( dorado, marrón escarchado, verde y morado escarchado)
- Cinta amarilla
- Corcho
- Silicon
- Tijera
- Cuters
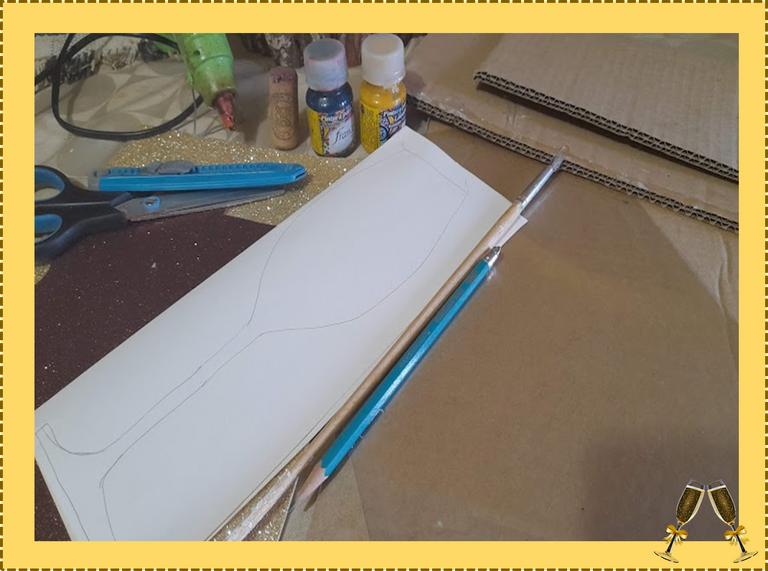

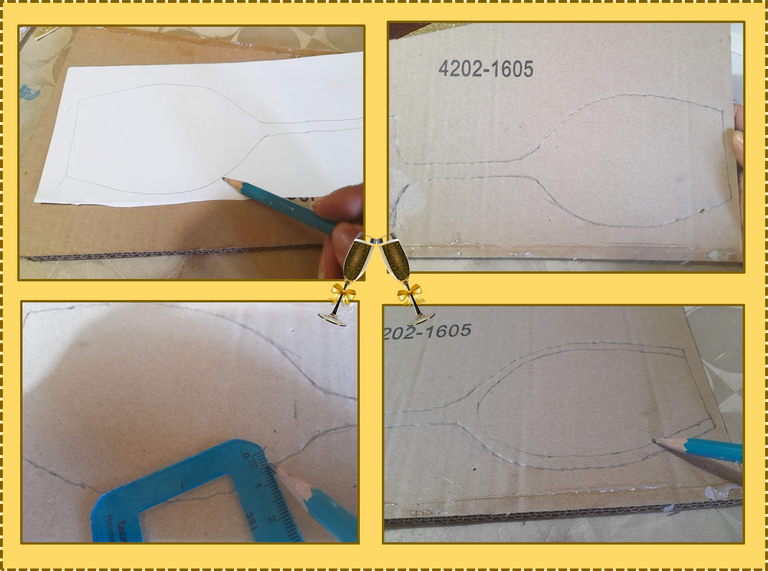
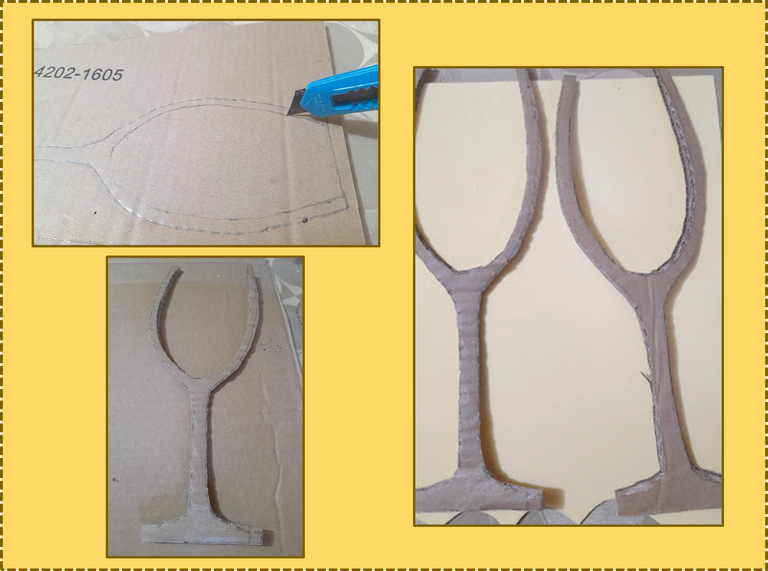
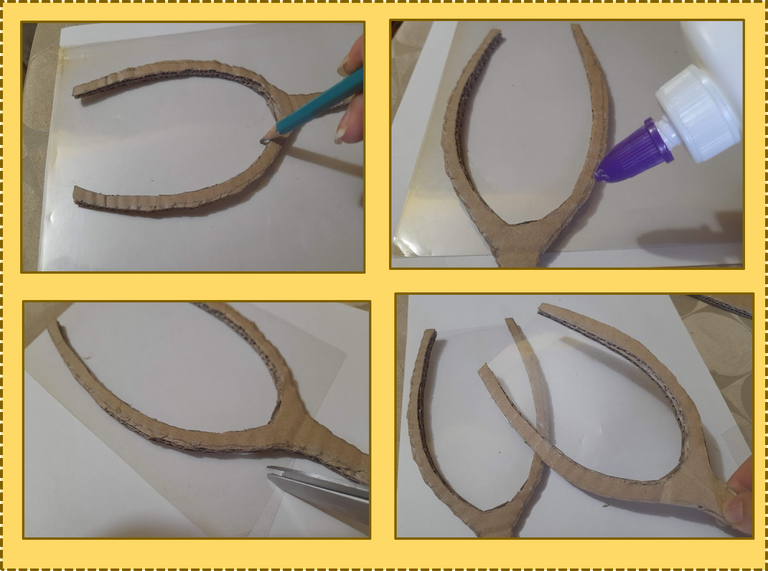
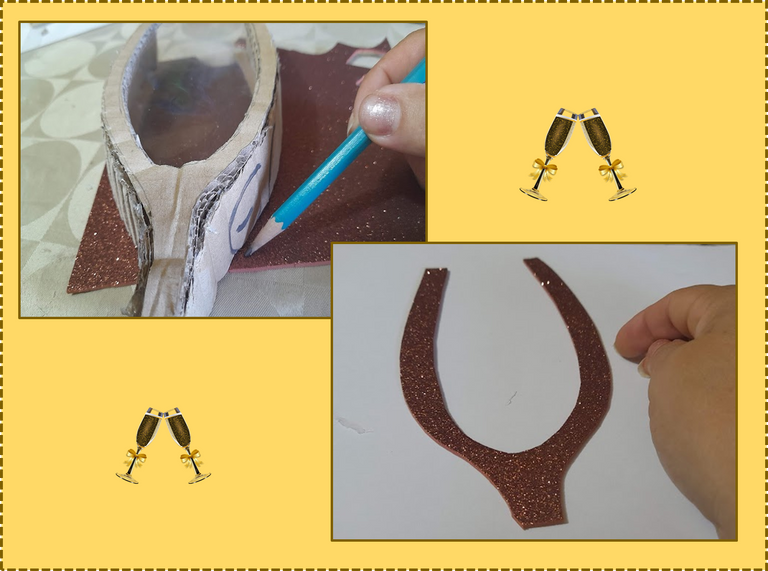
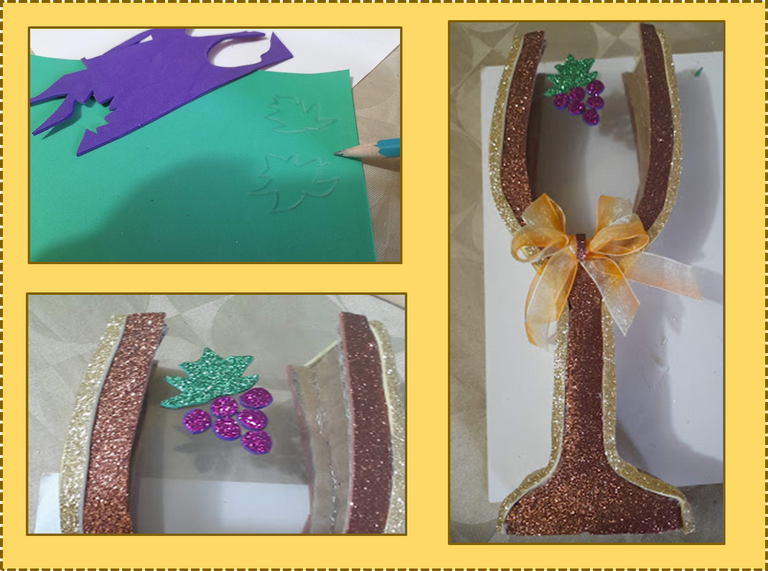
1: We draw on a sheet a cup of the design you like, then take the cardboard and mark your mold twice, then make a border of 0.5 centimeters on the contour of the cup, then with the help of the cutter we cut the chalice of the cup, as you can see in the images.
1: Dibujamos en una hoja una copa del diseño que mas te guste, luego tomas el cartón y marca tu molde dos veces, seguidamente realiza un borde de 0,5 centímetros en el contorno de la copa, luego con la ayuda del cuters recortamos el cáliz de la copa, como pueden ver en las imágenes.
2: Now we take the acetate sheet and mark the chalice of our cup, cut it out and glue it on both sides of the cup.
2: Ahora tomamos la lamina de acetato y marcamos el cáliz de nuestra copa, recortamos y pegamos en ambas cara de la copa.
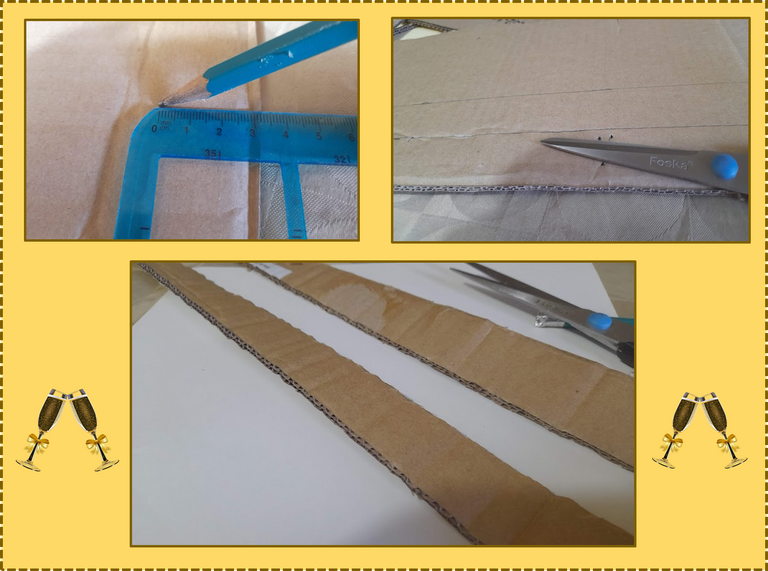
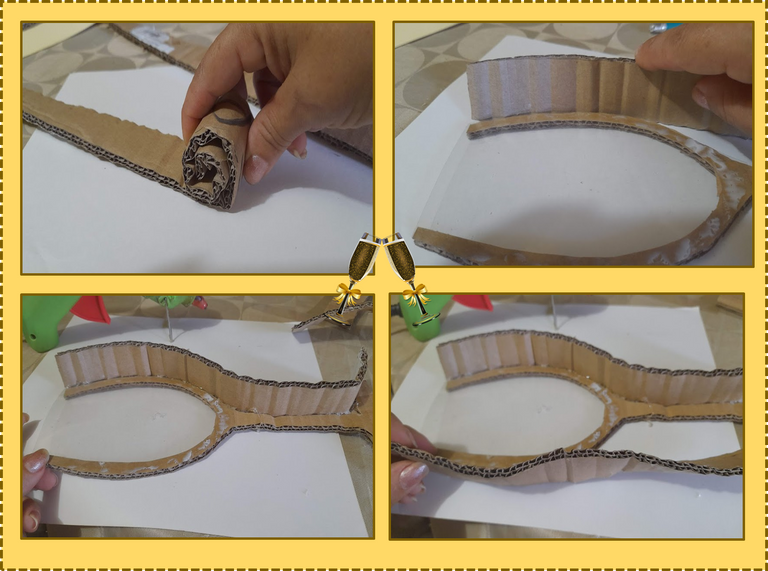
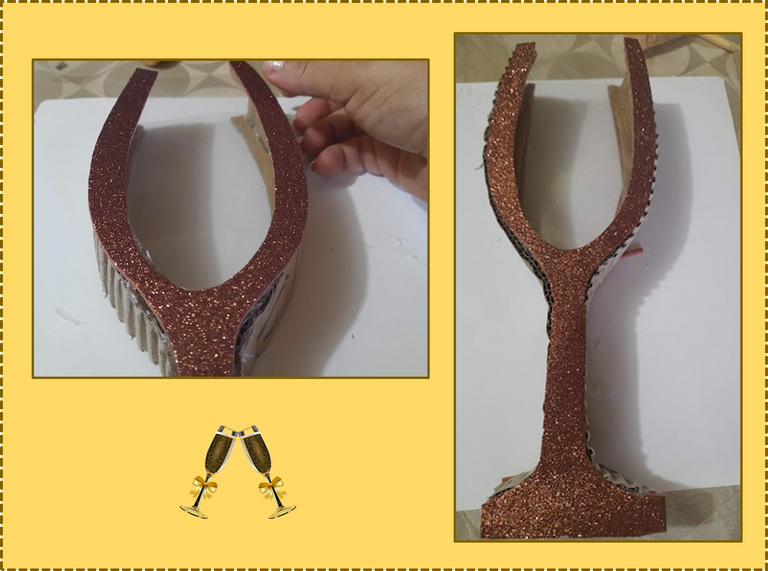
3: We cut two strips of cardboard 3 centimeters wide, roll a little to give flexibility, then proceed to paste it around the edge of one of the base, as you can see in the pictures, then paste the other base on top, then cut a rectangle 7 centimeters wide by 4 centimeters high and paste it on the bottom of the foot of the cup.
3: Recortamos dos tiras de cartón de 3 centímetro de ancho, enrollamos un poco para darle flexibilidad, luego procedemos a pegarla por todo el borde de una de la base,como pueden ver en las imágenes, seguidamente pegamos la otra base encima, luego recortamos un rectángulo de 7 centímetro de ancho por 4 centímetro de alto y lo pegamos en la parte de abajo del pie de la copa.

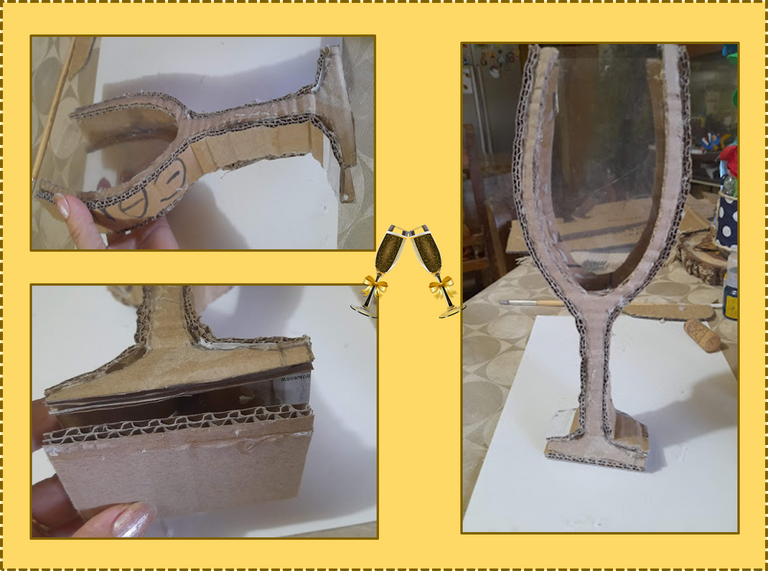
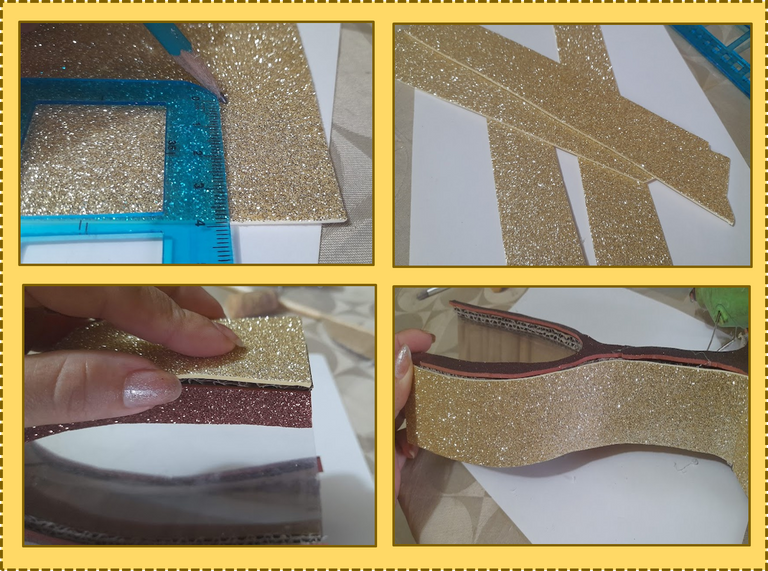
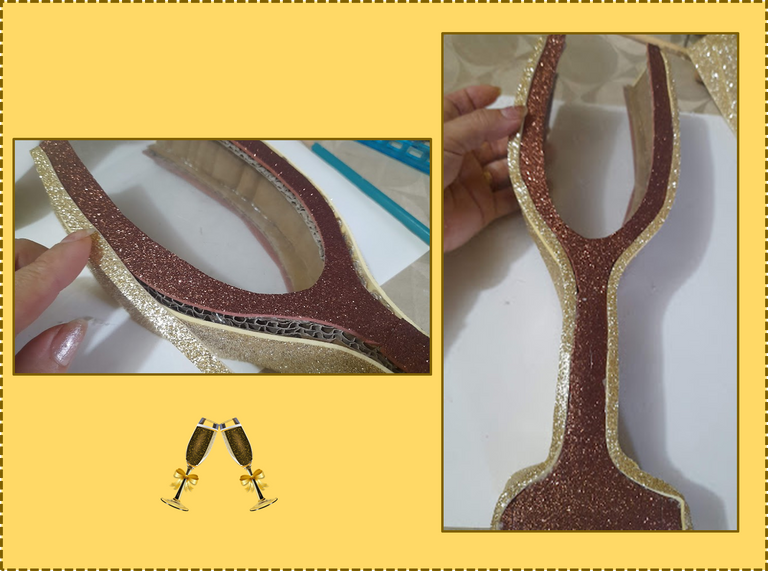
4: On the frosted brown foami we mark the outline of the cup, both the front and the back, cut it out and then glue it, then we proceed to cut several strips of gold foami 4 centimeters wide and glue them on the sides of our cup.
4: En el foami marrón escarchado marcamos el contorno de la copa tanto la parte del frente como la de atrás, recortamos seguidamente lo pegamos, luego procedemos a recortar varias tiras de foami dorado de 4 centímetros de ancho y la pegamos por los laterales de nuestra copa.
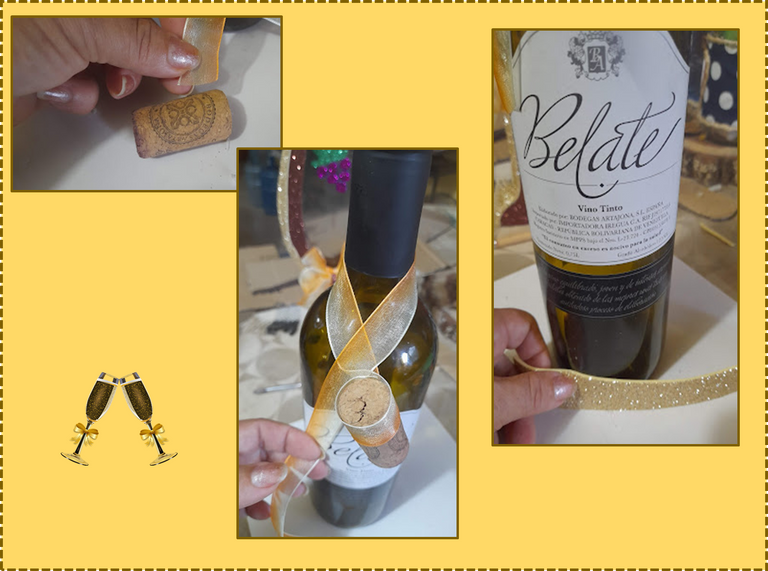
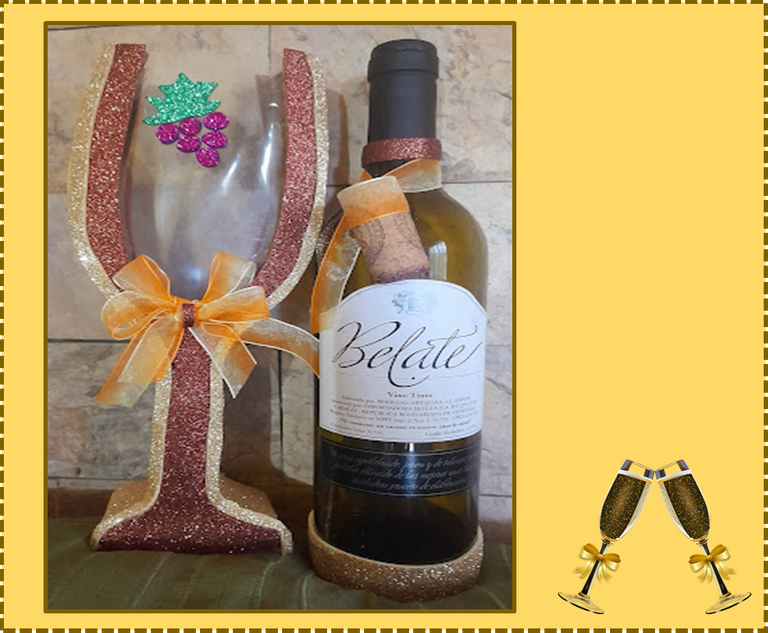
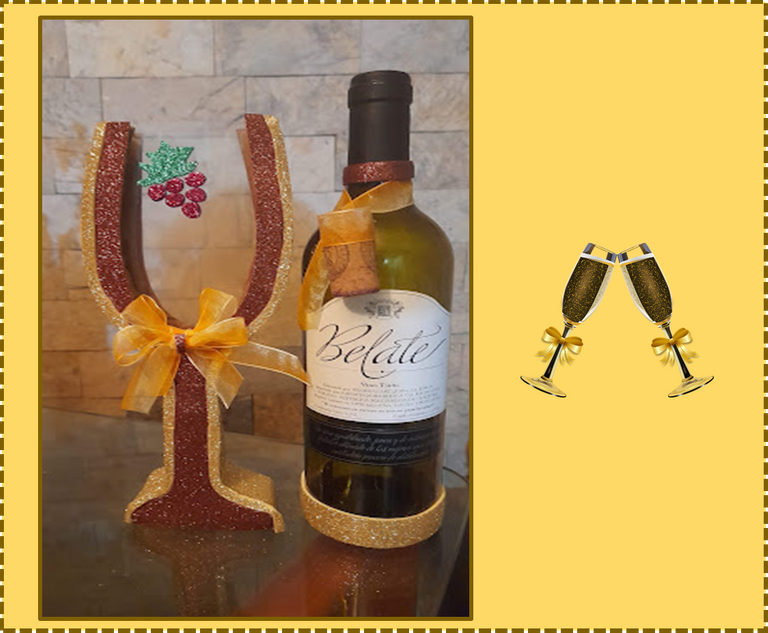
5: Finally we made several small circles in the purple foami and a leaf in the green foami to make grapes, then we pay them in the chalice of the cup, we make a bow with yellow ribbon and paste it on the front of our glass and to accompany it we decorate a bottle of wine for it we take the cork and we pay tape on top of it and then with the same tape we tie the neck of the bottle and paste and at the bottom we pay a strip of gold foami.
5: Para finalizar realizamos varios círculos pequeñitos en el foami morado y una hoja en el foami verde para realizar unas uvas, luego las pagamos en el cáliz de la copa, realizamos un lazo con la cinta amarilla y lo pegamos en el frente de nuestra copa y para acompañarla decoramos una botella de vino para ella tomamos el corcho y le pagamos cinta en la parte superior de el y luego con la misma cinta en lazamos el cuello de la botella y pegamos y en la parte inferior le pagamos una tira de foami dorado.
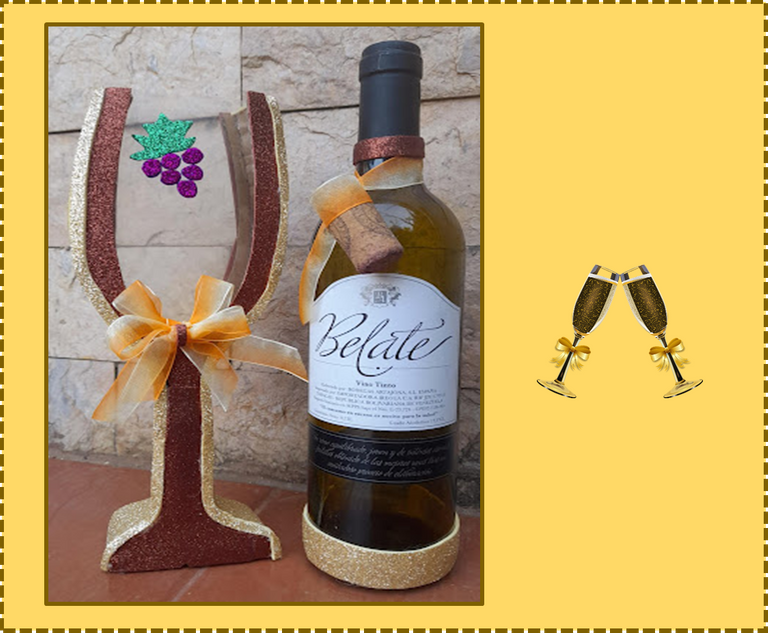
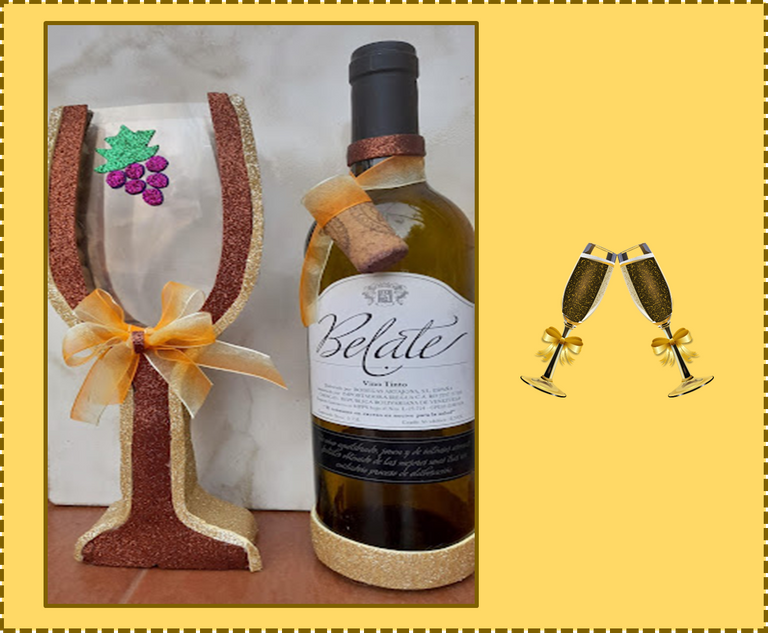
This is the final result of my Elegant and Glamorous 3D cup with recycled material, I hope you liked my project today!
Creative friends, see you in the next post !
Este es el resultado final de mi Elegante y Glamorosa copa en 3D con material de reciclaje.¡Espero les haya gustado mi proyecto del día de hoy !
¡ Amigos creativos hasta una próxima publicación !
Fuente portada
Fuente Separador

The photographs were taken with a Samsung A12 smartphone, the text was translated into English with the Google translator.link
The banner was designed on canvas link
Las fotografías fueron tomadas con un teléfono inteligente Samsung A12, el texto fue traducido al ingles con el traductor de Google.link
El banner fue diseñado en canvas link
Congratulations @janettbrito76! You have completed the following achievement on the Hive blockchain and have been rewarded with new badge(s):
You can view your badges on your board and compare yourself to others in the Ranking
If you no longer want to receive notifications, reply to this comment with the word
STOPCheck out the last post from @hivebuzz:
Support the HiveBuzz project. Vote for our proposal!
Te quedo hermosa amiga Felicitaciones y mucha suerte.
Hola Jannet, quedo muy linda esta copa. Exitos y feliz dia.