[ENG-ESP] Creative Pac-Man themed Pencil Case //Creativa Cartuchera con temática de Pac-Man


Greetings! HIVE friends I hope you are having a great night and that you had a productive start of the week. I wish you from the bottom of my heart lots of health and positive energies for all my friends of this great #HiveDiy community.
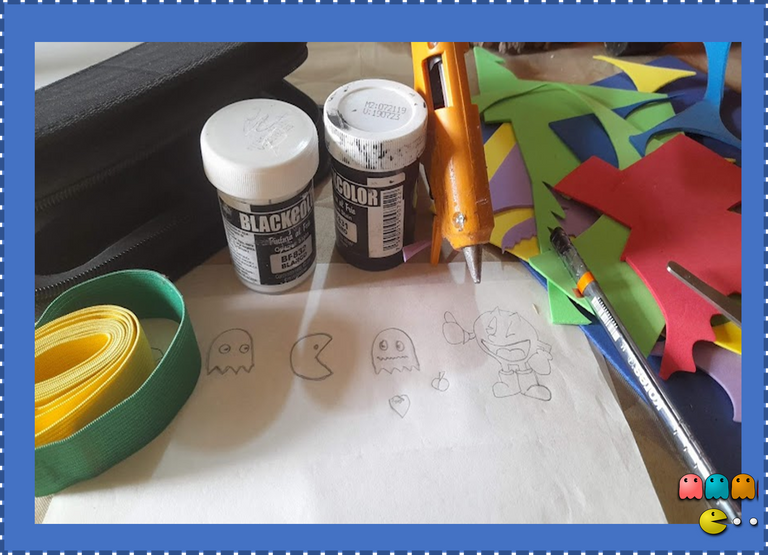
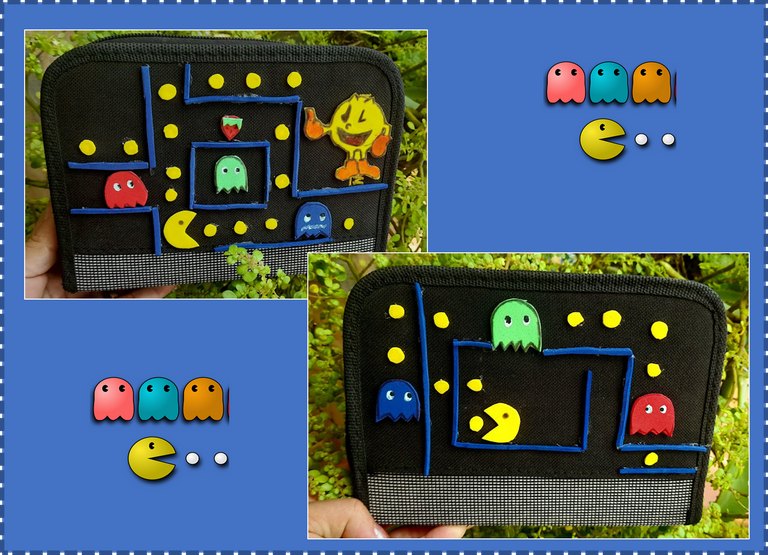
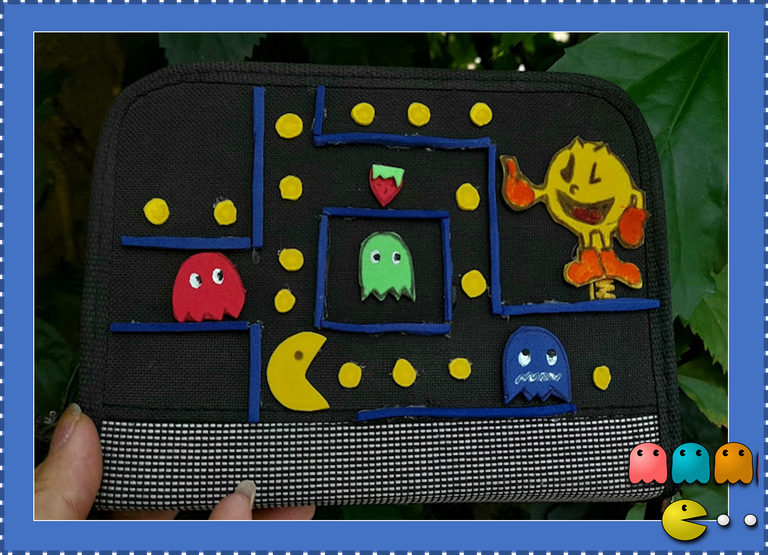
This time I want to show you the step by step of my project today, which is a creative pencil case that I made with a computer accessory case that I had in disuse, I decorated this pencil case with a theme that I liked and I still like since I was a teenager, which is a video game that came to have the Guinness record among the video games of the moment this is the famous Pac-Man.
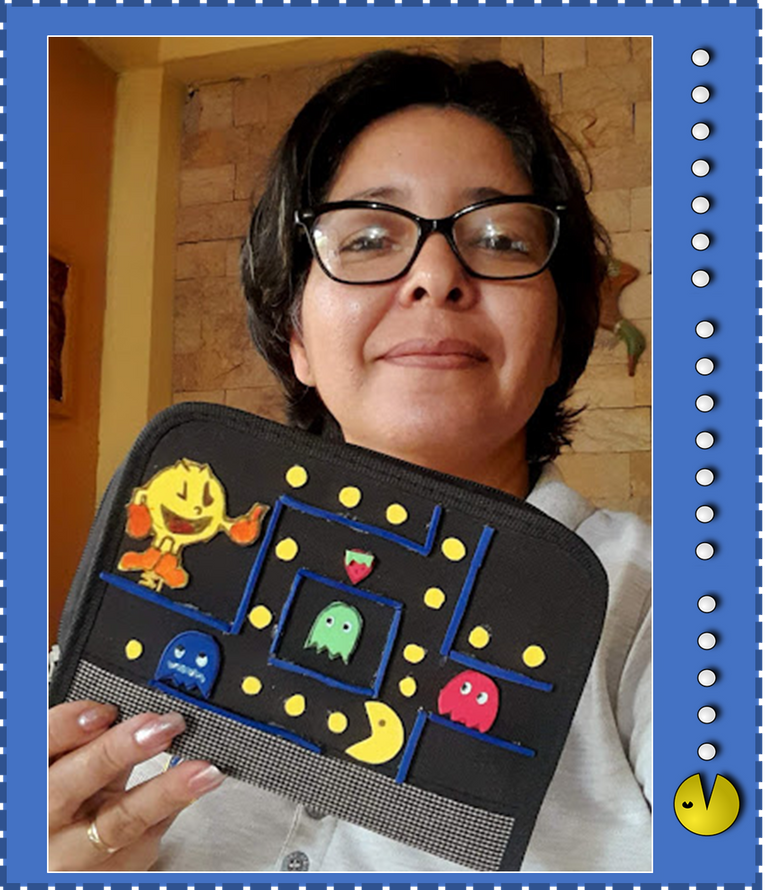
I tell you that the elaboration of this creative pencil case comes because my youngest son had damaged his pencil case, it was a little old, then I decided to make him one and I thought about making it out of fabric but he told me he did not want fabric, then I remembered a computer accessory case that I had saved for a long time to give it a second chance and the time came and as he really likes video games I wanted to decorate it with this theme that I used and thus bring back those old memories when he played Pac-Man with my cousins on vacation. I am almost sure that my son Jose will love his new pencil case so he will have his colors in order and his pencil sharpener at hand because he always loses it.... Well my dear creators, don't miss the step by step instructions on how to make this creative pencil case, let's get started!!!

¡Saludos! Amigos de HIVE espero estén pasando una estupenda noche y que hayan tenido un productivo inicio de semana. Les deseo de todo corazón mucha salud y energías positivas para todos mis amigos de esta estupenda comunidad de #HiveDiy.
En esta oportunidad les quiero mostrar el paso a paso de mi proyecto del día de hoy, el cual trata de una creativa cartuchera que realice con un estuche de accesorios de computadora que lo tenia en desuso, esta cartuchera la decore con una temática que me gustaba y me sigue gustando desde que era una adolescente, la cual trata de un vídeo juego que llegó a tener el récord Guiness entre los vídeo juegos del momento este es el famoso de Pac-Man.
Les cuento que la elaboración de esta creativa cartuchera viene porque a mi hijo menor se le había dañado su cartuchera, ya era un poco vieja, entonces decidí elaborarle una y pensé hacerla de tela pero me dijo que no quiera de tela, entonces me acorde de un estuche de accesorios de computadora que tenia guardado desde hace mucho tiempo para darle una segunda oportunidad y llego el momento y como a él le gusta mucho los vídeos juego quise decorarla de esta temática que utilice y así traer esos viejos recuerdos cuando jugaba Pac-Man con mis primos en las vacaciones. Estoy casi segura que a mi hijo José le va encantar su nueva cartuchera y así tendrá sus colores ordenados y tendrá su sacapuntas a la mano porque siempre se le pierde... Bueno mis queridos creadores no se pierdan el paso a paso de como realice esta creativa cartuchera. ¡¡Manos a la obra!!


- Foami (green, red, yellow, yellow, blue)
- Paint (white, black, orange and red)
- Elastic tape
- Computer accessory case
- Silicon
- Scissors
- Foami (verde, rojo, amarillo, azul)
- Pintura (blanca, negra, naranja y roja)
- Cinta elástica
- Estuche de accesorio de computadora
- Silicon
- Tijera

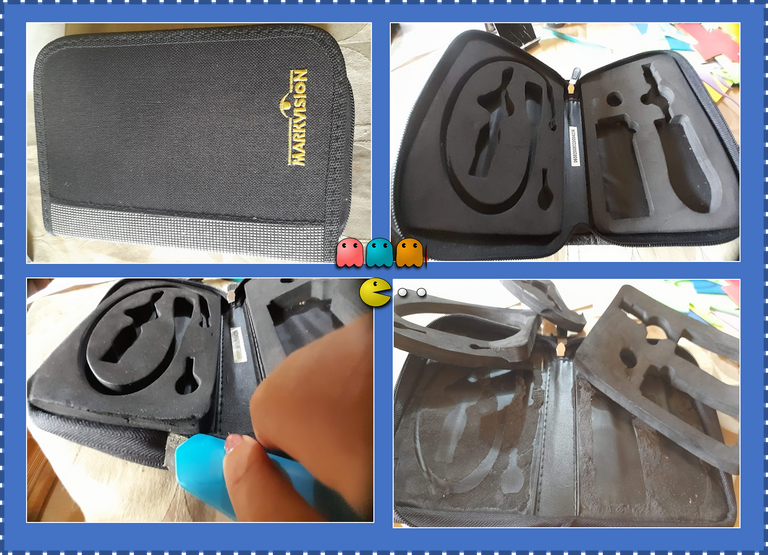
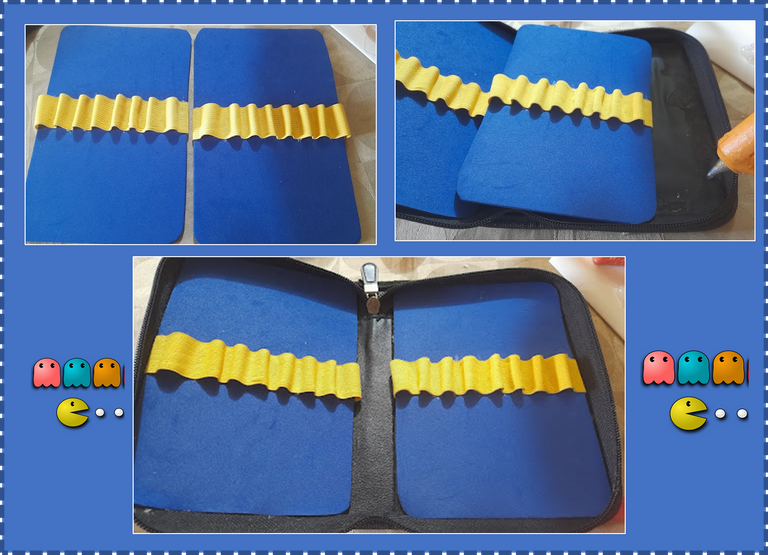
1: With the help of the cutter we begin by removing the rubber that has glued the case.
1: Con la ayuda del cutter comenzamos retirando la goma que tiene pegado el estuche.
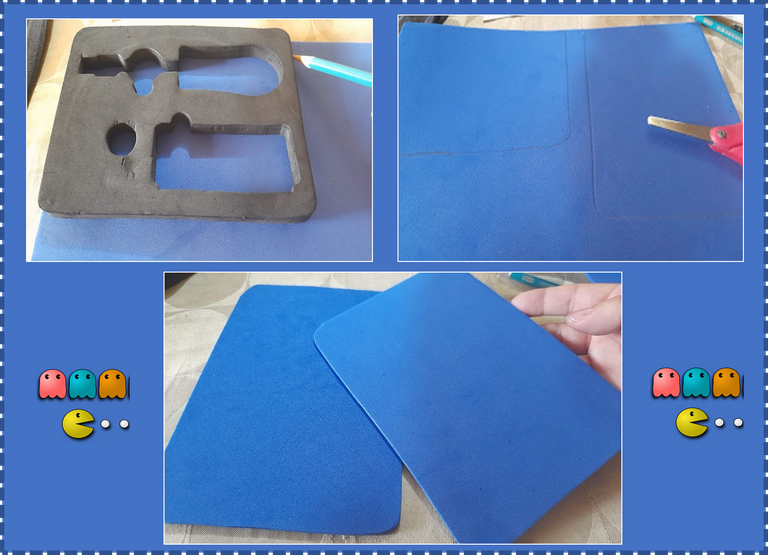
2: Then on the blue foami we mark two rectangles of the size of the gum that we removed, which has the following measures 12 centimeters wide by 17 centimeters high.
2: Luego en el foami azul marcamos dos rectángulos del tamaño de la goma que retiramos, el cual tiene las siguientes medidas 12 centímetros de ancho por 17 centímetros de alto.
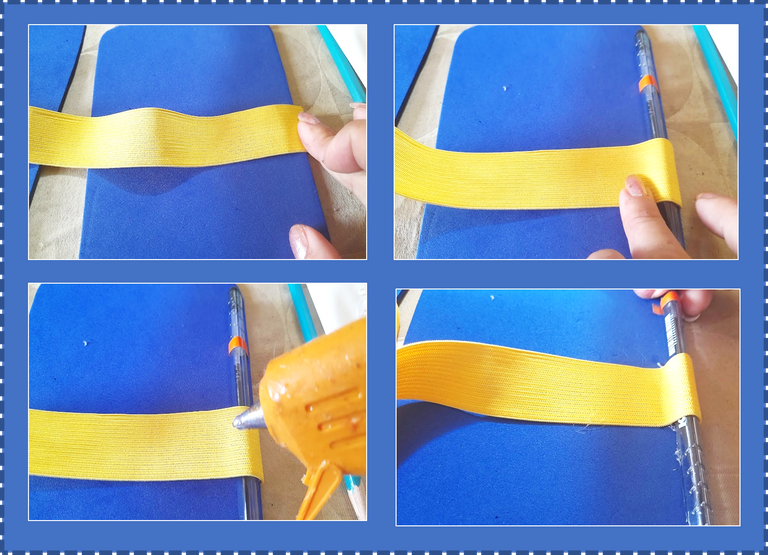
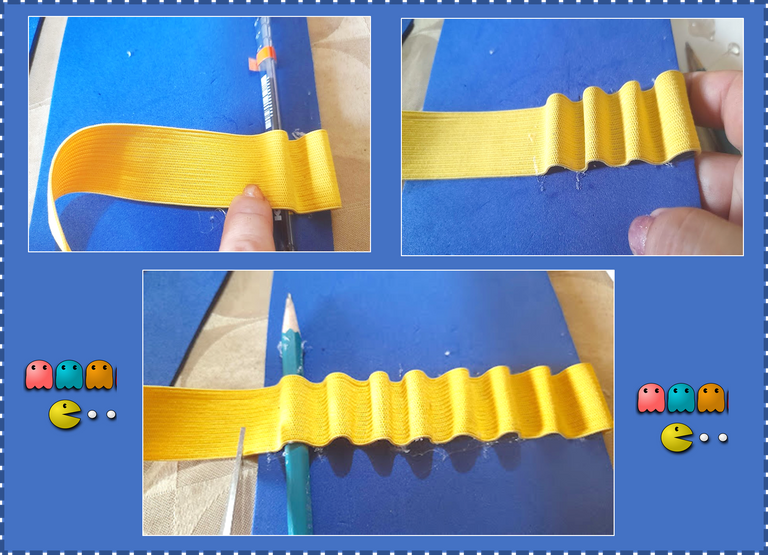
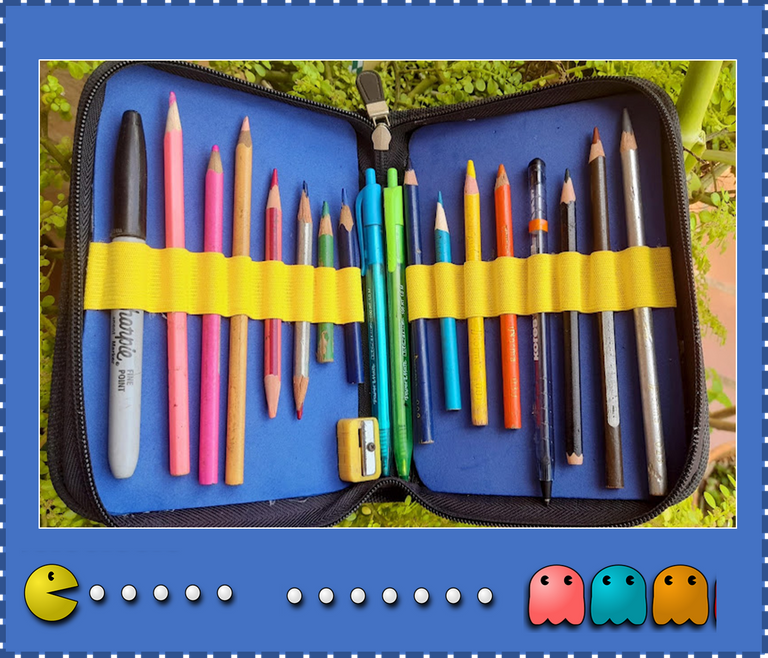
3: We take the elastic tape and proceed to glue it in the center of the rectangle, leaving adequate space to introduce each of the pencils, so that everything is at the same distance, we mark with a pencil the width and glue, as you can see in the images, then proceed to glue each rectangle to the base of our case.
3: Tomamos la cinta elástica y procedemos a pegarla en el centro del rectángulo, dejando un espacio adecuado para introducir cada uno de los lapices, para que quede todo a la misma distancia vamos marcando con un lápiz el ancho y pegamos, como pueden ver en las imágenes, luego procedemos a pegar cada rectángulo a la base de nuestro estuche.
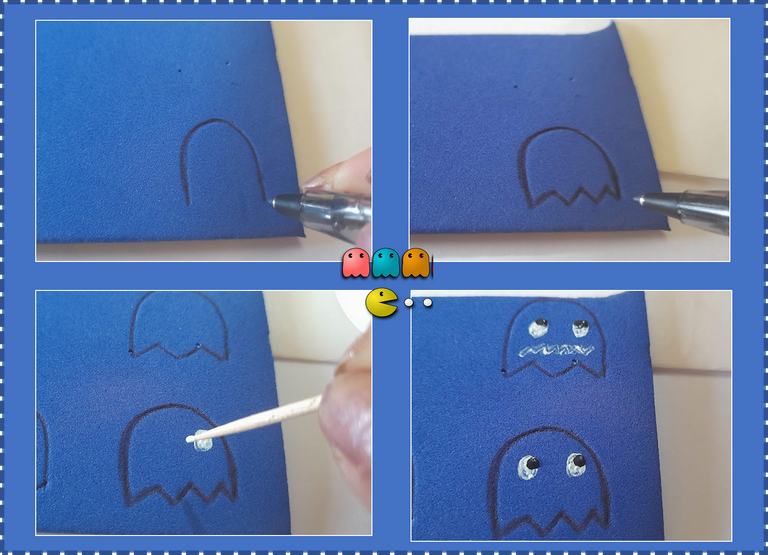
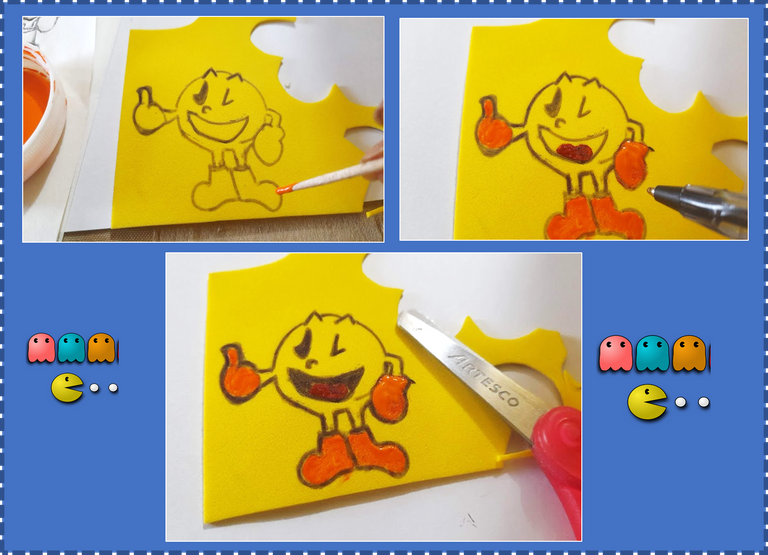
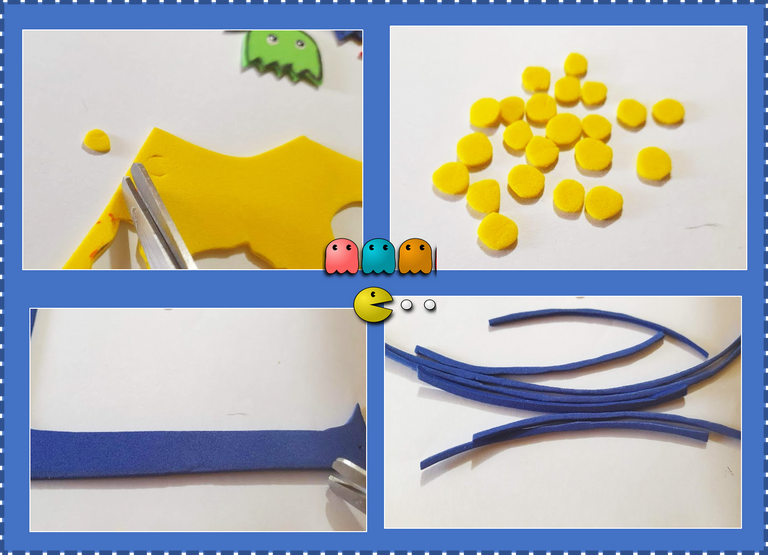
4: Now we proceed to draw on the blue, red and green fomai our ghosts, with the help of a toothpick and black and white paint we make the little eyes, then on the yellow foami we draw the character Pac-Man to which we paint the boots and gloves with orange paint, then we mark with the black pen all the edge of our character and cut out. Then we made several little balls of yellow foami and several strips of blue foami.
4: Ahora procedemos a dibujar en el fomai azul, rojo y verde nuestros fantasmas, con la ayuda de un palillo y pintura blanca y negra le realizamos los ojitos, seguidamente en el foami amarillo dibujamos el personaje Pac-Man al cual le pinte las botas y guantes de pintura naranja, luego remarcamos con el lapicero negro todo el borde de nuestro personaje y recortamos. Después realizamos varios pelotitas de foami amarilla y varias tira de foami azul.
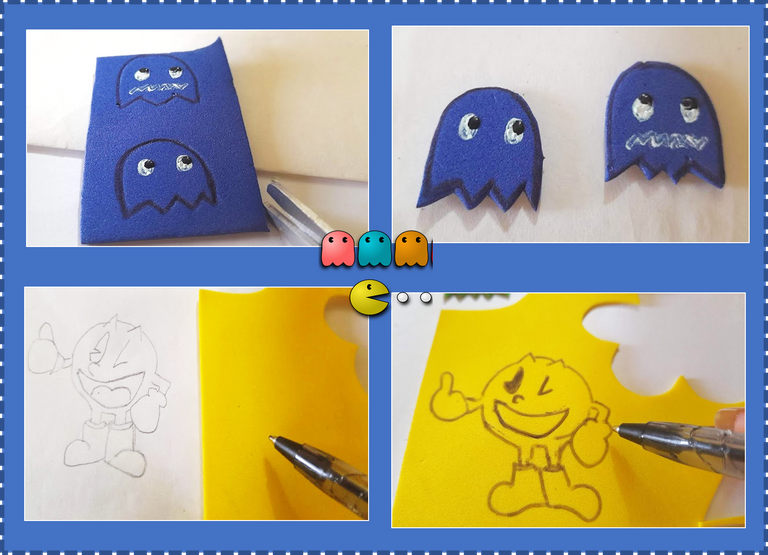
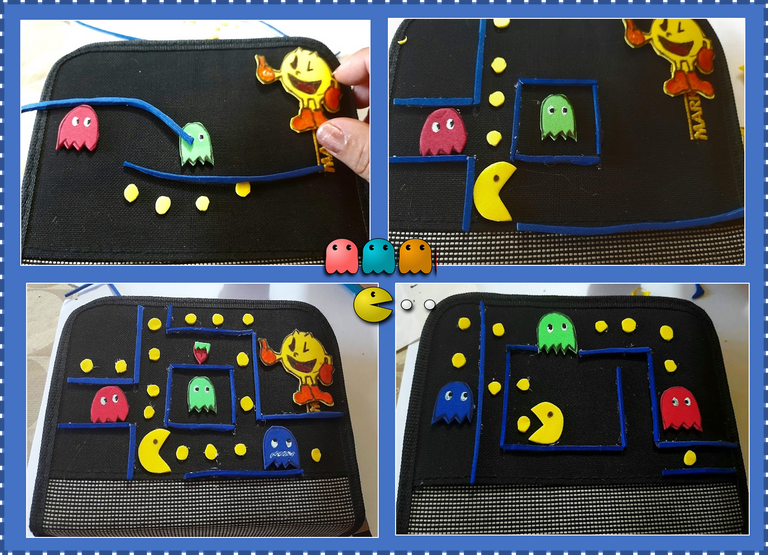
5: We proceed to glue each of the pieces to our case forming a classic Pac-Man video game screen.
5: Procedemos a pegar cada una de las piezas a nuestro estuche formando una pantalla clásica del vídeo juego Pac-Man.
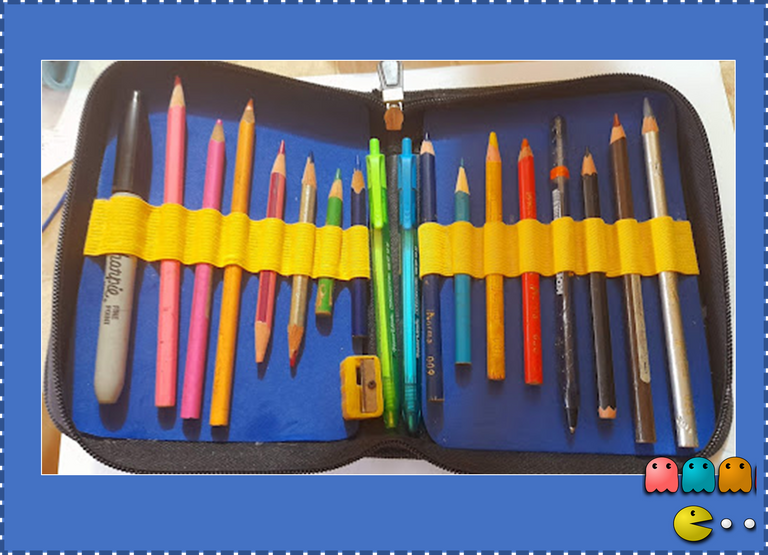
Ready, this is how beautiful and creative I got the pencil case that I made for my youngest son with a lot of love, I hope you liked my project today!
Creative friends, see you in the next post !
Listo, así de hermosa y creativa me quedo la cartuchera que le realice a mi hijo menor con mucho cariño. ¡Espero les haya gustado mi proyecto del día de hoy !
¡ Amigos creativos hasta una próxima publicación !
Fuente Portada
Fuente Separador
Imagen referencial


The photographs were taken with a Samsung A12 smartphone, the text was translated into English with the Google translator.link
The banner was designed on canvas link
Las fotografías fueron tomadas con un teléfono inteligente Samsung A12, el texto fue traducido al ingles con el traductor de Google.link
El banner fue diseñado en canvas link
Me encantó 💜.
Amo pac- man 🥰😘💜💋
Buen trabajo.👍🏼😊😉🤗😃😄☺️
Me gustó la técnica.
Gracias por compartir
💐🥀🌼🌻🏵️💮🌹🌷🌸🌺🎉💋
Bella! Excelente trabajo👍🏻
Me recuerdo cuando jugaba ese pac man en el nintendo con mis hijos, por Dios se me cayó la cédula jaja🤭🤭😛. Como siempre mi amiga trayéndonos unas ideas extraordinarias; la cartuchera muy lindas y practica y la decoraste con un juego que a los niños les gusta y así se animan a estudiar☺. Besito amiga
Gracias mi amiga 😘 por tus comentarios. Saludos y bendiciones
Pac-man, ciertamente quedo muy bueno su trabajo. Felicitaciones.