[ENG-ESP] Beautiful Fabric Doll // Hermosa Muñeca de Tela

Greetings and blessings to all my creative people of this great #Hivediy community. I hope you had a great Easter and that this beautiful week that is beginning is full of enthusiasm and creativity. I wish from the bottom of my heart lots of health, creativity and positive energies to all my #Hivediy crafter and artisan friends.
Tonight I am going to show you step by step how to make a beautiful fabric doll, I tell you that this is the first time I make a fabric doll, before I made them but they were made of paper, I confess that I had several days making it because I was not sure how it would look like, but the result was great. The idea of making this beautiful fabric doll is because several days ago my sister in law told me that she wanted to buy a fabric doll for my little niece Maria Alejandra, she is the youngest niece of the family and this was the reason that led me to make this beautiful doll, also I think that a fabric doll is the ideal toy for girls because they can be washed, you can change their clothes, plus you can customize them to your liking. So, my creative friends, don't miss this step by step guide to make this cute fabric doll, let's get started!

Saludos y bendiciones para toda mi gente creativa de esta estupenda comunidad de #Hivediy. Espero que hayan pasado un estupenda Semana Santa y que está linda semana que esta comenzando les sea de mucho entusiasmo y creatividad. Les deseo de todo corazón mucha salud, creatividad y energías positivas a todos mis amigos artesanos y crafteros del #Hive.
En esta noche les voy a mostrar el paso a paso de como realizar una hermosa muñeca de tela, les cuento que esta es la primera vez que realizo una muñeca de tela, antes las hacia pero eran de papel, les confieso que ya tenia varios días haciéndola porque no estaba segura de como me quedaría, pero el resultado fue grandioso. La idea de realizar esta hermosa muñeca de tela es porque hace varios días mi cuñada me comento que ella quería comprarle una muñeca de tela a mi sobrinita Maria Alejandra ella es la sobrina mas pequeñita de la familia y este fue el motivo que me llevo a realizar esta hermosa muñeca, ademas yo pienso que una muñeca de tela es el juguete ideal para las niñas ya que estas pueden ser lavadas, se le puede cambiar la vestimenta, ademas las puedes personalizar a tu gusto. Entonces mis amigas creativas no se pierdan este paso a paso para realizar esta linda muñeca de tela. ¡¡Comencemos!!
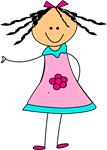

- White fabric
- Printed fabric
- Thread/needle
- Wadding
- Blue yarn
- Lace
- Black stones
- Silicon
- Scissors
- Doll mold
- Tela blanca
- Tela estampada
- Hilo/aguja
- Guata
- Estambre azul
- Encaje
- Piedras negras
- Silicon
- Tijera
- Molde muñeca
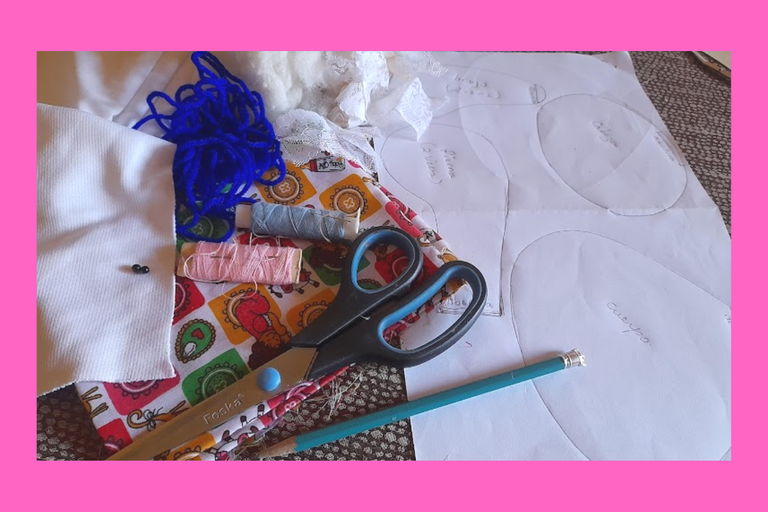

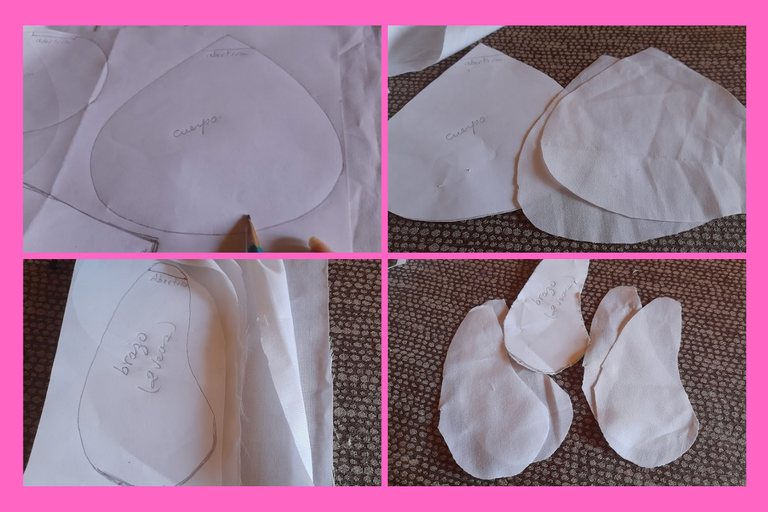
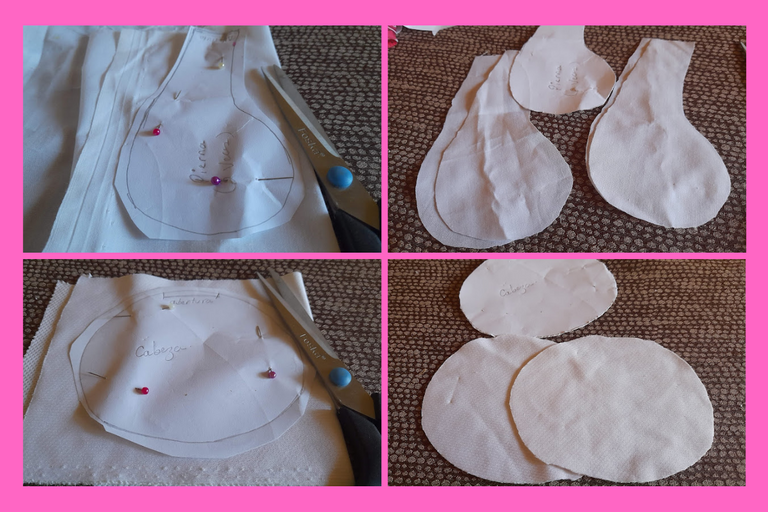
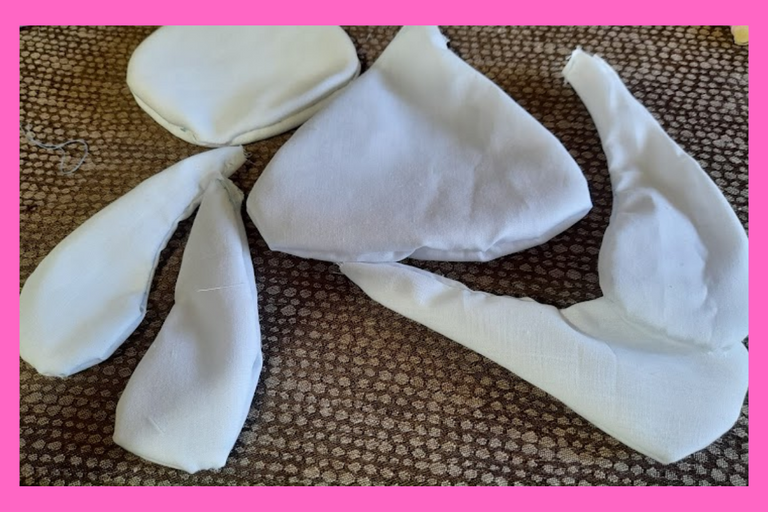
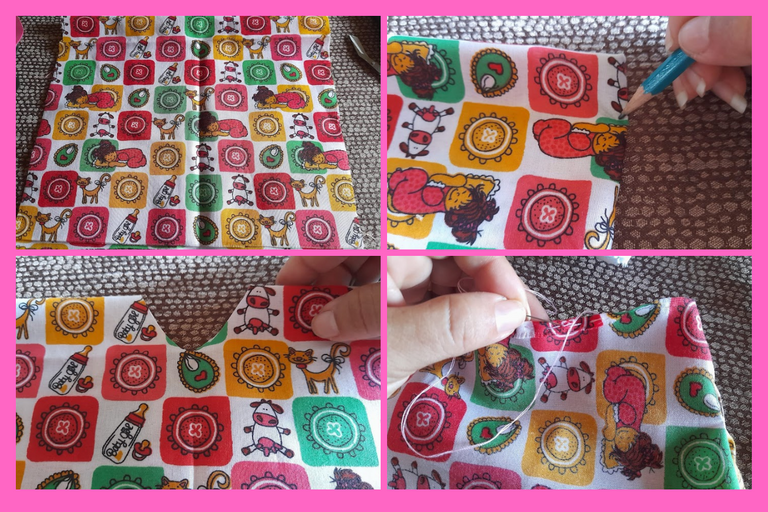
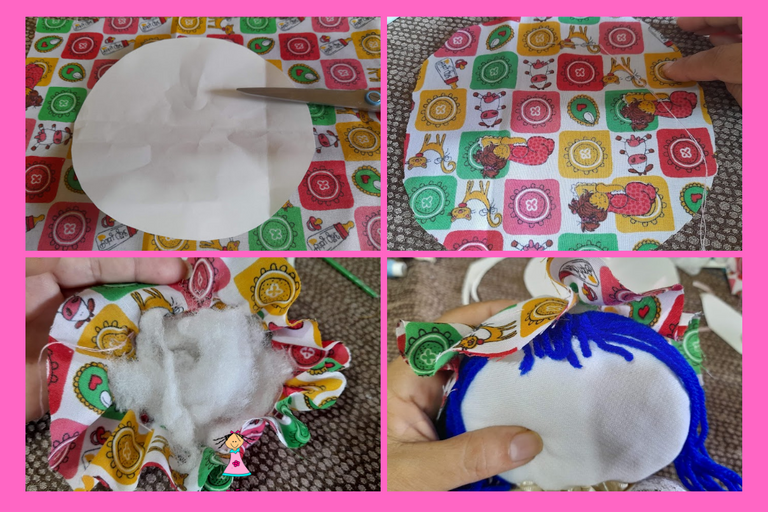
1: We take each of the pieces of our doll mold and mark them on the white fabric, then cut them out.
1: Tomamos cada una de las piezas de nuestro molde de muñeca y los marcamos en la tela blanca, luego recortamos.
2: Once each piece of our doll is cut out, we proceed to sew along the edges, remembering to leave a small opening in each of the pieces, then with the help of the tip of the scissors we flip each piece, as you can see in the pictures.
2: Una vez recortadas cada piezas de nuestra muñeca procedemos a coser por los bordes, recordando que deben dejar una pequeña abertura en cada una de las piezas, luego con la ayuda de la punta de la tijera volteamos cada pieza, como pueden observar en las imágenes.
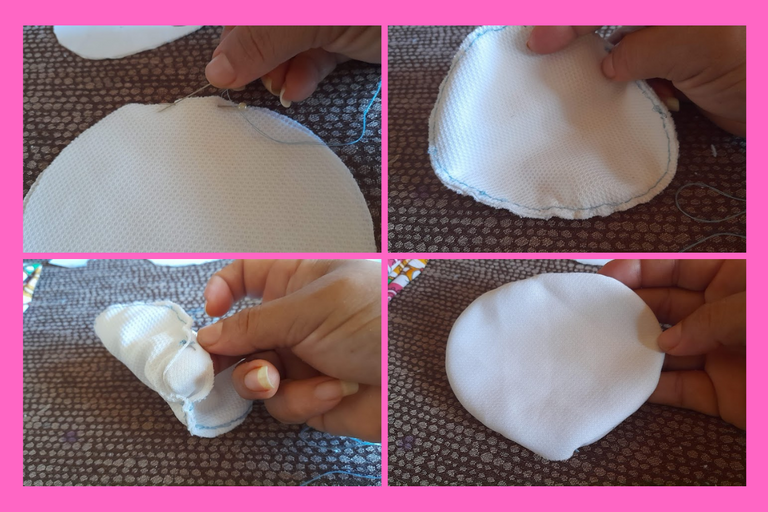
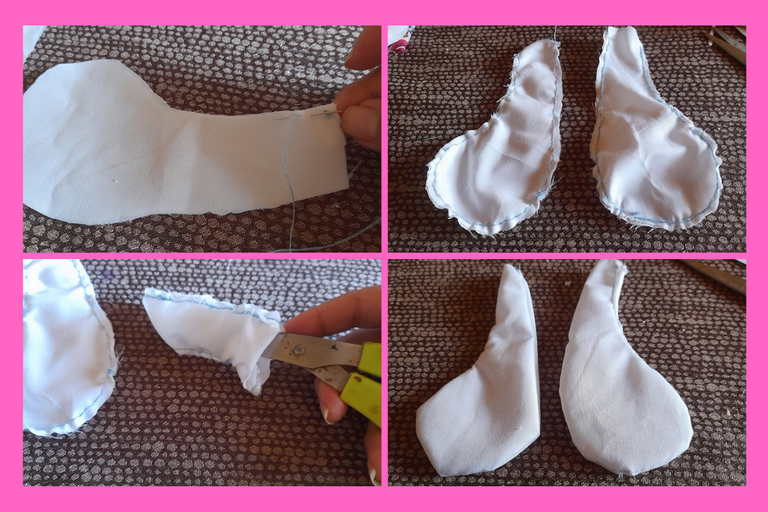
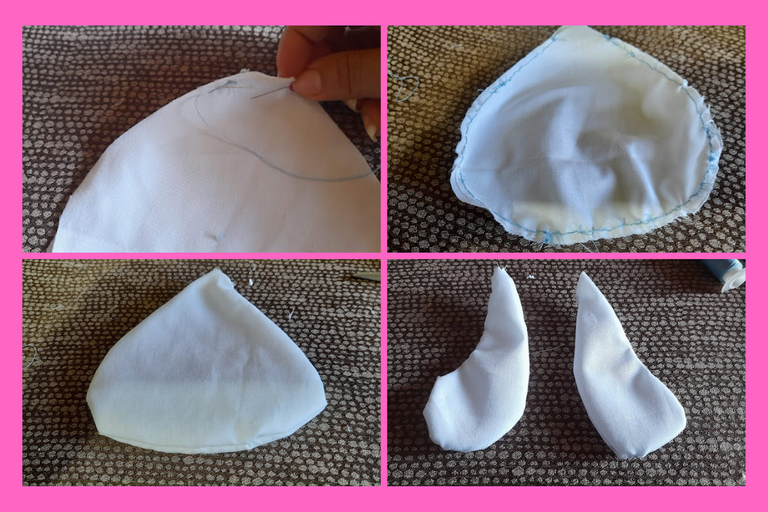
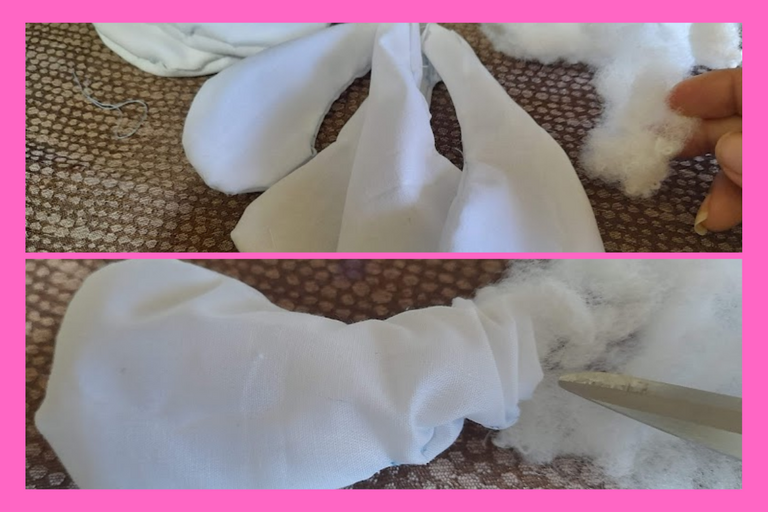
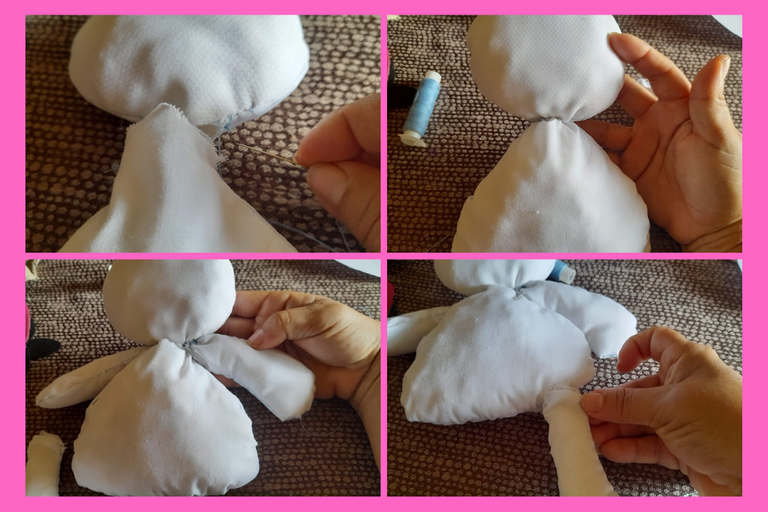
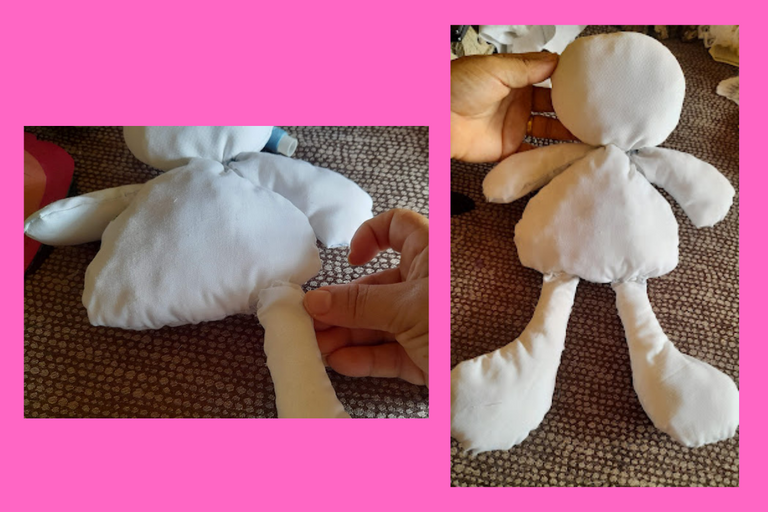
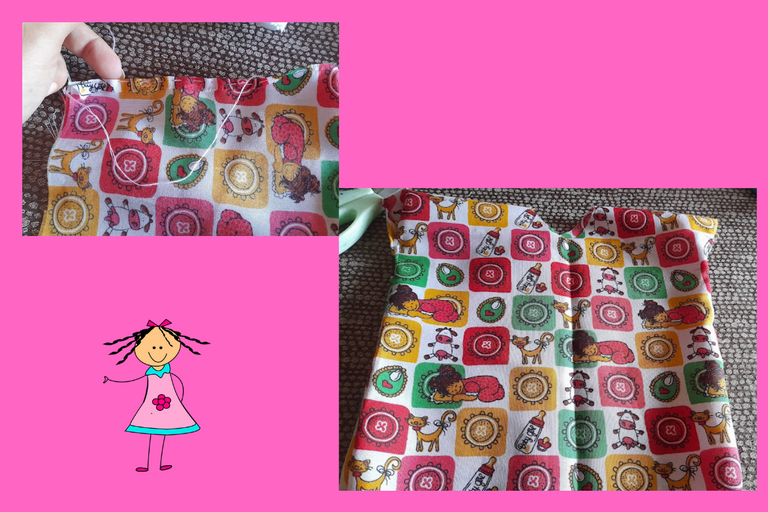
3: Now we fill with the wadding each of the pieces of our doll, then we proceed to sew the head to the body, then we sew the arms and legs, thus assembling our fabric doll.
3: Ahora rellenamos con la guata cada una de las piezas de nuestra muñeca, seguidamente procedemos a coser la cabeza al cuerpo, luego cosemos los brazos y las piernas, armando así nuestra muñeca de tela.
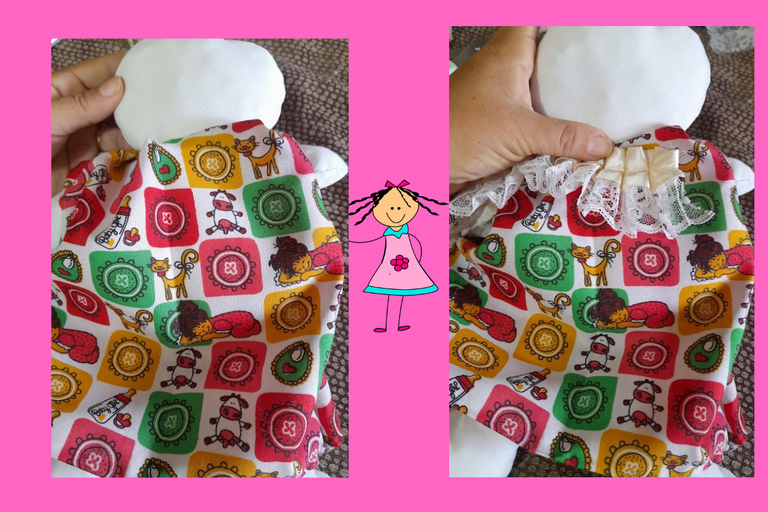
4: We cut a rectangle of 18 centimeters wide by 20 centimeters high of the printed fabric to make a dress for our doll, then we fold in half the rectangle and cut in one corner to make the neck opening, then we sew on the sides leaving a small opening to pass the arms, then we put the dress on the doll and decorate the neck with lace.
4: Cortamos un rectángulo de 18 centímetro de ancho por 20 centímetros de alto de la tela estampada para realizar un vestido a nuestra muñeca, luego doblamos a la mitad el rectángulo y recortamos en una esquina para realizar la abertura del cuello, después cosemos por los lados dejando una pequeña abertura para pasar los brazos, seguidamente le colocamos el vestido a la muñeca y decoramos el cuello con encaje.
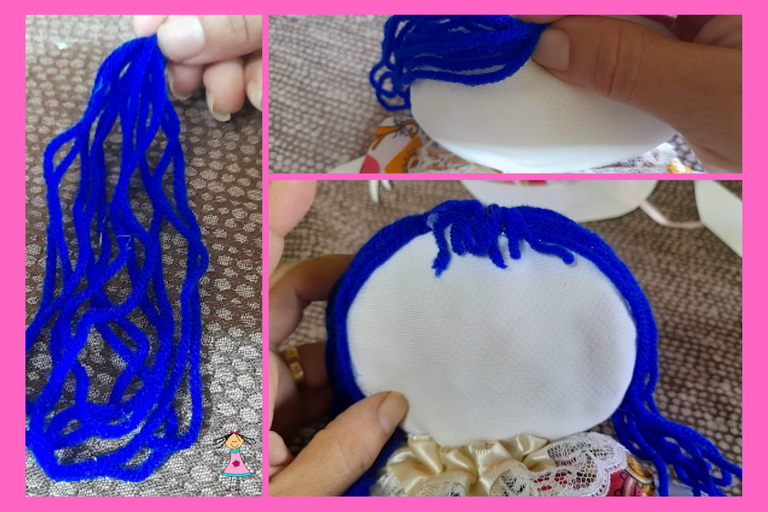
5: To make the hair we take the yarn and roll it several times of the desired size, then we proceed to glue it to the head. We cut a circle of printed fabric of 15 centimeters we cook leaving about 4 centimeters of edge to form a cap, we fill it with a little wadding and then we proceed to glue it to the head.
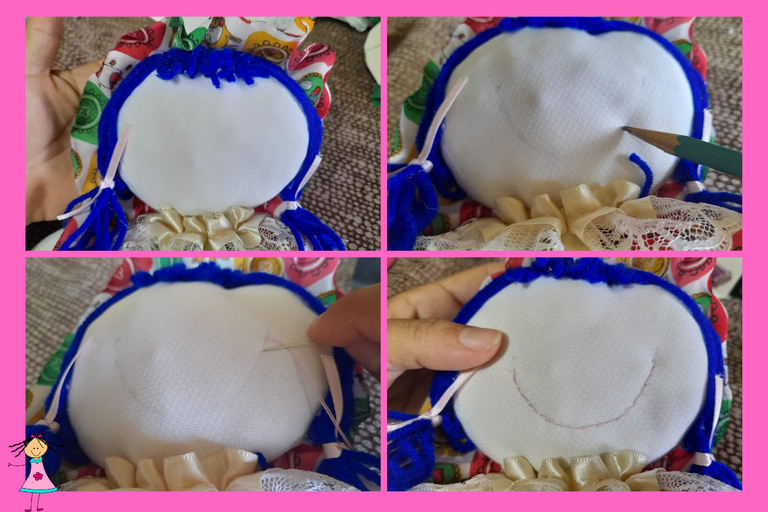
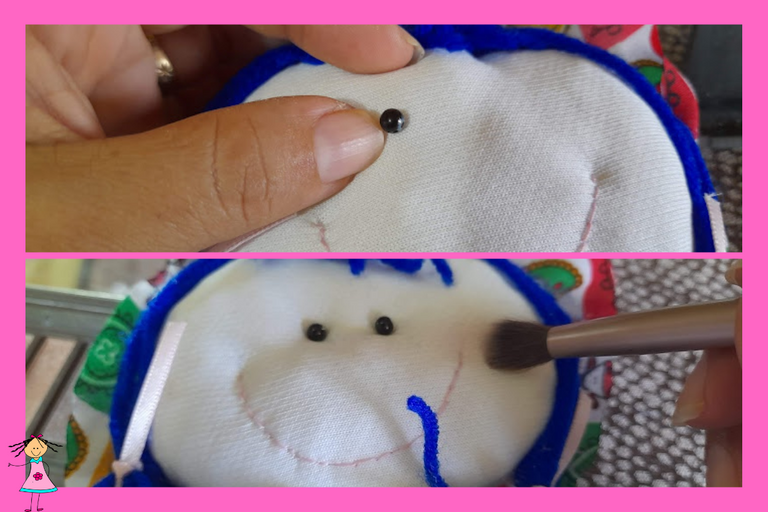
Then with a pencil we mark the silhouette of a smile, then with the needle threaded with pink thread we highlight the smile and finally we sew the little black stones to form the eyes of our doll and we put a little powder to highlight her cheeks.
5: Para realizar el cabello tomamos el estambre y lo enrollamos varias veces del tamaño deseado, luego procedemos a pegarlo a la cabeza. cortamos un circulo de tela estampada de 15 centímetro cocemos dejando unos 4 centímetros de borde para formar un gorro, lo rellenamos con un poco de guata y luego procedemos a pegarlo a la cabeza.
Después con un lápiz marcamos la silueta de una sonrisa, luego con la aguja enhebrada con hilo rosado resaltamos la sonrisa y por ultimo le cosemos las piedritas negras para formar los ojitos de nuestra muñeca y le colocamos un poco de polvo para resaltar sus mejillas.
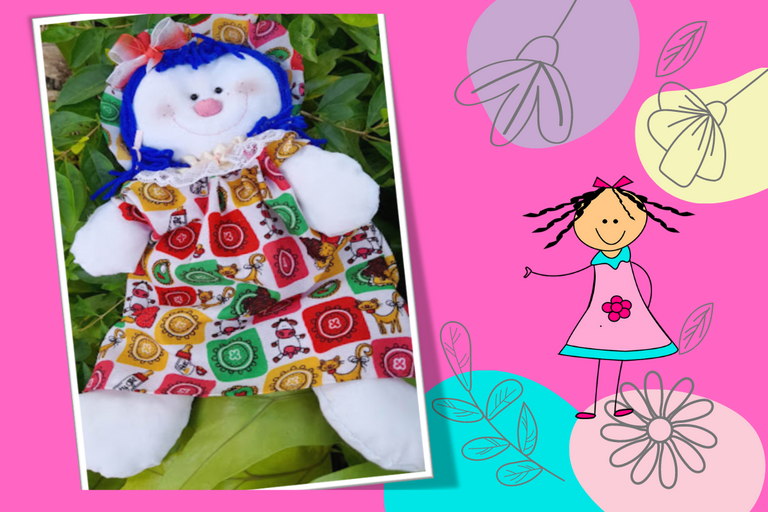
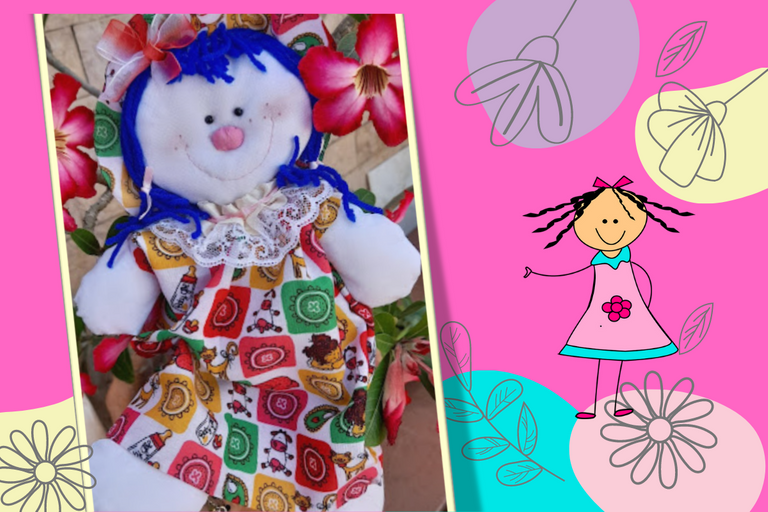
Ready this is the final result of my beautiful fabric doll, I was impressed with the result I got at the end, I'm almost sure that my pretty niece Maria will love her doll, I hope you liked my project today!
Creative friends, see you next time for a new post!
Listo este es el resultado final de mi Hermosa Muñeca de tela, quede impresionada con el resultado que obtuve al final, estoy casi segura que a mi linda sobrinita Maria le va encantar su muñeca. ¡Espero les haya gustado mi proyecto de hoy!
¡ Amigos creativos hasta una próxima publicación !

Portada y plantillas elaboradas en canva
Fuente Separador
Molde muñeca

The photographs were taken with a Samsung A12 smartphone, the text was translated into English with the Google translator.link
The banner was designed on canvas link
Las fotografías fueron tomadas con un teléfono inteligente Samsung A12, el texto fue traducido al ingles con el traductor de Google.link
El banner fue diseñado en canvas link
Hola amiga, te quedó súper linda, siempre me han gustado estás muñecas, de pequeña recuerdo que tenía una que me regaló mi abuela.
Se ve fácil de realizar, explicas muy bien el paso a paso.
Hola amiga, que chevere que te gusto, gracias por comentar y apoyar mi proyecto. Saludos
Linda muñeca de tela, a mi sobrina nieta le encantan estas muñecas, son muy buena para los niños ya que pueden jugar con ellas sin temor , son suaves. Muy bonito trabajo @janettbrito76
Gracias amiga, me alegra que te haya gustado mi primera muñeca de tela. Abrazos
Que cosita tan linda. Te quedó bella esa muñeca de trapo y muy colorida👍💯🥰. Saludos prima
Hola, hola prima, me alegra mucho que te guste mi muñeca de trapo. Saludos y abrazos.
Thank you for sharing this amazing post on HIVE!
Your content got selected by our fellow curator @rezoanulvibes & you just received a little thank you via an upvote from our non-profit curation initiative!
You will be featured in one of our recurring curation compilations and on our pinterest boards! Both are aiming to offer you a stage to widen your audience within and outside of the DIY scene of hive.
Join the official DIYHub community on HIVE and show us more of your amazing work and feel free to connect with us and other DIYers via our discord server: https://discord.gg/mY5uCfQ !
If you want to support our goal to motivate other DIY/art/music/homesteading/... creators just delegate to us and earn 100% of your curation rewards!
Stay creative & hive on!
Te quedó bien linda me gusta mucho las muñecas de trapo.💯🌹