DIY - Postoperative girdle for your Cat / Hazlo tú - Faja postoperatoria para tu gata (Eng/Esp)
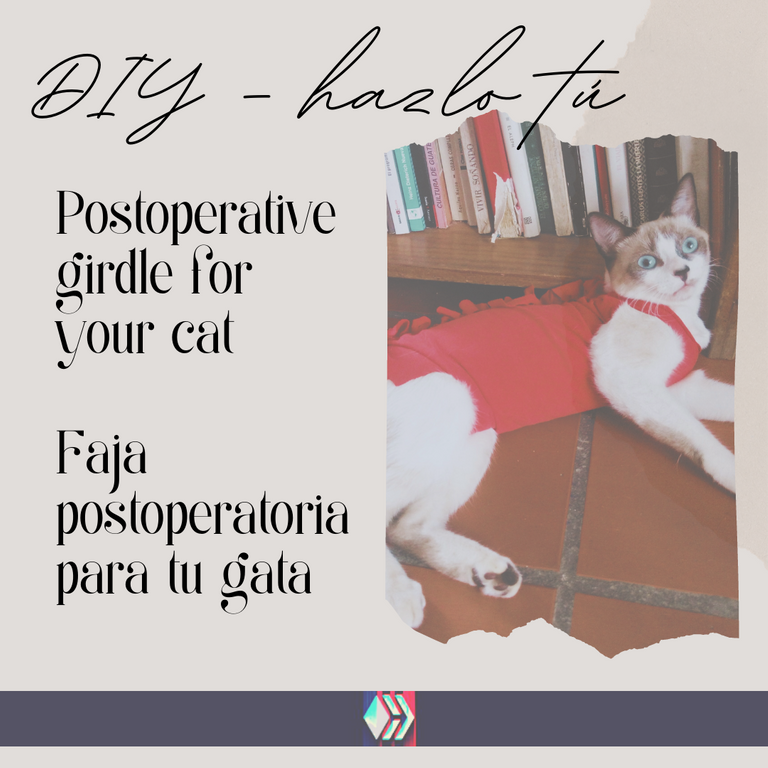

Greetings, dear pet-loving community. As you may recall, in a previous post I told you about the medical emergency I had with my cat Pastrami. She was diagnosed with Pyometra and the result was a surgical intervention, the same one they routinely perform for spaying. Like any operation, the subsequent recovery requires a series of care, among which is to place her in a girdle.
If you sterilized your cat, either by choice or because of a pyometra, you must be very careful with her recovery process. All of us who have had cats know how difficult it is to keep these little companions still in one place without their instincts leading them to want to jump, run, jump and climb or go outside. That's why you have to pay so much attention to their wound care. I know it's super hard, but you must avoid, at least for the first week, going out in the yard or outside, jumping or climbing trees, furniture or stairs. To have any kind of rough play or confrontation with any other animal (another cat or a dog).
The reason for this extreme care is to prevent his wound from getting infected or the stitches from the surgery from coming out. A postoperative girdle will be your best ally when it comes to taking care of his wound. Especially if you do not want to place a cone. This garment will prevent any foreign or dirty element from getting into your wound, or insects from getting into it, or from licking the wound or even trying to remove the stitches. And unlike the cone, it will allow you more mobility.
The postoperative girdle can be purchased at veterinary clinics or pet specialty stores. But you can also make it at home with very few materials that you surely have at hand. Making it is very easy and fast. It will only take you about 30 minutes. I assure you that it will take you longer to put it on your kitty than to make it.
This post I bring you today is to teach you how to make a postoperative girdle.
Saludos, querida comunidad de amantes de las mascotas. Como recordarán, en una publicación anterior les conté sobre la urgencia médica que tuve con mi gata Pastrami. Le diagnosticaron Piometra y el resultado fue una intervención quirúrgica, la misma que realizan de rutina para la esterilización. Como toda operación, la recuperación posterior amerita una serie de cuidados entre los que está colocarle una faja o body.
Si esterilizaste a tu gata, bien por decisión propia o por una piometra, debes tener mucho cuidado con su proceso de recuperación. Todos los que hemos tenido gatos sabemos lo difícil que es mantener a estos compañeritos quietos en un lugar sin que sus instintos los lleven a querer saltar, correr, brincar y trepar o irse a la calle. Esa es la razón por la que debes prestar muchísima atención al cuidado de su herida. Sé que es superdifícil, pero debes evitar por todos lo medios que, por lo menos la primera semana, salga al patio o a la calle, que brinque o escale árboles, muebles o escaleras. Que tenga algún tipo de juego brusco o enfrentamiento con algún otro animal (otro gato o algún perro).
La razón de este extremo cuidado es evitar que su herida se infecte o se le salgan los puntos de la cirugía. Una faja posoperatoria será tu mejor aliado a la hora de cuidar de su herida. Sobre todo si no deseas colocarle un Cono. Esta prenda evitará que algún elemento extraño o sucio se introduzca en su herida, o que se le paren insectos, o que se lama la herida e incluso que intente quitarse los puntos. Y a diferencia del cono les permitirá más movilidad.
La faja o body posoperatorio puede ser adquirida en clínicas veterinarias o tiendas especializadas para mascotas. Pero también puedes hacerla en tu casa con poquísimos materiales que seguro tienes a mano. Hacerla es muy fácil y rápido. Solo te tomará unos 30 minutos. Te aseguro que tardarás más en colocárselo a tu minina que hacerlo.
Esta publicación que hoy te traigo es para enseñarte a hacer una fajita o body posoperatorio.

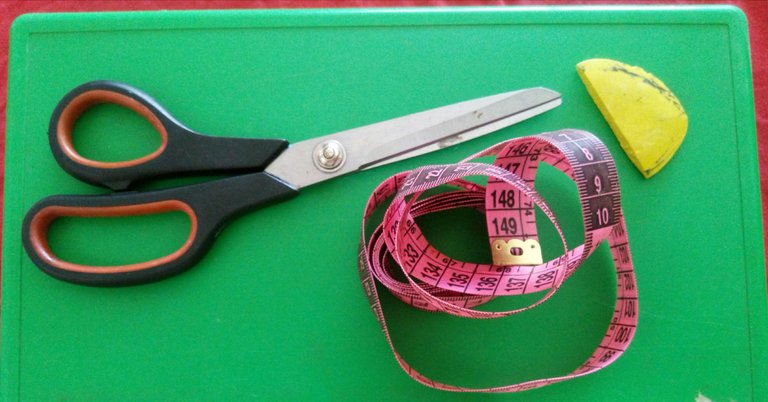
You will only need:
- Fabric scissors
- Tape measure
- Sewing chalk (or marker, or pencil)
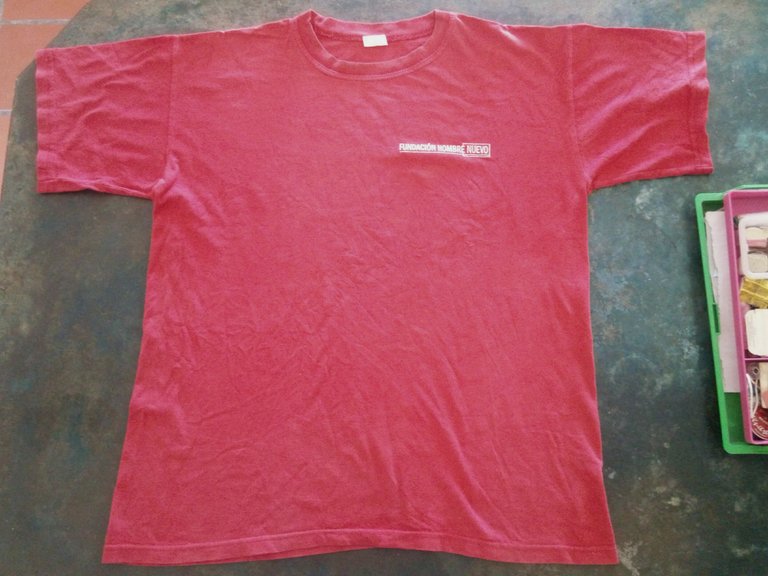
- An unused t-shirt, preferably large (Make sure it is clean and cotton, without prints so that the wound is as fresh and ventilated as possible).
Materiales
Solo necesitarás:
– Tijeras para tela
— Cinta métrica
– Tiza de costura (o marcador, o lápiz)
– Una franela que no utilices, preferiblemente grande (Que esté limpia y que sea de algodón, sin estampados para que la herida esté lo más fresca y ventilada posible.)
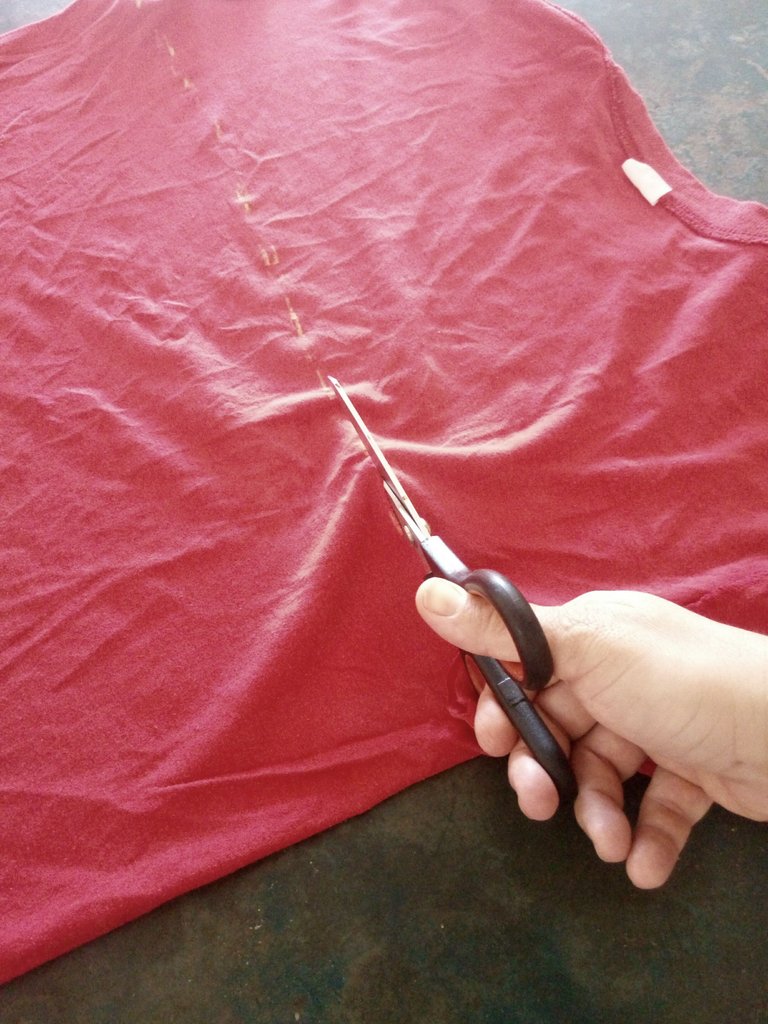
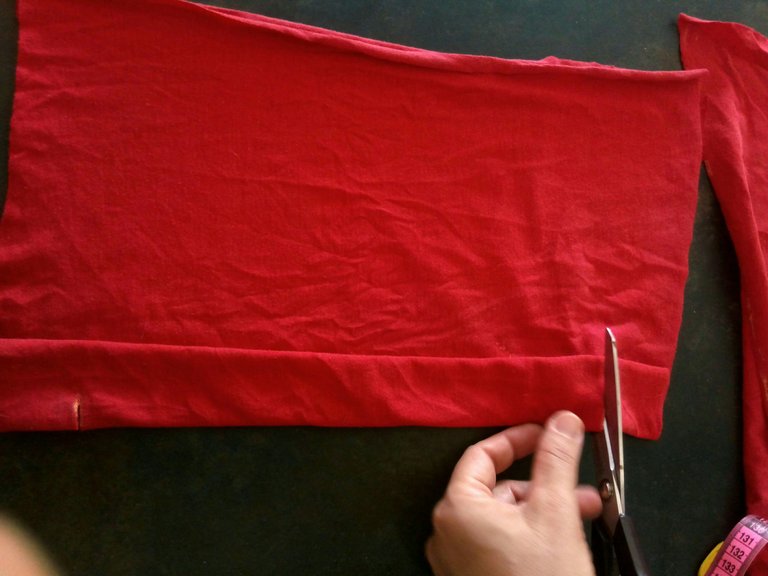
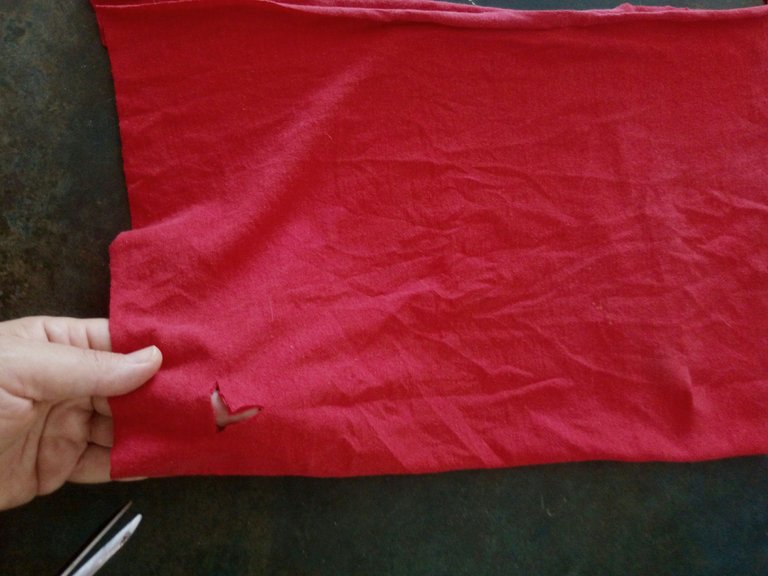
Cut t-shirt under the sleeves, in a straight line, from one sleeve to the other. The idea is to completely remove the sleeves and the collar.
Paso 1
Corta la franela debajo de las mangas, en línea recta, de una manga hasta la otra. La idea es retirar completamente las mangas y el cuello.
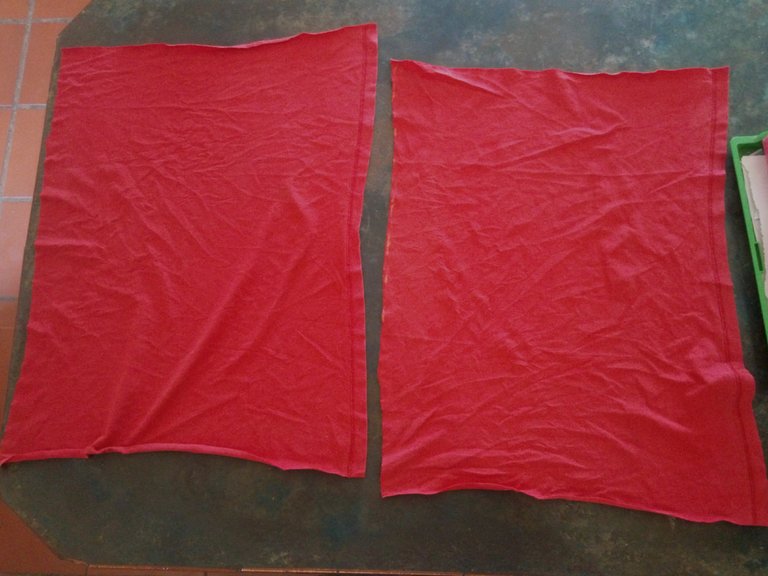
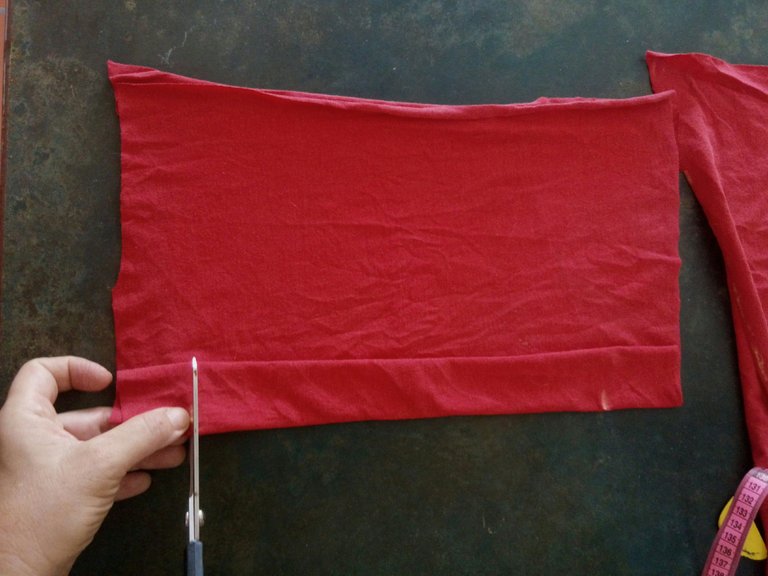
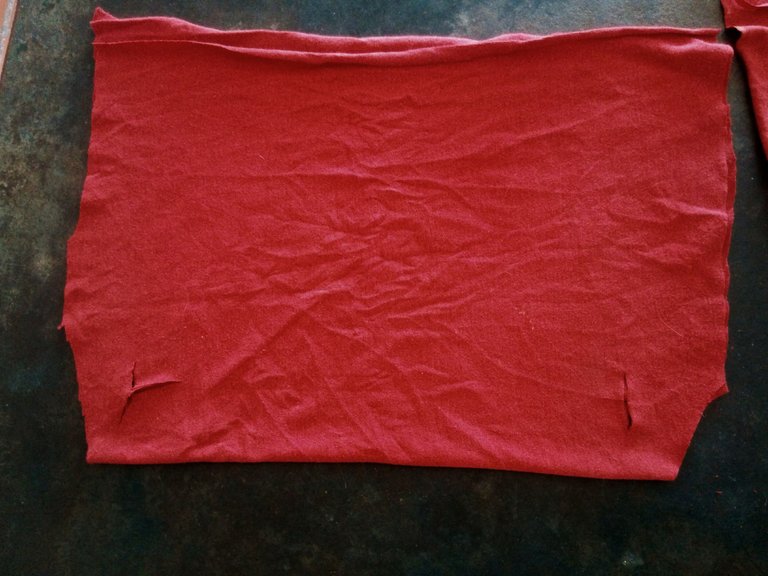
Cut through the joined ends of the T-shirt to get two rectangles or squares of fabric, depending on how long your T-shirt is. You can use them to make two sashes, so you have a spare while you wash one.
Paso 2
Corta por los extremos unidos de la franela para obtener dos rectángulos o cuadrados de tela, dependiendo de lo larga que sea tu franela. Te servirán para hacer dos fajas, de este modo tienes otra de repuesto mientras lavas una.

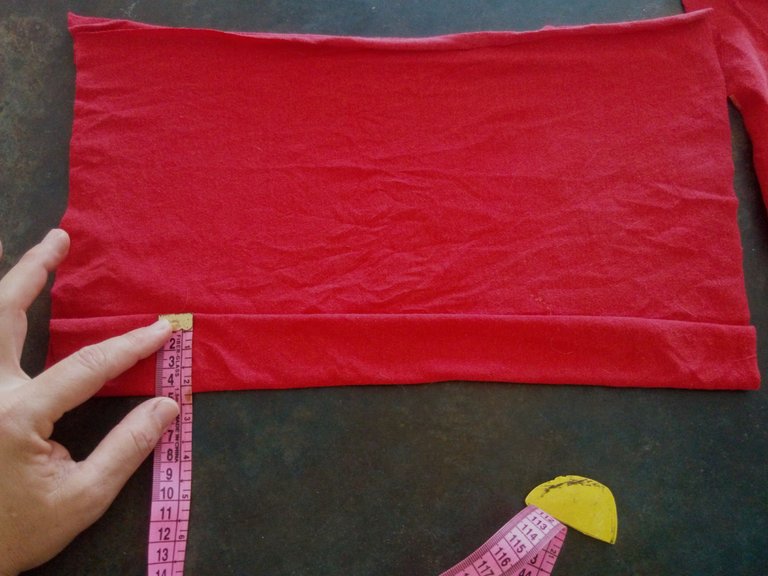
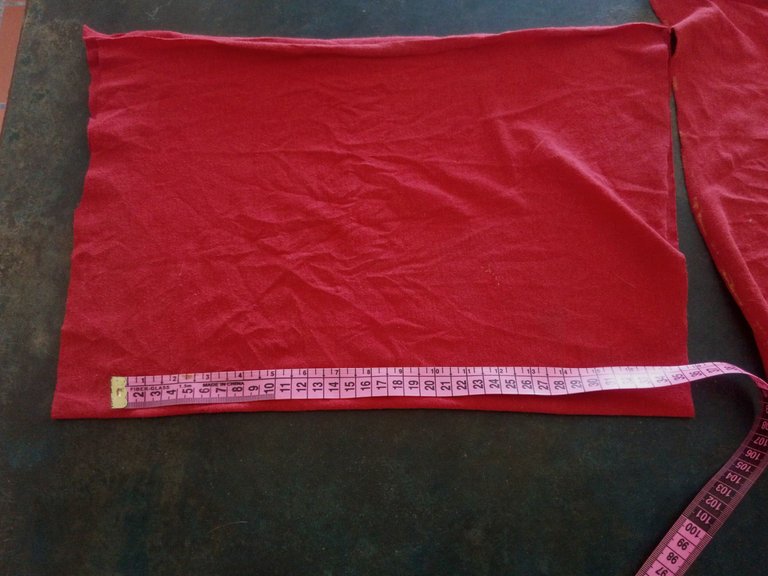
Measure your cat. You should measure the distance between the back and front legs. Of course this is an approximation, as your cat is unlikely to stand still.
Paso 3
Mide a tu gata. Debes tomar la medida de la distancia entre las patas traseras y delanteras. Por supuesto que es un aproximado, ya que difícilmente tu gata se quede quieta.
Fold the rectangle in half and make a fold about three centimeters across the folded end of the cloth.
Measure the fabric and make two marks according to the distance between your cat's paws.
Paso 4
Dobla el rectángulo a la mitad y haz un pliegue como de tres centímetros por el extremo doblado de la tela.
Mide la tela y haz dos marcas de acuerdo a la medida de la distancia entre las patas de tu gata.
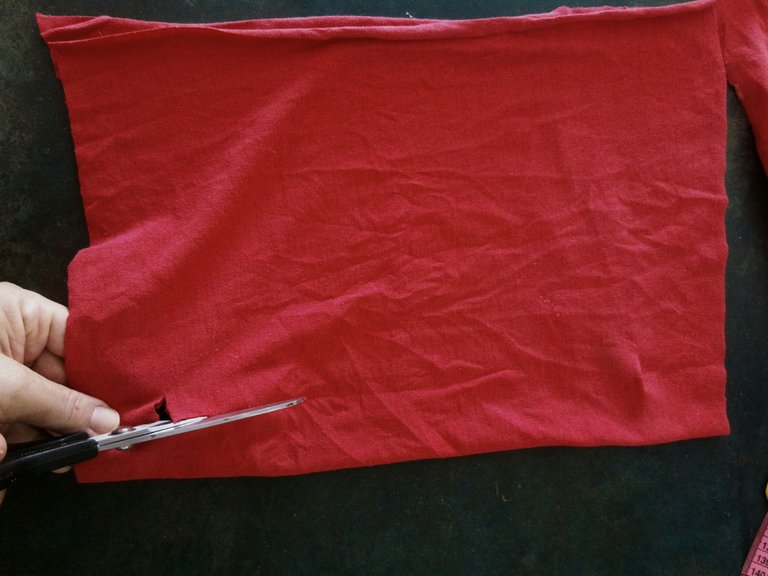
With the scissors make two small openings, of two centimeters, at the height of your cat's paws.
Paso 5
Con la tijera haz dos pequeñas aberturas, como de dos centímetros, a la altura de la medida de las patas de tu gata.
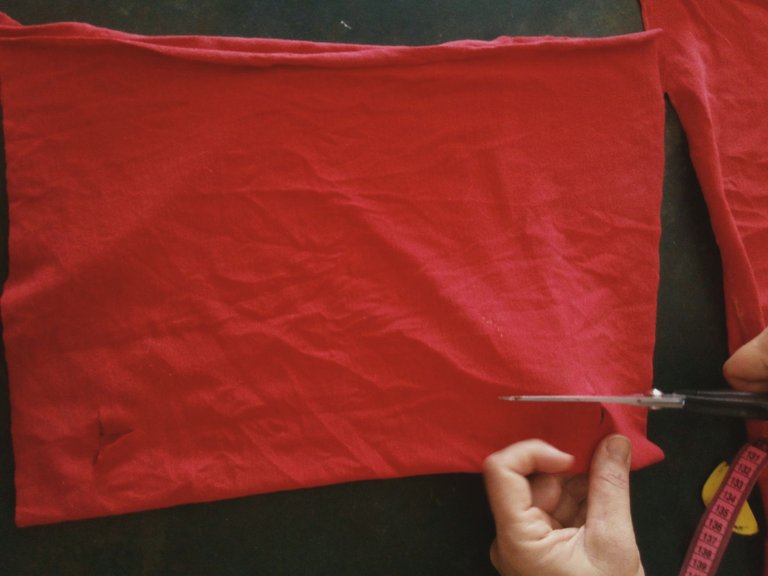
Unfold the fold and at each opening make another perpendicular cut, inward.
The ones on the back legs should be a little wider since their thighs are larger than the front ones.
Paso 6
Desdobla el pliegue y en cada abertura haz otro corte perpendicular, hacia adentro.
Los de las patas de atrás deben ser un poco más amplios ya que sus muslos son más grandes que los de adelante.
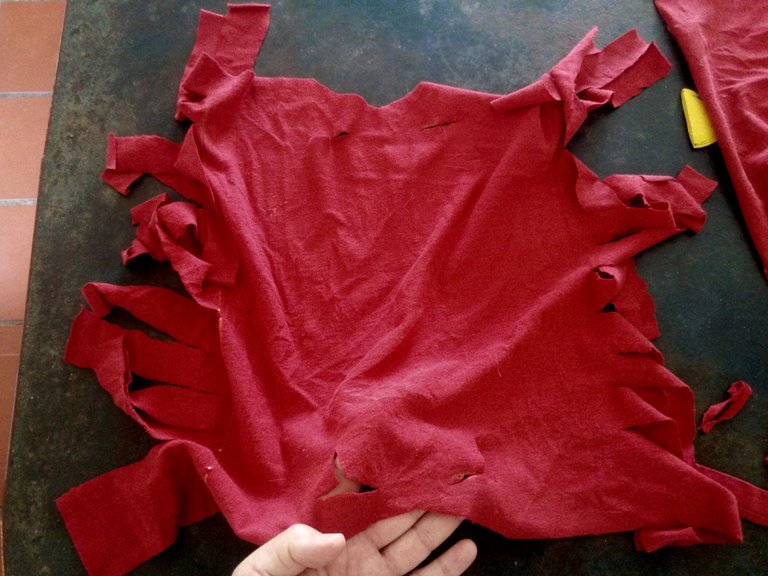
Make a diagonal cut on the folded corners of the fabric, as if making a triangle. The one in the back should be a little wider than the one in the front. This is very important because the cut in the front will allow for more comfort and fit of your cat's neck, and the one in the back will give her enough room to relieve herself without soiling the fabric.
Paso 7
Haz un corte diagonal en las esquinas dobladas de la tela, como haciendo un triángulo. El de la parte trasera debe ser un poco más amplio que es de la parte delantera. Esto es muy importante porque el corte en la parte delantera permitirá más comodidad y ajuste del cuello de tu gata, y el de la parte de atrás le dará espacio suficiente para hacer sus necesidades sin que ensucie la tela.
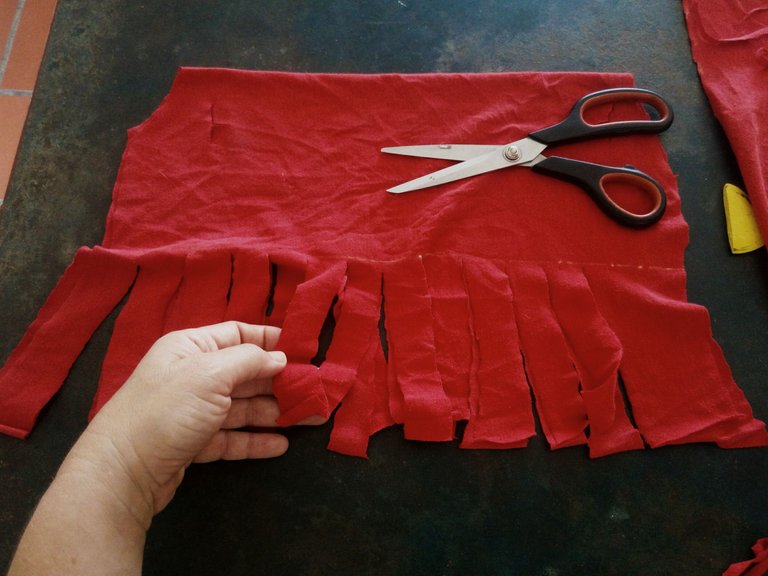
On the opposite side of the fabric, but not yet unfolded, cut strips up to the middle of the fabric or a little lower. These will serve to close and adjust the sash on your cat's body.
That's it!. This way it stays open.
Paso 8
En la parte contraria de la tela, pero aún sin desdoblar, corta tiras hasta la mitad de la tela o un poquito más abajo. Estas servirán para cerrar y ajustar la faja en el cuerpo de tu gata.
¡Listo! Eso es todo. Así queda abierto.
Now the hardest part, putting it on your cat. To put it on you will need help and patience. First introduce the front paws and tie the strips at that end, then introduce the hind paws and tie the strips at the other end. Then proceed to tie all the strips one by one.
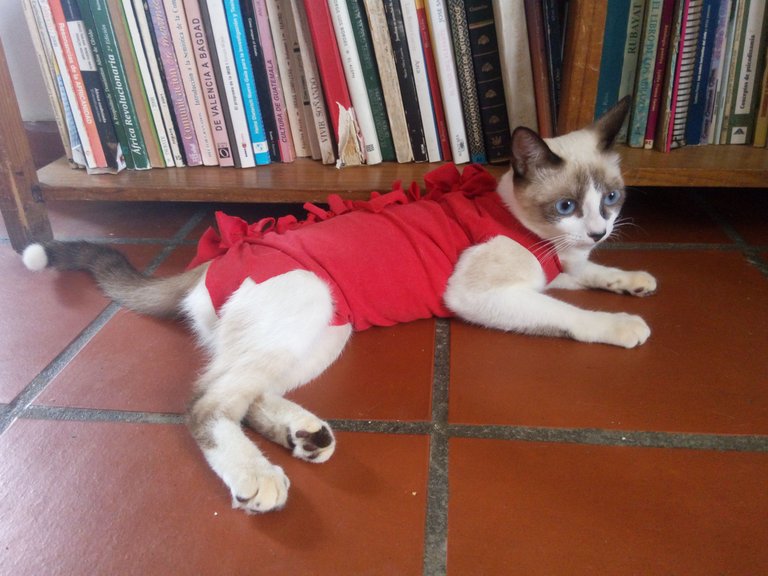
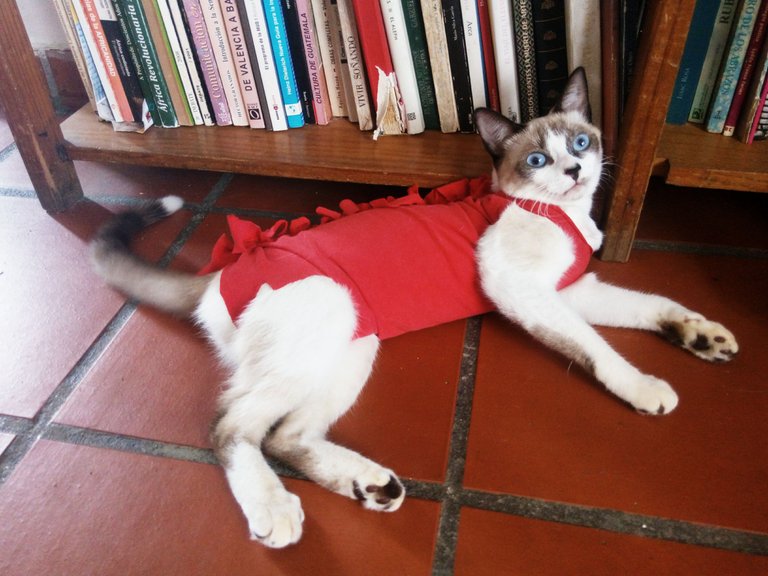
This is how Pastrami was left with his girdle. At first it was hard for him to walk, he was a little clumsy, but that's normal, then he gets used to it. The interesting thing is that, as it is something strange for them, they are calmer.
Ahora la parte más difícil, colocárselo a tu gata. Para colocárselo necesitarás ayuda y paciencia. Primero introduce las patas delanteras y amarra las tiras de ese extremo, luego introduce las patas traseras y amarra las tiras de ese otro extremo. Luego procede a amarrar una por una todas las tiras.
Así quedó Pastrami con su faja. Al principio le costaba caminar, estaba un poco torpe, pero es normal, luego se acostumbran. Lo interesante es que, como es algo extraño para ellas, están más tranquilas.
So much for today's post. I hope it has been useful. Remember to wash the girdle often, since the idea is precisely to keep the wound clean.
Happy Caturday, until a new post.
The photos used here were taken by me with my Blu R1 Plus cell phone.
The cover image was edited by me in Canvas.
Hasta aquí mi publicación de hoy. Espero haya sido de utilidad. Recuerda lavar seguido la fajita, ya que, precisamente la idea es mantener limpia su herida.
Feliz Caturday, hasta un nuevo post.
Las fotos aquí utilizadas fueron tomadas por mí con mi teléfono celular Blu R1 Plus.
La imagen de portada fue editada por mí en Canvas.
Son lo mejor, así se asegura que no quiten los puntos, pero evitamos el uso del collar isabelino que es tan molesto. Gracias por este tutorial :)
Gracias a ti por leer mi publicación y dejar tu amable comentario.
Ciertamente, son una maravilla.
Saludos, feliz Caturday.
Congratulations @isaomaroon! You have completed the following achievement on the Hive blockchain and have been rewarded with new badge(s) :
Your next target is to reach 800 replies.
You can view your badges on your board and compare yourself to others in the Ranking
If you no longer want to receive notifications, reply to this comment with the word
STOP