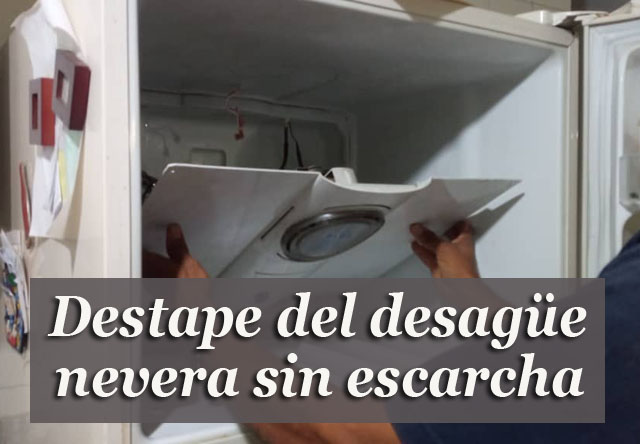
Destapar desagüe de nevera sin escarcha | Unclogging frost-free refrigerator drains
La nevera es de los electrodomésticos más útiles en el hogar, nos permite conservar los alimentos y tener bebidas frescas para cuando lo necesitemos. A lo largo del tiempo el diseño de las neveras se ha vuelto muy eficiente y en realidad son bastantes rendidoras, están pensadas para durar mucho, mucho tiempo, sin que den ningún tipo de problemas.
Pero a veces olvidamos que este electrodoméstico, como todos, necesita algún mantenimiento. Y nos damos cuenta de eso cuando comienza a fallar.
Mi nevera debe tener ya unos veinte años, es de esos modelos que llamamos sin escarcha, de dos puertas, que tiene en la parte superior el congelador.
Hace unos días comenzó a botar agua por la parte de abajo. Esto había ocurrido varias veces, pero siempre se solucionaba de forma mágica. Un buen día dejaba de botar y mi esposa y yo nos quedábamos mirándonos la cara, porque no habíamos hecho nada para corregir el problema.
Pero esta vez fue distinto. Limpiábamos el agua de la parte inferior, debajo del compartimiento de las verduras, y a los dos días comenzaba a gotear de nuevo. El problema de este goteo, aparte de mantener el piso de la cocina mojado todo el tiempo, es que puede oxidar y pudrir la lata de la parte inferior de la nevera, lo que sin duda es un serio problema.
Al principio pensé que yo podría encontrar la solución, busqué en internet y me enteré que la causa de ese problema del agua que se acumula en la parte inferior es por obstrucción del desagüe del congelador.
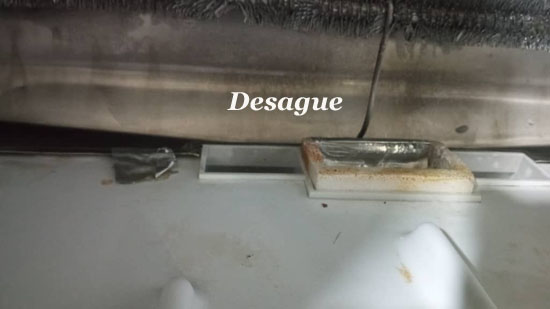
La nevera siempre produce un tipo de escarcha y se derrite durante el ciclo de descanso del compresor, baja por una tubería hasta una bandeja que está en la parte posterior, muy cerca del motor o compresor, y con el calor que genera este se evapora, por eso no vemos nunca agua hacia el interior de la nevera. Pero si este sistema se obstruye el agua no llega hasta esa bandeja, se acumula en el interior y comienza a derramarse por la puerta.

Destapar el desagüe es relativamente sencillo. Yo no me atreví a hacerlo porque había que desconectar algunas cosas y eso siempre me intimida. Así que decidí llamar a un técnico amigo que me resuelve todo lo relacionado con este tipo de problemas. Contar con una persona como él es realmente una bendición.
Lo primero que sorprendió a mi amigo es que yo le dijera que esa parte nunca se había destapado. Le pareció increíble que en veinte años la nevera no hubiese presentado ese tipo de falla. Yo tampoco sabía que era recomendable destapar esa zona para limpiarla adecuadamente, porque se van acumulando muchos residuos que ocasionan la obstrucción del desagüe. Y eso fue lo que me pasó a mí. Por ese descuido de mi parte la tubería se obstruyó.
Esa obstrucción no ocurre de un día para otro. Se van acumulando residuos que impiden que toda el agua baje hacia la bandeja de evaporación. Esa agua se va congelando y comienza un círculo vicioso. Mientras más agua se congela más se tapa el ducto, hasta que el hielo llega a formar un gigantesco tapón.
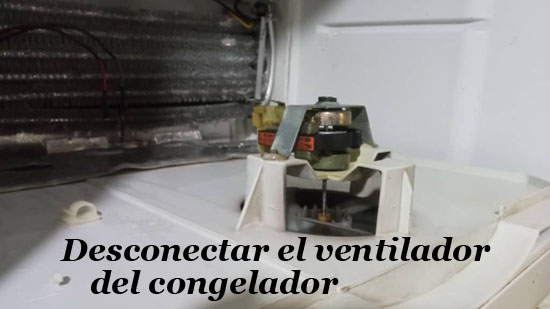
Para llegar hasta el ducto hay que retirar todas las tapas que están en el congelador, estas están atornilladas con unos tornillos de acero, tapados por unos taponcitos redondos. La única pieza eléctrica que hay que desconectar es el ventilador que mueve el frío en el congelador. Una vez retirado todo eso nos encontraremos con una parrilla que ayuda a mantener la zona con la temperatura de congelación.
Una vez que hemos limpiado todo el congelador (no tomé fotos de esa parte porque era realmente vergonzosa la cantidad de sucio que había acumulado mi nevera) procedemos a destapar el ducto. Por castigo ante mi descuido el técnico me puso a limpiar todo aquello y pasé un buen rato en eso.
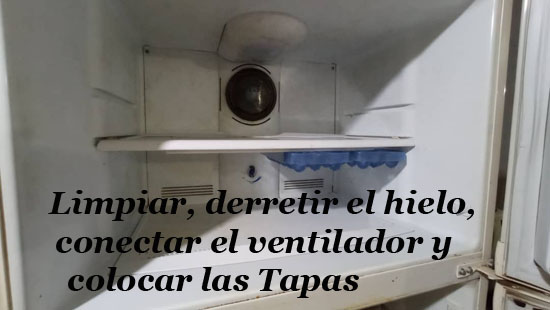
Como la capa de hielo sobre el ducto era tan gruesa teníamos dos opciones. Dejar la nevera desconectada y abierta hasta que todo ese hierro se derritiera, o comenzar a echar pequeñas porciones de agua hirviendo hasta que el hielo se comenzara a derretir. Esto último fue lo que recomendó el técnico.
Luego de usar como dos litros de agua hirviendo todo el hielo se derritió y el agua comenzó a bajar sin problemas.
Luego ensamblamos todo de nuevo y listo, el problema se ha corregido, ya la nevera no echa más agua por debajo.
Si tienen este problema no se descuiden con él. Como les dije, si ustedes son atrevidos quizá lo puedan hacer solos, pero si no, busquen la asistencia del técnico, no vayan a esperar que la lata de la parte inferior se dañe, repararla es bastante costoso.
Si tienen tiempo sin hacer este tipo de mantenimiento no esperen a que la nevera comience a botar agua por debajo. No hay necesidad de llegar a esa situación. No esperen veinte años como yo…
Gracias por tu tiempo.


The refrigerator is one of the most useful appliances in the home, it allows us to preserve food and have cool drinks for when we need them. Over time the design of refrigerators has become very efficient and they are actually quite efficient, they are designed to last a long, long time without giving any problems.
But sometimes we forget that this appliance, like all appliances, needs some maintenance. And we realize that when it starts to fail.
My refrigerator must be about twenty years old, it is one of those models that we call frost-free, with two doors, which has the freezer on top.
A few days ago it started leaking water from the bottom. This had happened several times, but it was always solved in a magical way. One day it would stop leaking and my wife and I would stare at each other because we had done nothing to correct the problem.
But this time it was different. We would clean the water from the bottom, under the vegetable compartment, and within two days it would start dripping again. The problem with this dripping, aside from keeping the kitchen floor wet all the time, is that I was able to rust and rot the can on the bottom of the fridge, which is certainly a serious problem.
At first I thought I could find the solution, I searched the internet and found out that the cause of that problem of water accumulating at the bottom is due to clogging of the freezer drain.
The refrigerator always produces a type of frost and melts during the rest cycle of the compressor, down a pipe to a tray that is in the back, very close to the motor or compressor, and with the heat it generates this evaporates, so we never see water into the refrigerator. But if this system is clogged the water does not reach that tray, it accumulates inside and begins to spill out the door.
Unclogging the drain is relatively simple. I didn't dare to do it because I had to disconnect some things and that always intimidates me. So I decided to call a technician friend of mine who solves everything related to this type of problem. Having a person like him is really a blessing.
The first thing that surprised my friend is that I told him that this part had never been uncovered. He found it incredible that in twenty years the refrigerator had not presented that kind of failure. I also didn't know that it was advisable to unclog that area to clean it properly, because a lot of residues accumulate and cause the drain to clog. And that is what happened to me. Because of that carelessness on my part, the pipe got clogged.
This obstruction does not happen from one day to the next. Debris builds up and prevents all the water from flowing down to the evaporation tray. That water freezes and starts a vicious circle. The more water freezes, the more the duct becomes clogged, until the ice forms a gigantic plug.
To unclog it is necessary to remove all the covers that are in the freezer, these are screwed with steel screws, covered by round plugs. The only electrical part that must be disconnected is the fan that moves the cold in the freezer. Once all that has been removed, we will find a grill that helps to maintain the area at freezing temperature.
Once we have cleaned the entire freezer (I did not take pictures of that part because it was really embarrassing the amount of dirt that had accumulated in my fridge) we proceed to uncover the duct. As punishment for my carelessness, the technician put me to clean all that and I spent quite a while on it.
As the layer of ice on the duct was so thick we had two options. Leave the refrigerator disconnected and open until all that iron melted, or start pouring small portions of boiling water until the ice started to melt. The latter was what the technician recommended.
After using about two liters of boiling water all the ice melted and the water started to go down smoothly.
We then reassembled everything and presto, the problem has been corrected, the refrigerator is no longer pouring water underneath.
If you have this problem don't be careless with it. As I said, if you are daring you may be able to do it on your own, but if not, seek the assistance of a technician, do not wait for the bottom can to be damaged, repairing it is quite expensive.
If you have not done this type of maintenance for a long time, do not wait for the refrigerator to start leaking water from underneath. There is no need to get into that situation. Don't wait twenty years like I did...
Thanks for your time.
Translated with www.DeepL.com/Translator (free version)


Te invito a apoyar este proyecto como witness y a formar parte de esta gran comunidad uniéndote a su Discord en el siguiente enlace:
Discord de la comunidad Cervantes
You can vote for @ocd-witness, with HiveSigner or on Hive Witnesses.
Que buen trabajo @irvinc y lo que más me gustó fue no estar en casa en ese momento sino tomando cafecito en una agradable pastelería compartiendo con una dulce amiga. Saludos😊
Saludos amigo @irvinc en una primera oportunidad me paso con la nevera de mi casa,parecía un manantial por debajo, entonces me puse a investigar por internet viendo vídeo en Youtube, hasta que aprendí a hacer esto, y ahora cada vez que se tapa yo mismo le hago el mantenimiento. Es impresinante la cantidad de información que hay para uno aprender algunas cosas que uno no tenga conocimientos.
20 años... es bastante tiempo.Cuida tu neverita porque estan muy caras amigo @irvinc
Un abrazo
Hola, siempre me ha ocurrido esto y es uno de los mayores misterios mecánicos de la vida,
pero siempre se solucionaba de forma mágica, que lo mencionaras hizo el post muchísimo más relevante para mi, mas aun por que la nevera de la casa tiene cinco años sin mantenimiento jajaja, pronto le toca, si bien no equivalen a los 20 años de tu caballo de guerra, sin duda un electrodomestico super fiel, saludos :)