Amigurumi #134: Articulación en amigurumi / Articulation in amigurumi
¡Hola, espero la estén pasando muy bien!
Hi, I hope you are having a great time!
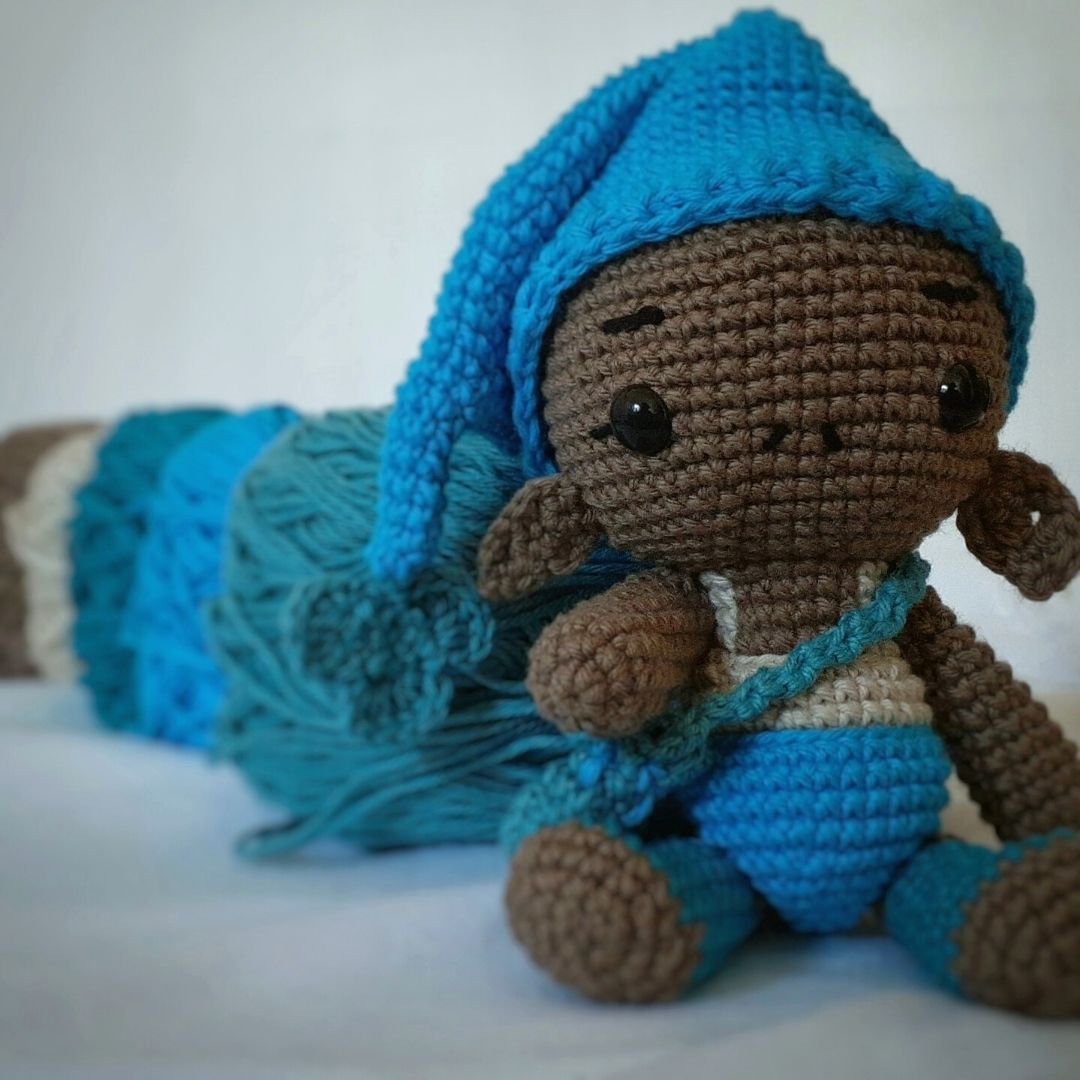
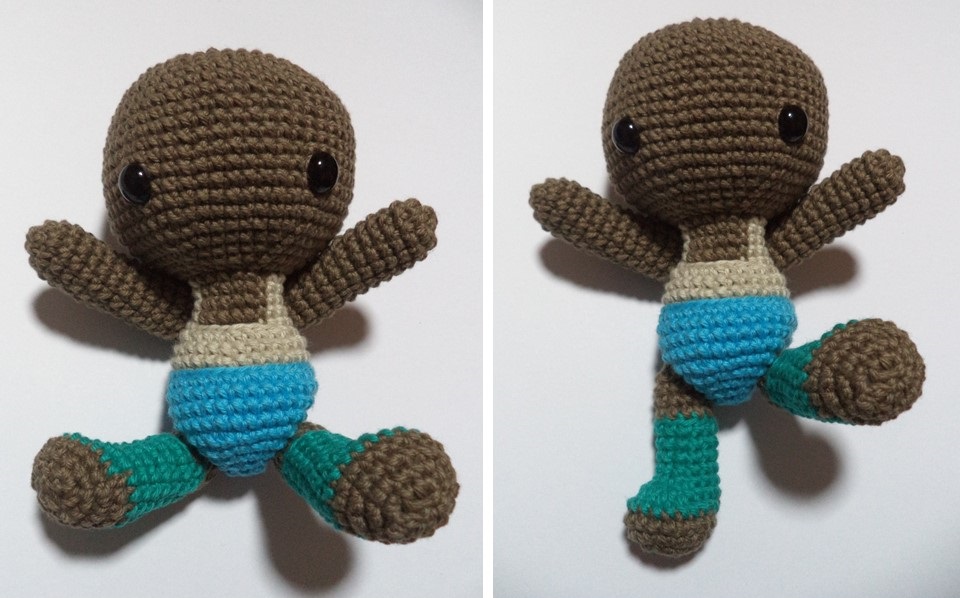
Hoy veremos un tipo de articulación muy sencillo. Para esto traje como modelo al "Duendecillo de la verdad" en su versión renovada, jaja.
Today we will see a very simple type of joint. For this, I brought as a model the "Duendecillo de la verdad" in its renewed version, haha.
¡Manos a ala obra!
This type of amigurumi has head and body knitted together and the limbs separately. It was designed for children to play with and carry around.
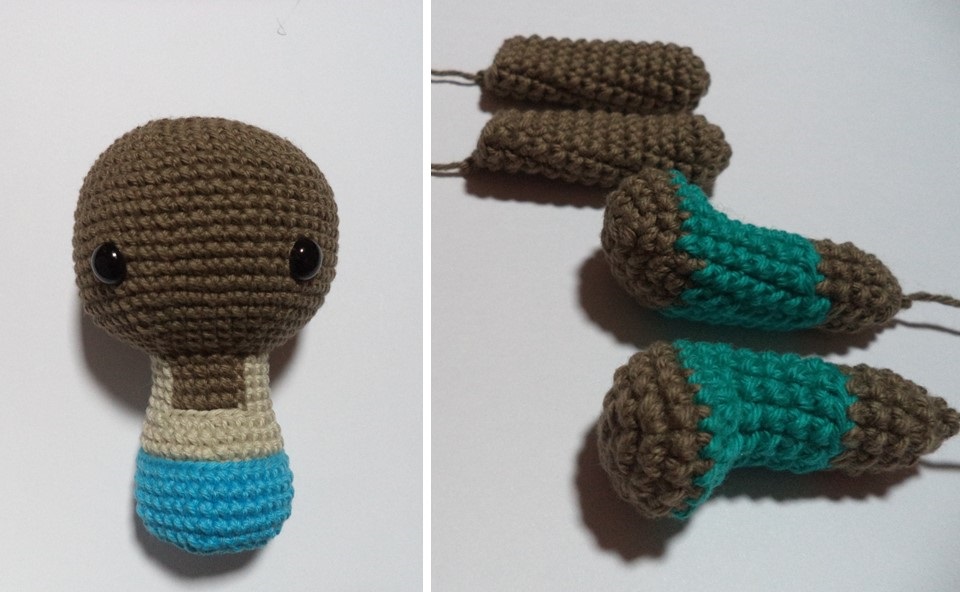
Brazos
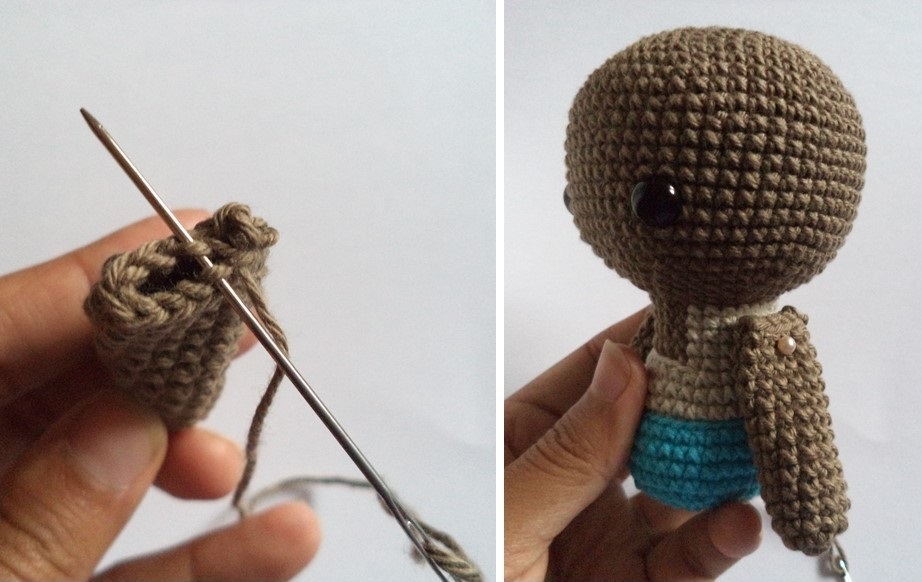
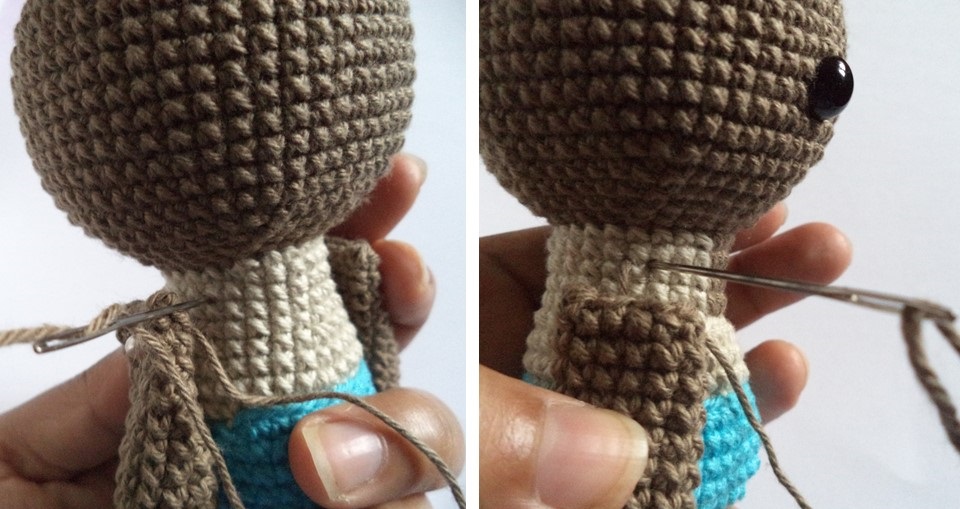
Once we have the arms, close both sides with thread. For the diagramming, place pins in the position where the arms will be. Pass the needle through the arm and come out in the middle (where the axis of the joint will be), then go through the amigurumi body and come out at the end (where the other axis of the joint will be). Usually the arms go to the height of the 2nd row of the neck.
Piernas

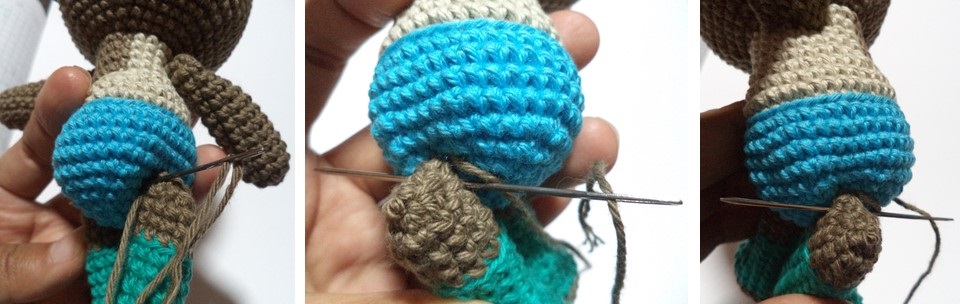
Once the legs are closed, insert the needle in the central part to form the joint axis. Then place pins for the diagramming. Pass the thread between the legs and the body to form the axis of articulation, similar to the previous one.
To clarify, the axis of articulation takes two points of the arm (squares) and joins two points of the body with the other points of the other arm. The same for the legs... I hope I understand.
¡Y eso es todo!
¡…Hasta la próxima!
See you next time!
Dato curioso: Este tipo de articulación solo es válido para ciertos patrones / This type of articulation is only valid for certain patterns.
►Si quieres saber un poco más, nos vemos en:
Creary
Thank you very much for your support!.
This is so beautiful thanks for sharing @inici-arte
Thank you very much. Articulation in amigurumi is important if you are just starting out in this field. Good vibes!.
He is cute. Like your work.
Thank you very much and I'm glad you like it. This is a revamped version of one of the first amigurumis I knitted. Good vibes!.
So cute! Amigurumi is indeed one of the best forms of crocheting.
Yes, we young people are the ones who are giving a new look to weaving. So let the good vibes continue!.
me encantan estos muñequitos, siempre se ven tan lindos :3
Muchas gracias. Y eso que no se nota bien el diseño de su bolcito, jaja. ¡Buenas vibras!.