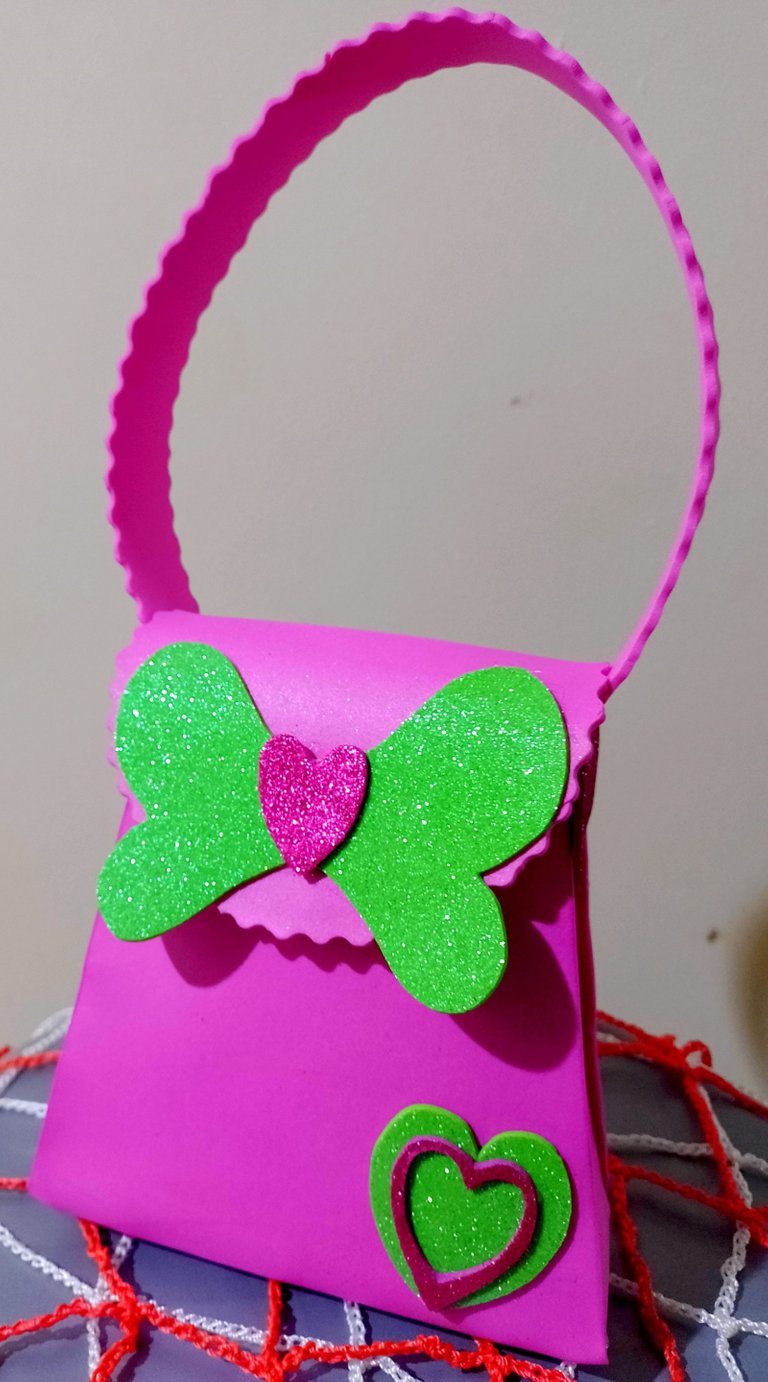
[Eng\Esp] Coqueta Foami Wallet For Girl.\ Coqueta Cartera de Foami Para Niña.
An excellent greeting to all the members that make up this beautiful Hive community, participating daily in their beautiful crafts. Today I am going to share with you an elaboration that I made, it is a flirty foami wallet for a girl, I tell you that I love working with foami, and my inspiration to make it was my niece, she is still very young to use it, but I'll just keep it for you when I can use it. Anyway, they can be made to give at parties, which girls love handbags. And to make this portfolio model I had to first make a pattern, with measurements to my liking, in the photographs I take you will be able to see the materials I use and the step by step, I hope you can enjoy it.
Un excelente saludo para todos los miembros que conforman esta linda comunidad de Hive, haciendo partícipe diariamente, de sus lindas manualidades. En el día de hoy voy a compartir con ustedes de una elaboración que hice, se trata de una coqueta cartera de foami para niña, les digo que me encanta mucho trabajar con foami, y mi inspiración de hacerla fue mi sobrina, aún está muy pequeña para usarla, pero de igual manera se la guardaré para cuando pueda usarla. De todas formas se pueden hacer para regalar en fiestas, la cual a las niñas le encantan las carteras. Y para hacer este modelo de cartera tuve que elaborar primero un patrón, con medidas a mi gusto, en las fotografías que tome podrán ir viendo los materiales que utilice y el paso a paso, espero que lo puedan disfrutar.
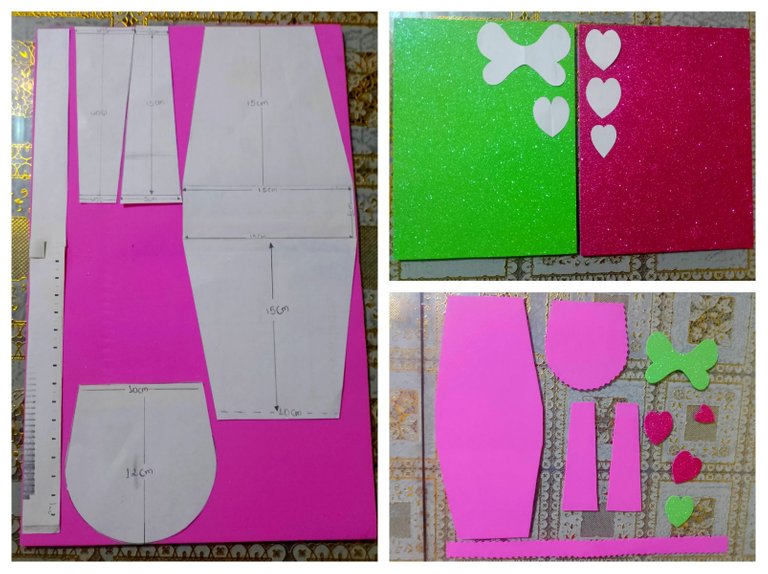
Materials:
- Fuchsia double letter foam.
- Fuchsia and apple green frosted foam.
- Pattern, hearts and bow.
- Silicone gun and bar.
- Black magic clasp.
- Shape scissors.
- Scissor.
- Pencil.
Materiales:
- Foami doble carta fucsia.
- Foami escarchado fucsia y verde manzana.
- Patrón, corazones y lazo.
- Pistola de silicona y barra.
- Cierre mágico negro.
- Tijera de forma.
- Tijera.
- Lápiz.

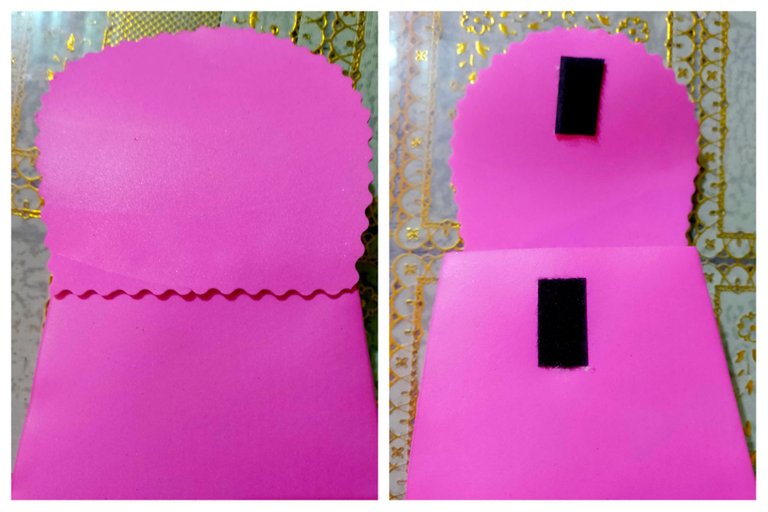
Step # 1:
I transferred the pattern to the double letter foam, all the pieces of the portfolio, then in the frosted green and fuchsia foam I placed what the decoration was going to do, to mark and cut out.
Paso #1:
Transferí el patrón al foami doble carta, todas las piezas de la cartera, luego en el foami verde escarchado y fucsia coloque lo que iba a hacer el decorado, para marcar y recorte.
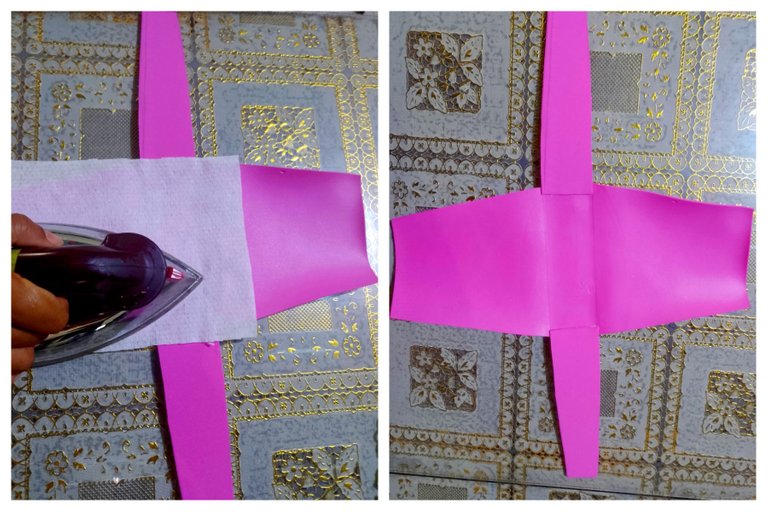
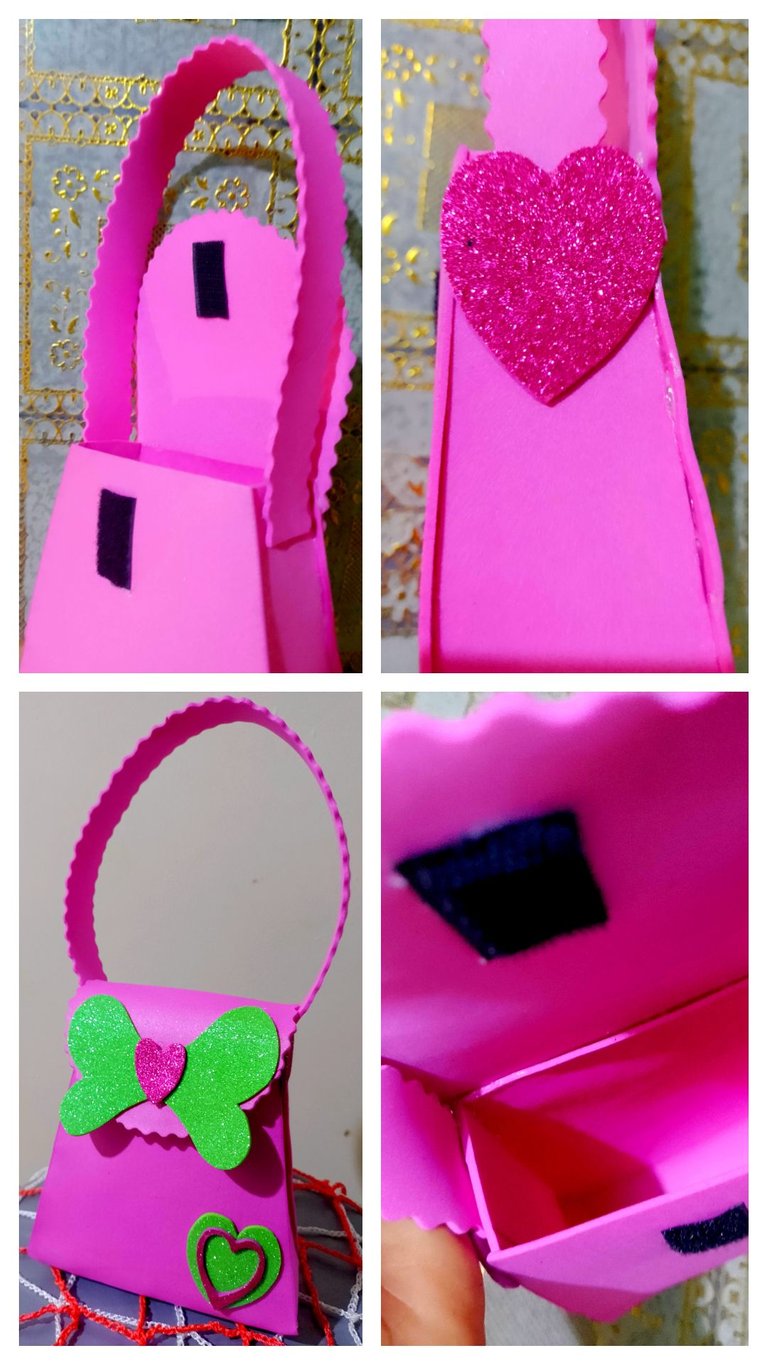
Step # 2:
Glue on each side the strip where I will make double to stick face to face, place a very fine cloth on the foami to iron the foami, this is so that the foami does not have the mark of the iron, thus giving it a little shine and to make it a little strong.
Paso #2:
Pegue en cada lado la tira donde haré él dobles para pegar cara con caras, coloque sobre el foami una tela muy fina para planchar el foami, esto es para que al foami no le quede la marca de la plancha, así darle un poco de brillo y para ponerlo un poco fuerte.
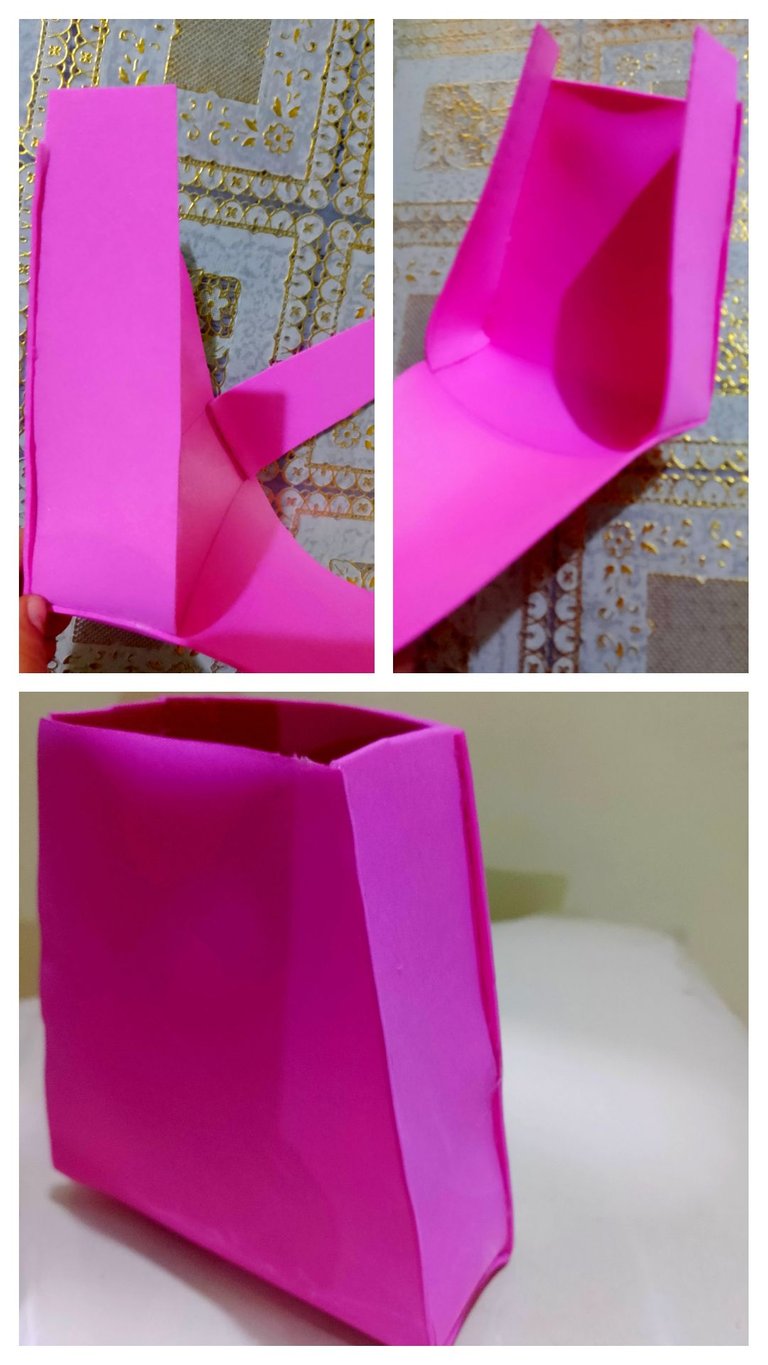
Step # 3:
Here I began to glue the strips on both sides, to face face to face, staying this way.
Paso #3:
Aquí comencé a pegar las tiras de ambos lados, para enfrentar cara con cara, quedando de esta manera.
Step # 4:
Glue what was going to make the lid part, from the back, then glue a magic closing square to it.
Paso #4:
Pegue lo que iba a hacer la parte de la tapa, por la parte de atrás, luego le pegue un cuadrado de cierre mágico.
Step # 5:
Finally, I glued the handle on both sides, placing a fuchsia heart on both sides to cover the joint shape, then decorate with the other materials that you had already cut out in Step # 1, gluing a ribbon on the part of the lid, and in the part of the wallet a heart. And voilà, this is my final result, you can see that it looks good on the inside, well attached. I hope you can take this great idea to make for parties or to give a gift. Thank you.
Paso #5:
Por último la pegue por ambos lados el asa, colocándole un corazón fucsia en ambos lados igual para taparle la forma de la unión, luego decore con los otros materiales que ya había recortado en el Paso#1, pegándole un laso en la parte de la tapa, y en la parte de la cartera un corazón. Y listo este es mi resultado final, pueden observar que se ve bien por dentro, bien pegada. Espero que puedan tomar esta grandiosa idea para hacer para fiestas o para regalar algún detalle. Gracias.
Collage making program: Fotojet Link
Translated from google translator Link
Photo editing program: PhotoFiltre 7
Las fotos fueron tomadas desde un Xiaomi Mi A2.
Programa para hacer el collage: Fotojet Enlace
Traducido del traductor de Google Enlace
Programa para editar fotos: PhotoFiltre 7
I say goodbye until another opportunity.
Thanks for your support.
Me despido hasta otra oportunidad.
Gracias por su apoyo.
Copyright @imargasa. All rights reserved.
Hermosa cartera!, me recuerda cuando mi mamá me hacía las mías, seguramente a su sobrina le encantará, saludos!
Congratulations, your post has been upvoted by @dsc-r2cornell, which is the curating account for @R2cornell's Discord Community.