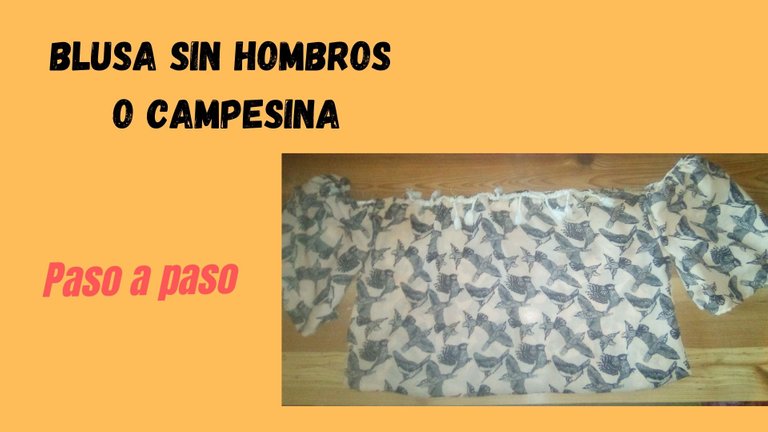
Shoulderless or peasant blouse. Step by Step // Blusa sin hombros o campesina. Paso a paso.
(Edited)
Saludos, bienvenidos a mi blog
Hoy compartiré con ustedes el paso a paso de una linda blusa sin hombros o estilo campesina que he realizado, de una forma bastante sencilla y con pocos materiales. Espero me acompañen y observen el proceso de este bonito proyecto, y si les gusta puedan realizar también la suya.
Today I will share with you the step by step of a beautiful off-the-shoulder or peasant-style blouse that I have made, in a fairly simple way and with few materials. I hope you will join me and observe the process of this beautiful project, and if you like, you can also carry out yours.
Materiales:
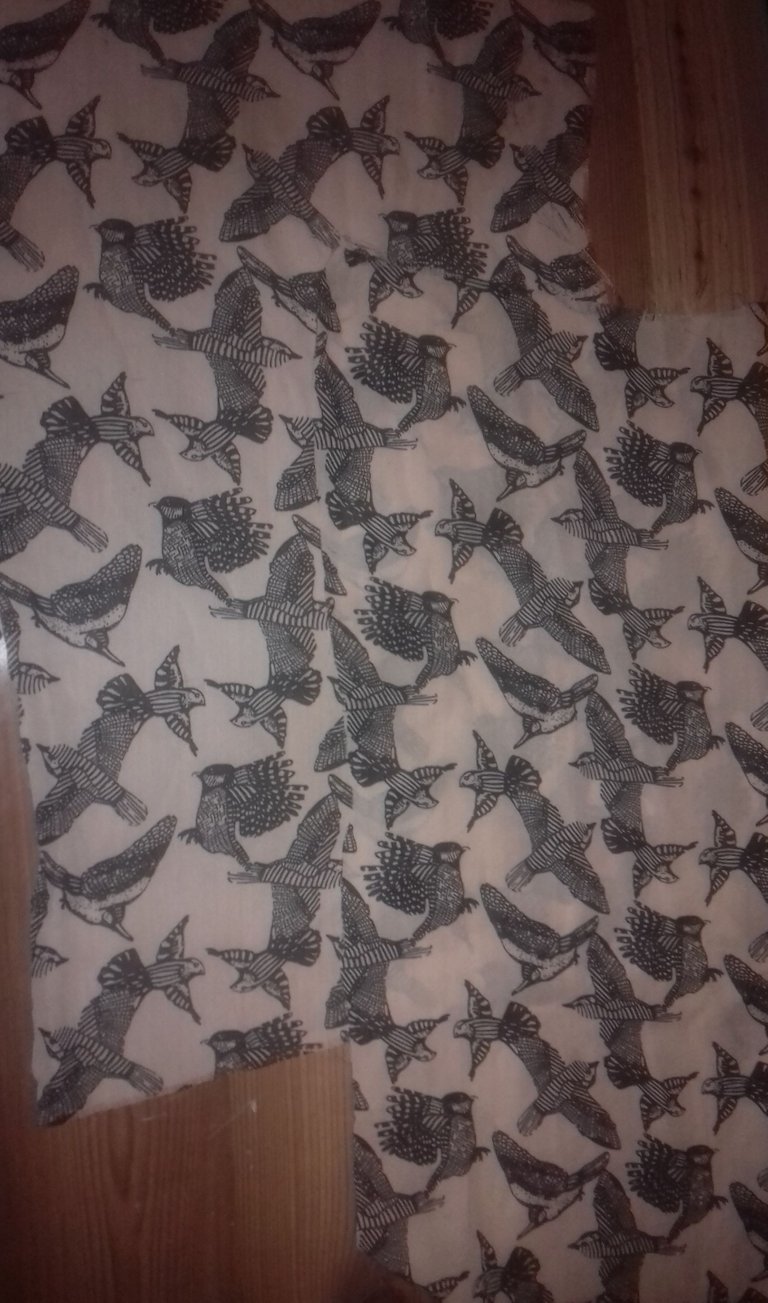
1m de tela de su preferencia (yo utilice chifon).
60 cm de cinta elástica de 1,5 cm
Tijera, agujas, hilos, algún tipo de encaje (opcional).
Materials:
1m of fabric of your preference (I used chiffon).
40cm of 1.5 cm elastic tape
Scissors, needles, threads, some kind of lace (optional).
Proceso / Process
Para realizar esta blusa no necesite de patrones, simplemente corte ciertos rectángulos, a fin de ver que resultado obtenía, era una suerte de ensayo y error. Pero me di cuenta que esta con esta prueba obtuve buenos resultados.
Así les cuento que vamos a necesitar principalmente dos rectángulos de 42 cm de ancho x 48 cm de alto, y dos más de 16 cm de ancho x 23 cm de alto para las mangas. Les aclaro que estas medidas son para una chica talla s-m aproximadamente.
To make this blouse you do not need patterns, simply cut certain rectangles, in order to see what result you obtained, it was a kind of trial and error. But I realized that this with this test I got good results. So I tell you that we are mainly going to need two rectangles 42 cm wide x 48 cm high, and two more 16 cm wide x 23 cm high for the sleeves. I clarify that these measurements are for a girl size s-m approximately.
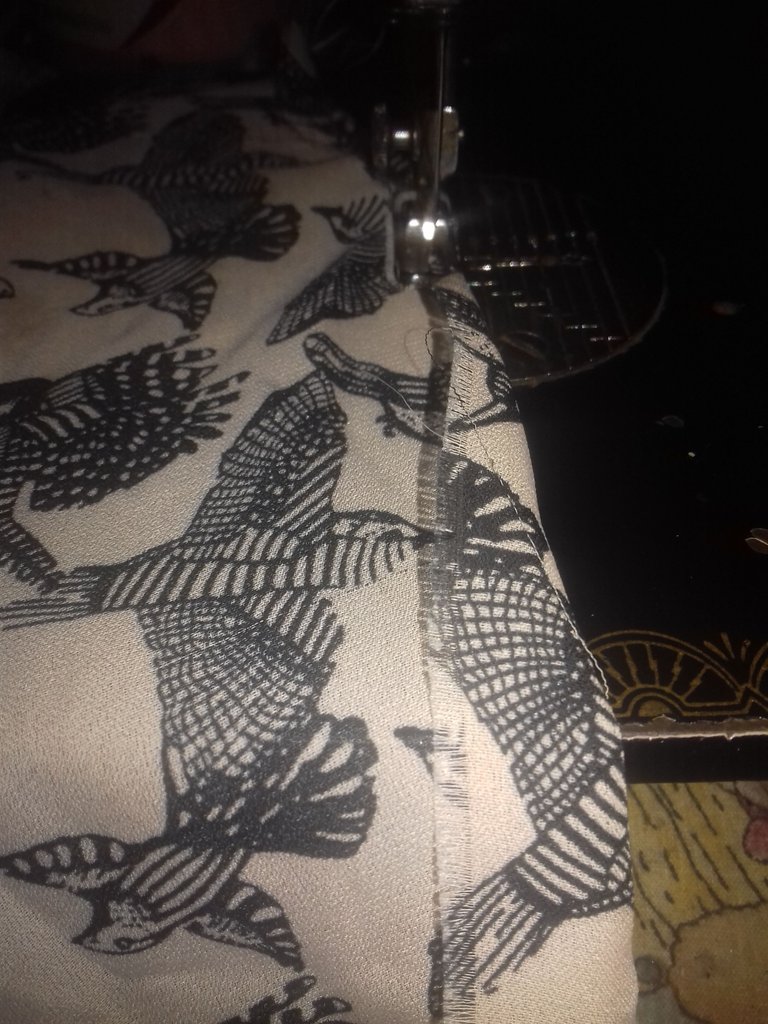
Ya luego de tener las piezas cortadas procedemos a coser, en este caso inicie uniendo los lados de la pieza principal es decir los dos rectángulos más grandes. Para después coser las orillas de las diferentes piezas.
After having the pieces cut we proceed to sew, in this case start joining the sides of the main piece, that is, the two largest rectangles. Then I sewed the edges of the different pieces.
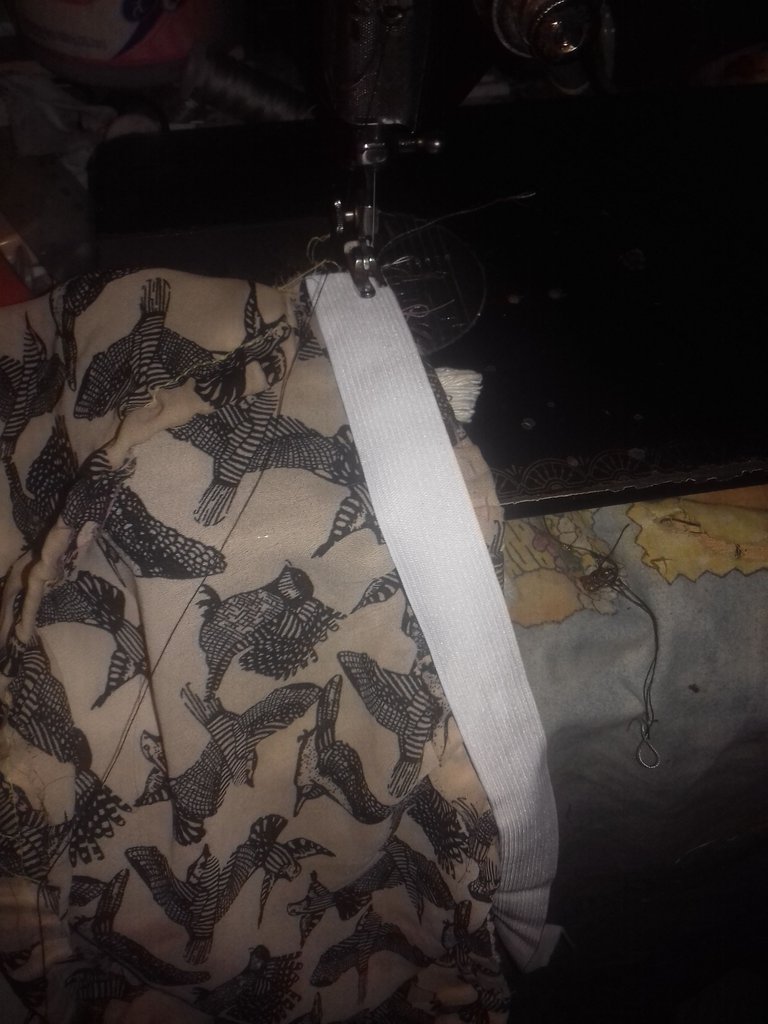
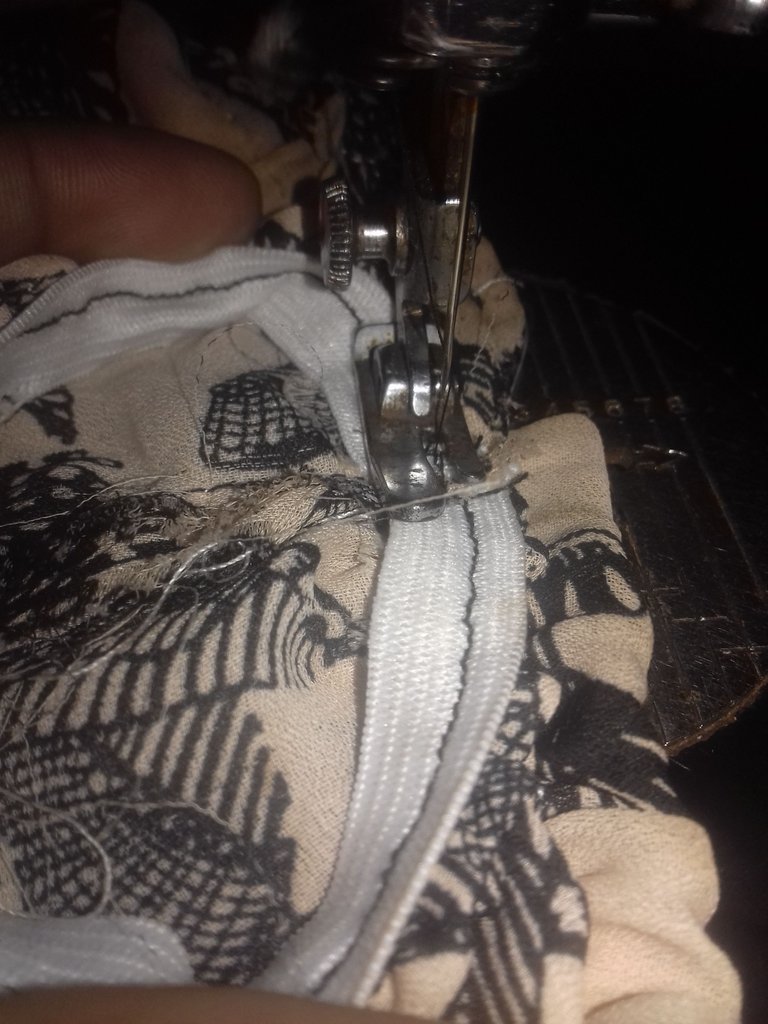
Continuo esta vez, con la colocación de la cinta elástica, primero en las mangas para ello utilizo un trozo de cinta de 9cm, este lo ubico en la parte superior de la tela, estirando la cinta procedi a realizar la costura,repitiendo el proceso en lo que sera la otra manga. Una vez incorporada la cinta elástica termino cerrando la manga a los lados, quedando una especie de cono. El mismo trabajo realizo en lo que sera la blusa como tal, para esta utilice un trozo de cinta de 54cm, de igual forma estiro el material y se realiza la costura.
Continuous this time, with the placement of the elastic tape, first on the sleeves for this I use a 9cm piece of tape, this I place it on the top of the fabric, stretching the tape, I proceeded to sew, repeating the process in what will be the other sleeve. Once the elastic tape is incorporated, I end up closing the sleeve at the sides, leaving a kind of cone. The same work I do in what will be the blouse as such, for this I use a piece of 54cm tape, in the same way I stretch the material and the sewing is done.

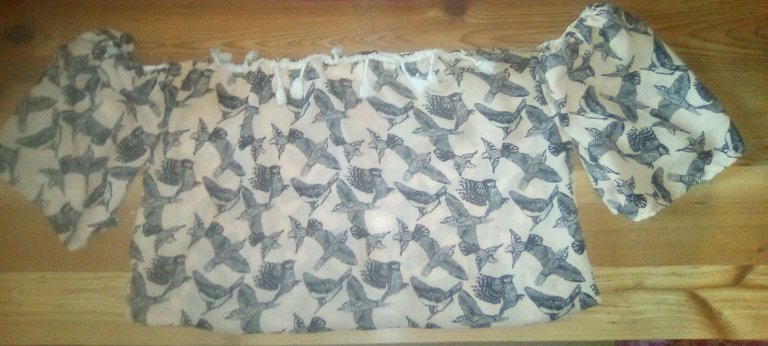
El siguiente paso es unir las mangas con la parte central de la blusa, para ello solo basta con juntar la costura de cada lado, es decir la costura de los lados de la manga y la de los lados de la parte central de la blusa, tal como se muestra en la imagen y de este modo realizar una pequeña costura, la cual debe estar bien reforzada.
The next step is to join the sleeves with the central part of the blouse, for this you just have to join the seam on each side, that is, the seam on the sides of the sleeve and the seam on the sides of the central part of the blouse, as shown in the image and thus make a small seam, which must be well reinforced.
Como detalle final yo le coloque a la blusa unos detalles en la parte superior, como una especie de encajes con volantes, esto realmente es opcional, este detalle debe tener la misma medida de la mitad de la blusa, y al momento de incorporarla debemos estirar totalmente la misma, para tener un buen acabado.
As a final detail, I put some details on the top of the blouse, such as a kind of lace with ruffles, this is really optional, this detail must have the same measurement of the middle of the blouse, and when incorporating it we must stretch totally the same, to have a good finish.---
Esta ha sido mi post del día de hoy espero les haya gustado. Gracias por leer y acompañarme hasta acá.
This has been my post today I hope you liked it. Thanks for reading and accompanying me here.
Nos vemos en la próxima. Un abrazo.
See you next time. A hug.
0
0
0.000
Hola @hildajtua, veo que eres bastante arriesgada, ya que trabajaste sin patrón y al final te resultó bien. Creo que de eso trata cuando queremos aprender a elaborar cosas nuevas.
Gracias por compartir tu proyecto con nosotros. Saludos y bendiciones.
Beautifully made thanks for sharing
Este modelos queda muy bonito y es bastante fácil de hacer, te felicito. Saludos 😄
Excelente post Hilda te felicito por tu blusa :D