Comenzó el armado || Assembly began (ESP/ENG)
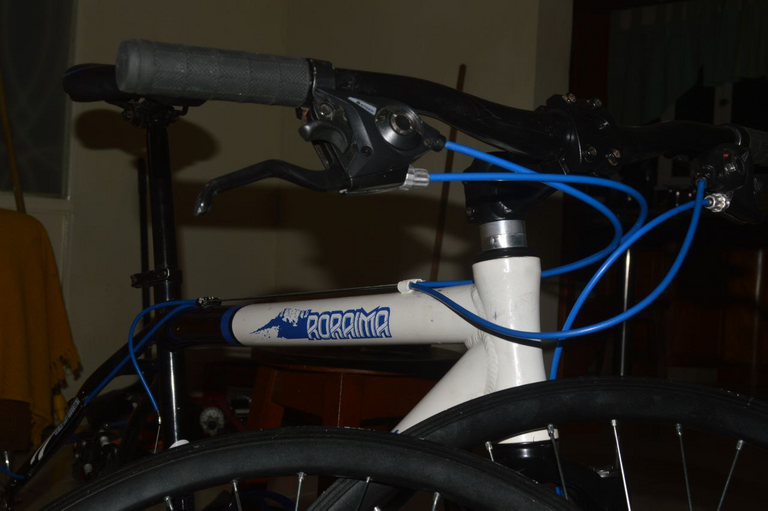
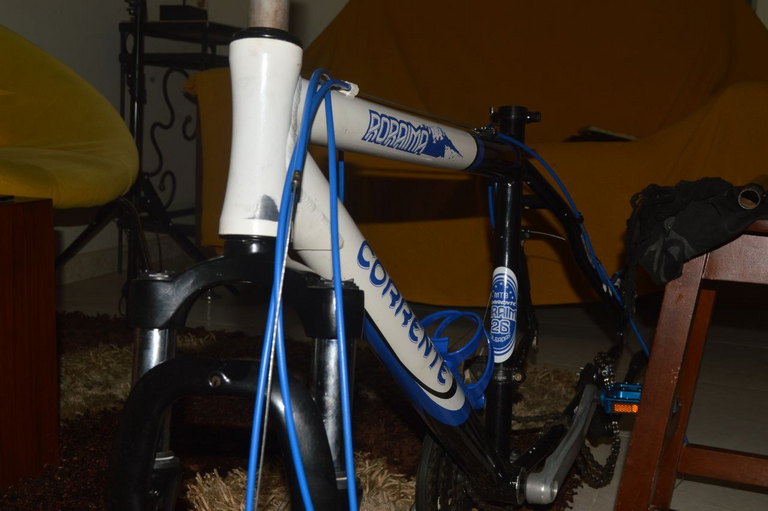
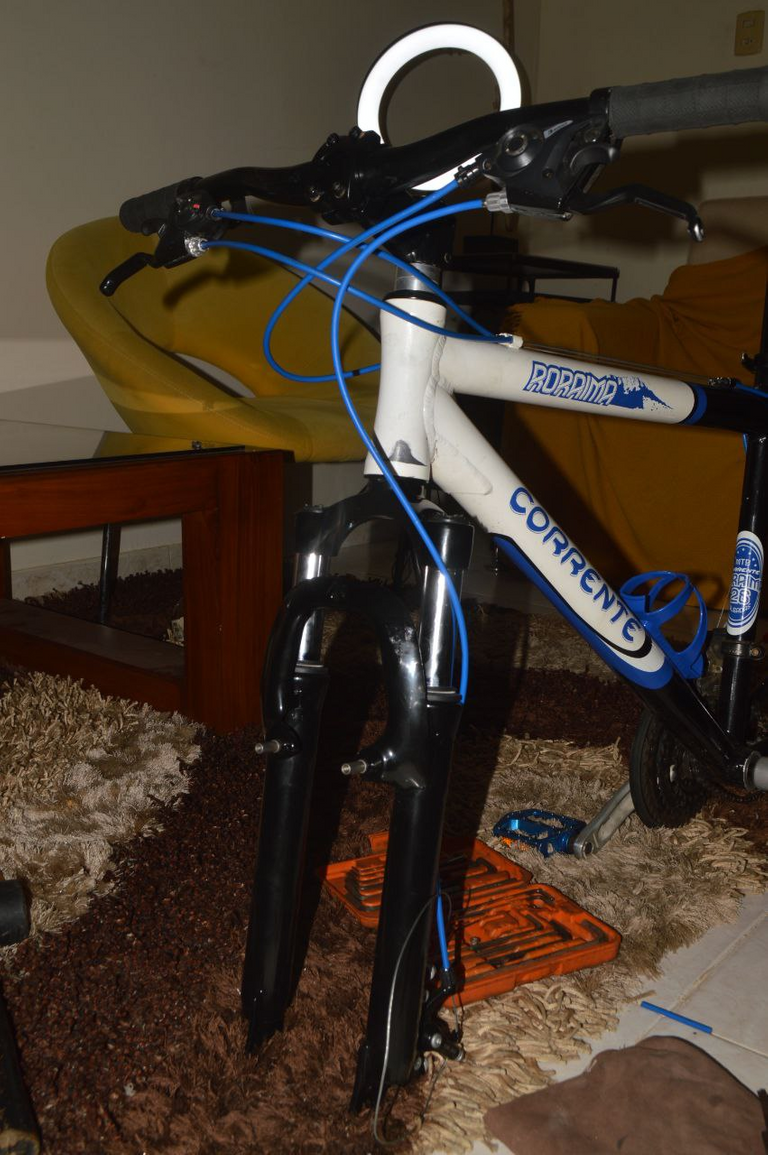
I started with the assembly of the blue bike #26, a bike that was brought to me to do the restoration and assembly since a friend asked me to be the one who updated the bike, in previous posts I uploaded what was the process of disassembly of almost the entire bike, now all those pieces were taken to paint and are already back to put them in place again.
Comencé con el armado de la bicicleta azul #26, una bicicleta que me trajeron para hacer la restauración y armado ya que un amigo me pidió que fuese yo quien actualizara la bicicleta, en anteriores post subí lo que fue el proceso de des ensamblaje de casi toda la bicicleta, ahora todas esas piezas se llevaron a pintar y ya están de vuelta para colocarlas en su lugar nuevamente.
Let's start by seeing how the parts look after restoring their appearance.
Empecemos por ver que tal quedaron las piezas luego de restaurar su apariencia.
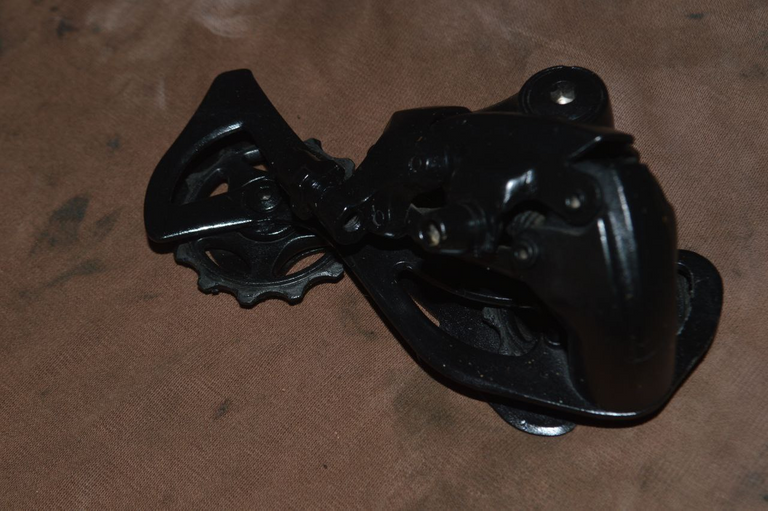
Rear derailleur
Descarrilador trasero

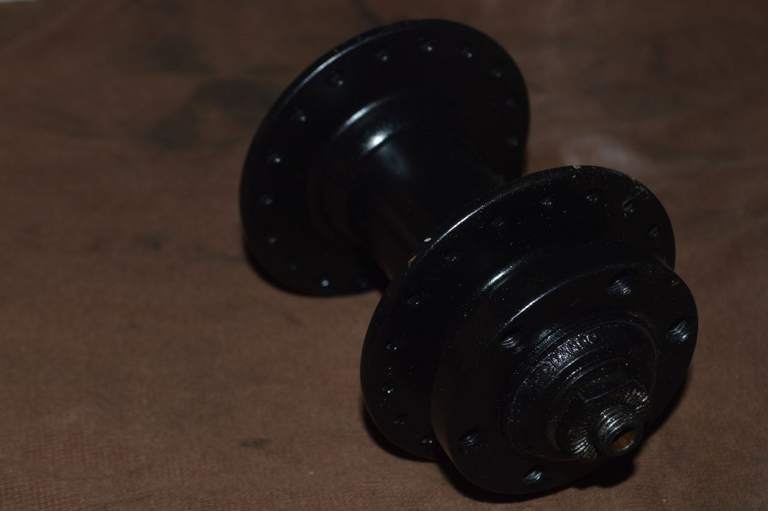
rear block
Manzanas
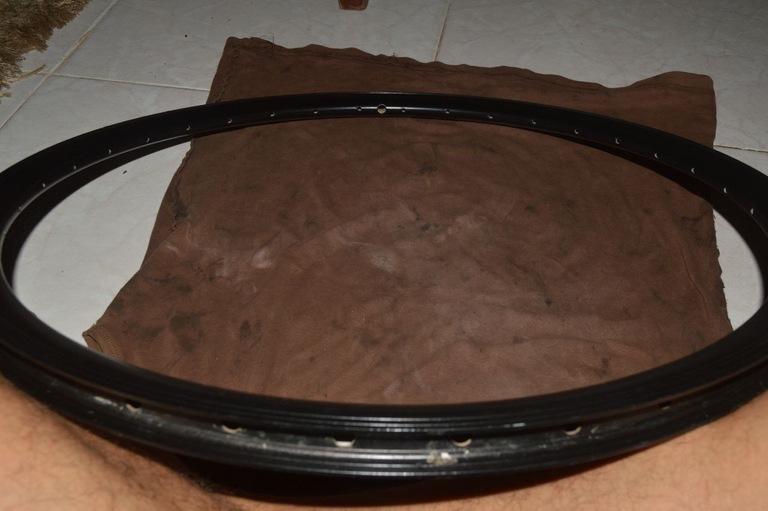
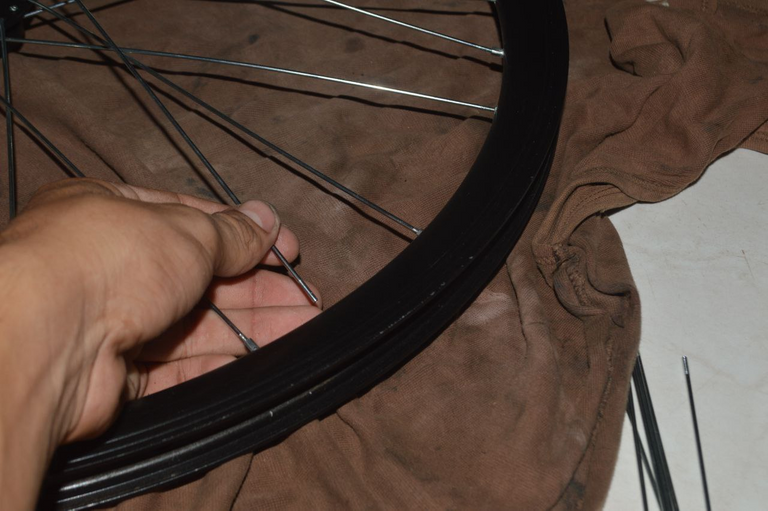
Rings
Aros
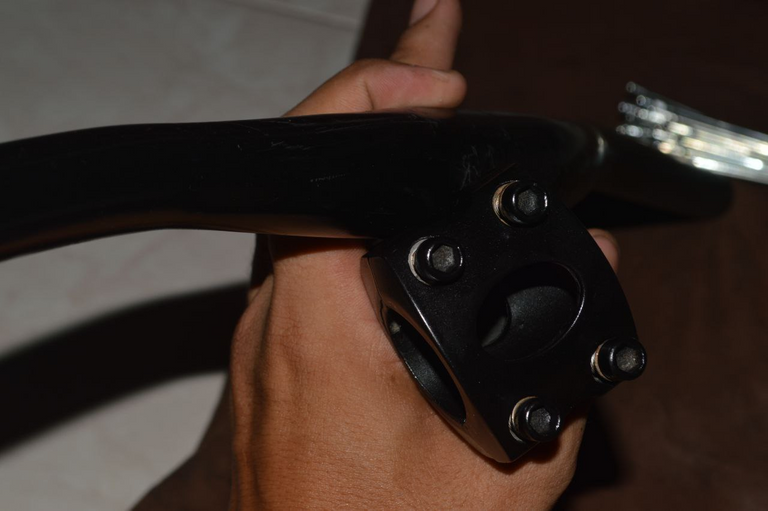
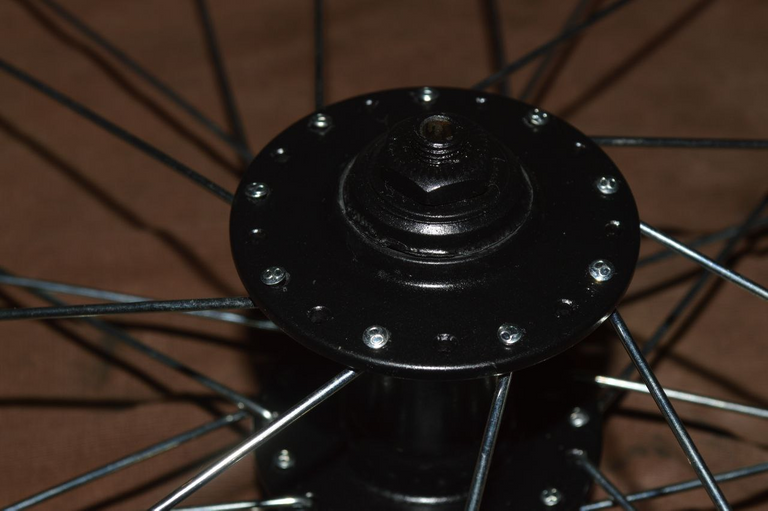
Power and flywheel
Potencia y volante
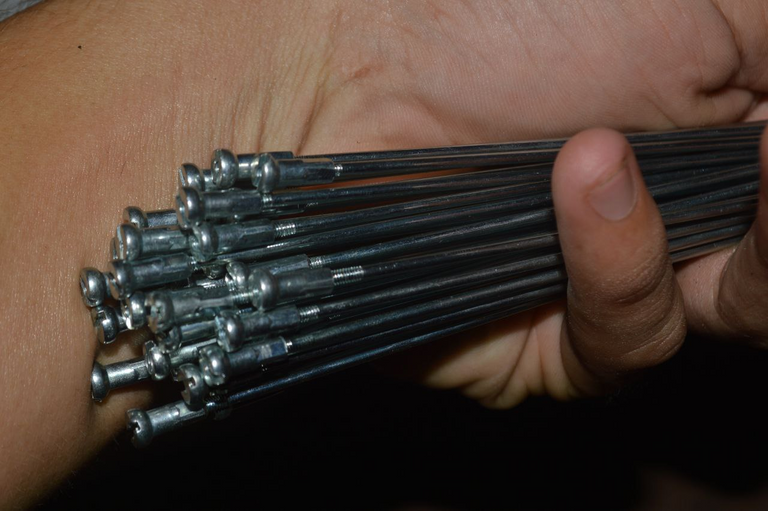
NEW RAYS
Radios nuevos
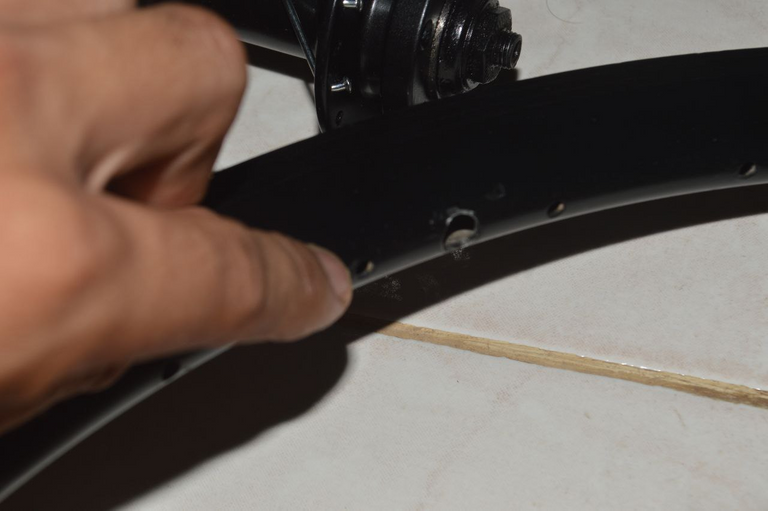
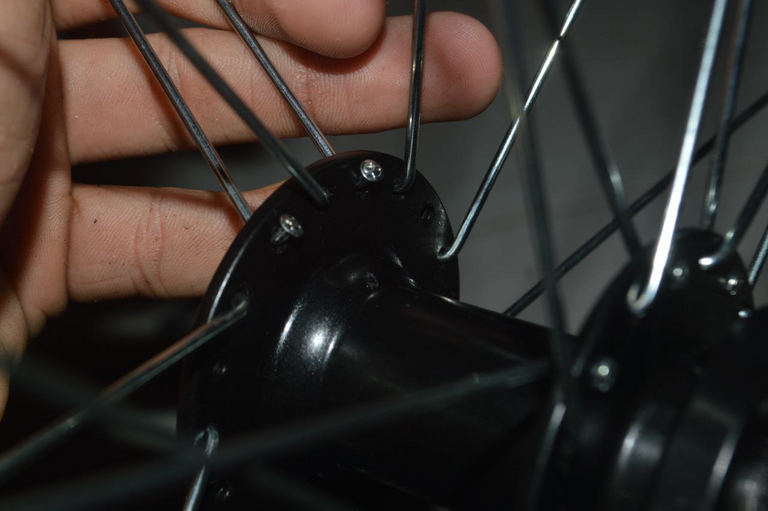
Knowing everything that arrived and seeing that everything was as it should, we started with the assembly of the bike polishing every detail as we went along. The first thing was to assemble the hoops, which is a tedious process and that needs an explanation more than everything in person to understand mostly the process because although it is something that everyone can do to learn is something complex for all the time and patience you need.
Conociendo todo lo que llego y ver que todo estaba como debía, comenzamos con el armado de la bicicleta puliendo cada detalle a medida que avanzo. lo primero fue armar los aros, lo cual es un proceso tedioso y que necesita una explicación mas que todo presencial para entender en su mayoría el proceso debido aunque es algo que todos pueden hacer el aprender es algo complejo por todo el tiempo y paciencia que necesita.
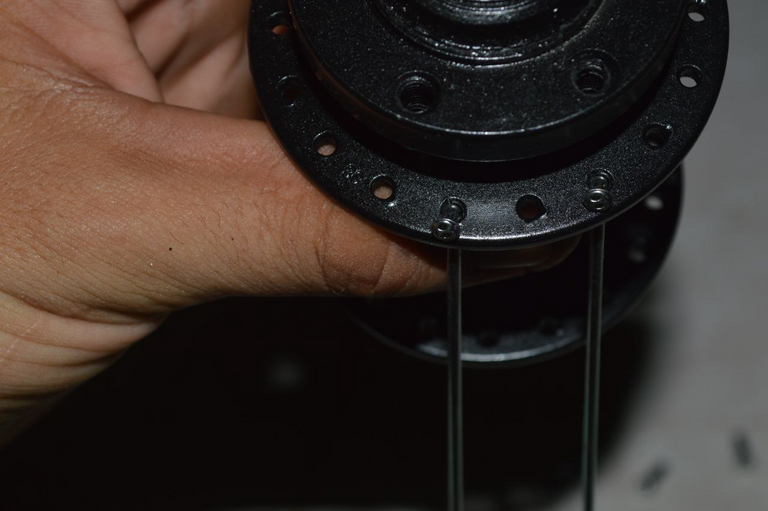
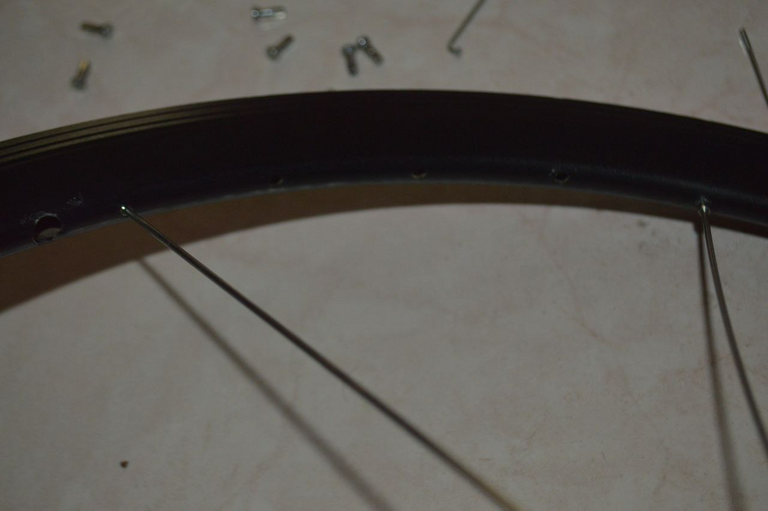
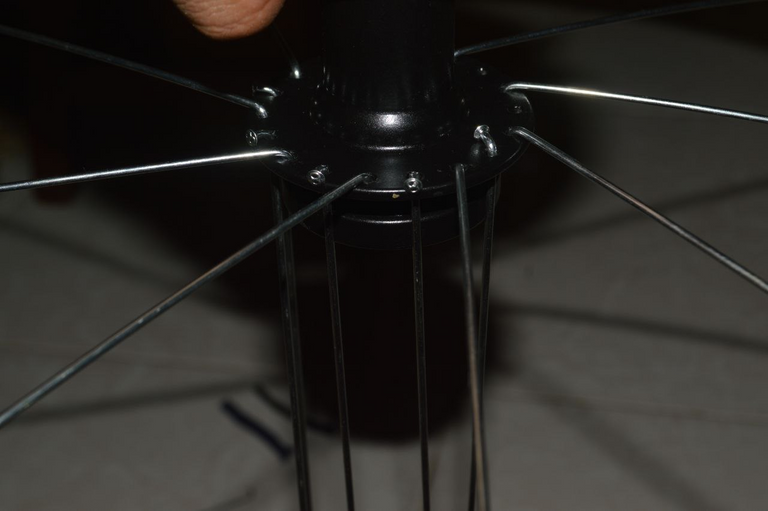
First of all, in order to start to line a rim, we have to know some basic principles such as starting by putting the spokes from the outside to the inside, leaving a hole in between each spoke, as shown in the picture below.
Primero para comenzar a enrayar una llanta tenemos que conocer algunos principios básicos como lo son empezar poniendo los radios de fuera hacia dentro dejando un orificio de por medio entre cada rayo, como se aprecia en la foto.
After doing this we place the valve hole in the ring, to put the first radius which should go in the hole that is just after it.
Luego de hacer esto ubicamos en el aro el hueco de la válvula, para poner el primer radio el cual debe ir en el agujero que esta justo despues.
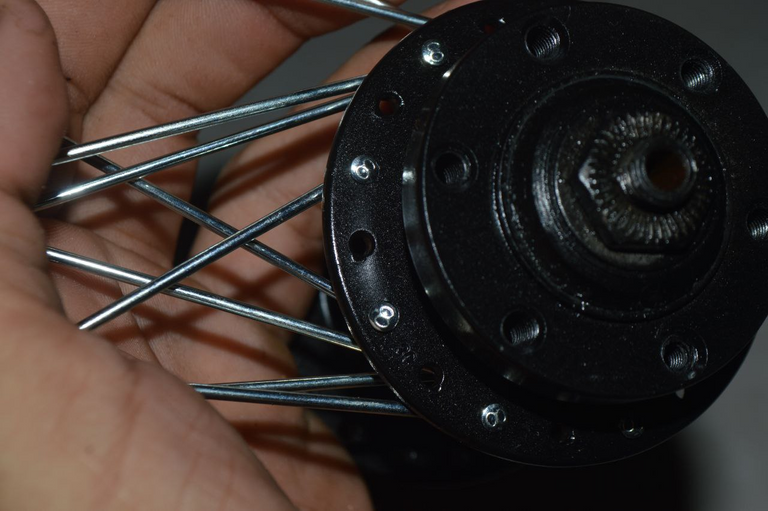
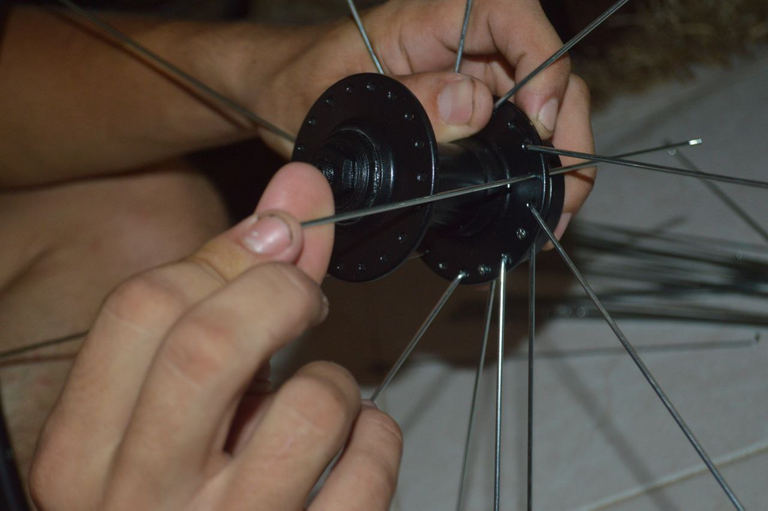
We place the first ray, the second must go in the fourth hole leaving 3 in between and so on until we have placed all the first line of rays, once placed we will turn the apple in any direction to make the rays are coupled to the ring.
Colocamos el primer rayo el segundo debe ir en el cuarto agujero dejando 3 de por medio y así sucesivamente hasta haber colado toda esa primera línea de rayos, una vez colocado giraremos la manzana en cualquier sentido para hacer que los rayos se acoplen al aro .
After that we will place the next row of spokes that go in the following way, these must enter from inside and outside, all this has a sense and is that the spokes are tightened with each other to give hardness to the rim, so some enter from the inside out and the others from the outside in. just as follows.
Siguiente de eso colocaremos la siguiente fila de rayos que van de la siguiente manera, estos deben entrar de dentro así afuera, todo esto tiene un sentido y es que los radios se aprietan unos con otros para dar dureza a la llanta, por eso unos entran de dentro hacia fuera y los otros de fuera hacia dentro. justo de la siguiente manera.
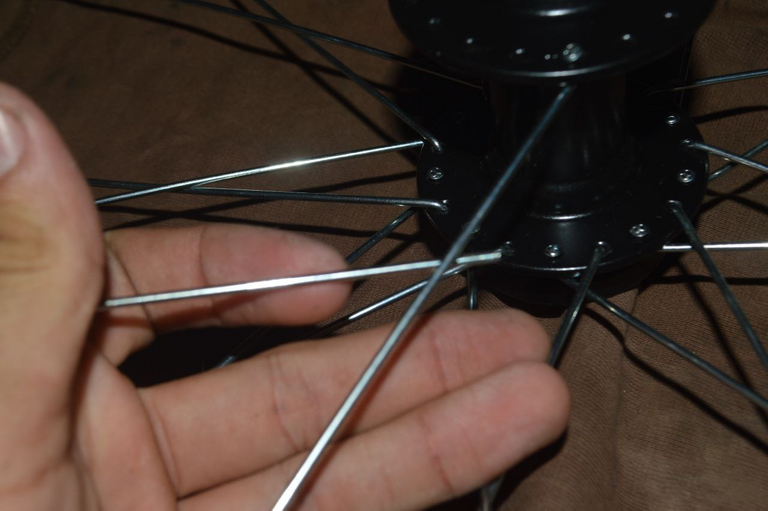
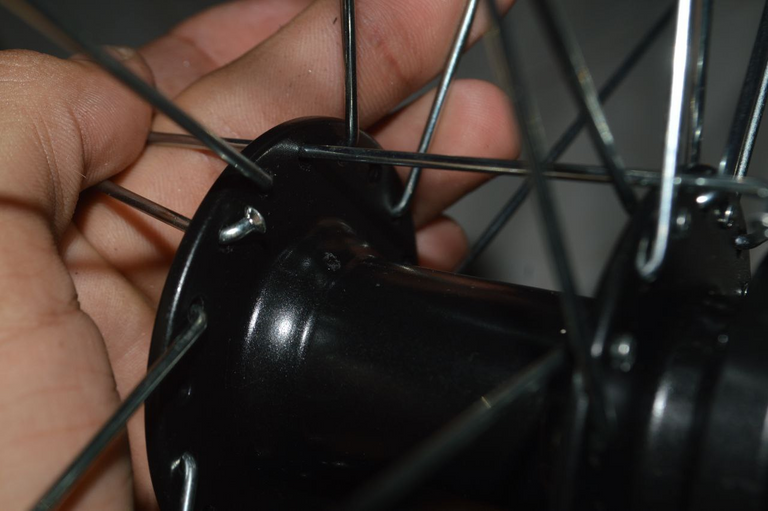
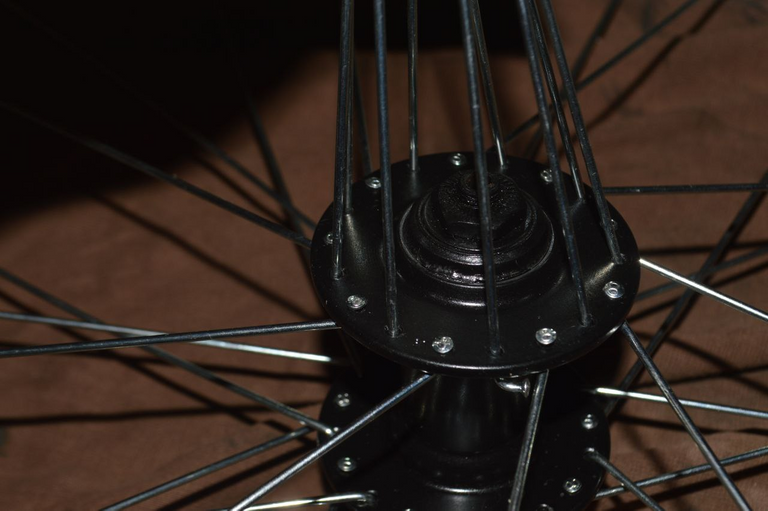
We are in a crucial part to finish the first side of the block this would be to intertwine the spokes here we must make a crossing that in this case is of 2 spokes, what do I mean by this? here we have to take the spokes of the second row in the opposite direction of where we turn the block, we can make crosses of 3 to 4 spokes, depending on what we need and the diameter of the radius allows us, the result is the following after making the whole crossing
Estamos en una parte crucial para terminar la primera cara de la manzana esto seria entrelazar los radios acá debemos hacer un cruce que en este caso es de 2 radios, que quiero decir con esto? acá tenemos que llevar los rayos de la segunda hilera en dirección contraria de donde giramos la manzana, podemos hacer cruces de 3 a 4 rayos, según lo que necesitemos y el diámetro del radio nos permita, el resultado es el siguiente luego de hacer todo el cruce.
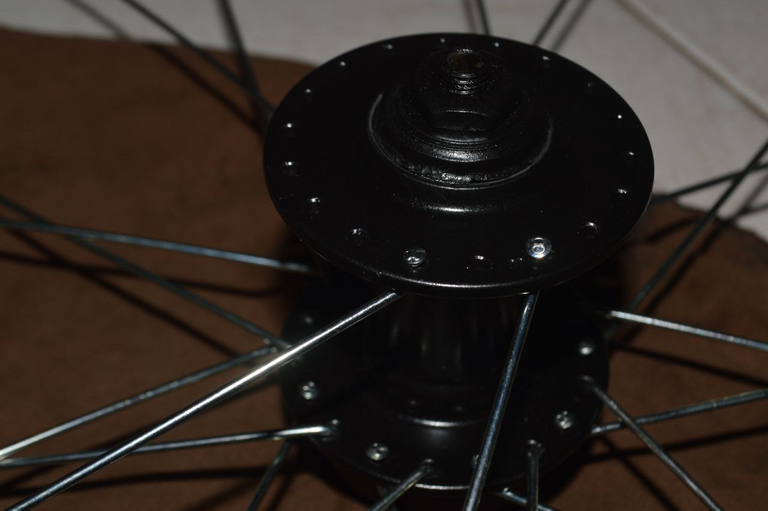
Completed the first one is time to assemble the second one for which we must place a radius taking into account a ray of the already assembled part, this has to go in parallel and enter a hole just in front of the radius that we take as reference, it is something like this.
Completada la primera es momento de armar la segunda para lo cual debemos colocar un radio tomando en cuenta un rayo de la parte ya armada, este tiene que ir en paralelo y entrar en un hueco justo delante del radio que tomamos como referencia, es algo asi.


This is the complex part since after squaring the first ray the second one squares itself since for the second one we leave a hole in the block and in the hoop we leave a hole in between as follows.
Esto es lo complejo ya que después de cuadrar el primer rayo el segundo cuadra solo ya que para el segundo dejamos un hueco en la manzana y en el aro dejamos un hueco de por medio de la siguiente forma.
Once these spokes are placed, the last spokes follow to complete the assembly of this rim, in this way we place the last row and the work is done by itself because each spoke goes in its hole and will always give the correct length because if we go over the hole the length will not be enough.
Ya puestos estos rayos siguen los últimos rayos para completar el armado de esta llanta, de esta forma colocamos la ultima fila y ya el trabajo se hace solo debido a que cada radio va en su hueco y siempre dará el largo correcto ya que si nos pasamos de orifico el largo no dara.
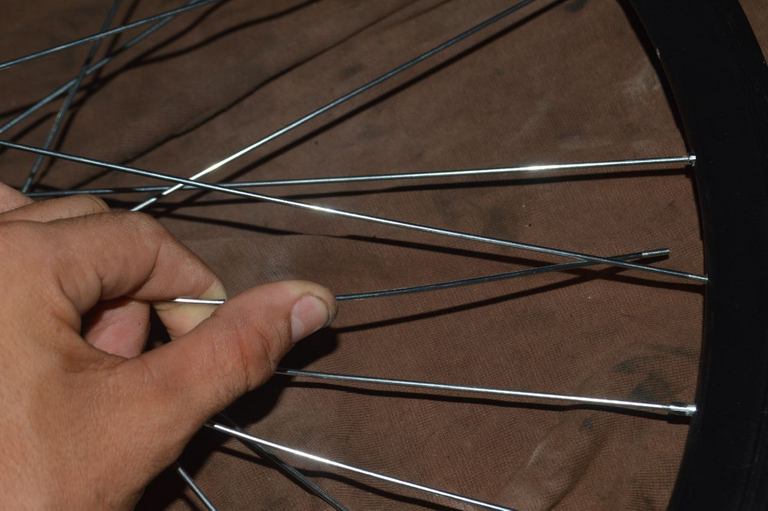
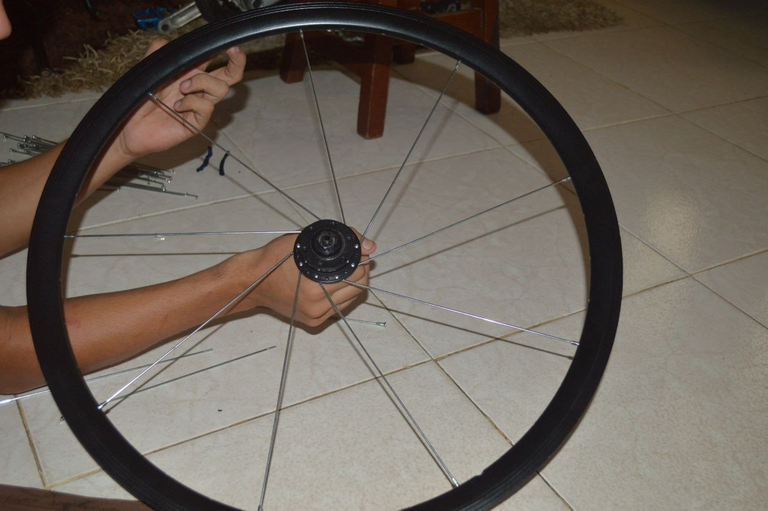
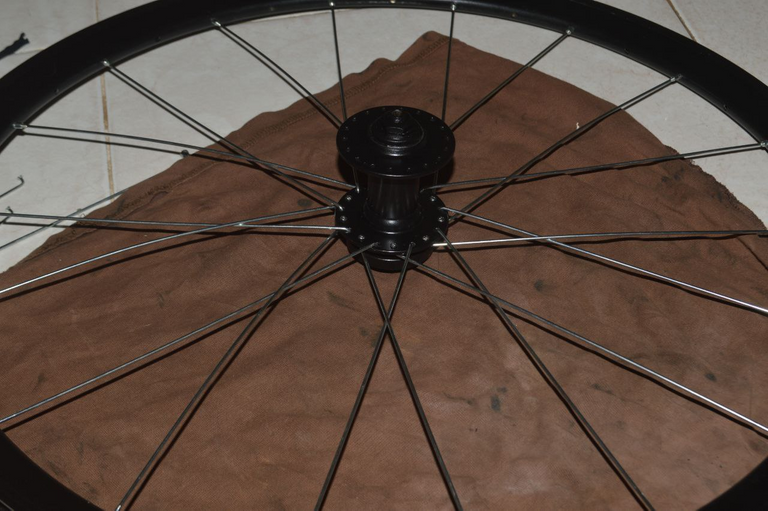
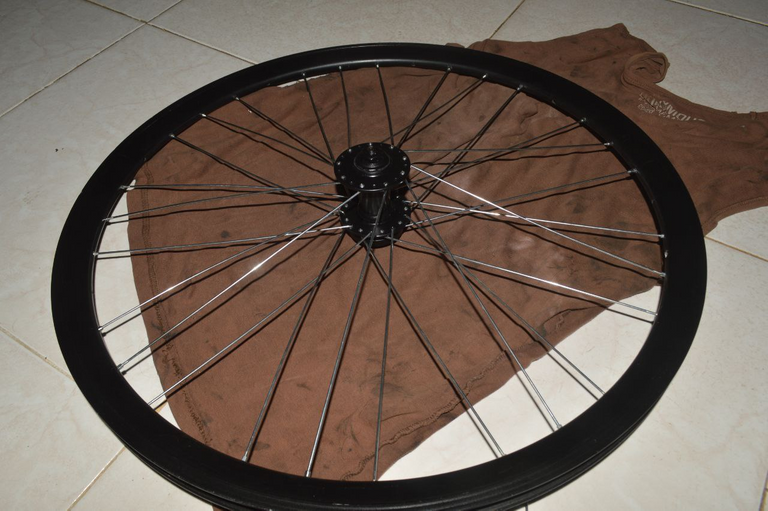
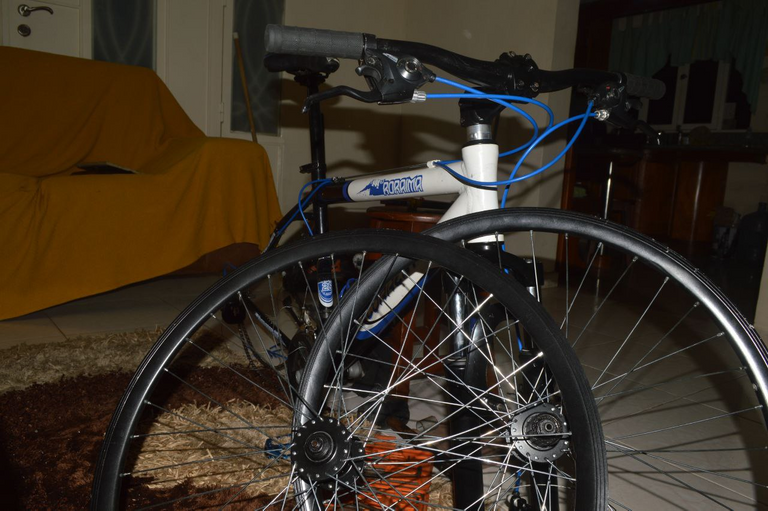
After finishing this process we repeat the same process with the other rim and the result should be the following, all the spokes should look symmetrical and well organized because if we peel in the position of a spoke when we want to adjust them it will be a problem.
Luego de finalizar este proceso repetimos el mismo proceso con la otra llanta y el resultado debe ser el siguiente, todos los rayos deben de verse de manera simétrica y bien organizados ya que si nos pelamos en la posición de un rayo al querer ajustarlos será todo un problema
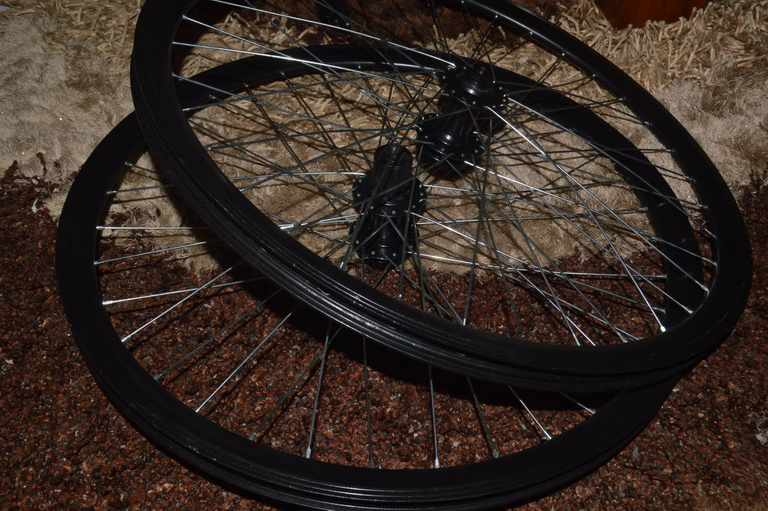
Now that the assembly of the two eye rims is finished, the most important thing is the tightening and balancing of the rims, but to save time and to be able to complete other points of the bicycle we will leave the adjustment for later since it is a task that takes me too much time to do.
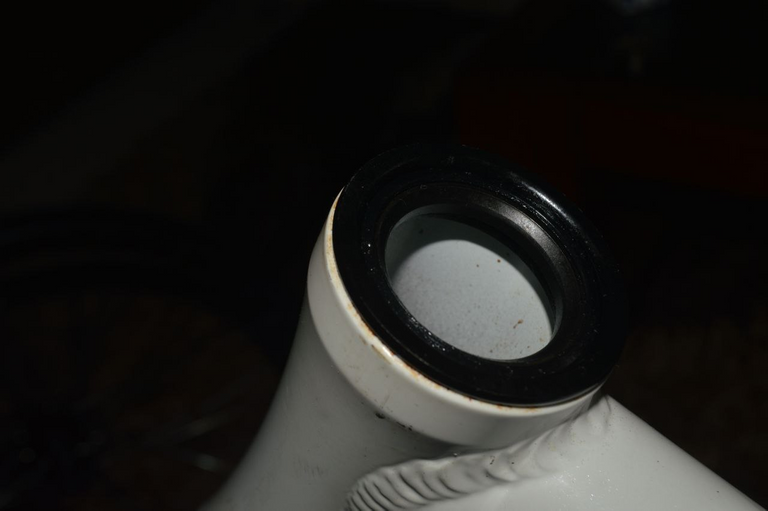
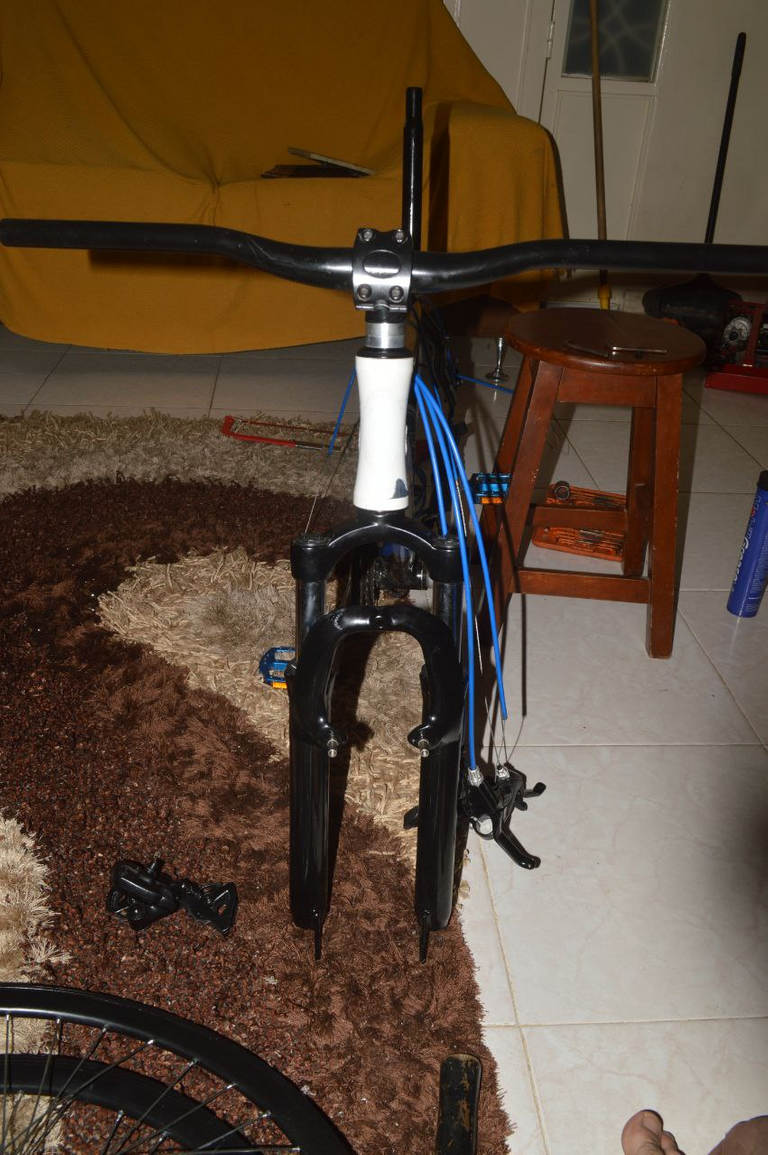
Now let's place the new fork, we have to install the steering system, and then measure and cut the fork tube to the required size, process that we will do as follows.
Ahora bien ya finalizado el armado de las dos llantas ojo aun falta lo mas importante que es el apriete y balanceo de las llantas, pero para ahorrar tiempo y poder completar otros punto de la bicicleta dejaremos el ajuste para luego ya que es una tarea que me lleva demasiado tiempo realizar.
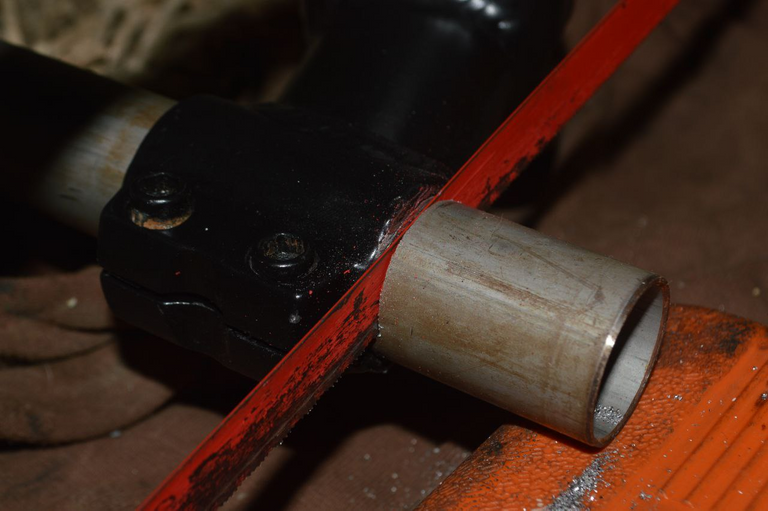
Ahora vamos a colocar la nueva horquilla, tenemos que instalar el sistema de dirección, para posteriormente medir y cortar el tubo de la horquilla a la medida requerida, proceso que haremos de la siguiente forma.

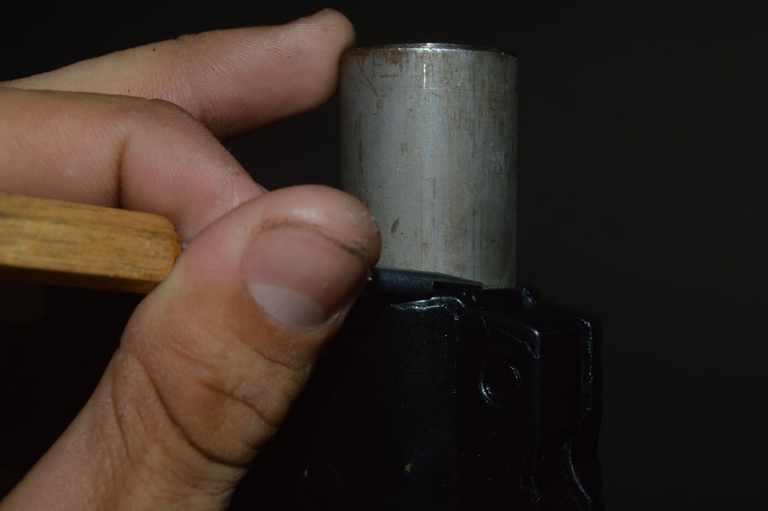
Set almost assembled now we can mark where the top of the stem is to make the cut a little lower.
Conjunto casi armado ahora podemos marcar donde queda el tope de la potencia para hacer el corte un poco mas abajo
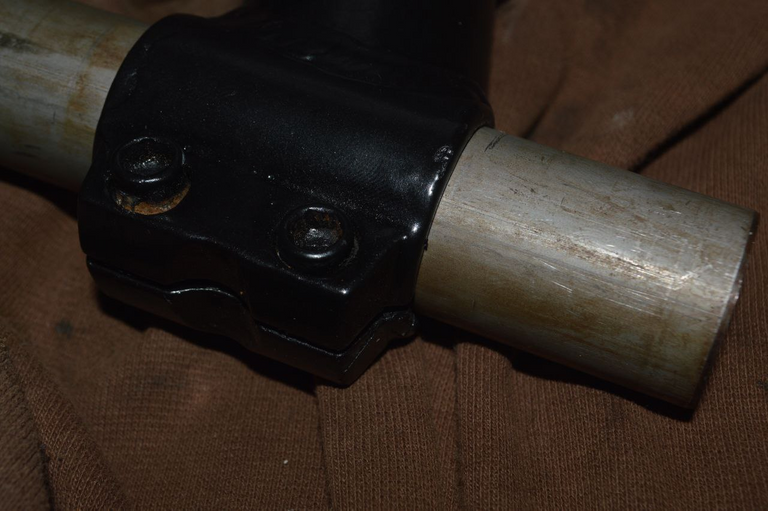
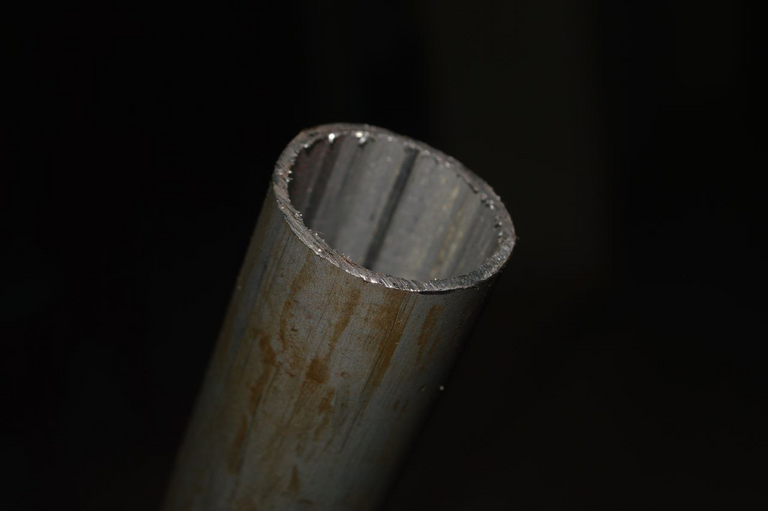
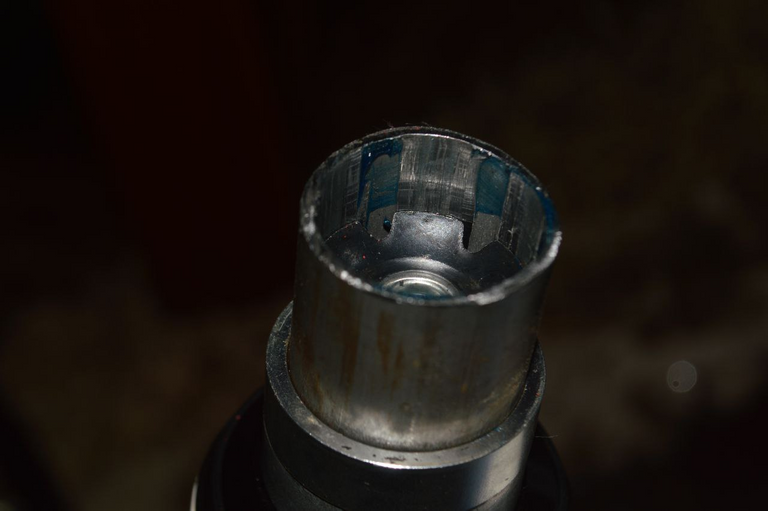
Ready the cut the result is as follows, now the following is to place grease mount the assembly to place the spider on the fork as this is the icing on the cake because without it we can not compress the system, this piece is responsible for adjusting the direction.
Listo el corte el resultado es el siguiente, ahora lo siguiente es colocar grasa montar el conjunto para poder colocar la araña en la horquilla ya que esta es la cereza del pastel debido a que sin ella no podemos comprimir el sistema, esta pieza es la encargada del ajuste de la direccion.

To place the chandelier we will use a 10mm die and a rubber hammer, in addition to placing a little bit of grease to make it easier for the chandelier to fit.
Para colocar la araña nos ayudaremos de un dado 10mm y un martillo de goma, además de colocar un poquito de grasa para que esta entre mas fácil.
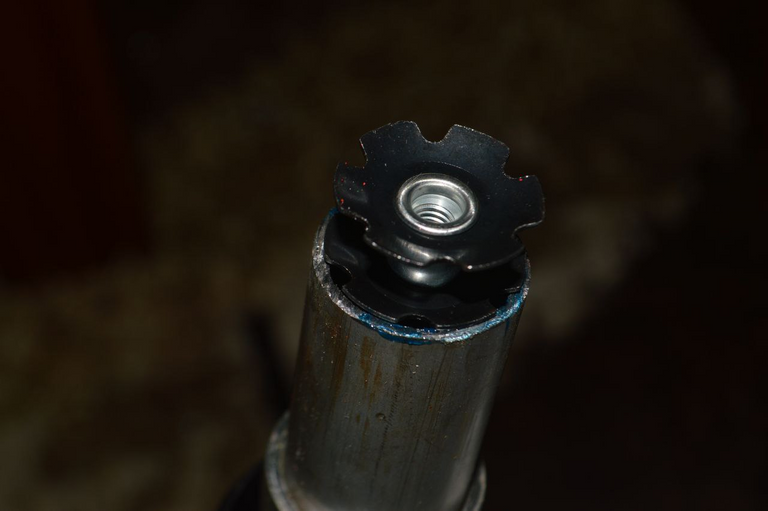
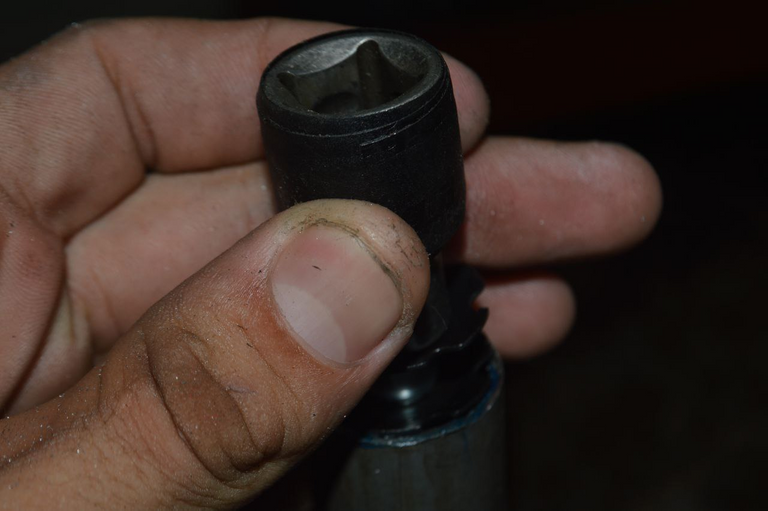
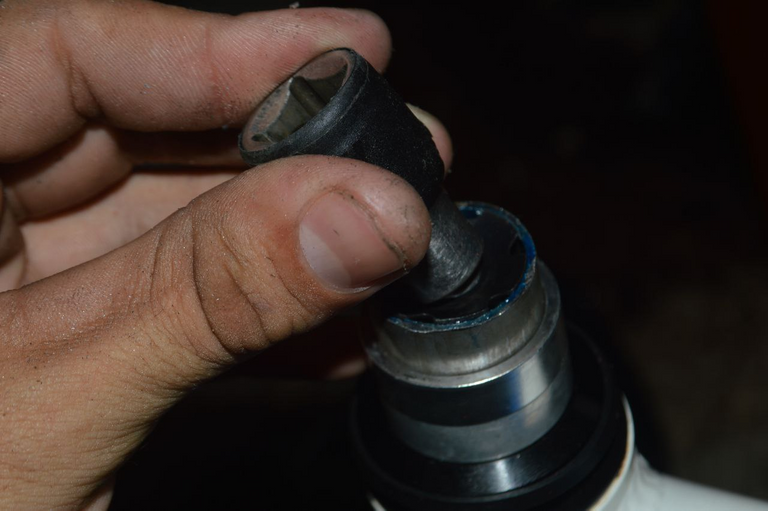
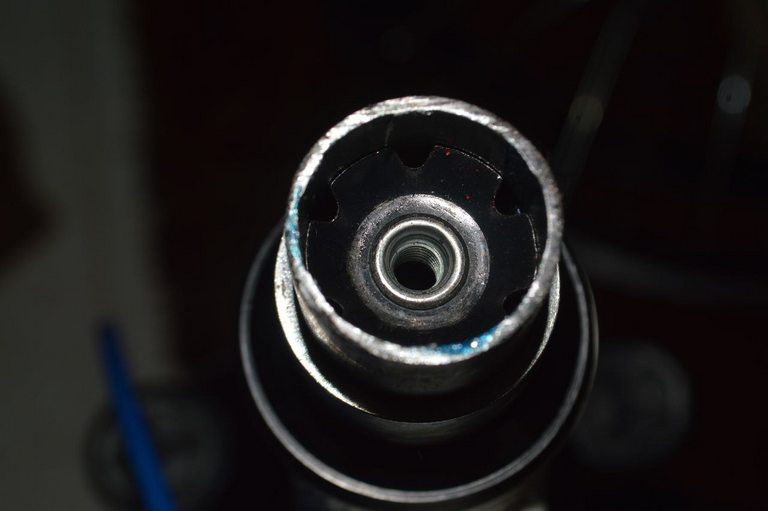
We hit it little by little so that it is straight and we will know that it is well placed when it looks like this.
Golpeamos poco a poco para que nos quede derecha y sabremos que esta bien colocada cuando se vea asi.
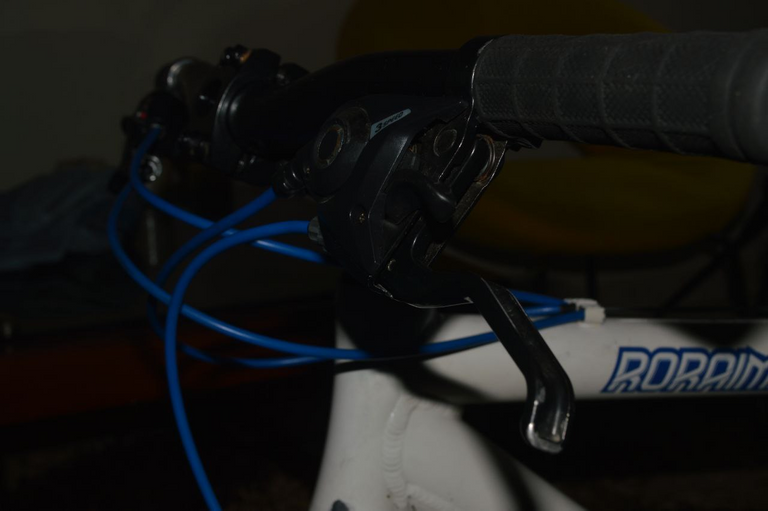
With this we would have the steering system ready, now if we can proceed with what for now will be the last piece that we will place the rear derailleur.
Con esto tendríamos listo el sistema de dirección listo, ahora si podemos proseguir con la que por ahora será la ultima pieza que colocaremos el descarrilador trasero.

We have made good progress today, since in theory 60% of the work would be ready, since we still need to adjust the brakes, tires, gears and small details to be able to say that the whole assembly is finished!
tensor colocado y podemos dar por finalizado la jornada del día de hoy donde hemos avanzado bastante ya que en teoría estaría listo un 60% del trabajo ya que aun falta ajustar los frenos, llantas , cambios y pequeños detalles para poder decir que se concluyo todo el armado!
So good friends of #hivemotors this was the beginning of the assembly of this bike what did you think ? what do you think of the progress and how were all the pieces ?
Así que buenos amigos de #hivemotors este fue el comienzo del armado de esta bicicleta que te ha parecido? que opinas del avance y que tal quedaron todas las piezas ?


Traducido desde Translated with www.DeepL.com/Translator (free version)
Las fotos son editadas desde canva, videos editados desde cap-cut desde mi Redmi note 10s.
Translated from Translated with www.DeepL.com/Translator (free version)
Photos are edited from canva, videos edited from cap-cut from my Redmi note 10s
Upvoted by the Cycling Community
Come join the Cycling Community and share your rides, bicycle, maintenance, news or any other cycling related blogs!
You can support the Cycling Community by delegating HP: 25 HP - 50 HP - 100 HP -250 HP - 500 HP