DIY//MAKING A UNIQUE SILVER BEADED BAG // THE MOST COMPLEX BEADED BAG I’VE EVER MADE
Hello my DIY family,
It’s been a while I pop here to share my creations with you. I’ve been so occupied with my art but i am am back today. Last week, I got disconnected with the art I was working on and so I decided to pause it for a while. Being someone that hates to stay idle, I decided to pick up my beads and create something beautiful.
This particular style of bag has been on my mind to create since last year but I didn’t try it out because it’s very complex. Guess what? I decided to try it out last week. I didn’t even know what came over me😂. I will not deceive you guys, this eventually becomes the most difficult and complex beaded bag I’ve ever made. The style of beading it is completely different from what I was used to. I watched tons on videos on YouTube before I was able to get a grasp of it. I’m just glad I pushed myself because the end result was worth all the stress😌😌😌.
In this blog, I will be taking us through the process of how I achieved the bag. Stay tuned with me🥰.
MATERIALS USED
The materials needed include:
- Silver beads(or any color of your choice)
- 0.7mm fishing line
- Scissors
PROCESS
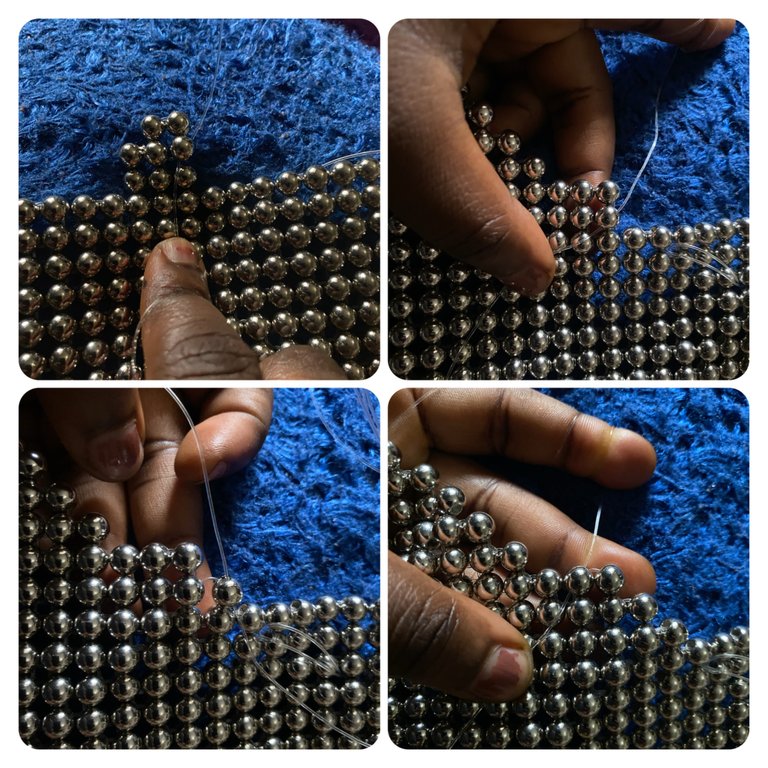
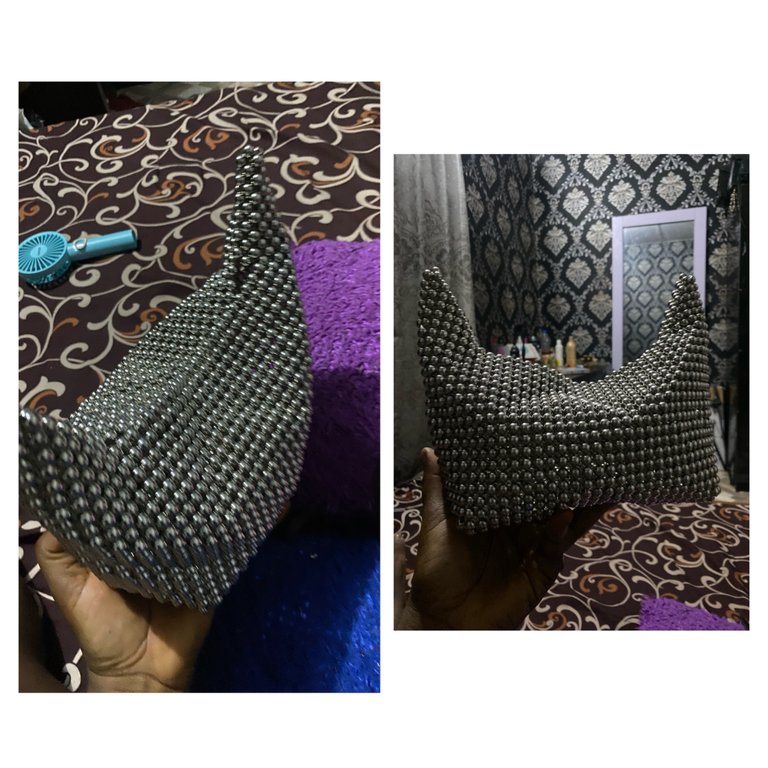
- The first step is to make 23 rings of the silver beads. After that I adopted the reduction method by reducing one ring at both ends until I have a triangular shape. At the tip, I leave it open as seen below.
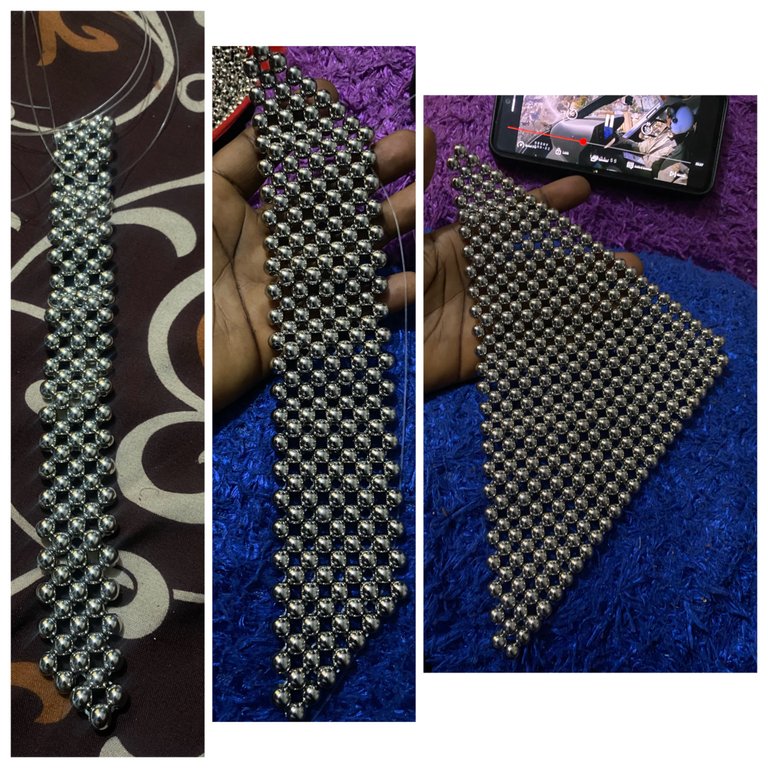
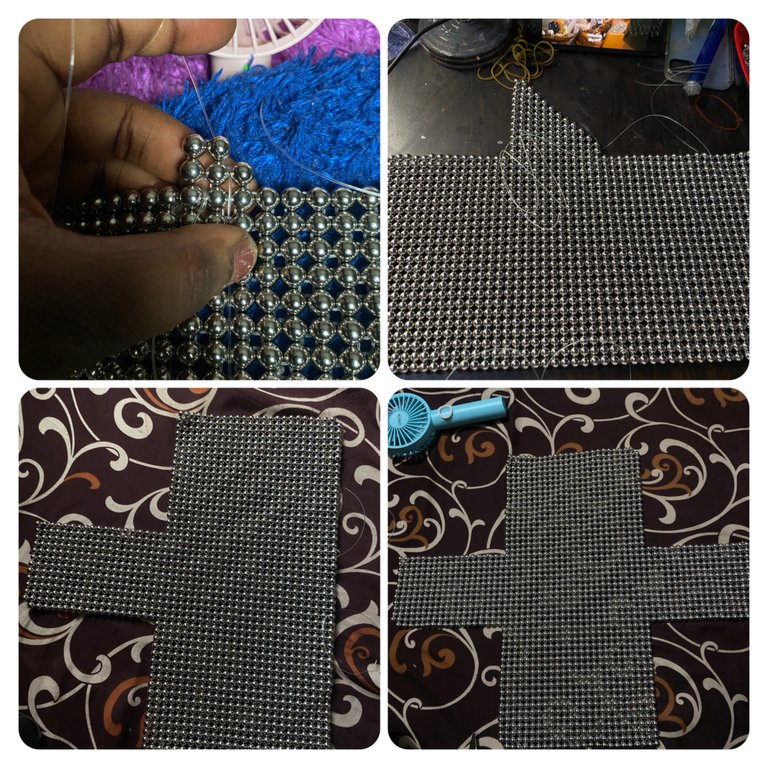
- Next, I completed the other side by using the addition and subtraction method. At the top, I was subtracting one ring while at the bottom, I was adding one ring. I continued this process until I got to the desired length I wanted.
- Upon reaching the desired length, I stopped and closed the remaining space up using the reduction method alone. Once it’s all closed up, what I had was a rectangular shaped bead as seen below.
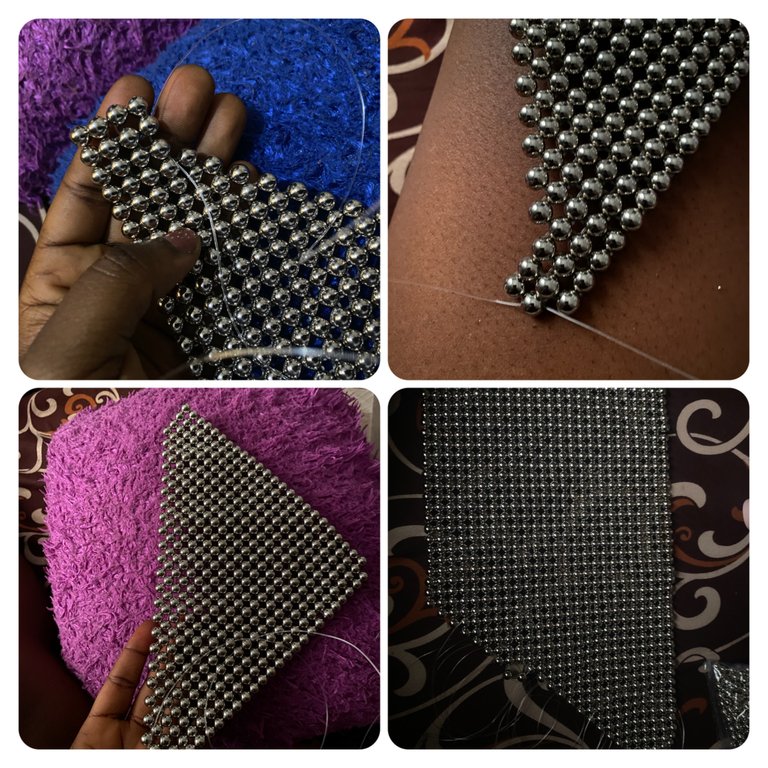
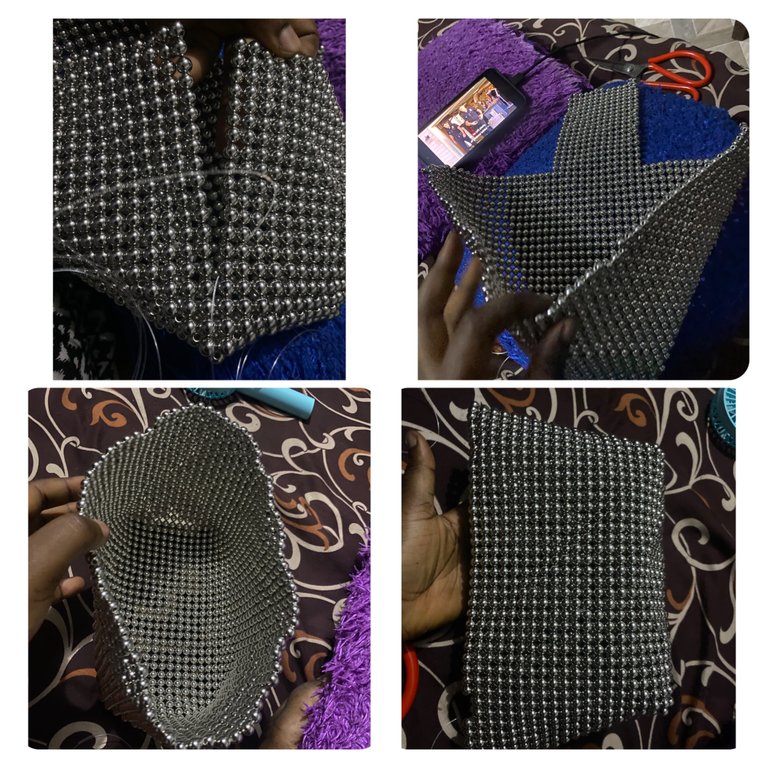
- Once the main body of the bad is completed, I started heading the sides. Ofcus, this didn’t follow the pattern of normal beading. I used the addition and subtraction method here too as seen below.
A close up look of the addition and subtraction method
- Finally, I close up the sides by joining the sides together. For the first time, since I’ve been making beaded bags, here I didn’t join by adding any beads to it. I just joined using fishing line alone. Fascinating right?
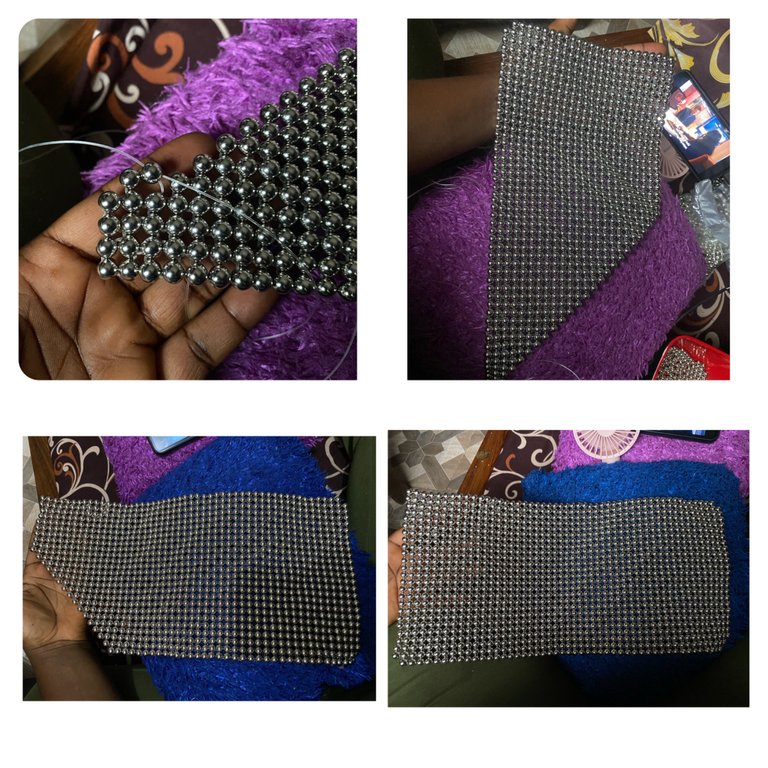
- Afterwards, I started elongating the sides to form an handle by using the addition and subtraction method too.
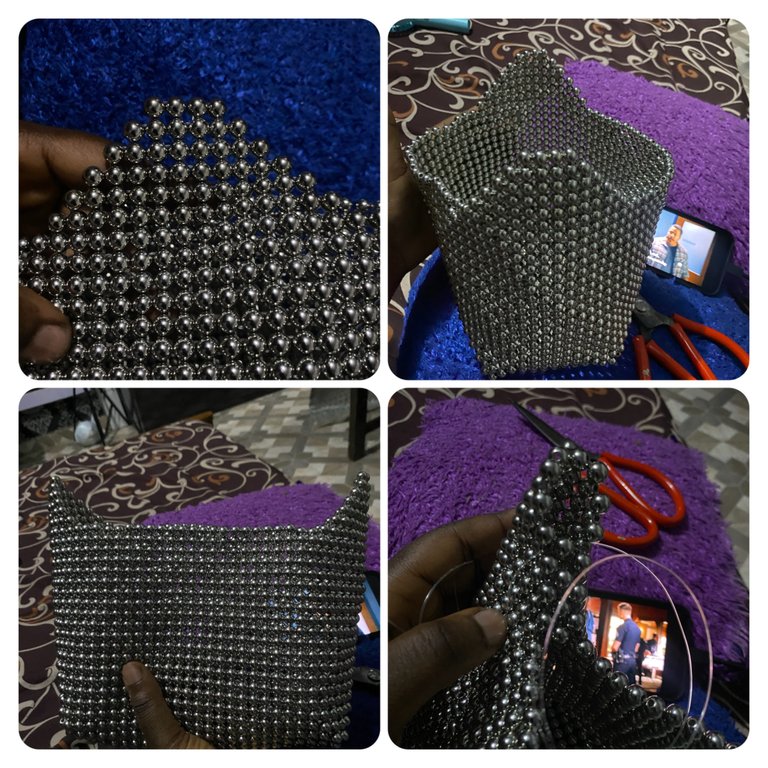
- Lastly, I closed the handle and added some length and joined them both together.
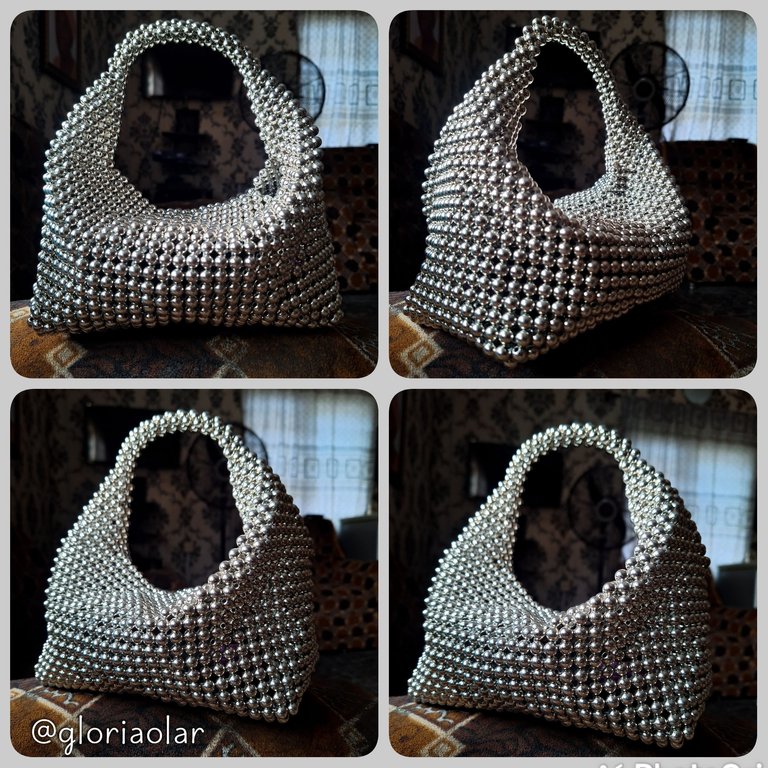
FINAL LOOK
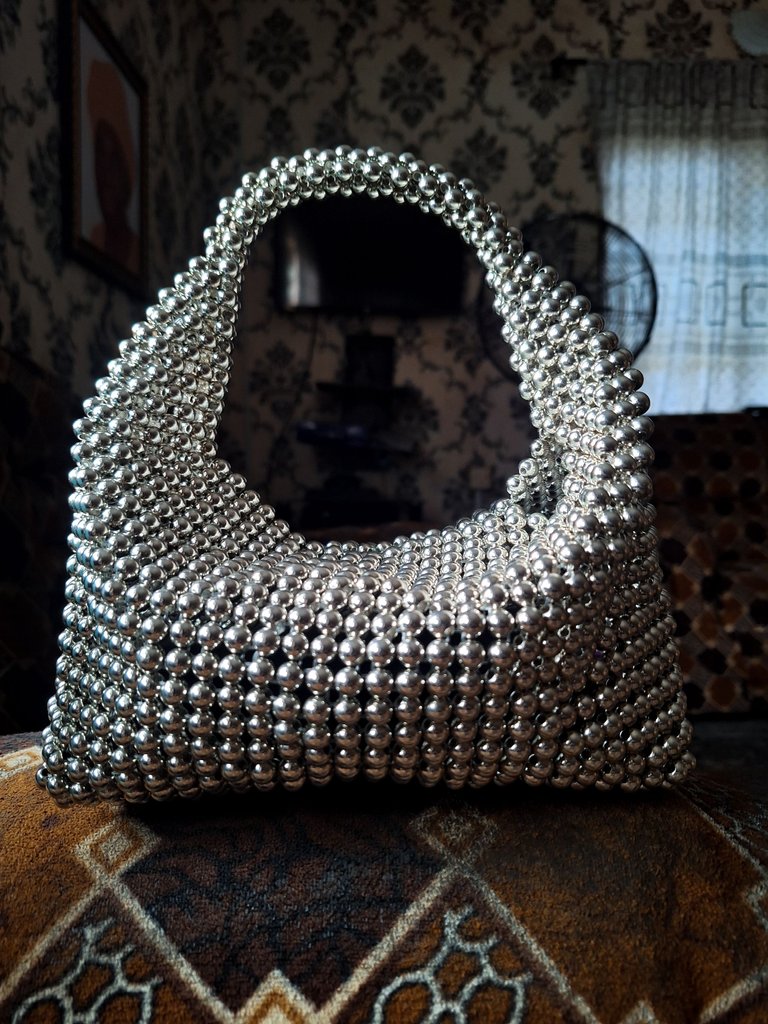
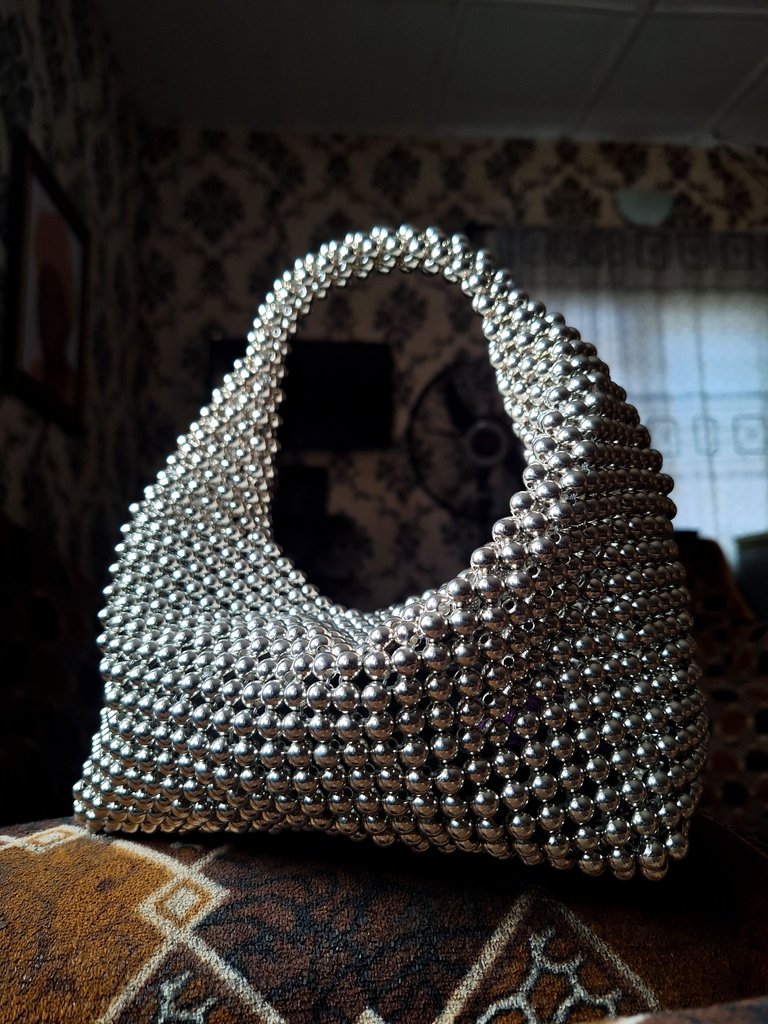

Wow, this beaded bag is extraordinary. I can imagine it takes a lot of time and work. I congratulate you for this wonderful result.
Thank you so so much. It dies takes lots of work but ut was worth it🥰🥰
It is so beautiful. The design of this bag is impressive! Love it. Well done!
Thank you so mmuch🙏. I'm so glad you love it🥰
Girl this is sooo beautiful!! I've seen many people doing this in fast videos on Tiktok, but this step by step you've made looks so easy!! I'm in love with this creation 😍. Thanks for sharing
Awwwww, thank you so much for your lovely and kind comment🥰🙏
It looks very elegant I have always wanted to have a bag like this. ❤️🌹
Awwwww, thank you so much🥰🙏
😁🤗