DISEÑO DE UNA VACA MUY CUCHI EN INKSCAPE | DESIGN OF A VERY CUTE COW IN INKSCAPE
Esta obra será titulada como la cuchi vaca, el termino cuchi proviene de los animalitos llamados cuy – cuyos- capibaras entre otros términos.
This work will be titled as the cow cuchi, the term cuchi comes from the little animals called guinea pigs - guinea pigs - capybaras among other terms.
La inspiración llego gracias a la idea que tiene mi actual pareja de realizar algo nuevo y que fuera provechoso para nuestra pequeña empresa, con esa idea comenzamos a realizar nuestros propios modelos de stickers, en lo particular me pareció una gran idea para el marketing.
The inspiration came thanks to the idea that my current partner has of doing something new and that it would be profitable for our small company, with that idea we began to make our own sticker models, in particular it seemed to me a great idea for marketing.
Sabemos y solemos utilizar dichos stickers en nuestras conversaciones de WhatsApp, Telegram y hasta Facebook algunos son solo imágenes de personas, memes conocidos, como también dibujos solidos o con cierta animación.
We know and usually use these stickers in our WhatsApp, Telegram and even Facebook conversations, some are just images of people, known memes, as well as solid drawings or with a certain animation.
Con esa idea procedí a realizar mi nuevo tutorial de cómo hacer un cuchi-vaca utilizando el programa de inkscape.
With that idea I proceeded to make my new tutorial on how to make a cuchi-cow using the inkscape program.
PASO 1:
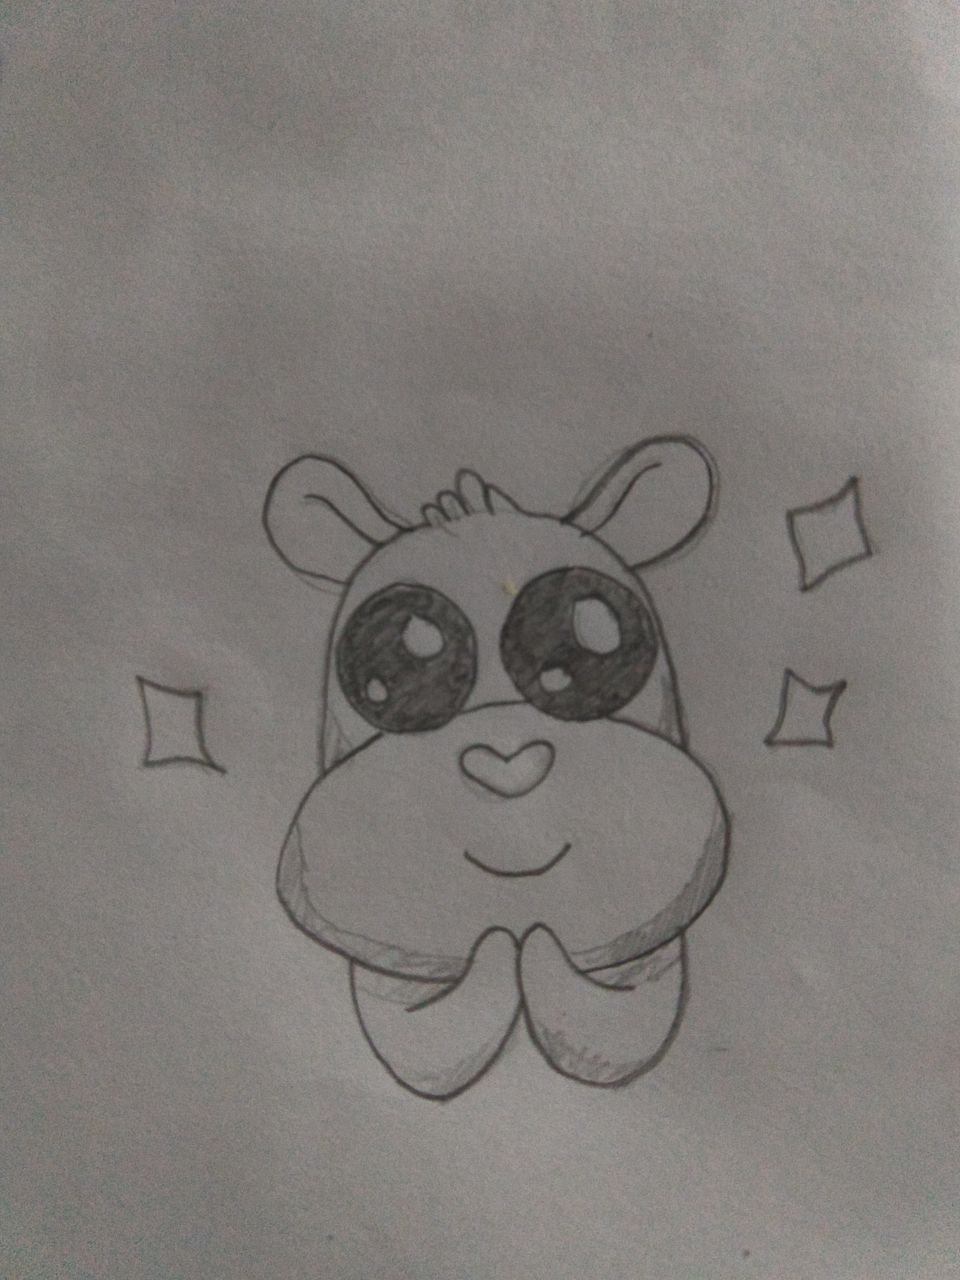
Lo primero que hice fue abrir el programa de Inkscape en la computadora, luego paso la imagen que realizo mi novio desde el Telegram de mi teléfono particular al Telegram que tengo abierto en la computadora, luego copio la imagen y la pego en el programa.
The first thing I did was open the Inkscape program on the computer, then I transferred the image that my boyfriend made from the Telegram of my private phone to the Telegram that I have open on the computer, then I copied the image and pasted it in the program.
Luego de tener la imagen ese boceto que necesito quito el internet de la computadora para mi es más sencillo de esta forma el poder trabajar ya que no hay distracciones como ver un capítulo de una serie x o distraerme leyendo noticias. La concentración en el trabajo que realizamos es primordial.
After having the image that sketch that I need, I remove the internet from the computer for me it is easier to work this way since there are no distractions such as watching an episode of a series x or getting distracted reading news. Concentration on the work we do is paramount.
PASO 2:


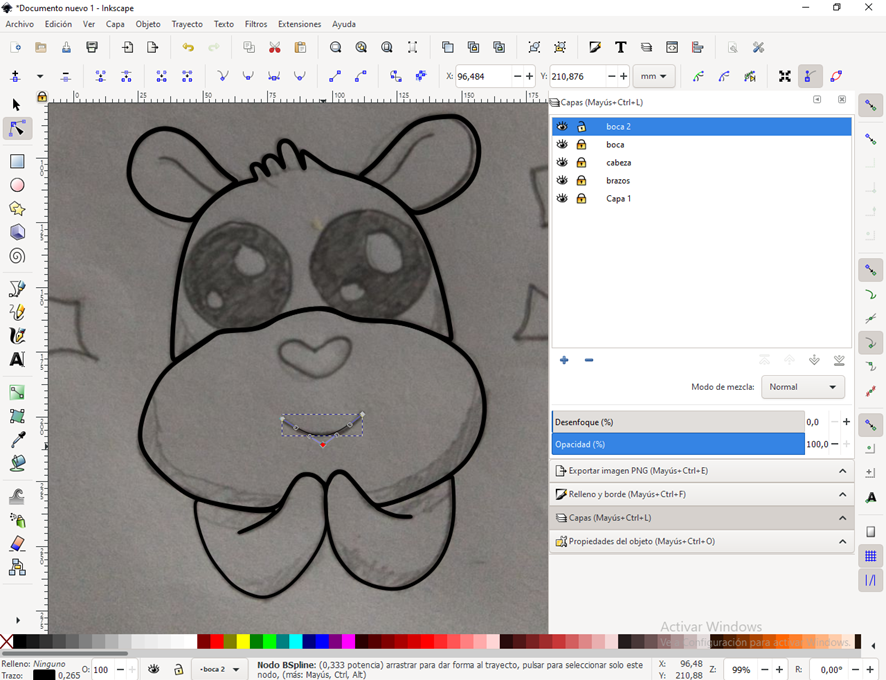
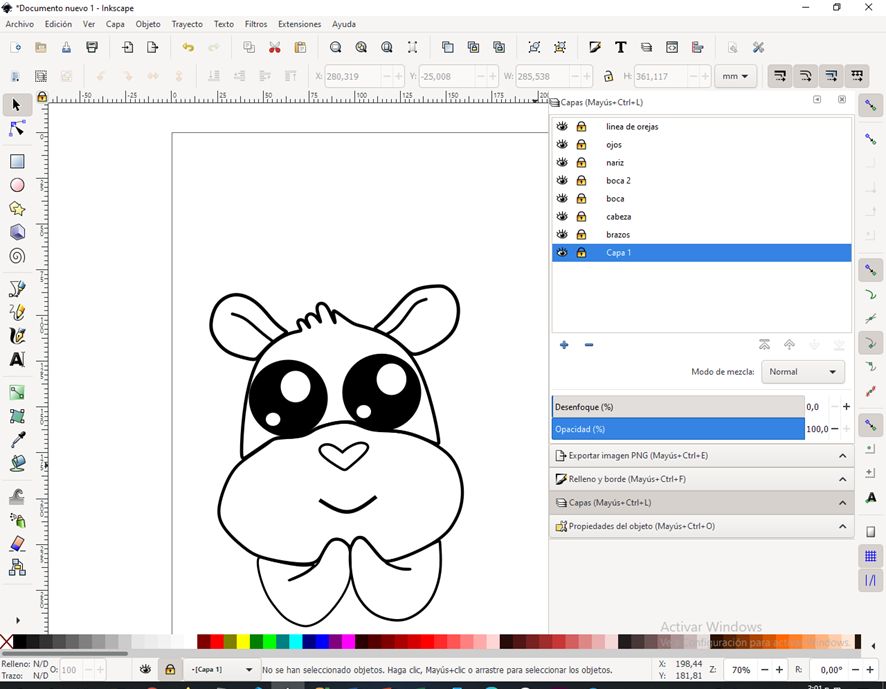
Ya teniendo el boceto en el programa procedemos a realizar (capas) esta herramienta nos permite a nosotros realizar por partes separadas cada parte del dibujo incluyendo las sombras o la iluminación.
Once we have the sketch in the program, we proceed to make (layers) this tool allows us to make each part of the drawing in separate parts, including shadows or lighting.
Les coloco un ejemplo: para mi dibujo lo primero en realizar serán las orejas de la vaca-cuchi asi que añadí una capa y le coloque el nombre de (orejas) eso significa que solo dibujare por el momento las orejas.
I give you an example: for my drawing the first thing to do will be the ears of the cow-cuchi so I added a layer and named it (ears) that means that I will only draw the ears for the moment.
Ahora bien para realizar dichas orejas nos dirigimos a la parte izquierda del programa donde veremos unas series de herramientas desplegadas, aquí y por el momento se hará solo uso de la herramienta del lápiz verde la cual nos ayuda a realizar líneas curvas y líneas rectas, si se fijan la parte de la oreja es casi en su totalidad curva y aun así en el mismo trazo debemos realizar una parte recta.
Now, to make these ears we go to the left part of the program where we will see a series of tools displayed, here and for the moment we will only use the green pencil tool which helps us to make curved lines and straight lines, if The part of the ear is fixed almost entirely curved and even so in the same line we must make a straight part.
PASO 3:
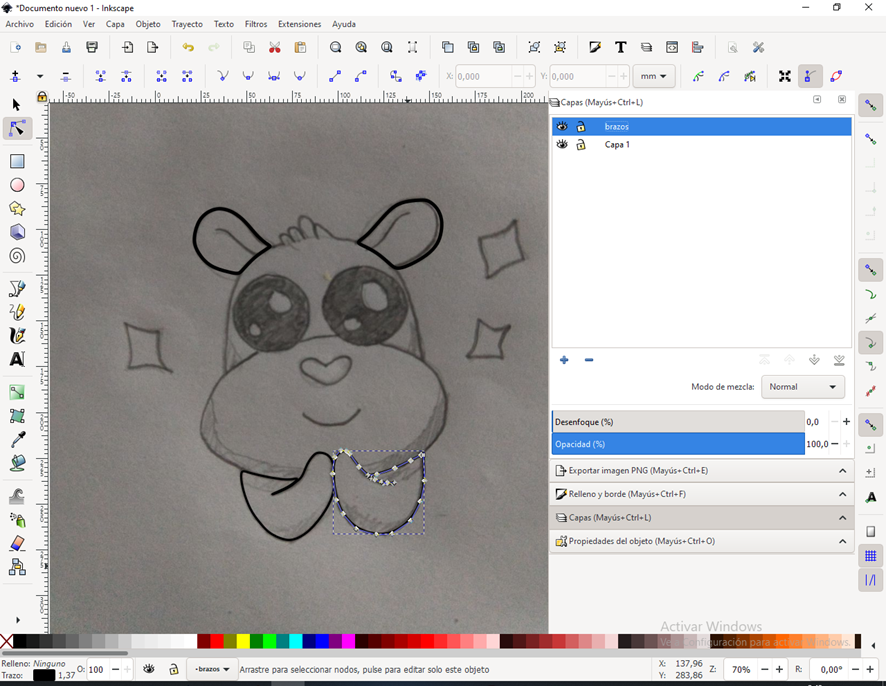

Ahora vamos a proceder con la segunda capa que vamos a titular como (brazos) lo primero que hacemos es analizar la imagen desde lejos, se observa una figura completa y luego una línea sola, queda de parte de su decisión si quieren hacer primero el contorno para luego añadir la línea o por el contrario hacer un solo trazo de manera todo unido.
Now we are going to proceed with the second layer that we are going to title as (arms) the first thing we do is analyze the image from afar, a complete figure is observed and then a single line, it is up to you if you want to make the outline first to then add the line or on the contrary make a single stroke so that everything is united.
Cabe destacar que para arreglar cada parte de los nodos pueden hacer uso de la herramienta de edición de nodos la podrán utilizar dando clic en el lado izquierdo justamente donde sale una flecha con tres puntos.
It should be noted that to fix each part of the nodes you can use the node editing tool by clicking on the left side just where an arrow with three points appears.
PASO 4:

Pasamos de los brazos a la cabeza, en esta parte ya notamos que debemos tener más cuidado ya que la parte de la cabeza debe estar enlazada con la parte de las orejas, a la misma si no te diste cuenta ya tienes parte de la solución, al crear cada capa y dibujar en cada una de ellas por separado el dibujo puedes decidir que parte va por encima y que parte va por debajo.
We go from the arms to the head, in this part we already noticed that we must be more careful since the part of the head must be linked to the part of the ears, to the same if you did not realize you already have part of the solution, By creating each layer and drawing on each of them separately, you can decide which part goes above and which part goes below.
En nuestro caso la parte la parte de la cabeza debe ir por encima de la parte de las orejas, realizamos la figura haciendo uso de la herramienta del lápiz de formación de curvas y líneas para luego editar con la flecha de los tres puntos mencionada en la parte superior.
In our case, the part of the head must go above the part of the ears, we make the figure using the pencil tool for forming curves and lines to then edit with the arrow of the three points mentioned in the figure. upper part.
PASO 5:
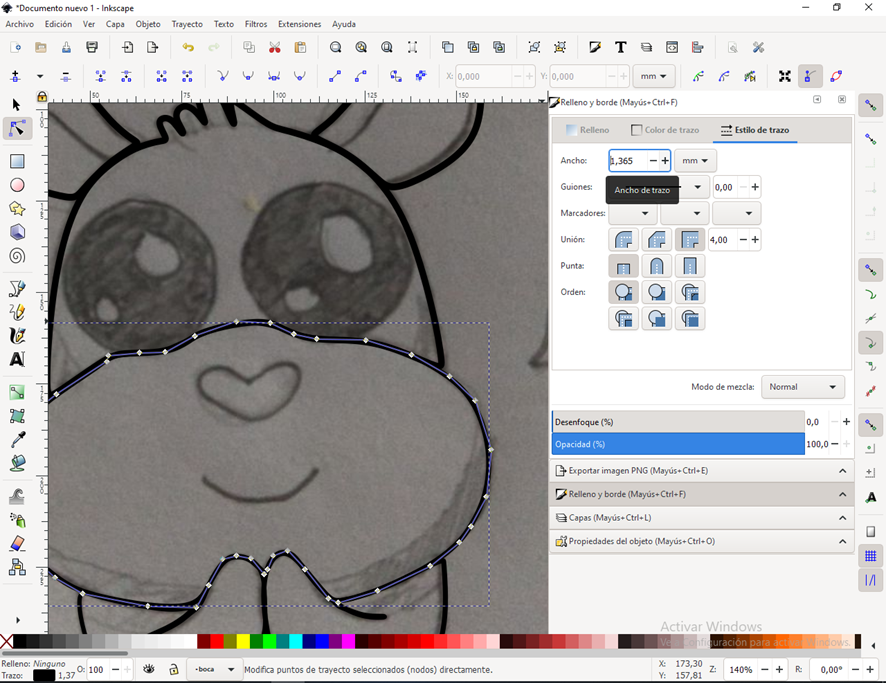
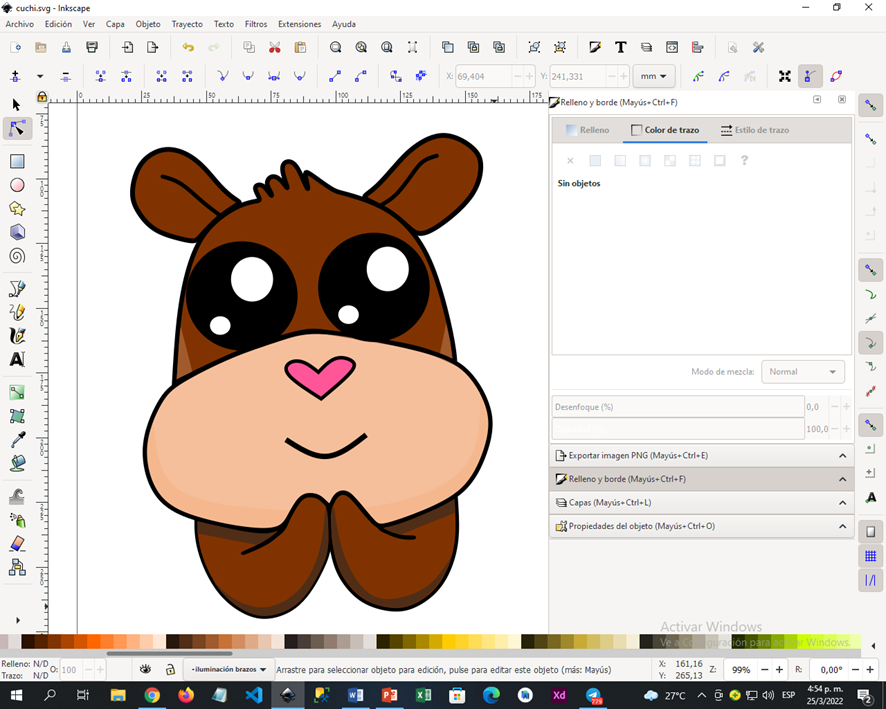
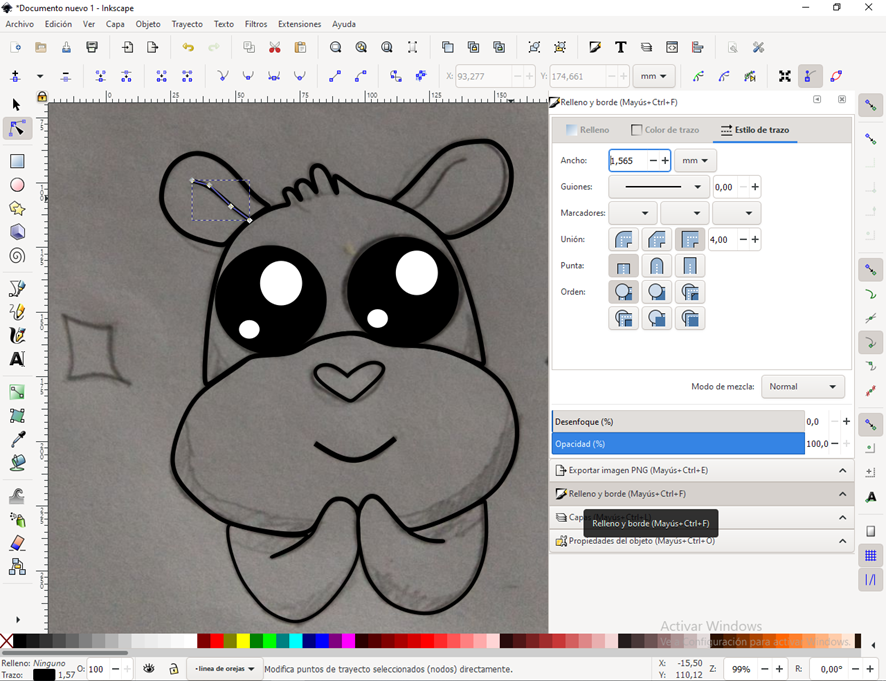
Toca realizar la parte de los cachetes y la boca, para esta parte seguimos utilizando la herramienta del lápiz y la edición de nodos pero además comenzamos a darle a nuestros trazos un grosor para distinguir lo que ya hicimos y lo que nos falta por realizar; además se darán cuenta que colocando las líneas sobre el boceto un poco más gruesas podrán apreciar de mejor forma cualquier imperfección, si una línea no está lo suficientemente recta o la curvatura de una parte de la mejilla izquierda no es igual al lado derecho.
It's time to make the part of the cheeks and the mouth, for this part we continue using the pencil tool and the node edition but we also begin to give our strokes a thickness to distinguish what we have already done and what we still have to do; In addition, they will realize that by placing the lines on the sketch a little thicker, they will be able to better appreciate any imperfection, if a line is not straight enough or the curvature of a part of the left cheek is not the same as the right side.
Mi consejo es ir a la parte derecha, dar clic donde dice (relleno y borde) luego ir a la parte donde dice (estilo del trazo) y cambiar el ancho a 1.200 o 1.535 realizando esta acción podremos tener mejor visibilidad del dibujo.
My advice is to go to the right side, click where it says (fill and border) then go to the part where it says (stroke style) and change the width to 1,200 or 1,535 by doing this we can have better visibility of the drawing.
PASO 6:
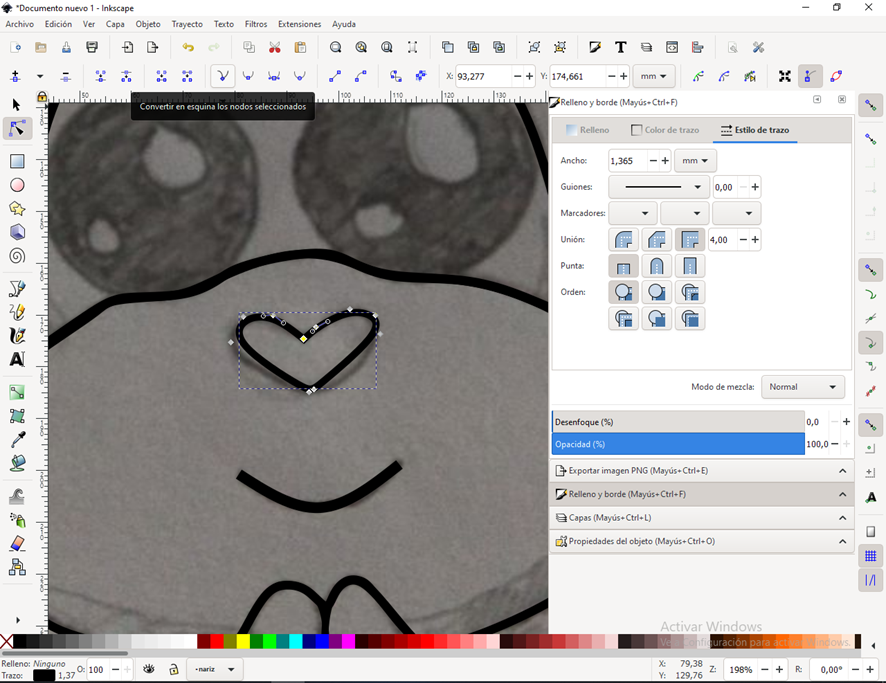

La nariz según el boceto de dicho dibujo tiene forma de corazón, les informo que aunque no haya una herramienta exacta, de igual manera lo pueden realizar, piensen en que están realizando un triángulo realizaran 3 puntos del lado derecho y luego tres más en el lado izquierdo y sin darte cuenta ya tendras una forma de corazón la cual darás forma utilizando la herramienta de la parte superior donde se visualice un trazo curvo que diga (Suavizar nodos o Autosuavizar nodos) estas herramientas nos ayudaran a darle un aspecto más curvo en las esquinas creando la imagen de un corazón.
The nose according to the sketch of said drawing has the shape of a heart, I inform you that although there is no exact tool, you can do it in the same way, think that you are making a triangle, you will make 3 points on the right side and then three more on the side left and without realizing it you will already have a heart shape which you will shape using the tool at the top where a curved path is displayed that says (Smooth nodes or Auto-smooth nodes) these tools will help us to give it a more curved appearance in the corners creating the image of a heart.
PASO 7:
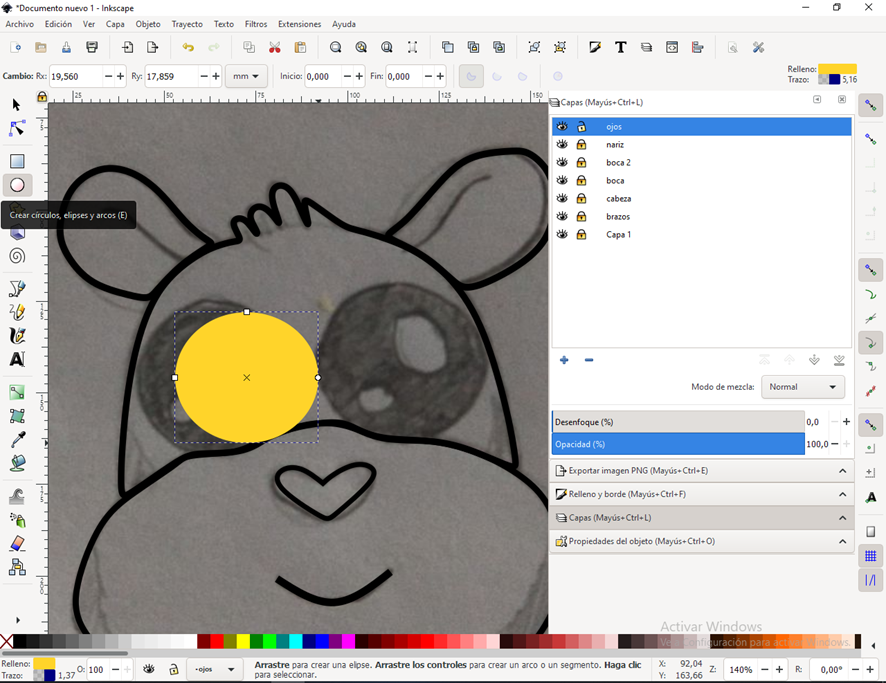
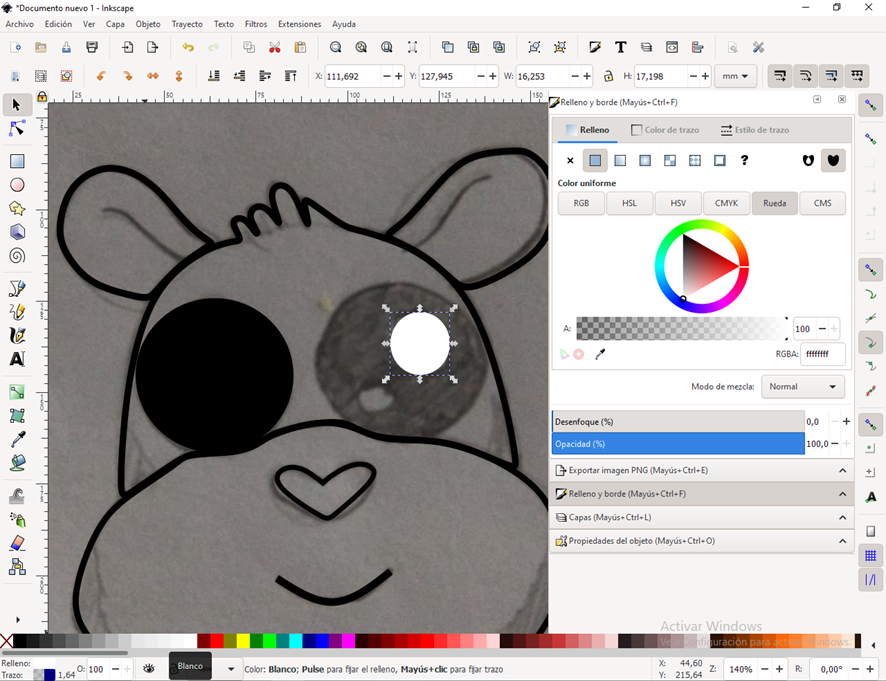
Los ojos: esta parte es un poco complicada y sencilla a la vez, ya que se hace uso de la herramienta de al lado izquierdo circular que nos permite crear círculos, indico que es un poco complicada ya que la parte de los ojos es la que realmente le dará vida y emoción al dibujo, así que elegí realizar un solo circulo negro de base para luego realizar dos círculos más, esta vez de color blanco.
The eyes: this part is a bit complicated and simple at the same time, since we use the circular tool on the left side that allows us to create circles, I indicate that it is a bit complicated since the part of the eyes is the one that It will really give life and emotion to the drawing, so I chose to make a single basic black circle and then make two more circles, this time white.
Ahora lo que debes hacer es formar tu primer ojo y luego lo que haces es copiar ese mismo ojo con control c y control ve para que se forme el ojo izquierdo lo puedes hacer todo unido o por partes (cada circulo)
Now what you have to do is form your first eye and then what you do is copy that same eye with control c and control go so that the left eye is formed you can do it all together or in parts (each circle)
PASO 8:
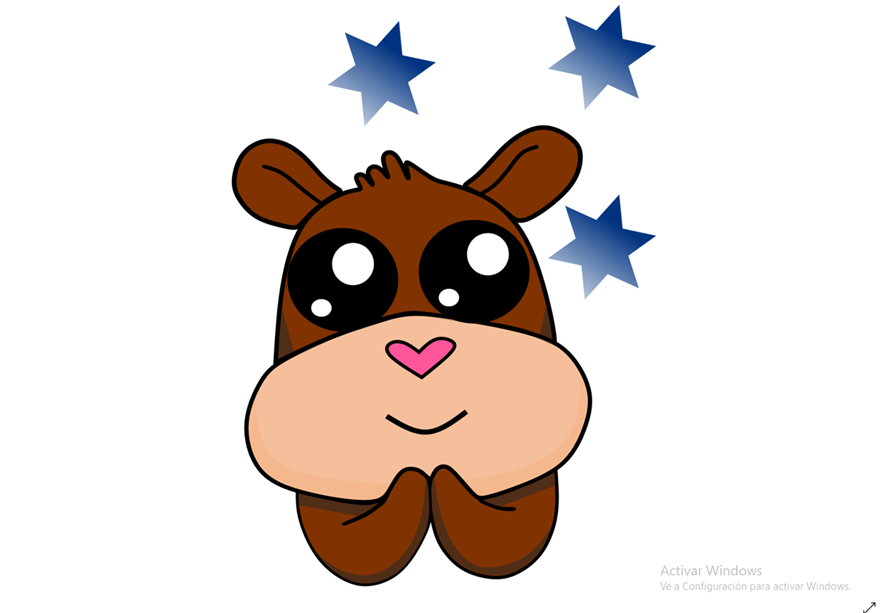
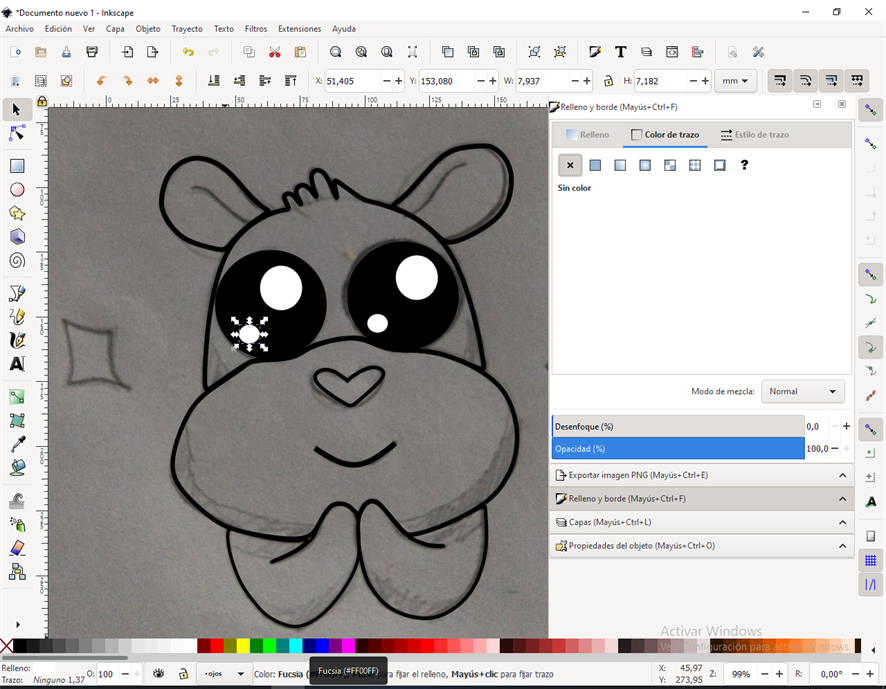
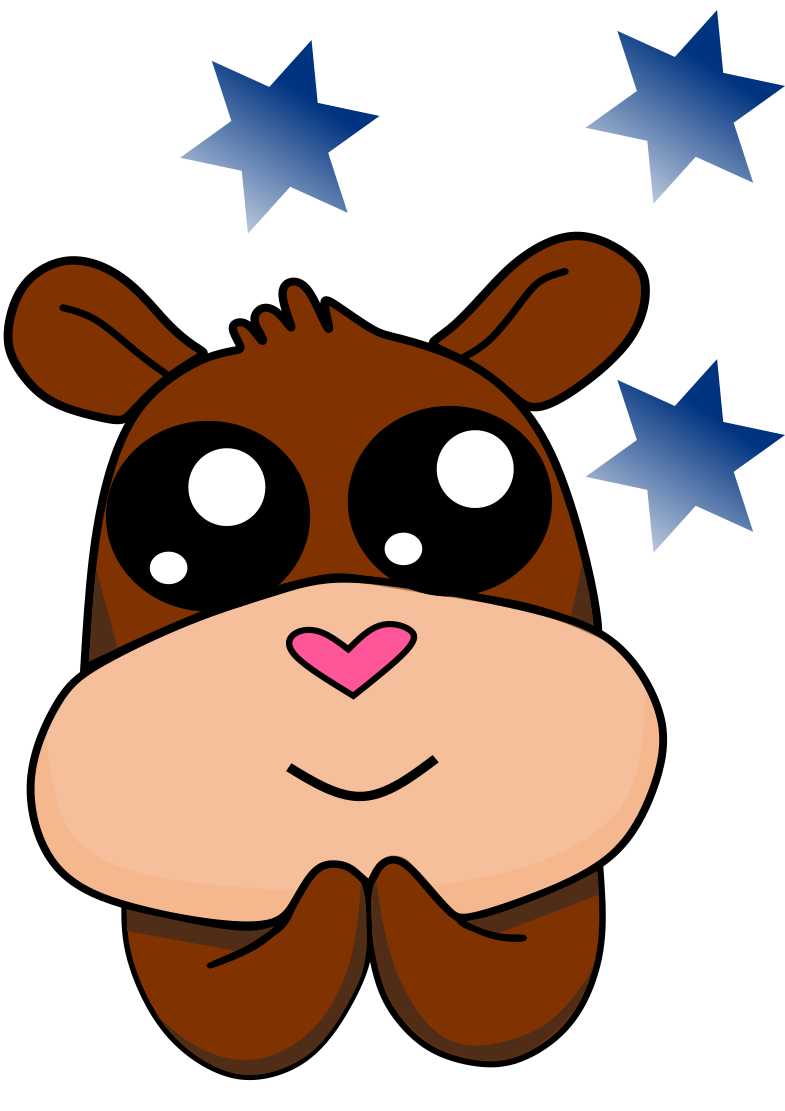
Y ahora terminamos la figura de la cuchi-vaca colocando las dos líneas semi curvas en las ojeras.
And now we finish the figure of the cuchi-cow by placing the two semi-curved lines in the eye circles.
COLOR:
Como lo indica el titulo ya terminamos de hacer la figura de la cuchi-vaca ahora es tiempo de decidir qué tipo de color queremos colocar en cada parte del cuerpo.
As the title indicates, we have finished making the figure of the spoon-cow, now it is time to decide what type of color we want to place in each part of the body.
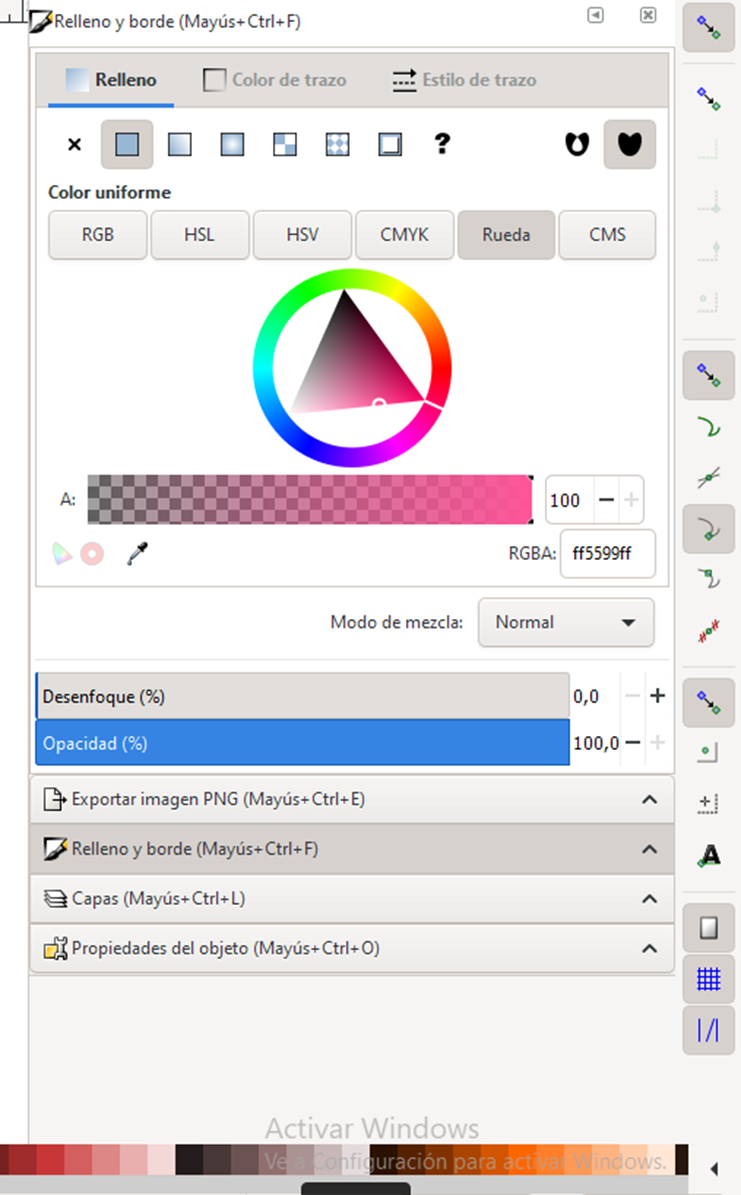
Para este paso es importante hacer uso de la herramienta del lado derecho llamada (Relleno y borde) conjuntamente con la paleta de colores que se tiene desplegada en la parte inferior del programa.
For this step it is important to use the tool on the right side called (Fill and border) together with the color palette that is displayed at the bottom of the program.
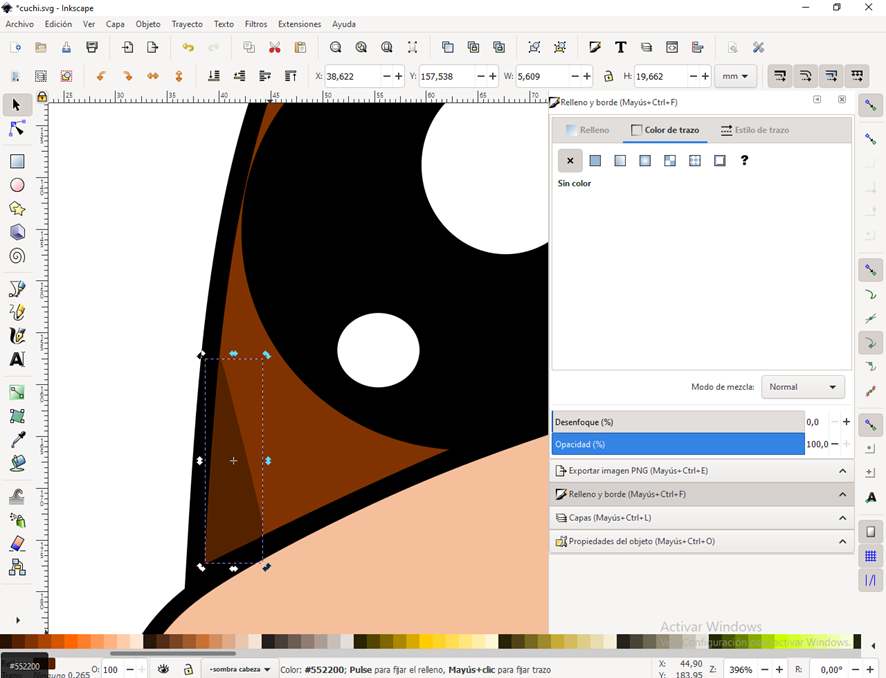
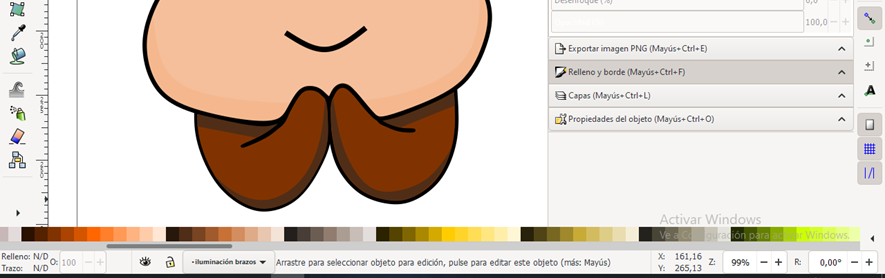
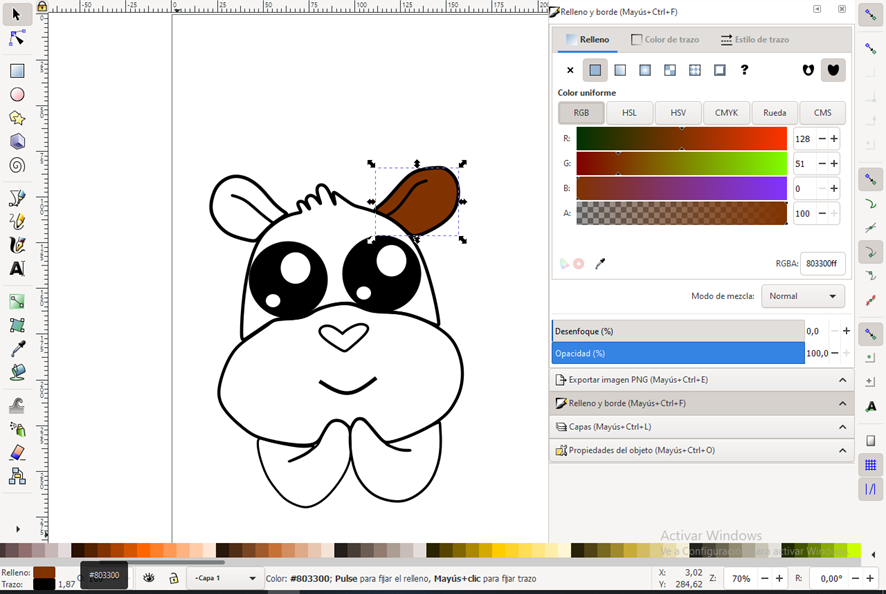
Ahora bien para la parte las orejas, cabeza y brazos elegimos un color marrón oscuro y para la sombra un marrón un tanto más oscuro al que elegimos, es sencillo si tenemos ya elegido en la paleta de colores desplegado el programa el color base debe ser un tono neutro ni muy oscuro ni muy claro ya que esas otras derivaciones de colores serán las que utilizaremos para darte más vida y realismo al dibujo.
Now, for the part of the ears, head and arms we choose a dark brown color and for the shadow a slightly darker brown than the one we chose, it is simple if we have already chosen in the color palette displayed in the program the base color must be a neutral tone neither too dark nor too light since those other color derivations will be the ones we will use to give more life and realism to the drawing.
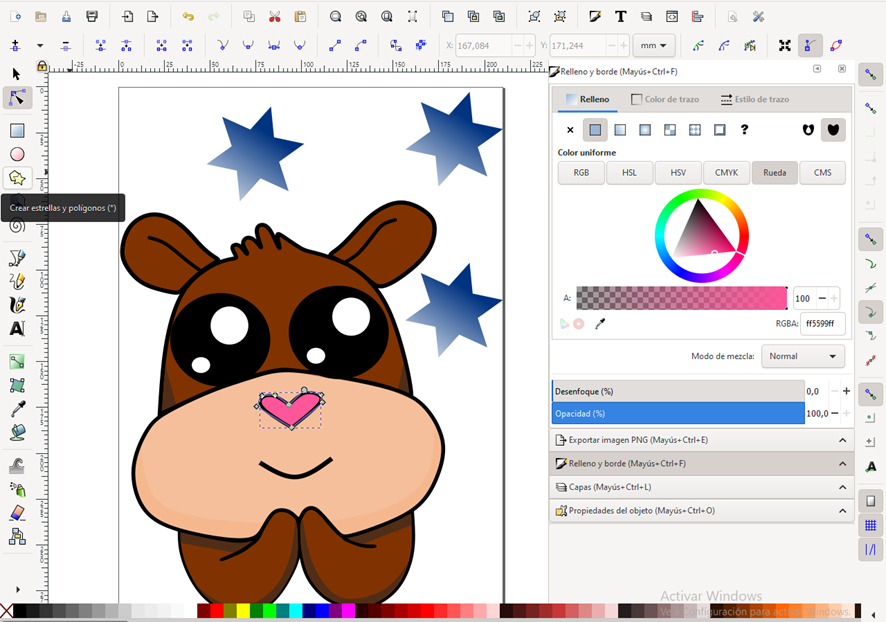
Por último el tono de la nariz de un color rosado y agregue a mi gusto unas estrellas azules, las cuales realice con la herramienta del lado izquierdo debajo del circulo que te permite crear estrellas y polígonos.
Finally the tone of the nose of a pink color and add some blue stars to my liking, which I made with the tool on the left side below the circle that allows you to create stars and polygons.
https://twitter.com/GinethMaria2/status/1509249591417393162
The rewards earned on this comment will go directly to the person sharing the post on Twitter as long as they are registered with @poshtoken. Sign up at https://hiveposh.com.
Hola que bueno que está dibujando con esta excelente herramienta de Inkscape, éxitos para ti.
Gracias, cada vez veo más funciones que me gustan de esta herramienta
Hola @ginethchira2301,te quedo muy lindo tu dibujo está bien fino. Bendiciones pata ti
Muchísimas gracias por pasar y leer mi post, las horas de trabajo dieron su bello resultado