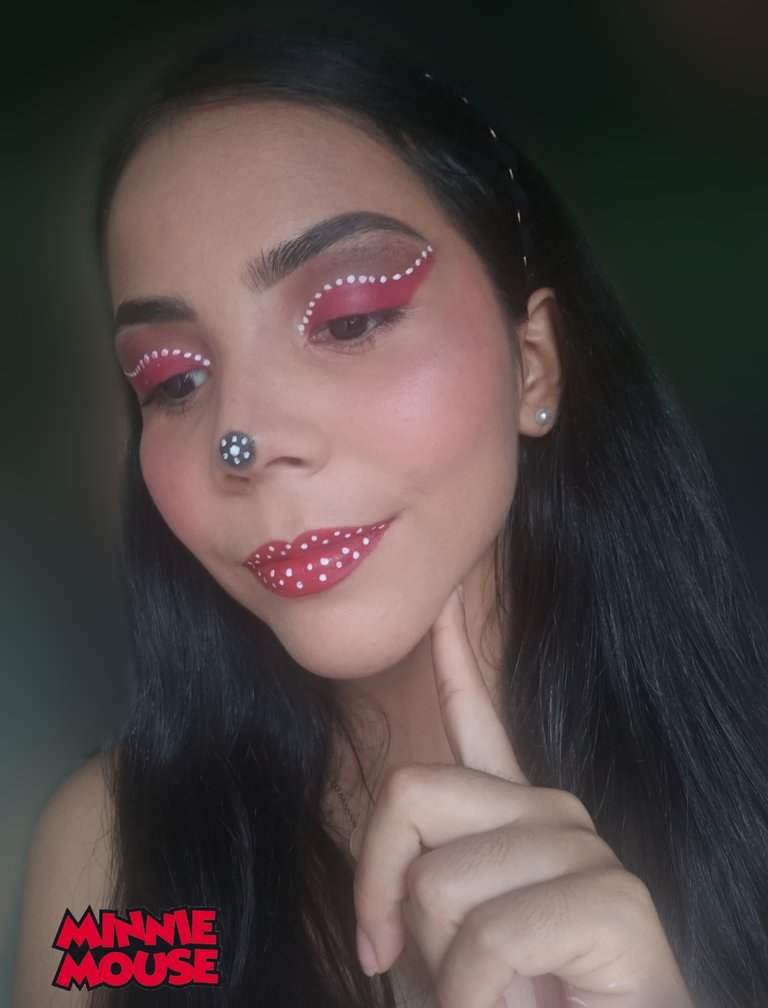
[ESP-ING] Maquillaje inspirado en "Minnie Mouse"
¡Bienvenidos a una nueva entrada en mi blog gente linda de Hive!
Welcome to a new entry of my blog pretty Hive people!
Como siempre llegué demasiado tarde a la iniciativa de la comunidad jajajaj, no sé por qué rayos pensé que todavía tendría más tiempo, pero bueno, igual decidí subir el look y el personaje de Disney en el cuál me inspiré fue Minnie Mouse, tenía en mente otro pero no me dió chance de comprar los materiales.
As always I arrived too late to the community initiative hahahahah, I don't know why I thought I would still have more time, but well, I still decided to upload the look and the Disney character I was inspired by was Minnie Mouse, I had another one in mind but I didn't have the chance to buy the materials.
No sé porqué pero últimamente me siento demasiado cansada y hacer las cosas me cuesta más, creo que necesito vitaminas, con decirles que no siquiera he empezado a los looks navideños, por el momento les dejo el proceso de este maquillaje:
I don't know why but lately I feel too tired and it's harder for me to do things, I think I need vitamins, I haven't even started the Christmas looks, for the moment I leave you the process of this makeup:
⭐ Paso 1| Step 1
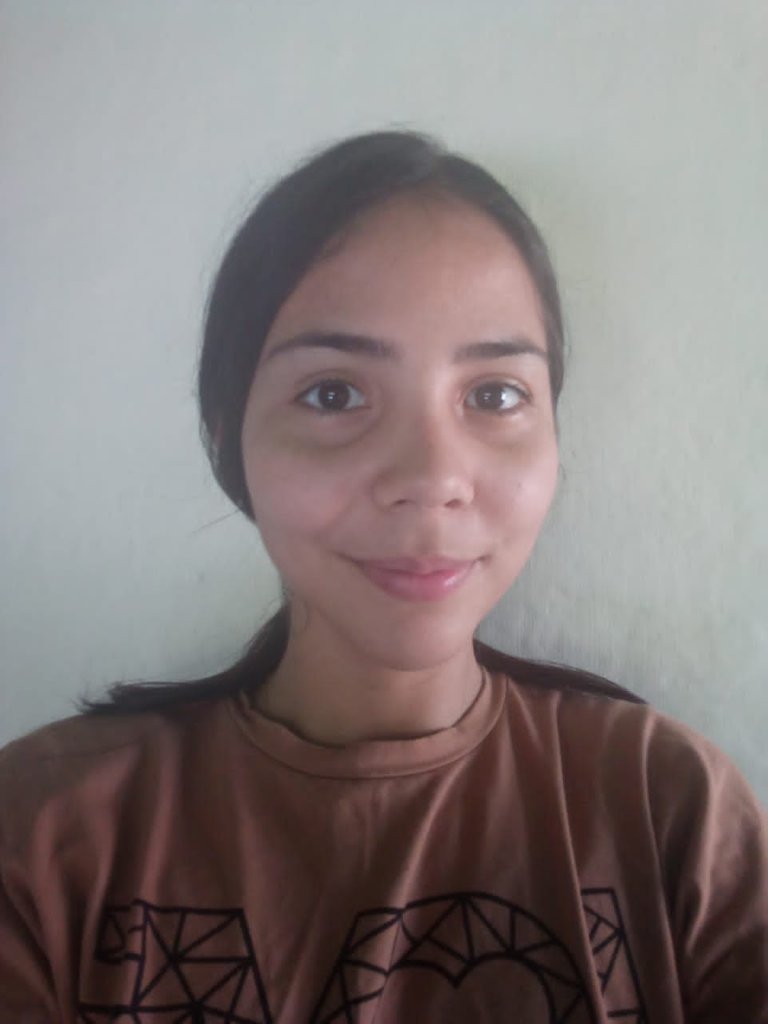
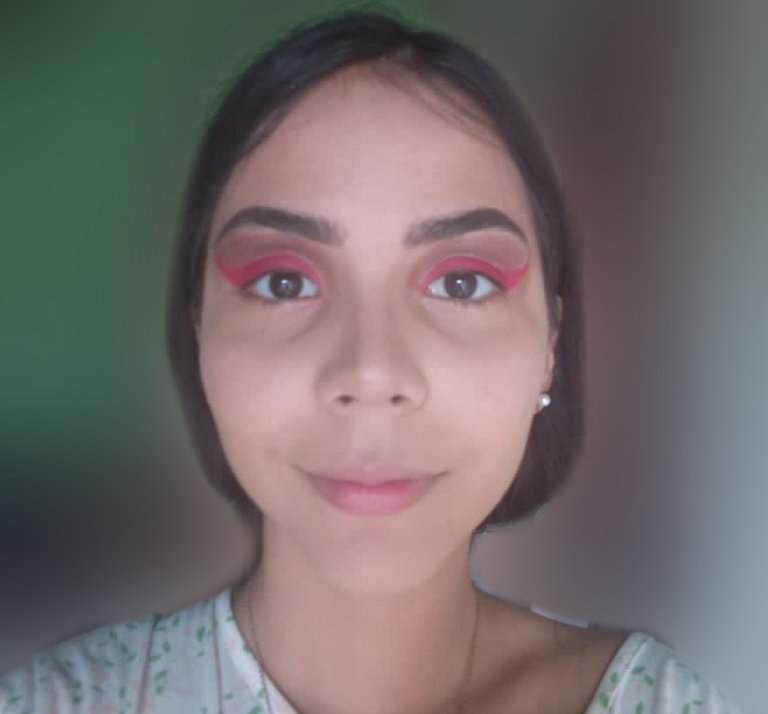
| Lo primero que hice fue lavar mi carita con jabón y luego aplicar un poco de tónico y crema hidratante, se supone que tenía que utilizar el cintillo pero sinceramente no lo soporto. | The first thing I did was wash my face with soap and then apply some toner and moisturizer, I was supposed to use the headband but honestly I can't stand it. |
⭐ Paso 2 | Step 2
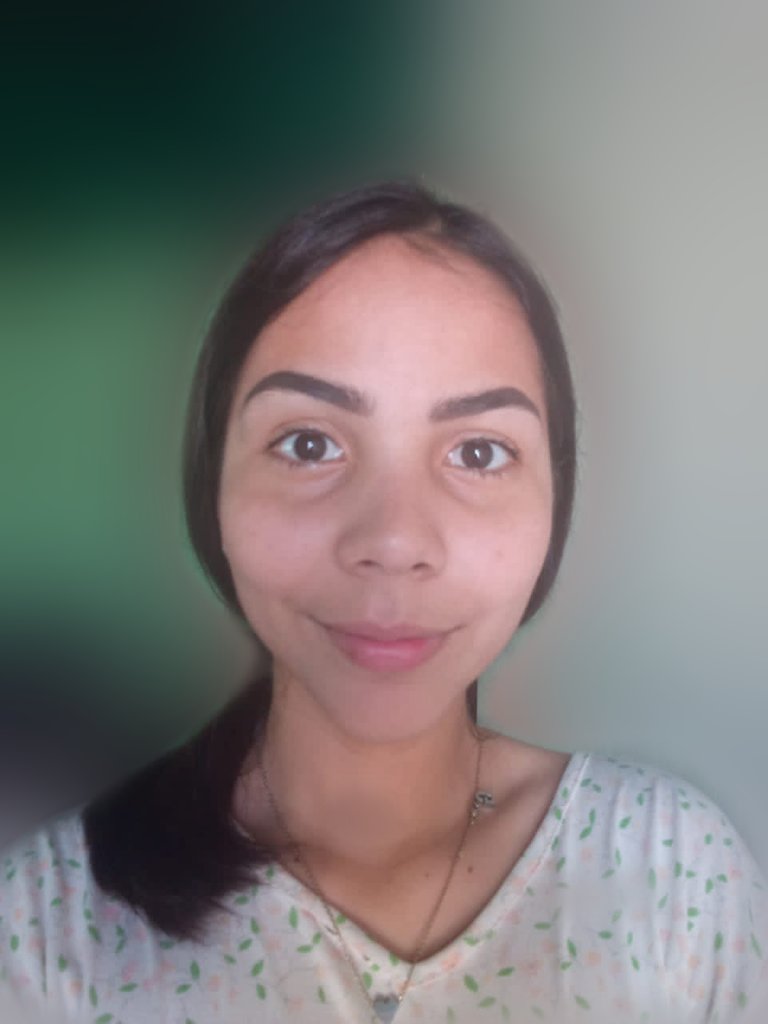
| Maquillar mis cejas siempre es un proceso porque les cuento que todavía no las dejo tan parecidas jajaja, así que primero las peiné y luego agregué una pomada marrón claro. | Making up my eyebrows is always a process because I tell you that I still don't leave them that similar hahaha, so first I combed them and then I added a light brown pomade. |
⭐ Paso 3 | Step 3
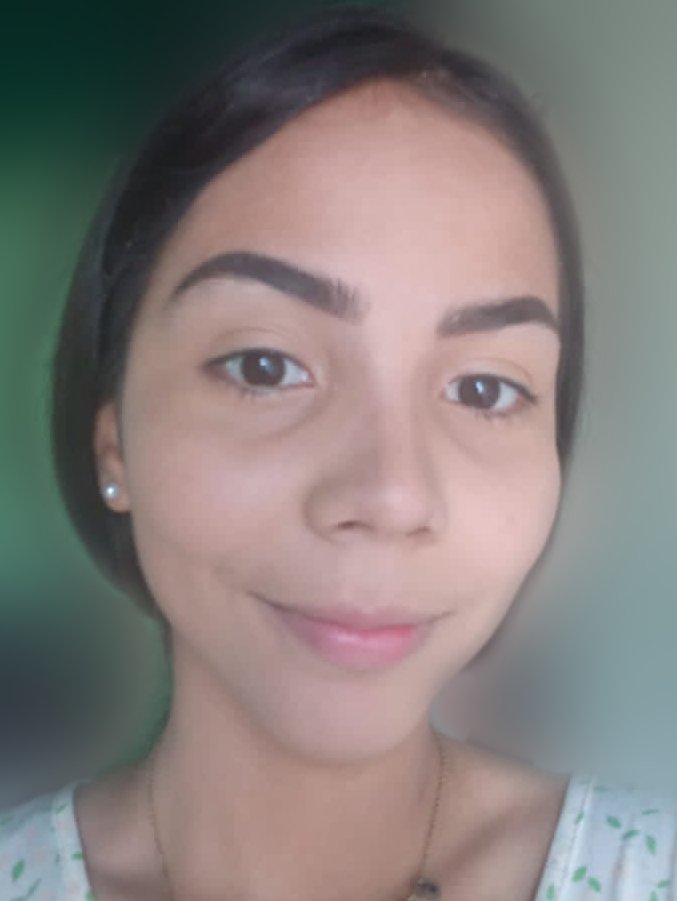
| Procedí a preparar mi rostro aplicando corrector en las zonas problemáticas y base, con la ayuda de una esponja difuminé todo, decidí hacerme un contorno en el área de la nariz pero aún no me sale como debería jajaja. | I proceeded to prepare my face by applying concealer on the problem areas and foundation, with the help of a sponge I blurred everything and yes, the foundation tone is lighter than my skin but that was the idea. |
⭐ Paso 4 | Step 4
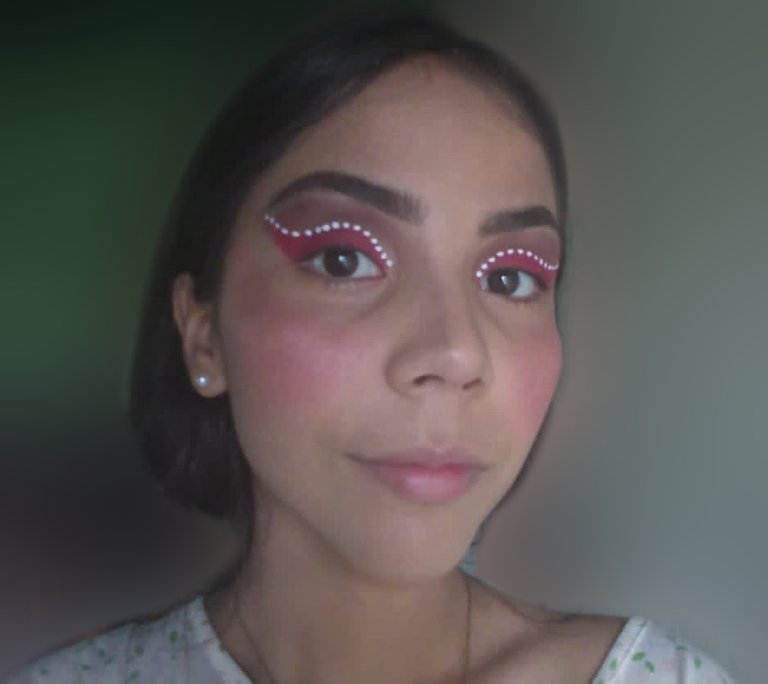
| En mi párpado empecé aplicando una sombra marrón y difuminando toda esa área, para luego realizar un corte de cuenca a la mitad. Y el segundo tono a utilizar sería el característico rojo de este personaje, el cuál complemente haciendo pequeños puntos blancos para marcar el corte. | On my eyelid I started by applying a brown shadow and blurring the whole area, and then cut the eye socket in half. And the second shade to use would be the characteristic red of this character, which I complemented by making small white dots to mark the cut. |

⭐ Paso 5 | Step 5
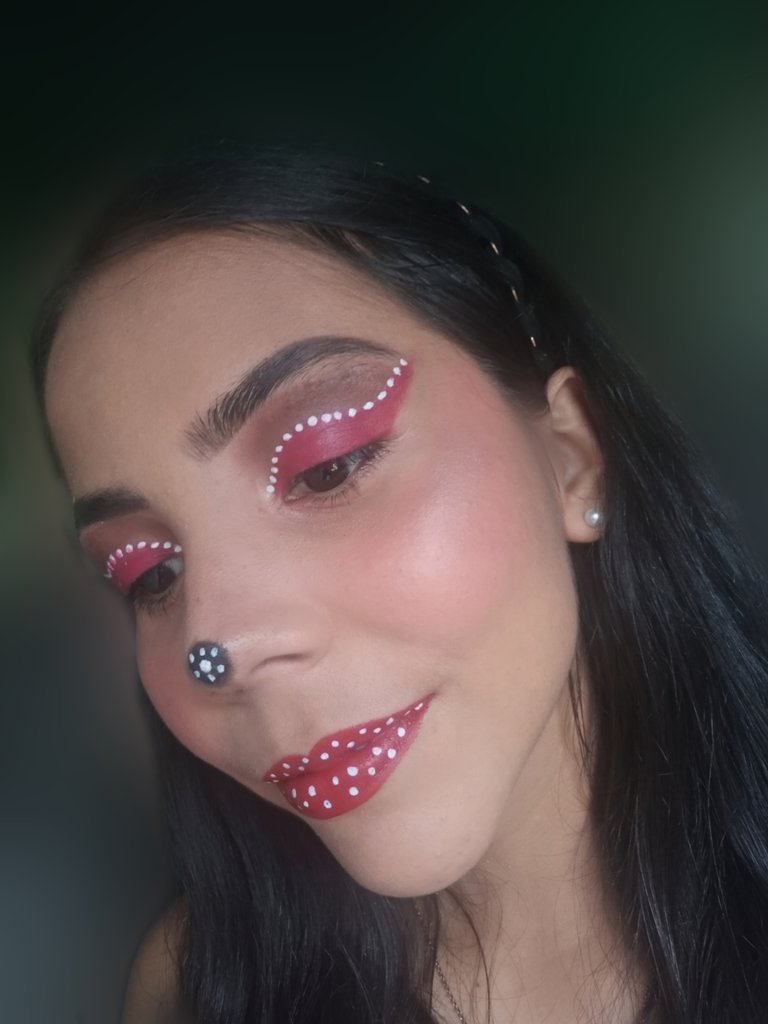
| Al terminar con los ojos apliqué rubor en mis cachetes y en mis labios decidí aplicar un tono rojo y complementar con puntos blancos, para luego hacer lo mismo en el área de la nariz. | When I finished with the eyes I applied blush on my cheeks and on my lips I decided to apply a red tone and complement it with white dots, then I did the same on the nose area. |

⭐ Paso 6 | Step 6
| Quería hacerme el cintillo distintivo de este personaje pero no tenía la idea de cómo así que decidí tomarme las fotos sin ello. | I wanted to make the distinctive headband of this character but I had no idea how to do it so I decided to take the pictures without it. |
Espero les haya gustado amigos. ¡Nos estamos leyendo!
I hope you liked it friends. We are reading each other!
0
0
0.000
Que lindo :) Me gusta como te quedè el labio 😊
!discovery glowup
This post was shared and voted inside the discord by the curators team of Discovery-it in collaboration with Glowup Art community.
Discovery-it is also a Witness, vote for us here
Delegate to us for passive income. Check our 80% fee-back Program