[EN/ES] Do you want to record gameplays with an old computer? Here are my experiences and tips

Selfie taken with my Redmi Note 11, showing a screenshot of my YouTube channel in the background.
Although in this community I have not yet uploaded any gameplay, I have experience recording this type of content for my YouTube channel, which I have been making gameplays since 2015 with a modest computer and I would like to share that experience of creating audiovisual content with limited resources. Demonstrating that it is not necessary to have a cutting-edge computer, or high-end peripherals for the creation of this type of content related to the world of video games.
Of course, respecting the limitations of the computer we have, it's practically impossible for you to play AAA titles on an old machine no matter how optimized that computer is. That's why my YouTube channel focuses on indie games that generally consume few resources, although nowadays the line that separates an indie company from an AA company is increasingly blurred. There are even indie games that look like AAA because of their quality.

Image courtesy of Unsplash.
Hardware
In the case of the computer I have an Intel i3 2100 which is a second generation processor with 8GB of RAM, a GeForce GTX 750 Ti graphics card and a mechanical disk, all running on Windows 10 Pro. As you can see it is a modest computer that we could rather say that it is getting to the point of becoming obsolete, but still managed to get a good use when recording gameplays.
As a microphone I have a Behringer C-1U that I bought used some time ago for mercado libre, this microphone works via USB and its only detail is that it has little volume which we can raise in editing if we record the audio on a separate channel. Today any current condenser microphone that is by USB is good to get started in the recording of gameplays, obviously the better the brand of microphone higher price will be, but often the brand is not necessarily representative of the final quality in the audio.
And as final hardware, headphones, which are an important part when making recordings, since it is convenient to have the audios well separated for greater clarity of the tracks. So that the music of the game does not end up entering through your microphone and complicating the fact that you can be heard well. In my case I use one of those cheap headphones that come as a gift with all cell phones.
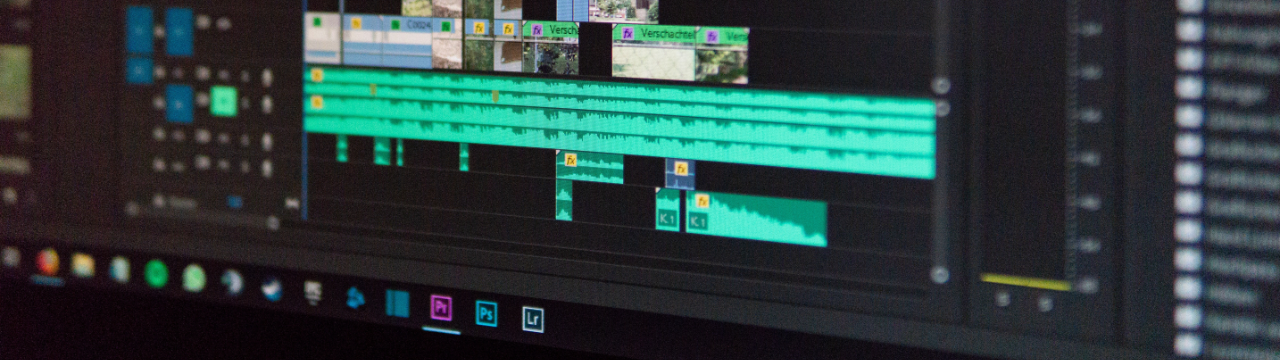
Image courtesy of Unsplash.
Software
For recording I use Mirillis Action, after a lot of testing it is the one that gave me the best results in terms of FPS stability when capturing video, it also allows me to have a small window on the screen that indicates FPS, if the recording is activated and how long I've been recording. This is essential for me since I have only one monitor that is not 1080p and without this window it is complicated to control the recordings being very common to think that you are recording and miss some important part that you want to capture.
Note that Action is a paid program, but it allows me to use the power of the graphics to perform the processing of the video capture without having to configure many parameters, with OBS you can do the same, but you have to configure absolutely everything by hand and in Action I just indicate which game to capture, that uses the graphics processor, capture format and location. I make the video captures in MP4 format with two stereo tracks inside the file, the first track is the audio of the video game and the second track is my voice, with this I can adjust the levels comfortably in the edition.
When it comes to video editing I use DaVinci Resolve in its free version, with this program you will have everything you need and much more. It's like having Premiere Pro, After Effects and Audition in one program with the convenience that everything is integrated without having to jump to other programs. The free version of the program will be enough to edit gameplays, only the advanced tracking and color manipulation effects require the paid version to make use of them.

Image courtesy of Unsplash.
Additional recommendations
Always check the microphone and main output settings of the system, no matter if the previous day's recording was perfect, always get into the habit of checking everything and making test recordings. Unfortunately Windows 10 is very susceptible to changing audio settings which could cause you to end up losing an entire gameplay because of audio glitches that are unsalvageable in editing.
When recording and thinking about editing it is always convenient to leave silences at the beginning and at the end of each clip to achieve better transitions. In the same way if you make a mistake during the recording it is good to leave a silence after the mistake to make the cuts later, these silences will help you to locate the parts where you have to make the respective edits.
The Windows audio is set to 48000 Hz at 24 bits as is the microphone, but in 16 bits which I also have it set to use both stereo channels, although the microphone is mono it makes editing easier since I only have to adjust its volume. It may not be necessary to capture the audio with so much quality, but since the computer can handle it I see no reason to use a lower quality capture.
It is also advisable to have an additional hard disk for the recordings, so that the game load cannot affect the stability of the recording. This applies especially if you have an older computer with mechanical hard disks, where the recording is easily damaged if the game makes heavy use of the hard disk.
Finally and to close, spend time learning how to use in a more optimized way the program you use for video editing. One of the most time consuming things is the editing stage, the faster you are in this process the less tedious the whole content creation procedure will be and therefore it will be easier for you to make gameplays. Believe me that as much as you enjoy creating this content over the years it becomes tedious and anything you can do to optimize the process will be like a breath of fresh air.

Selfie realizada con mi Redmi Note 11, mostrando de fondo una captura de mi canal de YouTube.
Aunque en esta comunidad aun no tengo ningún gameplay subido, tengo experiencia grabando este tipo contenido para mi canal de YouTube, el cual llevo haciendo gameplays desde el 2015 con un equipo modesto y me gustaría compartir esa experiencia de creación de contenido audiovisual con recursos limitados. Demostrando que no hace falta tener una computadora de última generación, ni periféricos de alta gama para la creación de este tipo de contenido relacionado al mundo de los videojuegos.
Por supuesto, respetando las limitaciones de la computadora que tenemos, es prácticamente imposible que puedas jugar títulos AAA en una máquina antigua sin importar lo optimizada que dicha computadora esté. Por eso mi canal de YouTube se enfoca en videojuegos indie que por lo general consumen pocos recursos, aunque hoy en día la línea que separa una empresa indie de una empresa AA es cada vez más difusa. Llegando incluso a tener videojuegos indie que parecen AAA por la calidad que tienen.
Imagen cortesía de Unsplash.
Hardware
En el caso de la computadora tengo un Intel i3 2100 que es un procesador de segunda generación con 8GB de RAM, una tarjeta gráfica GeForce GTX 750 Ti y un disco mecánico, todo ellos corriendo sobre Windows 10 Pro. Como verás es un equipo modesto que más bien podríamos decir que está llegando al punto de quedarse obsoleto, pero aun así logró sacarle un buen uso a la hora de grabar gameplays.
Como micrófono tengo un Behringer C-1U que compré usado tiempo atrás por mercado libre, dicho micrófono funciona por USB y su único detalle es que tiene poco volumen el cual podemos subir en edición si grabamos el audio en un canal separado. Hoy en día cualquier micrófono actual de condensador que sea por USB te sirve para iniciarte en las grabaciones de gameplays, obviamente cuanto mejor sea la marca del micrófono mayor será su precio, pero muchas veces la marca no es necesariamente representativa de la calidad final en el audio.
Y como hardware final unos audífonos, que son una parte importante a la hora de realizar las grabaciones, ya que conviene tener los audios bien separados para una mayor claridad de las pistas. Que no termine la música del juego entrando por tu micrófono y complicando el que se te pueda escuchar bien. En mi caso uso unos audífonos de esos baratos que vienen de regalo con todos los teléfonos móviles.
Imagen cortesía de Unsplash.
Software
Para grabar yo uso Mirillis Action, después de mucho probar programas es el que mejor resultados me dio en cuanto a estabilidad de FPS a la hora de capturar video, además me permite tener en pantalla una pequeña ventana que indica FPS, si la grabación está activada y cuánto tiempo llevo grabando. Esto para mi es esencial ya que cuento con un solo monitor que no es 1080p y sin dicha ventana es complicado controlar las grabaciones siendo muy común pensar que estás grabando y perderte alguna parte importante que deseas capturar.
Destacar que Action es un programa pago, pero me permite usar el poder de la gráfica para realizar el procesamiento de la captura de video sin tener que configurar muchos parámetros, con OBS puedes hacer lo mismo, pero tienes que configurar absolutamente todo a mano y en Action solo indico que juego capturar, que use el procesador de la gráfica, formato de captura y ubicación. Realizó las capturas de video en formato MP4 con dos pistas estéreo dentro del archivo, la primera pista es el audio del videojuego y la segunda pista es mi voz, con ello puedo ajustar los niveles cómodamente en la edición.
A la hora de la edición de video uso DaVinci Resolve en su versión gratuita, con este programa tendrás todo lo que necesitas y mucho más. Es como tener Premiere Pro, After Effects y Audition en un solo programa con la comodidad que todo está integrado entre sí sin tener que saltar a otros programas. Destacando que la versión gratuita del programa te llegará de sobra para editar gameplays, solo los efectos avanzados de tracking y de manipulación de color requieren tener la versión paga para poder hacer uso de ellos.
Imagen cortesía de Unsplash.
Recomendaciones adicionales
Siempre revisa la configuración del micrófono y salida principal del sistema, sin importar si la grabación del día anterior salió perfecta acostúmbrate siempre a verificar todo y realizar grabaciones de prueba. Lamentablemente Windows 10 es muy propenso a cambiar las configuraciones de audio lo que pudiera provocar que termines perdiendo un gameplay completo por tener fallas de audio que son insalvables en edición.
A la hora de grabar y pensando en la edición es siempre conveniente dejar silencios al inicio y al final de cada clip para lograr mejores transiciones. Del mismo modo si te equivocas en el transcurso de la grabación es bueno dejar un silencio después del error para después hacer los cortes, esos silencios te ayudarán a ubicar las partes donde tienes que hacer las respectivas ediciones.
El audio de Windows lo tengo configurado en 48000 Hz a 24 bits al igual que el micrófono, pero en 16 bits que además lo tengo puesto para que use los dos canales, aunque el micrófono es mono que se grabe de una vez en estero facilita la edición ya que solo tengo que ajustar su volumen. Quizá no sea necesario capturar el audio con tanta calidad, pero debido a que la computadora puede manejarlo no veo motivo para usar una menor calidad de captura.
También es recomendable tener un disco duro adicional para las grabaciones, de manera que la carga del videojuego no pueda afectar la estabilidad de la grabación. Esto aplica sobre todo si tienes una computadora vieja con discos duros mecánicos, donde la grabación fácilmente sale perjudicada si el videojuego hace un uso muy intenso del disco duro.
Por último y para cerrar dedica tiempo en aprender a usar de forma más optimizada el programa que uses para la edición de video. Una de las cosas que más consumen tiempo es la etapa de la edición, cuanto más rápido seas realizando este proceso menos tedioso será todo el procedimiento de creación de contenido y por ello te será más sencillo sacar gameplays. Créeme que por mucho que disfrutes de crear este contenido con los años se vuelve tedioso y todo lo que puedas hacer por optimizar el proceso será como una bocanada de aire fresco.
https://twitter.com/Geeklania/status/1550250871228928000
The rewards earned on this comment will go directly to the people( @geeklania ) sharing the post on Twitter as long as they are registered with @poshtoken. Sign up at https://hiveposh.com.
Hi @geeklania,
Thank you for the useful tips.
Whenever you are giving tips, instructions etc. you should be able to use the #diy tag to earn the BUIDL token.
I see that many authors are not aware of this and are losing out on a token that has great potential.
Thank you very much for the advice, I did not know the tag. I will use it for the next time I apply for what I write.
Gracias por compartir tu experiencia basada en los recursos de hardware y software que empleas para la creación de contenido gaming. Espero que pronto podamos ver parte de ese contenido en la comunidad. Saludos.
Al contrario, gracias a ustedes por esta gran comunidad que nos permite hablar de nuestras pasiones y si, tengo planes de compartir nuevos gameplays en la comunidad. Saludos
Me ha llamado la atención tu recomendación a Action de mirillis, la tomaré e intentaré ver como me va con ese programa, gracias por la información, saludos :)
Para mi ese programa fue la salvación, me da todo lo que necesito y funciona excelente considerando que tengo una máquina antigua. Para mí el tener una ventana que me indique el estado de la grabación es vital y sobre todo cuanto menos tiempo pese peleando con la configuración mejor. Gracias por leerme y comentar
Siempre que pueda pasare, esta bastante bueno por lo que puedo ver, asi que le echare un ojo mientras grabo un juego de terror :P.
Congratulations @geeklania! You have completed the following achievement on the Hive blockchain and have been rewarded with new badge(s):
Your next target is to reach 700 replies.
You can view your badges on your board and compare yourself to others in the Ranking
If you no longer want to receive notifications, reply to this comment with the word
STOPSupport the HiveBuzz project. Vote for our proposal!